Painting rusted metal windows takes time and patience. If you do it right, it will last a long time.
Painting old metal window frames that are rusted and stuck with decades-old glaze is not for the faint of heart, but can be done.
Mary from Magnolia Springs, Ala., lives in her grandparents’ 1941 home and needs advice on painting the metal cranking windows in the home.
Before painting metal windows, you need to remove the aging caulk. (Photo courtesy of Mary)
Remove Old Glaze
First, you need to start by removing as much of that old glaze on the metal window frames as you can. The good thing about working on metal rather than wood is you can be relatively aggressive when removing the glaze. Use a Dremel tool with an abrasive end to get the old glaze off.
To remove the glaze in the inner corners closest to the window glass, use a small disc grinder. Be sure to wear a full face mask and a respirator. Because of the age of the windows, you never know if there is a risk of you being exposed to lead in the original glaze.
You can also steam the metal window frames with a wallpaper steamer or regular steamer to soften up the glaze. This will take several minutes, but you should be able to remove a good bit with a putty knife afterward. Intact glazing that is not badly cracked can be left behind.
A fresh coat of glaze on metal windows will give you an even surface for painting.
Apply Fresh Glaze
Next, you need to prep your metal window frames for painting. Find some window glaze that comes in a tube with a square nozzle. This will make it easier and cleaner to apply to the metal closest to the windows than dipping the glass from a can and using a brush. DAP makes latex window glazing with this kind of nozzle that is paintable and weather-resistant.
Another trick when applying tubed glaze is to make sure the container is nice and warm. All you need to do is store it in your home to make sure it’s at least 70 to 80 degrees. This will make squeezing the thick glaze out of the tube easier.
Once you have the innermost lines of your window glazed, spread the rest of the metal frame with DAP 33 Window Glaze with a putty knife to even out the surface for painting.
Attention to detail is a must, so this step in painting the metal window frames will take some time.
Oil-based, rust-resistant primer will keep your metal windows looking fresh.
Prime and Paint
Next, you will need to prime the metal window frames for painting. Use an oil-based, rust-resistant primer. oil-based paint as well because it provides a smooth surface and can be used to cover up any existing flaws
For your top coat, use 100-percent acrylic paint.
If you’re diligent and follow these steps, the repair project will last a long time.
Skip to [30:53]for the full segment on the Today’s Homeowner Podcast.
Also on this episode:
Best New Product
Get a higher reach and have space for your tools with Gorilla’s Multi Platform ladder. Learn more>>
Simple Solutions
Sawhorse Saddle — To prevent sawhorses from scratching up finished pieces, such as a painted door or cabinet, try covering the sawhorses with pool noodles. Use a serrated bread knife to cut a pool noodle about an inch longer than the horizontal rail on each sawhorse. Next, cut a slit along the length of the noodles with a utility knife. Then, slip one pool noodle onto the rail of each sawhorse. The soft pool noodle grips on tightly and will protect workpieces from dings, dents and scratches. And when you’re done, simply pop off the pool noodles and you’re back to a pair of standard wooden sawhorses.
Tarp Tie-Down — To prevent plastic tarps from being blown away, try this trick: Fill a few one-liter plastic bottles with sand or water, then tie one bottle to each corner of the tarp, and one or two in between on larger tarps. The weighted bottles will hold the tarp securely place.
Question of the Week
Q: How is a hybrid water heater different from a regular water heater?
A: A hybrid water heater is an electric water heater equipped with a heat pump. The pump captures heat from room air and transfers it to the cold water entering the water heater. This system makes it so the water heater element doesn’t have to work as hard and, therefore, uses less energy.
Other Products and Links Mentioned
This page contains affiliate links. If you purchase a product from these links, we will earn a small commission at no additional cost to you.
Ask a Question! (Podcast)
Ask a question and we could answer it on the “Today’s Homeowner Podcast!” We also may use it on our nationally syndicated radio broadcast or on todayshomeowner.com.
Jerry and Shay’s backyard is big enough for them to enjoy, but something is missing. Their small patio offers little space for entertaining guests, and their old firepit is secluded from any seating.
But that’s OK. Because when your patio is tiny, just create another one! That’s just what we’re doing on this episode of Today’s Homeowner.
The Projects
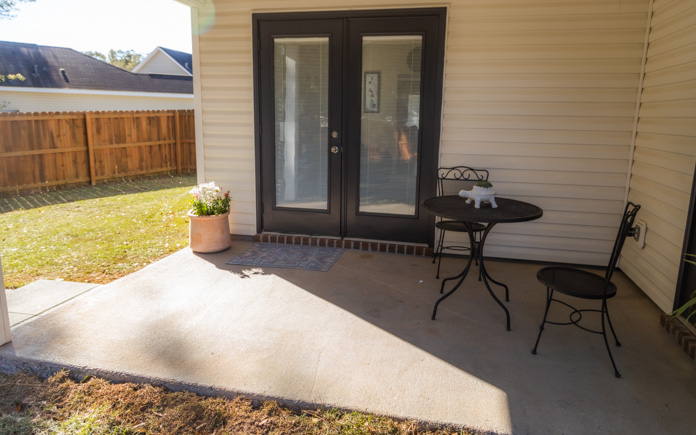
This patio is small but in good shape. Fresh paint and concrete stain brighten its appearance to better match the new patio.
We pressure wash the concrete pad and then stain it to better match the new paver patio. To apply the stain, we use a pump sprayer with circular motion, and then roll the stain to get it deep into the surface.
Before we can create a paver patio, we have to define the space.
Laying Out the New Patio
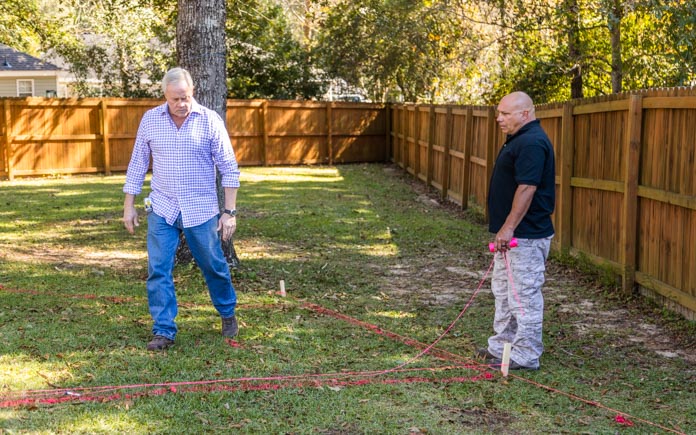
The first step to building a new paver patio is creating the layout. We determined where we wanted the fire pit and used a string and spray paint to find a radius for the paver patio surrounding it.
Once the layout was complete, we removed the grass with a rented sod cutter. Because the backyard had a slight slope to it, we needed a short retaining wall on the lower side of the space to create a graceful transition from the existing patio to our new one.
First, we had to dig a trench for the retaining wall. Next, we poured paver base into the trench and tamped it down. Compacting paver base deep into the dirt ensures the patio will have a strong foundation.
A retaining wall is a must for installing patios in sloped backyards.
Building a retaining wall isn’t the most glamourous part of the project, but it’s necessary. We used Pavestone Rumblestone Pavers for our wall.
To cut our pavers to the size we needed, we rented a concrete saw from The Home Depot. If you only plan to use an expensive tool once, it just makes sense to rent instead of buy.
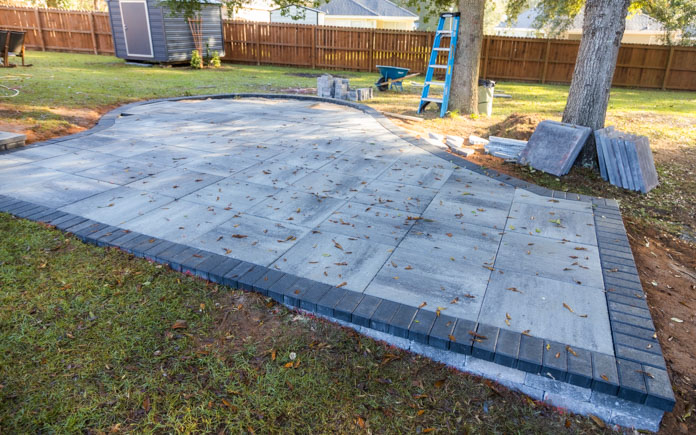
Large 2-by-2-foot pavers make this patio feel more spacious and look luxurious.
Build New Patio
After lining the patio with pavers, we prep the area for laying down slab pavers.
First, we compact the dirt and spread paver base. We then lay metals pipes before laying sand down to ensure the sand is a consistent depth throughout to support the heavy 2-by-2-foot pavers.
We added two steps from the existing patio to lead down to the new one. Both steps must be the same size, so we have to cut down some of the concrete on the existing patio.
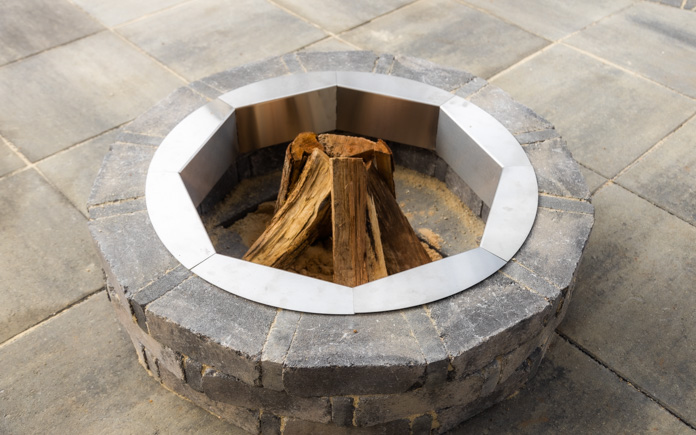
Jerry and Shay’s new firepit is now the focal point of their patio.
Once the pavers are complete, we sweep sand into the joints and we’re ready for the new fire pit. We used a Pavestone Rumblestone Fire Pit Kit, and assembled the fire pit in less than 20 minutes!
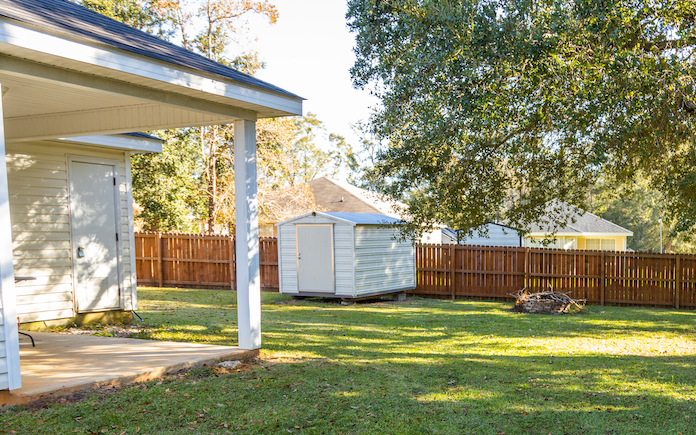
The shed in the backyard felt too out of place, so we painted it to tie into the house instead of standing alone.
To tie the shed to the patio, we used the same color to paint the back doors and trim.
We also:
“Today’s Homeowner” hosts Danny Lipford and Chelsea Lipford Wolf, pictured with homeowners Shay and Jerry.
Post-Production Thoughts
Jerry and Shay have a beautiful backyard with great shade trees and lawn. But the old fire pit had seen better days and the existing patio offered few opportunities to enjoy the outdoor space. It was too small for entertaining and the monotone color palette lacked any real interest.
Now, the whole backyard has come alive with the addition of a big new patio that complements the shape of the trees while it enjoys its shade.
Large-format pavers make the patio seem larger than it actually is and the new fire pit is the ideal spot for entertaining.
There are two large steps that create a graceful transition to the old patio, which has been revived with a new shade of stain and a bold color on the doors.
That same color on the storage shed plus some simple landscaping have transformed this yard into a spot you just can’t wait to enjoy.
To keep your garden or yard green and full of life, test your soil’s pH valueto ensure it will meet your plants’ needs.
The pH value affects how easily plants can absorb nutrients and chemicals in the soil’s water. Some nutrients are more available under acidic conditions; others require more alkaline.
You should test a soil sample at least once every three years or when you want to change your landscaping.
You can buy a soil test kit at the home center, or check your soil’s condition with this basic DIY test.
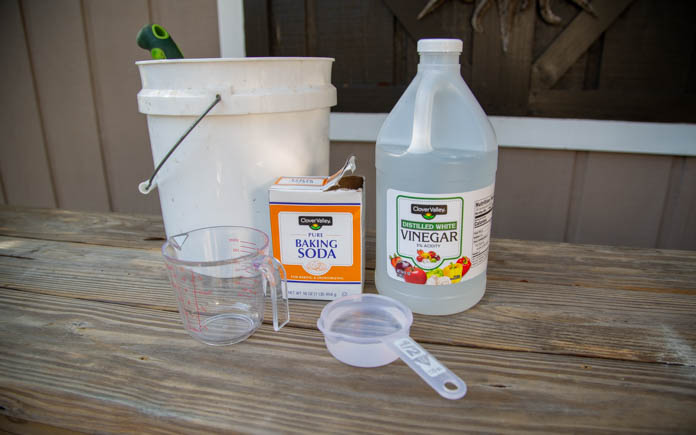
Gather these household items for a simple soil pH test.
Simple Soil pH Test
For this simple soil pH test, all you need is baking soda, vinegar, water, a container, a measuring cup and, of course, a sample of your soil!
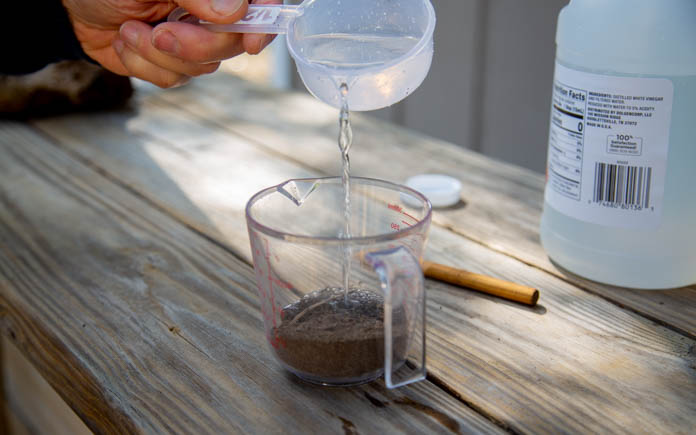
Vinegar causes a reaction in alkaline soil.
Testing for Alkalinity
Place a handful of soil into a clean container.
Add ½ cup of white vinegar.
If the soil starts to fizz, it’s likely high in alkaline.
If the test proves the soil’s alkalinity, amend the soil with sulfur or pine needles.
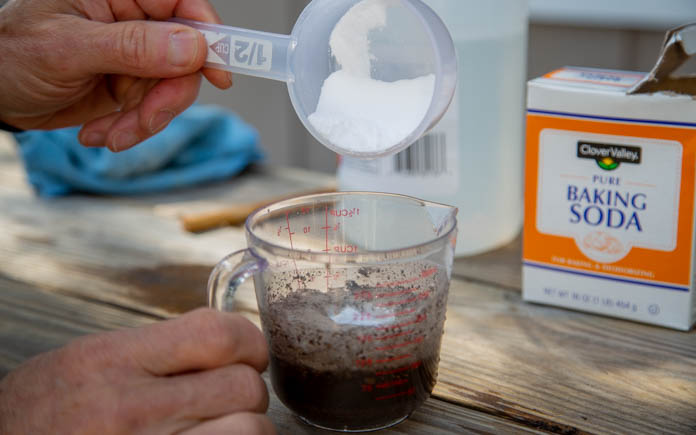
Baking soda causes a reaction in acidic soil.
Testing for Acidity
If there is no reaction in the vinegar test, take a second container and add fresh soil.
Pour ½ cup of water into the container, mix well, and add ½ cup of baking soda.
If the soil begins fizzing, the soil is likely acidic.
If there’s no reaction to either test, the soil has a neutral pH and it’s fine.
If the soil is acidic, amend it with pulverized lime or wood ash.
Test soil and make sure it has good drainage before you plant anything.
How to Make Acidic Soil More Alkaline
Acidic soil has a lower pH value. If you need to increase the soil pH, add lime in the form of calcium carbonate or dolomite (calcium and magnesium carbonate), according to the Mississippi State University Extension.
Some homeowners prefer the pellet form of lime over agricultural limestone because it is easier to apply with broadcast spreaders. It’s also not dusty and can be evenly distributed without wind affecting it.
Apply lime before planting so you can thoroughly incorporate it and have time — several months — to increase the soil pH.
MSU does not recommend using hydrated lime because it can easily burn plants. Applying too much lime can reduce nutrient availability, especially micronutrients like iron, manganese and zinc.
How to Make Alkaline Soil More Acidic
Alkaline soil has a higher pH value. If you need to decrease the soil pH, add elemental sulfur several months before planting, according to MUS’s Extension. It’s slow-acting but effective.
If you add elemental sulfur to established plants, water the soil immediately to avoid burning shallow roots. Once the correct pH is established, the sulfur remains effective for years.
Here’s what else you should know, according to MSU’s Extension:
Iron sulfate decreases soil pH and is faster-acting than elemental sulfur. But you need more iron sulfate than elemental sulfur to achieve the same pH change. Follow the label instructions carefully because too much iron sulfate can burn shallow plant roots.
You can also use ammonium sulfate to decrease soil pH, and it is less likely to burn shallow plant roots.
If you want to produce blue blossoms on your mophead hydrangeas, use aluminum sulfate to lower the pH while adding aluminum. Aluminum, together with a low pH, produces a blue color.
Except for blue hydrangea, don’t use aluminum sulfate as a soil acidifying amendment because of the potential for aluminum toxicity to plant roots.
Want to give your backyard a modern farmhouse vibe? Make these chicken-wire light balls!
Hanging these handmade orbs around your yard will add rustic ambiance and create the perfect environment for a backyard party.
They’re simple to make and add character to any outdoor space!
Materials Needed
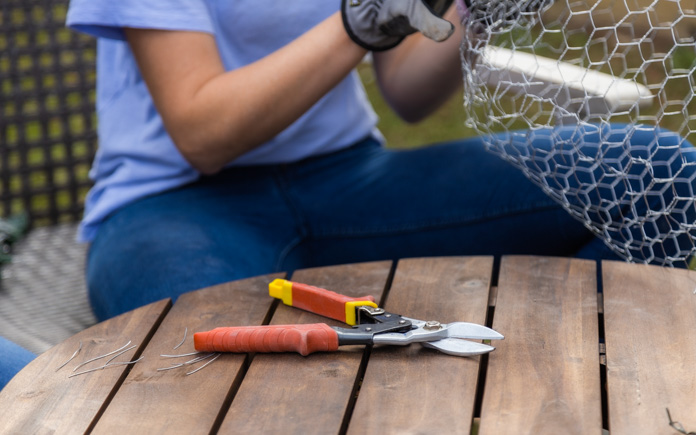
Use heavy-duty snips to cut through chicken wire.
1. Cut and Roll the Chicken Wire
Cut a section of chicken wire about three times wider than the diameter you want for the finished light ball. Use snips tough enough to cut through metal.
Then roll the chicken wire into a cylinder and tie it together with the wire.
Shape the chicken wire as desired for your light ball.
2. Sculpt Your Wire Light Ball
Fold the cylinder’s ends into the middle and begin sculpting the orb shape. Be sure to secure the folds by bending over the wire’s raw ends.
Wrap string lights around the chicken wire light ball.
3. Add the Lights
Fish one end of string lights through holes in the chicken wire and begin wrapping the string around the orb until you reach the other end.
Then, repeat the process of fishing the plug to secure the string lights.
Now the light ball is ready to hang — by itself or with others.
Watch the video above for more information!
Chicken wire light balls can be hung in groups around your yard.
This page contains affiliate links. If you purchase a product from these links, we will earn a small commission at no additional cost to you.
Cost
We purchased enough materials to create multiple sets of light balls.
Here’s what you can expect to pay for this project:
Every homeowner needs a safe stepladder for projects around the house.
Say you need to change a lightbulb hanging from your fixture in an 8-foot-tall entryway. Or, what about painting that entryway a fresh color?
This page contains affiliate links. If you purchase a product from these links, we will earn a small commission at no additional cost to you.
A traditional stepladder is easy to move around, but what about a compartment for project materials? And while a regular ladder may have a top surface to place tools, mobility is a concern.
It’s a common dilemma for homeowners: How do you know which ladder to choose?
Gorilla’s Dual Platform Ladder is the perfect combination of both! You have the convenience of a stepladder without the hassle of hauling around a traditional ladder.
Gorilla’s Dual Platform Ladder has a 10-foot maximum reach and withstands 300 pounds.
Best of Both Ladders
This 5.5-foot ladder features dual-platform top steps, providing three times the step depth of a traditional ladder.
It also offers a safe, secure and comfortable place to complete projects without hurting your feet.
With the same maximum reach height (10 feet) as a standard 6-foot stepladder, this heavy-duty aluminum stepladder has a unique design that allows the ladder to be quickly and safely opened or closed with one hand.
That kind of convenience saves you time on the job, avoiding the pinch points of other ladders with spreader bars.
A removable bucket tray that clips onto the top of the stepladder gives you a spacious, accessible work area.
It’s perfect for paint cans, tools, hardware and everything else you’ll need to keep handy while working.
Best of all, that means no more stepping up and down for materials on the floor!
Gorilla’s Dual Platform Ladder comes with a limited lifetime warranty.
Built to Last
The professional-grade aluminum construction is lightweight, yet safe and strong. This ladder can withstand up to 300 pounds with its Type 1A Duty Rating from the American National Standards Institute.
Although this ladder comes with a lifetime limited warranty, you’ll need to store it in a cool, dry place and keep the stool clean and free of all foreign materials.
Like with anything else in your home, proper maintenance will ensure it has a long lifetime!
Radiation is not something most people think about very often, and when they do, they usually turn to its effects as portrayed in movies. These being namely that exposure to radiation will either turn them into a hideous monster or a superhero.
Although radiation is great fuel for any Hollywood script, it’s more than sci-fi fodder. It’s part of your real world. While it is not something you should fear, you should be aware of it.
To that end, here are five things you may not know about radiation.
1. You are exposed to radiation every day
One-third of the U.S. population lives in a “nuclear shadow” area, meaning they live within 50 miles of a U.S. nuclear power plant.
Many people are also exposed to radiation every day through their work as dental assistants, medical practitioners, radiology technicians, chiropractors, etc.
2. It can come from man-made, terrestrial or cosmic sources
Not all radiation comes from man-made technology. Naturally occurring radiation is in Earth’s crust as well as in the floors and walls of homes, schools and businesses.
It is even in the food we eat and drink, and the air we breathe. Our own bodies — muscle, bones and tissue — contain naturally occurring radioactive elements as well.
3. It comes in multiple forms
Non-ionizing radiation, like that found in microwaves, radio waves and visible or infrared light, is largely harmless due to its low energy levels.
Ionizing radiation is found in gamma rays, X-rays and other sources. It has higher energy levels and can be harmful to the body if you are exposed to large doses or for a long period of time.
4. You can track radiation levels around you
Radiation is invisible, but that doesn’t mean you have to be blind to it. The Dosime device is a hybrid smart home and wearable personal dosimeter that captures real-time radiation exposure in the environment.
The accompanying app provides an immediate assessment of the ionizing radiation present in the homes, buildings and spaces you live, work and play that can potentially impact your health without your knowledge.
Dosime allows you to access accurate, reliable, easy-to-understand information in real-time to manage potential health risks and ensure peace of mind.
5. You bring it into your home every day with things you purchase
Your cat’s litter box is a common radiation source in your home, while Brazil nuts and bananas also give off small levels. The glossy paper appearing in the magazines you read requires a radioactive finish to achieve that shine.
The glaze used to decorate those antique jars could be radioactive if the uranium levels are high enough. Even your new granite countertops are a source as granite is one of the best rock sources for retaining natural radiation.
Radiation is around you every day, but that doesn’t mean you have to fear it. Remember, most is naturally occurring and your exposure to it won’t turn you into a monster, even if a superpower would be pretty cool. To learn more about the Dosime device and to see how it can help you monitor radiation levels around you, visit Dosime.com.