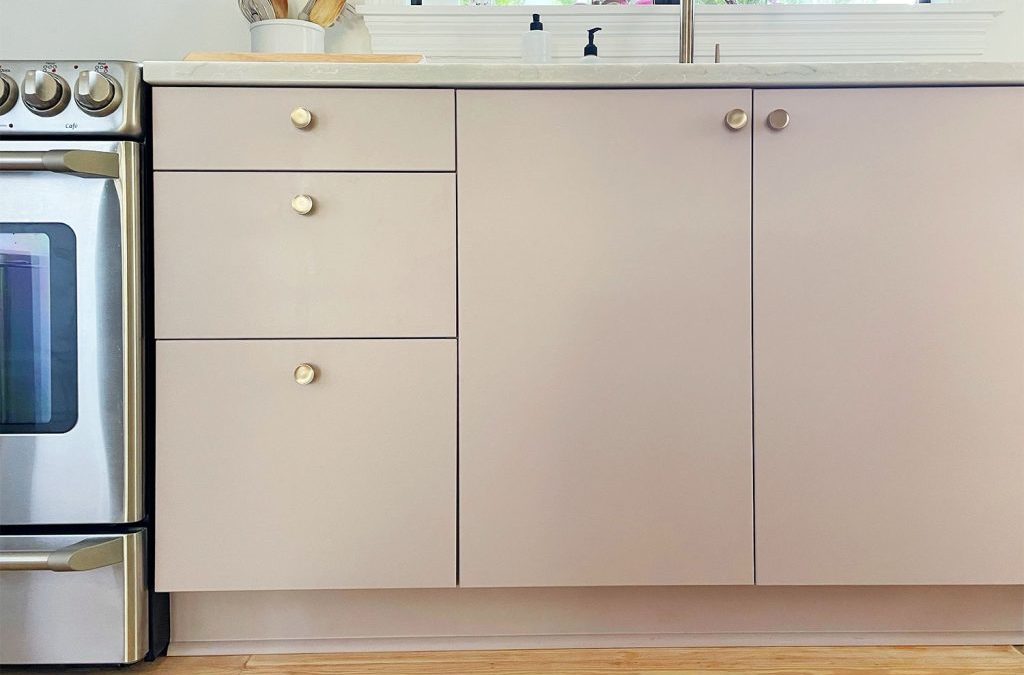
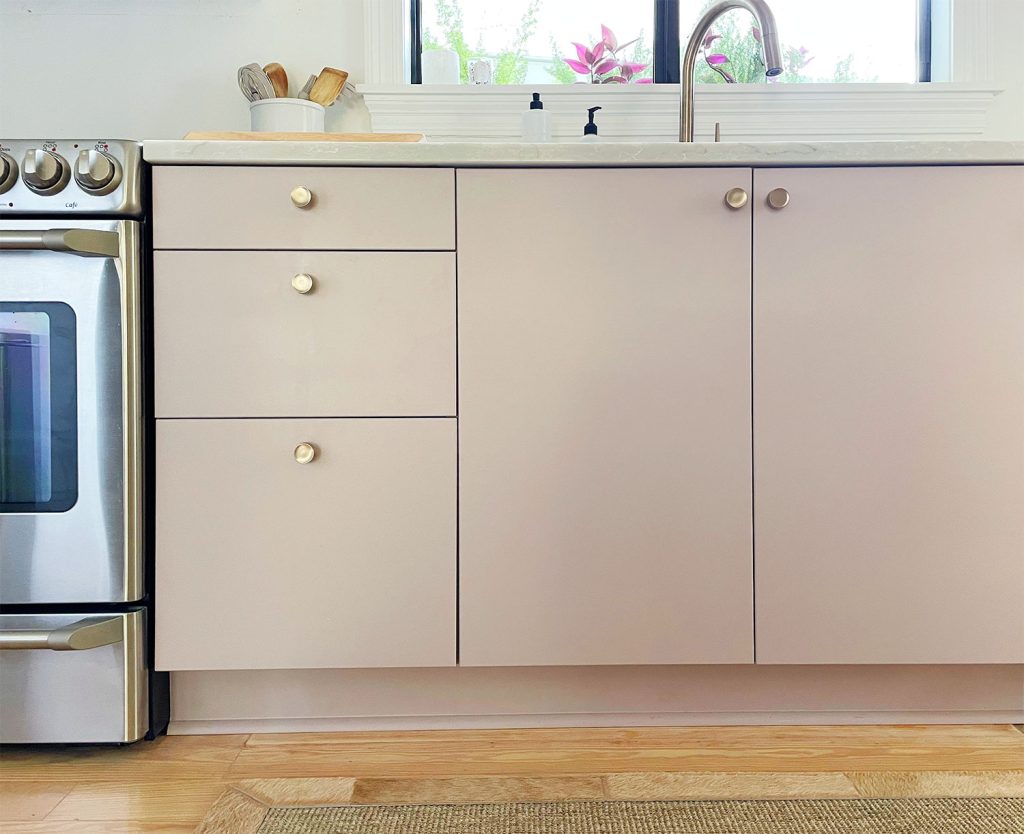
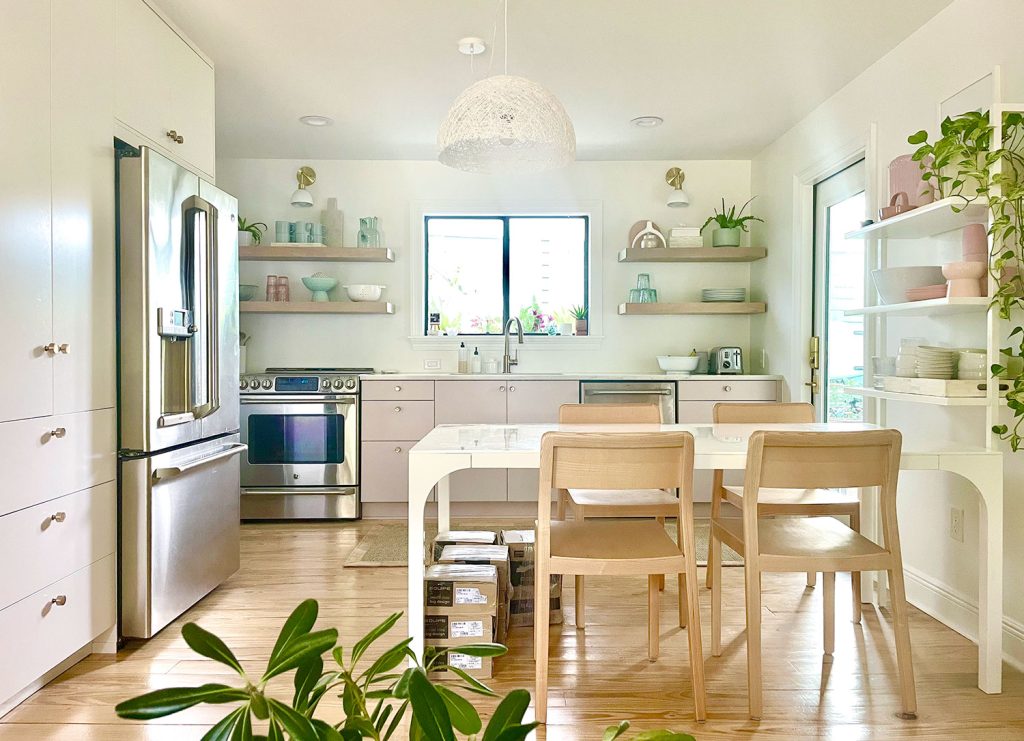
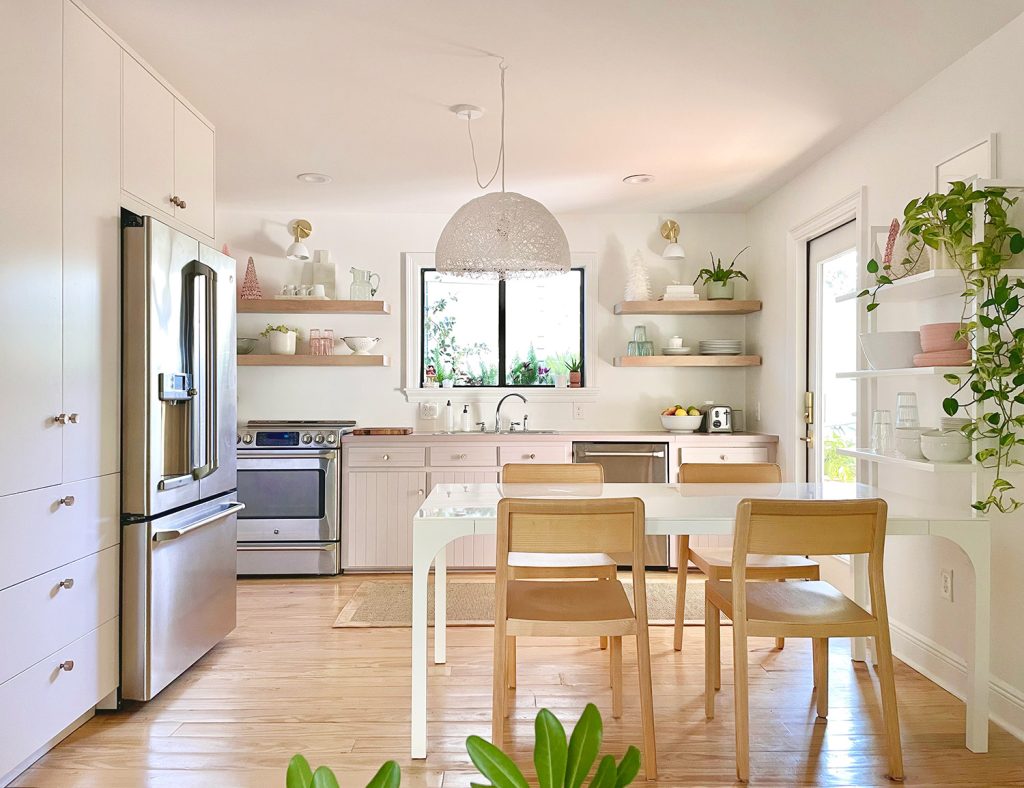
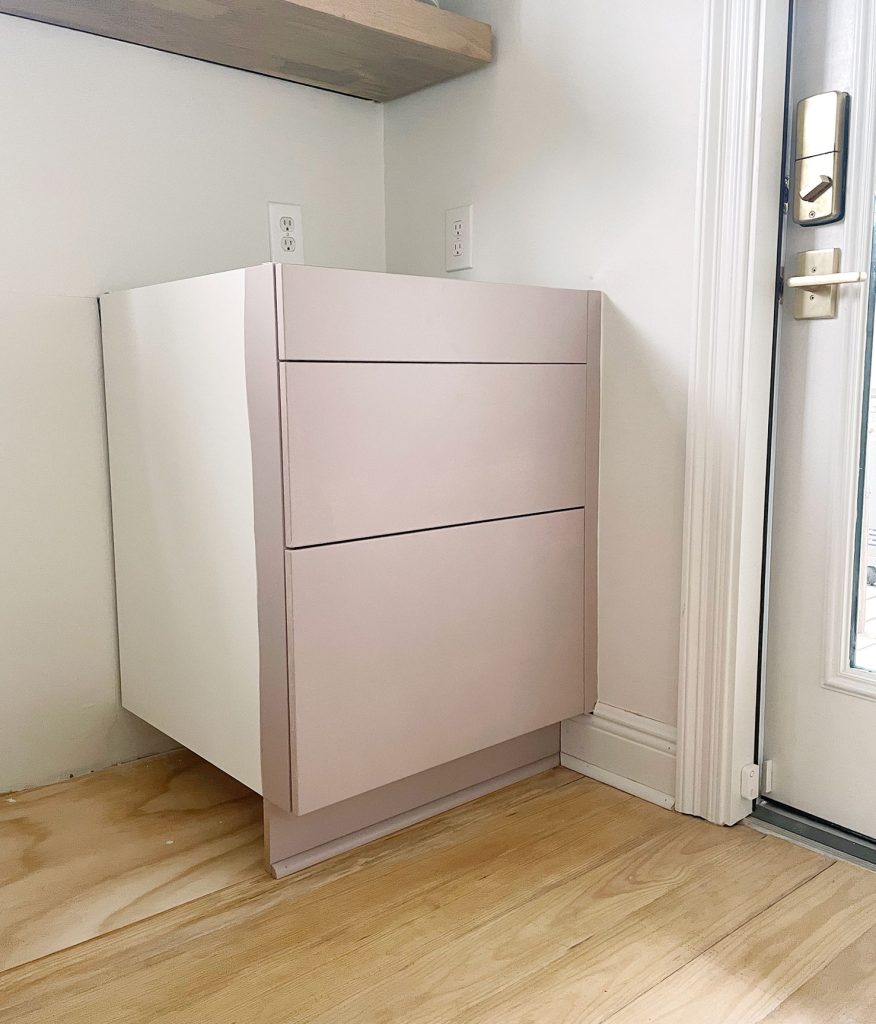
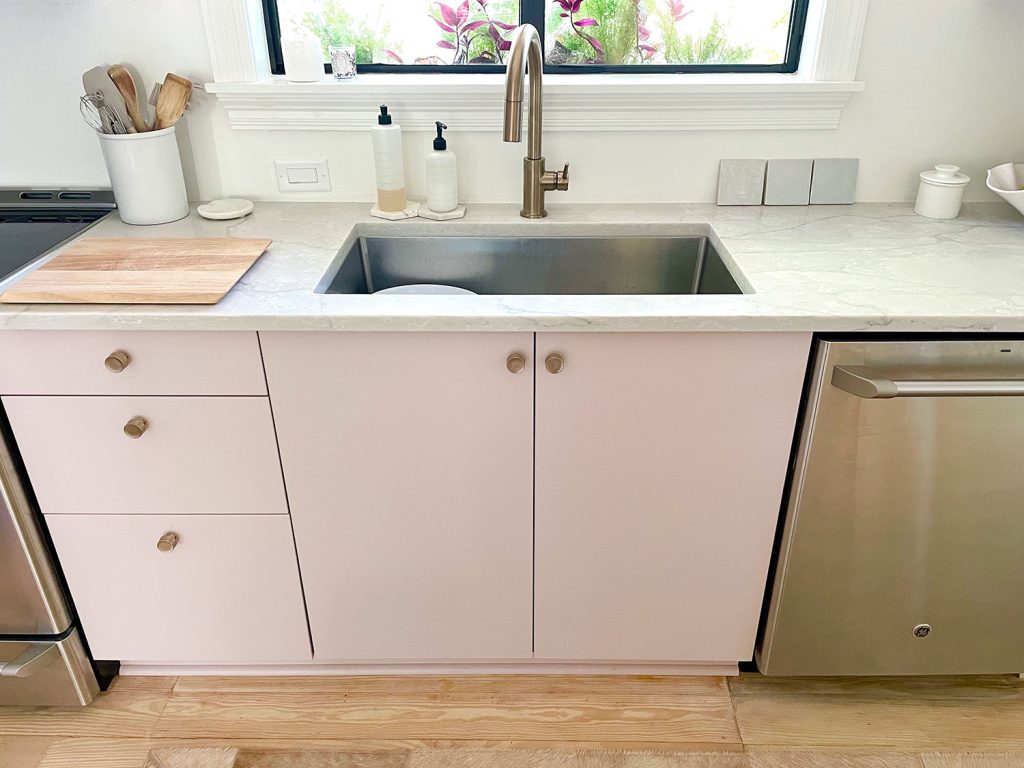
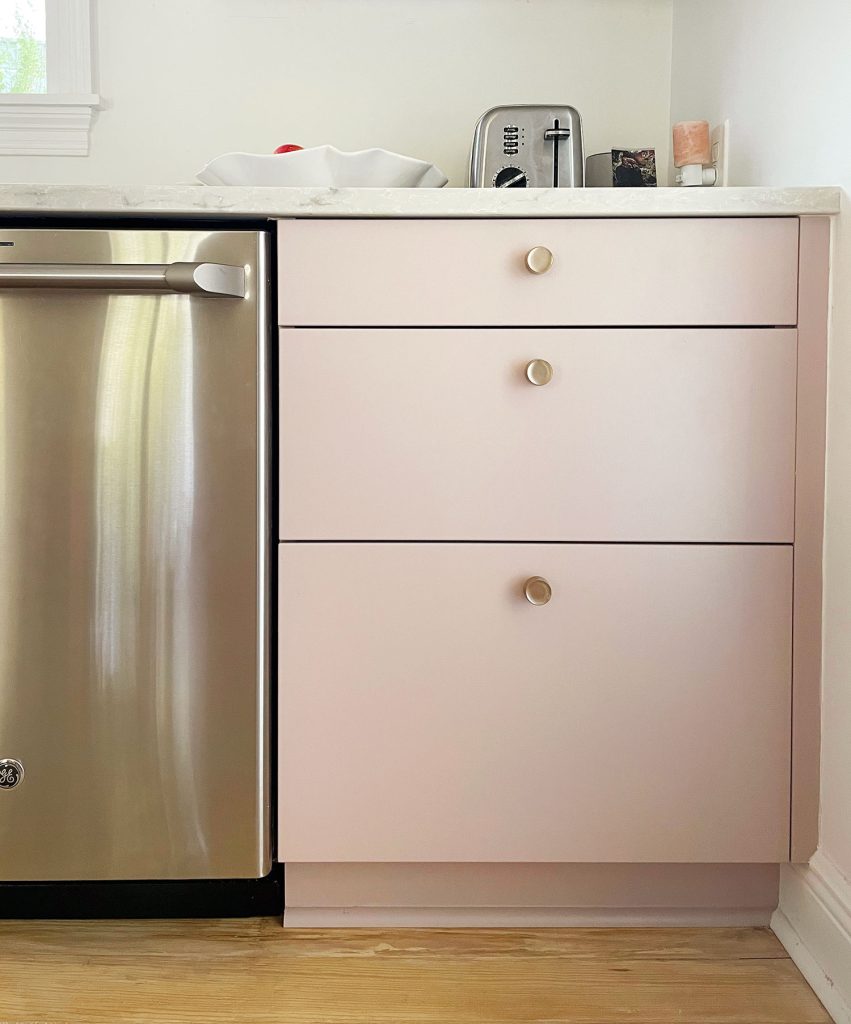
We’ve painted kitchen cabinets before. We’ve done Ikea kitchen cabinets before. But painting Ikea kitchen cabinets was a new combo move for us. And despite a nagging voice in our heads that asked if it was a bad idea (paint laminate cabinets?! can that even be durable?!), we’re extremely happy with the final result. Plus, it was pretty easy to do – no paint sprayer or fancy equipment necessary!
We’re about a month into using them every day and so far they’re holding up wonderfully. They’ve been scratched, scrubbed, kicked, and real-life tested by two kids and so far no scrapes, dings, or dents to report. They look as good as the day we freshly painted them, and as smooth as factory-made Ikea cabinets – so we’ll share how we got such even coverage.
Before I show you the step-by-step instructions, let me give you some context for the project.
Why Did We Redo Our Kitchen With Ikea Cabinets?
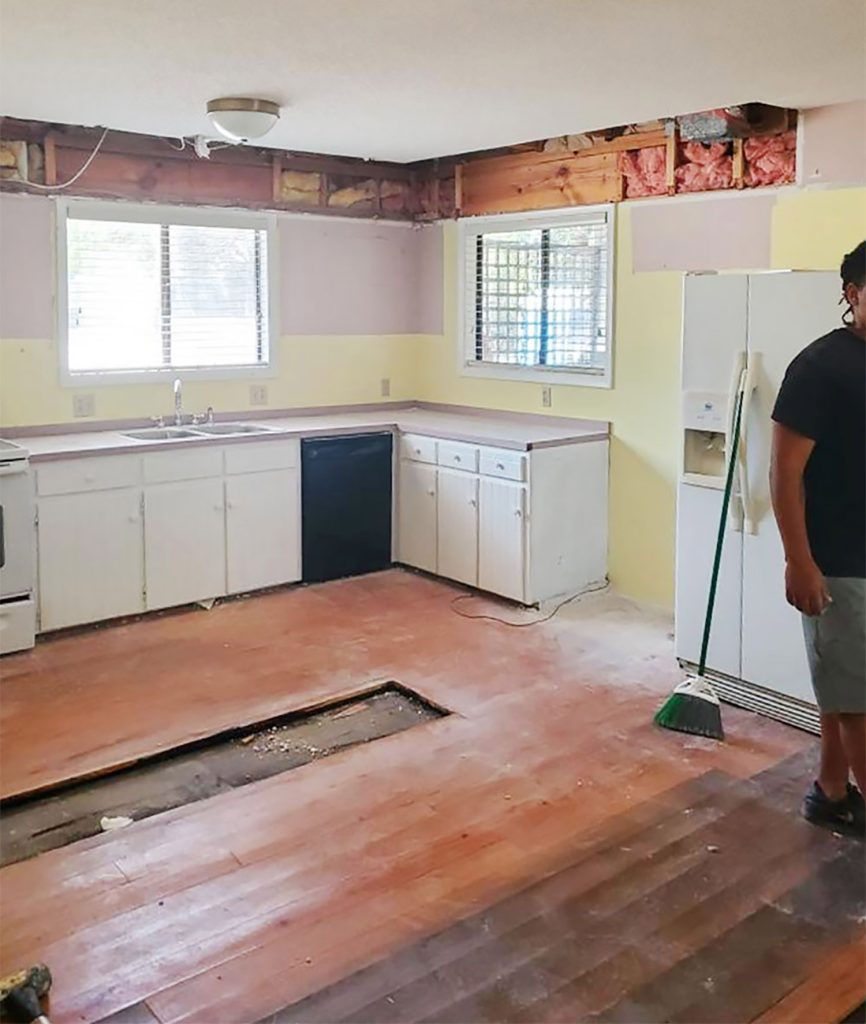
As we discussed in our last podcast, we wanted to replace our old kitchen cabinets to better maximize the storage along that back wall. It’s a small kitchen and, although we’d organized it carefully enough to make it work for the past two years, we knew there was room for improvement.
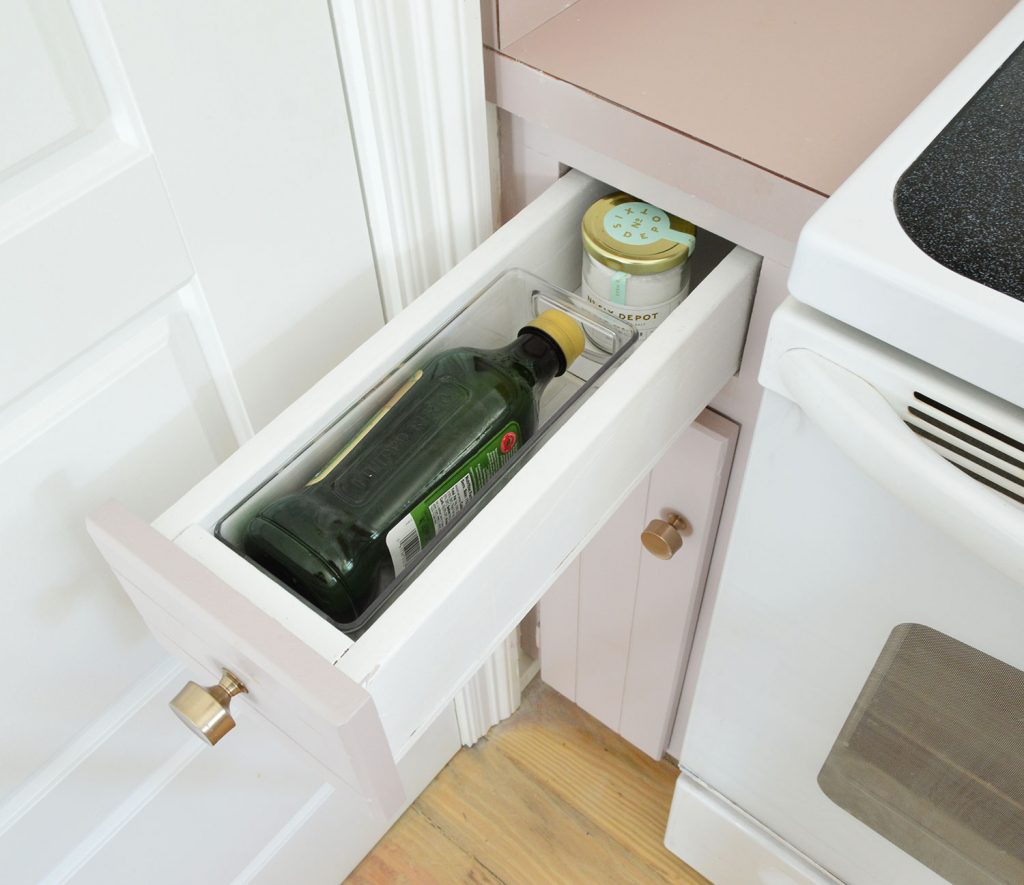
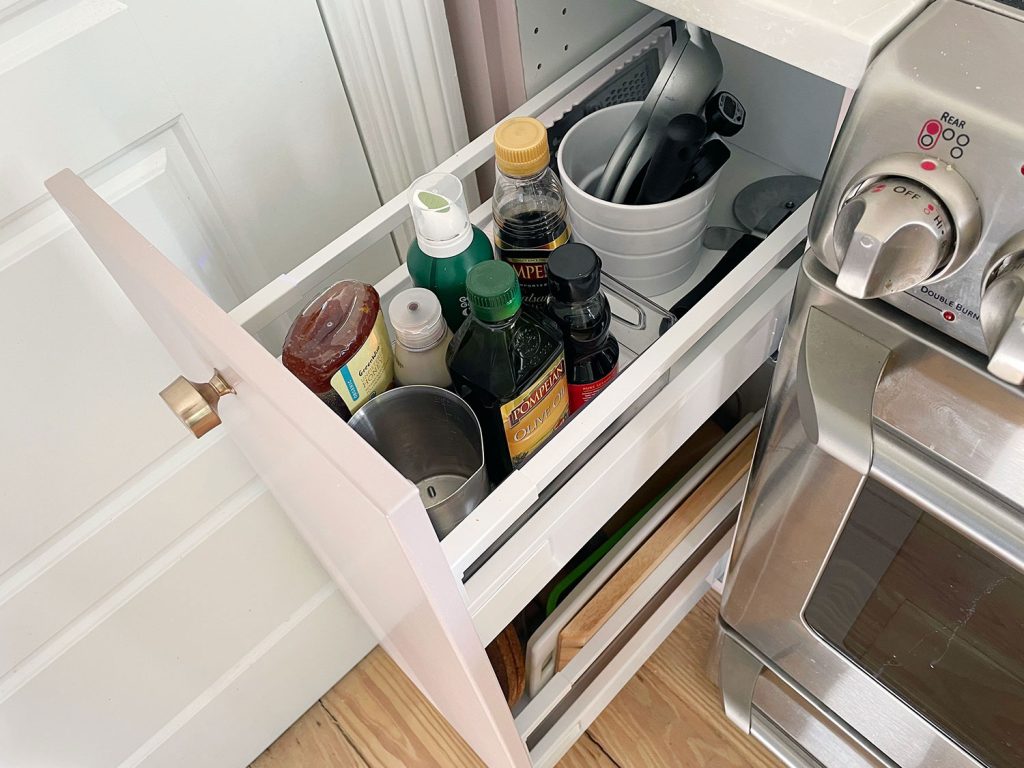
The skinny drawer pictured below is a great example of how inefficient the old thickly-framed cabinets were. There was so much wood framing around the drawers & doors that everything was more cramped than it needed to be. What do you even put in a drawer that’s one olive oil bottle wide?
Yes, that’s the same sized olive oil bottle in the photo below, except now it can stand up because the drawer is much deeper along with being significantly wider, so we can store a lot more. We knew from our previous experience with Ikea kitchens (like at our beach house) that we could get big functional gains by replacing the cabinets. For one, there’s much less thick framing around the sides of Ikea cabinets- as you can see below – plus we shifted the stove over a bit, so this drawer ended up being much more useful for us.
Not to mention that Ikea cabinets have so many customizable systems you can add (secret drawers that nest within other drawers, caddies that fit perfectly to corral things, etc). I’d say we upped our small kitchen’s efficiency by at least 50% by upgrading the cabinets. We’ll show you more about how we organized them in a future post. For now, back to the subject at hand: how we went from “Ikea white” to a custom paint color of our choosing.
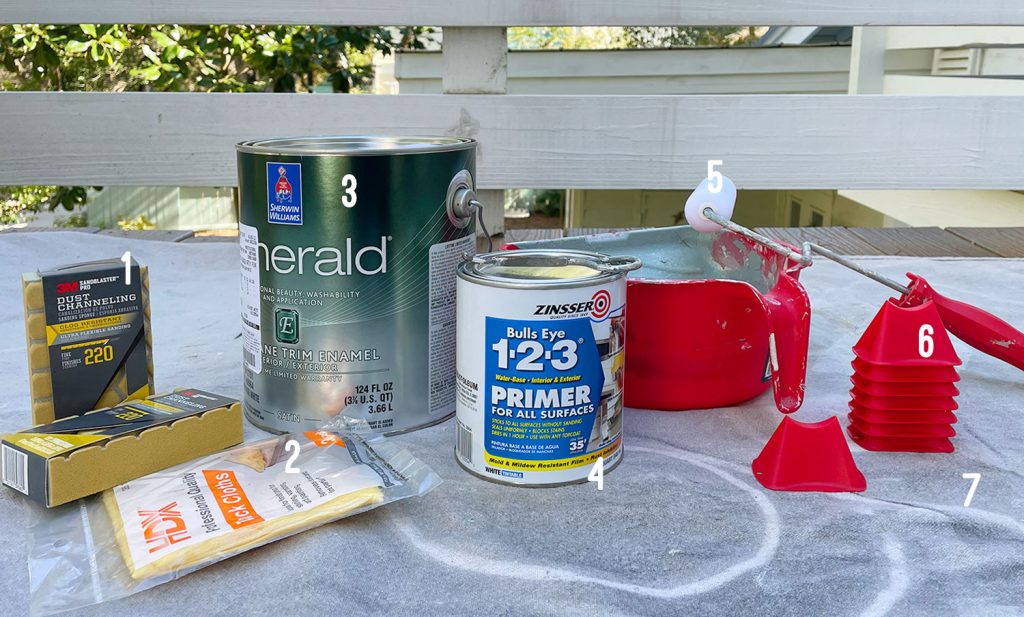
Ikea doesn’t sell any doors that color and ordering paintable Semihandmade doors is significantly more expensive. Their DIY flat slab fronts would’ve cost us about $600 vs the $185 we’d pay for white flat fronts from Ikea. And we are no strangers to painting something, so it felt worth attempting this, even though laminate surfaces can be a little tricky. Thankfully, paint and primer “technology” is constantly improving and you can now get strong bonds, even without turning to oil-based products. So here’s exactly what we used:
Tools & Materials For Painting Ikea Cabinets
We took a low-tech, low-mess approach to this project (aka: no paint sprayer) so the material list is pretty simple. Had we been painting a larger kitchen, we might’ve opted for a faster paint sprayer approach, but I personally find that we can be more methodical and careful when we hand paint a project like this.
In addition to your cabinets (we ordered Ikea’s VEDDIGNE door and drawer fronts) you’ll need the following:
*You can also use an electric sander for a faster result, but it takes some extra care that we’ll talk about in a moment
How To Paint Ikea Cabinets: A Quick Video!
If you want the quick & dirty version of this process, I had fun with this two-minute video that covers each step in a Gen Z-friendly, transition-tastic way. You won’t catch me on TikTok or making IG Reels, but I like an editing project (I was the kid in middle school making all sorts of videos with star wipes and other “fancy” effects). For the more detailed scoop, we’ve got a full written tutorial AND A MORE DETAILED VIDEO later on in the post that includes more specific tips. That one’s for all of my fellow Millennials that like to see someone talk through a project without sparing a single detail (as I’m known to do).
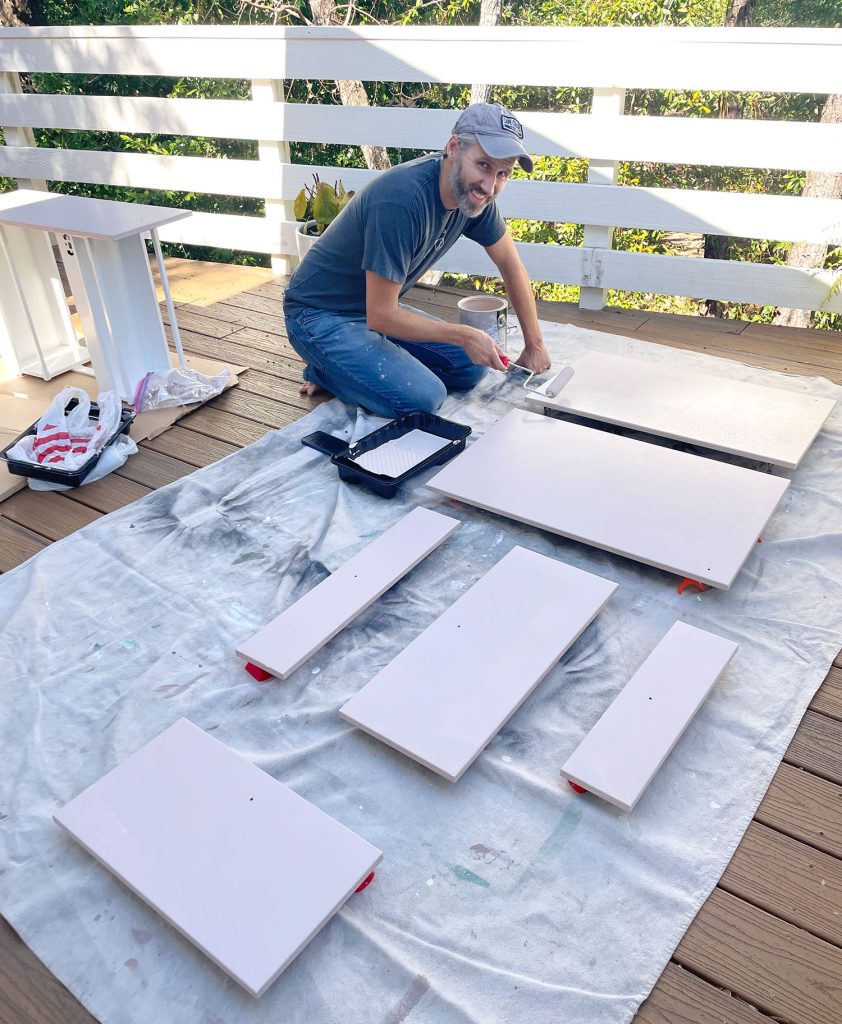
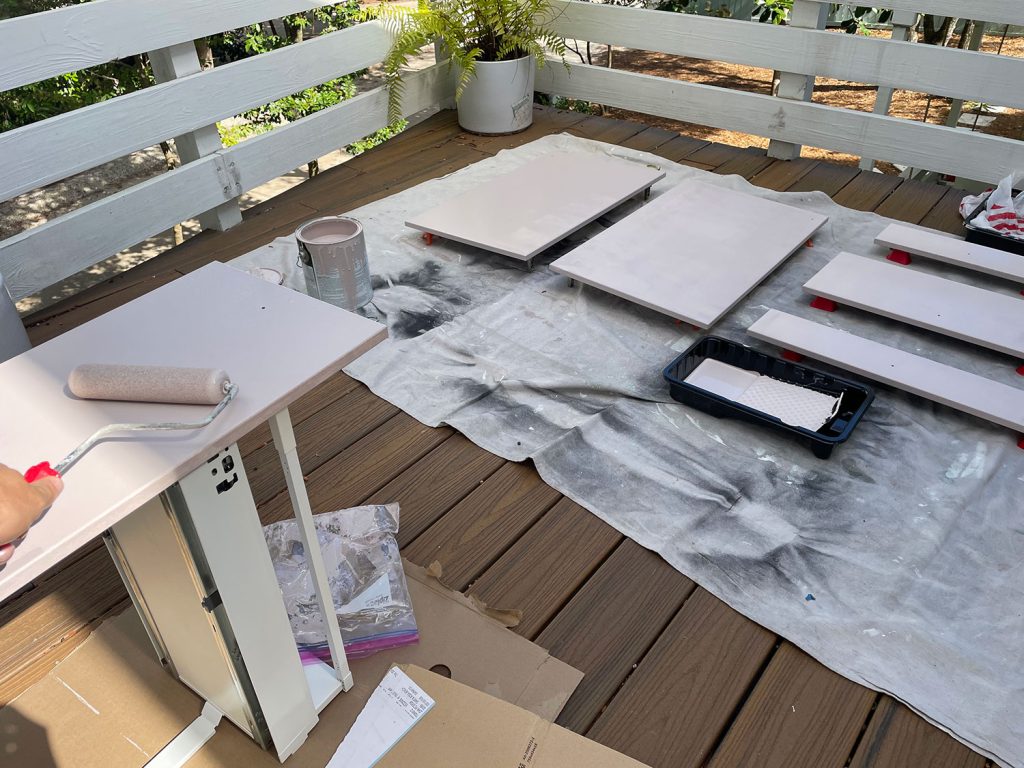
Since we were painting our cabinets BEFORE assembling our kitchen, we just unboxed the doors and laid everything out on a dropcloth to get started. But if you’re painting an existing kitchen you’ll want to remove all of your doors and drawer fronts first. You’ll also probably want to take the extra step of cleaning them with a liquid deglosser to remove any cooking grease or oils that may have built up on your doors and drawers.
Step 2: Rough Them Up With Sandpaper
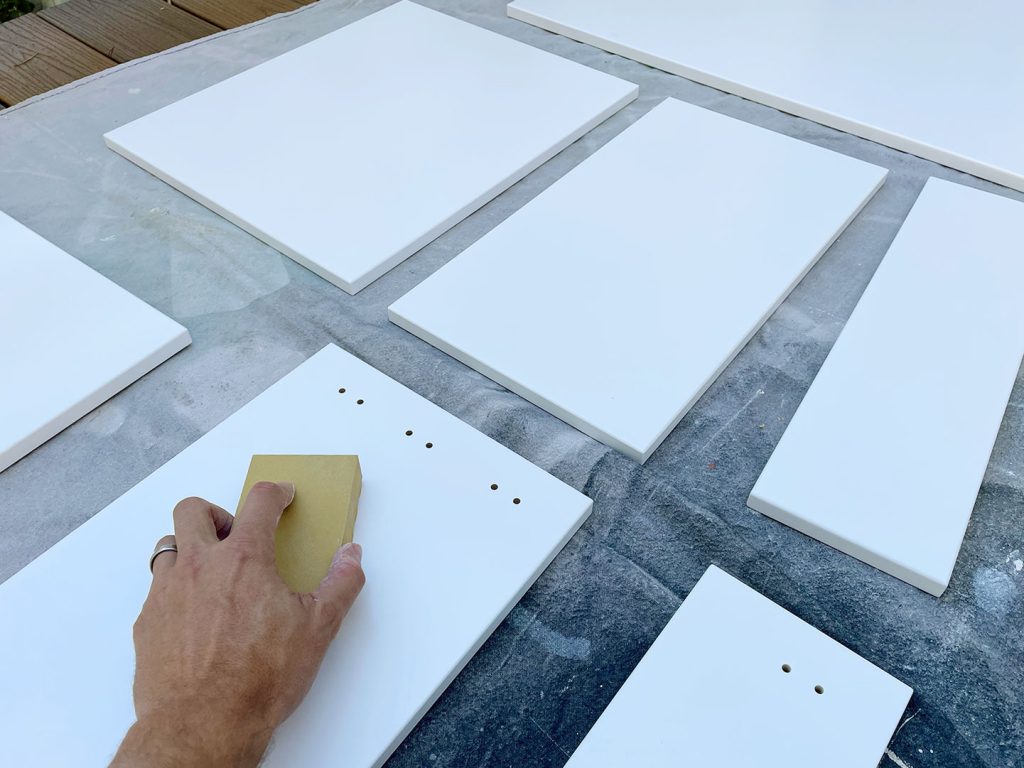
Even if you’ve used a deglosser or liquid sandpaper, it’s still a good idea to rough up the laminate surface with actual sandpaper to create a better surface for primer and paint adherence. Prep is really the difference between painted cabinets that last and ones that look crappy within a month. So don’t skimp on the prep, my friends. Trust me.
The goal was NOT to fully remove any of the white laminate surface since it offers moisture protection to the MDF below. So we started carefully with a fine-grit 220 sanding block and eventually worked up to 120-grit sandpaper on our battery palm sander. I filmed the how-to videos before testing out my power sander because it should be used with cautio. You can easily sand off too much if you’re not careful- especially on the edges and corners – so I didn’t trust myself to simultaneously film and sand with it. But it can speed up this step a bit.
Step 3: Fully Remove Your Sanding Dust
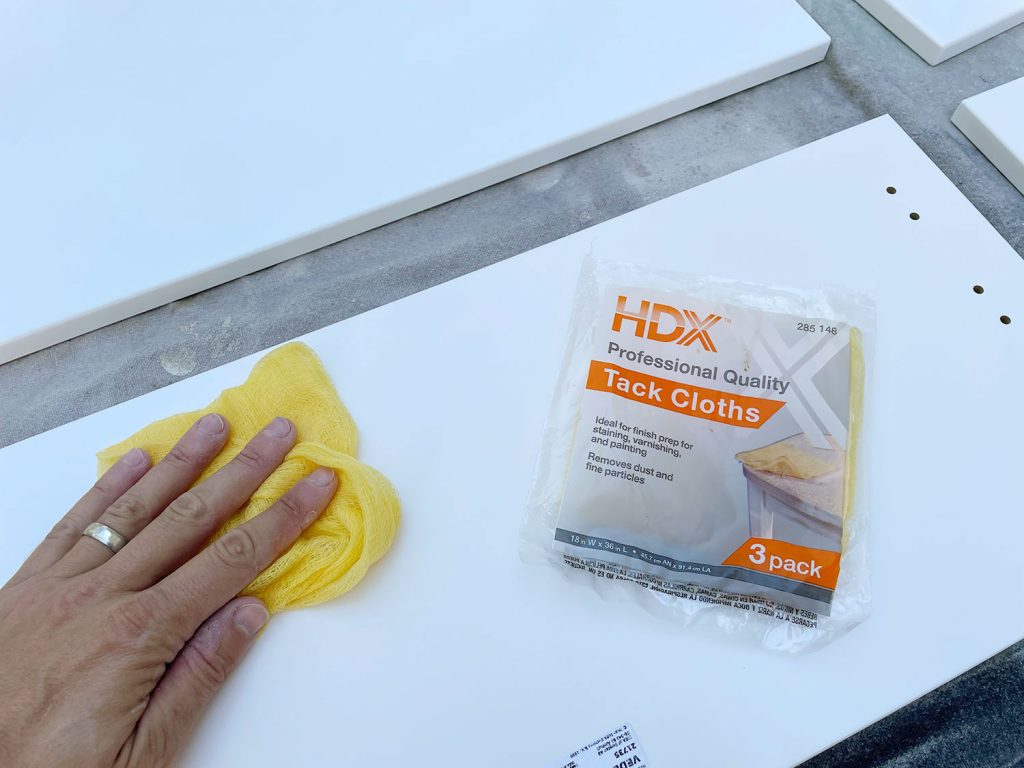
You want your primer to adhere to the door itself, not a layer of sanding dust, right? So we went over each door with a damp paper towel first, then a tack cloth. The slightly tacky surface of the cloth is great for grabbing fine particles before you paint or stain any surface. Be sure to get all sides.
Step 4: Prime the BACKS
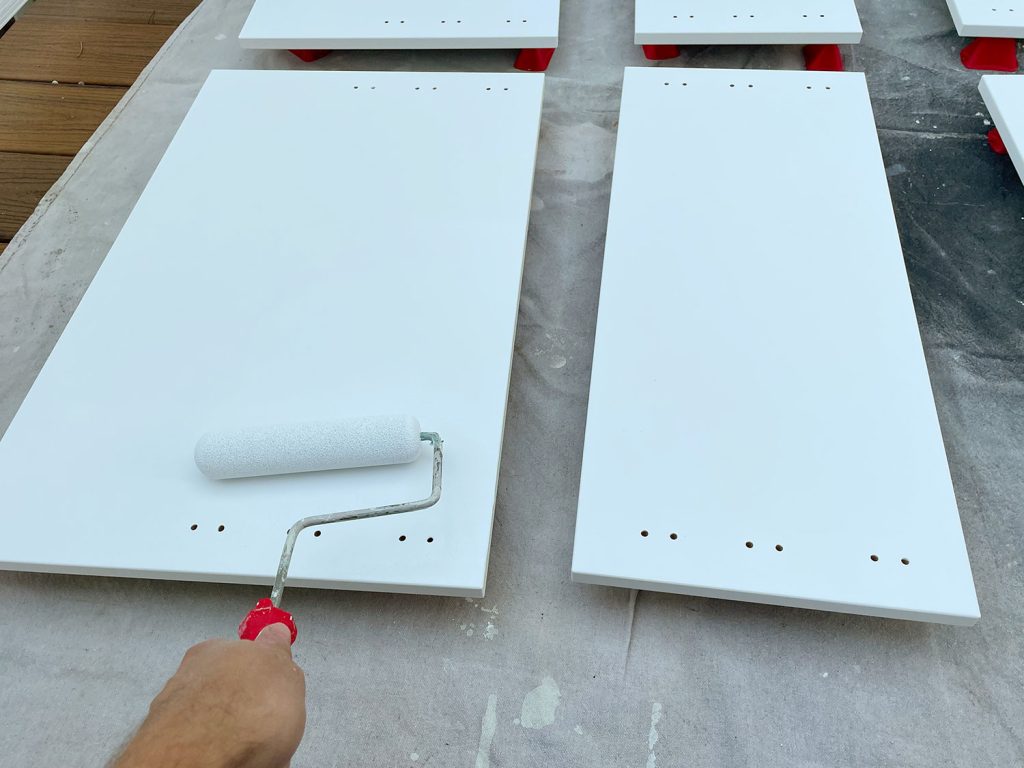
Before we started priming and painting, we propped everything up off our dropcloth with these paint project lifters. It was my first time using them, so I was a little paranoid that they might scratch or leave marks as I flipped the doors over to work on each side. So to be totally safe I decided to FULLY PRIME & PAINT THE BACKS before doing anything to the fronts. This way I’d never have to rest the painted fronts on the lifters. That way, if the lifters did leave tiny marks somewhere, it would be on the less-important backside of the drawers (fortunately they didn’t!).
Oh and as for the actual priming, we just used a small foam roller to apply a thin and even coat of Zinsser Bulls Eye 1-2-3 and let it fully dry for 4 hours before proceeding. Store your wet rollers in a Ziploc bag for later use.
Step 5: Paint The Backs
Once our primer was fully cured, we used a fresh roller to apply two thin and even coats of paint. Again, we used Sherwin-Williams Emerald Urethane Trim Enamel based on the recommendation from the paint pro at the store. We chose a Satin finish because we like that low-sheen look. If you choose a glossier finish, just be aware that roller and brush strokes can be easier to see, so you may want to use a paint sprayer instead.
Our general order for painting each door back was:
Apply paint across the whole flat surface
Gently roll along all 4 vertical sides to smooth out any drips (more on this in the next step)
Roll lightly over the flat surface again, using parallel overlapping strokes in the same direction
Step 6: Repeat! Apply A Second Coat of Paint.
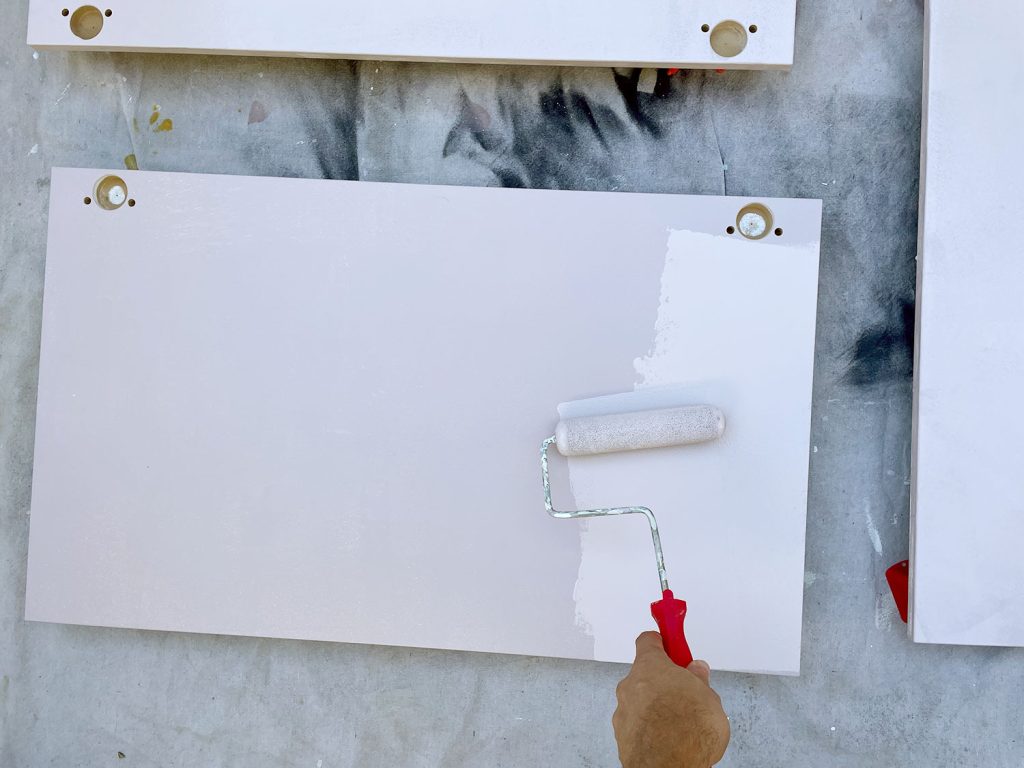
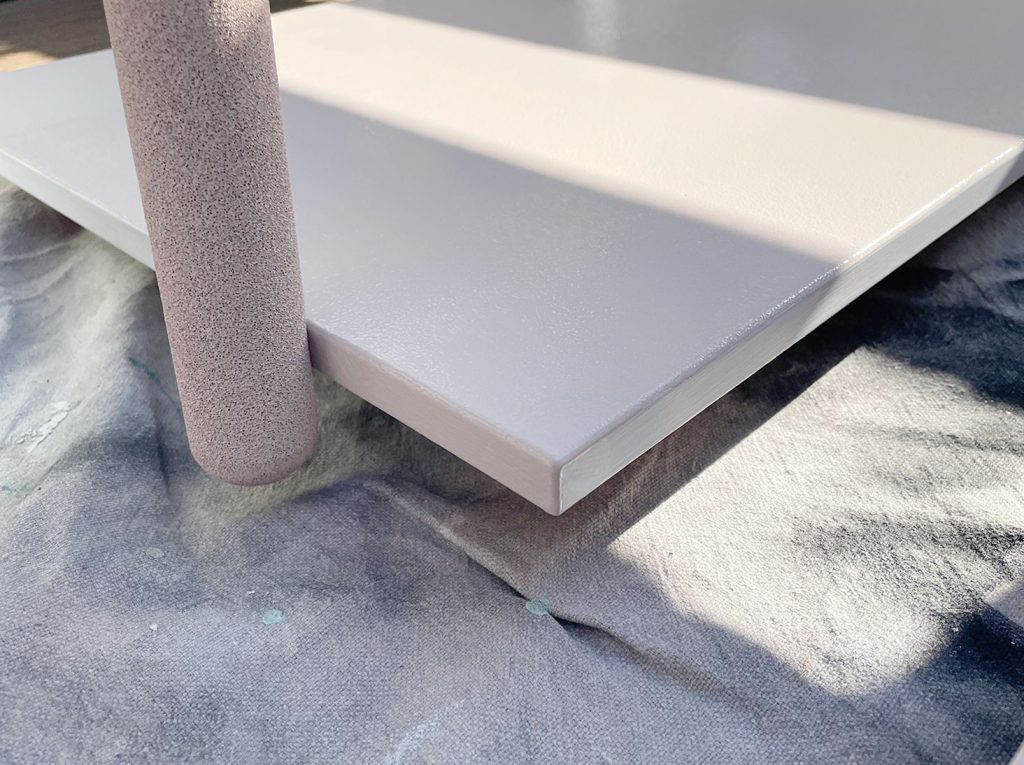
Don’t panic if your first coat looks imperfect like ours did below. I always recommend two coats for any project because it’ll give you a more consistent looking and stronger/more durable finish (and two thin and even coats are WAY better than one thick and gloppy one). So once your first coat has fully dried (we let ours dry overnight), roll on a second coat.
You can also see above that our coverage is spotty on the sides. That was intentional. Since we were focusing only on the BACKS, we just gently rolled the sides to smooth out any drips if they occurred. Hence that weird half-painted effect on the edges above.
Why not paint the sides completely yet? Well, if you press a roller too firmly or apply too much paint against a thin edge like this, it can cause paint to collect along the underside. That’s something you might not notice until you flip things over and, in this case, that would mean a ridge or bead of paint on the front of your cabinet. So we decided to fully paint the edges while painting the fronts, that way any errant paint build-up would be on the less-important back side (spoiler alert: we didn’t have any anyway, but better to be safe than sorry!).
Step 7: Flip Over & Repeat Steps 4, 5 + 6
We gave the cabinet backs a full 24 hours to dry and harden, and then carefully flipped everything over to begin the process again on the fronts. I know this seems tedious, but we figured it was better to be slow and methodical for the best result. Remember, we really didn’t want any dings from the paint lifters on the fronts, which we worried might happen if we were flipped them back and forth throughout the process.
So we proceed with a coat of primer on the fronts…
And then, once the primer fully dried, we painted them (you guessed it, two coats).
This time around we made sure to get the sides good and covered. Again, not using too much paint or too much pressure, but being careful to get everything well coated.
Once the second coat was done on the fronts and sides, we let things dry and cure for another full 24 hours before installing them. It honestly doesn’t hurt to wait 48 hours. Most cabinet jobs get ruined by two things: inadequate prep, or not enough curing time (literally anything can get dings or scrapes if the paint isn’t fully dry).
Step 8: Don’t Forget To Paint The Cabinet Boxes
We used the same technique to paint any visible parts of the cabinet boxes themselves as the one I detailed above. We sanded/primed/painted the filler pieces on the sides, the toe kicks, and the front of the frames (but not the insides – those we left white). Use a small foam roller for as much as you can and feel free to use painter’s tape as needed. You’ll likely need a short-handled paintbrush to edge some parts.
You can see that we also painted slightly around the side edge of this cabinet next to the dishwasher so we wouldn’t see any random flashes of white when the dishwasher door was open.
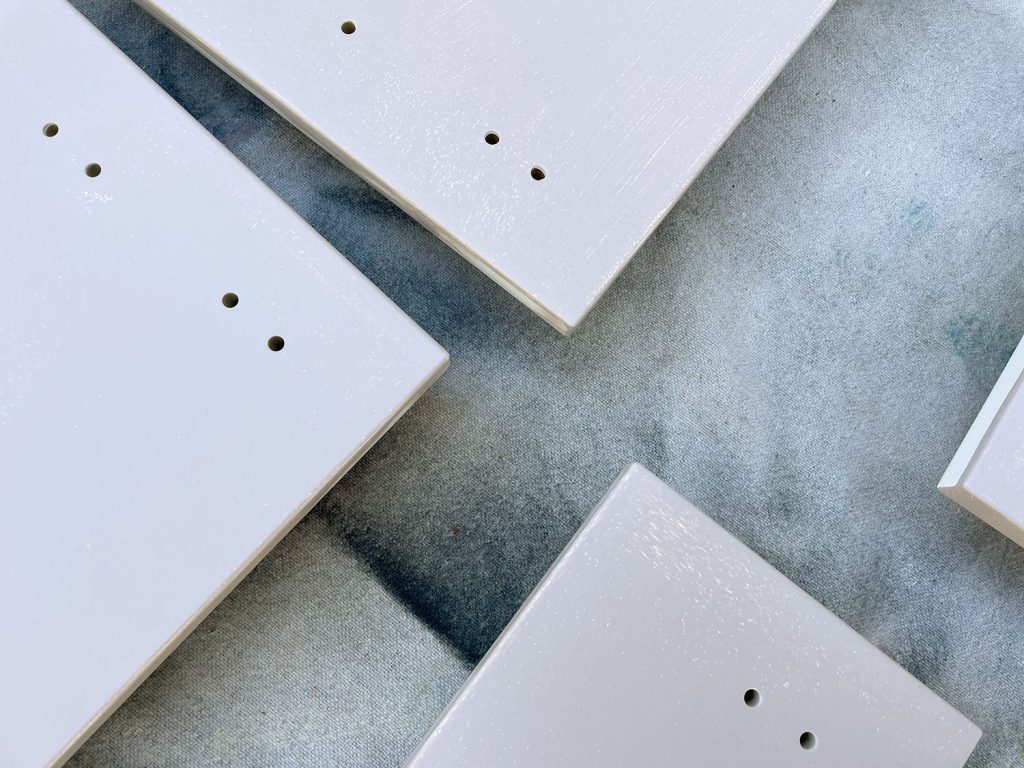
TIP: Maybe Make Your Hardware Holes Earlier?
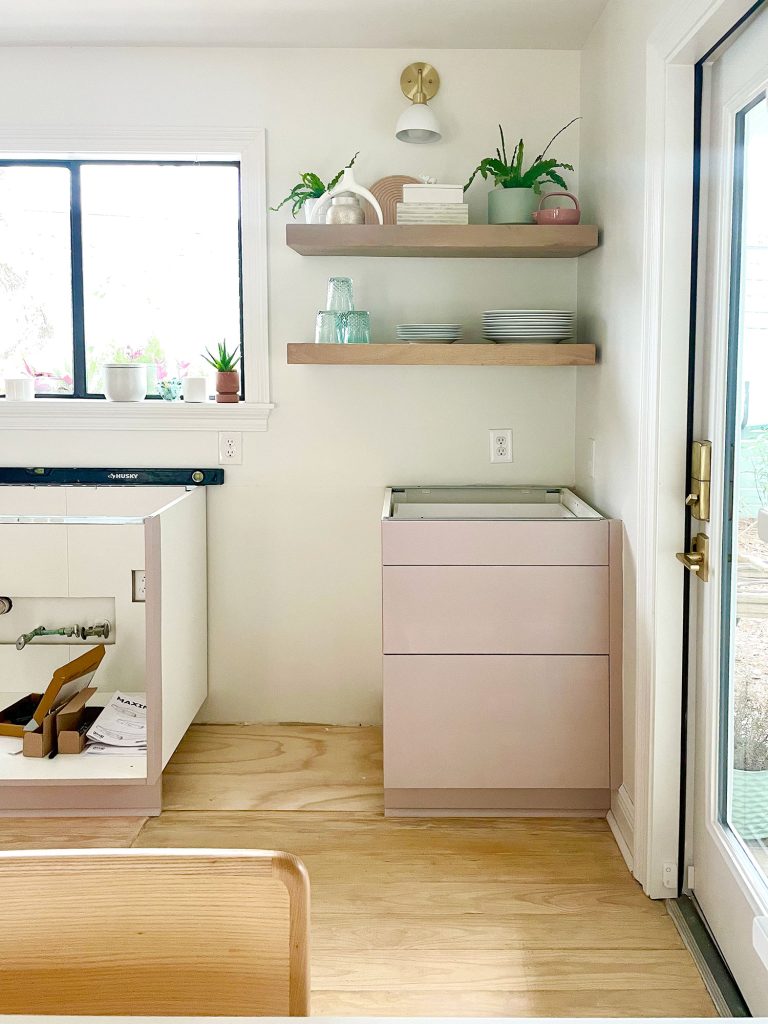
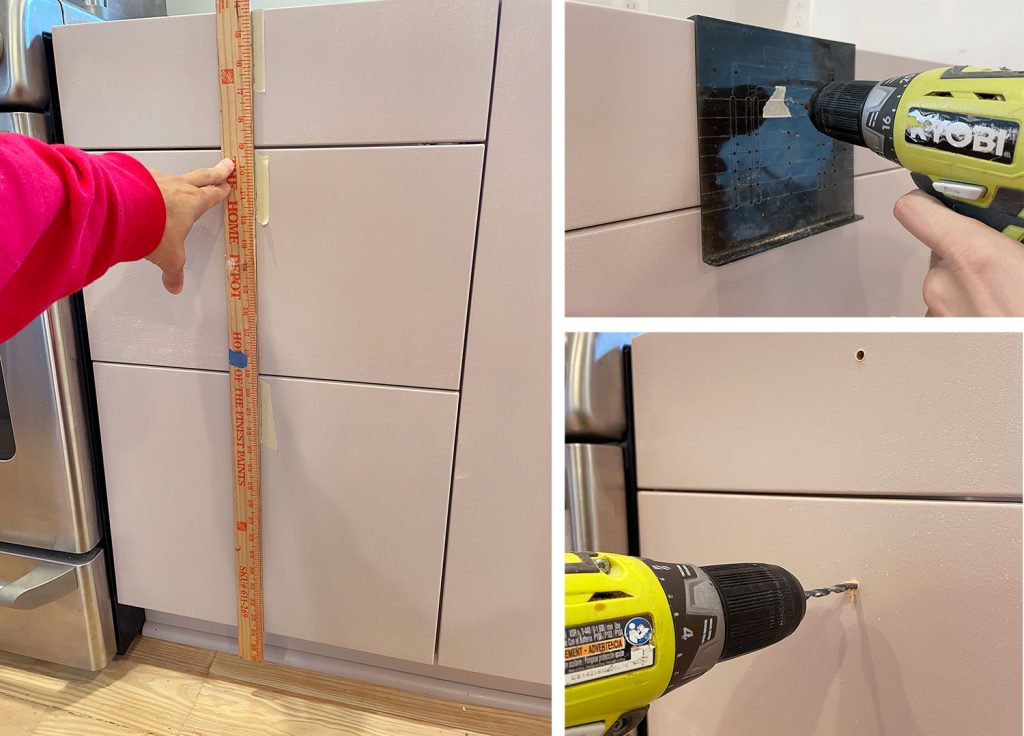
Confession: the photos above were actually taken BEFORE we finished painting the drawer fronts. In fact if you study the sides of the drawer fronts you can see that they’re not fully covered yet.
Our counters were being templated that day and we really wanted all of the doors and drawers in place, just to be sure the templater took them into consideration when measuring for the countertop. But the weather had delayed our painting schedule, so we made the decision to install everything with only one coat of paint on the fronts (even though we’d have to uninstall the door and drawers to finish up later).
We decided to make the most of this curveball and go ahead with making our hardware holes while we had them hung for countertop templating (you can watch our cabinet hardware installation tutorial here). Turns out, we were decidedly less nervous about marking, taping, and drilling into the drawers knowing we wouldn’t be messing up the *final* paint coat on each door. If our drill slipped or plastic template scuffed something, we could cover it with our last coat.
Plus, with our holes already made, we could really let that second coat cure and harden without any heavy manhandling immediately afterward, which can happen when you install the hardware.
So while it’s certainly not necessary to drill your hardware holes between your first and second coat of paint on the fronts, we found it to be a happy accident that we appreciated.
Step 9: Install Everything & Enjoy!
As delicately as we treated these painted cabinets the whole time we worked on them, they very quickly proved that they didn’t need to be handled with any special care at all. I don’t want to be too cocky since we’re only a month into using them, but so far they’ve stood up to bangs, kicks, spills, scrubbing, and lots of use. Zero issues. Again, I repeat: don’t skim on your prep and let everything not only dry but fully cure before you beat it up. That is truly the key to a good lasting finish. It meant this kitchen took about a full week to come together instead of just a day or two of quick-and-dirty painting, but it’s so worth it in the end.
Step-By-Step Video
But before I go, as promised, here is a much more detailed and less Gen-Z-transition-heavy video that details the process of painting these cabinets. I’m glad we filmed this along the way, because sometimes a video is worth a thousand photos, and while a quick TikTok like mashup of footage makes everything look like it takes five minutes, you can really see how doable this process is in this video. It’s not fast but it’s very beginner-friendly.
We’ll keep everyone posted (and will update this post) as time goes on to see how they hold up over months and years of daily use. I doubt it will be perfect, but no painted cabinets ever are anyway. The premium factory painted white cabinets in our last house had dings and scratches all around the pullout trash drawer about a year into owning them. At least with these we can fix the finish ourselves with just a fresh coat of paint!
Oh and we felt so good about how this process went that we decided to install more cabinets (hello uppers! Goodbye open shelves along that back wall! And it also means we can add a hidden vent hood over the stove!). We’re still fans of open shelving (we have that white glossy shelving system next to our kitchen table just steps away) but we think it’ll be the best of both worlds to have some upper cabinets too. And as for the process of painting them, we plan to do the exact same thing that we detailed here in this post. Stay tuned for a post full of photos when they’re done!
And if you’re interested in some other painting projects, here are a few oldies-but-goodies:
*This post contains affiliate links, so we may earn a small commission when you make a purchase through links on our site at no additional cost to you.
So last month I wrote a post about the smart tech we added, ditched, and love most in our house. And in it I mentioned that I’d share a detailed smart blind post for you “in a few days” because they’re hands down one of my favorite smart home features that we’ve added. Apparently I overshot that deadline just a smidge, but better late than never. So let’s dive into where we got them, why we chose them, how they’re powered, the upsides & downsides, and – of course – how much they cost (please note that I cannot explain why I insist on calling them “blinds” when they’re technically roller shades).
Let’s start with the question I heard most from Sherry (as I mentioned in my last post, she was very reluctant but has completely come over to the smart-blind-dark-side – er, bright side? I guess it depends if they’re open or closed).
Why Install Smart Blinds or Shades?
Ever since we started incorporating smart devices into our last home (this post from 2018 called 10 ways we used smart devices covers what tried and liked in that house) the one thing I was still weirdly eager to automate was our blinds. Each morning and evening I would manually open or close the blinds in 6 windows across our 3 bedrooms. Was it a terribly difficult or time-consuming task? No. Should you feel sorry for me? You most definitely should not. But as we began to automate our family’s wake-up and bedtime routine, the blinds just seemed like the next logical step. And having a few friends who had already automated theirs (who always gushed about how much they liked it) definitely had me considering it more as time went on.
We didn’t switch to automated smart blinds at that house because it would’ve involved replacing or retrofitting the 15 existing blinds that we had already purchased throughout our upstairs rooms. We never formally priced out totally new blinds because we knew 15 motorized blinds would be very expensive. And even if we were to try adaptor kits like this one from Tilt – that $200 kit (per window!) would quickly add up to thousands of dollars. Yes, thousands. To retrofit blinds you already paid for and own. So, ultimately, it was cost-prohibitive. Even my love of smart stuff has its limits.
Luckily, the math changed when we moved into our current home where we owned zero blinds or window coverings at all.
Knowing we had to buy them but wanted something smart helped me look at it as an initial investment instead of buying something that I’d feel guilty replacing or spending hundreds to update later. And instead of 15 windows, we only had 5 windows that needed blinds – 3 in our bedroom and 1 in each kid’s room. Note: the bathroom window is frosted so that didn’t need covering.
Another change we made here is that we decided to leave the windows in the main areas untreated to maintain their clean modern look. We actually bought woven shades for the common areas downstairs in our last house that we never ended up closing. Ever. (We aren’t naked in the kitchen or the living room so that’s likely why). We opted to cover any french doors in bedrooms with these blackout curtains, so even if the smart shades were pricey, it felt extremely fortuitous that we only needed 5 for the entire house to achieve our full-privacy-and-light-blocking bedroom goals.
We decided to do roller shades instead of blinds since they would “disappear” more when open and that would help maintain that bright, modern feeling that we love in this house. From the street it also makes all of our windows look similarly treated (just big panes of glass) so it’s not super obvious that the bedrooms have roller shades and the kitchen and living room don’t).
Also, in my opinion, roller shades are practically BEGGING to be automated. Maybe I’ve just been traumatized by the cheap plastic-y roller shades of my youth, but I always picture re-pulling a roller shade over and over again to get it to roll up neatly or bracing myself for that sudden violent snap backto the top if you don’t pull at the exact right angle to lock them in a fully-down position. So the idea of a roller shade I never have to touch with my hand? Sign me up.
Long story long, I made a fresh case to Sherry that we should finally go smart on our window treatments and although she was still hesitant, she agreed that we should price it out. When the cost came back (more on that in a second) I’m not going to lie. Sherry was extremely skeptical about splurging for them, but I was unrelenting in my #smartblindgoals. And since we only needed five of them, she indulged me. And well, now she’s a loud and proud convert.
What Smart Shades Did We Choose?
We ended up ordering Bali Blackout Roller Shades with added smart motorization through Blinds.com (not sponsored, we paid with our own money, yada yada). We bought blinds from Blinds.com once before – a blackout accordion blind in our beach house’s bunk room. And since we were happy with their options and their customer service (they even replaced the shade for free when it wasn’t fitting quite as we expected), we just went with them again for this house.
They carry LOTS of options that could be motorized – roman shades, cellular shades, sheers, light filtering, etc – but once we narrowed down our criteria to: blackout, roller shade, and “Smart Home Compatible” – it gave us two options: Blinds.com’s own line of shades, or the Bali brand shades that they sell. We went with the Bali one because our friends the Vargos had been very happy with theirs, and they have more/slightly higher reviews.
Once we selected the base product, there were still tons of style options to choose from – the first being fabric color. Due to Covid we weren’t able to order samples at the time (this was May of 2020) but our local Home Depot had a swatch book in the store that we could browse. We landed on one called Acadia Vintage Veil. It’s a light neutral sand color with a subtle natural texture that makes these look and feel nicer than your run-of-the-mill vinyl roller shade. Sort of the texture of seagrass wallpaper.
You can customize the rest of your shade style to your preference, just be sure to choose “Z-Wave Motorization” for your Lift option to get the smart technology if you want to come over to the smart-blind dark/bright side.
How Does The Smart Shade Get Power?
Motorized shades usually get their power from one of three sources: solar, batteries, or electrical plug (although solar wasn’t an option with the shades we bought). There are pros and cons to each one, so you’ll have to decide what’s best for your home. Here are some things to consider:
Solar Powered Blinds Pros & Cons
PRO: Cord-free and eco-friendly
PRO: Automatically recharge without your help
CON: May not work on windows without much direct sun
CON: Solar power strip will be visible from outside
Battery Powered Blinds Pros & Cons
PRO: Cord-free and no need to have an outlet nearby
PRO: Rechargable versions can reduce cost of replacement batteries
CON: Battery packs may be too bulky for some window frames
CON: Require regular recharging or replacement
Plug-in Blinds Pros & Cons
PRO: Reliable power source that doesn’t need recharging
PRO: Doesn’t require bulky battery packs or visible solar panels
CON: Needs an electrical plug nearby
CON: Cords, although small, may be visible near your window
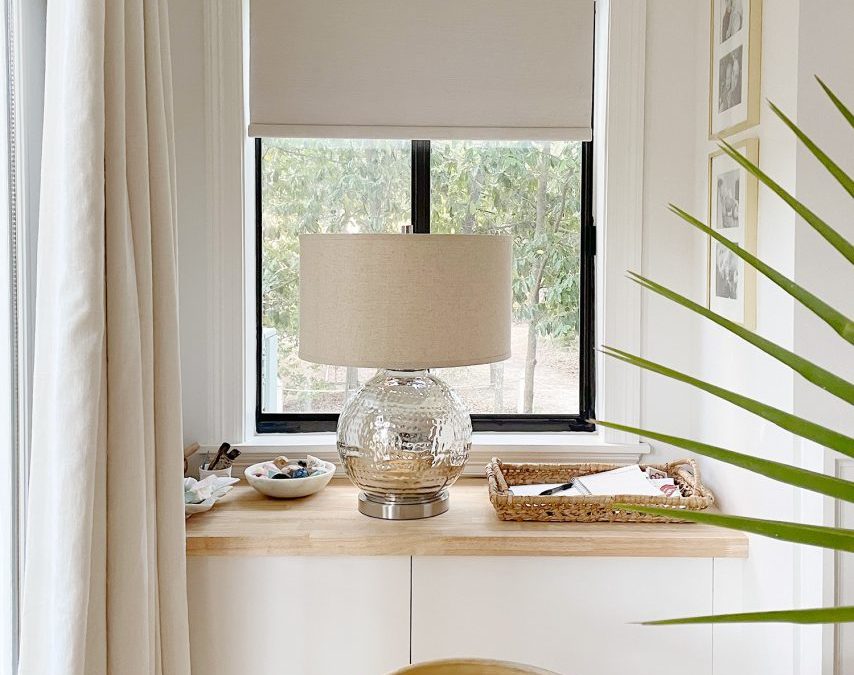
As you can see above, we chose the plug-in option for our smart shades. I’ll talk more in a moment about how we dealt with the cords, but we ultimately decided that we didn’t want to worry about recharging or replacing batteries on these puppies for the rest of our lives. Although the cord looks giant and obvious in that photo above, I was standing about two inches away. When you aren’t standing right next to the side of the window trim that you run it down, it’s not very noticeable at all.
For example, I’m a few feet in front of this window and it’s not really visible at all.
In fact every person we’ve shown our blinds to asks if they’re battery powered because they don’t see the tiny cord running down the side of the window trim. For reference, our window trim only sticks out from the wall about 3/4″ and the cord is around 1/8″ thick. Very very small.
Do I Need Any Other Equipment To Make Them Smart?
Yes, most likely. The technology has changed a bit since we bought them two years ago, but if you intend to control your motorized blinds through an app or voice assistant like Alexa you need to purchase a Bali gateway device (you can buy your own or add one from the customization screen). One gateway controls up to 15 devices, so tally up how many blinds you’re getting to see if you need more than one). Currently, Blinds.com shows this as a $135 add-on to your order.
However, since these particular blinds work using Z-Wave technology, we were able to use a compatible Z-Wave gateway instead. Z-Wave is basically a low-power signal that’s used to connect a variety of smart home products into a network using your wi-fi, usually controllable through a single app. So if you already have a Z-Wave hub, you shouldn’t need to purchase the Bali gateway device. We bought a Samsung SmartThings hub (seen below) for $75 back when we got our blinds, but it now seems to be discontinued. This Aeotec Smart Home Hub is similar and should do the trick.
Then all you’ll need is to download a free app to set them up and control them. Bali now has their own Bali Motorization app, but we set ours up using the Samsung SmartThings app (shown below). It gives us the ability to control the height of the blind, set schedules, create presets, etc.
But if you really want to make the most of your smart shades, I recommend getting a voice assistant device like an Amazon Echo or Google Home so you can raise and lower your window treatments without breaking out your phone. We programmed our shades with a variety of commands in our Alexa app to make it easy to controls groupings of shades (all of them, or just one room) and to incorporate them into some of our morning and nighttime routines (more on that in a bit).
How Much Did They Cost?
Our five smart roller shades cost us about $300 per window, for a grand total of $1,450. I know. Sherry’s face was like that “wut” emoji with the giant sweatdrop. But we definitely spent more on non-smart blinds for our last house when you tally up the 16 woven blinds that we used throughout the downstairs (which we never even lowered – hence us forgoing them in the common areas here) + the 15 white faux wood blinds that we added throughout the upstairs. That house had a total of 29 windows that we bought coverings for.
So while $300 is definitely the most we’ve ever spent per single window covering, it’s honestly less than I expected for smart blinds (some of our friends who got them before us paid around $400 per window but prices have been going down as the technology gets more mainstream). Blinds.com also has sales often (we waited for one when we ordered ours back in 2020). We also saved because our windows aren’t very tall (although we spent more to get the blackout liner because that was one of our prerequisites). All those features aside, it appears that the smart motorization adds about $145 – $190 to the cost of each shade at the time of this writing (depending on which power source you choose).
Were They Difficult To Install & Set-Up?
Nope! Installation of our smart shades was just like any regular blind installation, with just the small addition of (in our case) a long thin cord that needs to be plugged in. You mount a couple of brackets and snap the shade into place – bingo, bango, you’re pretty much done.
There is some setup involved in connecting them to your wi-fi and establishing your smart commands or routines, but ours was really straightforward. The exact steps will differ depending on your Z-Wave device and controller app so I won’t try to cover the specifics here (but Bali’s how-to video can give you an idea of what’s involved). Rest assured that our set-up was no more difficult than any other wi-fi connected device we’ve ever owned.
How Did You Hide The Cord?
I thought I’d circle back to the its-a-small-cord-but-it’s-there discussion for a second. The short answer is: we just ran it diagonally along the top corner of the window trim where there’s a seam anyway and then down the side of the window trim. And we used tiny nails to hold it in place (see the one in the top corner on the side of the window trim?)
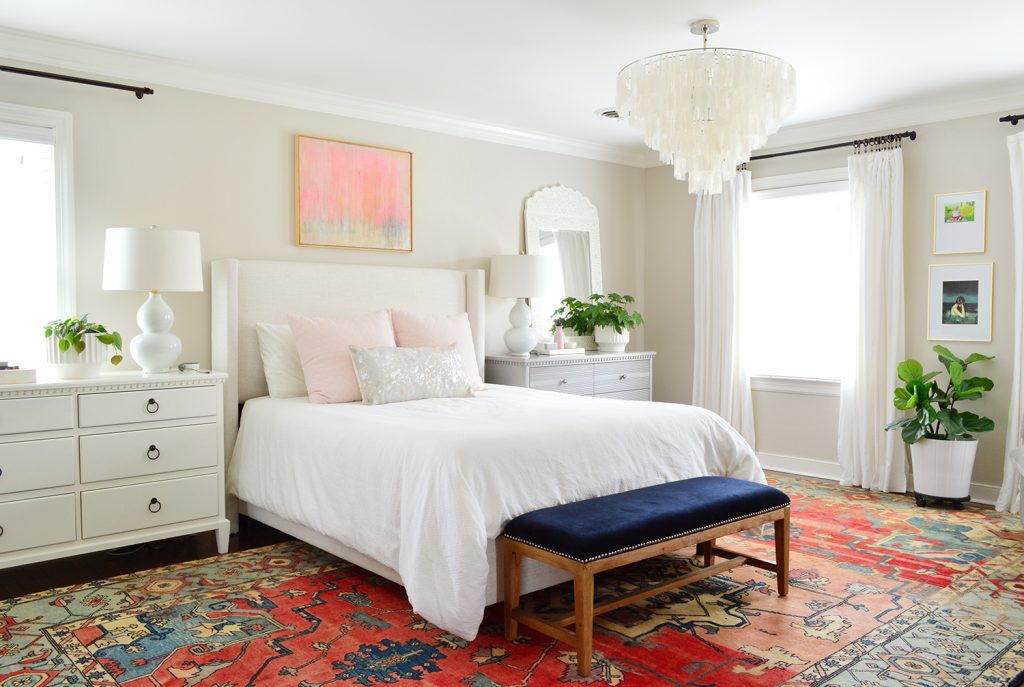
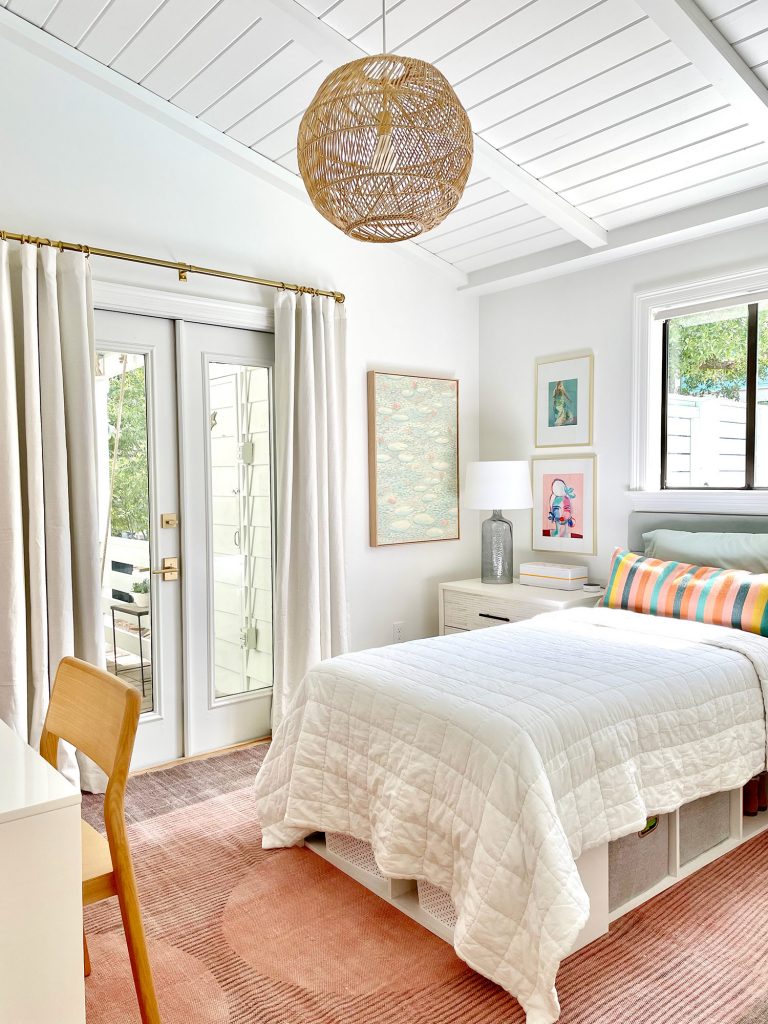
If you think about how often you stare at the side of your window trim (it’s really not too often in our rooms), the good news is I bet you won’t notice them very much. The cord runs down the right side of this window trim below, scoots behind the headboard (it’s super thin) and down into an outlet beneath the bed. In fact every single room photo that we’ve shared above (except for the extreme close-ups) has been on the blog as we shared various rooms and not a single eagle-eyed reader has said: “what’s that cord?” It really isn’t something you see unless you’re actively looking for it.
One other thing to mention is if you’re pairing your smart blinds with curtains (we always did blinds + curtains in our previous more traditional homes like our Richmond house and the pink house) – the cords will be completely hidden behind your curtain panel. Heck, they could probably snake down to a nearby plug without being detected at all!
But since we chose to go curtain-less on our windows (we just wanted blackout curtains on the glass bedroom doors), we just ran the cords down the side of the window molding.
The only instance where this didn’t work was near our bedroom door, where the cord has to take a bit of a longer “journey” to get to the outlet. So we used a cord cover kit to help it blend in with the baseboard (in hindsight that made it a LOT thicker, so you might want to just try running it down with small finish nails and painting it to match the wall).
Thankfully in this instance, it doesn’t both us because it’s hidden behind the open door unless we’re sleeping at night, at which point we close the door… but there are zero lights on to stare at said cord cover.
Were They Worth It?
Unsurprisingly, I absolutely think so. And even Sherry, who was extremely skeptical at first, is a complete smart blind convert. Here are some reasons why we like them so much:
Automating Our Morning & Evening Routines
Just as I had hoped, having voice-controlled shades save us the trouble of individually opening and closing them every morning and night – and because we integrated them into entire smart house routines, the lights dim as well and the entire house basically prepares itself for bed at night or a new day in the morning, which feels delightfully efficient.
Whenever we say “Alexa, Good Morning” they all go up at once and at night, saying “Alexa, It’s Bedtime” makes them all go down in unison. It’s REMARKABLY satisfying and has become a favorite party trick when friends are over. Nearly everyone who sees them asks us to send them links to the exact things we bought so they can do it too. It really isn’t that hard, and once it’s set up it’s a very nice luxury. Definitely not a need-to-have, but to us it’s most definitely a nice-to-have.
Beyond making mornings and evenings feeling more auto-pilot, living at the beach can mean lots of outfit changes due to being hot, putting on a bathing suit or taking it off, or wanting to don painting clothes (ok, that one has nothing to do with the beach & everything to do with our DIY pursuits). But the point is that we often change a few times a day and want a little privacy, so one voice command (“Alexa, Close Bedroom Blinds“) means they all go down at once. We use this multiple times a day in multiple bedrooms beyond just the am and pm routines we have set. So convenient.
Making Blinds More Kid-Friendly
By making our kids bedroom shades (and lights) voice-activated, we’ve also made it easier for them to control the lighting and privacy in their own spaces. Rather than having to deal with a blind cord or a shade that snaps up or down if they don’t pull it at the exact right angle, our kids can operate our smart blinds completely hands-free. Even better: there are zero handprints staining the fabric because nobody touches them. So whether our kids are changing clothes or trying to make their room dark for fort-building, it requires zero parental involvement and there’s something very cute about hearing them ask Alexa to “enable dark mode” or whatever funny name they use for their own room commands.
Creating Quiet Kid “Alarm Clocks”
Now that our kids are at different schools (elementary and middle) which have different start times, we wanted a soundless and more natrual-light-related way to cue them it was time to get up and get ready – you know, so some blaring alarm doesn’t wake up their sibling across the hall who can keep sleeping. And these smart shades turned out to be an unexpected solution! We used the Alexa app to create separate routines for their individual shades to raise up partway, lighting their room enough to wake them up at the right time (we can also add their room lights turning on to that schedule but haven’t needed to – just the shades is a nice gentle nudge). It definitely wouldn’t work for all sleepers, but both of our kids wake up unprompted thanks to the light shining in at exactly the time that we set their blinds to slide up for their specific school schedule during the week.
Added Security When We’re Away
Since we can set the blinds on schedules, we created a custom “Blinds Away Mode” in the Alexa app that will raise and lower the blinds at specific times whenever we’re on vacation. Just like you might put lights on a timer to create the illusion that your house is still occupied, our blinds can open and close just like they would if we were home. Imagine what Kevin McAllister would do with this technology!
Are There Any Downsides?
Apart from them being pricier than your typical non-smart shades or blinds, the only hiccup we’ve had is that the blind farthest from the Z-Wave Hub very occasionally loses its connection and doesn’t respond with the two others in our bedroom. Our house has never had amazing internet, so if you have a good signal it likely wouldn’t ever be an issue for you. Even with our spotty internet, it’s not frequent and always resolves itself in a few hours, so it’s more of a momentary weirdness than a deal-breaking issue. Each shade has a button on the right side that can be pressed to lower or raise it manually – almost like you’d operate a garage door. So we’ve never been stuck with a blind we couldn’t control. We usually just ask again and it works or we press that button, but it’s a pretty occasional glitch.
With plug-in power, there’s always the possible hiccup of a power outage, but in the two years we’ve lived here, we haven’t experienced one (and we have a back-up generator so it shouldn’t be an issue). The Bali website recommends having a local remote if you worry about it as an easy solution, but if you experience frequent power outages, you may want to consider a battery-operated shade instead.
Any Other Tips?
Consider buying one test blind before buying a whole house worth of them. We did this, even though at the time we were desperate to replace the rapidly-disintegrating packing blankets we had been using as makeshift window coverings. It was a true practice in patience.
And we’re so glad we did because we caught a mistake that we definitely would’ve regretted about our shade design. We had originally chosen “Standard Roll” for our fabric direction because it sounded, well, standard. It wasn’t until we received our test blind that we realized this meant that instead of seeing our pretty textured fabric selection wound up at the top, it just looked like a tube of white blackout liner (you see the backing on the roll at the top if you choose Standard Roll – not the front of the fabric). It looked almost as if you bought wrapping paper and it was wrapped inside out around the cardboard, hiding the design you picked.
We would definitely recommend ‘Reverse Roll” since seeing a seamless span of fabric instead of a bright white roll of blackout liner at the top is what makes these look noticeably nicer. Just like our previous experience with Blinds.com customer service, they were understanding of the confusion and offered to replace the initial blind that we ordered for free. And with that kink worked out, we felt confident placing our order for the rest of the house.
What Else Should I Smart-ify In My House?
Funny you should ask!
Okay, no one asked this, but I wanted to end this post by mentioning the original post that I did many years ago called: 10 Ways We Use Smart Technology To Make Our Home More Efficient. It’s a really good place to start if you want to add some smart tech to your house – even just some basic $15 and under lights or plugs. And the updated favorite-smart-tech rundown that I did last month is full of all the newer stuff we’ve added, a few things we have since ditched, and what we love most.
So there you have it. My extremely thorough thoughts about smart blinds. “Alexa, publish this blog post!” Wait that didn’t work. Boo, I have to use my hands.
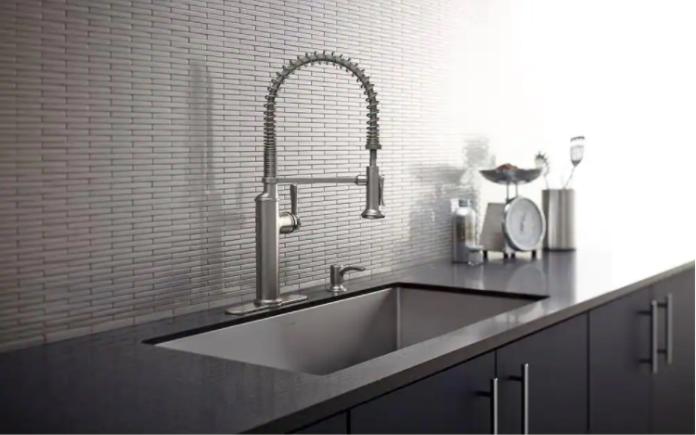
The faucet’s high-arch spout with exposed spring provides outstanding range, flexibility and control for every task, from food prep to filling pots and cleanup.
Its simple-to-use single-lever handle makes adjusting water temperature easy.
The two-function sprayhead with touch-control allows you to easily switch from stream to sweep spray. The sweep spray features specially angled nozzles that form a wide, powerful blade of water to sweep your dishes and sink clean.
Exposed springs keep this faucet in place.
Industrious Design
The Sous faucet’s industrious design will have you feeling like it was plucked straight from a top chef’s kitchen.
The faucet’s MasterClean sprayface features an easy-to-clean surface that withstands mineral buildup. Plus, the spring and sprayhead both are detachable to make clean-up easy.
The magnetic docking arm keeps the sprayhead securely in place and swivels 360 degrees to not obstruct your sink.
And ScratchShield technology helps the faucet withstand the toughest daily use.
The faucet’s ceramic disc valves exceed industry standards by two times, so you should get a lifetime of durable performance.
No need for a professional to install this faucet! This is a DIY-friendly job.
Easy to Install
This kitchen faucet might look like it needs to be installed by a professional, but the job is easy enough to do yourself.
The faucet comes pre-assembled, and thanks to flexible hoses and quick-connect fittings, you’ll quickly transform your kitchen into a space fit for a chef!
The longer shank works with countertops between a half-inch to two-and-a-half inches thick. All you need to do is hand-tighten and secure them with a screwdriver.
The Sous Pro-Style Single Handle Pull Down Sprayer Faucet installs with 1-, 2-, 3-, or 4-hole sinks and includes a sink adapter plate.
Listen above to learn all about this Best New Product!
This week we talk about removing a stone fireplace mantel and repairing broken window slats.
In this week’s radio show, we’re talking repairs and removals!
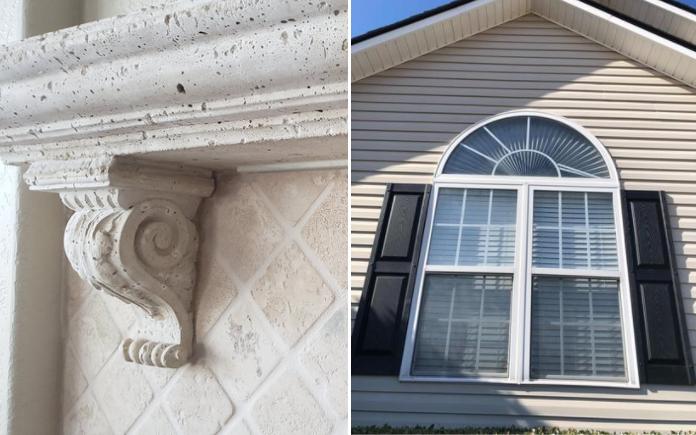
Use caution when removing a heavy, stone fireplace mantel.
Removing a Stone Fireplace Mantel
Lisa Dylina in Vero Beach, Fla., is wondering how difficult it would be to remove a stone fireplace mantel and replace it with a wood one.
To remove this heavy stone, you need to use a sledgehammer to bump it up and loosen it from the tile. Try using a baby sledgehammer, as it will be more manageable for this indoor project. Once you bump it loose enough to see a crease between the mantel and the tile, use a chisel to separate it completely.
Definitely have someone help you with this so you don’t injure yourself while removing it. Use a piece of plywood and a drop cloth to protect the wall and hearth, in case you drop the stone mantel.
Keep in mind when removing the corbels, the tile behind them could be damaged and not presentable after. Whatever wood supports or corbels you install next need to cover that same footprint or larger to hide the damage.
Skip to [9:09] for the full segment on the Today’s Homeowner Radio Show.
These broken slats are nearly impossible to fix without removing a pane of glass.
Repairing Broken Trim in a Double-Pane Window
Two vinyl trim pieces have become detached inside Tracy Ammons’ half-round double-pane window. So, how can he get this trim back in place?
The manufacturer probably mulled the windows together and installed them as one unit. You would need to contact the manufacturer for repair. You usually can see the manufacturer’s name etched in the corner of the glass.
If you can’t find the manufacturer, it can still be fixed despite not knowing the brand. Call a glazier. They can see if there is a way to get in there to fix it. If it’s sealed, they would have to remove the interior pane, fix the slats, and replace the window.
Skip to [19:51] for the full segment on the Today’s Homeowner Radio Show.
A pool provides the perfect environment for mold and mildew to form.
Ridding a Pool Deck of Mold and Mildew
Bobby Cleveland from LaGrange, Ga., pressure washes his deck every two years, only to have it taken over by mold and mildew again and again. Now, he’s looking for a permanent solution to keep it clean for years to come.
First, pressure wash the pool deck using a round concentrated washer. Then, allow it to dry and use a masonry sealer. It’s clear, fairly inexpensive and won’t change the look of the concrete or make it slippery. Apply one light coat over the surface with a garden sprayer. Then apply a second and third coat. This will prevent the water from soaking into the concrete.
Bay windows vs. bow windows: Although they look similar, these types of windows are installed differently and could have an impact on your home’s curb appeal.
Bay windows vs. bow windows: A lot of folks wonder about the difference, and which is right for their home.
That’s the case for Erica from Huntington, Calif. She’s wanting to remodel a large flat picture window in her living room to either a bay window or a bow window. Erica asks, “Do you know any reason why we should choose one over the other?”
In this week’s Podcast Question of the Week, we’ll break down the differences.
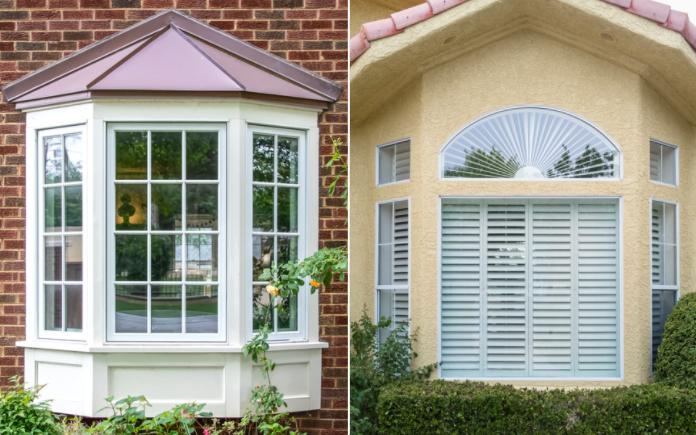
Bay windows typically extend down to the home’s floor level.
Bay Windows
A bay window is the combination of three windows that angle out beyond a home’s exterior wall. These windows also will have walls beneath them that extend to your home’s floor surface.
The angle the windows are installed will determine how far out it extends. With a 30-degree angle, the window will typically extend about 13-14 inches. If the windows are at a 45-degree angle, they could extend about 20 inches.
If you have a walkway in front of your house, that might be projecting too far out and obstruct the walkway.
Bow windows are sometimes called pocket windows.
Bow Windows
Similar to bay windows, bow windows usually have more window panels. They also typically don’t have walls that extend down to the home’s floor level. These pocket windows sometimes have seating within them.
Bow windows come in different sizes and can project beyond your home’s exterior as little as four inches. With a small bow window, you won’t have so much of an obstruction outside your house as with a bay window.
Other Considerations
No matter which window you choose, think about your roof before installing it. You might be extending the window beyond your roof overhang, which means you will have to do some roof work. Then, you’re affecting the aesthetics of your home exterior. Consider having a drawing made by an architect to see how the window will look from the outside.
No matter which window you choose, it will make a difference in the room. The added window area will make the room feel larger by flooding it with light.
Bow windows and bay windows are not DIY projects, so you should check with some remodeling contractors before installing either one. The average cost of a bow window is $3,600, according to HomeAdvisor. A bay window costs an average of $2,110.
Skip to [18:52]for the full segment on the Today’s Homeowner Podcast.
Also on this episode:
Best New Product
The Kohler Sous faucet brings the convenience and performance of a professional faucet to your home kitchen. Learn more>>
Simple Solutions
Fast Fix for Sagging Gutter — If you notice that a section of rain gutter is sagging, chances are the spike that holds the gutter in place has pulled free from the fascia board. The solution is to use pliers to pull out the spike, and then replace it with a long structural screw. And, if possible, always drive the screw through the fascia and into the end of a rafter tail.
Paint Color Reminder — This home-decorating tip was submitted by a listener, Betty Dodson. Whenever you paint a room, save two or three extra paint chips of that color, and put them in your wallet, purse or car’s glove compartment. Then, when shopping for new curtains, towels, rugs, or other room accessories, you can pull out the paint chips to help you select accessories that best complement the room paint.
Other Products and Links Mentioned
Further Reading
Ask a Question! (Podcast)
Ask a question and we could answer it on the “Today’s Homeowner Podcast!” We also may use it on our nationally syndicated radio broadcast or on todayshomeowner.com.
Spending on home remodels and improvements is expected to peak by fall 2022. (Deposit Photos)
MOBILE, AL (March 10, 2022) — Spending on house remodeling is going strong, but the Joint Center for Housing Studies of Harvard University reports growth could be “easing.”
The latest Leading Indicator of Remodeling Activity projects, issued by the Remodeling Futures Program at JCHS, suggests remodeling and maintenance spending will top out in fall 2022 before trending downward.
Although annual home improvement and repair spending could reach $430 billion by the second half of 2022, rising costs of labor and construction materials could discourage remodeling projects.
Rising Costs To Curb Remodel Spending
The rising cost of lumber is driving up the overall cost of construction materials. This, in turn, directly affects budgets for house remodeling and repair.
“The rising costs of labor and construction materials, difficulty retaining contractors, and climbing interest rates could discourage owners from undertaking new or larger remodeling projects.”
Abbe Will, Associate Project Director of the Remodeling Futures Program
The price of lumber, a key building material, is more unpredictable today than it has been since the end of World War II, according to recent analysis from the National Association of Home Builders.
About the Leading Indicator of Remodeling Activity
LIRA provides a short-term outlook of national house remodeling, improvement and repair spending.
The indicator projects the annual rate of change in spending for the current quarter and previous year. It helps identify future turning points of the home improvement and repair industry.
Changing Measuring Techniques
The previous two LIRA releases used a smoothing technique to adjust for quickly changing growth rates during the onset of the pandemic.
As rates begin to stabilize, the program is going back to its standard methods for projecting house remodeling and repair spending.
As a result, growth rate projections are higher than previously reported.