Listen to hear how to prevent nails from pooping out, raise an outdoor dryer vent’s height, and more!
How to Stop Drywall Nails from Popping Out
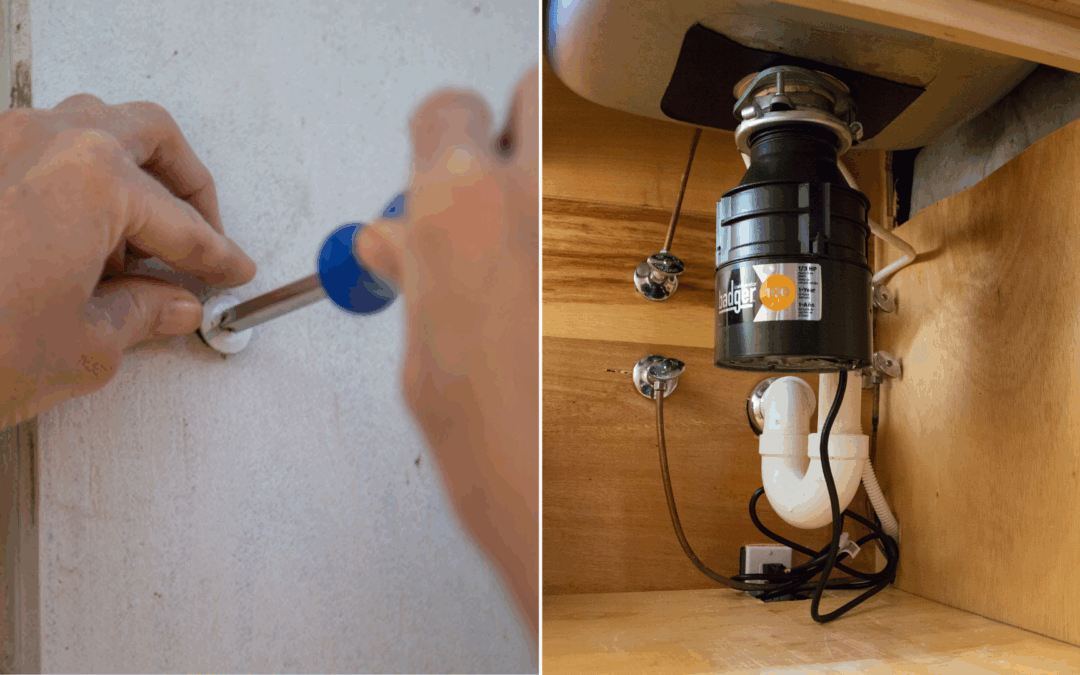
Use a drywall screw instead of a nail to stop nails from backing out. ( 3 Echoes Content Studio)
A homeowner’s house was built in 1954 and she is tired of watching nails back out of the drywall.
She asks, “How do I fix this? Can I pound the nails back in?”
First, pounding the nails back in is just a temporary fix — they will eventually pop out again. But the bigger question is this: why does it happen?
In a home, there is a lot of movement — doors slamming, people walking, etc. All these movements cause vibrations. And, over time, those vibrations will cause a drywall nail to back out.
To fix this problem, you’ll need to remove the nails and replace them with screws because drywall screws are the better option.
You don’t want to just remove the nail and replace it with a screw before checking if the nail is in the center of the stud or close to the center. The stud might be the reason it is popping out.
So, we recommend taking a hammer and a finishing nail and tapping through the drywall until you find the center of the stud.
Once you find the center and pull out the nail, then drive one or two drywall screws an inch or two above the old nail hole. This will hold it tight.
After replacing the nail with a drywall screw, put joint compound over the screw heads and in the old nail hole, let it dry, sand it, and do it again. Once you have it filled and sanded dry, paint it.
The screws will hold up very well, and you will hopefully never have to do this process again!
An outdoor dryer vent should be at least 12 inches from the ground. (3 Echoes Content Studio)
A homeowner’s dryer vent runs on an exterior wall and under the brick veneer. It is installed about an inch off the ground instead of 12 or more (the recommendation).
He has trouble with stormwater getting into the vent, and now asks, “Do you have any recommendations for me?”
First, it’s rare to find a dryer vent so low to the ground. It is possible that when the vent was originally installed, it was the correct height off the ground. However, as time passed, grading and landscaping could have been added, and the vent got closer to the ground.
To make this dryer vent work efficiently, you’ll want to have as short of a path as possible. So, we do not recommend rerouting the current ductwork and going through the soffit.
Instead, we recommend trying to elevate or extend the existing vent upward, or digging dirt around the vent to give it more space. You could also add a slight turn and elbow to get it off the ground.
Check your local home center for a device that curls up at 90 degrees, which will help elevate the vent on the outside. There are many dryer vent options.
For safety, do not use PVC pipe for an elbow because it cannot handle the high temperatures that come through a dryer vent.
In addition, make sure you frequently clean your dryer vent to prevent house fires and keep your dryer working efficiently.
Hour 2
Listen to learn about garbage disposal rules, how to fix a toilet that won’t flush, how to lay an underlayment over a tile floor, and more!
What You Can Put Down a Garbage Disposal
It is acceptable to put things down a garbage disposal if they are small enough. (3 Echoes Content Studio)
A homeowner and his wife have had an ongoing disagreement about whether it is okay to put scraps of meat down the garbage disposal. They have septic tank disposal.
He says, “Can you settle this debate?”
It is perfectly fine to have a garbage disposal with a septic tank. However, some septic tanks are really good, and others are very marginal. That plays a large part in the disposal’s functionality and what waste it accepts.
When it comes to garbage disposals, you do want to use them sparingly and not put everything down it. You want to avoid putting large substances down.
The answer to the question would be yes, but only small pieces of meat, and don’t pack it full.
Make sure you use and maintain garbage disposals correctly. It is recommended to use cold water to wash waste down the drain and ensure you don’t put something in the garbage disposal and not run it!
If your garbage disposal gets clogged, use this trick!
How to Solve Toilet Flushing Issues
Adjusting the chain is an easy fix to solve toilet flushing issues. (3 Echoes Content Studio)
A homeowner is struggling to get her toilet to flush completely. She says she has to hold the handle down until the bowl is flushed.
She wants to know, “Why does this happen, and how can I fix it?”
There are two reasons that she may be having this problem. One, there is not enough water in the tank, meaning the water stops before reaching about half an inch below the overflow tube. That is where you want to adjust it.
Next, you want to ensure that when you push down the handle, the flapper stays open to allow the flushing action and then closes. If the chain is too short or too long, that will prevent that from happening.
Another reason is an obstruction in the drain. If there is an obstruction, then you won’t get that flushing action because it’s resisting the water going into it.
It is most likely the first problem. This is a very common fix, and there are lots of great repair kits out there. Do this quickly so you won’t waste water!
Although fixing a toilet might not be the most glamorous form of home improvement, it is so important to have a working toilet that will stay in good shape for a long time.
Make sure you use the right notch trowel size to install an underlayment. (3 Echoes Content Studio)
A homeowner wants to put a quarter-inch underlayment over a tile floor.
He asks, “Do I need to nail or screw it? What do I use?”
No, you are not going to want to nail through or screw it. You will have to glue it down. Do some research and find the right adhesive you need, depending on the materials you are using. Most likely, it will be in a bucket, and you’ll use a notch trowel to install the right amount.
Make sure that you read the directions to ensure you use the recommended notch trowel size. A lot of people do not realize that the size of the notch trowel needs to correlate with the adhesive in order to work well.
To ensure there is no movement when putting down the floor, use leftover blocks, bricks, or heavy objects to weigh it down a little bit. Leave it overnight so that it will dry and really cure well.
There are multiple options for underlayment. One option is a self-leveling underlayment. This is like really thin concrete. Do a thin coat over the tile to create a smooth and flat surface for a vinyl floor to be put over.
The StyleWell Parker Mill 4-Piece Metal Patio Set is durable and long-lasting, providing you with the outdoor furniture you can count on. Learn more>>
Simple Solutions
Use a push broom before painting to remove dust and dirt from walls. (®JodiJacobson via Canva)
Push Broom Paint Prep—Prior to painting a room, it’s important to clean the walls and ceiling to remove all dust, dirt, and cobwebs. Here’s a quick and easy way to do that: Wrap a towel around the head of a push broom, and secure it with a binder clip or pinch clamp. Then lightly mist the towel with water. Now use the towel-wrapped broom to wipe down the walls and ceiling. The damp towel will trap any dust or dirt, leaving behind a clean, ready-to-paint surface. This tip also works great to remove joint-compound dust from newly sanded drywall joints.
Use concrete blocks to create easy storage for your gardening tools. (3 Echoes Content Studio)
Easy-Access Garden-Tool Storage—Most people store their lawn and garden tools in the garage or shed by simply standing them up and leaning them in the corner. There’s nothing particularly wrong with this except that it’s a little messy, and it’s hard to grab one tool without knocking over another. So, here’s a super simple solution to that problem: Take three concrete blocks and stack them up wherever you want to store your tools. What you end up with is two deep compartments for storing long-handled tools. The blocks are heavy enough that you don’t have to worry about them falling over, no matter how many tools you put in there. If you don’t have enough headroom, you can use two blocks so you can lift the tools out. This will give you a neat place where your tools are out of the way and easily accessible, and you don’t have to worry about them falling over.
The gardening statistics are in. Surveys over the last few years reveal the latest home gardening trends that we can expect for 2023. From flowers to homegrown vegetables, fruit, decorations, and new gardening challenges in today’s world, here are the biggest takeaways from 2021 and 2022.
The most popular houseplant of 2022 was the Philodendron. 1
86% of home gardeners grow tomatoes in their vegetable garden. 2
The average U.S. garden produces $600 worth of food. 2
Flowers, veggies, and houseplants are the most popular types of gardening activities. 3
One in five of the world’s plants — 4,400 in the U.S. — are at risk of extinction. 4
In 2022, there were 52,793,657 trees planted. 5
The No. 1 most hated garden chore in U.S. households is weeding. 6
Gnomes were the biggest garden trend of 2022. 7
In 2021, the U.S. city with the most community gardens per 1,000 residents was Portland, OR.17
79% of American gardeners take gardening advice from online sources. 6
Gardening Sales
Gardening has always been popular in the U.S., but we continue to see gardening retail sales and horticulture increase, whether it be at a garden center or elsewhere.
From 2019 to 2020, the U.S. was the largest importer of gardening tools at $93.5 million 8
Globally, the sale of gardening supplies is projected to be $120.5 billion in 2023.18
Plant costs rose by 8–13% in 2021. 9
In the past two years, mowers, leaf blowers, and other electric equipment or building materials accounted for 17% of the U.S. market, 3x that of electric cars. 6
The U.S. garden hand tool market is expected to grow at 2.5% yearly, from USD 3131.91 million in 2020 to 3632 million by 2026. 10
The growth rate of nurseries and garden stores is projected to grow by 0.5% in 2023. 11
Gardening Demographics
In addition to millennials doing most gardening post-pandemic, we‘re learning more about the demographics of today’s growers and new gardeners.
43.6% of all gardeners are women, while 56.4% are men. 12
The most common ethnicity of gardeners is White (56.7%), followed by Hispanic or Latino (28.0%), Black or African American (7.8%), and Unknown (4.2%). 12
The average age group range for gardeners is 35–44.16
3% of all gardeners are LGBT. 12
Gardening Jobs
American households and homeowners don’t always do the work themselves. Here is a breakdown of stats on professional services in the gardening industry.
The average age of an employed gardener is 41 years old. 12
Gardeners are mostly in demand in New York, NY. 12
The media industry is the highest-paying for gardeners. 12
53% of gardeners work for private companies, followed by 30% working with education companies. 9% work for public companies, and 8% work for the government. 13
Types of Gardening
Home gardening statistics also show there is more than one way to garden or use gardening products, and some don’t involve holes in the dirt.
Gravel gardens require 80% less maintenance. 6
Container gardening is the No. 1 way 34–45-year-old gardeners prefer to garden. 6
In an average household, the second most popular gardening trend in 2022 is urban gardening.7
The urban farming market was valued at $213 billion in 2020 and is projected to grow continuously at 2.8% each year until 2026. 14
In food gardening, the second most popular vegetables to grow are cucumbers, followed by sweet peppers. 16
The average garden size is 600 square feet, but the median size is 96 square feet. 16
Small space design and container garden research reaches new highs on Google Trends each season. 6
Gardening and the Environment
Many people garden for their mental health or well-being and feel a sense of accomplishment, while others like DIY projects and growing their own food. A survey commissioned by the National Wildlife Federation found more people are actually gardening for environmental reasons. According to that survey:
One in three respondents (32%) stated they would purchase mostly or all organic products for their garden. 15
One in three U.S. adults (34%) purchase plants to help wildlife, up 26% in 2020. 15
One in four people (25%) buys native plants, up 17% in 2020. 15
The number of people adding wildflower native landscapes doubled from 9% in 2019 to 19% in 2021. 15
Learn the secret to removing vinyl wallpaper and how to prevent internal frost on windows. (3 Echoes Content Studio)
Hour 1
Learn what trends are hot in kitchen remodeling, how to prevent internal frost on windows, the difference between refacing and refinishing cabinets and more.
As a home improvement professional, I’m always looking to learn about the latest design trends. I recently came across the 2023 U.S. Houzz Kitchen Trends Study, and I have to say, the findings are quite interesting.
The study surveyed more than 2,000 U.S. homeowners who are in the midst of, are planning, or recently completed a kitchen renovation project, and the results provide a valuable glimpse into what’s trending in kitchen design. Here’s what stood out the most to me:
Renovation Spending Rises: The median spend on a minor remodel increased $4,000 year over year to $14,000 by mid-2022. Homeowners spent $15,000 on a minor remodel of a larger kitchen and $13,000 on a smaller kitchen.
Sustainability Influences Choices: 92 percent of homeowners incorporate sustainable features during a kitchen remodel. These include LED lightbulbs, energy-efficient appliances and water-efficient fixtures.
Open Layouts are Here to Stay: Following a dip in the trend of open kitchens last year, this year renovators are once again more likely to open their kitchens to other interior spaces and outdoor spaces. The most popular choice for kitchens newly open to interior spaces still is to have no wall separation. For the transition between the kitchen and outdoor areas, the most common choice is double doors or a row of doors.
Wood Cabinets Gain Popularity: White cabinets aren’t going out of style anytime soon. The color remains the most popular choice, but wood tones are a strong contender. Nearly a quarter of homeowners choose wood-tone cabinets.
Colorful Islands: 46 percent of homeowners selected an island cabinet color that contrasts the color of the main cabinets. The popularity of blue and gray declined slightly, while black, medium-tone wood and dark wood saw increases.
Frost building up on the inside of windows and doors during extremely cold temperatures could mean the humidity in the home is too high. (Julie Geving)
A homeowner in Wyoming says during the last cold snap, temperatures dropped to around 36 degrees below zero! She noticed frost building up on the inside of all of her windows and doors.
“Is there anything we can do to prevent this from happening?” she asks.
Frost building up on the inside of windows and doors during extremely cold temperatures can be caused by a number of factors.
Our first thought is that the doors and windows are older and defective. However, the homeowner says the house is new, so the doors and windows are very energy efficient. Because of this, less humidity is escaping from the home through the windows and doors. So, once the moisture in the air makes contact with those cold surfaces, it freezes.
So what’s causing this high humidity? Some possible explanations include:
Lack of ventilation: Insufficient ventilation can cause humidity to build up in a home, especially in bathrooms and kitchens where moisture is generated from cooking, bathing and showering.
Houseplants: Large numbers of houseplants can release moisture into the air, contributing to high humidity.
High occupancy: High occupancy in a house can increase humidity levels because of the many people living and breathing in the same space.
The solutions to high humidity are adding ventilation and insulation, and in extreme cases installing a whole-house dehumidifier. Make sure you’re venting any moisture out of the house, like using a range hood and bathroom vent fan.
To keep an eye on humidity levels in your home, and address the underlying causes, get a hygrometer to measure the amount of humidity in your home. It shouldn’t exceed 50 percent.
Refacing vs. Refinishing Cabinets
Refacing is the process of covering the existing cabinets with new materials to change the overall design while refinishing is the process of applying a new finish on the existing cabinets. (3 Echoes Content Studio)
We’re renovating our kitchen, but the budget doesn’t allow for all new cabinets. So, we were planning on refinishing them by sanding and then repainting. But then I read an article about refacing the cabinets. What’s the difference between refinishing and refacing, and which would you recommend?
Refinishing and refacing are two different methods used to update the look of kitchen cabinets.
Refinishing involves sanding down the existing finish on the cabinets and applying a new finish, such as paint or stain. This method is typically less expensive than refacing and is a good option for those looking to change the color of their cabinets. However, it does not change the overall design of the cabinets and can be time-consuming and labor-intensive.
Refacing, on the other hand, involves covering the existing cabinet doors and drawer fronts with new materials, such as veneer, laminate or solid wood. This can change the overall design of the cabinets and can be used to update the look of your kitchen. It’s also a more expensive option than refinishing, but it’s a quick way to change the appearance of your cabinets, and it’s less disruptive to your kitchen.
In summary, refinishing is the process of applying a new finish on the existing cabinets, while refacing is the process of covering the existing cabinets with new materials to change the overall design.
Hour 2
Hear the secret to removing vinyl wallpaper, tips for staining a pressure-treated wood fence, and more.
The Secret Removing Vinyl Wallpaper
Removing wallpaper may seem daunting, but with the right tools and techniques, it’s a manageable task. (3 Echoes Content Studio)
A homeowner wants to know — what’s the trick to removing vinyl wallpaper?
“I sprayed it down with DIF wallpaper remover, covered the wall with thin plastic, and then waited an hour or so, but the wallpaper was still stuck in place. I don’t want to damage the drywall by trying to scrape it off. What do you suggest?” he asks.
When removing vinyl wallpaper, you need to score the vinyl coating in order for the DIF wallpaper remover to work. To do this, use a tool called a paper tiger. Simply rub it over the face of vinyl to poke thousands of holes in it. This will allow the remover to penetrate to the wallpaper and deactivate it, so you can easily remove it.
To remove the wallpaper, mix in a 5-gallon bucket:
Stir the mixture, then apply it to the wall using a pump-up garden sprayer. After thoroughly soaking the wallpaper, cover the wall with a layer of thin (0.7 mil) plastic, using a wallpaper brush to press the plastic onto the wall.
Let the wallpaper remover soak on the wall for at least three hours, overnight would be even better. The mixture will dissolve almost all the adhesive, allowing you to peel away the wallpaper with virtually no effort!
Oil-based stains are the best option for pressure-treated wood because they’re more effective at penetrating the wood. (IcemanJ, Getty Images)
A homeowner wants to stain her newly installed pressure-treated wood fence. She asks, “Can you give me some tips or advice?”
Staining a pressure-treated wood fence can be a great way to protect the wood and enhance its natural beauty. However, there are a few things to keep in mind to ensure that the stain is applied properly and adheres well to the wood:
Wait for the wood to dry: Pressure-treated wood is typically wet when it is first installed, so wait for it to dry completely before staining. This can take several weeks or even months, depending on the weather and the wood’s exposure to the elements. You can also try this test.
Clean the wood: Before staining, clean the wood to remove any dirt, grime, or other contaminants that may be on the surface. A solution of water and a mild detergent is usually sufficient, but you can also use a wood cleaner specifically designed for pressure-treated wood.
Choose the right stain: Not all stains are suitable for pressure-treated wood, so choose a stain that is specifically formulated for use on pressure-treated wood. Oil-based stains are the best option because they’re more effective at penetrating the wood.
Apply the stain evenly: Apply the stain evenly and in the direction of the wood grain. Work the stain into the wood using a brush, roller or pump-up, then back-brush it into the wood to ensure it’s thoroughly covered.
Allow the stain to dry: After staining, allow the wood to dry completely before applying a second coat or using the fence. This can take several hours or even days, depending on the weather and what stain was used.
Best New Products
Ridgid’s new and improved 2.0 Pro Gear System portable toolbox keeps all your tools organized and easily accessible while you’re on the go. Learn more >>
Simple Solutions
Conditioning a paint roller prevents loose fibers from shedding into the paint. (3 Echoes Content Studio)
Condition New Paint Roller — Before using a brand-new paint-roller sleeve, it’s important to “condition” it, so that it spreads paint evenly and smoothly.
Place the new sleeve on the paint roller, fill a plant mister with water, then spin the sleeve as you spray it liberally with water.
Dry-spin the sleeve to remove any excess water, then roll the sleeve onto a piece of cardboard or other bare, clean surface. That will help remove any loosened fibers from the roller sleeve — and prevent them from getting into the paint or onto the newly painted surface.
Now use the dampened, conditioned sleeve to immediately apply paint.
Hanging S-hooks from ventilated metal-wire shelving is an easy way to add extra storage. (Photo illustration: ABBPhoto, Getty Images/Adobe Stock)
Extra Storage for Ventilated Shelving — If you have ventilated metal-wire shelving in your closet or pantry, here’s a quick, simple way to gain a little extra storage.
Buy several metal S-hooks and slip them onto the wire shelving. Use pliers to pinch closed the hooks so they can’t pop off.
The hooks are great for hanging all sorts of items that would ordinarily be taking up valuable shelf space, including dust brooms, hand towels, flashlights, belts, scarves, etc.
Further Reading
Radio Show & Podcast: Send us your question!
If you have a comment, general question about home improvement, or something we’ve featured on Today’s Homeowner, please fill in this form:
The difficult thing about having a lot of tools is keeping up with them. Some people have a great organization system for their garage or shop, but that goes out the window when they need their tools somewhere else. This is where a portable toolbox comes in handy.
Ridgid’s new and improved 2.0 Gear System keeps your gear organized wherever you go.
This page contains affiliate links. If you purchase a product from these links, we will earn a small commission at no additional cost to you.
The Ridgid 2.0 Pro Gear System 22-inch toolbox’s newly perfected 2.0 attach and detach design allows for effortless transport and storage. Its heavy-duty latches and handle allow for a firm grip when you’re on the go.
Integrated organizers inside the portable toolbox keep small parts at hand and a removable utility tray is a perfect solution for bringing only the tools you need to your job site.
A padlock eye keeps your tools safe, and a water and dust seal keeps them clean and dry when you’re out of the shop.
Wall hanger brackets are included to keep your Ridgid 2.0 Tool Box stored professionally. (The Home Depot)
Stationary Storage
In the shop, you can install the system’s wall hanging mounts on 16-inch centered studs and hang each box directly on the wall.
The included Pro Gear Mount gives you full access to the box, even when it’s hung.
Today’s Homeowner TV host Danny Lipford and Today’s Homeowner Media Production Manager Corey Wilson. (3 Echoes Content Studio)
Raising backyard chickens can be a fun and rewarding experience, providing fresh eggs and even a source of companionship. However, before you start your backyard chicken journey, it’s important to understand the basics of building and maintaining a chicken coop.
Today’s Homeowner Production Manager Corey Wilson is joining me to chat chicken.
A chicken coop’s size depends on how many chickens you own, so one this size is perfect for a couple of chickens. (RandallJSylvia, Getty Images)
Coop Size
When it comes to building or buying a chicken coop, size is an important consideration. The amount of space needed for each bird will vary depending on the number of birds you plan to keep, but a general rule of thumb is to provide 2-3 square feet of coop space per bird and 5-10 square feet of run space per bird.
Remember —chickens sleep in the air, perched on a limb, so make sure to include enough space for them to sleep comfortably.
Hay flooring absorbs moisture so the bottom of the chicken coop stays dry and smells fresh. (GarysFRP, Getty Images Signature)
Coop Components
A chicken coop typically includes several key parts: nesting boxes, roosts, runs, and an enclosed area for sleeping and protection.
Nesting boxes provide a safe and secure place for chickens to lay their eggs, while roosts give the birds a place to sleep.
Runs are essential for exercise and foraging. The enclosed area serves as a protected space for the birds to sleep, rest and take shelter.
When it comes to flooring, use materials like sand, hay or pine shavings. These materials are comfortable for the chickens and easy to clean. They also absorb moisture, which helps keep the coop dry and smelling fresh.
A well-built and maintained coop is crucial for the health and well-being of your chickens. Providing enough space, perches, and suitable materials for the birds, will ensure that they are comfortable and healthy and can produce eggs efficiently.
Egg-laying chickens lay up to one egg per day at their peak. (georgeclerk, Getty Images Signature)
Egg Production
A healthy hen will typically lay one egg per day, with her reproductive cycle lasting between 24-27 hours. However, the actual egg production can vary depending on a number of factors such as the amount of daylight, comfort, predators, and nutrition.
Daylight: Chickens need at least 14 hours of daylight in order to lay eggs. In the winter, when daylight hours are shorter, egg production will naturally decrease. You can use artificial light to supplement the daylight hours, but it’s important to use the right type of light and the right amount to avoid stressing the birds.
Comfort: Chickens need a clean, dry and safe place to lay their eggs. A well-maintained chicken coop with nest boxes will provide the comfort and security that chickens need to lay eggs.
Predators: Chickens that feel threatened by predators will not lay eggs. It’s important to protect your chickens from predators by securing the coop and the surrounding area.
Nutrition: Chickens need a balanced diet that provides the necessary nutrients for egg production. Feed specifically formulated for laying hens will provide the right balance of protein, calcium, and other essential nutrients.
Interestingly enough, a rooster is not necessary for a hen to lay eggs. Hens will lay eggs whether or not there is a rooster present. However, if you want to breed chickens, you will need a rooster.
Chicken scratch is a type of feed that is made up of whole grains such as corn, barley, oats, wheat or other grains. (maerzkind, Getty Images)
Chicken Food
There are a variety of types of chicken food available on the market, each designed to meet the specific nutritional needs of chickens at different stages of their life.
Starter feed: This type of food is formulated for chicks during their first six weeks of life. It contains a high level of protein, around 20-24 percent, to help them grow and develop quickly.
Grower feed: As the chicks grow, they need different food. Designed for chickens between 6-20 weeks old, grower feed contains a lower protein level around 16-18 percent as they don’t need as much protein as when they were chicks but still need enough to support their growth.
Layer feed: Chickens are adults once they reach 20 weeks old, so they now need a different type of food. Layer feed is formulated for egg-laying hens, so it contains a higher level of calcium to support the formation of eggshells.
Pellets: These small, easy-to-eat pieces are convenient to use and store, and are often used as a complete feed for chickens.
Crumbles: Similar to pellets, crumbles are also compressed, but they are smaller in size and tend to be more palatable for chickens.
Mash: Mash is made by mixing together different grains and protein sources. It is usually moist and easy for chickens to eat.
Scratch: Scratch is a type of feed that is made up of whole grains such as corn and barley. Chickens are encouraged to forage, so this type of food is can used as a treat.
On average, a flock of 10 chickens will consume about one bag of feed every three weeks. (3 Echoes Content Studio)
Cost to Feed Chickens
When it comes to feeding your chickens, a good rule of thumb is to plan for about one bag of food every three weeks for a flock of 10 hens.
On average, a bag of chicken feed can cost anywhere from $40 to $50. This may seem like a lot, but when you consider the fact that chickens will lay eggs almost every day, it’s a small price to pay for the delicious, fresh eggs they provide.
In addition to regular chicken feed, provide your birds with oyster shells for calcium. This is essential for maintaining the strength of their eggshells. You can purchase oyster shells in a bag and they usually cost around $10-15.
Energy tax credits have been around for a while, but thanks to the Inflation Reduction Act, you can now save even more.
The new Energy Efficient Home Improvement Credit is available to homeowners in the United States as an incentive to encourage the use of renewable energy sources.
This credit can help offset the cost of installing clean energy systems in homes and businesses.
Starting in January 2023, eligible homes can use the high-efficiency tax credit for electrical panel upgrades and wiring. (BanksPhotos, Getty Images Signature)
Energy-Efficient Home Improvement Credit Breakdown
The Inflation Reduction Act increased the tax credit percentage for installing some energy-efficient equipment. For example, you can now receive 30 percent of the cost of installing insulation, energy-efficient windows and doors and more.
New energy tax credits cover part of the cost of home battery storage and electrical panel upgrades. Also new in 2023 is a tax credit for having a home energy audit.
Review the table below or go to whitehouse.gov/cleanenergy to see everything included in the new energy tax credits.
Using energy tax credits to purchase a heat pump is a smart way to save money on energy costs while helping reduce your carbon footprint. (jpproductions, Getty Images)
Products Eligible for Inflation Reduction Act Tax Credits
‘Clean’ electricity products
Solar panels for electricity from a provider in your area.
Home backup power battery storage with a capacity of 3 kWh or greater.
Heating, cooling, and water heating
Electric or natural gas heat pumps; electric or natural gas heat pump water heaters; central air conditioners; natural gas or propane or oil water heaters; natural gas or propane or oil furnaces or hot water boilers that meet or exceed the specific efficiency tiers established by the Consortium for Energy Efficiency.
Solar water heating products certified for performance by the Solar Rating Certification Corporation or a comparable entity endorsed by the state government in which the product is installed.
Other energy efficiency upgrades
(blackwaterimages, Getty Images Signature)
How to Claim Inflation Reduction Act Tax Credits
Homeowners who purchase energy and other efficient appliances and products can take advantage of these clean energy tax credits.
To claim them, homeowners must file their taxes using IRS Form 5695 and provide proof of the purchase, like invoices and receipts.
You can claim the same or varying credits year after year with new products purchased. However, some credits have an annual limit, so check the table above to make sure you don’t go over.
Additionally, these credits may have limits and expiration dates, so it’s best to check with the relevant tax authorities for the most updated information.