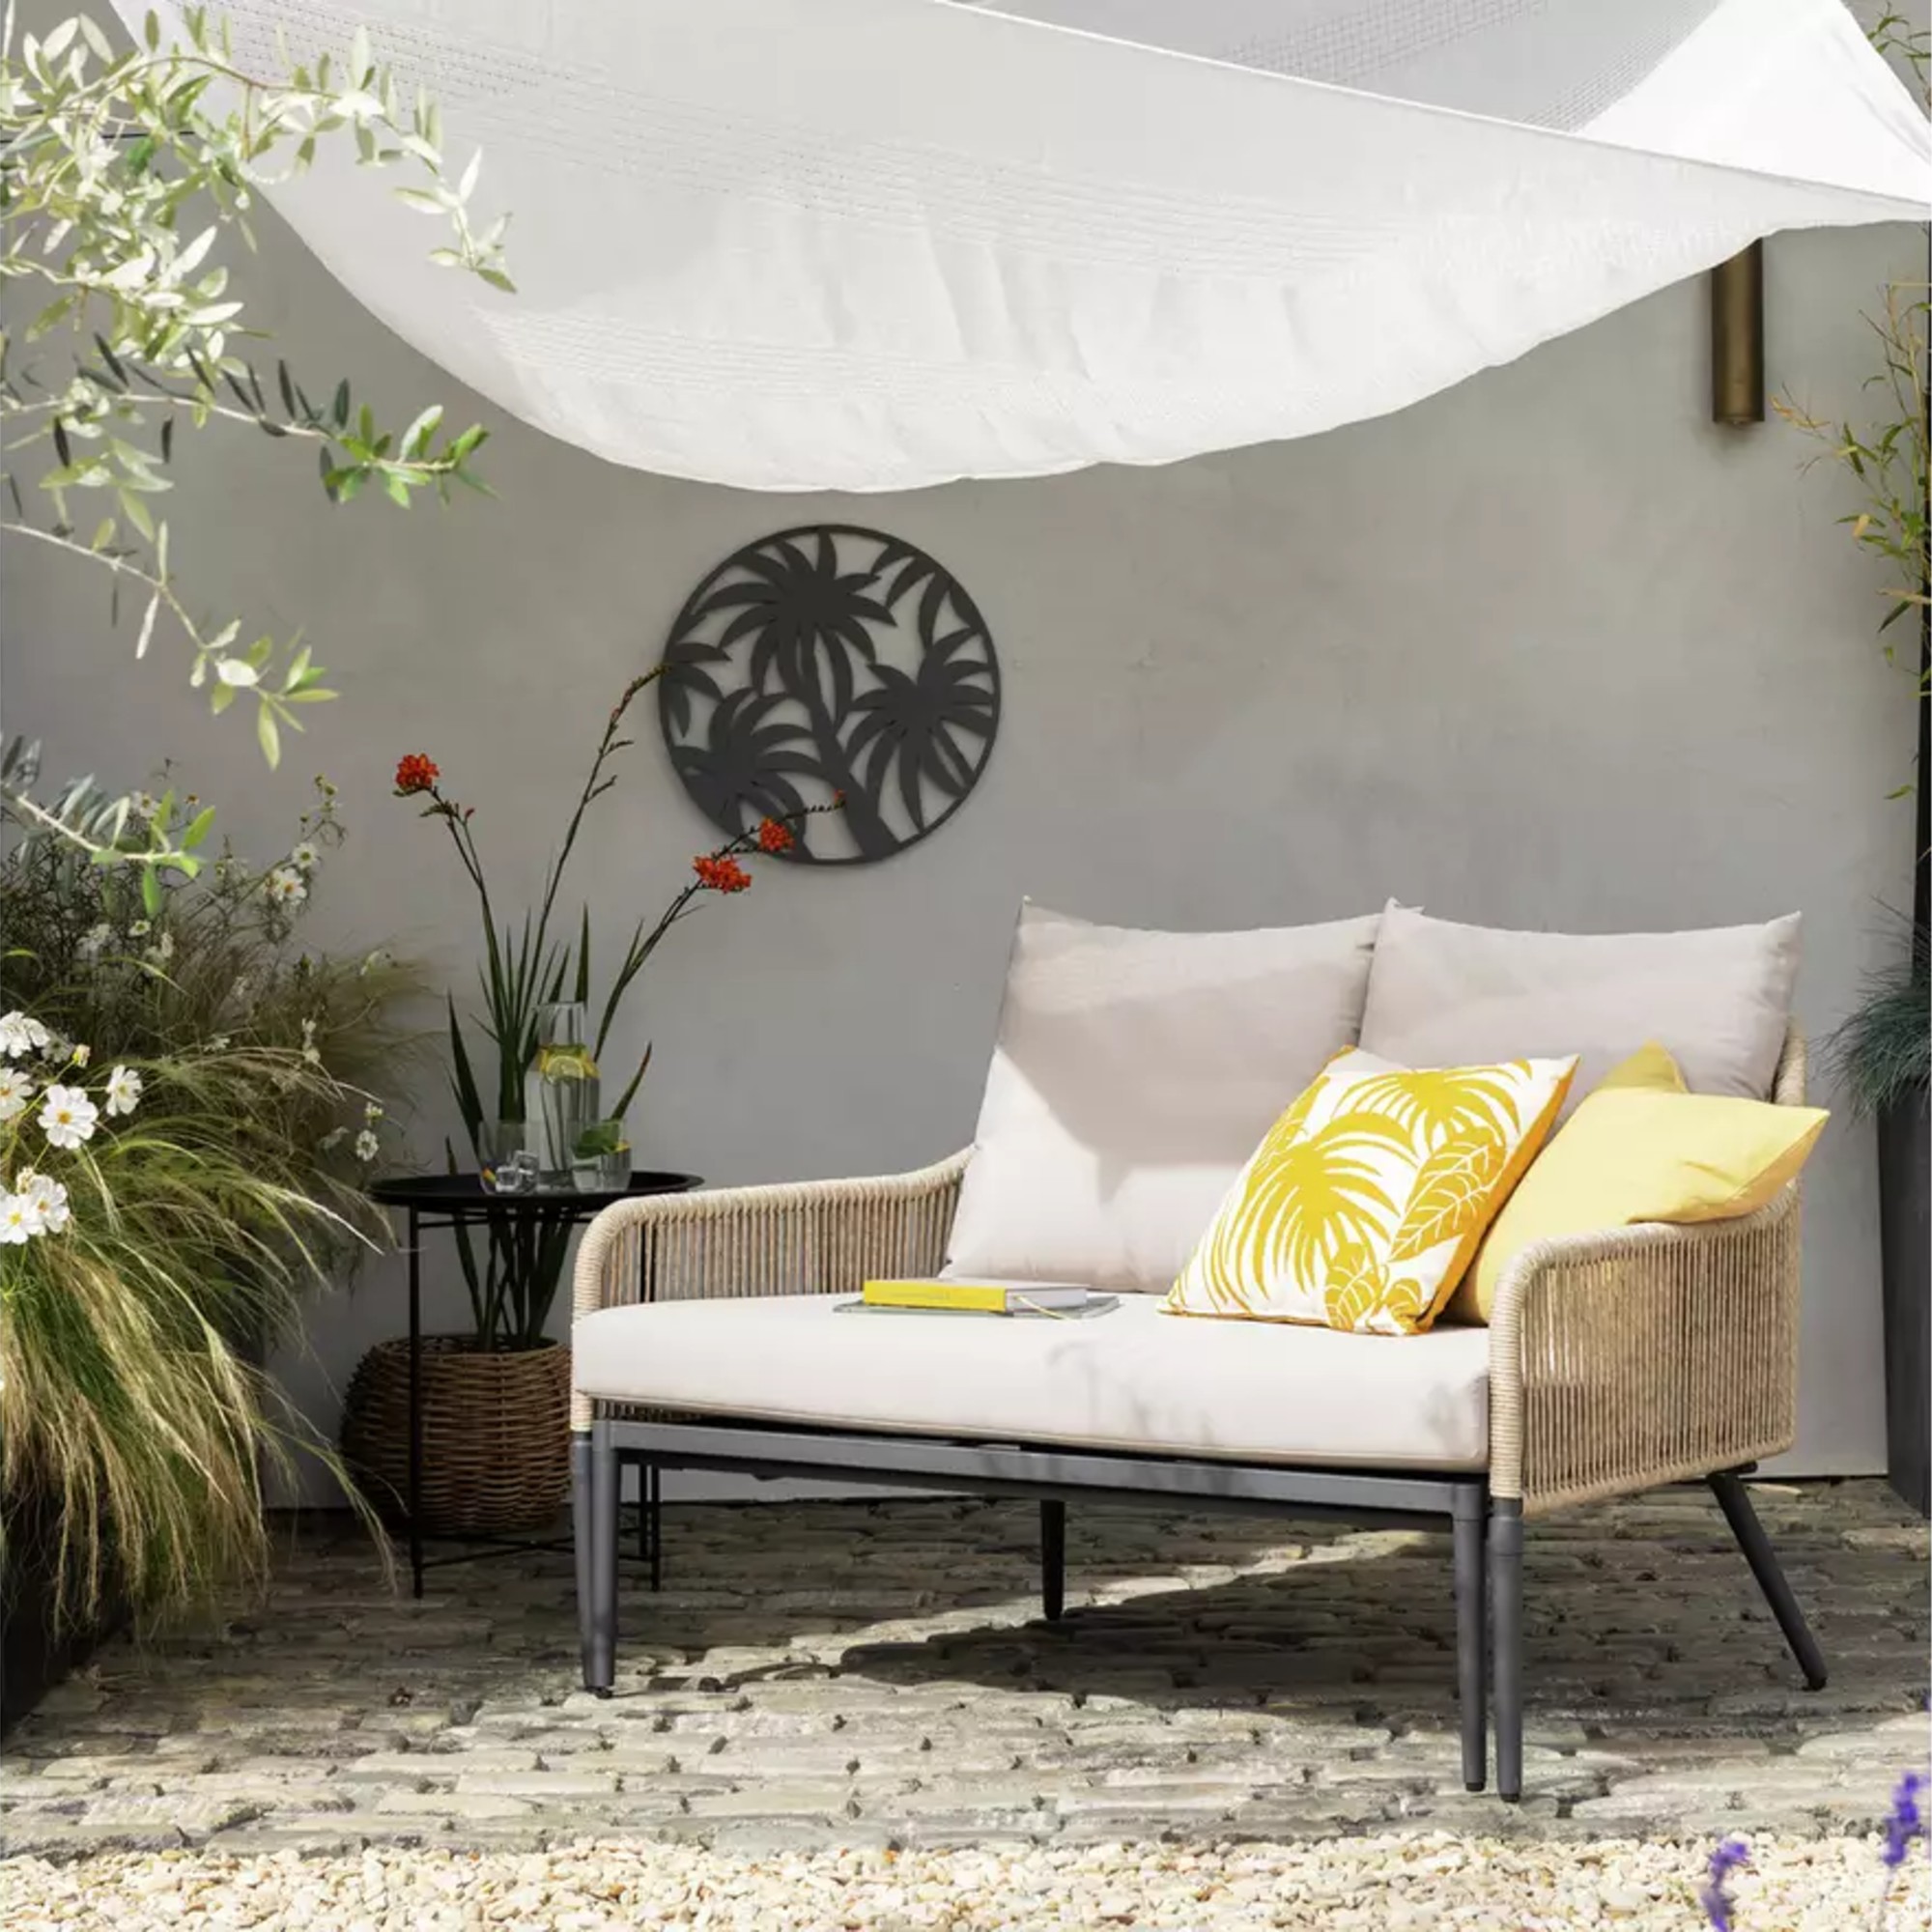
You’re probably wondering what makes this garden day bed so special. What makes this one of the best garden furniture designs? That would be the convertible function. As the product comes as a compact two-seater outdoor sofa, perfect for any small outdoor spaces like a balcony or a tiny garden. But it can easily be transformed into a day bed by pulling out a hidden section from underneath the base frame. It’s so simple yet genius, if you ask me.
Habitat
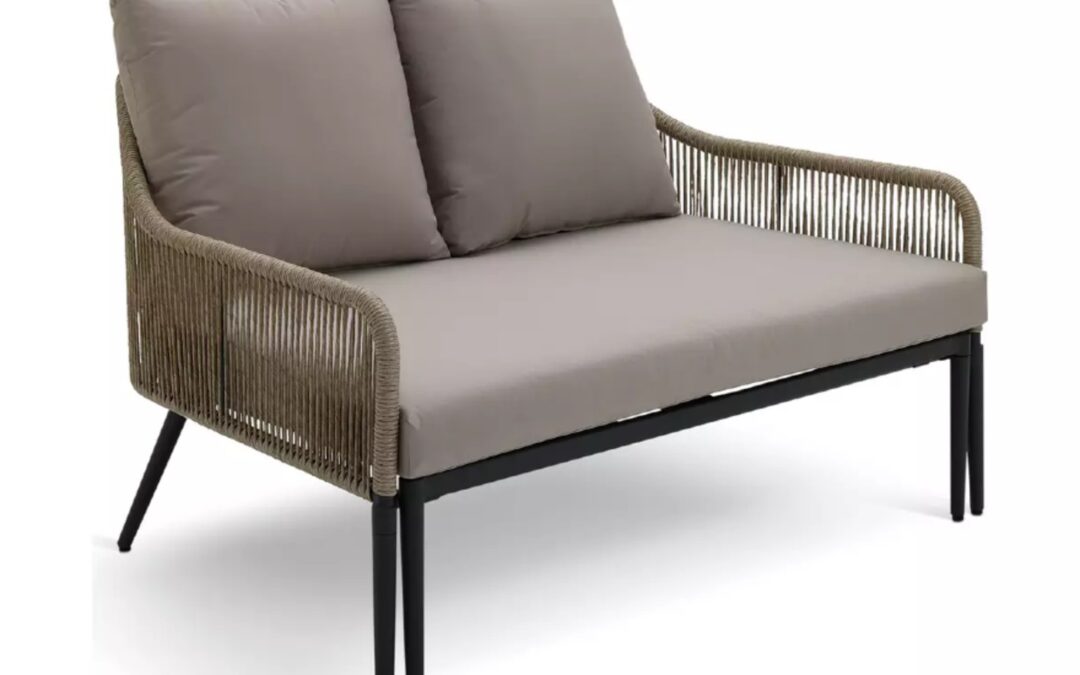
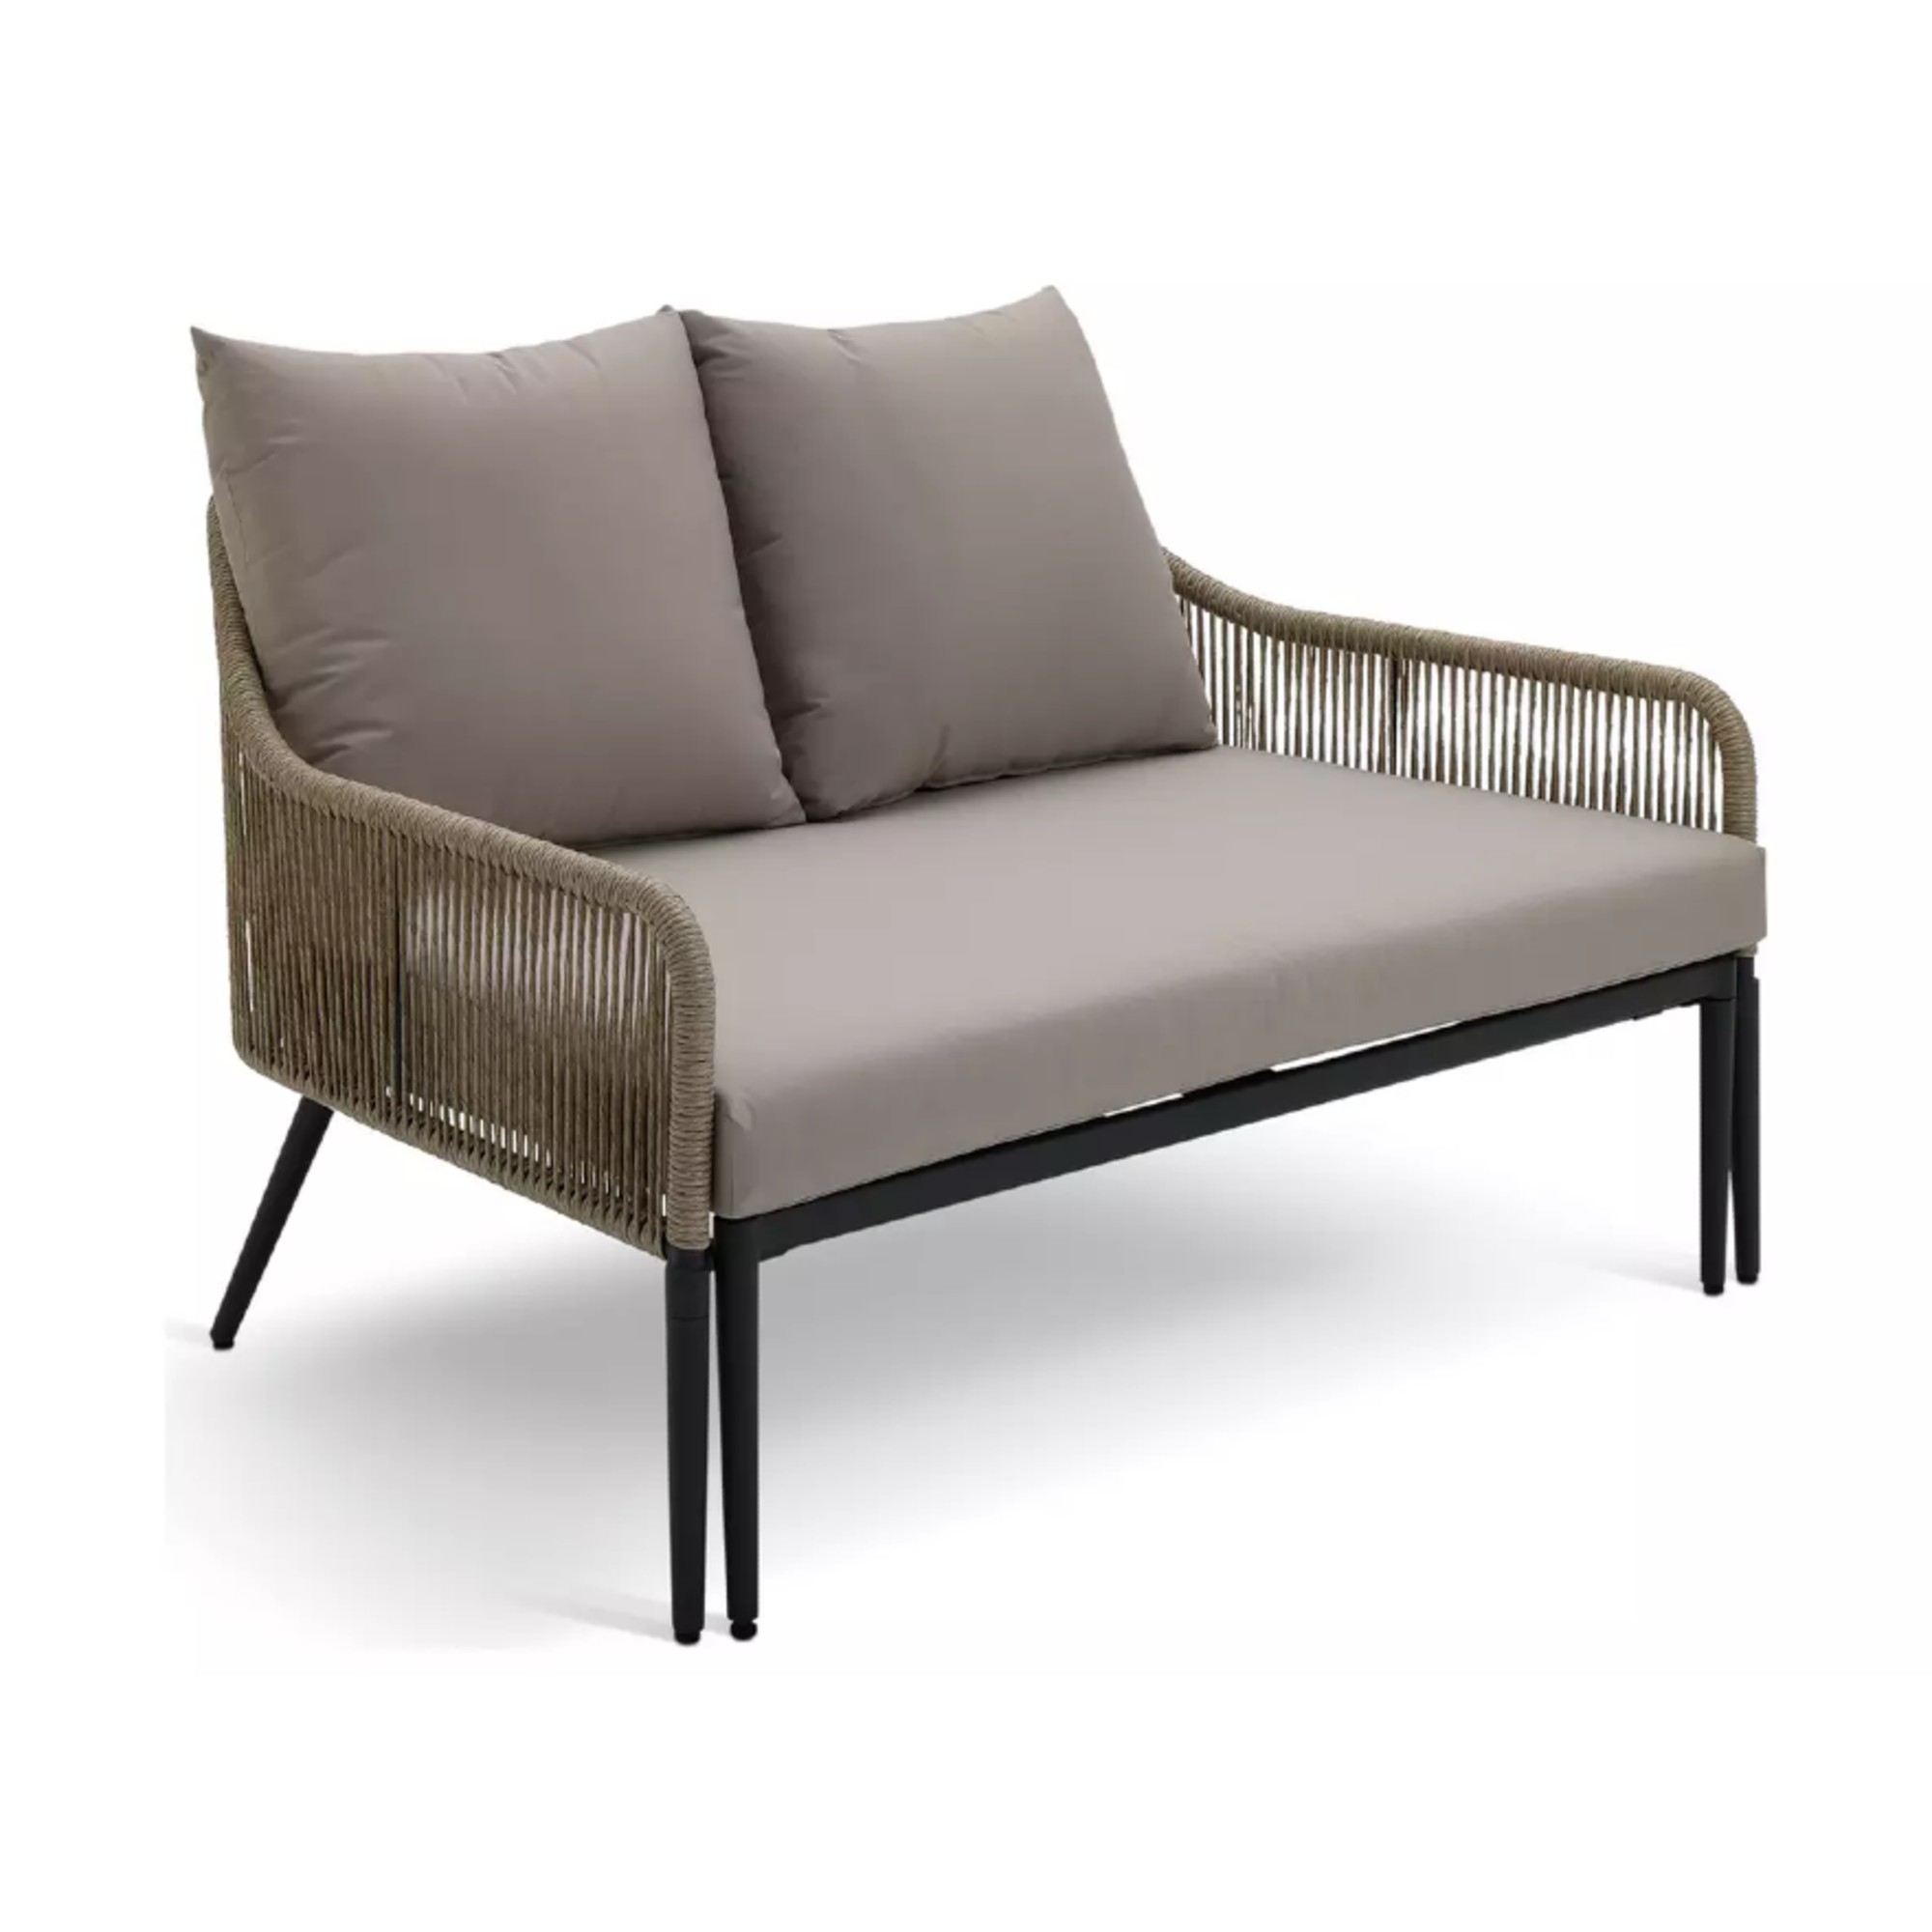
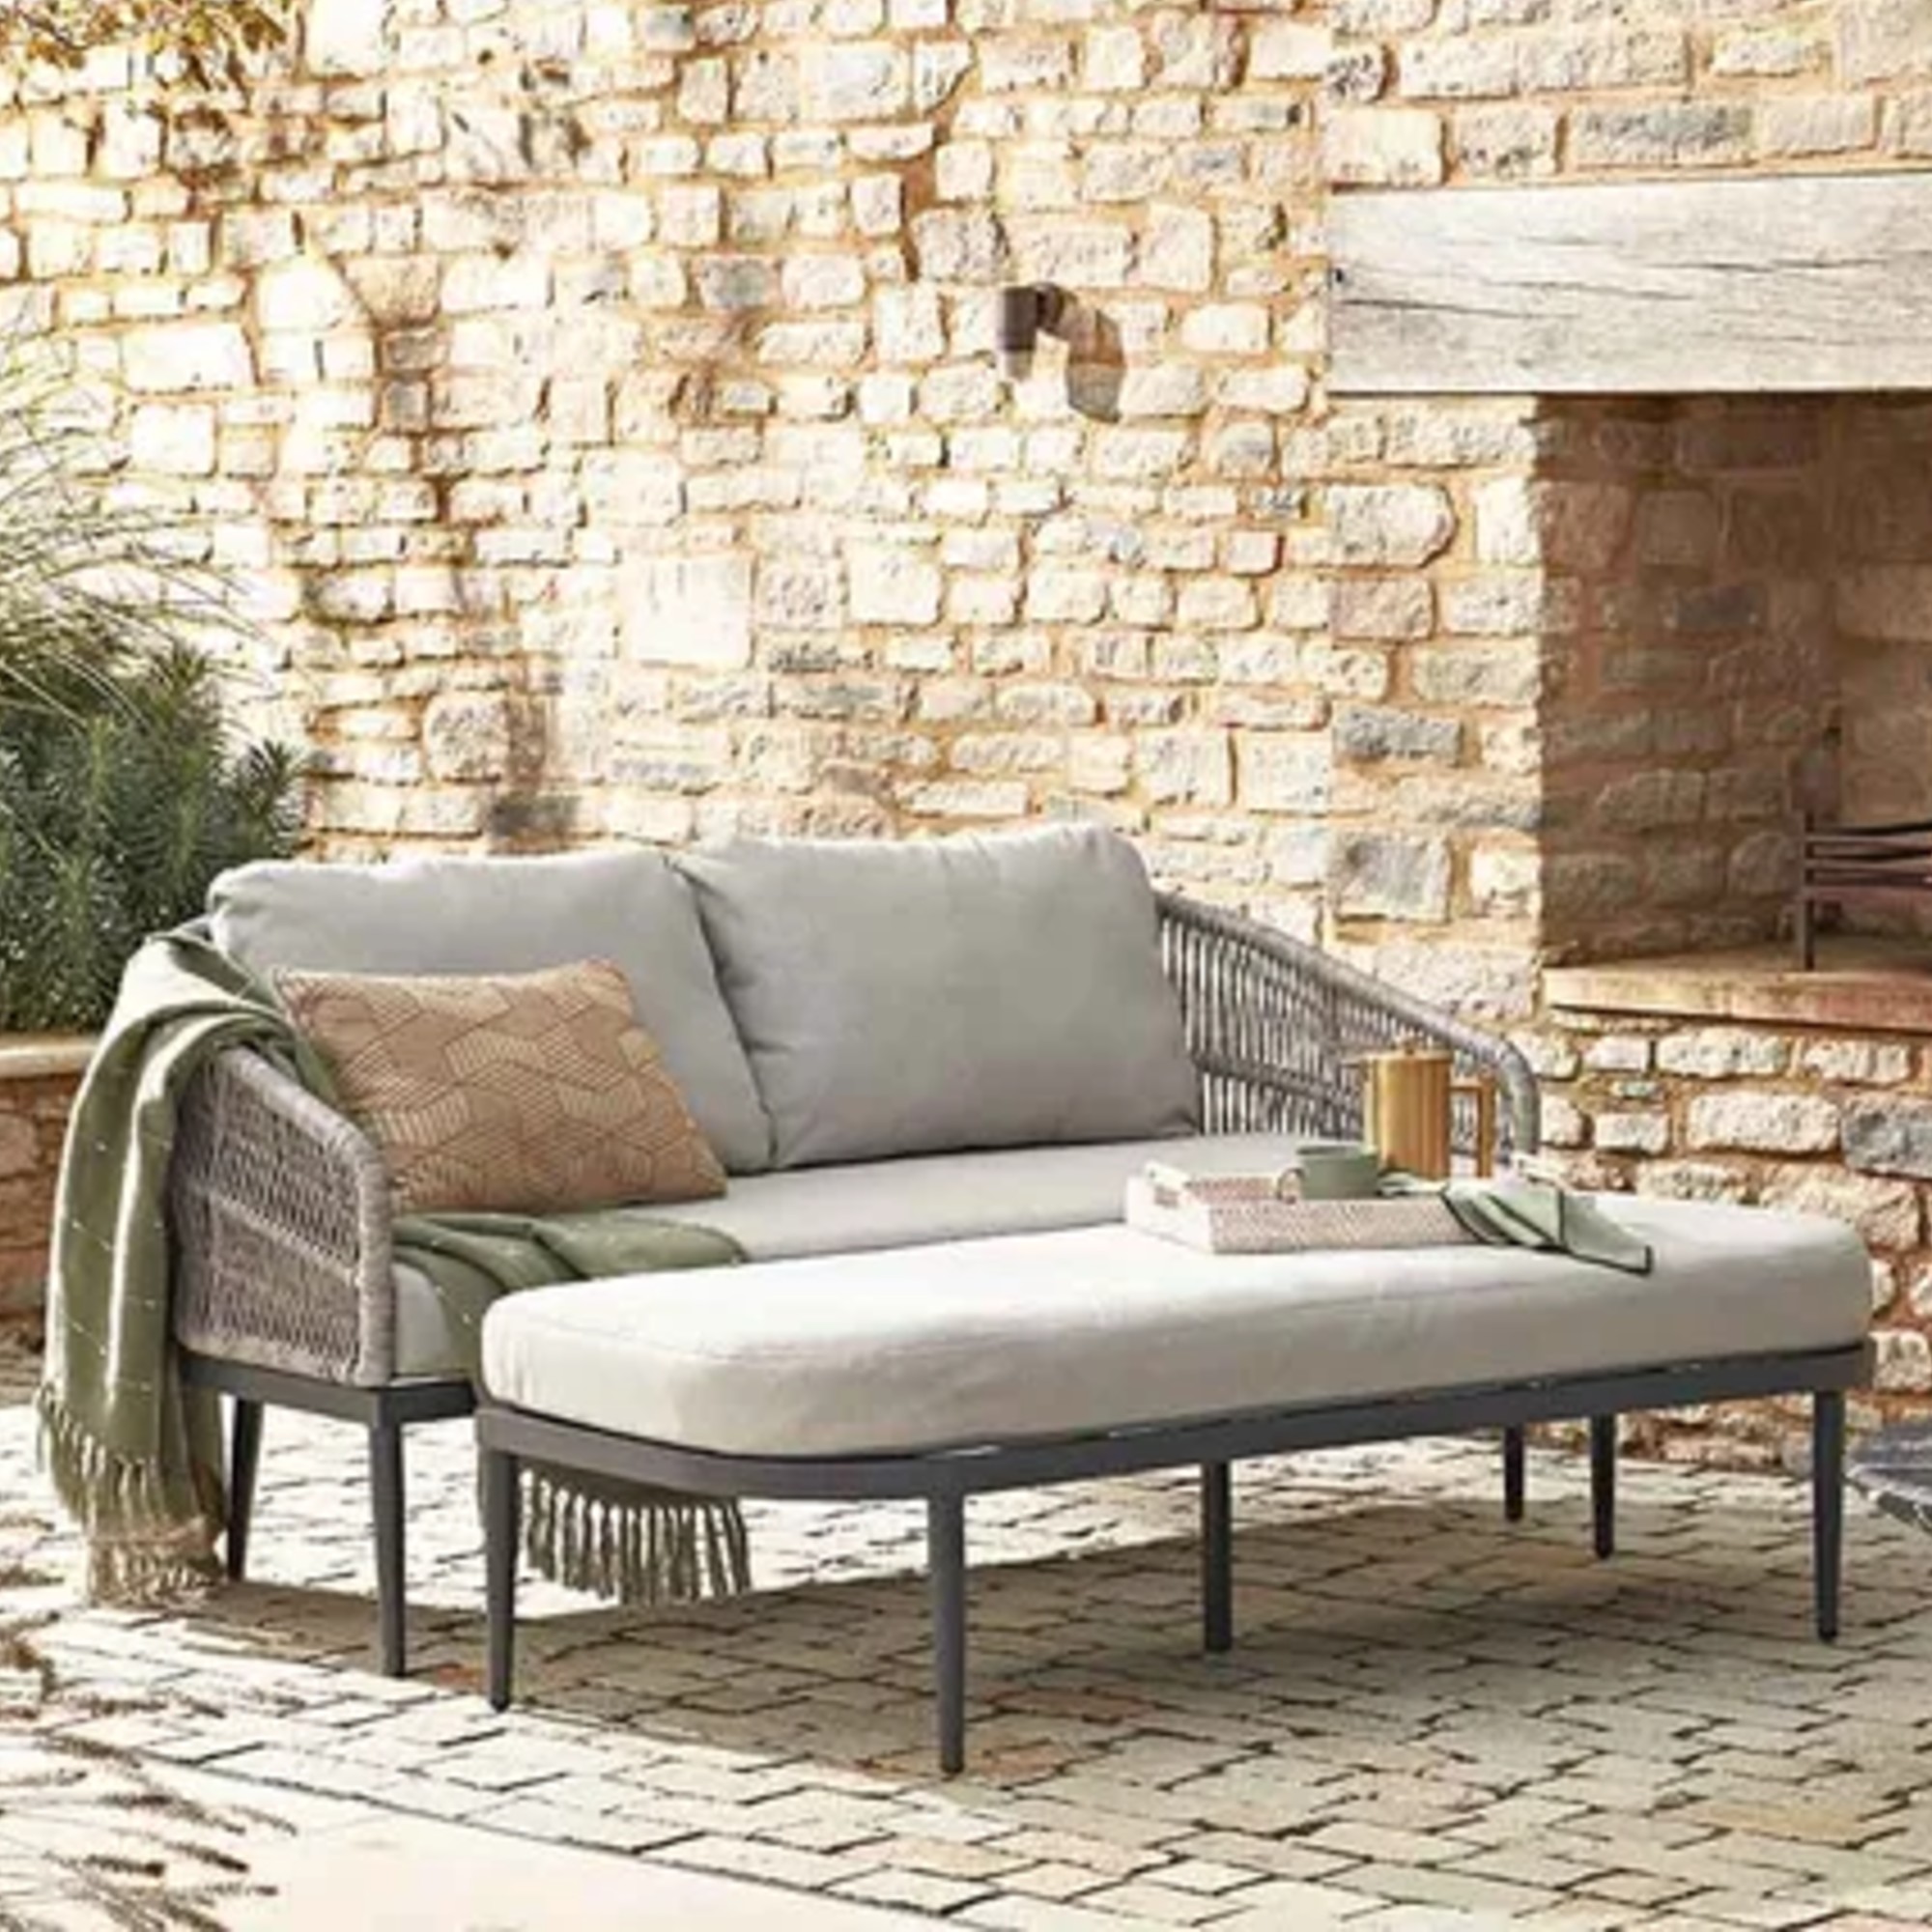
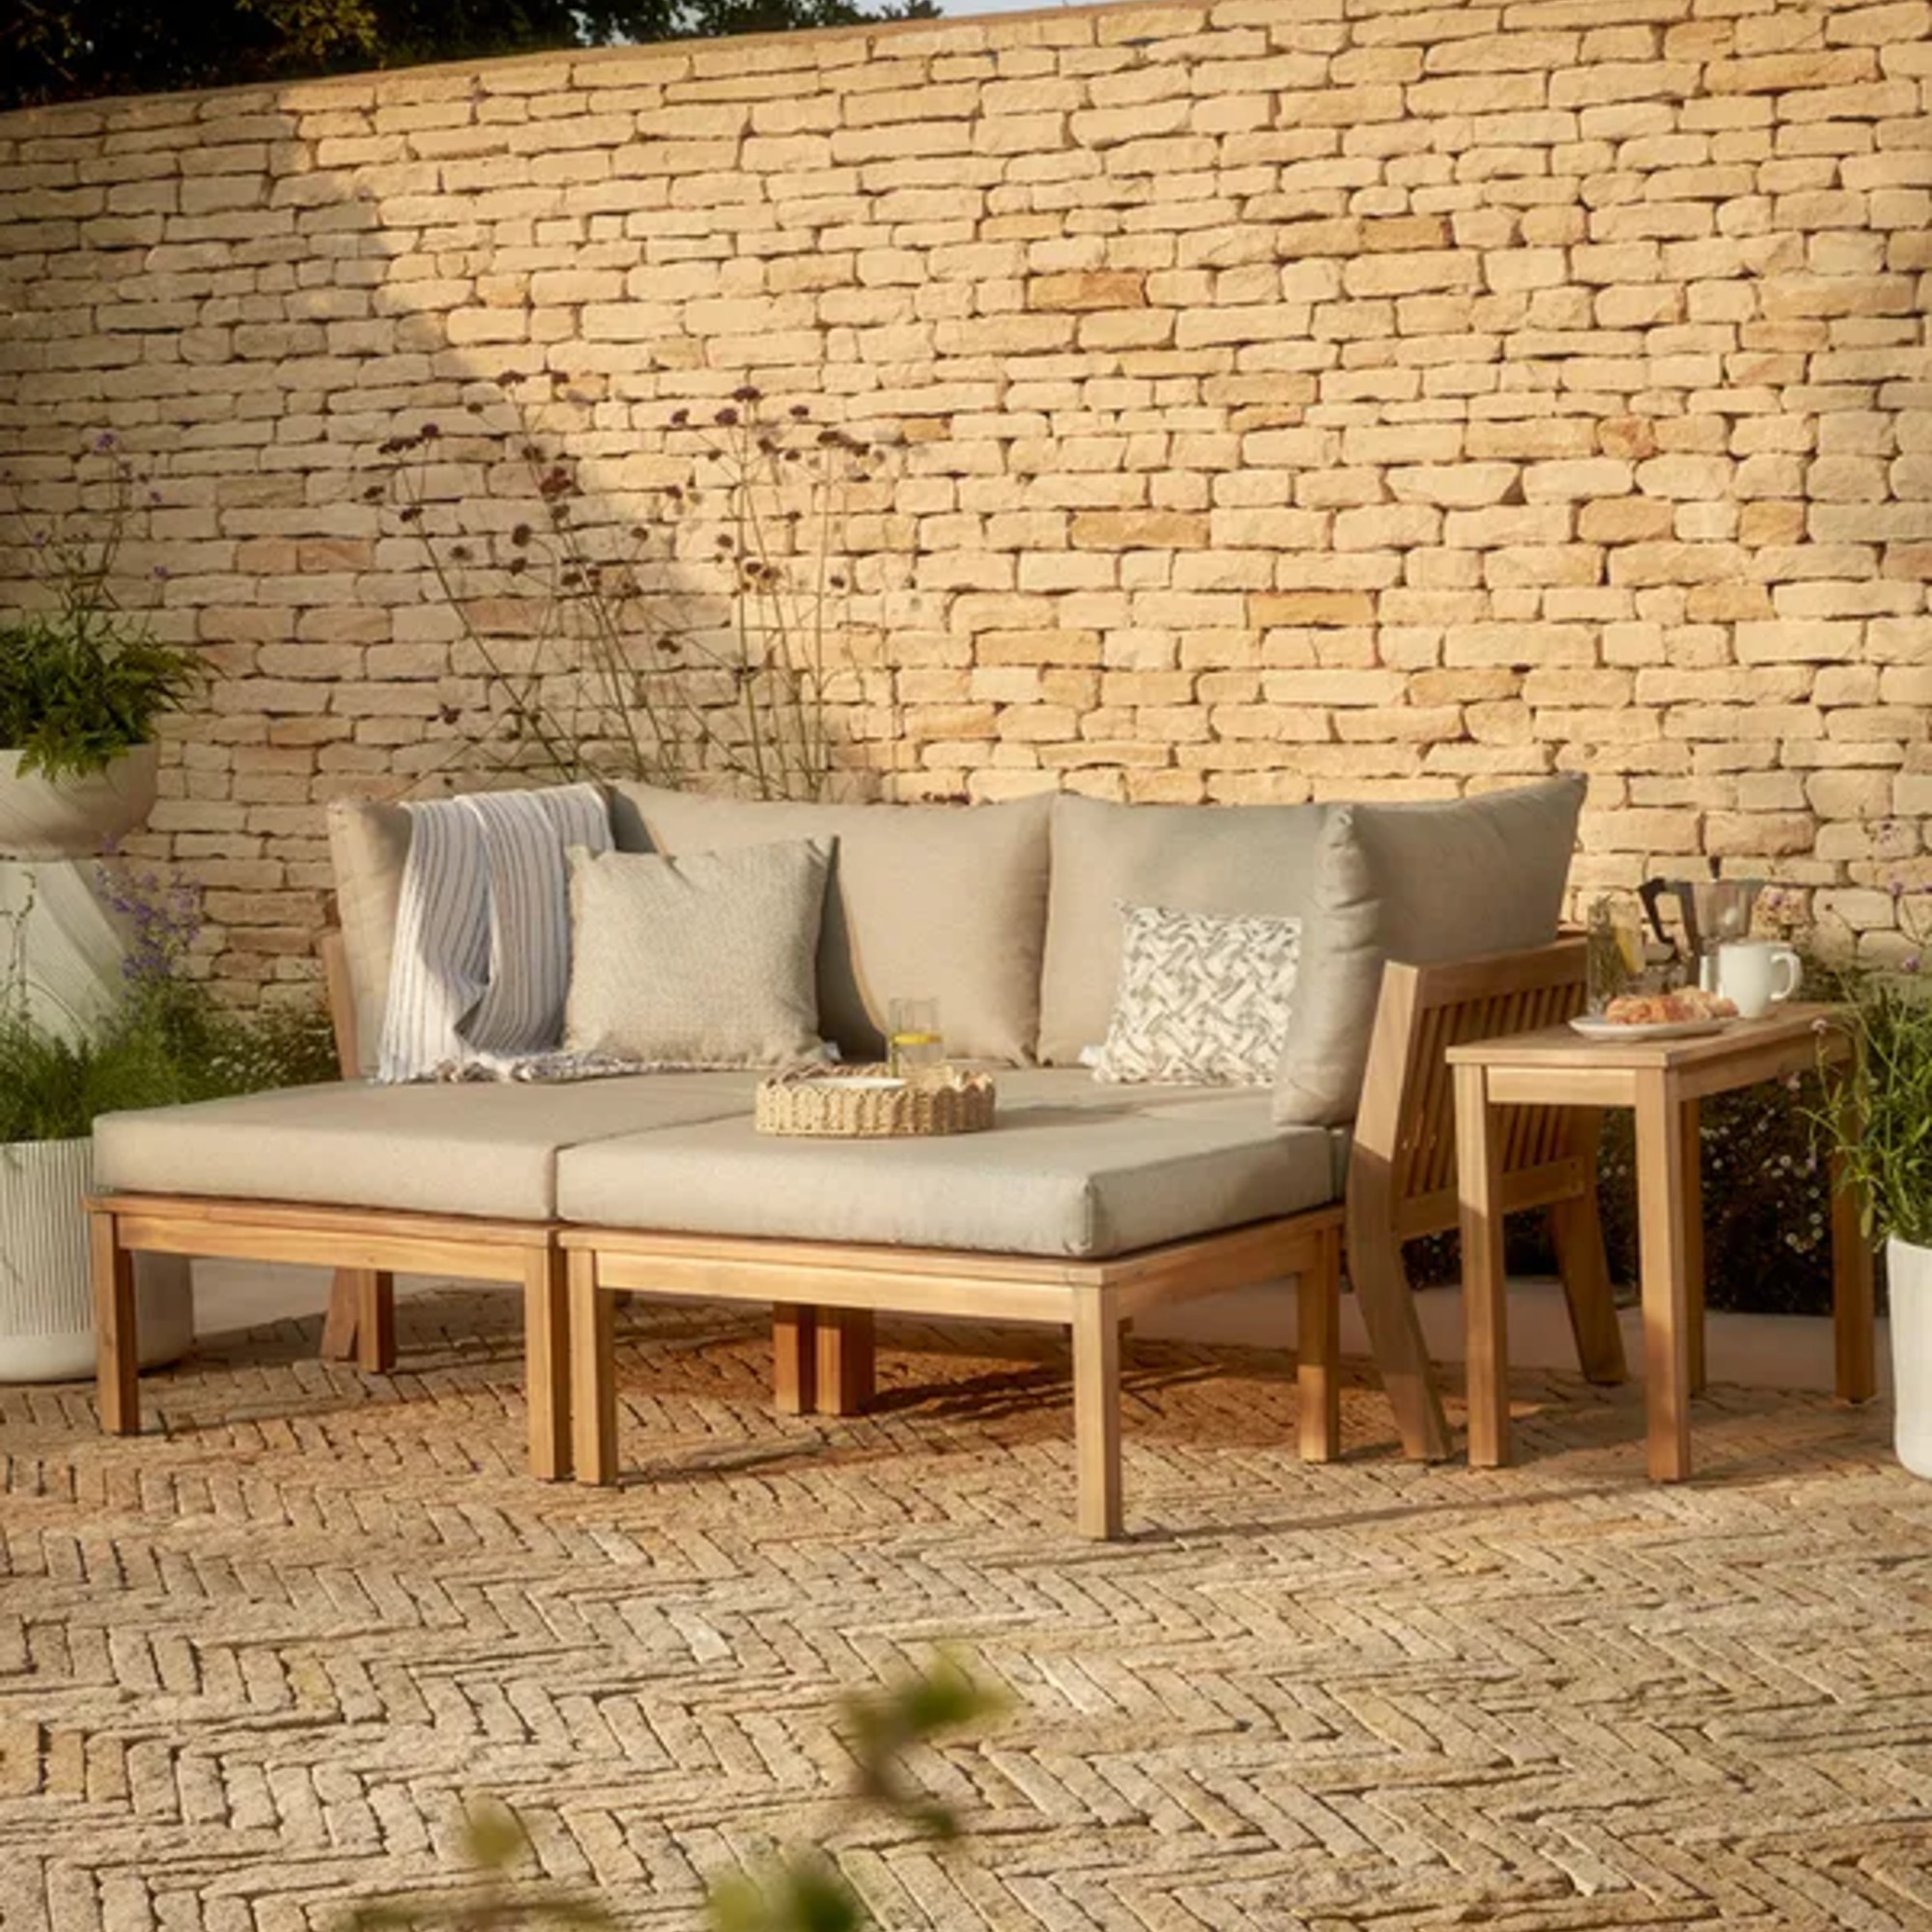
Habitat Malta Rattan Effect Garden Day Bed
Last month, I came across a similar product – B&Q’s Atar outdoor corner sofa which could also be turned into a day bed using a similar pull-out method as Habitat’s Malta day bed. But the Atar was much larger, while Habitat’s day bed is more small garden ideas-friendly. Nevertheless, it turned out to be so popular that it sold out within a few days.
Latest Videos From
And given the feedback from the existing shoppers of the Habitat Malta day bed, you might find the same happening to this one – sooner rather than later, might I add.
(Image credit: Argos)
One customer wrote, ‘Best garden furniture we’ve bought, just love it.’ While another further elaborated, ‘This item turned out to be a great purchase and good value. Thick comfortable cushions and sturdy framework. Only had to put the legs on from the packaging which was also extremely well presented. All round fantastic quality and looks stylish.’
Several of the customers mention the high levels of comfort which is obviously very important – so much so, that several of the Malta outdoor day bed regularly fall asleep on it. It’s like the best sofa bed for your garden!
(Image credit: Argos)
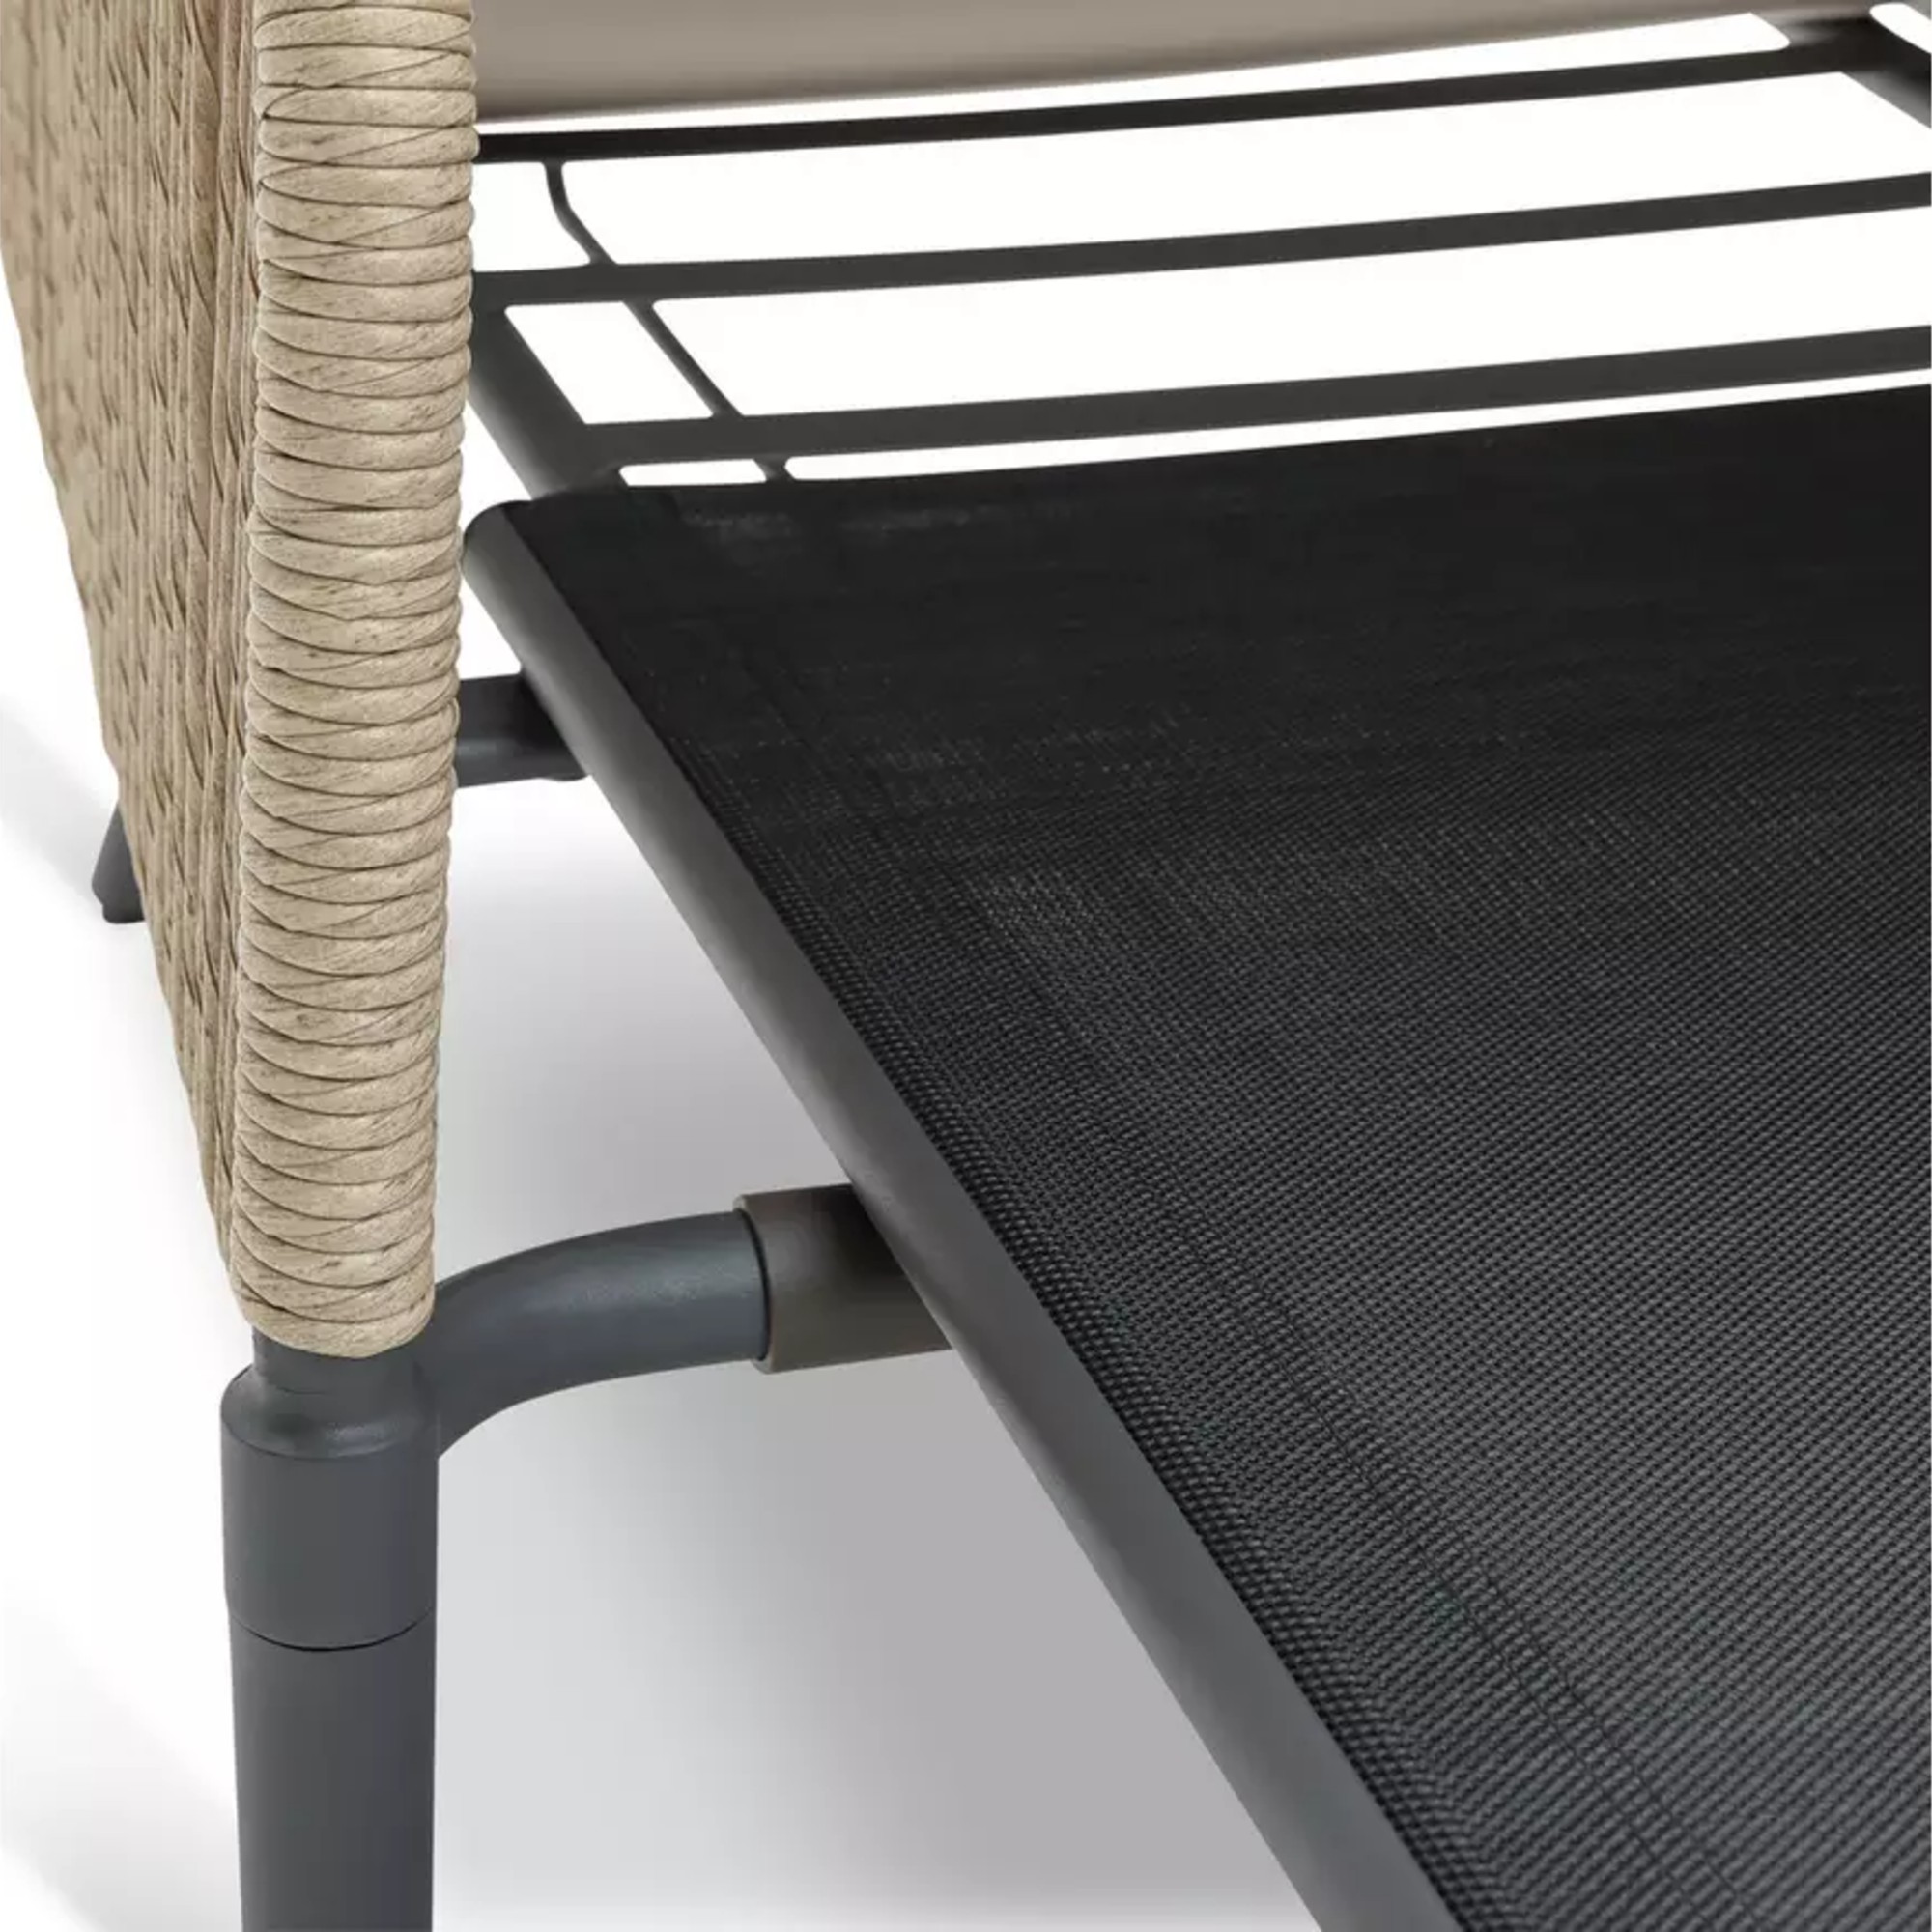
Built on a steel frame, the day bed comes with plump removable cushions which can handle light rain as they’re shower proof. The day bed is part of a larger Habitat Malta outdoor furniture range, all of which features the same woven rattan-effect design. So if you want to invest in matching pieces like the Malta 2 seater garden bistro set, you can.
Sign up to our newsletter for style inspiration, real homes, project and garden advice and shopping know-how
This product is quite unique, especially given its affordable price point. But I’ve found a few flexible day bed alternatives that you can peruse.
Atkin & Thyme
Celia Daybed
This two-piece design can either be used as an outdoor sofa with a matching ottoman – which can also be used as a coffee table – or by combining the two pieces, it becomes a day bed.
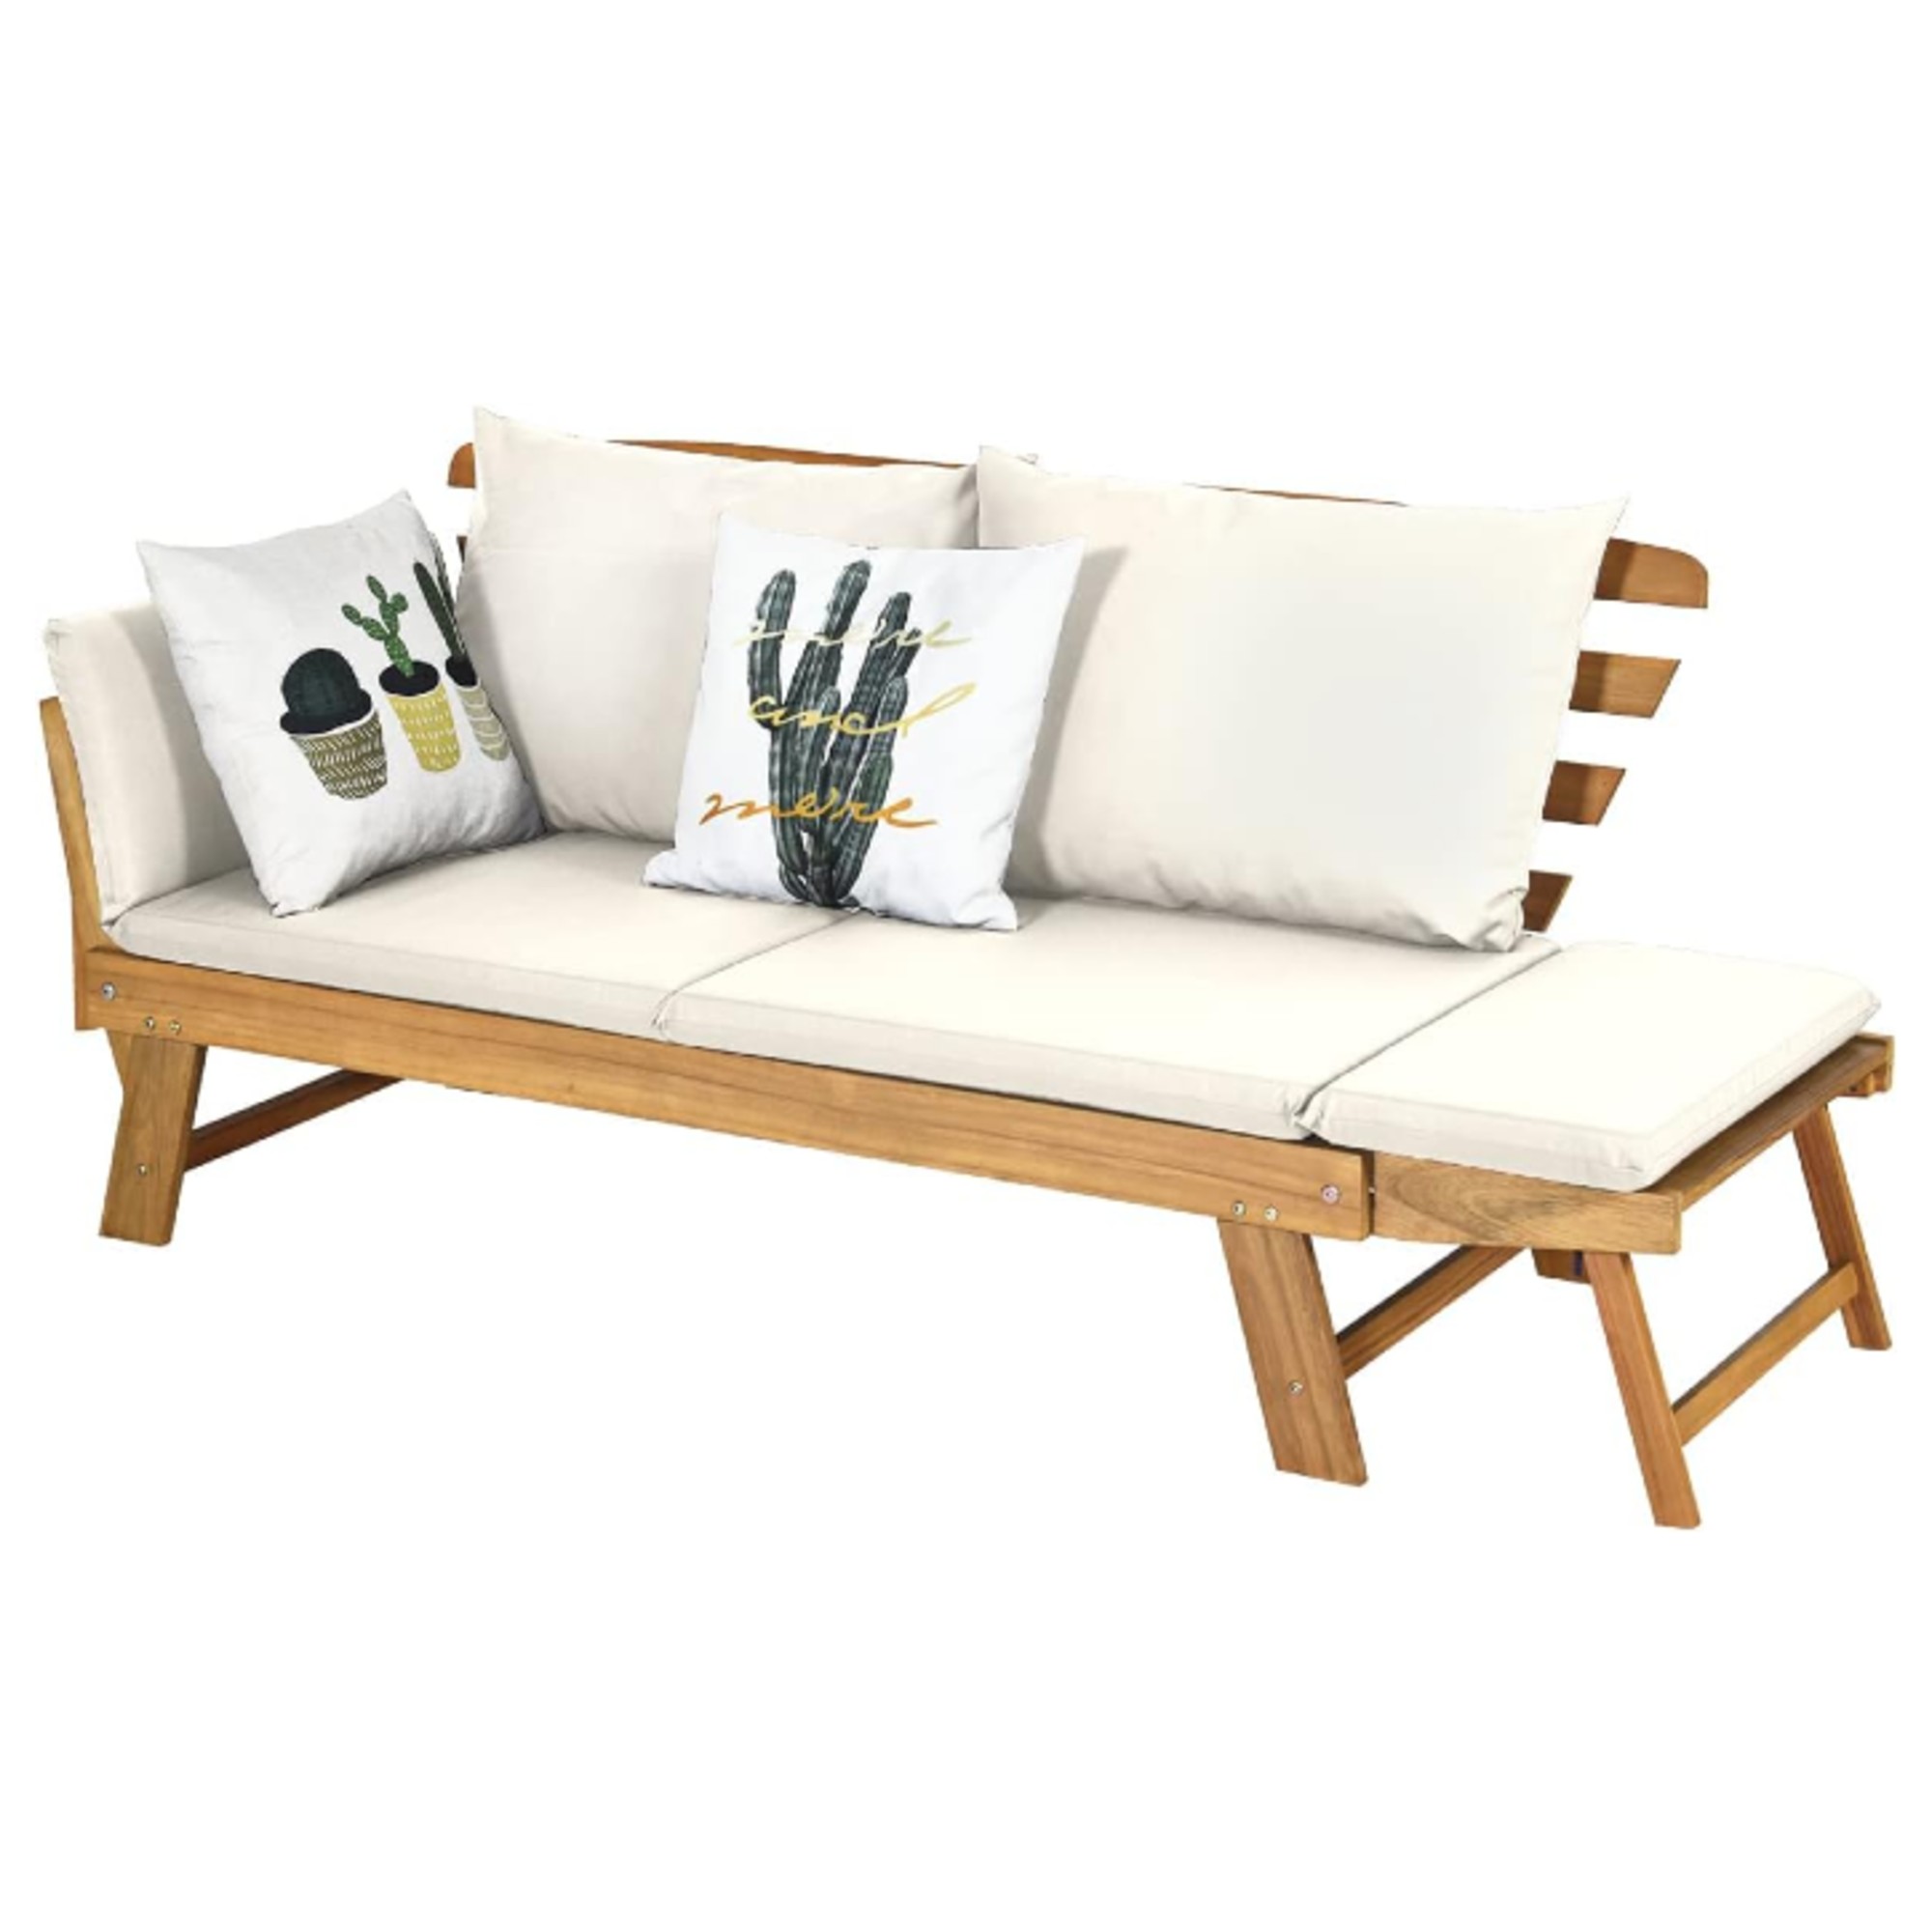
Multigot
3 in 1 Outdoor Convertible Daybed
If you were after something even more budget-friendly, this two-seater outdoor sofa can have its armrests lowered and that way turns into a single day bed.
Cox & Cox
Ravenna Versatile Daybed
This design is the most modular and therefore the most versatile of the bunch – but it’s also reflected in the price. This set includes two corner chairs, two ottomans and a side table which can be configured however you like.
Are you thinking of adding a convertible day bed to your garden or balcony?
I’ve been on the hunt for some rechargeable wall lights for months to fill an empty wall and a set to go up my staircase. I’m looking for something that oozes luxury, at a reasonable price tag, and I’ve found just the thing in Dusk’s rechargeable lights range.
Dusk has emerged as one of our favourite affordable online homeware stores at Ideal Home. They won us over with their bedding, and we’ve been impressed with all the furniture and lighting they’ve launched in recent years.
However, it is there collection of rechargeable lights that has caught my attention lately. While the best wireless lights are becoming more accessible price-wise, they can all look a bit ‘same-y’. Well, Dusk has broken out of the mould with some striking designs that look chic and expensive, but prices start at £20.
Latest Videos From
The first design from this collection that caught my eye was the Trinity Rechargeable Pleated Wall Light. I’ve not seen a rechargeable wall light like this at such an affordable price. For just £29, I’ve already added 2 of these lights to my basket, as they’ll make the perfect addition to my staircase to break up my wall frames.
This isn’t the only wall light that piqued my interest. Here are my 6 other top picks going under the radar.
DUSK
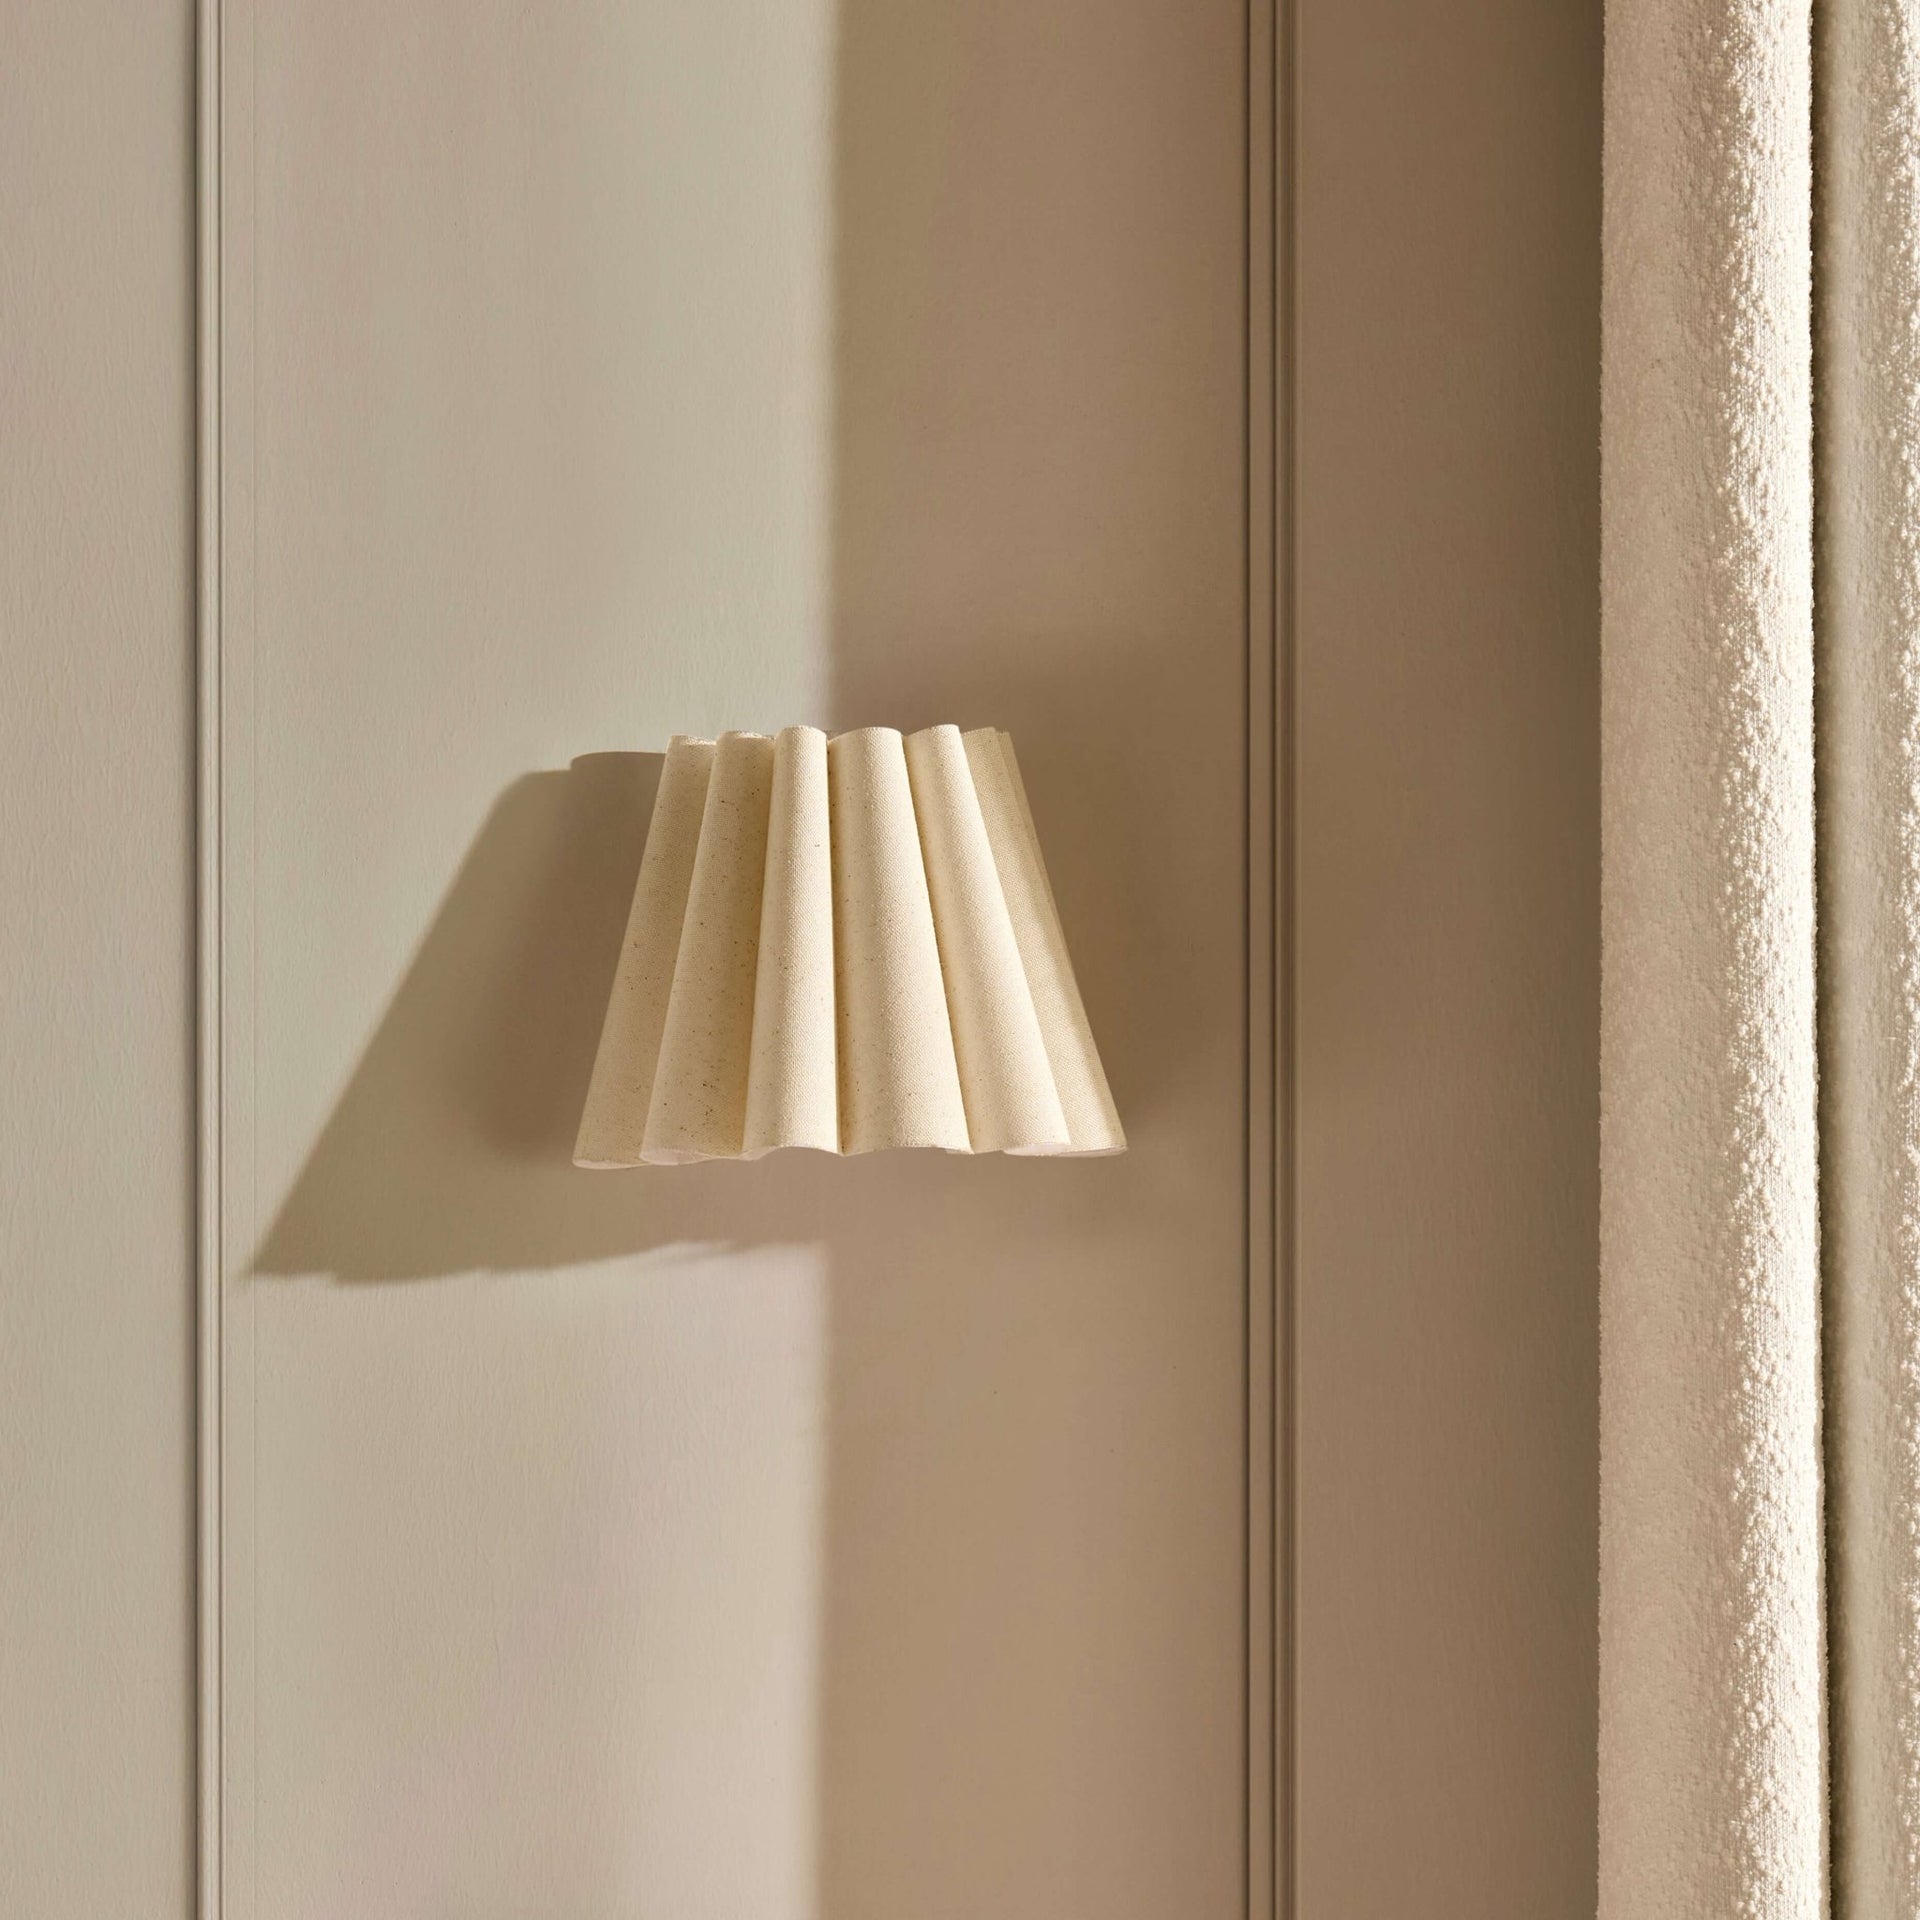
Trinity Rechargeable Pleated Wall Light
My favourite style from the collection, this pleated wall light matches perfectly with my other scalloped lights. It requires 4-5 hours of charge for 7 hours of cordless use, and they’d be the perfect addition to a smaller room, where table and surface space is a premium.
DUSK
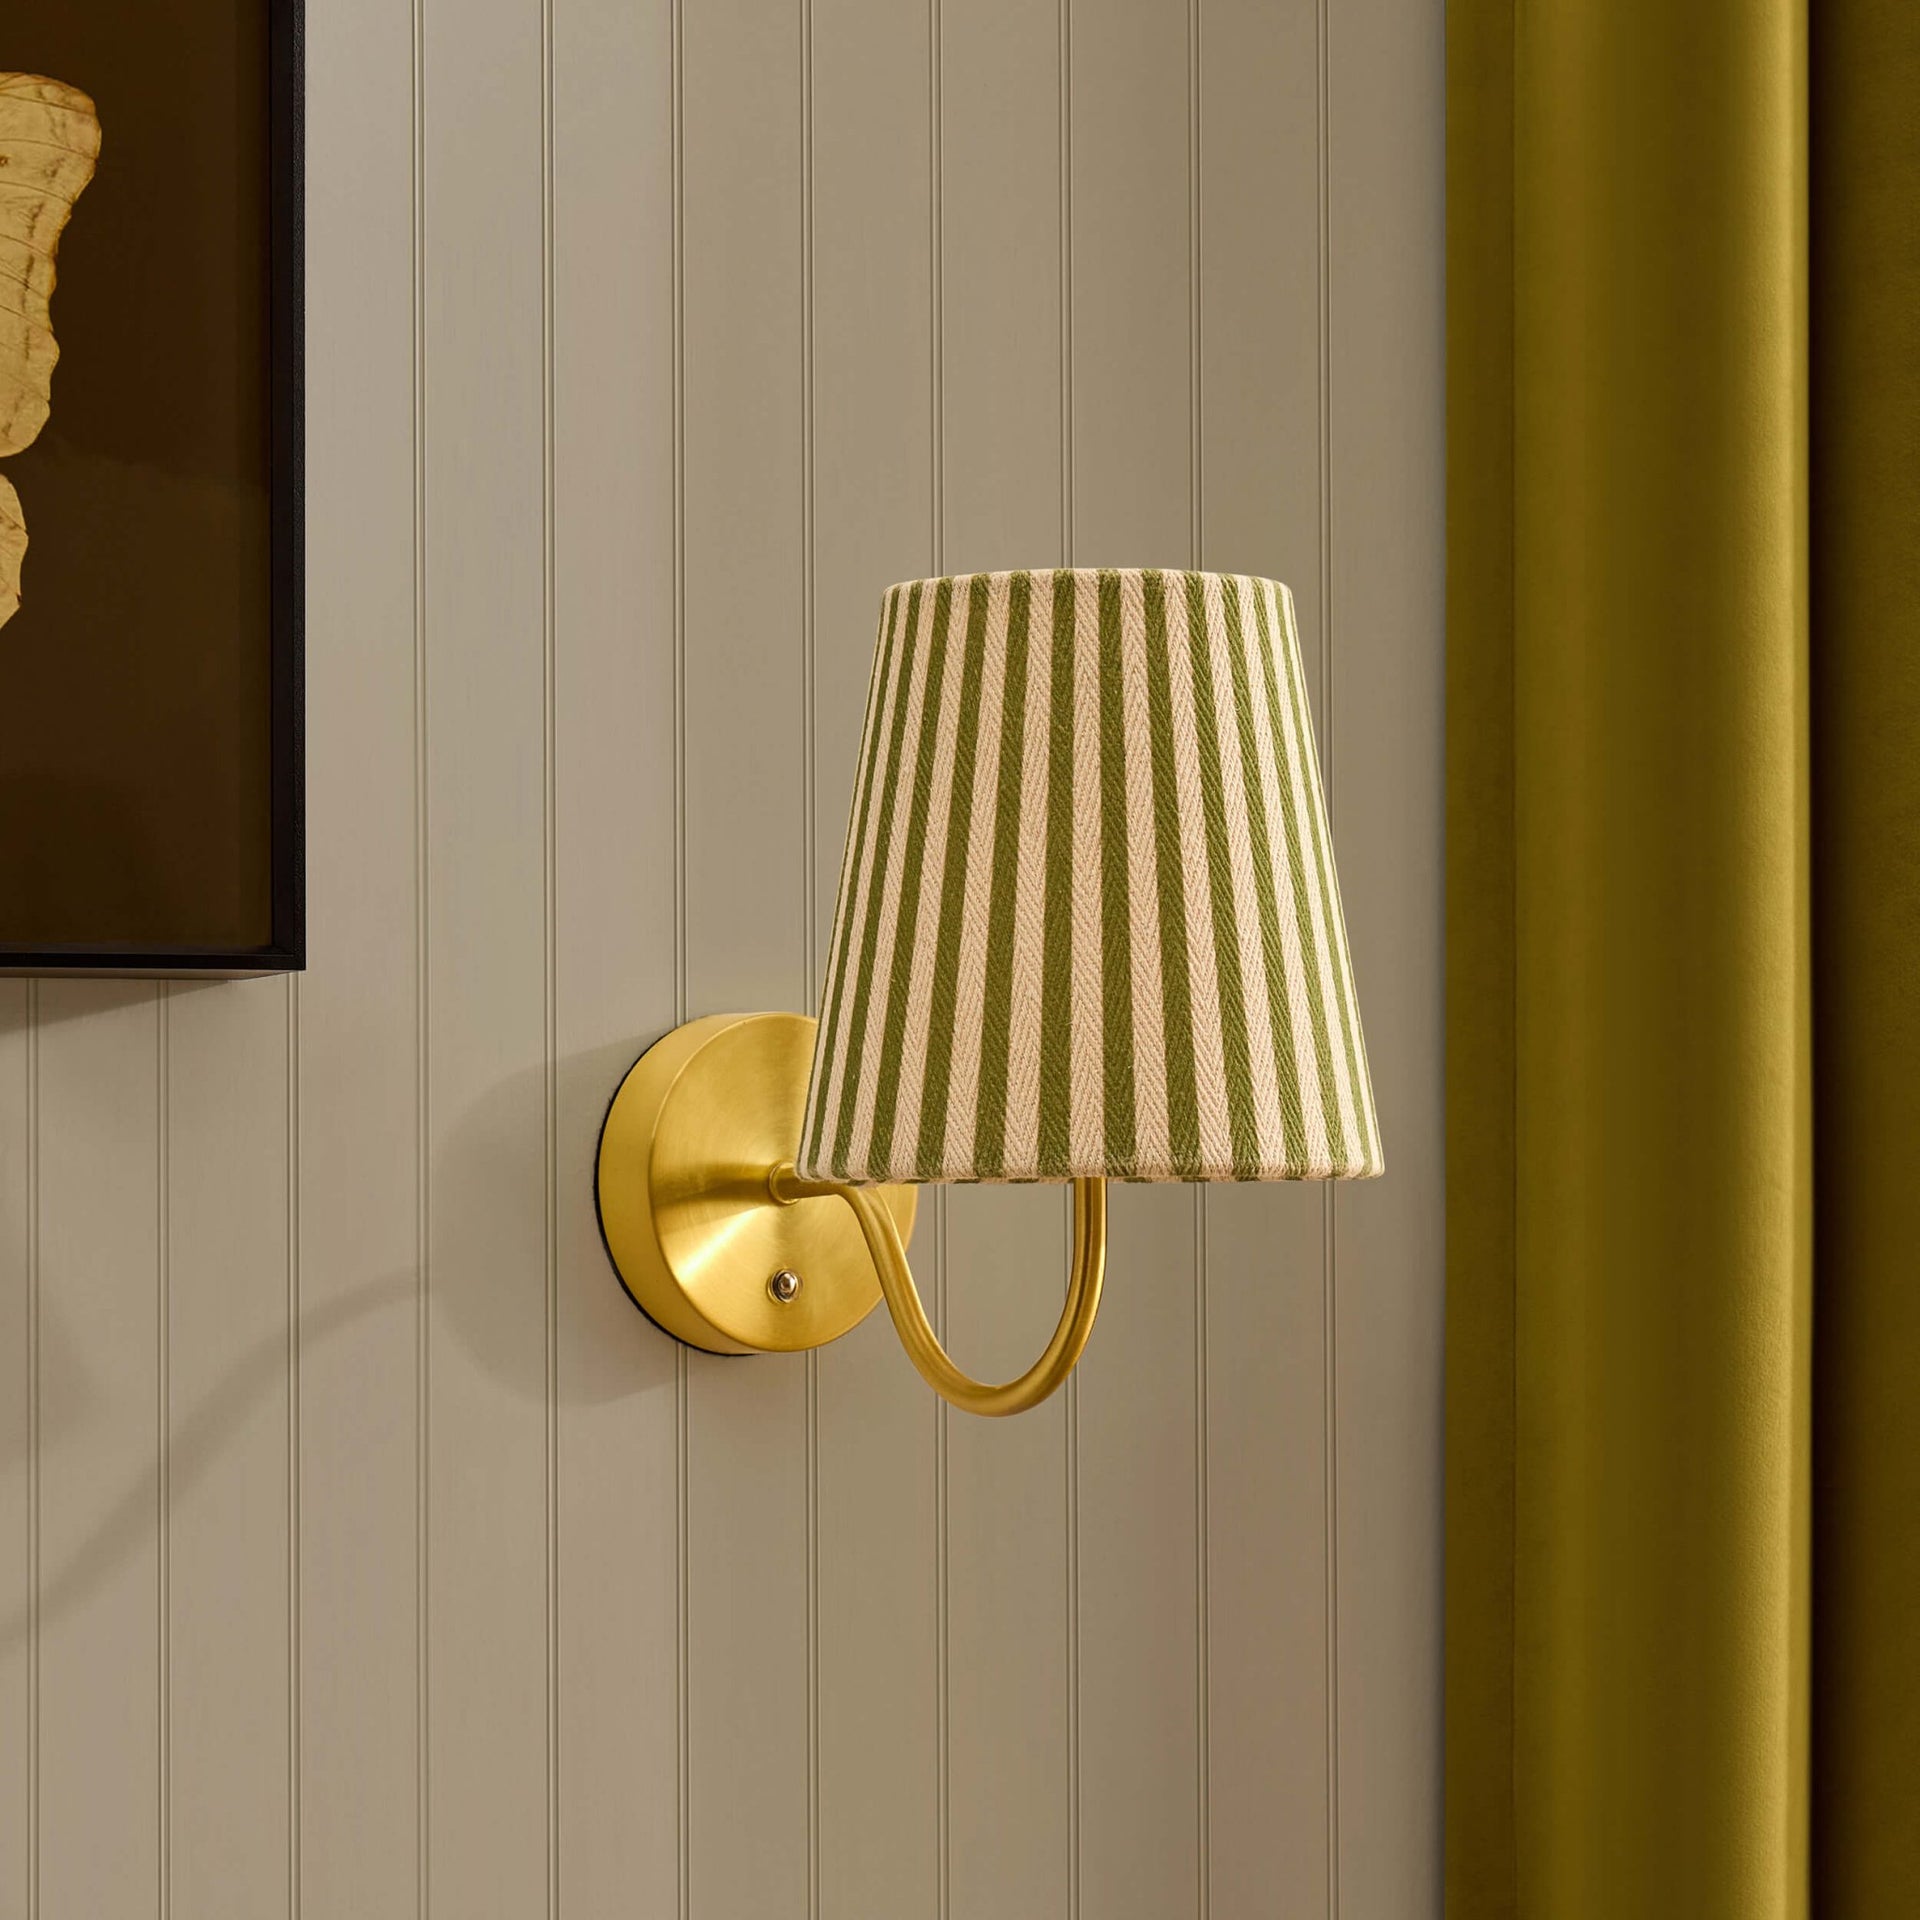
Lucia Rechargeable Striped Wall Light
This gold beauty is paired with a green striped shade. It gives a cosy vibe to a living room or bedroom, or it would even make the perfect lighting addition to a kids’ bedroom. It looks like it should cost a lot more than £30, too.
DUSK
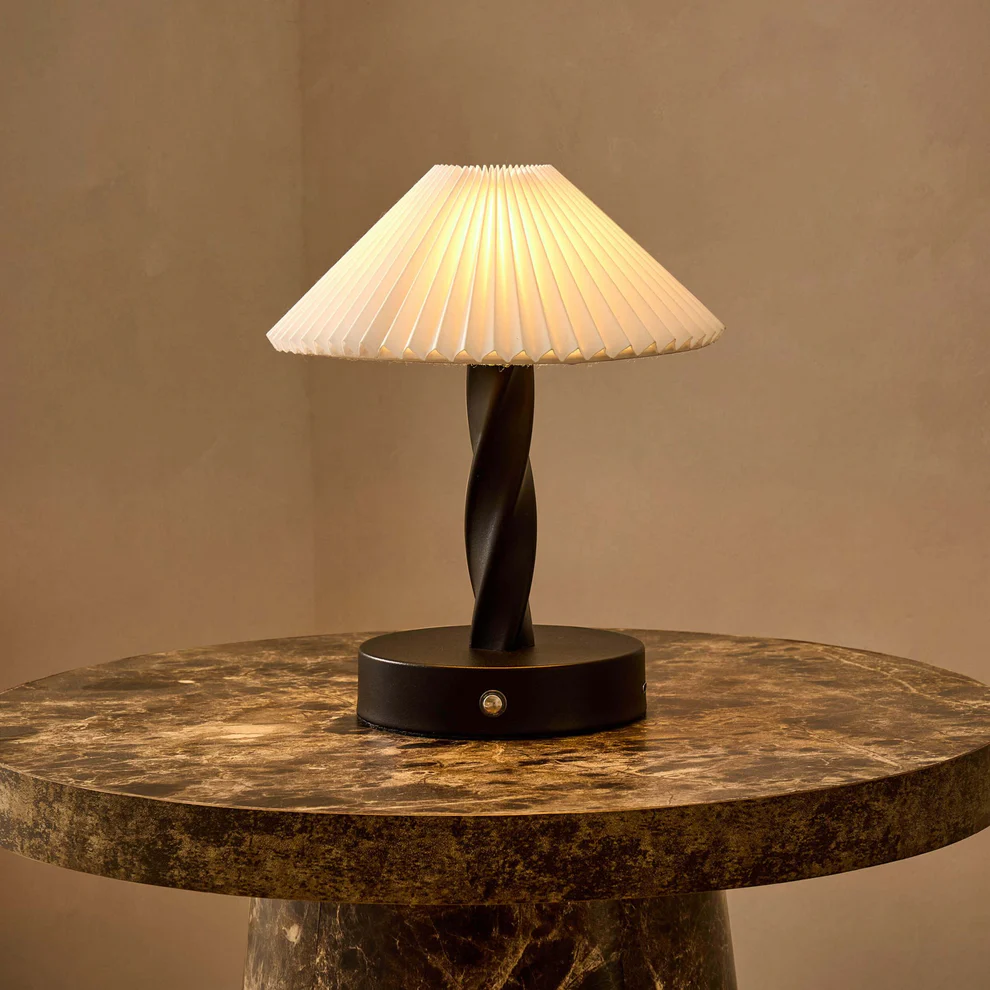
Birdie Rechargeable Pleated Table Lamp
There’s no way anyone would think this table light cost less than £30. It oozes luxury, whether placed on a hallway console or on either side of a TV. Its black, thick, twisted base makes it look serious, while its pleated shade brings a soft feel to your space. Charge it for 3-4 hours and enjoy for 5-6 hours, and the best part is that it’s dimmable.
DUSK
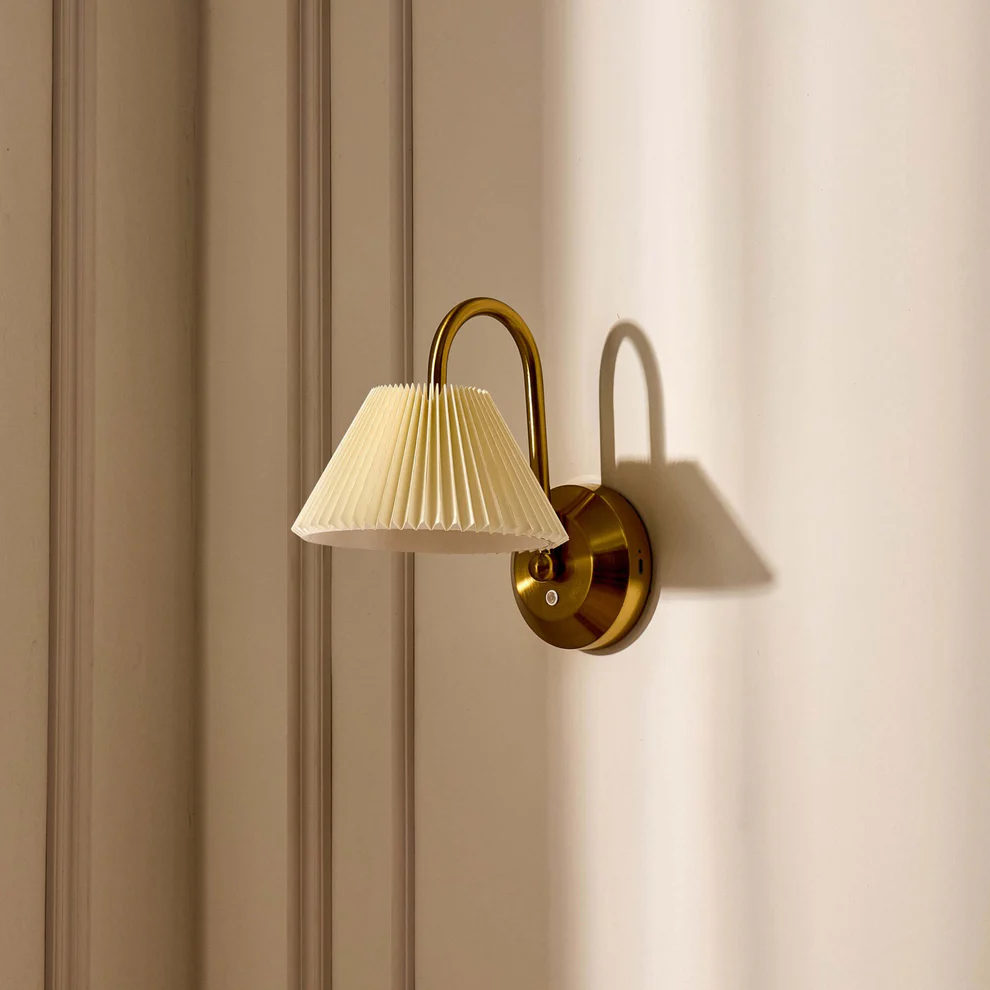
Twila Rechargeable Pleated Wall Light
An ideal bedside light if brass is your go-to, this light offers 5-6 hours of glow from 3-4 hours of charge. It’s the perfect size for smaller spaces, as it’s not huge, so it won’t overwhelm a wall or corner, plus it’s also conveniently dimmable. Otherwise, it’d be ideal for a hallway, perhaps either side of a statement mirror.
DUSK
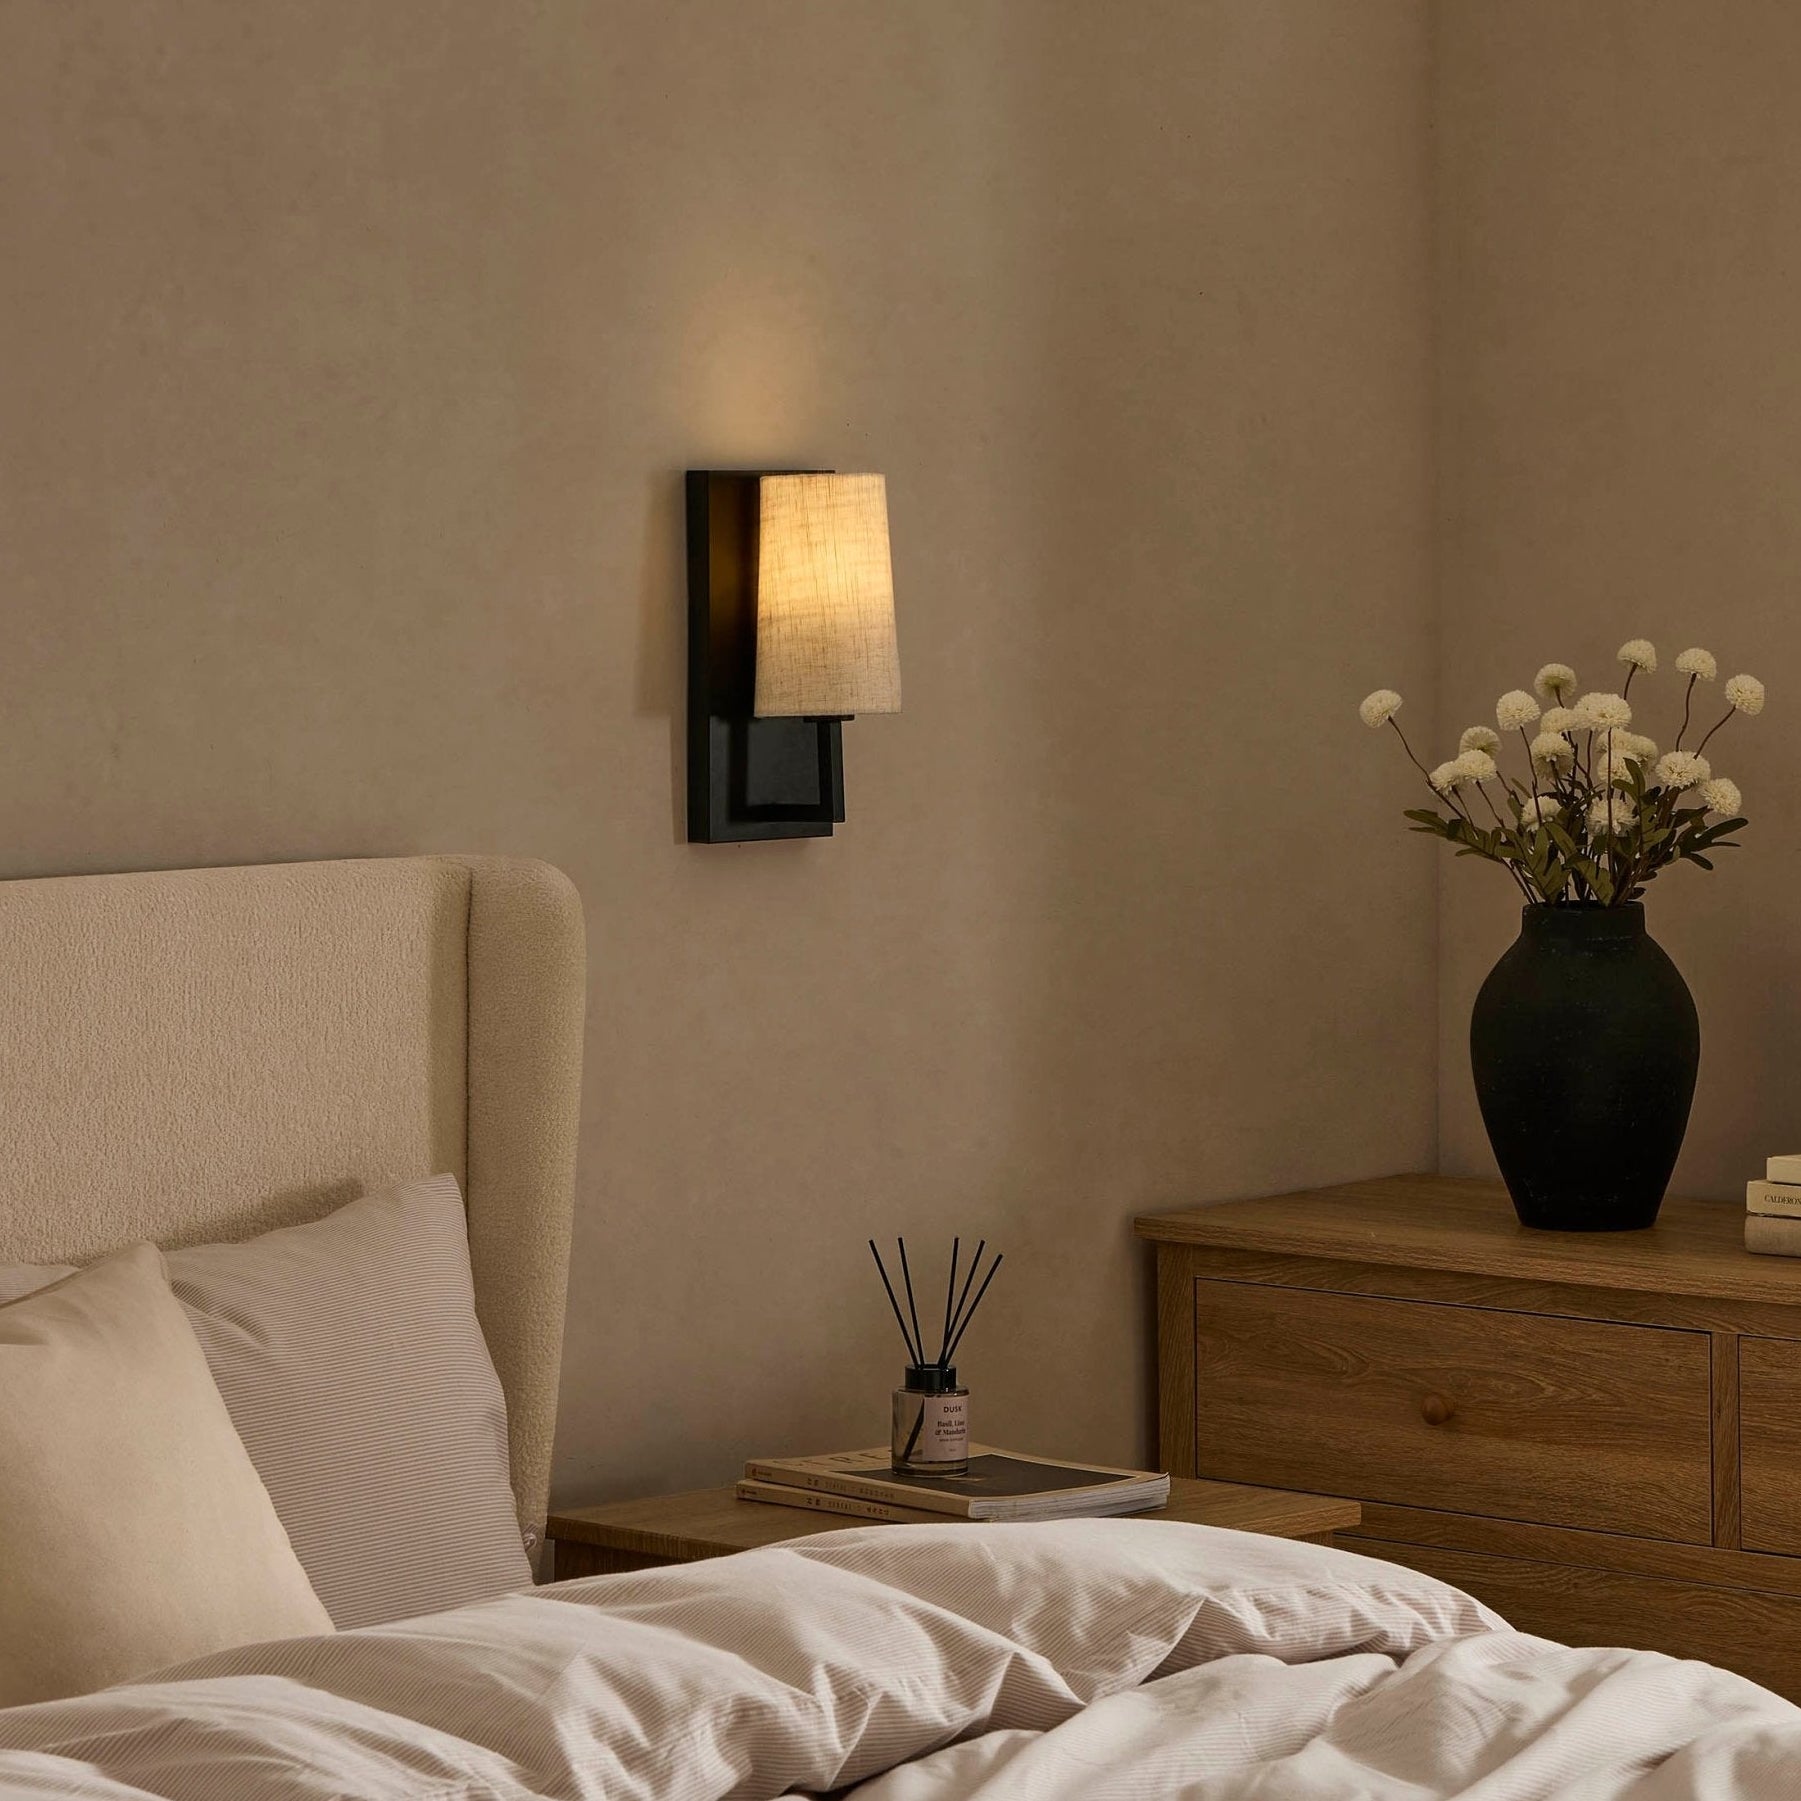
Alban Led Rechargeable Wall Light
If I didn’t already have bedside lights, these would be en-route to my house, RN. I love incorporating linen into my decor, and while this shade is a linen-effect, it looks so expensive. It lasts for approximately 8-10 hours from one charge, which is impressive, while it’d also be ideal for a tight (yet dark) staircase, to add light without making this area feel claustrophobic.
DUSK
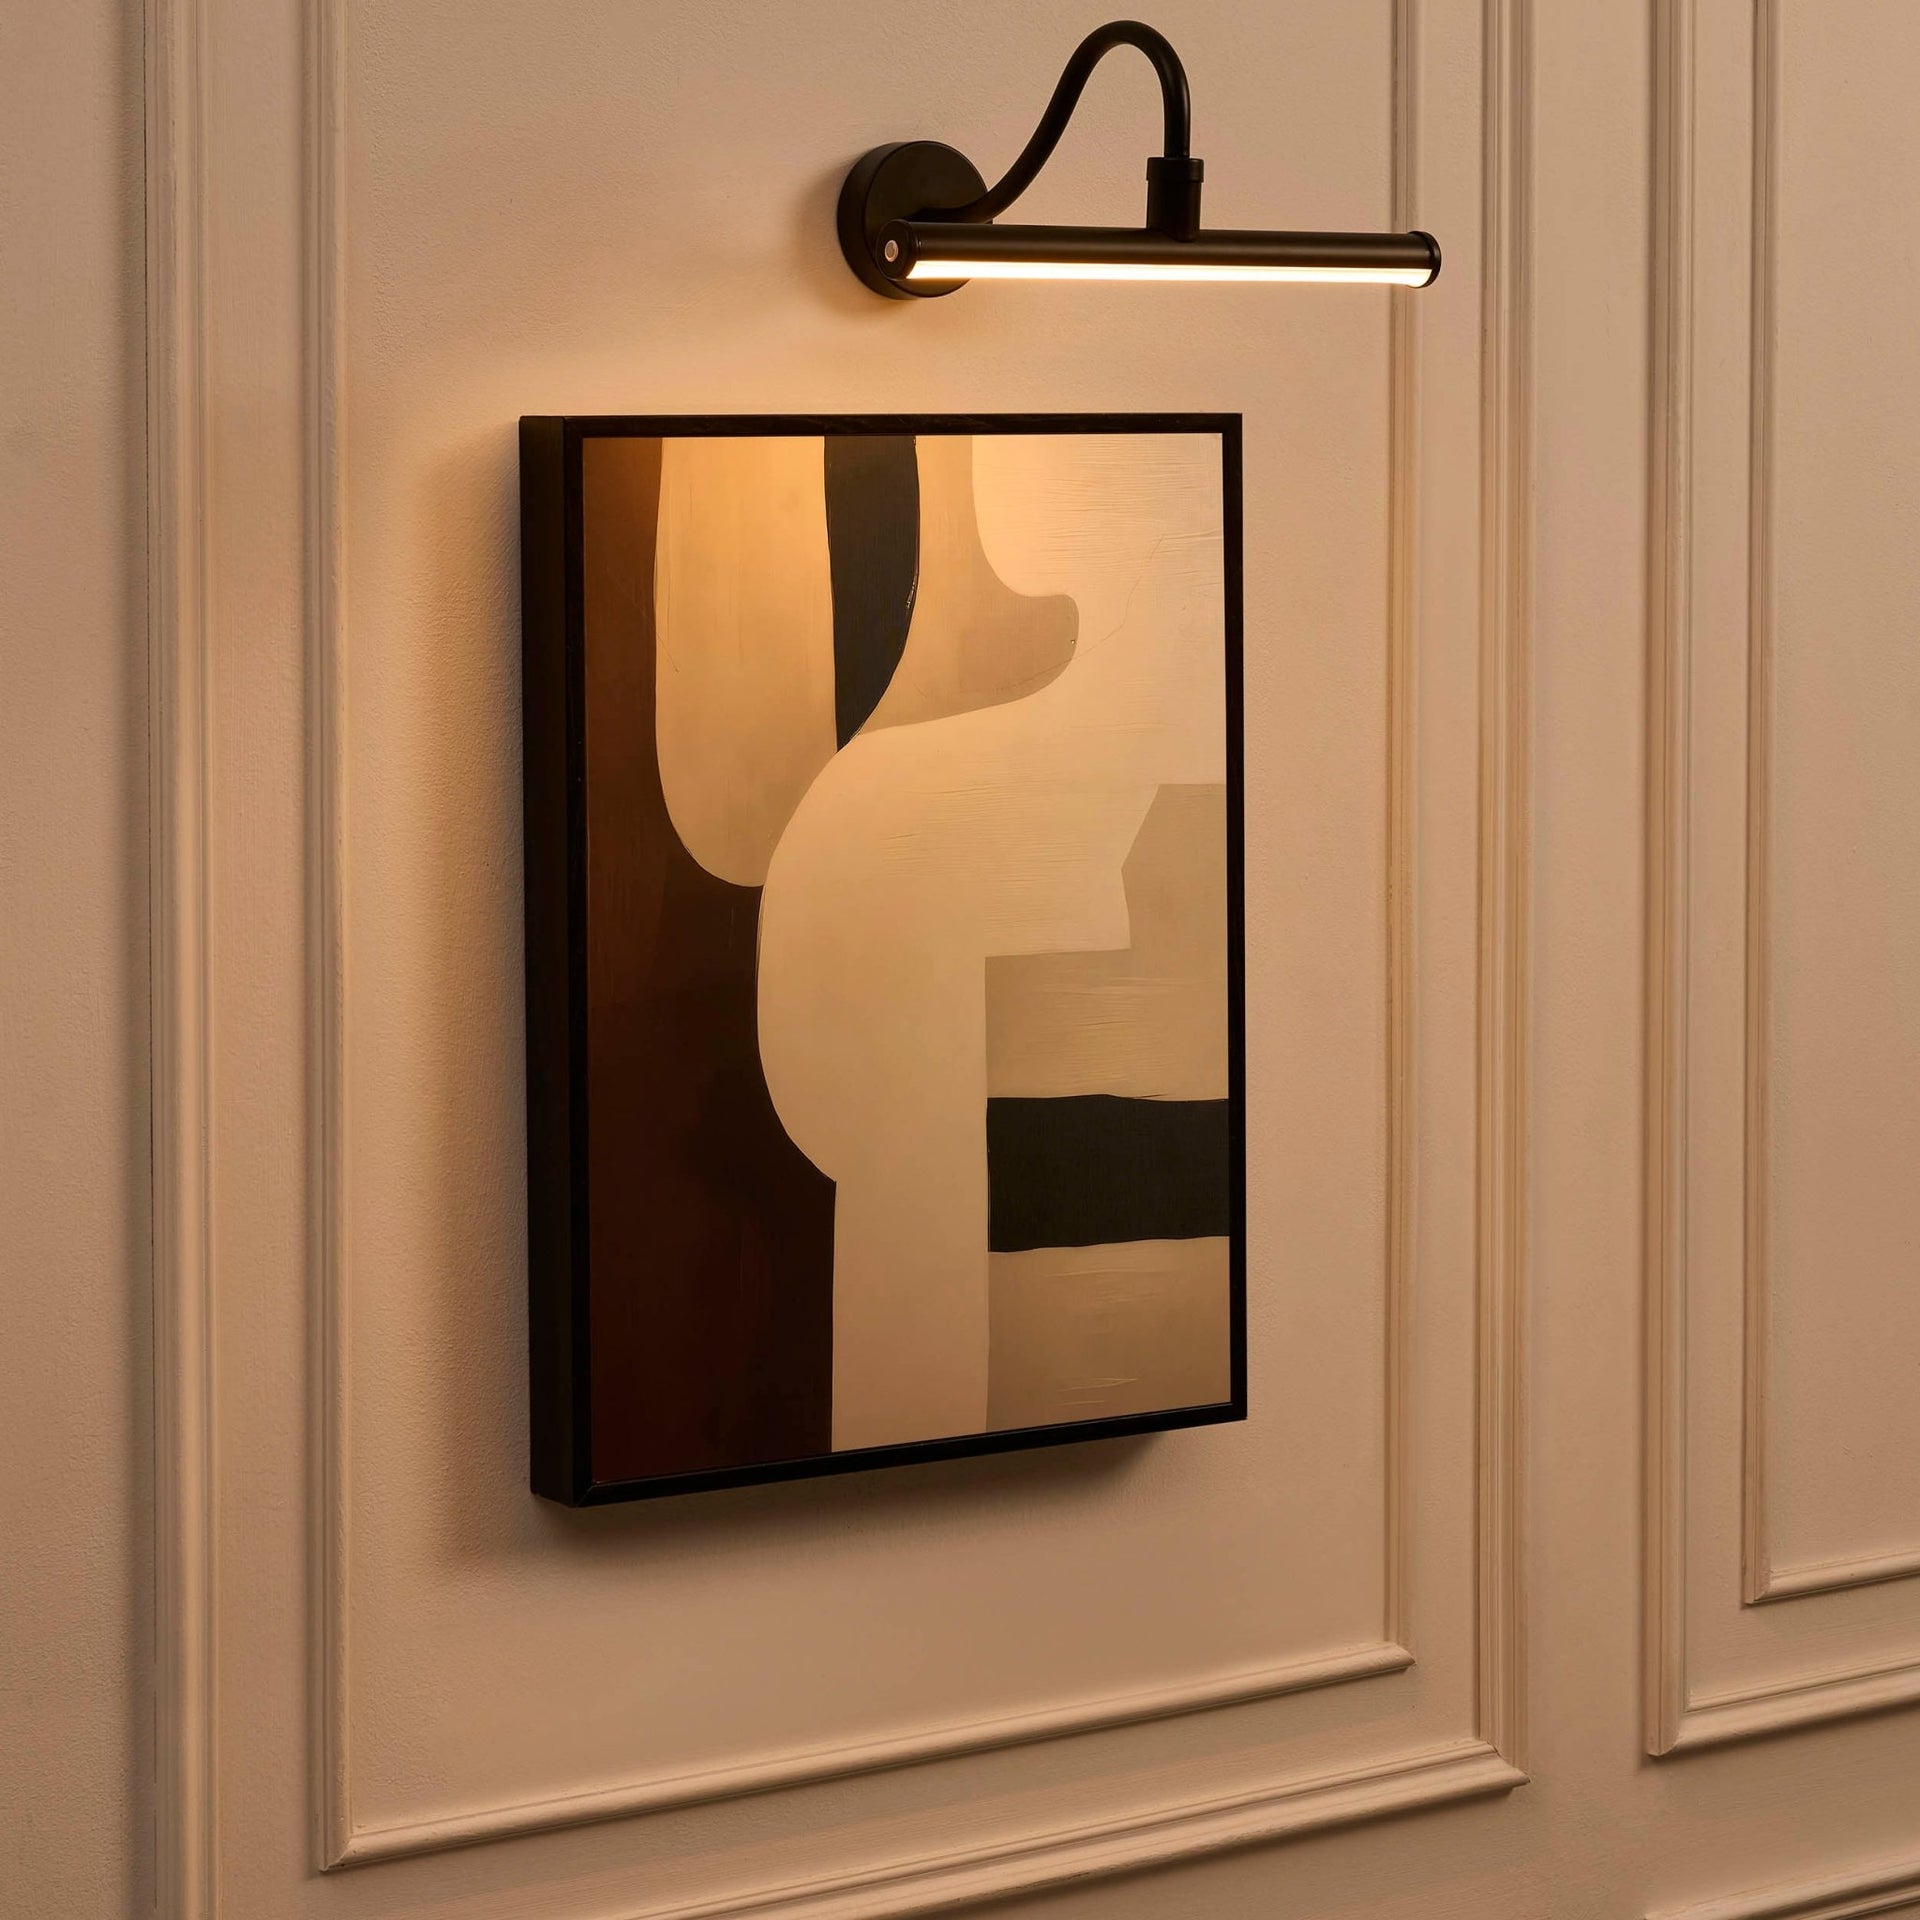
Bar Led Rechargeable Wall Light
I know these bar lights have been around for quite a while, but I still stand by the fact that they make a strong statement — especially when fitted above the right piece. Also available in gold, it’s on sale with £5 off, and only one is needed to make a good impression, so long as it’s placed in the right spot. It works for 5-6 hours once charged.
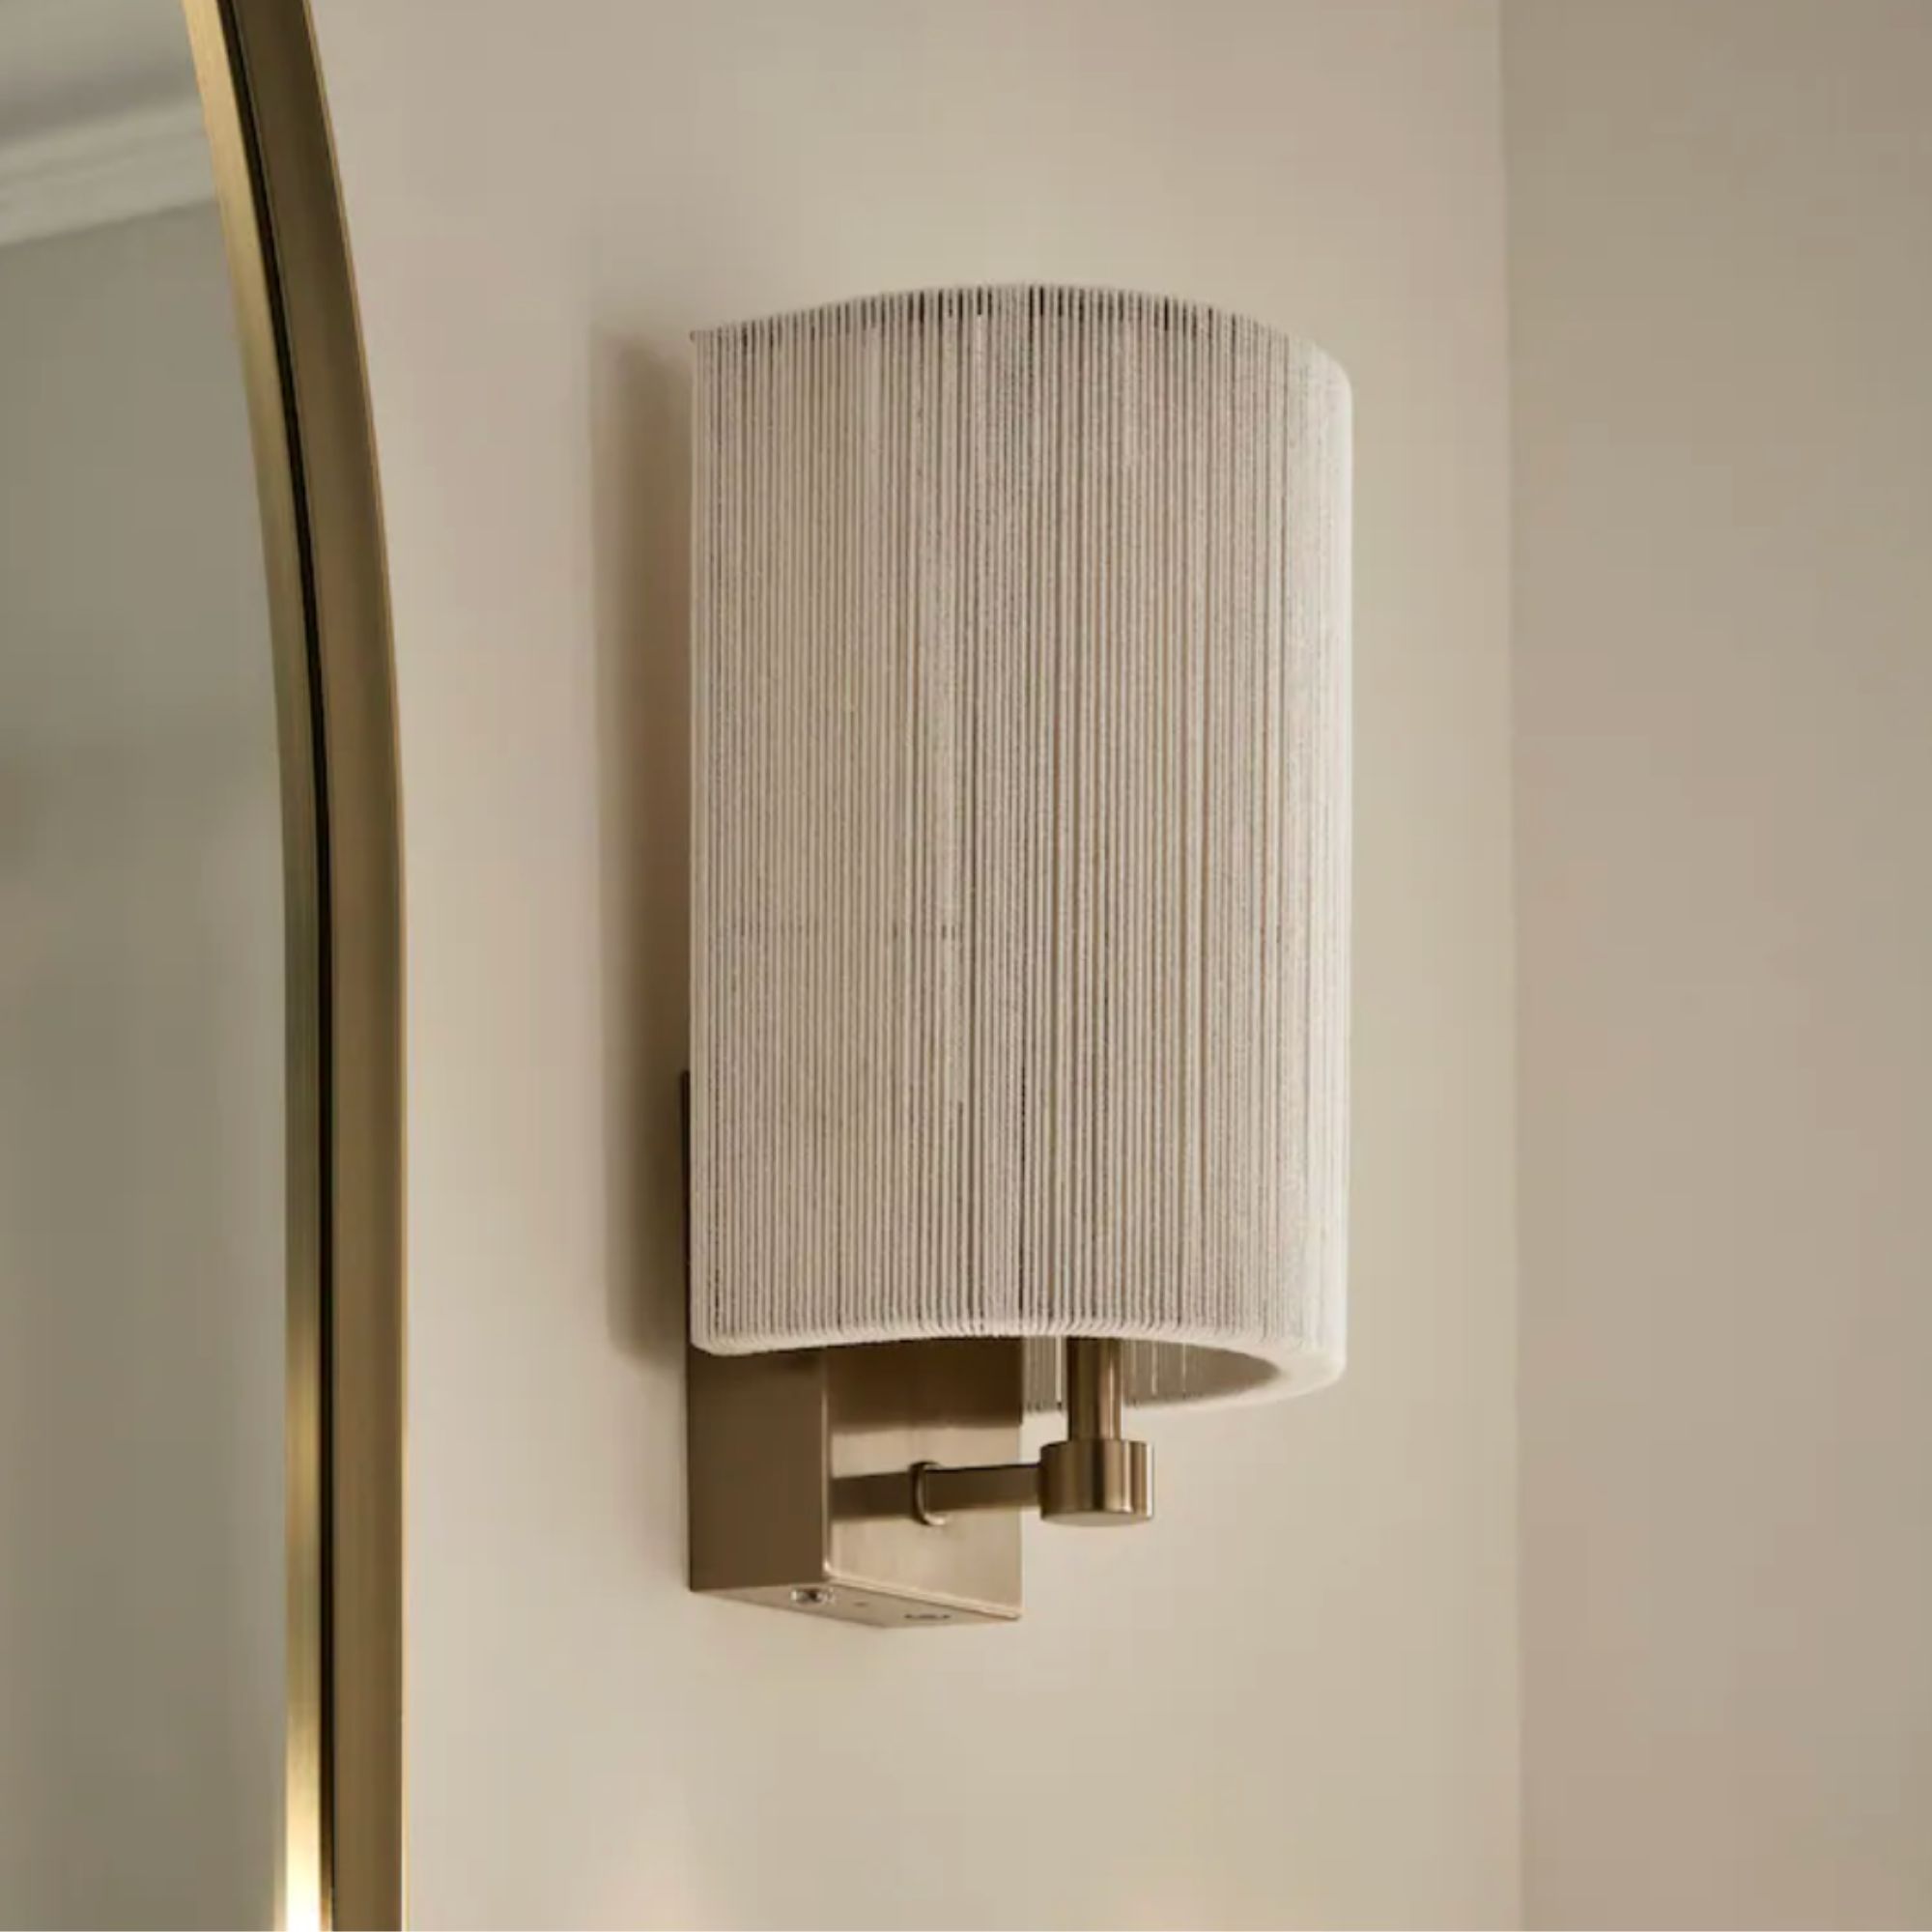
Make a statement with this Next light, which, as pictured, looks gorgeous beside a mirror in a hallway. It runs for 8 hours from a full, 4-hour charge, and it looks so luxurious. It boasts a super high-quality build, from metal and string.
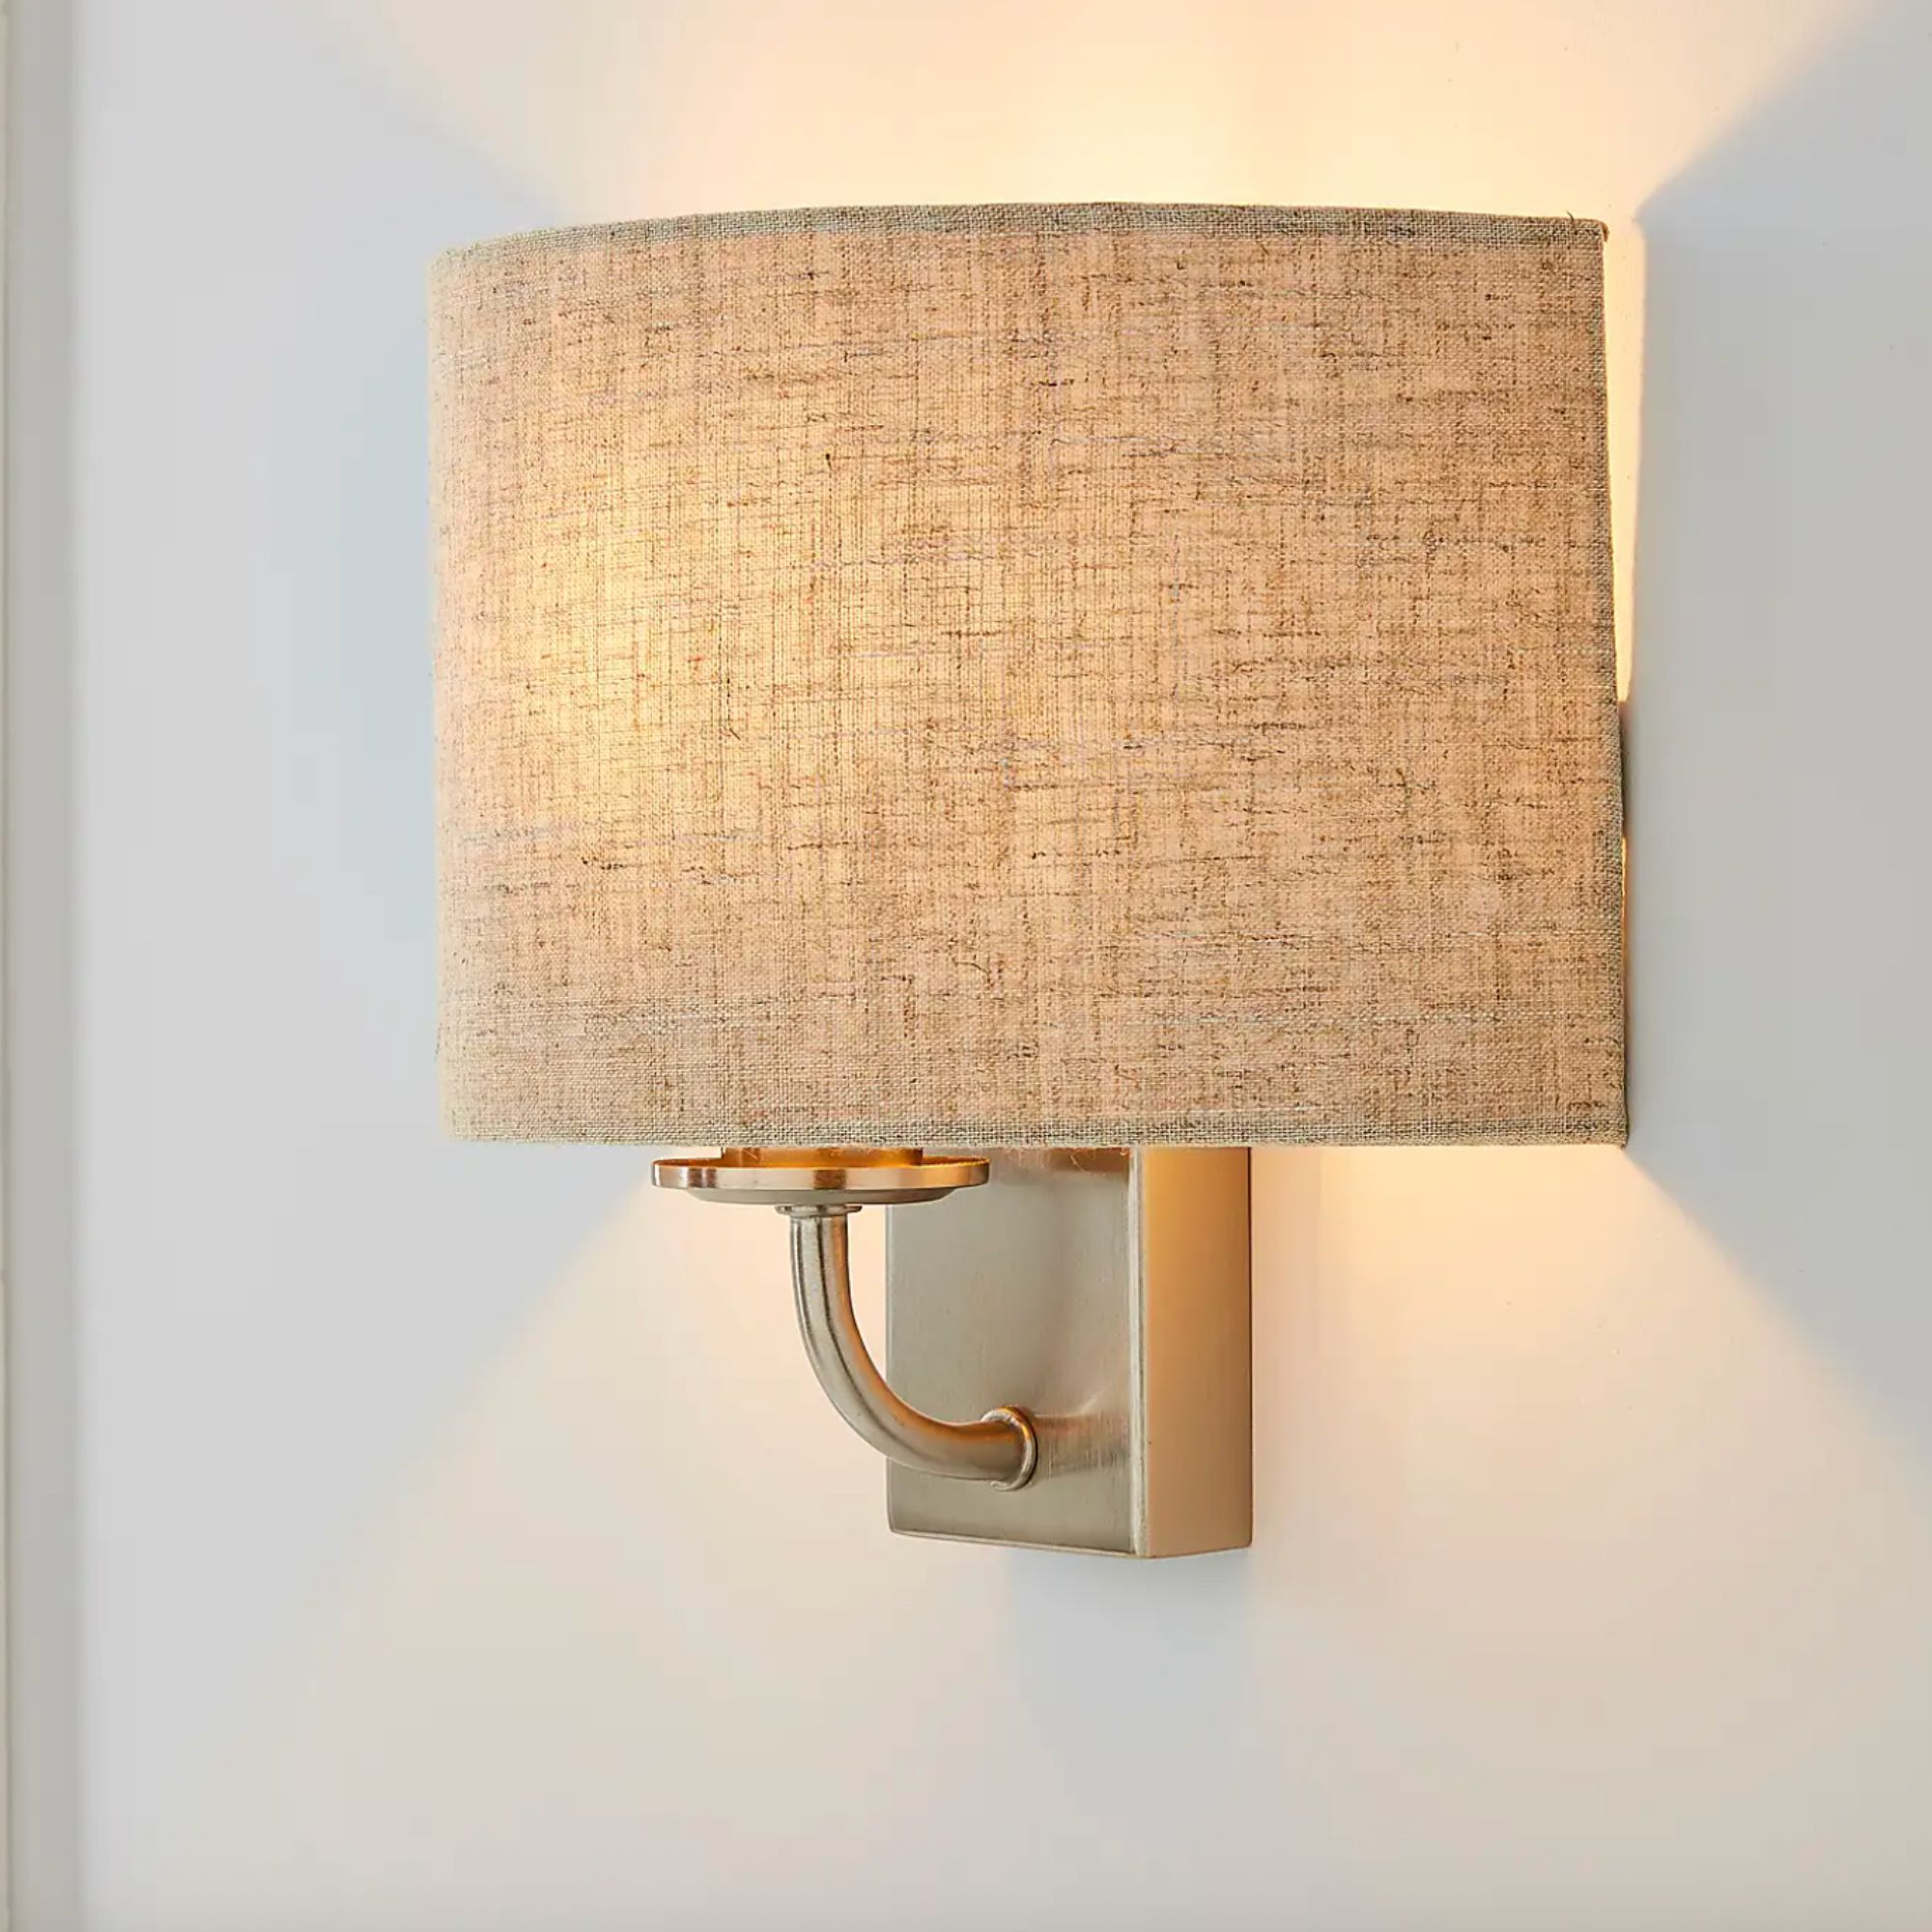
Need 2 of the same lights for your bedside? This pack of 2 is affordable, at £50, as well as dimmable for practicality, whether reading or scrolling. Its shade is natural linen, complemented with a brushed chrome finish. There are also other matching items available, if you want to follow suit and complete the set.
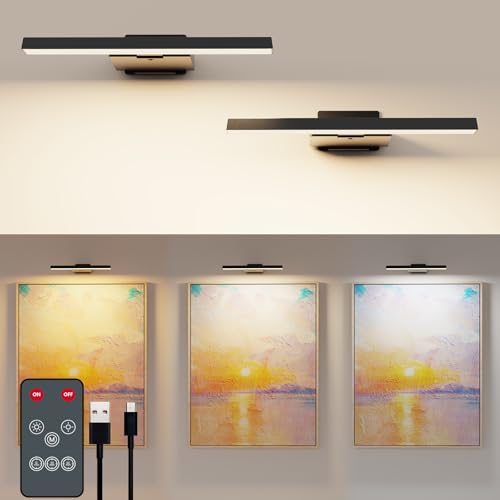
Amazon’s Choice for good reason, this 2 pack of picture lights can help shine a light on the memories that you treasure the most. At £15 each, included comes a remote for easy control, while you can choose its colour temperature and brightness — plus you can set them on a timer.
Which of these rechargeable lighting picks would be your favourite for a living room?
Sign up to our newsletter for style inspiration, real homes, project and garden advice and shopping know-how
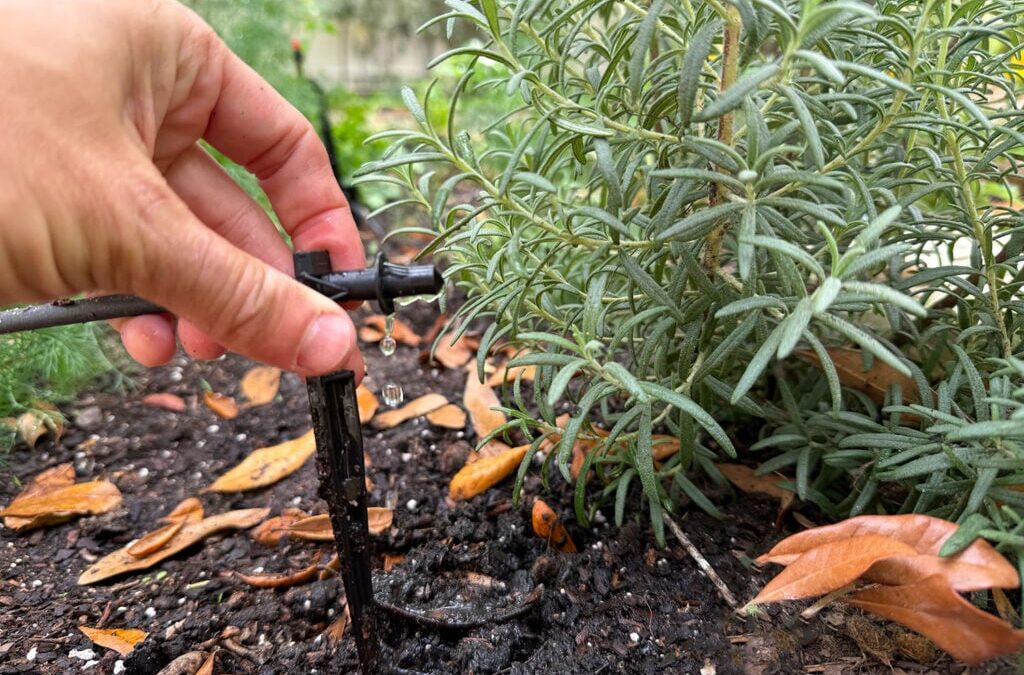
Our neighbor recently asked for help adding a drip irrigation system to their new garden. My last experience with a DIY irrigation installation was pretty intense, so I was wary. But installing drip irrigation was the total opposite. It was easy, affordable, and fast. Plus, it only cost around $75 and took just a few hours to install. It’s also a much more efficient way to water your plants than traditional sprinklers – so there’s a lot less water waste.
Drip irrigation systems can be installed right onto a typical outdoor spigot, so no special equipment or plumbing experience is needed. They’re great for flower beds, vegetable gardens, shrubs, and even large trees because you get precise control of the amount of water that each plant receives.
What is Drip Irrigation?
Drip irrigation is an easy & efficient method for watering plants in gardens, mulch beds, containers, and more. Unlike sprinkler irrigation, which is used for lawns, drip systems deliver water directly to the soil at the base of each plant through slow, low-pressure hoses. This has several advantages:
Less wasteful: Less water is lost to evaporation, overspray, and runoff than with sprinkler systems. Drip irrigation systems are said to use up to 50% less water!
More efficient: Precise watering to the plant’s root zone means shorter, more effective watering times.
Highly customizable: Flexible hoses and a variety of emitters make it easy to get each plant exactly the water it needs.
Easy to install: Requires no special tools, plumbing knowledge, or previous experience. You can add an entire system in just a couple of hours!
They are also a more durable, permanent, and targeted solution than soaker hoses. Those are good for quick, low-effort set-ups if you’re getting new plantings established, but soaker hoses tend to deteriorate over time. So once again, a drip irrigation system wins!
So let this be your sign to drop whatever excuses you’ve been using to put off installing a drip system in your garden or yard. I know I’m kicking myself for not doing it sooner. Yes, I’m adding one to our house thanks to the simplicity and efficiency of the setup that I did for our neighbors.
How Does A Drip Irrigation System Work?
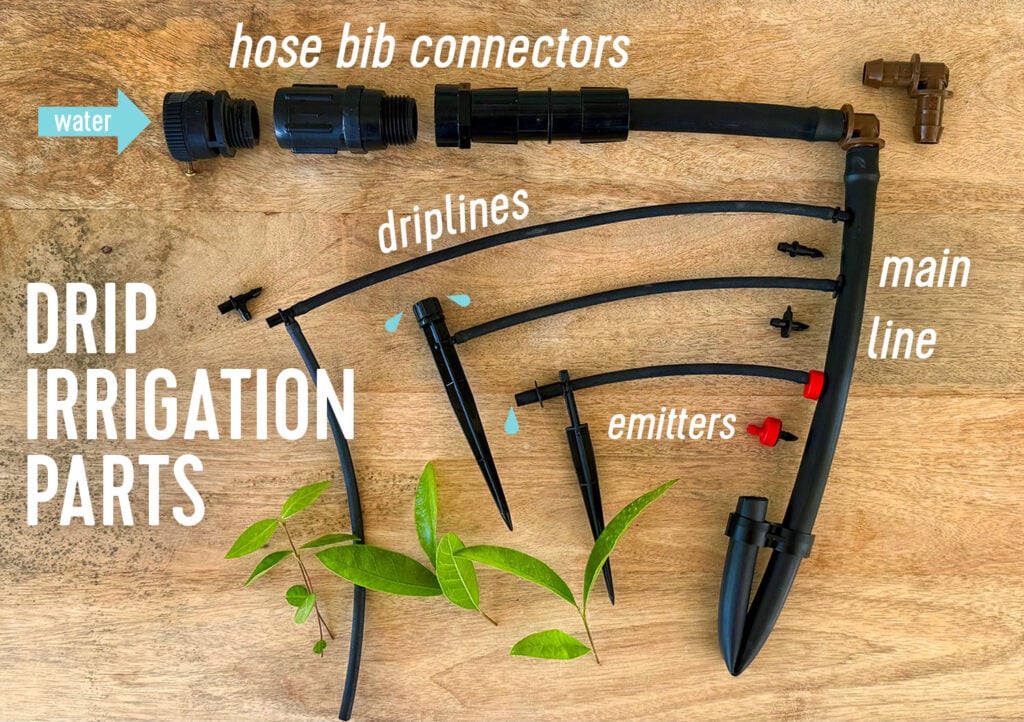
Drip irrigation systems use a series of hoses, flexible tubing, connectors, and emitters to transport a slow flow of water to your outdoor plants. Whereas traditional lawn irrigation uses high-pressure water to activate sprinklers that can spray long distances, drip systems mostly just, well, drip. Here are the key components, all of which are included in this drip irrigation kit (except for a hose timer).
This post is not sponsored in any way. We were just very impressed with the ease of the drip irrigation kit… and it only cost $55! And when you add in a hose timer, which is the only other component you need if you want this to run on autopilot instead of manually, it still clocks in around $75, all in!
Drip Irrigation Tutorial Video
In the video below, we take you through all of the parts of the drip system. You can also read the instructions below the video.
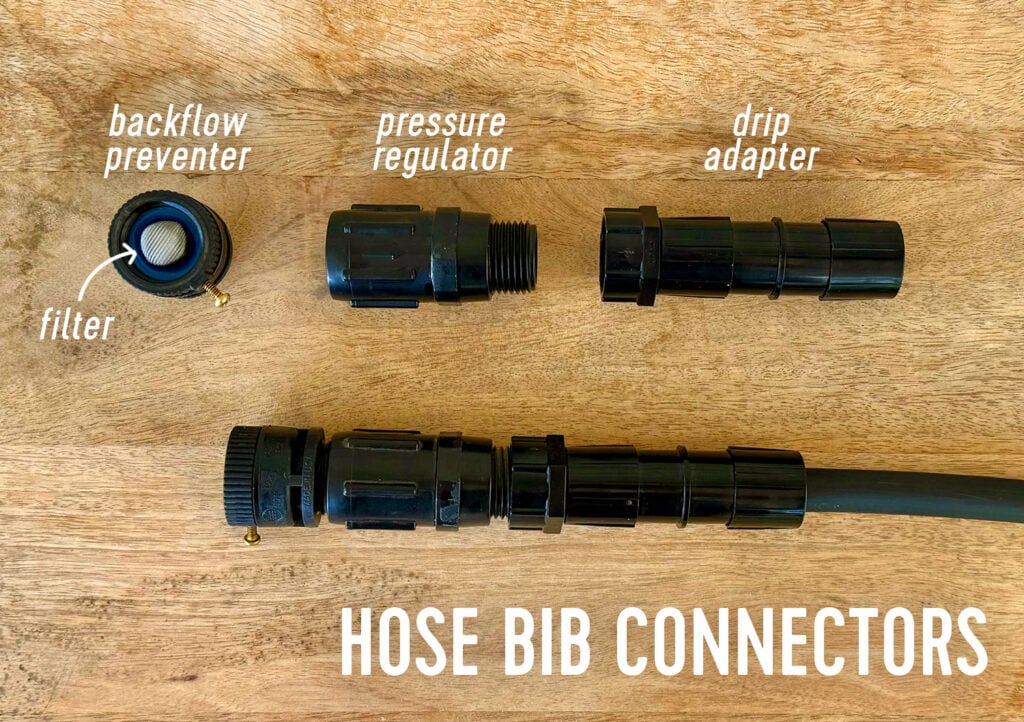
As I explained in the video above, you can hook up a drip irrigation system to any outdoor spigot or hose bib, but there are a few important items to make this connection. Everything in the list below is included in the the drip irrigation kit except for the hose timer, so buying materials for this entire project is really easy.
Timer (not pictured): A sprinkler timer helps you schedule regular, automated watering. You can also buy a multi-zone timer to create separate schedules for different areas of your yard or a smart timer to program from your phone.
Backflow Preventer: This keeps water in your irrigation lines from flowing back into the municipal water supply, should there ever be a drop in pressure on their end. That way, potential contaminants in your yard (fertilizers, pesticides, etc) don’t get in the local drinking water.
Filter: A small mesh filter (usually included in the backflow preventer) keeps debris like sand and rust from clogging your lines
Pressure Regulator: This helps reduce and stabilize the water pressure from your hose to a lower, consistent flow that’s more suitable for drip irrigation.
Drip Adapter: Lastly, this connector allows you to attach 1/2″ or 5/8″ irrigation hose to a standard 3/4″ hose bib.
Once again, all of these pieces (except for the timer) are included in the kit. I loved how simple it was to just grab two things and be able to do this whole project myself in a few hours. If you’re setting up multiple zones, you can buy additional connection kits that include all of the pieces linked above.
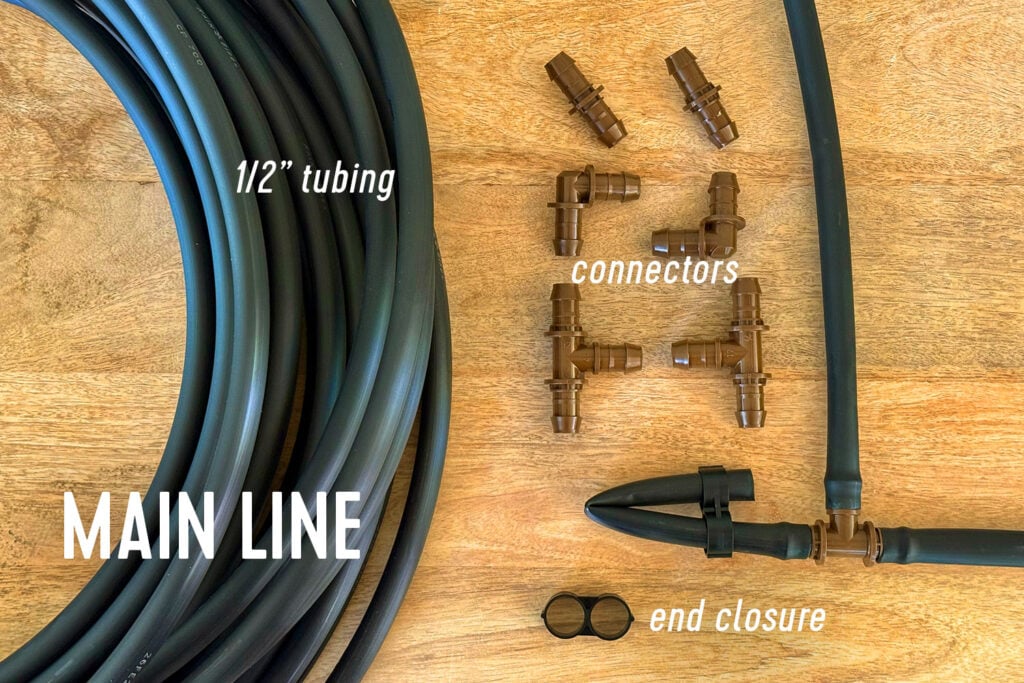
Main Line
The majority of a drip irrigation system is a series of flexible hoses that can be arranged to fit your space. The “main line” transports water from your spigot throughout your garden (not to individual plants), sort of like how a water main runs through your city or neighborhood (not to individual houses).
1/2″ Tubing: This 1/2″ polyethylene tubing – sometimes called flex pipe or “funny pipe” – is sold in various lengths. It can be cut using household scissors.
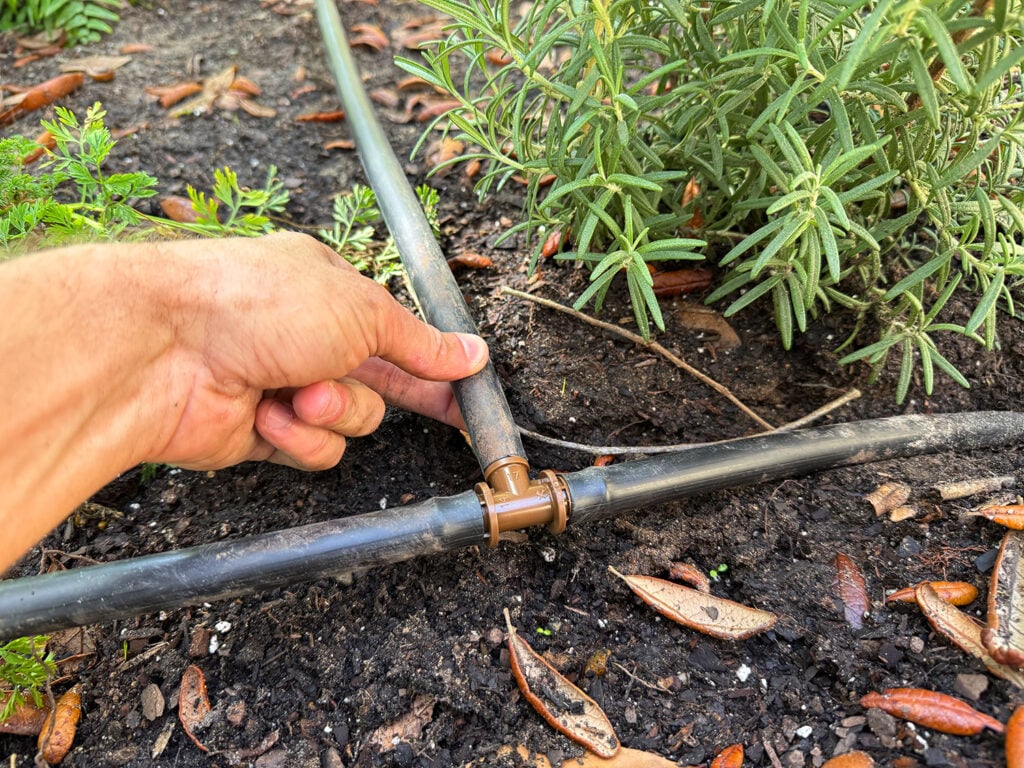
1/2″ Connectors: These connect sections of main line tubing and come in a variety of shapes (tees, elbows, etc) so you can match the shape of your space. Simply push the tubing onto the barbed ends to secure it.
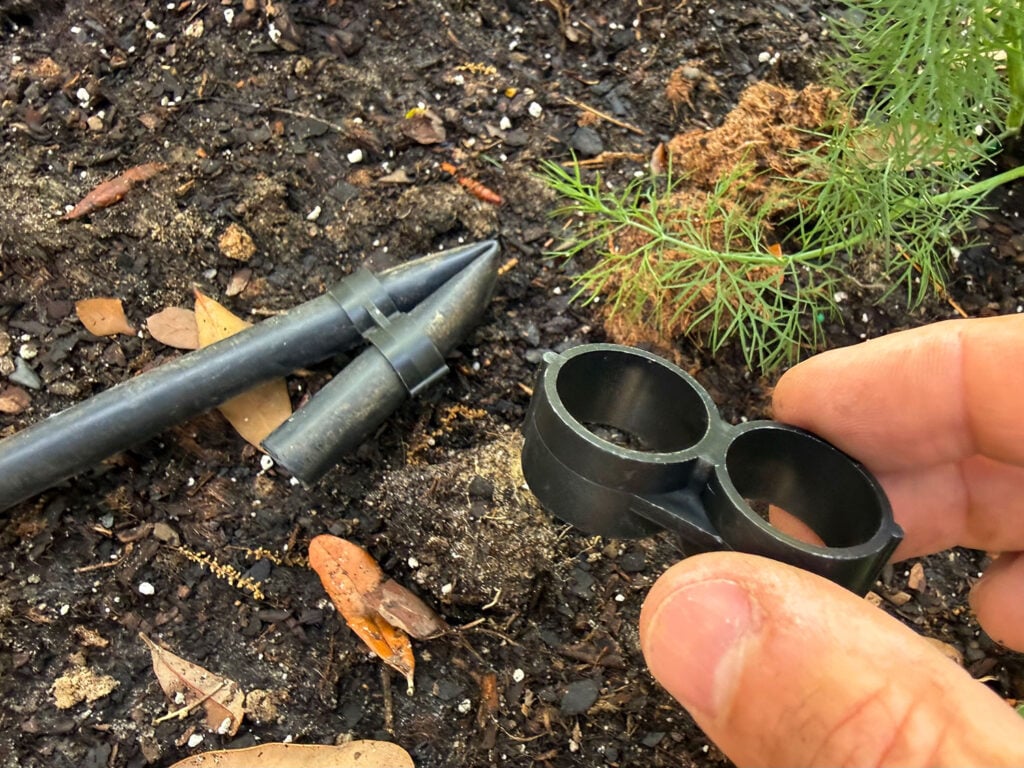
1/2″ End Closure: These end closure rings pinch the open end of your main line closed.
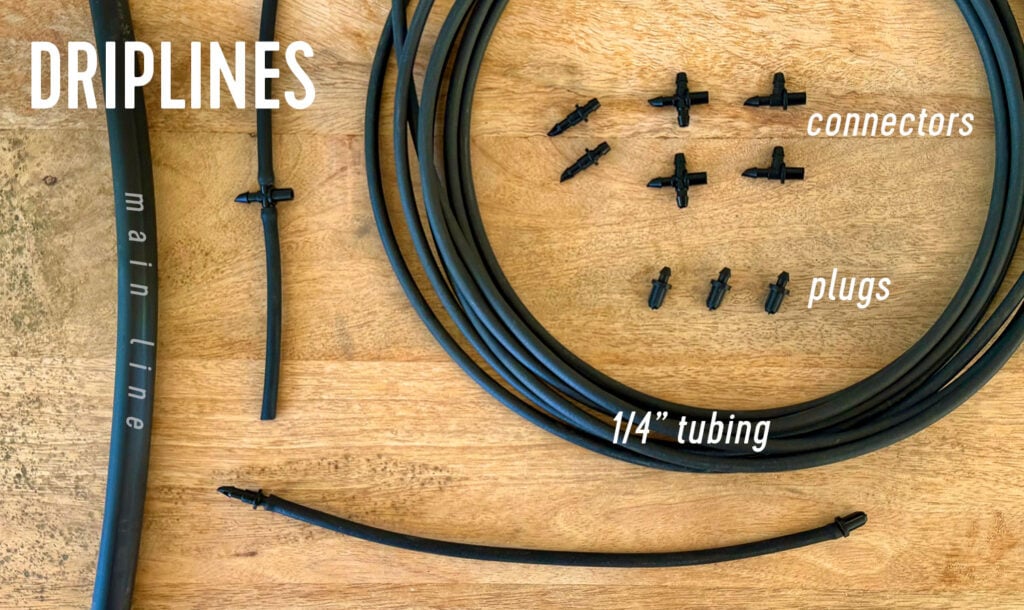
Driplines
From the main line, a variety of smaller, flexible driplines branch off to the individual plants. Think of these like the unique water lines that connect individual homes to the municipal water main.
1/4″ Tubing: Also called distribution tubing or “spaghetti pipe,” this is a smaller, flexible hose that can also be cut using scissors.
1/4″ Connectors: These barbed connectors are similar to those for the 1/2″ tubing, but are also used to connect each dripline into the main line. You do this by puncturing one barbed end through the side of the main line.
Goof Plugs: These are barbed endcaps that can be used to plug any open ends of 1/4″ tubing. They can also be used for any small puncture in your 1/2″ main line.
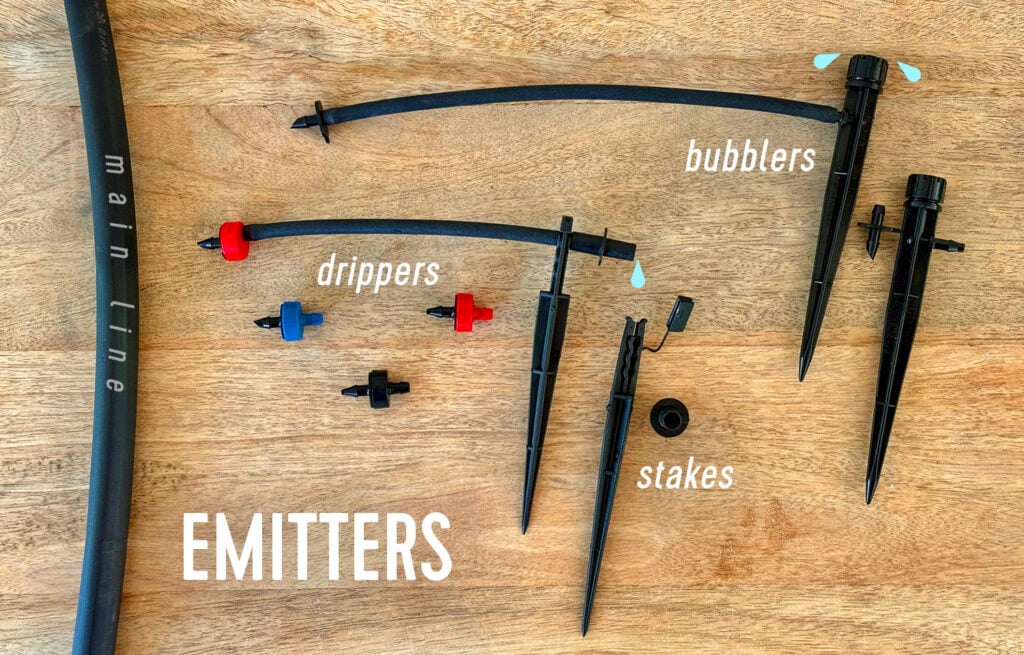
Emitters
Emitters are the small devices on your driplines that determine how (and how much) water is delivered to each plant.
Here are some common types of emitters:
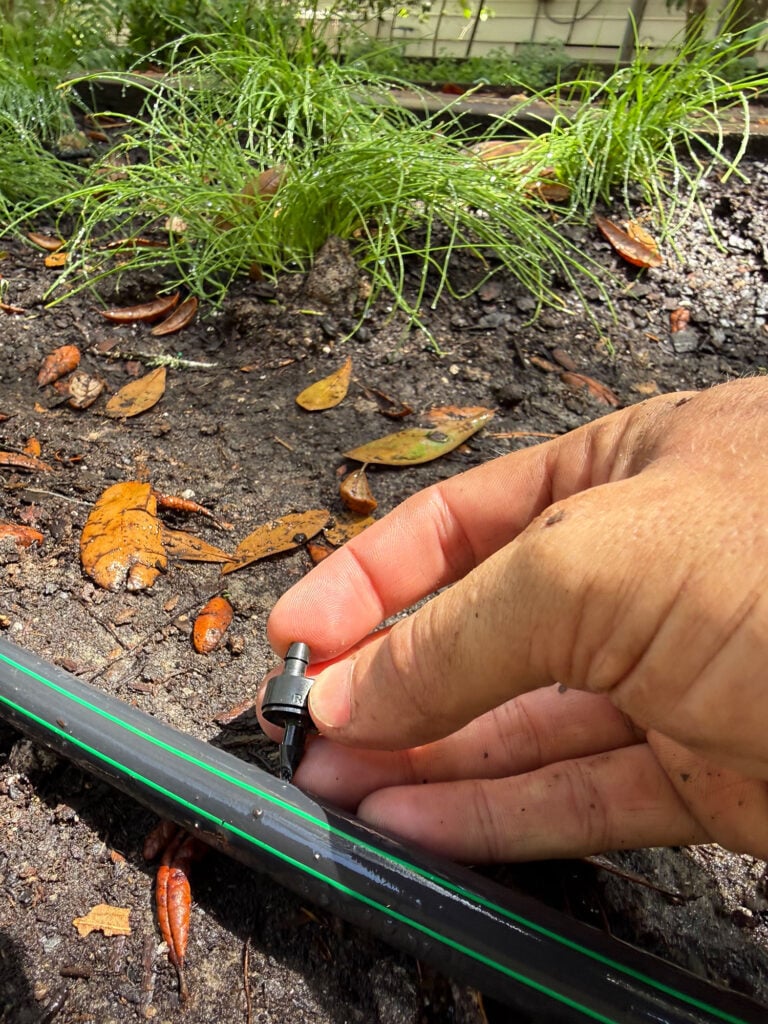
Drippers: These are the most common emitters in a drip system. They are installed at the start or in the middle of the dripline and control the release of water to a consistent drip. Different colors indicate different flow rates measured in gallons per hour (GPH). Commons speeds are 0.5 GPH, 1 GPH, 2 GPH, and 4 GPH.
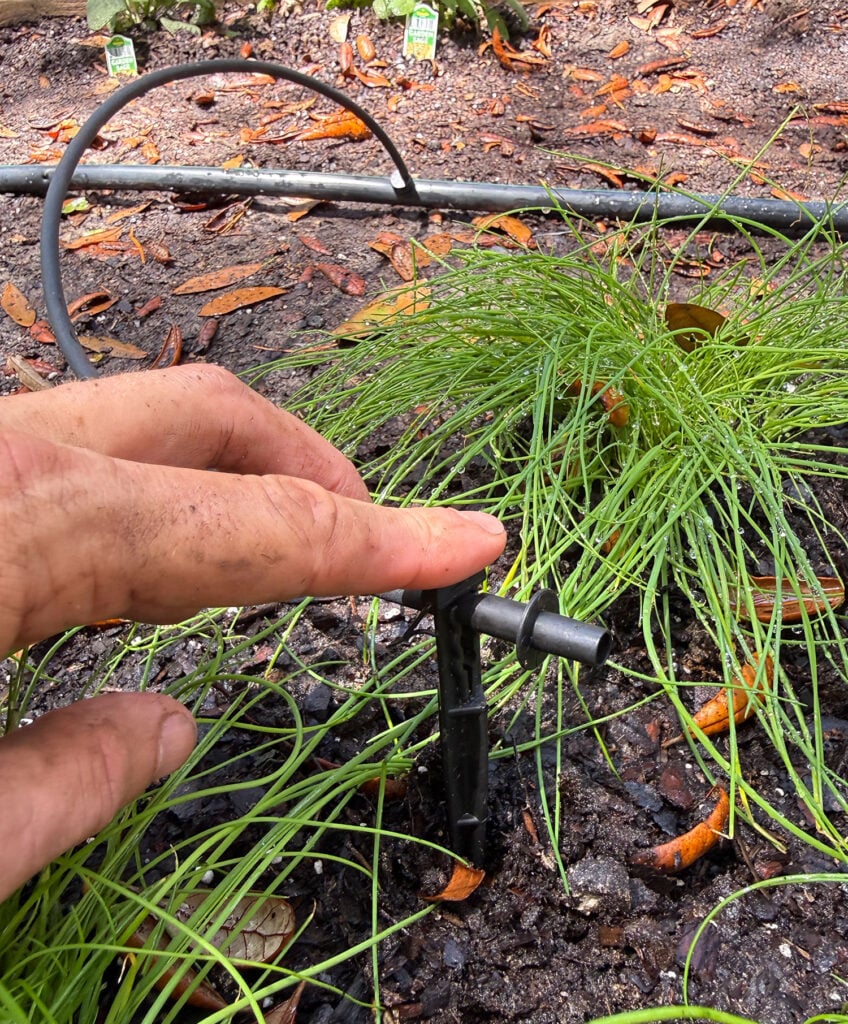
Tubing Stakes: These clips hold the ends of your driplines so you can stake them exactly where you want them.
Bubblers: These attach to the end of a dripline and emit 8 small streams of water in a tight circle, reaching a small cluster of plants.
Sprayers (not pictured): These emitters are closest to a traditional sprinkler, with a spray head placed on a raised stake. Sold in full circle, half circle, and quarter circle varieties.
And that, folks, are all of the key pieces that go into a DIY drip irrigation system.
Steps To Install A Drip Irrigation System
Now that you understand the parts of your drip system, putting it all together is very straightforward.
Plan Your Layout
Gather Supplies
Give Your Tubes Some Sun
Attach Timer & Hose Connectors
Run The Main Line
Connect Driplines & Emitters
Test & Program Timer
Step 1: Plan Your Layout
An important first step is planning how to lay out your drip irrigation system. They’re pretty easy to adjust as you go, but having a general plan ensures you’ll have enough supplies. Important pieces of information are:
Where is my water source?
How many zones do I need on my timer?
Are there any obstacles (decks, sidewalks, fences) I need to plan for?
How many plants am I trying to reach?
Do some plants need more water than others?
What types of emitters do I want?
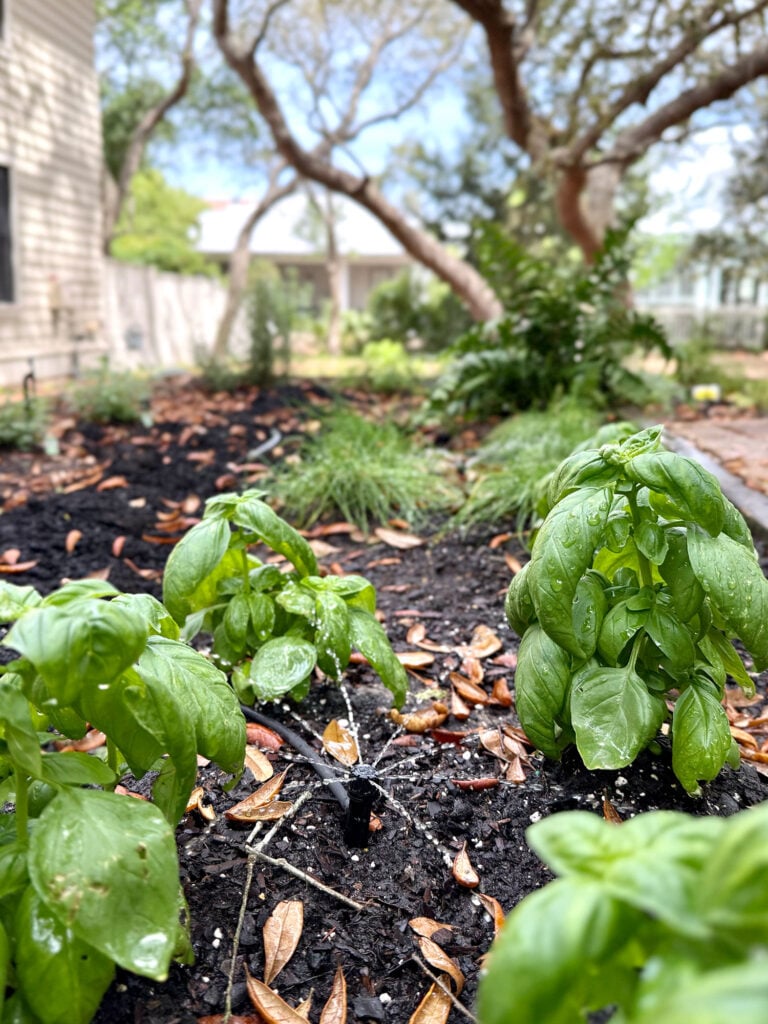
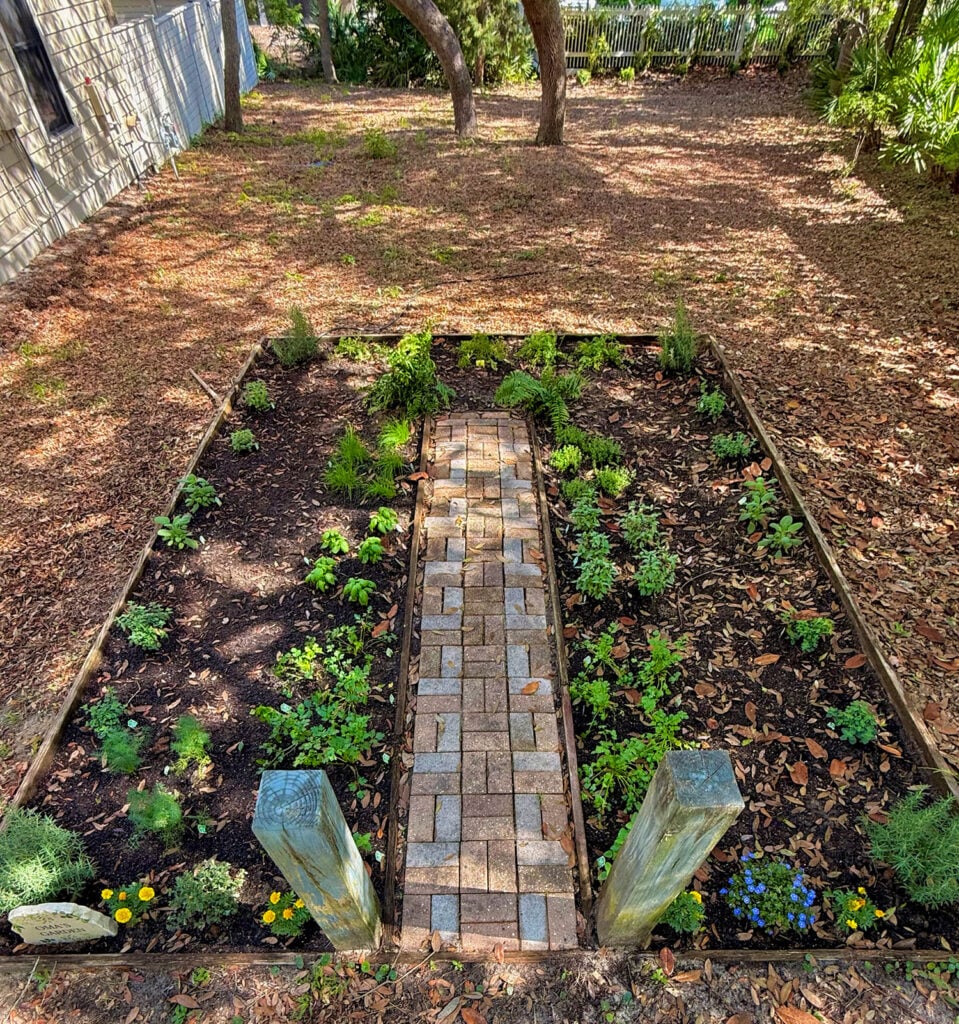
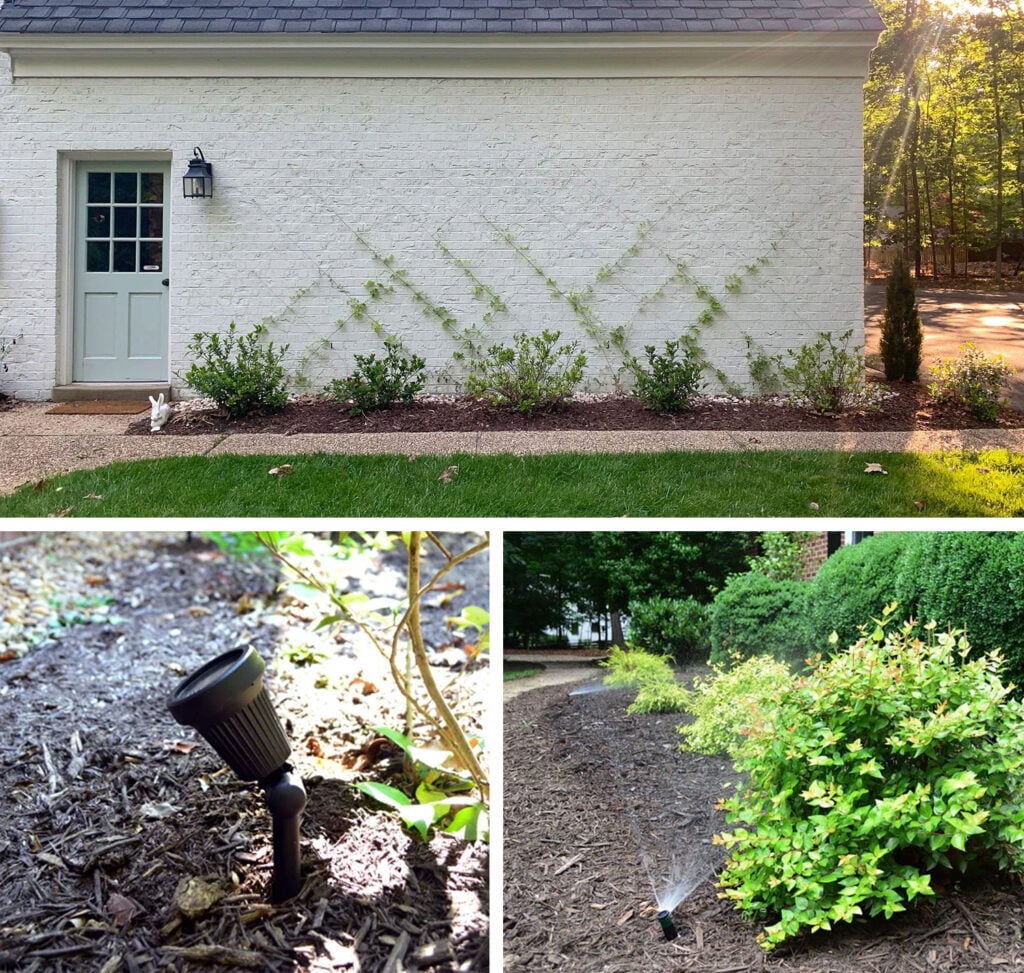
For reference, here is the space we wanted to water. This is my friend’s yard. He asked for my help installing irrigation to their new herb garden.
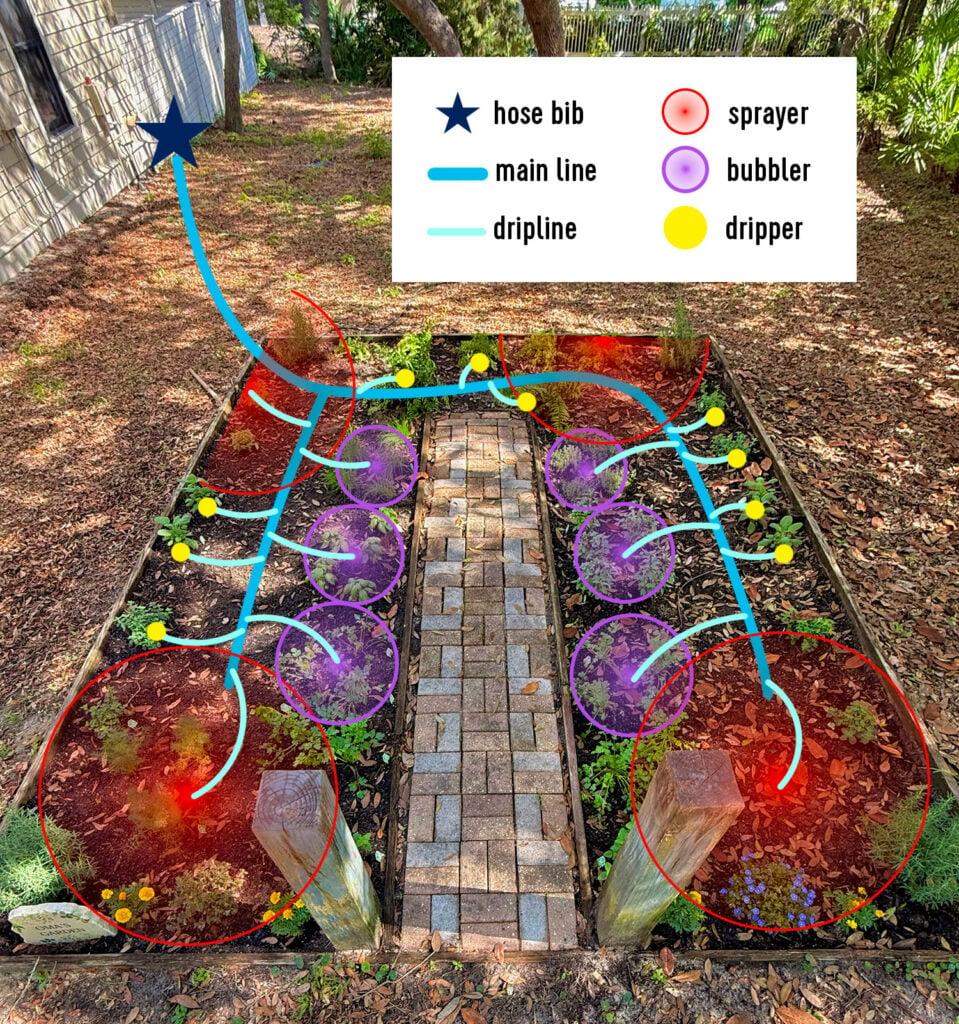
And here is a rough map (with key!) of how we laid out his drip system using the materials in the kit (we did buy some extra bubblers too – they’re about $1.50 each). We relied mostly on sprayers and bubblers, and then filled in with drippers for any plants that we felt weren’t getting enough spray.
The kit also includes guides with recommendations for layouts as well as watering times & frequencies.
Step 2: Gather Supplies
Again, purchasing this drip irrigation kit and a hose timer may be all you need to install your system. But here are some situations that may require additional materials:
If your water source is far from your plants, you may need additional coils of 1/2″ tubing and connectors. The kit includes 50 feet.
If you have lots of plants, you may need additional 1/4″ tubing, emitters, or stakes.
Also, you may want/need additional emitters ( the kit includes 20 drippers/stakes, 2 bubblers, and 4 sprayers).
The good news is that most emitters and connectors are very affordable (usually only a few bucks). The most expensive supply will probably be your timer. Our neighbor opted for a a 4-zone timer, which cost $60. More than the irrigation kit itself! But a simple hose timer like this would do the trick well if you’re just adding one zone that you want to water (for example, a side garden or a front landscaping border).
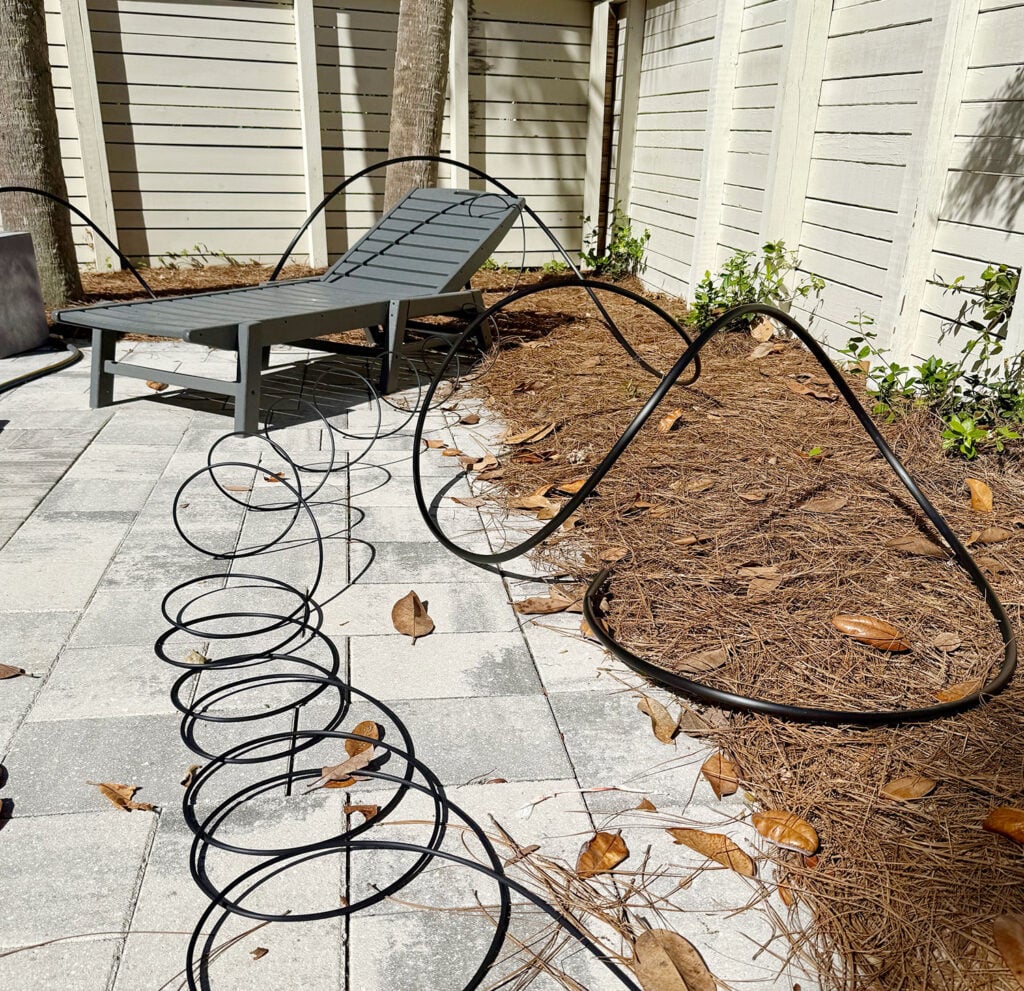
Step 3: Give Your Tubes Some Sun
This sounds silly, but before you begin assembling anything, lay your tubing out in the sun for about an hour. The heat makes the tubes a little more malleable, which will make all of those pressure connections easier on your hands.
This is also a good time to start laying out your emitters, digging any holes or trenches you want to create, or getting started on the next step…
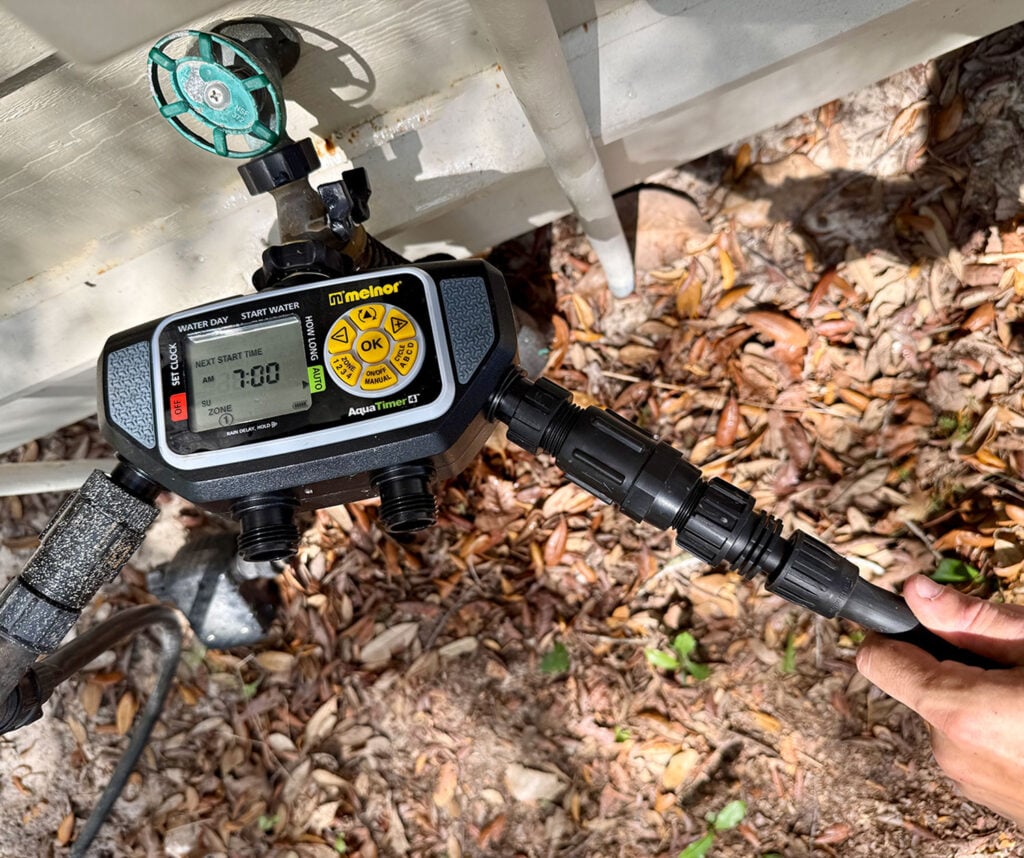
Step 4: Attach Timer & Hose Connectors
As I described in the video, you want to start by connecting the pieces to your spigot or hose bib. This includes your timer, backflow preventer (with filter), pressure regulator, and drip adapter. Screw everything together and hand-tighten it. You can check for leaks once your system is fully attached.
When you’re ready, you can also attach one end of your 1/2″ main line tube to the drip adapter. Depending on your adapter, it should attach with pressure and a small twist.
Step 5: Run The Main Line
Next, run your 1/2″ tubing from your water source to and throughout the main areas that you will be watering. It doesn’t need to run right up against your plants, just within a few feet of them, ideally. Use barbed connectors to split or turn your line as needed. Just push the tube onto the barbed end to connect it.
Be sure to clamp any ends of your main line tube closed with these ring closures. The kit includes 2 of these, so you may need to purchase more if you split your main line in more than 2 directions.
And when it comes time to shorten your main line, just cut off the excess. You can purchase a special tube cutter, but I found household scissors worked fine.
Step 6: Connect Driplines & Emitters
Next, you’ll be connecting driplines (1/4″ tubing) into the side of your main line (1/2″ tubing) near wherever you’ll be placing an emitter. Different types of emitters may require different connections, so don’t start making holes all willy-nilly.
The bubblers and sprayers in this kit came with the correct barbed connectors attached. Just use pressure to puncture them into the side of your main line. The kit did include a tool to help with this, but I didn’t use it much.
For most drippers, you will poke them directly into the main line and then attach your 1/4″ tubing to the other end. If your dripline is quite long, however, it’s recommended that you install the dripper somewhere within the dripline (ideally within 5ft of the plant). Just cut the tube using scissors and attach the dripper between the cut ends, making sure the correct end faces the water source.
Finish off any of these driplines with a tube stake that will keep your water running exactly where you want it.
How To Correct Mistakes
Oops, you poked a hole in the wrong place? Don’t fret! The kit comes with several “goof plugs” which can be used to plug up the end of 1/4″ tubing or any small holes you make in your main line. If the hole is too large for a goof plug, you may need to cut the bad section out and use couplings to install a bit of new hose.
One warning, though. Once you place any barbed end into the 1/4″ tubing, it can be tough to remove. You may just need to cut off the errant piece and use another. Nothing is too complicated though. I made plenty of mistakes and was able to have a great working system by the end of a few hours. Really, you can do this. It’s the opposite of rocket science.
Step 7: Test & Program Timer
Once you have all of your driplines and emitters in place, it’s time to turn on your water and test your system. Use this test run to:
Check for leaks near your hose bib or in any of your lines. Tighten connections to fix any.
Make sure all emitters are dispensing properly. Sprayers and bubblers may need to be twisted open to work.
Refine placements and spray patterns. Make sure water is reaching the places you intended. Adjust bubblers and sprayer heads to change spray distances.
Look for overlap or overspray. Move or adjust spray patterns if areas are getting watered by multiple emitters. Try to limit overspray on sidewalks, driveways, fences, and siding.
Once you are happy with everything, take a moment to program your timer. It is generally better to do 1 or 2 deep waterings a week (versus short daily waterings). Deep waterings that soak the soil encourage stronger, more drought-tolerant roots.
Step 8: Dig In or Mulch Over (Optional)
Lastly, you may choose to dig in or apply a layer of mulch (or soil) atop your hoses. This is optional and purely for aesthetics, although some coverage can protect hoses from damage. Just be warned that burrowing rodents like moles may chew through buried lines looking for water. And buried lines may be harder to spot leaks in and repair. So in most cases, a thin layer of mulch is a good compromise.
More Garden DIY Projects
Want more ideas to upgrade or maintain your outdoor areas? Here are some other posts you might enjoy:
*This post contains affiliate links, so we may earn a small commission when you make a purchase through links on our site at no additional cost to you.
So, it’s always helpful to have a little refresher on the ins and *specifically* outs of your general household waste bin. The best kitchen bin shouldn’t be a catch-all for things you don’t know what to do with. These are five items you should never put in a household bin.
Latest Videos From
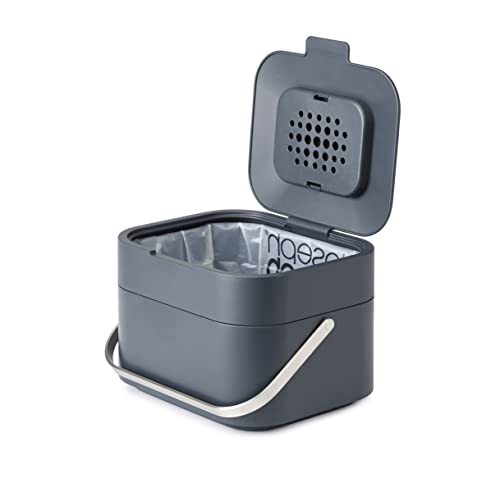
1. Food waste
Under the new rules, households in England will be issued a food waste bin, meaning putting your veg peelings in the kitchen bin is a big no-no. This can actually result in less stinky kitchen bins, especially if you opt for an odour-absorbing food bin such as the Joseph Joseph Food Waste Caddy (£29.99, Amazon).
(Image credit: Getty Images)
‘In areas of the UK where food waste is now collected separately, food should be kept out of the general household waste bin where possible and only put into the food waste bin. The separate food waste collections allow for it to be processed more efficiently,’ adds Ryan Kaila, waste and recycling expert at Kingfisher Direct.
2. Vapes, batteries and small electricals
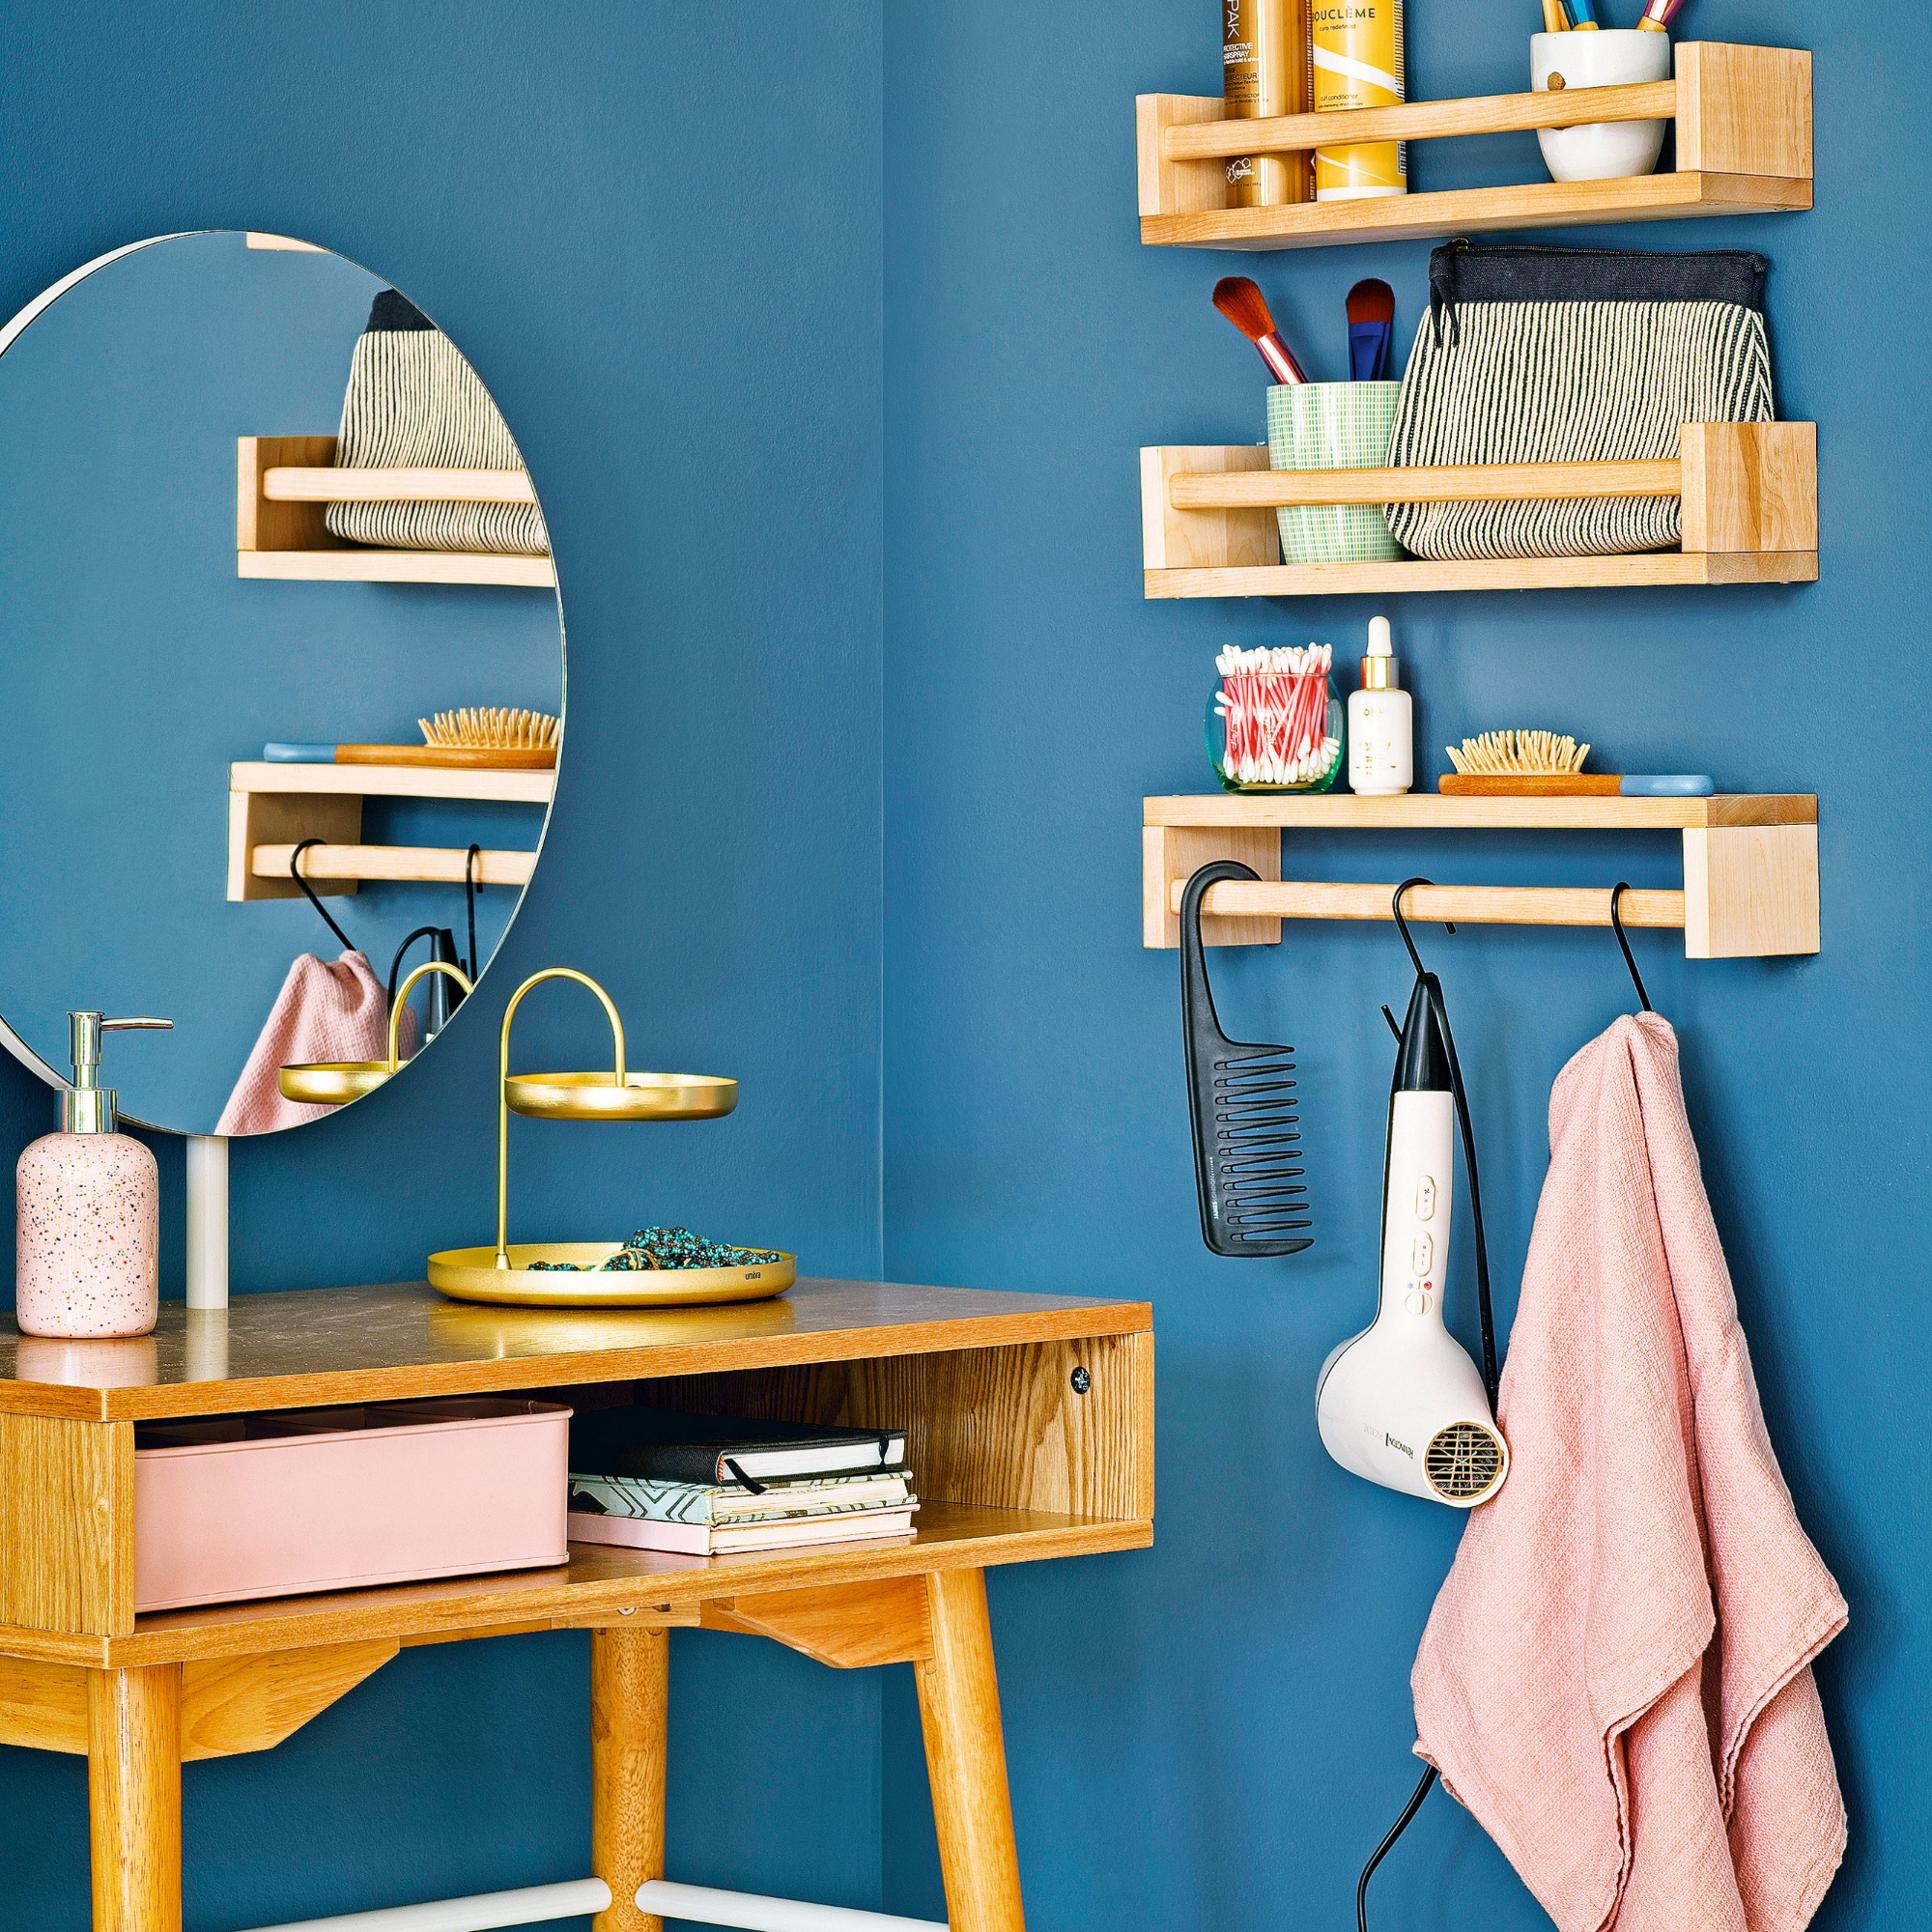
You must avoid putting these items in your kitchen bin at all costs. This is because they pose a fire risk, which puts you and the waste collectors at risk. Small electricals refer to a number of appliances, including small toys, cables and even hairdryers.
(Image credit: Future PLC/Dominic Blackmore)
‘We’re seeing a worrying increase in fires caused by items that simply shouldn’t be placed in household recycling or general waste. The biggest culprits are vapes, loose batteries and small electricals – what we often call ‘hidden hazards’ or ‘bombs in bins,’ says Luke Walter, regional manager at the Aldridge depot for waste management company Biffa.
Sign up to our newsletter for style inspiration, real homes, project and garden advice and shopping know-how
‘These items contain lithium-ion batteries. If they are crushed or damaged during collection or processing, they can spark and ignite extremely quickly. In a split second, that can turn into a serious fire in a collection vehicle or at a recycling facility, putting our crews at risk and causing significant disruption to local services.
‘Instead, they should be taken to designated recycling points at supermarkets or household waste recycling centres, where they can be handled safely and recycled properly.
We know most residents want to do the right thing, but there’s still confusion about what belongs in the recycling bin. Anything with a plug, battery or cable should be kept out.’
3. Medical waste
‘Any medical waste, including sharp tools, syringes and even medications. Sharp items can injure sorting staff at waste facilities, and medications can pose a risk to the environment. Dispose of sharp medical waste through a specialist collection system, or take sharp medical waste and waste medications to a pharmacy for safe disposal,’ says Ryan.
(Image credit: Future Plc)
Your doctor or chemist should be able to provide you with a sharps bin if you need one. Or you can pick up a sharps bin for £6.51 at Amazon. You may be able to dispose of medical waste via your doctors or chemist, or you need to arrange a Clinical Waste Collection from your local council.
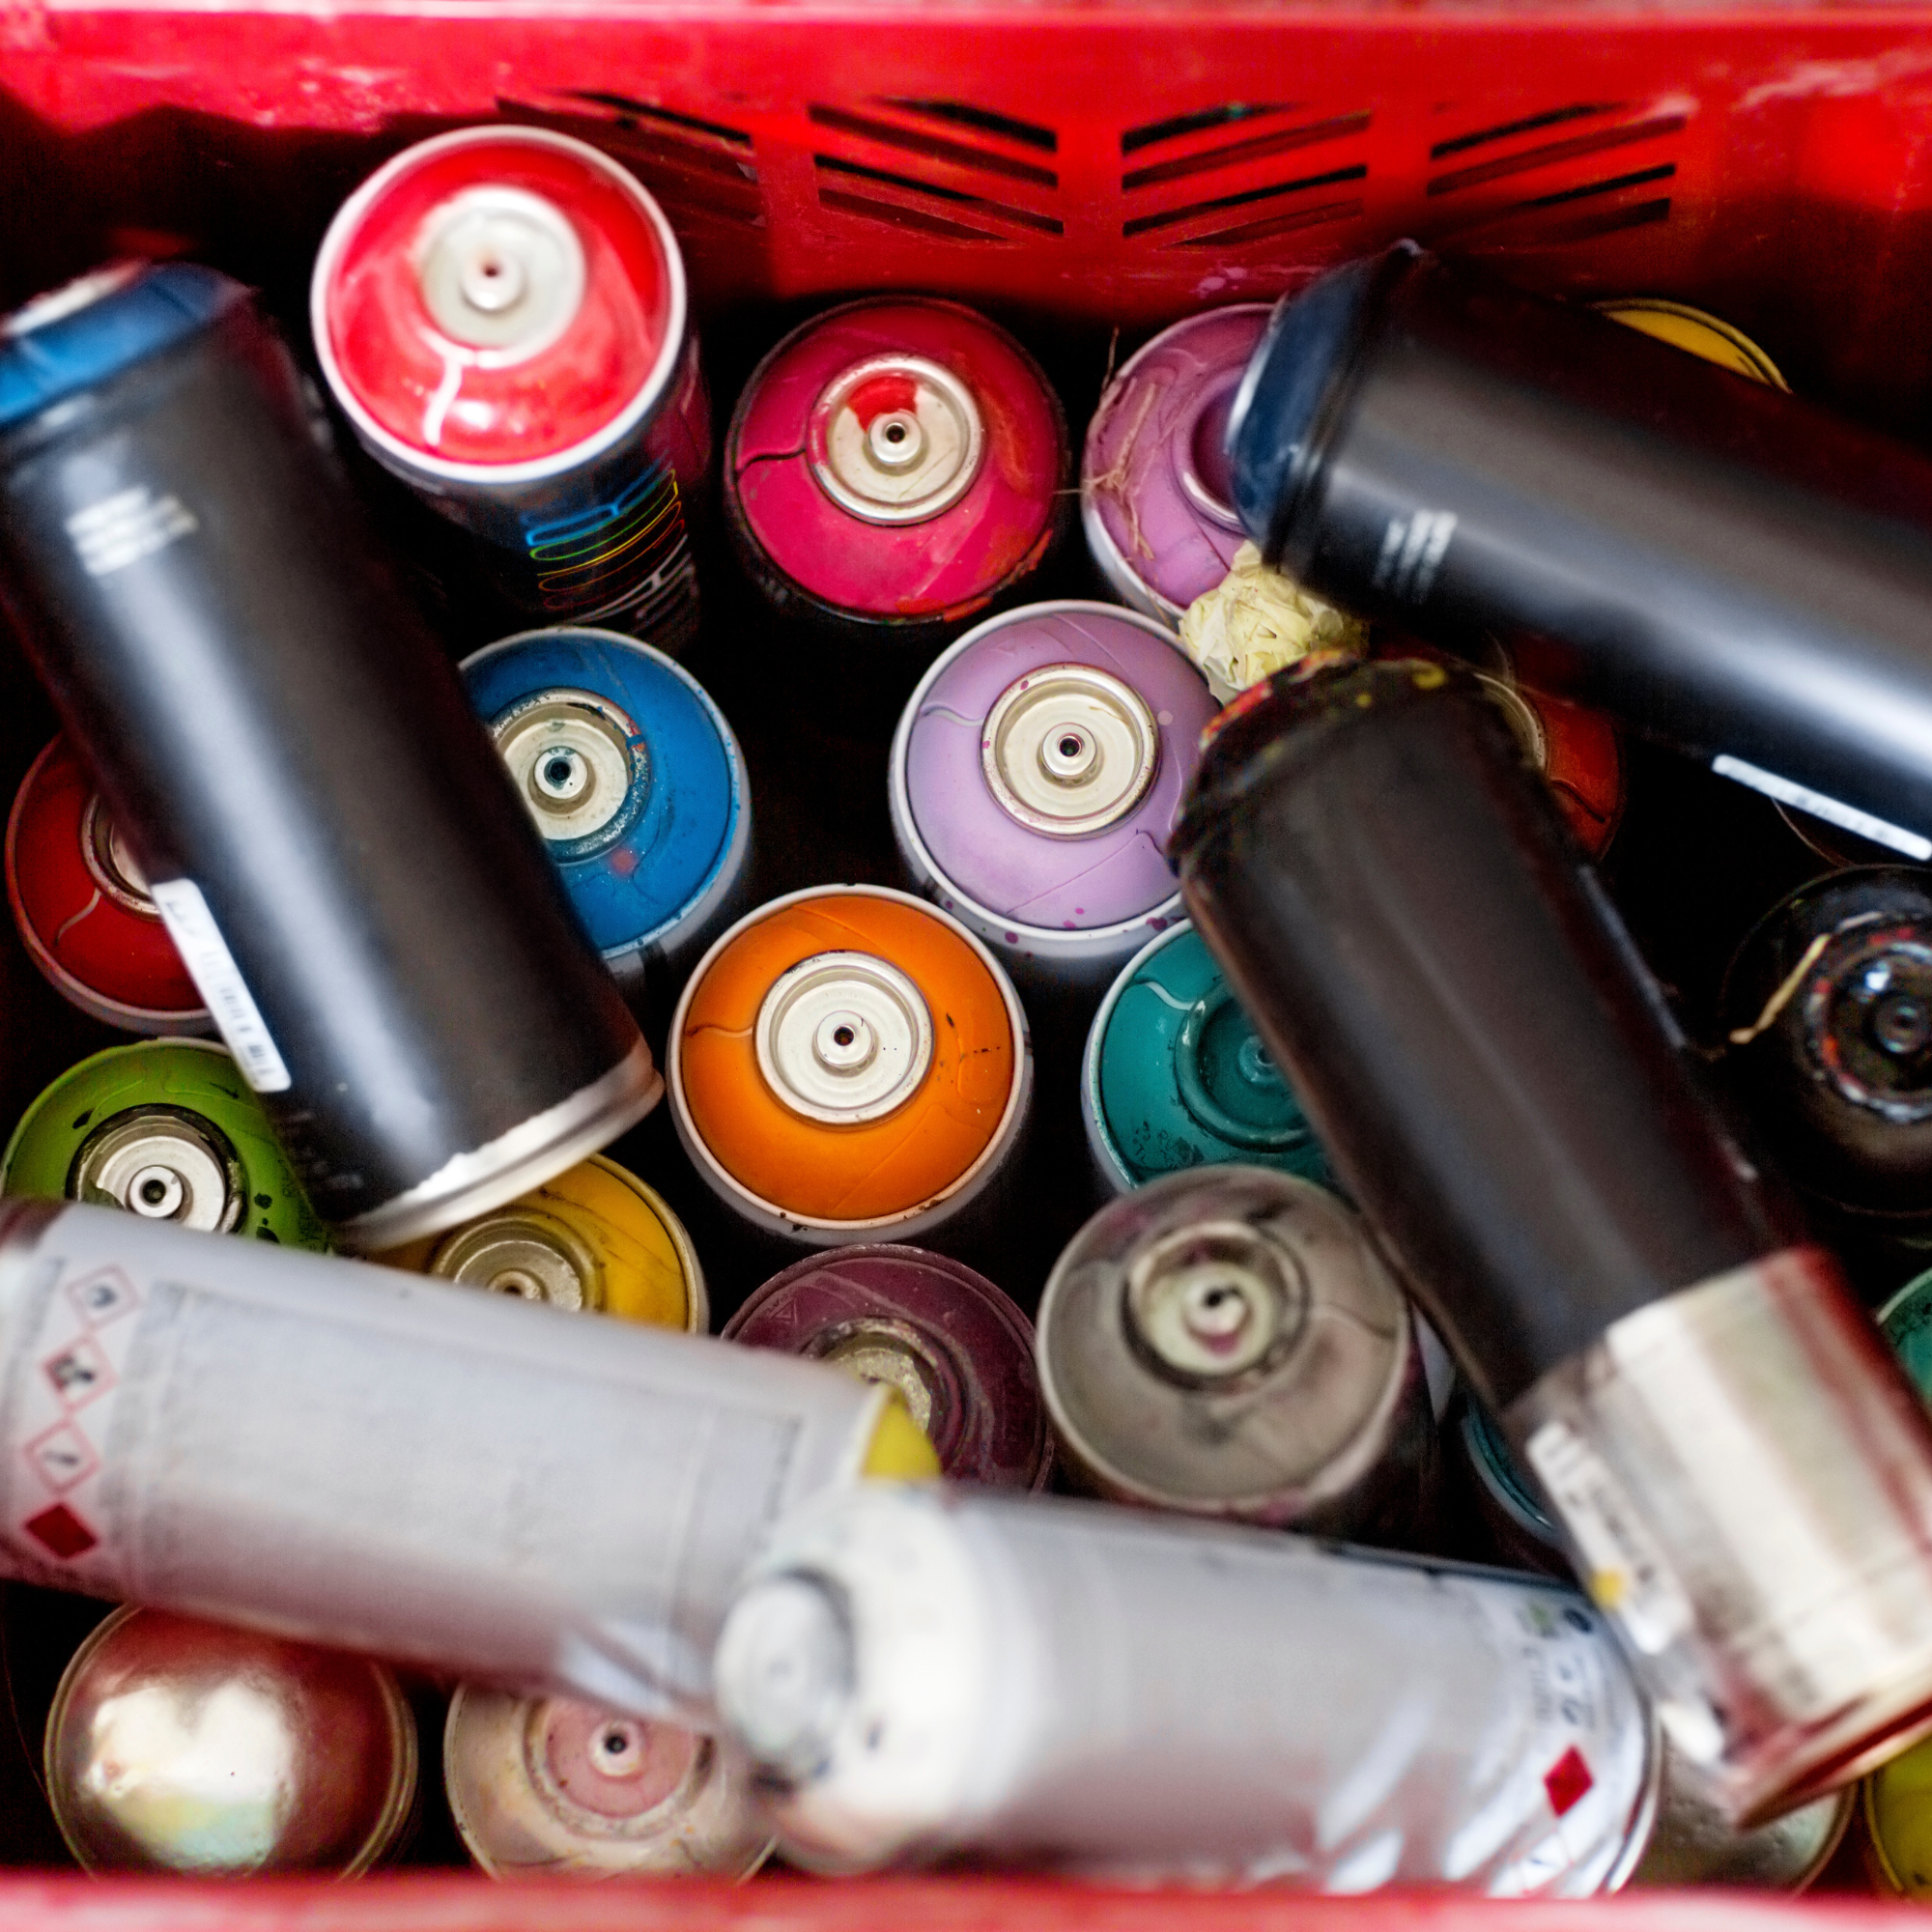
4. Gas canisters and aerosols
It is perhaps common sense that anything flammable should never go in your bin. This is not only to keep you safe, but to keep waste collection workers safe, too. You should instead take these items to a local recycling centre.
(Image credit: Getty Images)
‘Items like gas canisters, aerosols, and anything flammable are a major fire risk and should never go in standard household recycling,’ says Luke.
‘These fires are preventable. By taking a moment to dispose of these items correctly, people can help protect frontline workers, prevent damage to vital infrastructure, and ensure more materials are recycled safely and effectively.’
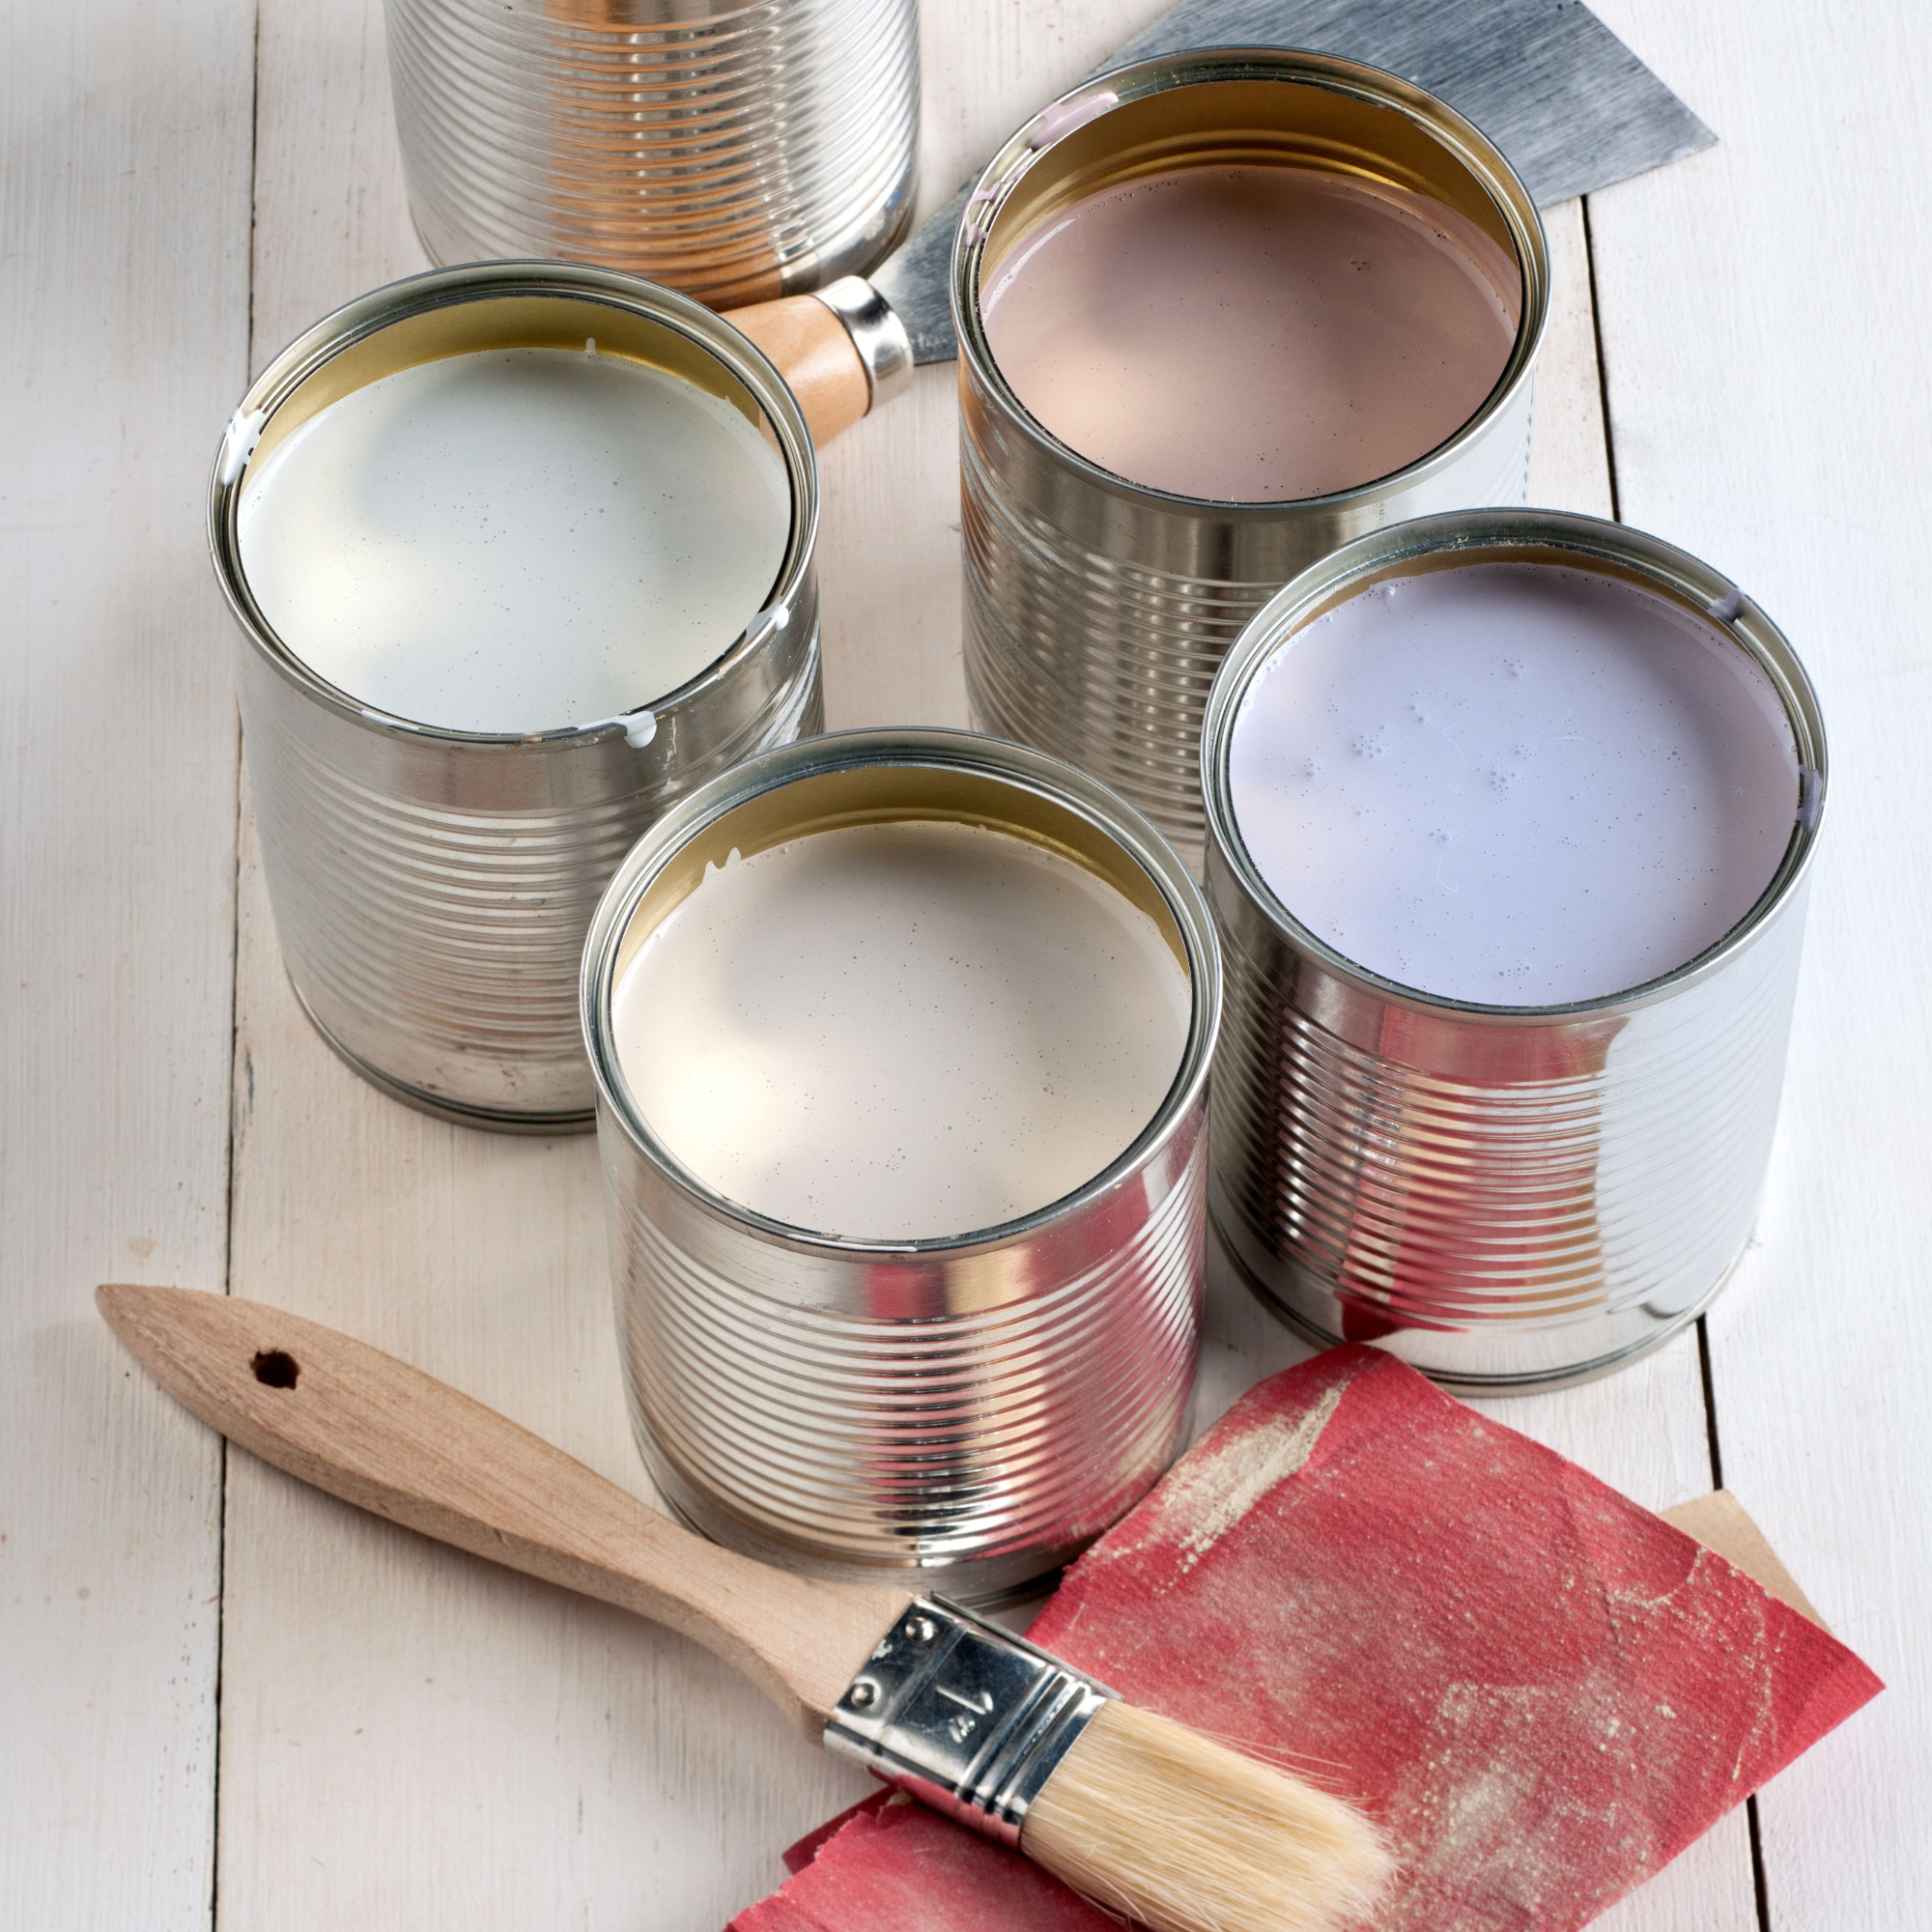
5. Paint
Lastly, if you’re looking to get rid of paint, your kitchen bin is not the answer.
(Image credit: Getty Images)
‘Any kind of paint shouldn’t be poured into bins or placed into household waste while it’s still wet, as it can leak, spill and contaminate other waste, which makes it harder for this waste to be disposed of safely and effectively,’ says Ryan.
‘Paint can also contain chemicals that shouldn’t be sent to landfill or standard waste processing facilities, as doing so could damage the local environment. Check your local council’s waste guidelines for paint disposal instructions.’
Sort your waste easily
Joseph Joseph
Joseph Joseph Food Waste Caddy
Invest in a well-made food waste bin and sit it near the kitchen sink.
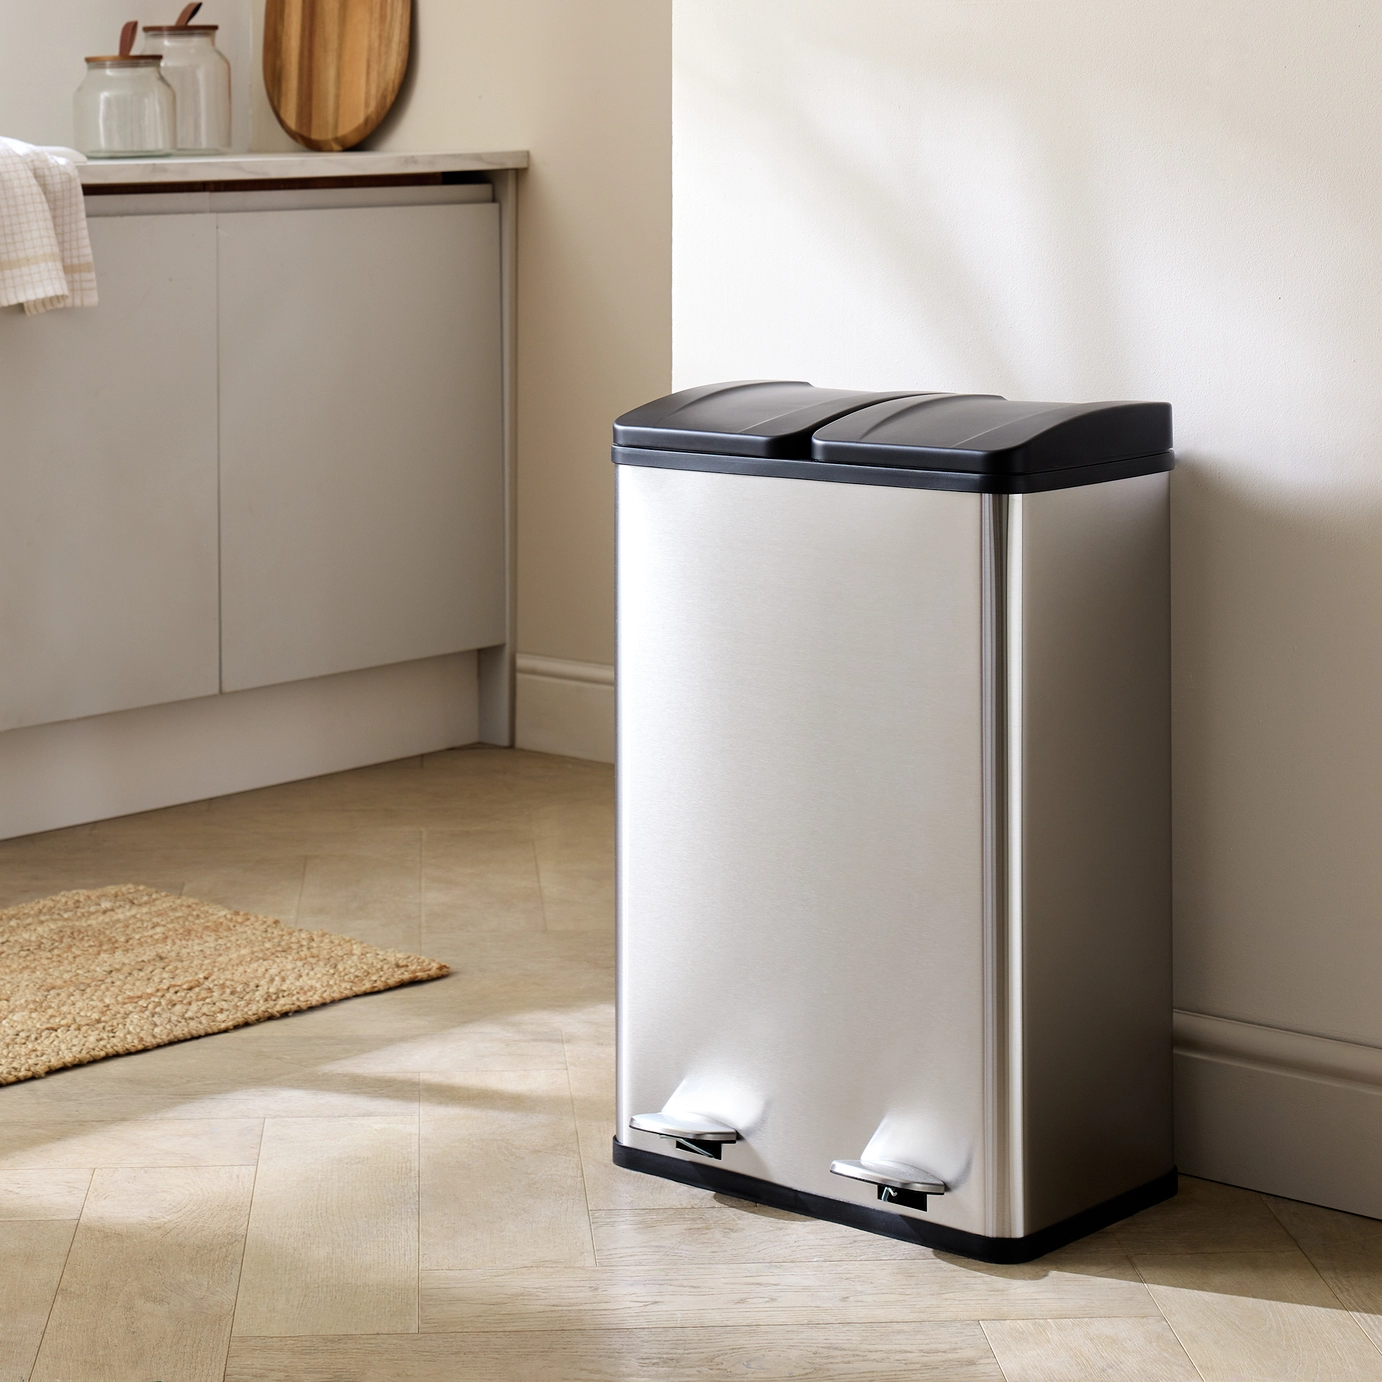
Habitat
Habitat 55 Litre Twin Compartment Pedal Bin – Steel
A twin compartment bin will make recycling feel more streamlined and second nature in a busy household.
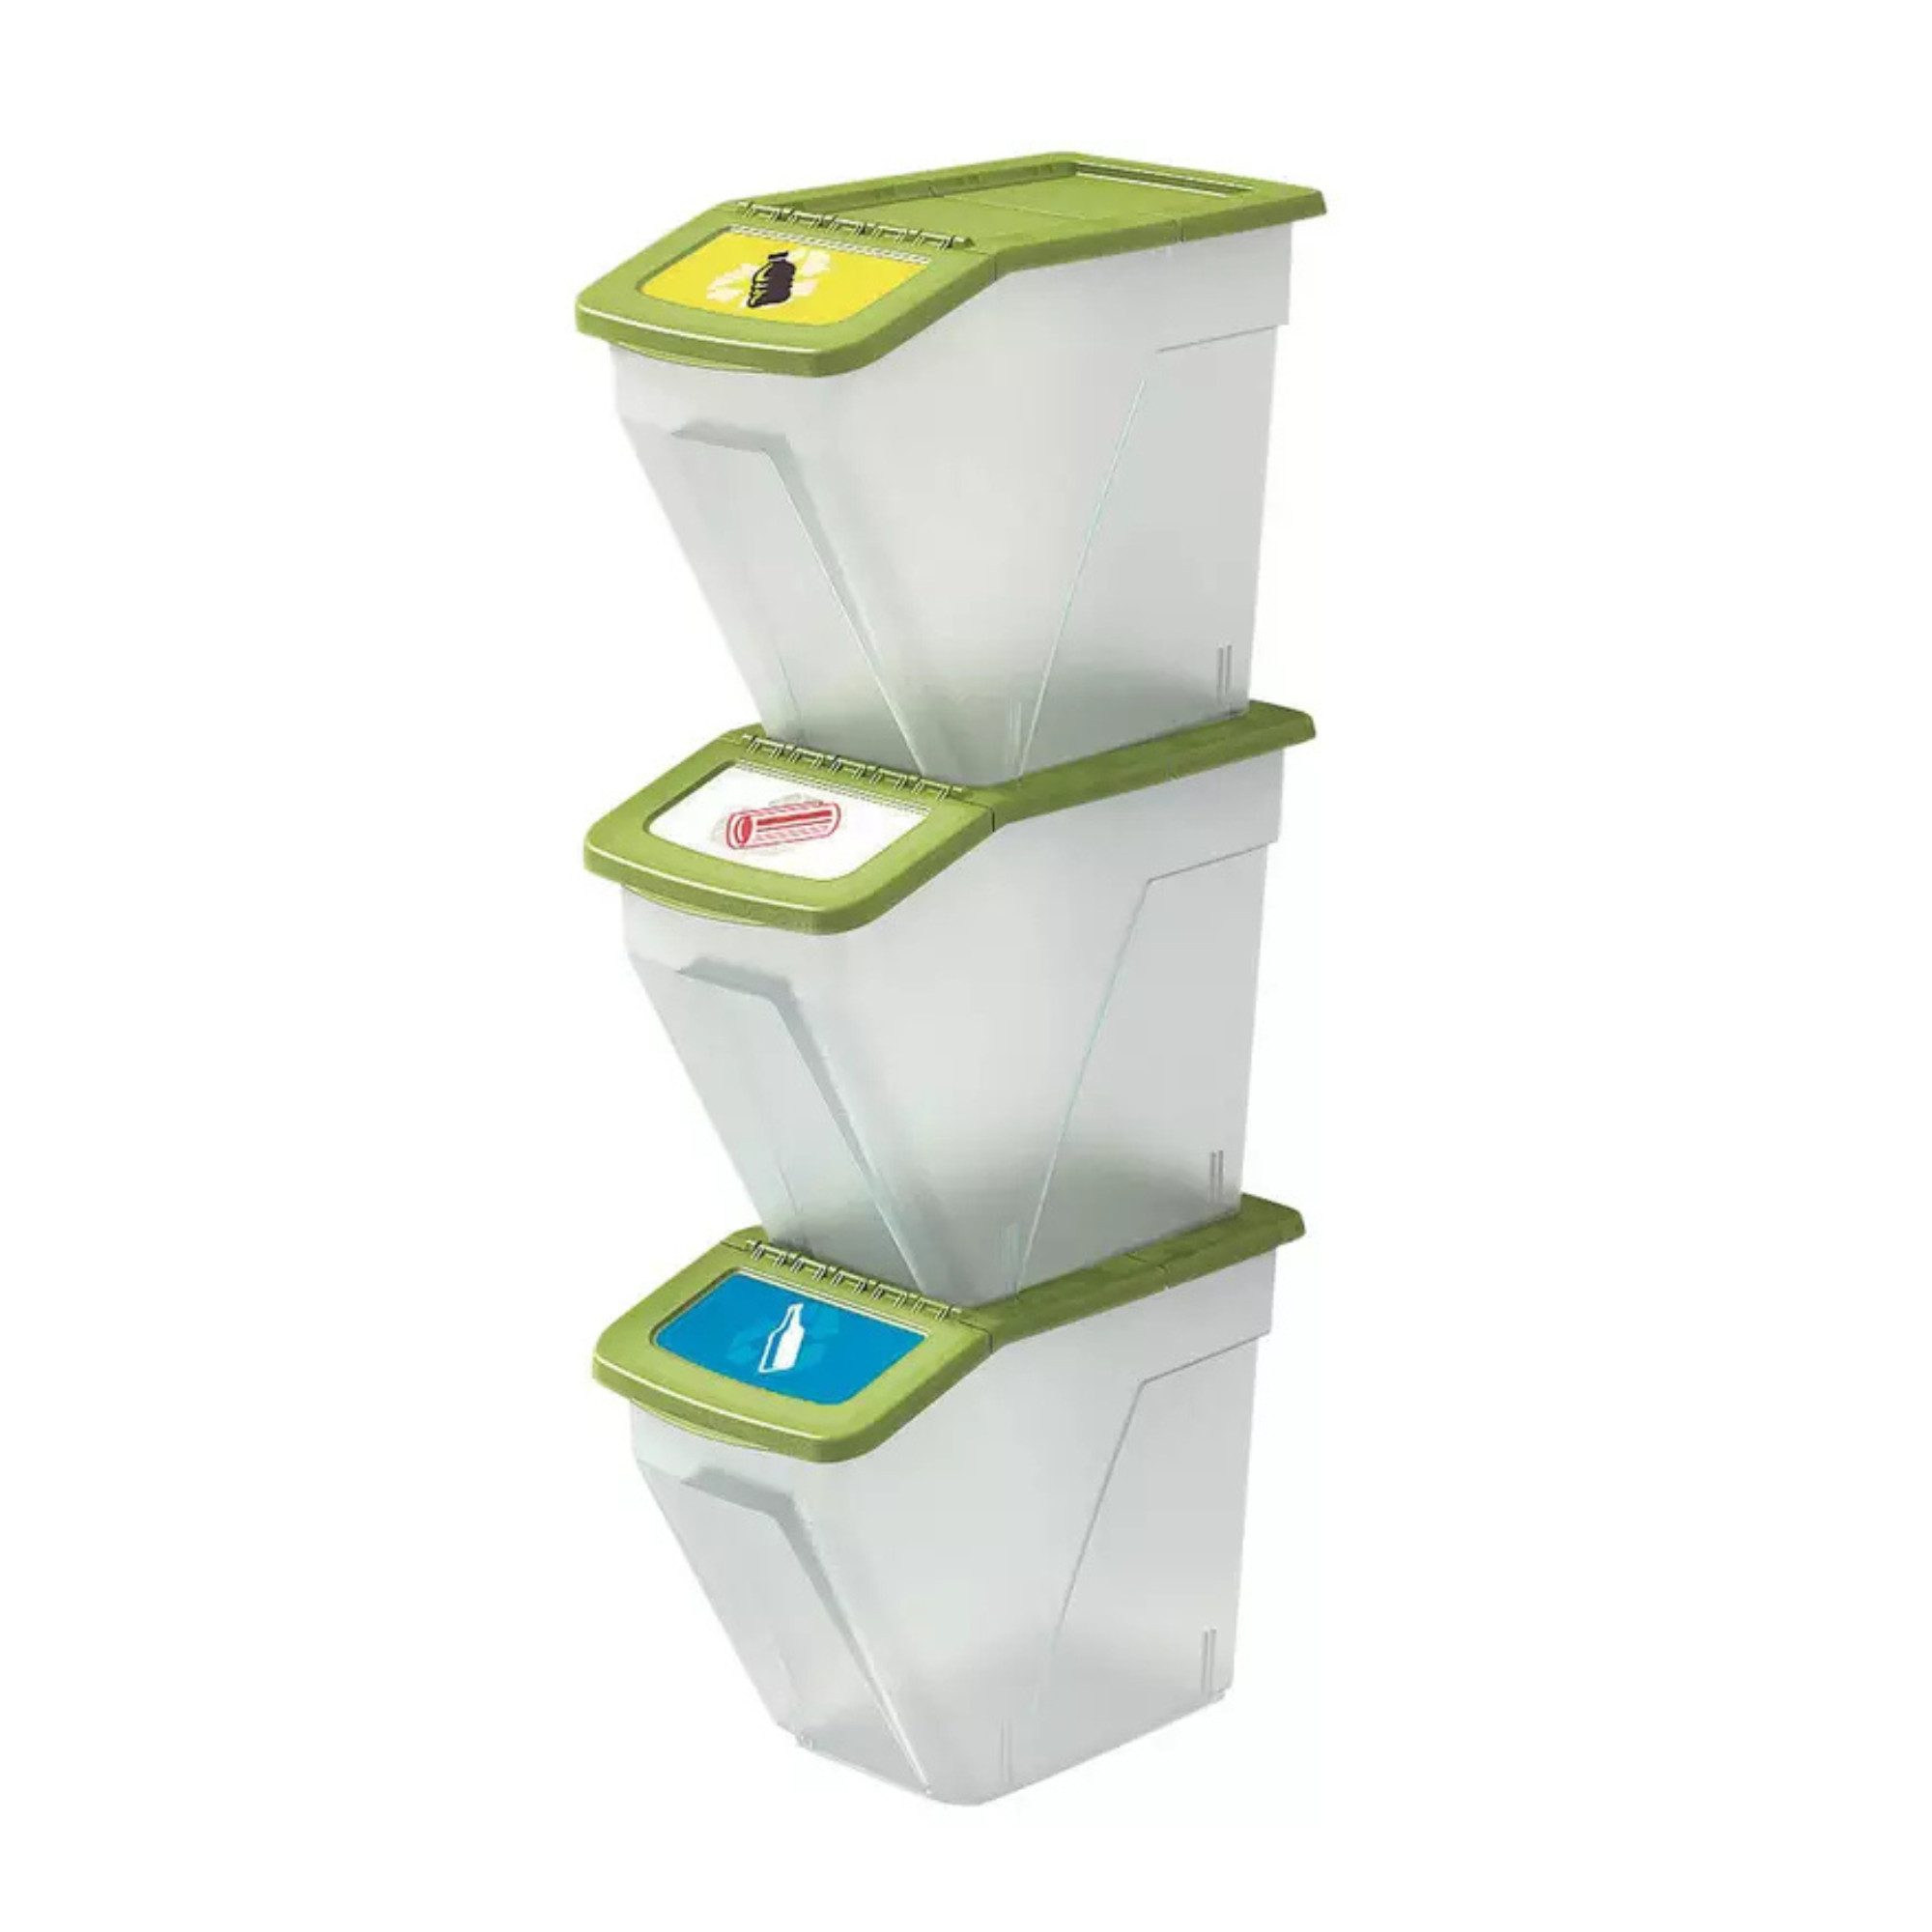
Curver
Curver 34 Litre Recycling Bins – Set of 3
If you need more recycling space, these stackable bins are a great alternative. You could even use them in a garage to organise things to go to the local tip.
If you’re in doubt about what items you can put in your bin, you should always check your local council’s website for more information.
If you enjoyed reading this, sign up for the Ideal Home newsletter for all the latest home decor trends and inspiration delivered straight to your inbox
Regardless of what the year’s lighting trends are saying, an Addison Ross lamp is always in fashion. The cult brand is favoured by many of the Ideal Home team, and if a home’s editor hasn’t already got one of the Bobbin LED Lamps on their nightstand, I can promise you that it is on their wishlist.
But at £125, the cult Addison Ross beauty is not the most affordable for rechargeable lighting options, and this is where a good lookalike comes in handy. And I’d say Dusk’s £25 version looks pretty good.
Latest Videos From
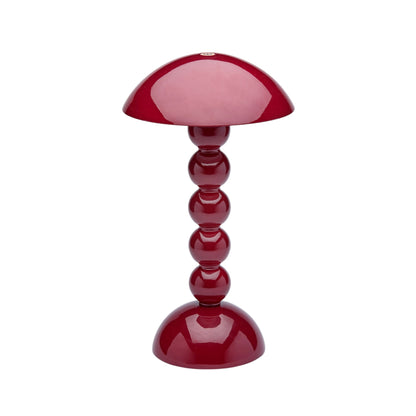
Addison Ross Ltd UK
Cherry Lacquer Rechargeable Bobbin Led Lamp
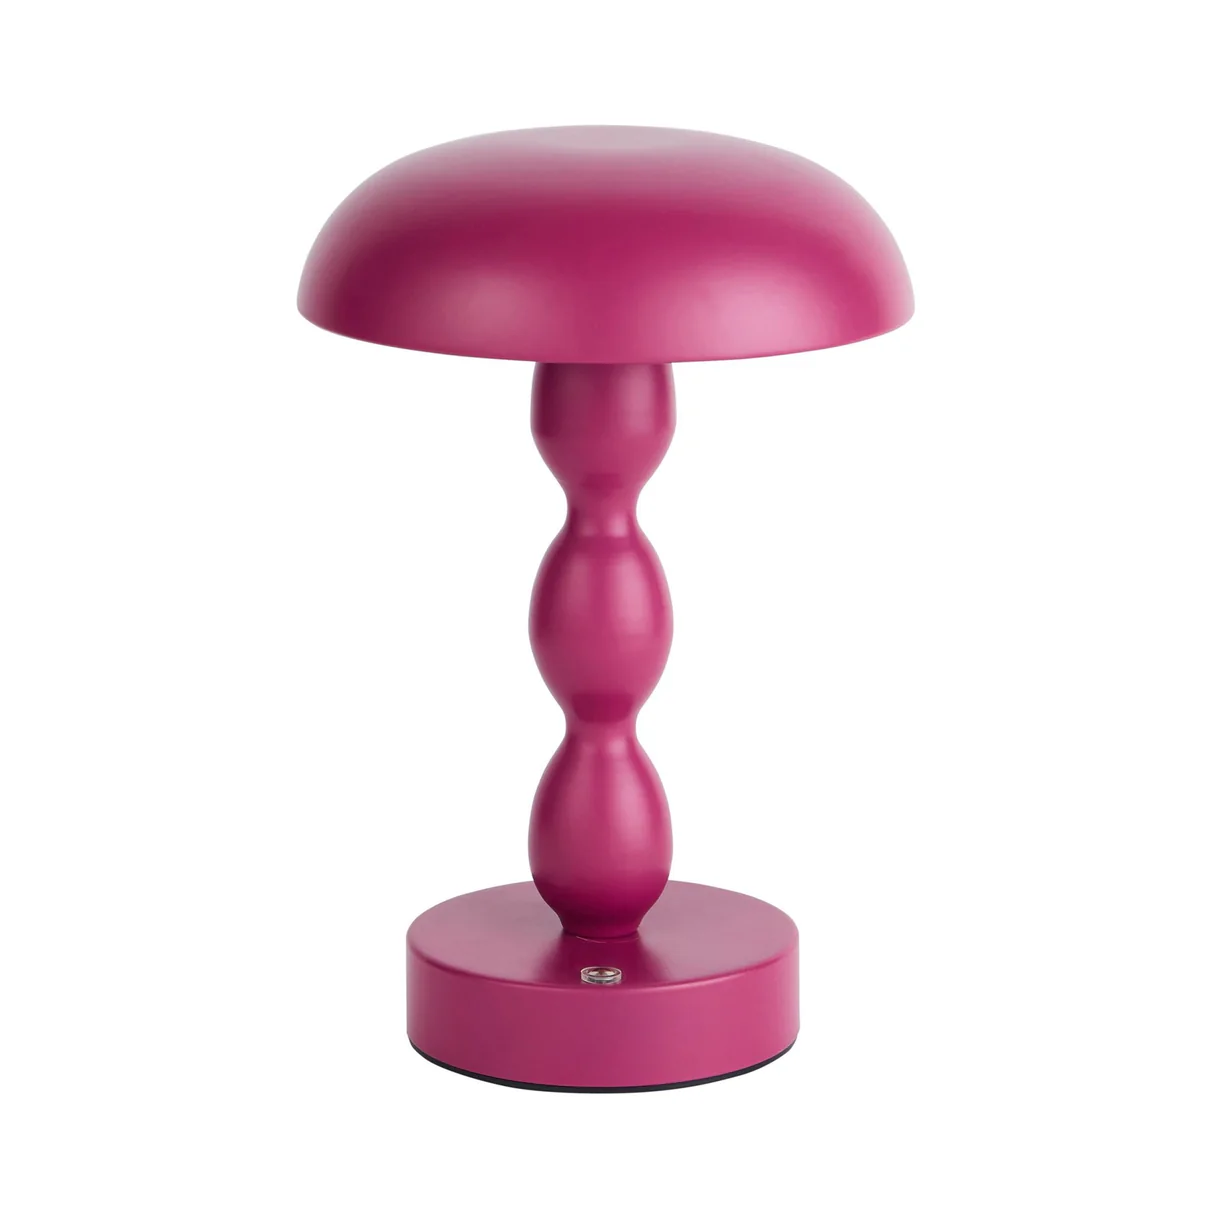
DUSK
Kirsty Rechargeable Bobbin Table Lamp – Plum
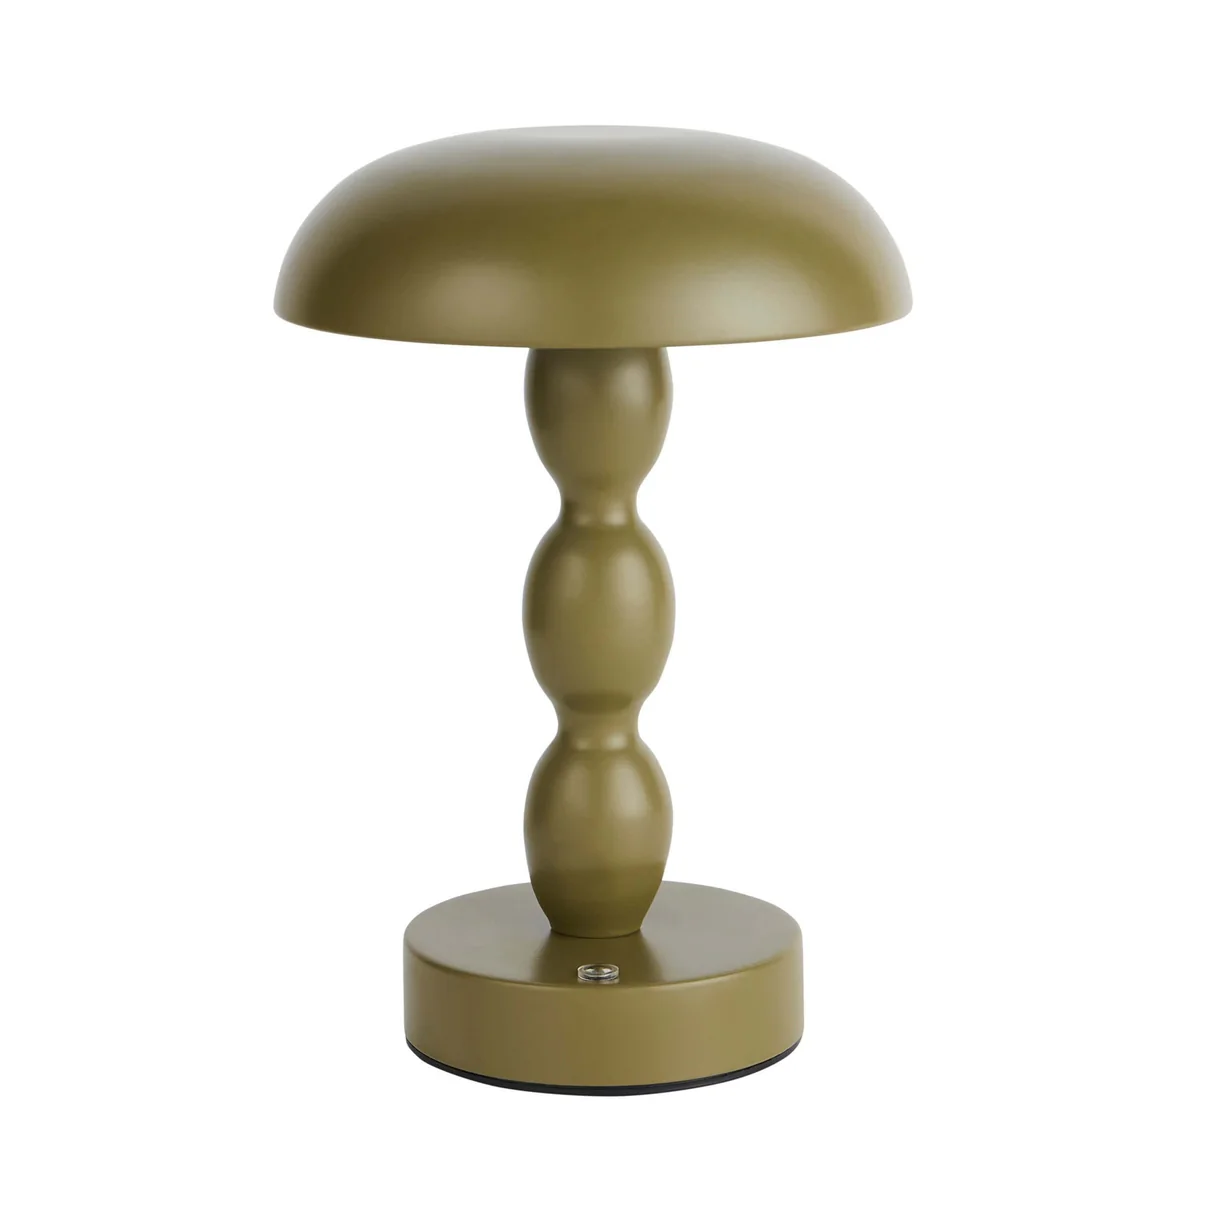
DUSK
Kirsty Rechargeable Bobbin Table Lamp – Green
If you don’t already know Dusk, it’s certainly worth getting to know the online retailer, as they are great for dishing up on-trend styles on a budget. Dusk’s designer-look lighting is especially worth having a look at, and having a few Dusk pieces in my own home, including throws, bedding, candles and the Lucille Rechargeable LED Lamp (£35), I feel I can vouch for the brand’s quality.
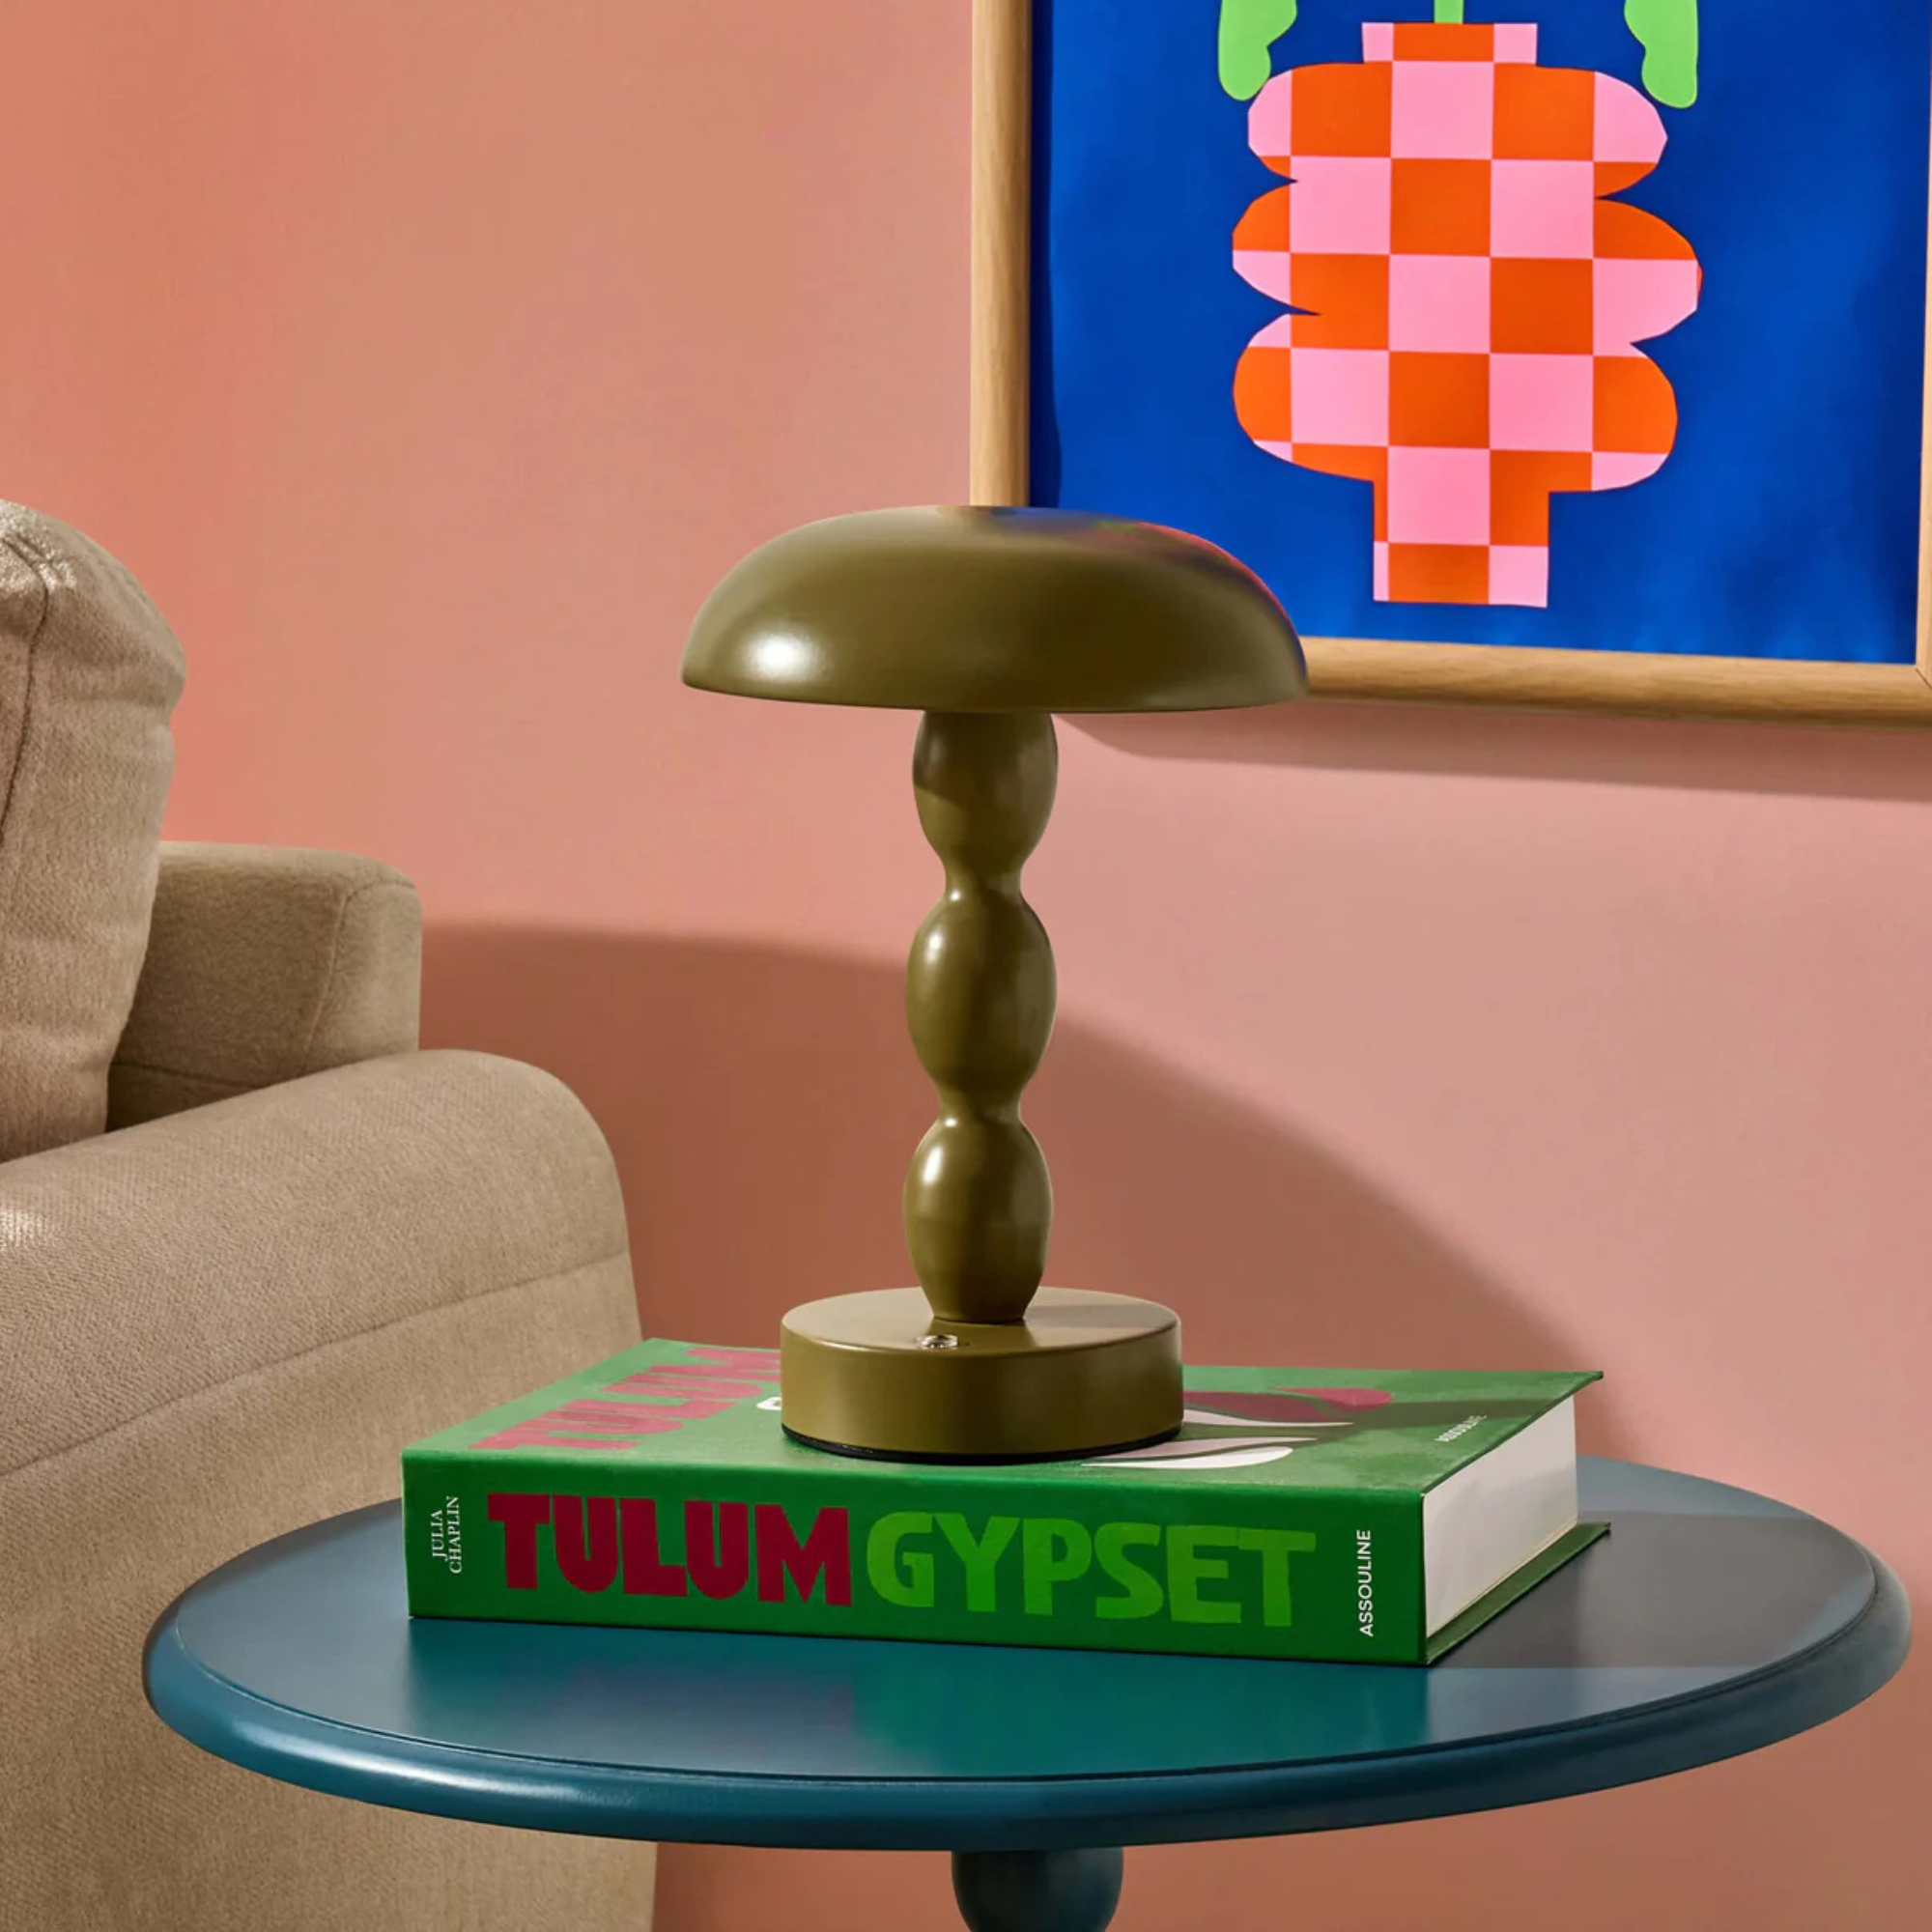
This is why I’d opt for the Kirsty bobbin lamp if I were looking for an alternative to the Addison Ross bobbin lamp. Available in two colours, Plum and Olive, Dusk claims the lamp will be a ‘playful’ addition to your home. I’m inclined to agree.
With a quirky bobbin base and a bold pop of colour, this lamp will add a decorative touch to shelves, nightstands or even kitchen worktops (if you don’t have a kitchen lamp, you really should consider it!). As it is rechargeable, you don’t have to worry about plug space; simply pop the lamp wherever you need to illuminate a dark corner.
(Image credit: Dusk)
My main criticism of the Kirsty lamp is that it lacks the bold, beautiful lacquered finish of an Addison Ross lamp. Available in a variety of bold colours, Addison Ross lamps are famous for their glossy, luxurious finish, which is achieved by 10 coats of lacquer. Of course, for just £25, I can’t say I expected the Dusk lamp to be as glossy, but it is something to compromise on.
Sign up to our newsletter for style inspiration, real homes, project and garden advice and shopping know-how
The Kirsty lamp has a charging time of 3.5 hours and has up to 12 hours of operating time. By contrast, the Addison Ross bobbin lamp offers 10 hours of battery light and has three adjustable lighting levels.
If you love Addison Ross but are less sure about its prices, the Dusk Kirsty Lamp is a brilliant alternative. It’s colourful, fun and looks far more expensive than its budget price tag.