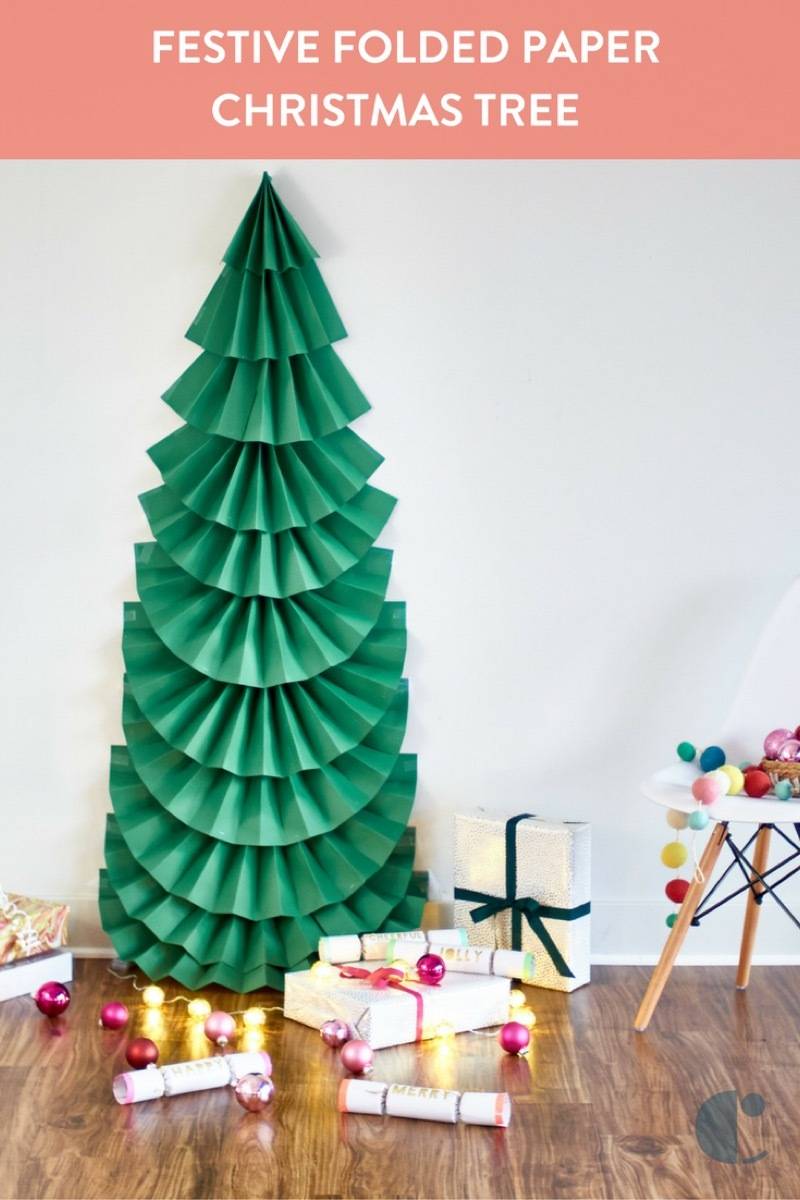
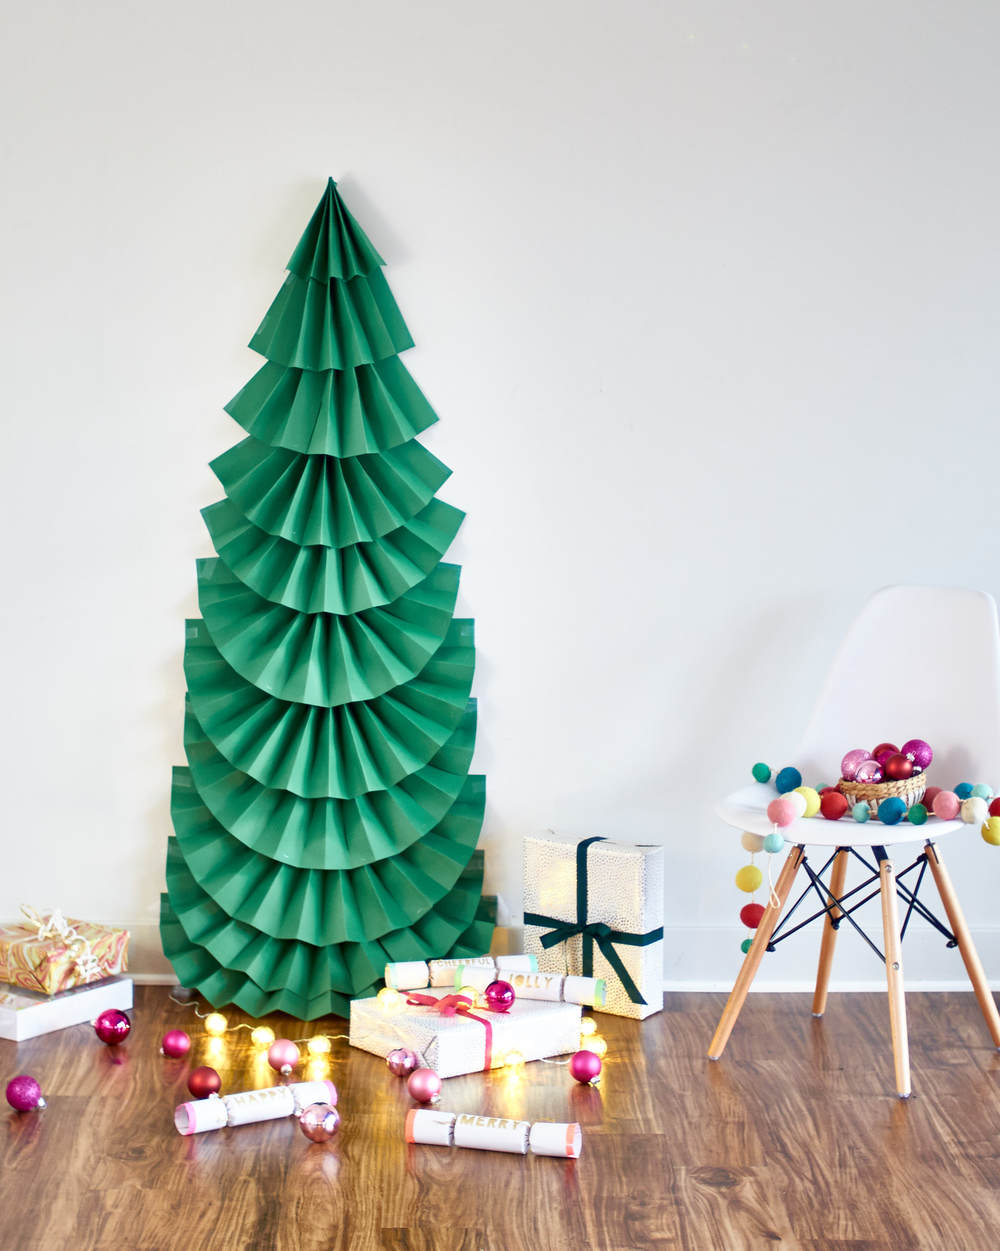
Christmas trees aren’t for everyone. They can be pricey when you’re on a budget, tricky in a small apartment, and nearly impossible with pets.
This year we came up with a super affordable, easy to assemble, clever tree that only requires a wall, a roll of tape, a stapler, dexterous fingers, and about an hour of your time. Right? Right! Let’s make one.
Materials
Step
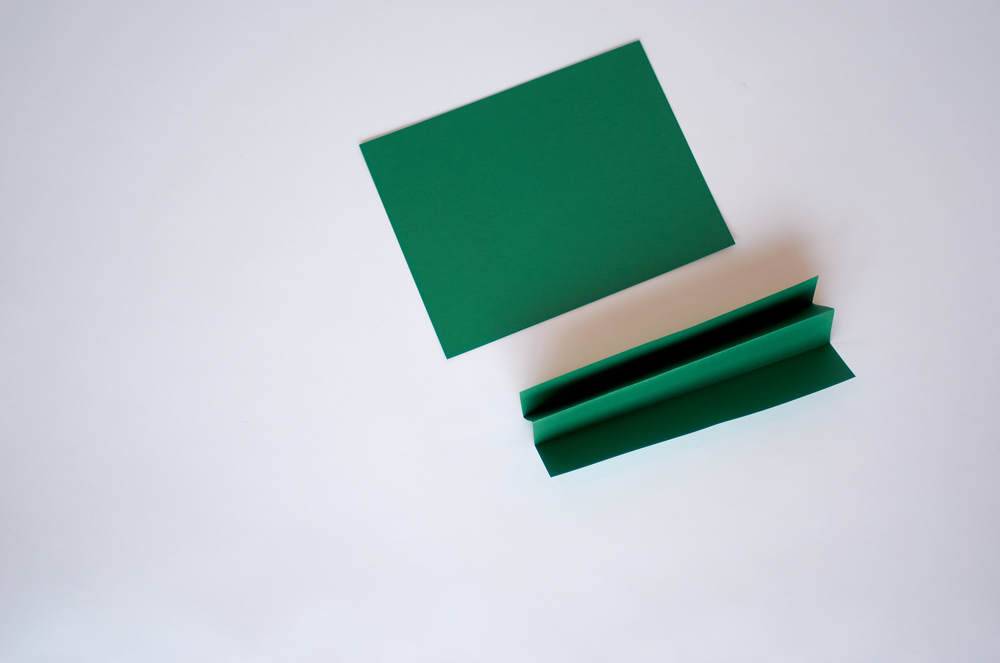
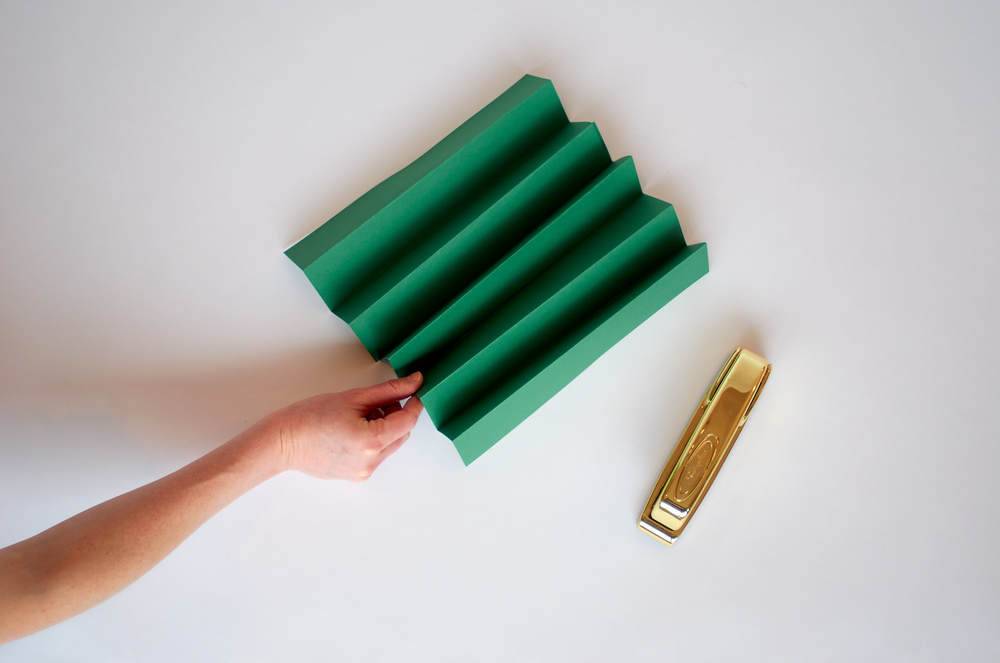
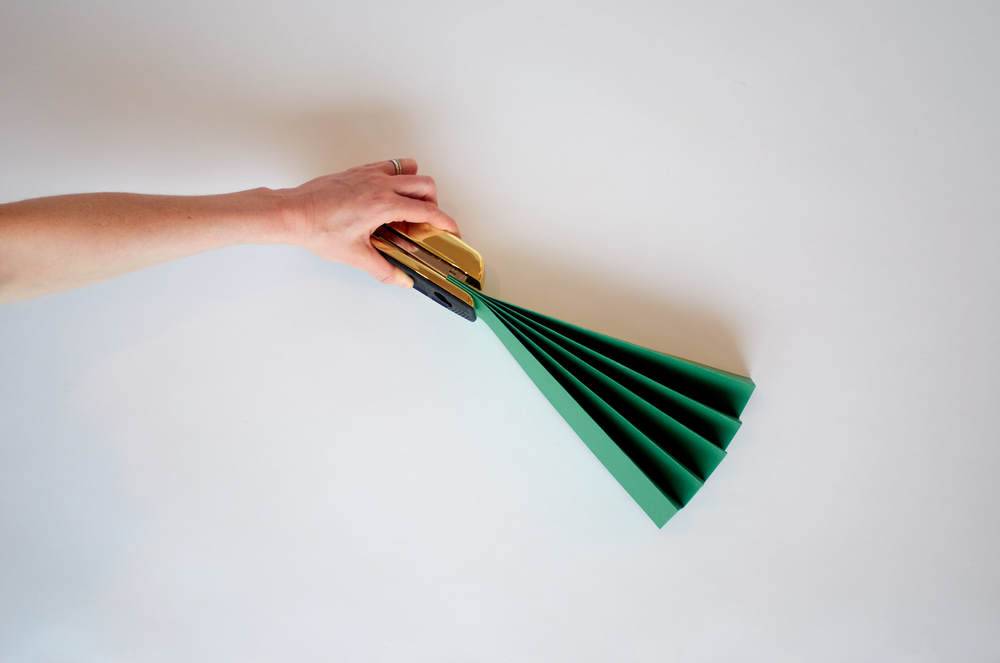
Fold 50 sheets of paper the long way in an accordion pattern. Start by folding the paper in half, lengthwise and then fold the two ends in toward the middle. Your paper will look like the letter “M” (or “W” if you please) while on its side.
Step
Staple the long ends of the paper together and repeat. You’ll want roughly 6 sets of paper that are 10 sheets, or “M”s long.
Step
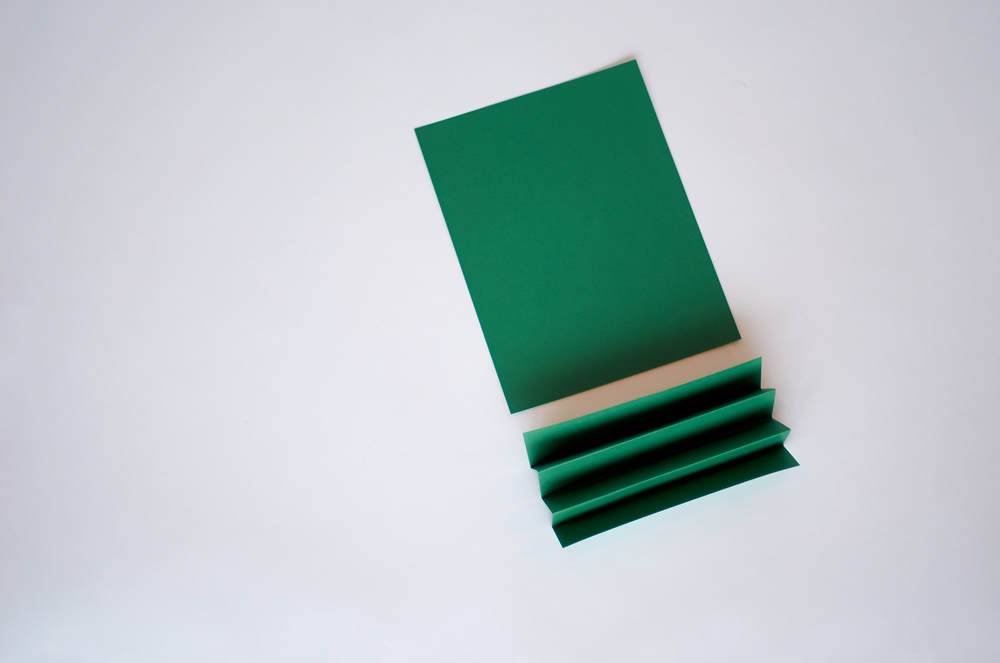
Fold another 30-40 sheets of paper widthwise in the same accordion pattern. You’ll want the height of your fold to be roughly the same size as your previous folds. You can eyeball it or use one of your previous folds as a template.
Step
Staple the short ends of paper together and repeat.
Step
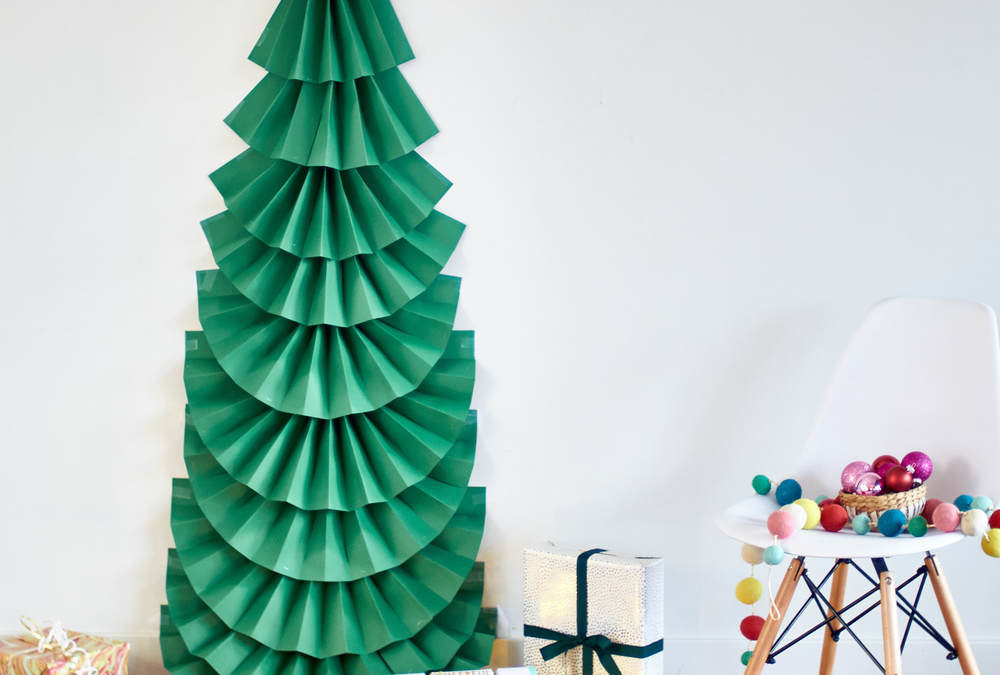
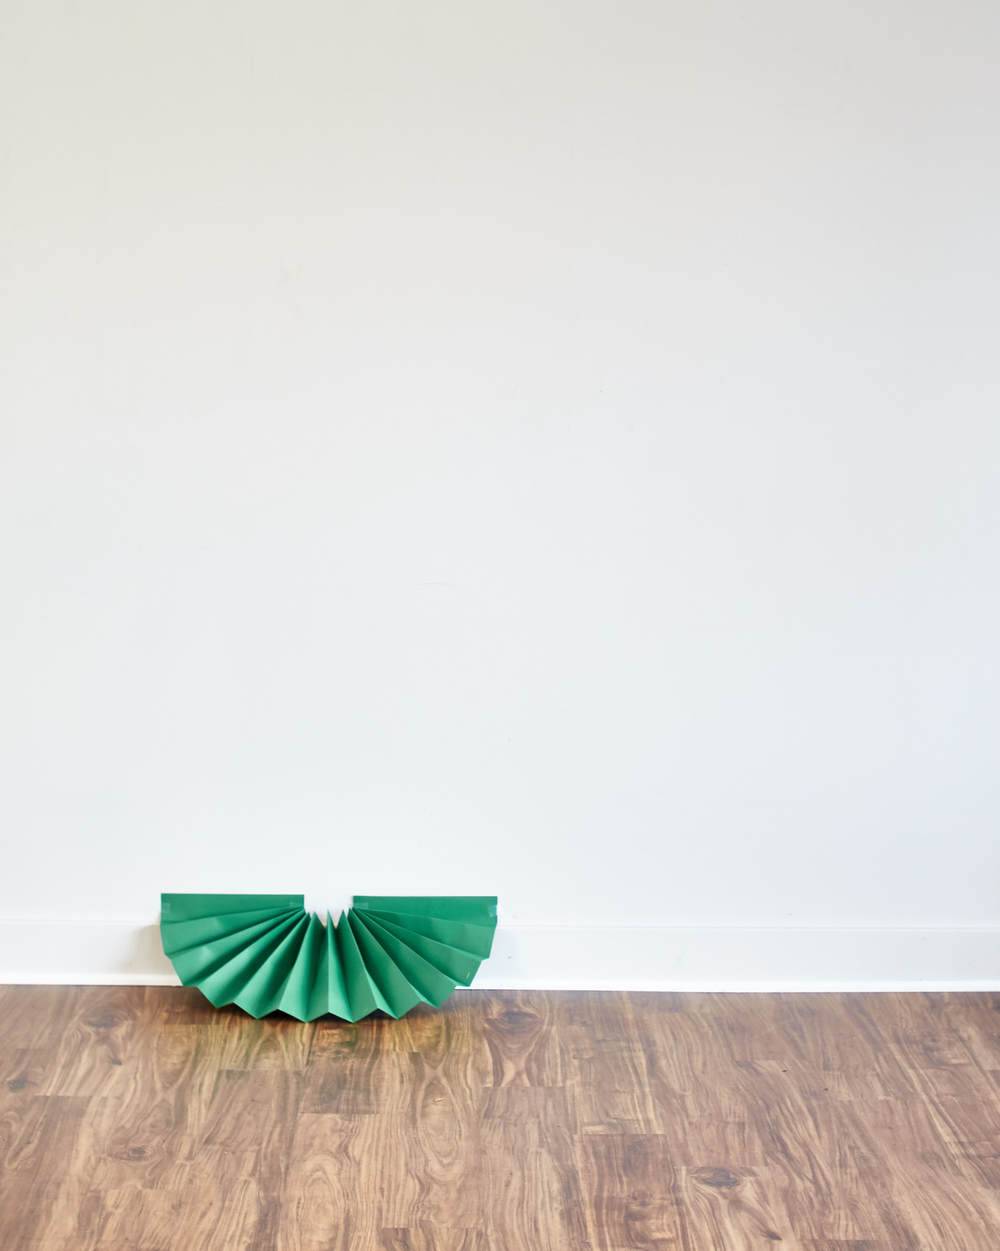
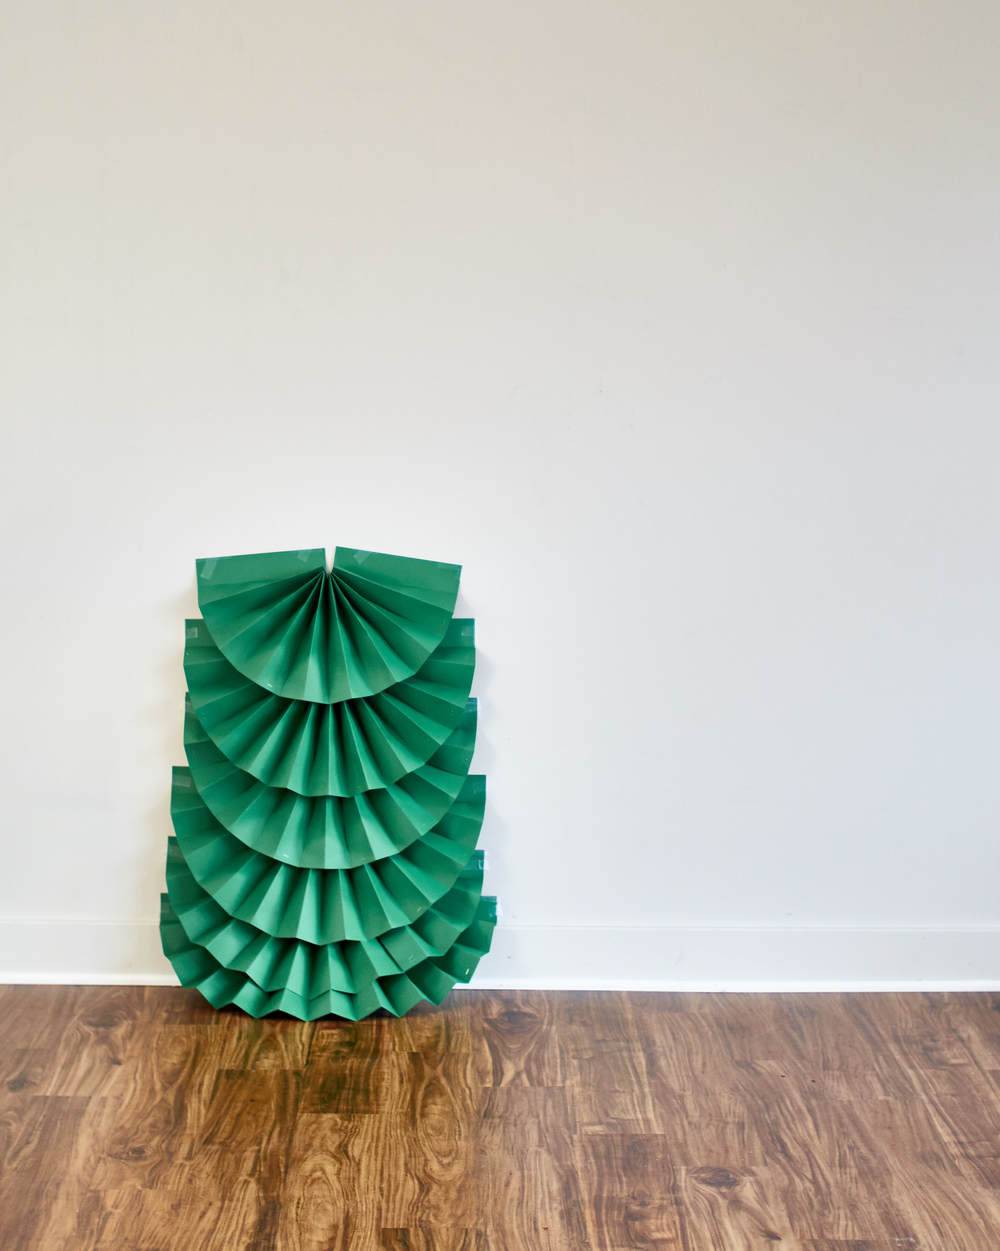
Attach the first set of 10 “M”s to the bottom of the wall with tape. The first layer should be your longest. You can make the subsequent ones shorter as you create a true tapered tree shape. We used Scotch tape for this because I have never had a bad experience with Scotch tape on a painted wall. But, you could easily use removable GlueDots or another adhesive of your choosing. The stapled together “M”s will have a fan-like look and you’ll want to let the drape that occurs with the weight of your paper hang a little bit. It makes it more tree-like as you build up your tree.
Step
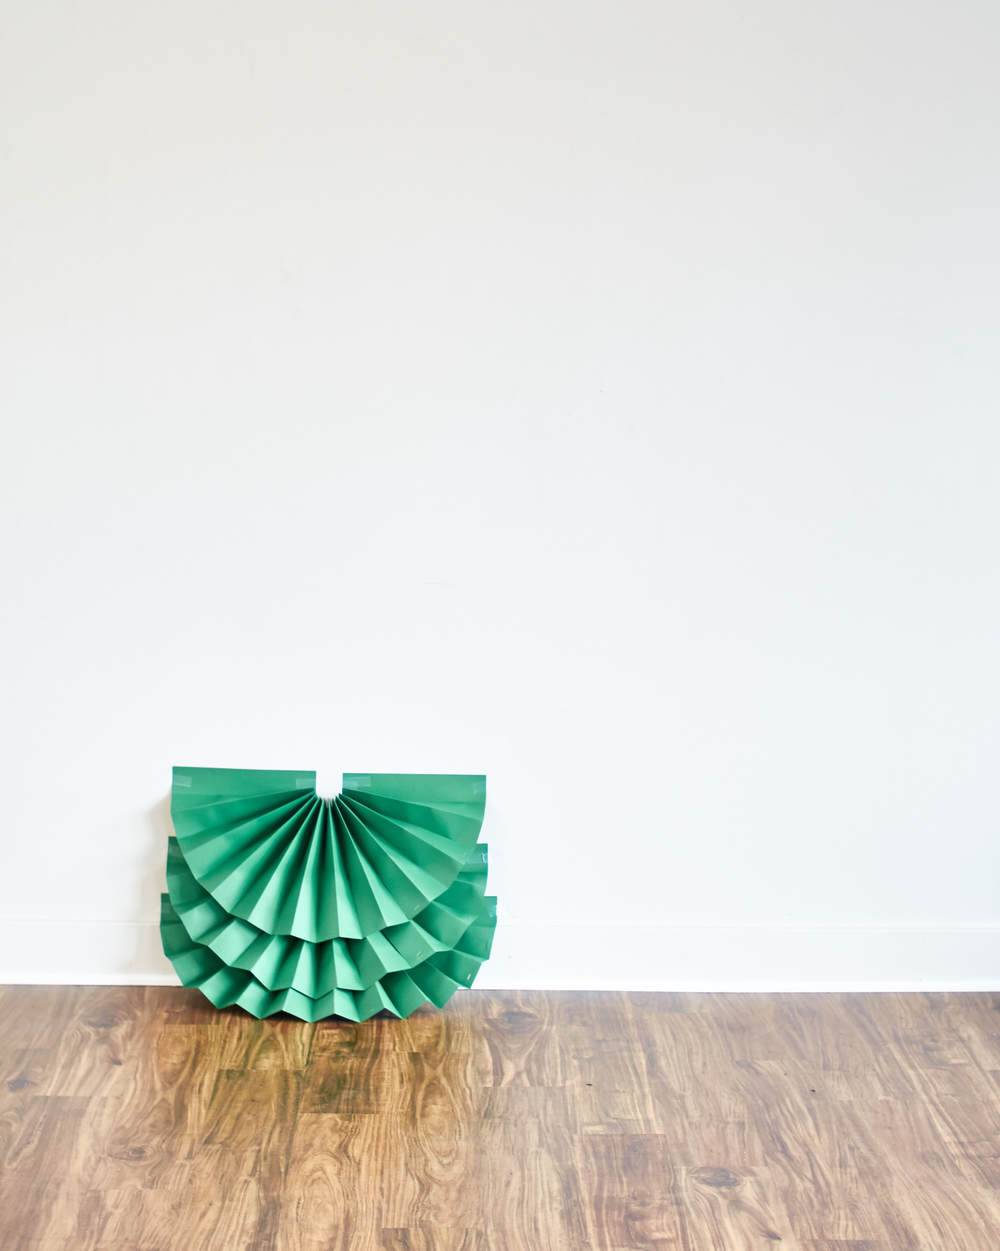
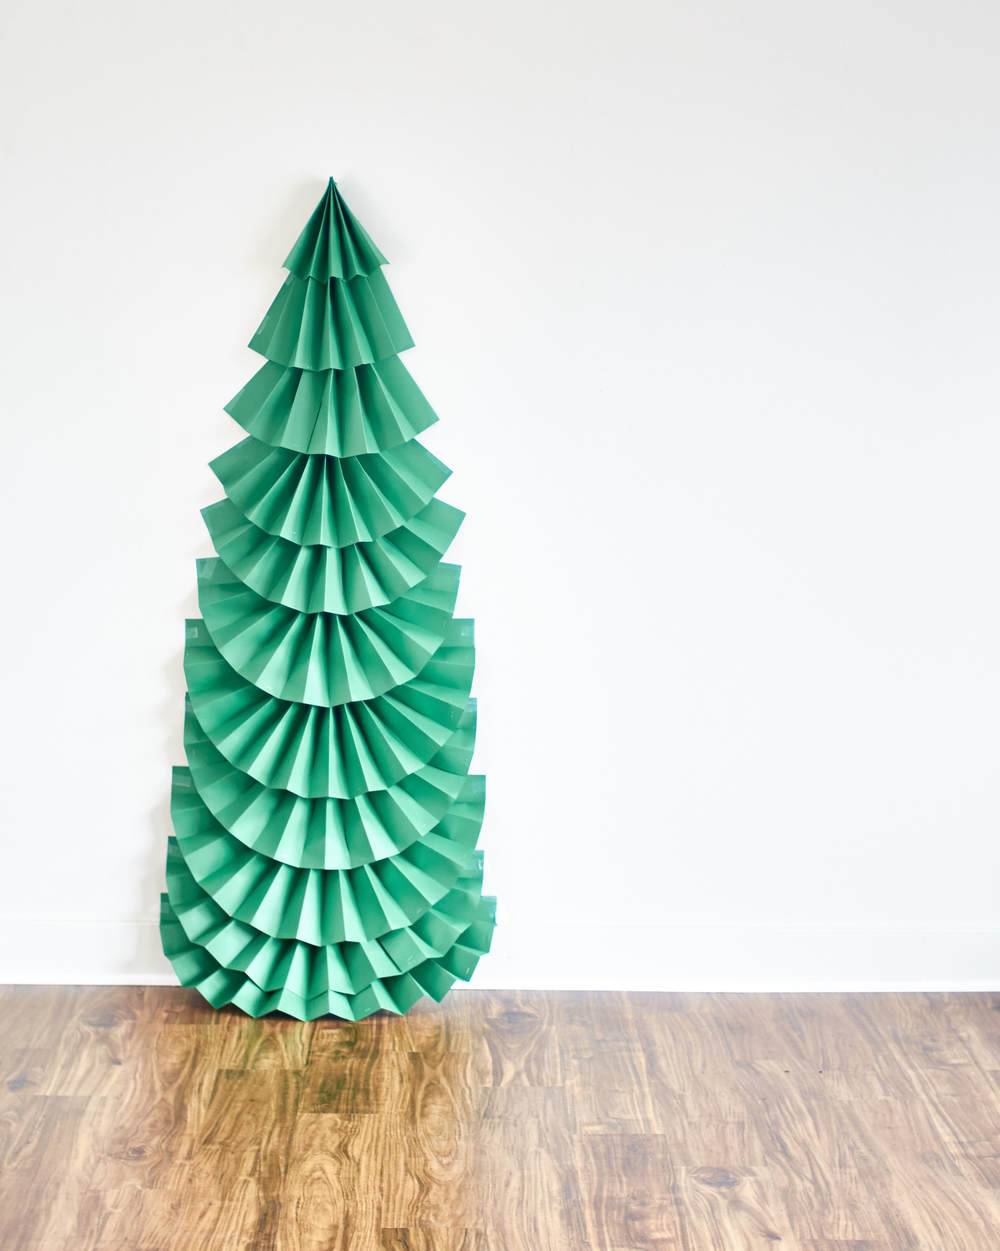
Continue to build your tree, row by row. As you add layers, you may need to begin trimming the ends off of your rows of “M”s. We took about an inch off of 3 sets of the long “M”s and 1-3 inches off of 2 sets of the shorter “M”s. We continued tapering until we reached the top of the tree.
Step
To create your tree’s top, simply accordion fold a sheet of paper, staple the top and fan out the bottom before attaching it to the wall.
And, there you have it, folks! Your own, joyful little wall tree made of paper and your own two hands.

Love this project? Share your love by pinning it!