A stop block makes cutting multiple pieces of wood on a miter saw faster and easy.
A stop block is a simple reusable jig used in woodworking to mark an edge so multiple pieces of wood can be cut quickly and uniformly.
It can get tiresome to stop and measure each piece before you cut it, so built-in stop blocks keep you working at a steady and fast pace.
The hold-down clamps that come with most power miter saws are useful for securing a stop block when making repetitive cuts. But they’re only useful for cutting short pieces because it limits the length of board you can cut.
For bigger projects like decks and railing, long cuts of wood typically won’t fit within a standard stop block. Cutting these pieces shouldn’t take up the majority of your time. This time is better spent on getting these pieces together and your project complete.
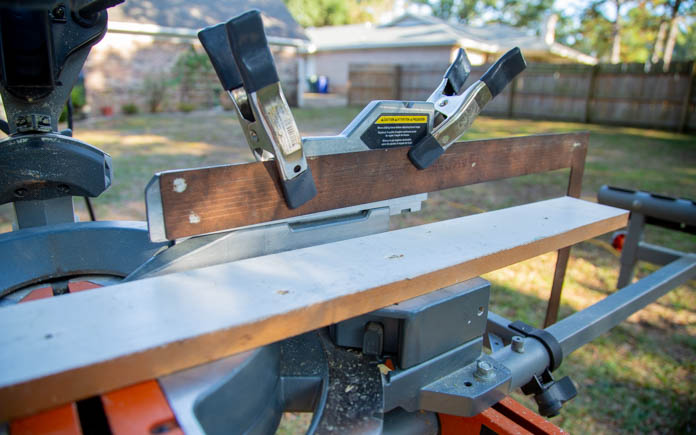
However, you can make an extended stop block using a framing square. This technique works well for making repetitive cuts between about 16 inches and 23 inches long.
Here’s how you do it:
First, use two spring clamps or short bar clamps to secure the framing square to the saw’s fence. Extend it out to the length you need the board to be.
Check to confirm the distance from the blade to the vertical tongue of the framing square equals the desired length of the pieces you’re cutting.
Then, carefully slide the board up against the edge of the square’s tongue and make the cut.
Repeat to make repetitive cuts to produce pieces of all the same exact length.
Easily detach the crate from the wall rails to take any tools you need on the go.
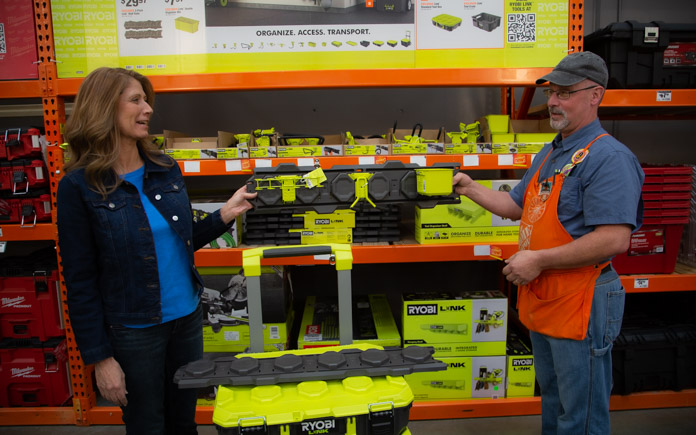
Link Rolling Tool Box
Ever heard the phrase, “Messy bed, messy head?” The same applies to your garage. Having all your tools and equipment where you can find them is key to being productive.
The Ryobi Link Rolling Tool Box keeps all your tools and parts organized with its integrated accessory bit storage and a double organizer bin. No more digging to the bottom of the box to find the part you need!
It’s designed with impact-resistant material to handle the toughest of situations and protects your tools from water and dust.
This rolling toolbox has a wide, steel telescoping handle and nine-inch all-terrain wheels that support a 200-pound load capacity. You’ll be able to get all the materials you’ll need in one trip to the most rugged project sites.
This toolbox has secure locking points, tie-down anchors and impact-resistant latches so your tools are safe and sound.
Best of all, it is part of the Ryobi Link Modular Storage System, so it will seamlessly connect your stationary storage.
The Ryobi Link Modular Storage System can be configured any way you need it!
About the Ryobi Link Modular Storage System
The Ryobi Link Modular Storage System allows you to easily organize, access and transport the tools you need for your job. The interlocking modular pieces allow you to customize your storage space for optimum organization.
This storage system is available for purchase in starter kits, or you can build your own at your own pace by purchasing single pieces.
The seven-piece wall storage kit provides you with the foundation to organize your life and easily expand with a full range of storage solutions.
This page contains affiliate links. If you purchase a product from these links, we will earn a small commission at no additional cost to you.
Watch the video to learn all about this Best New Product!
Easily detach the crate from the wall rails to take any tools you need on the go.
Link Rolling Tool Box
Ever heard the phrase, “Messy bed, messy head?” The same applies to your garage. Having all your tools and equipment where you can find them is key to being productive.
The Ryobi Link Rolling Tool Box keeps all your tools and parts organized with its integrated accessory bit storage and a double organizer bin. No more digging to the bottom of the box to find the part you need!
It’s designed with impact-resistant material to handle the toughest of situations and protects your tools from water and dust.
This rolling toolbox has a wide, steel telescoping handle and nine-inch all-terrain wheels that support a 200-pound load capacity. You’ll be able to get all the materials you’ll need in one trip to the most rugged project sites.
This toolbox has secure locking points, tie-down anchors and impact-resistant latches so your tools are safe and sound.
Best of all, it is part of the Ryobi Link Modular Storage System, so it will seamlessly connect your stationary storage.
The Ryobi Link Modular Storage System can be configured any way you need it!
About the Ryobi Link Modular Storage System
The Ryobi Link Modular Storage System allows you to easily organize, access and transport the tools you need for your job. The interlocking modular pieces allow you to customize your storage space for optimum organization.
This storage system is available for purchase in starter kits, or you can build your own at your own pace by purchasing single pieces.
The seven-piece wall storage kit provides you with the foundation to organize your life and easily expand with a full range of storage solutions.
This page contains affiliate links. If you purchase a product from these links, we will earn a small commission at no additional cost to you.
Watch the video to learn all about this Best New Product!
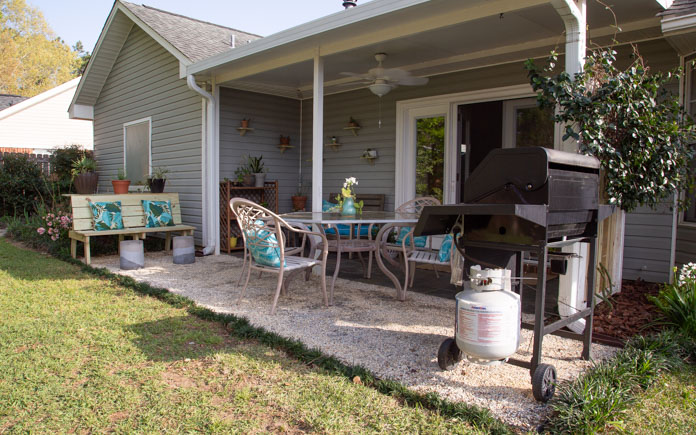
This week we’re helping a blended family expand their patio to better meet their needs.
Eric and Corrina love spending time outdoors with their children, but their patio space just wasn’t enough to make their family feel together during “get-togethers”
Their grill is separated from the main seating area, and Corrina’s container plants make the limited patio space feel cluttered.
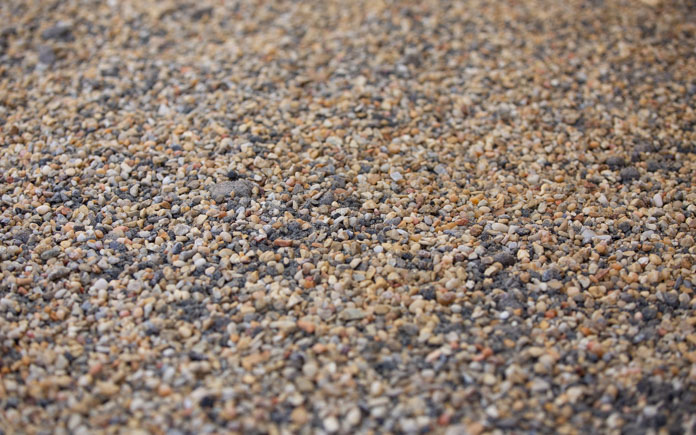
Pea gravel is an excellent alternative to pavers for expanding patio space.
Expand Patio with Pea Gravel
To double the size of this patio without using concrete or pavers, we use pea gravel.
The existing patio is slanted downward away from the home for drainage, so with our pea gravel landing, we can make it almost level with the ground. The pea gravel will hold the drainage water well. Plus, the water will be moving slowly, so it will prevent any erosion.
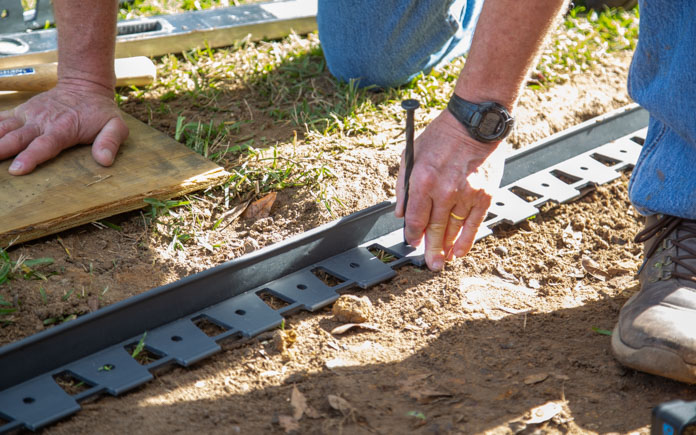
This plastic edging will keep our pea gravel in place.
First, we lay plastic edging to frame our expanded patio area. This plastic edging is usually used with pavers, but we’re switching it up to work with our pea gravel. The smooth ridge will keep the pea gravel in place so it won’t spill out into the yard.
We use a mallet to drive landscaping spikes into the edging to keep it in place.
Once the edging is in place, we fill the space with Pavestone paver base and tamp it down.
We then sprinkle the pea gravel across the paver base so we can create a uniform surface. The pea gravel is part of the decorative feature of this patio, so we don’t want to rush it.
Once we have an even spread of pea gravel, we tamp it down into the paver base.
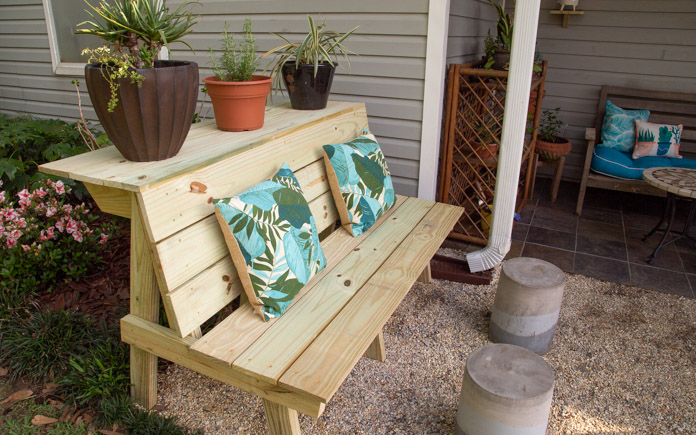
This combination planter bench provides sitting space for people and plants!
Build Plant Shelf Bench
To create more seating and also more space for Corrina’s plants, we build a custom plant shelf bench.
The bench is constructed like a regular wood bench, but we add a shelf to the back for container plants.
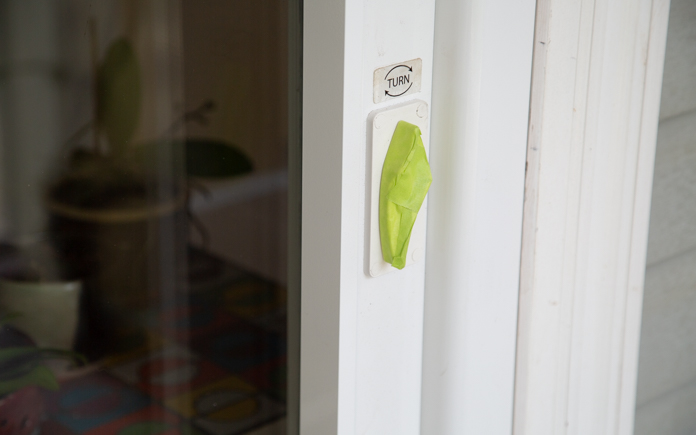
Retractable screen doors neatly tuck away when not in use.
Install Retractable Screen Door
Our solution to Eric’s aversion to bugs is installing a retractable screen door from Wizard Screens on the French doors.
Retractable screen doors mount to the side of a door frame with a track at the top and bottom to guide the rolled screen. The screen door can be pulled out to allow fresh air into your home when needed, and then rolled back out of the way when not in use.
These screens keep mosquitoes away without obstructing the outside view.
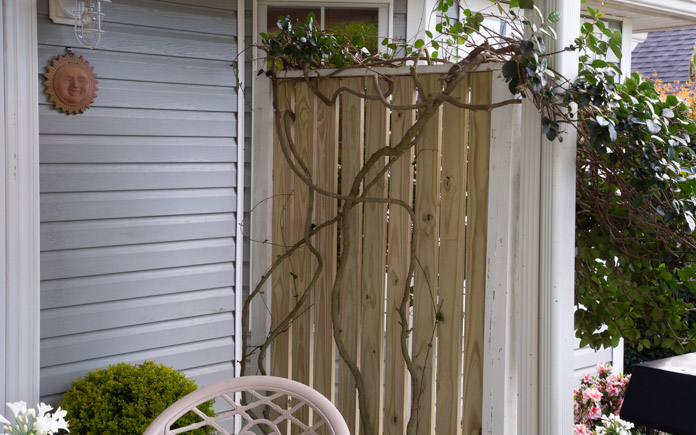
Vertical wood slats add more privacy than lattice.
Replace Lattice
The jasmine growing around the lattice on the patio no longer needs the lattice for support, so we replace it with vertical wood slats to add more visual appeal and privacy.
We also:
Cleaned existing patio tiles
Replaced the ceiling fan and light fixture
Diverted the downspouts away from the patio
Planted flowering plants near the house from Southern Patio
Now, there’s room for all on this expanded patio!
Post-Production Thoughts
Eric and Corrina’s backyard is beautifully accented with all kinds of plants. But they couldn’t fully enjoy it because their patio was cramped and cluttered, to the point that the grill had to be moved out into the yard. They rarely opened the french doors because it invited in the bugs, and everything was a little dated.
But now, we’ve doubled the size of their patio with a unique drainable surface. Plus, we maximized the space by relocating Corrina’s container plants to a new combination bench and plant shelf. More shelves on the wall display the smaller pots and the new vertical slat trellis provides privacy and support for Corrina’s jasmine vine.
Plus, Eric and Corrina can enjoy their patio from the inside “mosquito-free” thanks to their new retractable screen.
A plant shelf is great for displaying potted flowers and herbs.
Potted plants can quickly clutter up your patio or deck space. Building shelves for them not only frees up valuable floor space but also perfectly displays your plants for all to see.
Adding a shelf to a home with wood siding is easy to do. But what if your home has vinyl siding? Screw holes damage the vinyl and can be hard to repair if you decide to take down the shelves later on.
Hanging a plant shelf on vinyl siding can be done without doing any damage. These simple plant shelves hang on the outside of the house using a small hook designed specifically for vinyl siding.
Here’s how to do it.
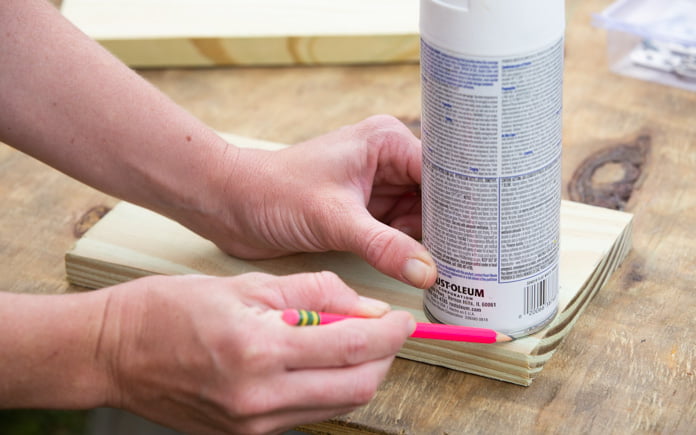
Start your shelf with a piece of 1×6 wood. Use a can or another round bottom object as a guide to cut the corner for a round edge.
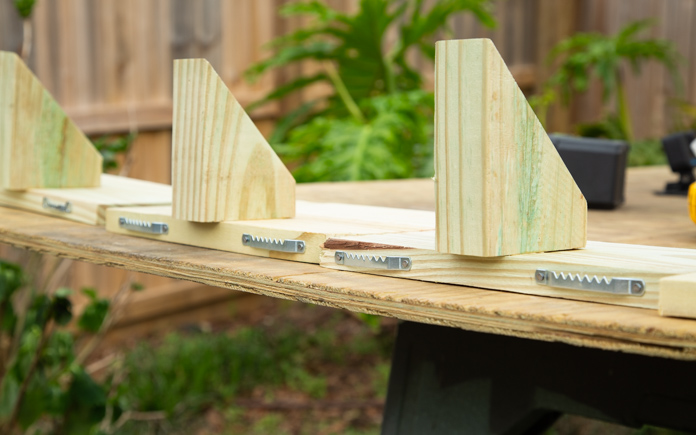
On the back of each shelf, nail two sawtooth picture hangers.
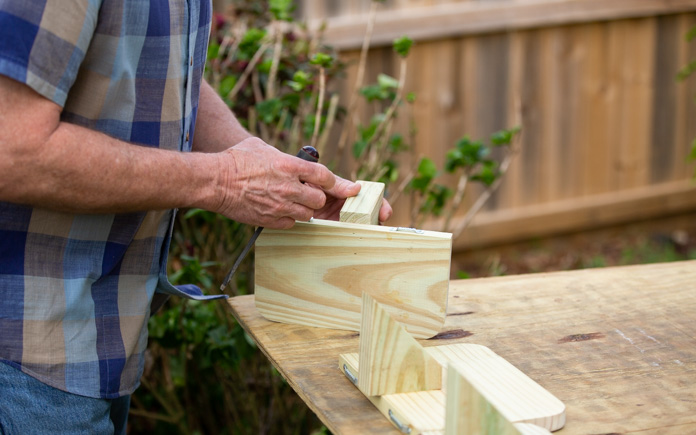
To keep the plant shelf hanging in a horizontal position, build a small trapezoid corbel from 2×4 material. To do this, make a 45-degree diagonal cut and then a 90-degree cut, one inch from the diagonal.
Attach the corbel to the shelf with its longest edge facing the wall and slightly offset to the back. The offset accommodates the angle of the siding.
To hang the shelf, thread the siding hooks through the sawtooth hangers before slipping the hooks under a row of siding on the wall.
Because the hooks attach beneath the vinyl siding, there won’t be any damage left behind if you decide to move your plant shelves!