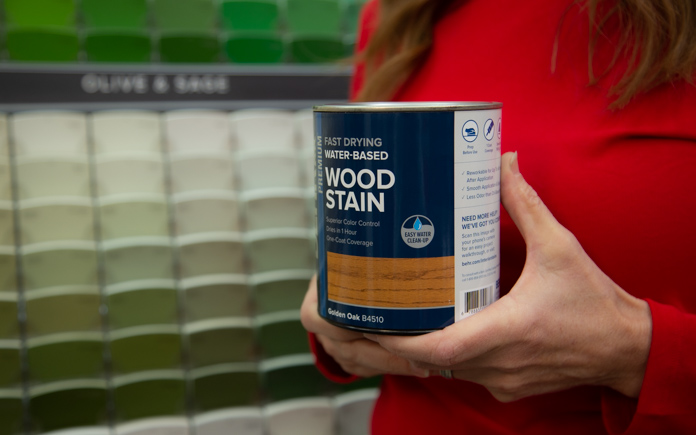
Behr’s new wood stain comes in 12 premixed colors and 60 custom colors, so you’re sure to find a tint that matches your unique style.
The high-performance stain dries quickly and evenly in just one hour, giving you great results in less time. It also provides superior color control and application control for interior projects.
Plus, it’s reworkable for up to 48 hours after staining the wood, so you have more time to get the look you want.
Faster drying means less time waiting to get your wood pieces functioning again. (3 Echoes Content Studio)
The stain starts working in two to three minutes. The longer you leave the stain on, the richer and darker the color will be. To get an even deeper and darker color, apply a second coat after the first hour of drying.
Clean-up is easy — just use soap and water. And you won’t have to smell that stain for very long because this product has less odor than other oil-based stains.
This page contains affiliate links. If you purchase a product from these links, we will earn a small commission at no additional cost to you.
Watch the video to learn all about this Best New Product!
A sofa arm tray keeps everything you need in the living room within close reach.
Let’s face it, your couch can easily swallow everyday items if you lack table space to keep them stable and in view. Remotes mysteriously vanish moments after you set them down, and phones slip between cushion gaps.
From reading glasses to snacks, and everything in between, a sofa arm tray can keep these items in plain sight and easily accessible. Plus, it’s the perfect spot to set down a drink so you don’t have your hands full while lounging in the living room.
This is especially useful if you use your hands a lot while talking — it eliminates any chance for your drink to spill during a spirited conversation!
You can easily build this small sofa arm tray in less than a day. And, depending on how long it takes the finish to dry, you can enjoy its convenience and receive compliments from friends in no time!
Materials
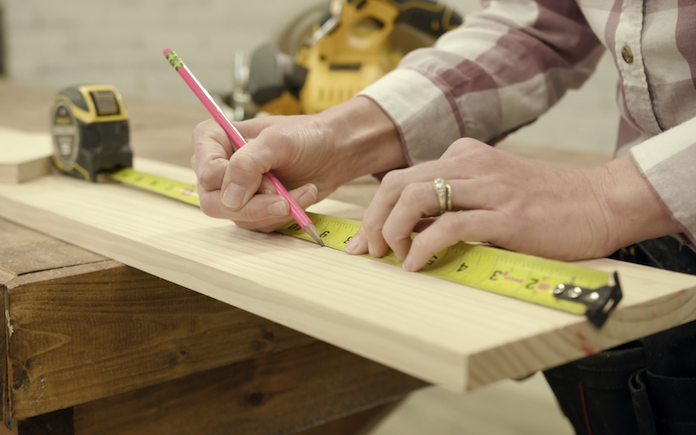
Determine the Size
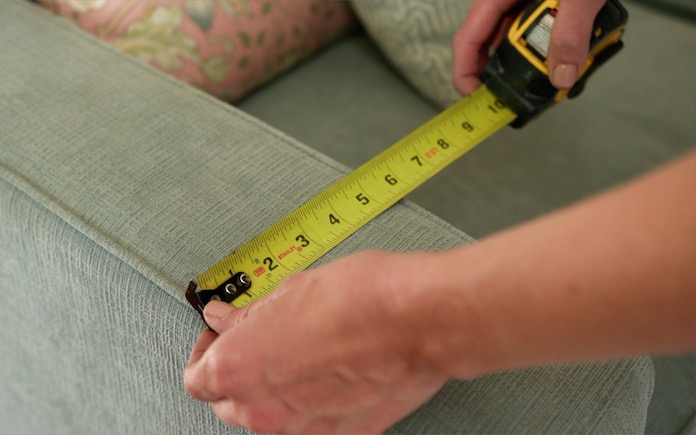
First, you’ll need to measure the width of the armrest where you’ll use the sofa arm tray.
Then, measure the distance from the top of the armrest to the cushion.
Cut Wood Pieces
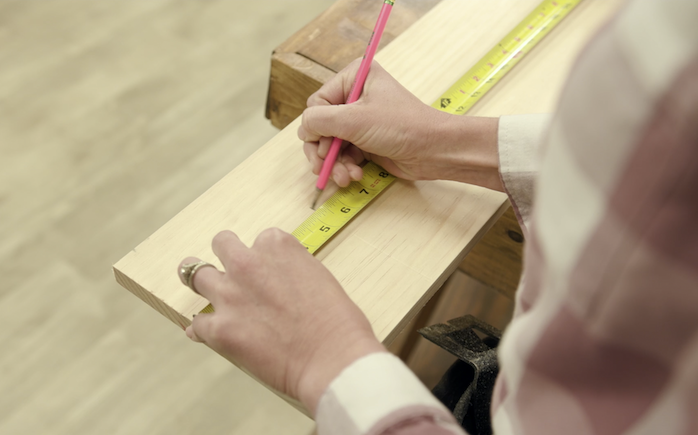
From a piece of 1-by-8 board, cut one piece 1 1/2 inches wider than the armrest and one piece the same length as the distance to the cushion.
Then, cut a third piece 2 1/2 to 3 inches longer than the cushion height. This piece will go on the outside.
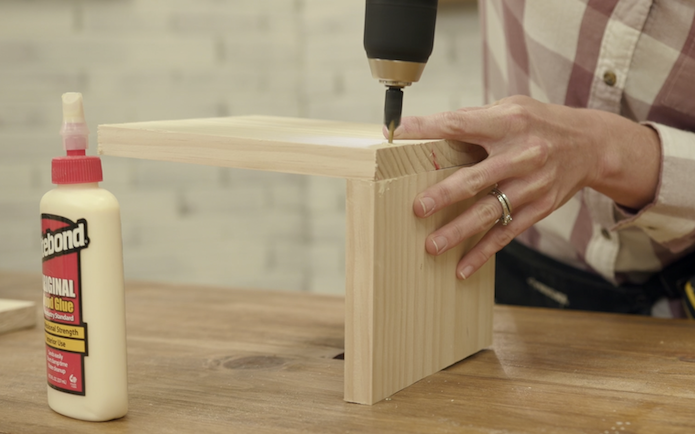
Assemble Sofa Arm Tray
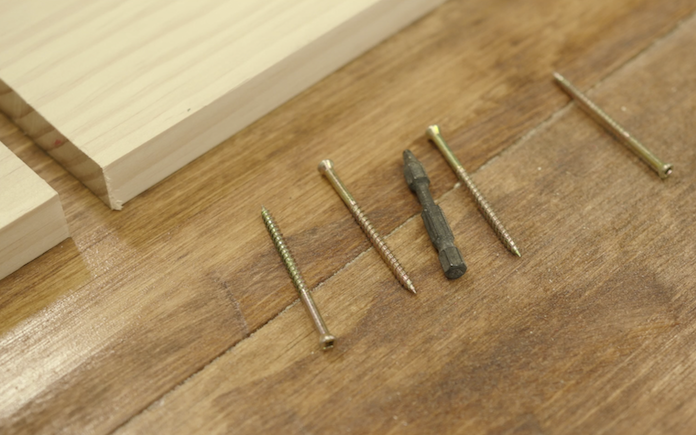
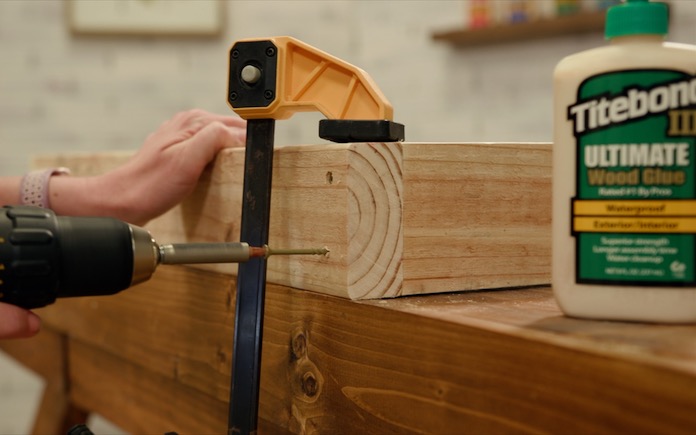
You’ll need some 3-inch trim screws, a countersink drill bit, and some wood glue for assembly. Glue the pieces together with Titebond Original Wood Glue to quickly bond them together. This makes the tray sturdier and drilling the screws easier.
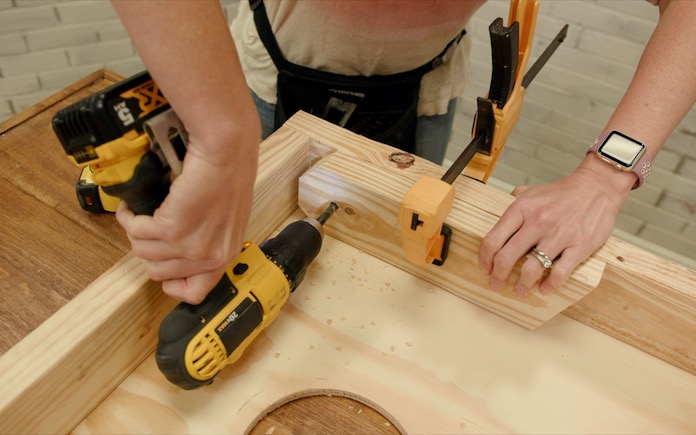
Use the countersink bit to drill a pair of pilot holes in each location before you drive in screws to secure the joint.
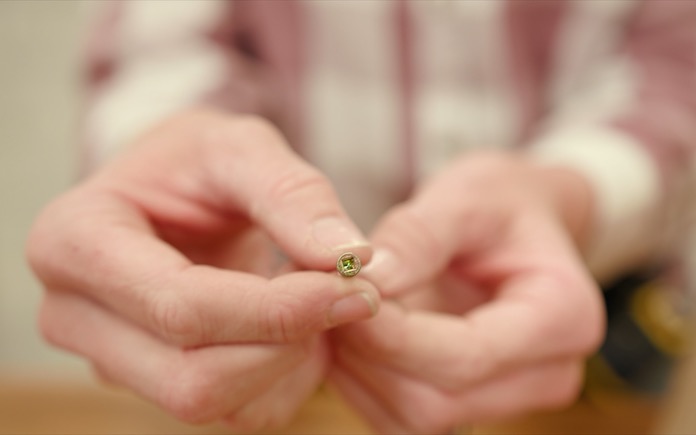
Trim screws have a tiny head, so once they’re in place, they’re nearly invisible.
Repeat this process with the other leg.
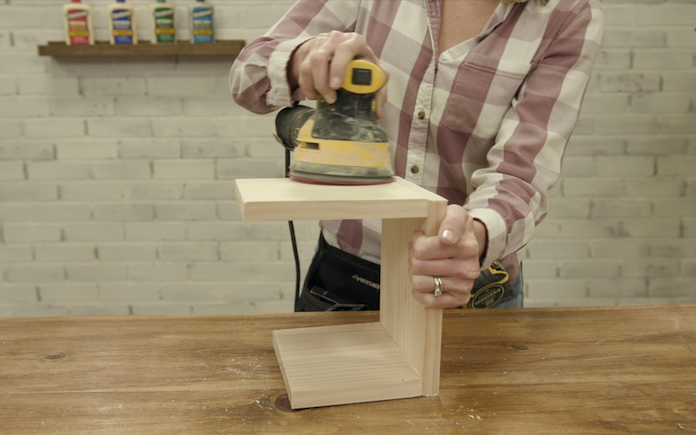
Add the Final Touches
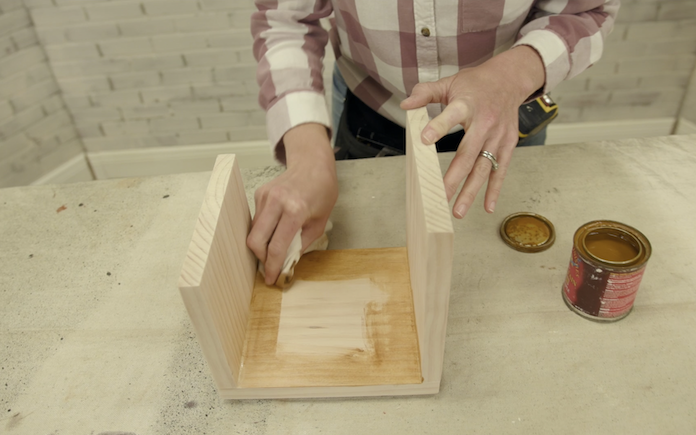
After you’ve assembled the sofa arm tray, sand the edges for a smooth finish.
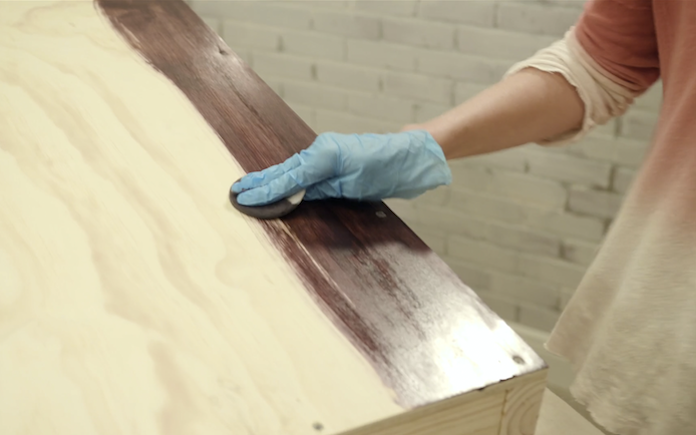
Next, apply a coat of wood stain with a cotton cheesecloth.
Once the wood stain is dry, brush on a coat of clear polyurethane sealer. A water-based polyurethane sealer should dry in about two hours, whereas an oil-based one will take at least eight hours.
After your sofa arm tray is dry, unwind in your living room with your essentials in sight!
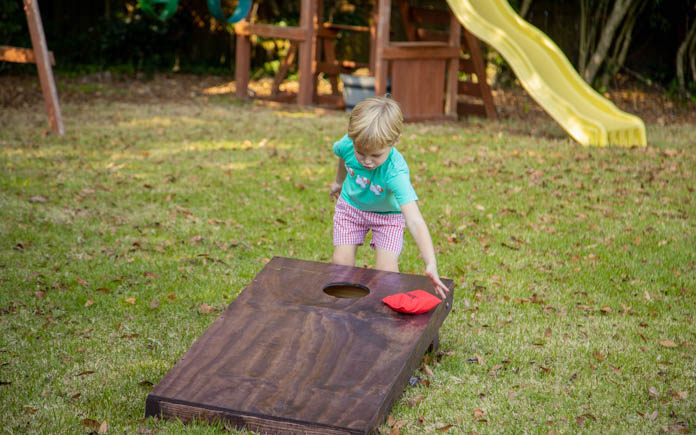
Cornhole, a game that’s been around for centuries, is a popular pastime for tailgate entertainment or backyard fun. You just need a cornhole board and some bags — and a free afternoon with family or friends!
As the story goes, Matthias Kuepermann found a group of boys throwing stones into groundhog holes for fun. Worried for their safety, he crafted the cornhole board, replacing groundhog holes with wooden boxes with round holes and stones with bags filled with dried corn.
Because of its simplicity, the game hasn’t evolved much. These days, the corn-filled bags are sometimes replaced with plastic and resin beads. But some die-hard cornhole enthusiasts insist on using real corn kernels.
Players in the United States even compete at state and national levels. And now, there are efforts to make the cornhole game an Olympic sport.
You can build a cornhole board for your backyard. The process is simple, but it might require a few specialty tools if you don’t already have them on hand!
Whether you’re passing time in the backyard or competing for bragging rights, the cornhole game is a fun activity for all ages.
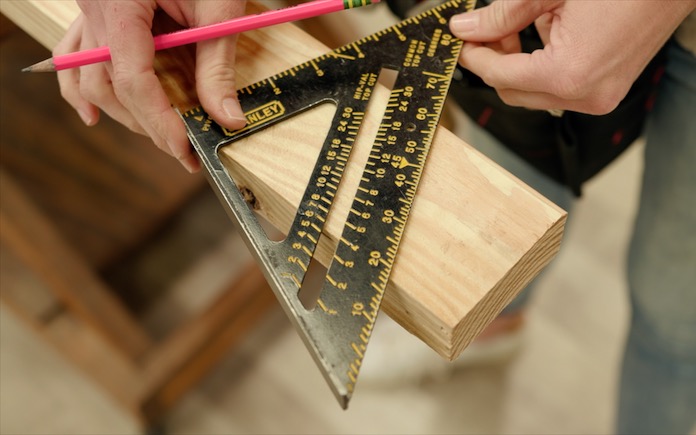
Use a carpenter square to get accurate angles for your cornhole game’s leg pieces.
Cut the Cornhole Board’s Wood Pieces
Using a carpenter or speed square, mark 25 degrees and cut along that angle. Then mark a straight line 12-and-1/4 inches from the angle’s long side. Repeat this three more times to create your boards’ legs.
For the frames, you’ll need four straight cuts at 21 inches and four straight cuts at 48 inches.
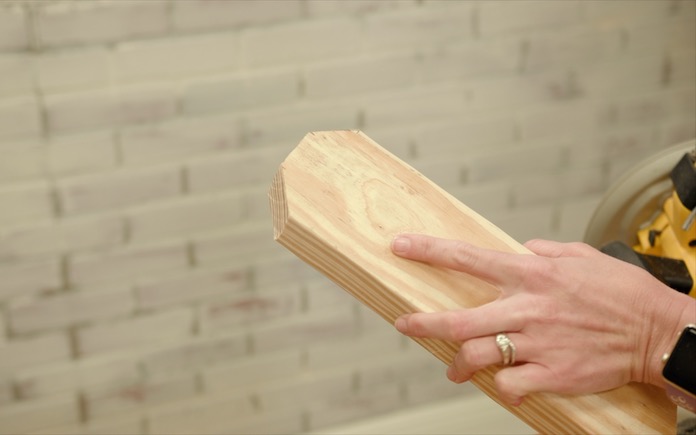
The 45-degree cuts on the leg pieces will make them easier to fold
Now back to your leg pieces. You need to cut them on the square side to make them easier to fold and unfold. Mark 1 inch in from each side and 1 inch down on each side. Connect those marks with a straight edge to draw a 45-degree angle on each corner. Cut the two triangles on each leg.
Lay your cornhole game frame on a waist-high table for easy drilling.
Assemble the Frame
To mark the hole for the legs to attach to your frame, measure 1 and 3/4 inches from one side and 1 and 3/4 inches from the short end. Drill all the way through with a 3/8-inch drill bit. Then set aside.
Titebond III Ultimate Wood Glue will keep your frame in place and add some waterproofing to your cornhole game.
To lay out your frames, lay two 48-inch pieces parallel to one another and set the 21-inch pieces at the ends, between them. Apply a bead of wood glue rated for exterior use, like Titebond III Ultimate Wood Glue, and attach the pieces together with 3-inch screws.
Apply more wood glue around the top of your new frame, and set the 2-by-4 sheet of plywood in place. Attach it with 1-and-1/2-inch screws through the plywood into the frame below.
To create the hole for the bean bags, mark 9 inches from one end, then measure and mark the center of the board near that 9-inch mark.
Using a 6-inch hole saw, cut a hole with your mark at the center. A hole saw this large can be a little tricky, so take your time!
Flip the board over to attach the legs.
Folding legs will save storage space.
Attach the Legs
On the end of your board with the hole, set your legs in either corner with the longer part of the angle on top. Clamp the leg half an inch from the end and use the existing hole in the leg to drill a 3/8-inch hole through the frame. Then sand the ends of the legs to round the cut angles.
Next, slide a carriage bolt through the hole from the outside, then one washer, a wood leg, another washer and finally the nut. Hand tighten.
Repeat as necessary until both of your cornhole boards are assembled!
Stain your cornhole game for a finished look or customize it by painting it with your team colors.
Start with 150- or 180-grit sandpaper. Once you’ve sanded all of the surfaces, step it up to a 220- or 300-grit sandpaper to create that smooth, slick surface that’s synonymous with cornhole boards!
Staining: In long, even strokes rub your wood stain with the grain of the wood. Follow with a clean rag to wipe up the excess stain. Once it has dried for a few hours, start applying a clear topcoat, like spar varnish, that is safe for outdoor use.
Let the coat completely dry before sanding with 220-grit sandpaper, wiping clean and applying another clear coat. Repeat for a third time.
Painting: If you’re choosing to paint your boards, select an exterior semi-gloss paint and make sure your design covers all the wood on the top so the surface will be appropriately slick. Several coats might be required.
Once your topcoat or paint is dry, you’re ready to start keeping score!
To get your backyard ready for more summer fun, add some hanging string lights. Use planters or shepherd’s hooks to keep the good times going past sundown.
A Bluetooth bathroom speaker fan can completely reshape your morning routine and make it more efficient.
You already have to turn on the vent fan while showering to reduce humidity and improve indoor air quality — why not enjoy relaxing music during a scrub-down? Plan your day? Check voicemail?
This newest addition to your smart home can do that and much more.
Jodi Marks, pictured with a ReVent Smartphone Connected fan, at The Home Depot.
This page contains affiliate links. If you purchase a product from these links, we will earn a small commission at no additional cost to you.
The ReVent Smartphone Connected Fan includes a music control and works with Apple and Android phones. It has dual-microphone technology and is Bluetooth-connected — so it acts as your phone away from your phone!
Here are some other features:
Use Siri or Google Assistant to stream some tunes while you get ready for the day.
If someone calls while you’re shaving, easily answer it and talk through the smart speaker fan.
Wondering if you need to bring an umbrella with you? Ask about the weather while you’re getting ready.
Not sure if you have time to make an extra cup of coffee? Ask how long the drive to work is.
In addition to its convenience, don’t forget this Bluetooth bathroom speaker fan also improves your indoor air quality.
In fact, that’s its most important feature.
Ventilation in the bathroom is a must to keep moist air outside your home so mold and mildew won’t grow. This fan vents humid air quietly at just .8 sones — about the same level of noise as a kitchen refrigerator.
The designer shield cover adds a modern look and it’s easy to clean. Plus, it’s paintable, so you can customize it to match your bathroom style.
And you don’t have to climb into the attic to install it. Handle the job from inside the bathroom using ReVent’s Sheet Locks that attach directly to the ceiling drywall.
Watch the video to learn all about this Best New Product!
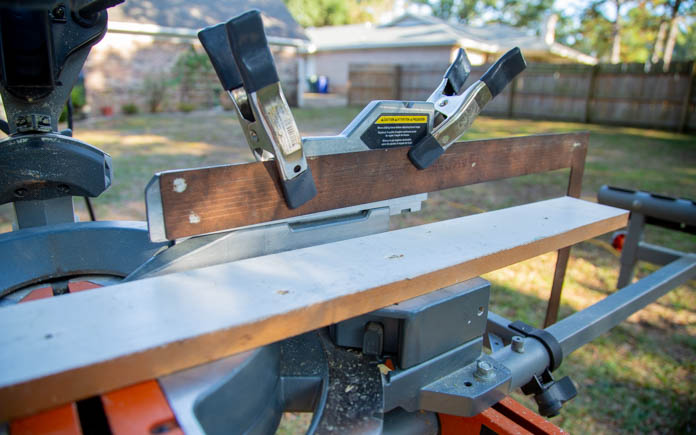
A stop block makes cutting multiple pieces of wood on a miter saw faster and easy.
A stop block is a simple reusable jig used in woodworking to mark an edge so multiple pieces of wood can be cut quickly and uniformly.
It can get tiresome to stop and measure each piece before you cut it, so built-in stop blocks keep you working at a steady and fast pace.
The hold-down clamps that come with most power miter saws are useful for securing a stop block when making repetitive cuts. But they’re only useful for cutting short pieces because it limits the length of board you can cut.
For bigger projects like decks and railing, long cuts of wood typically won’t fit within a standard stop block. Cutting these pieces shouldn’t take up the majority of your time. This time is better spent on getting these pieces together and your project complete.
However, you can make an extended stop block using a framing square. This technique works well for making repetitive cuts between about 16 inches and 23 inches long.
Here’s how you do it:
First, use two spring clamps or short bar clamps to secure the framing square to the saw’s fence. Extend it out to the length you need the board to be.
Check to confirm the distance from the blade to the vertical tongue of the framing square equals the desired length of the pieces you’re cutting.
Then, carefully slide the board up against the edge of the square’s tongue and make the cut.
Repeat to make repetitive cuts to produce pieces of all the same exact length.