Did you know you can recycle coffee grounds for plants to use in your garden?
Horticulturists praise coffee grounds for acidifying soil and enhancing plant growth.
Coffee grounds are slightly acidic (5.5 to 6.8 pH), so certain acid-loving plants like azaleas, rhododendrons and gardenias love them.
Azaleas prefer soil with a pH of 5 to 6.5. (c11yg, Getty Images)
They contain about 2 percent nitrogen, 0.06 percent phosphorus, and 0.6 percent potassium by volume, according to the University of Wyoming Extension. They also contain many micronutrients including calcium, magnesium, boron, copper, iron, and zinc.
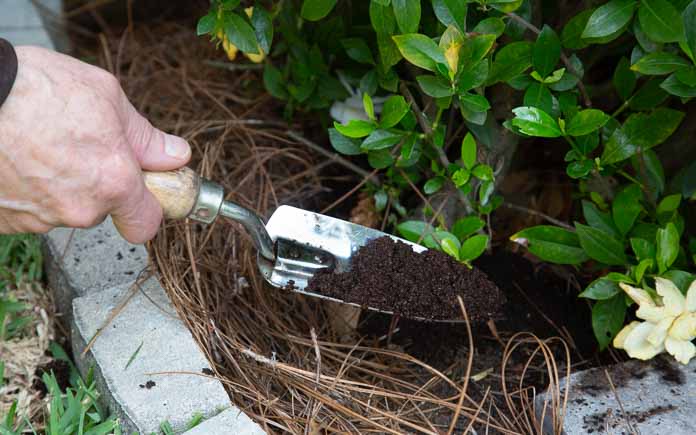
Use a garden shovel to spread a thin layer of coffee grounds around the base of acid-loving plants. (3 Echoes Content Studio)
Here’s how to use them in your garden:
After you’ve had your morning cup of joe, save the used coffee grounds in a plastic container. You should have enough grounds after about a week or so to use in your garden.
To use them as a soil amendment for your plants, rake back the mulch to expose the soil. Then, use a small garden trowel to spread the coffee grounds around the base of the plant. Only spread the grounds about a quarter of an inch thick.
And then, of course, rake the mulch back just to protect the soil and keep the weeds down.
Add a thin layer of grounds to the plants about once a month, and you’ll see a much healthier plant with many more blooms.
By the way, if you don’t have coffee, you can also use tea leaves just be sure to take it out of the tea bag first.
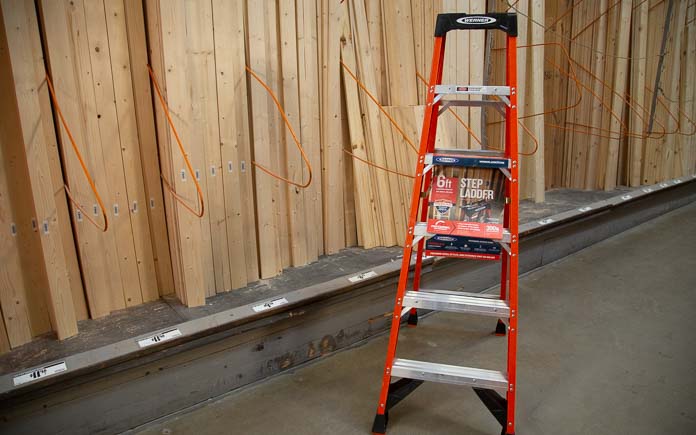
Most homeowners only own one ladder, and it’s usually a six-foot step ladder. So if this is the only ladder you have, make sure it’s one that keeps your parts and tools organized and within reach, like the Werner 6 ft. Fiberglass Step Ladder.
This page contains affiliate links. If you purchase a product from these links, we will earn a small commission at no additional cost to you.
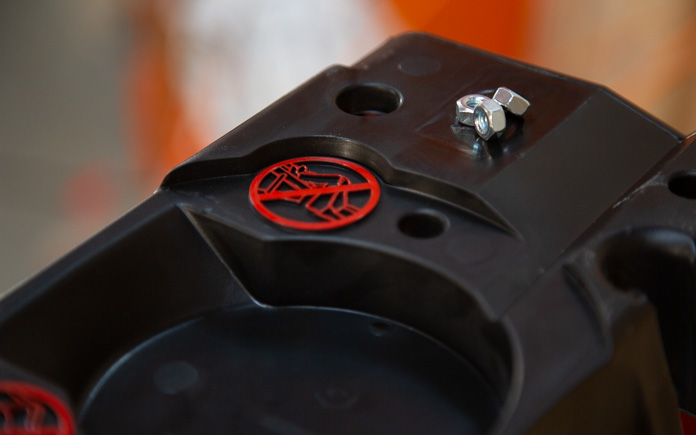
Multi-Functional HolsterTop Keeps tools and supplies secure and within reach while working. (3 Echoes Content Studio)
Designed With Productivity in Mind
The Werner 6-ft. ladder has a trademarked multi-functional Holster-Top to keep your tools secure. It features a magnetic strip hardware bin, drill slot and pipe channel, so tools and supplies stay secure and in reach while you’re working.
This ladder is compatible with lock-in accessories. It works with Werner Lock-In accessories (sold separately) to provide customized tool storage right at your fingertips.
The Werner 6-ft. ladder is rated to hold up to 300 pounds, so you can have peace of mind knowing it can hold you and all the materials you’re working with.
For added safety, the steps are double-riveted and slip-resistant. And because it’s made from aluminum and has non-conductive fiberglass rails, it’s ideal for working near electricity.
With this ladder, you can reach up to 10 feet and feel safe while doing so. All steps and top rear horizontal are knee-braced for extra support. And, this ladder has oversized footpads, so you can firmly plant your feet on each step.
Other Features
The Werner 6-ft. ladder is ANSI and OSHA-compliant for safety, plus it’s weather-resistant, so you can use it outdoors.
It has internal pinch-proof spreaders, so it’s easy to open and close, and the legs have 360 Edge bracing for enhanced strength and increased protection against damage.
Watch the video to learn all about this Best New Product!
Board and batten adds a geometric, layered look to both interior and exterior walls.
This siding and paneling style uses thin strips of wood — or battens — placed over the seams of wide boards.
You can mimic the look of board and batten on an accent wall without installing wide wood boards. Here’s how:
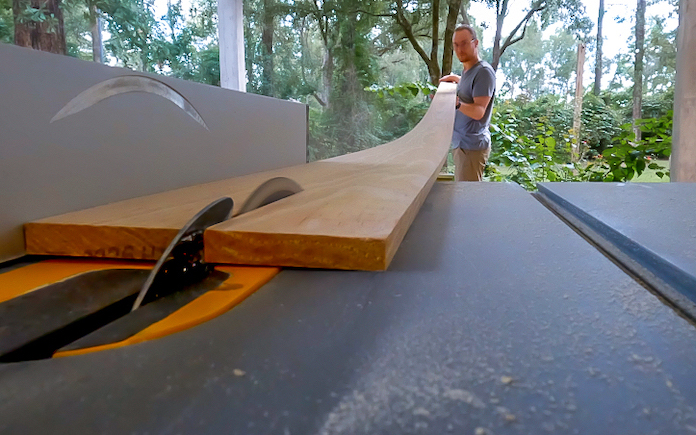
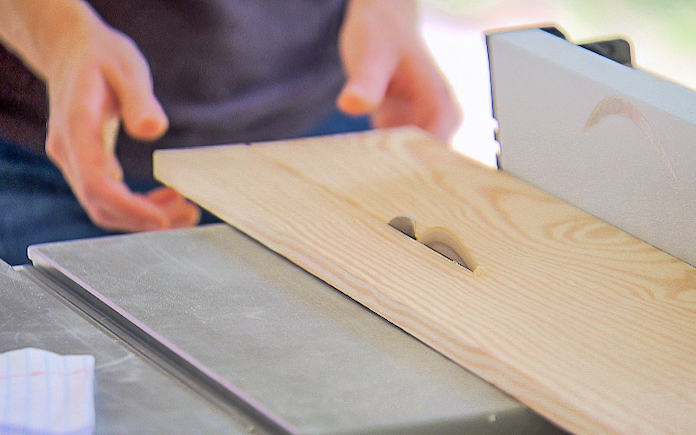
Because we wanted custom-sized battens, we had to cut them down from larger boards. (3 Echoes Content Studio)
For the battens, rip half-inch by 6-inch pine siding along its length to create battens that are about 2¾-inch wide.
We use the same wood for the baseboard but cut it slightly wider to match the existing baseboards. (3 Echoes Content Studio)
Use the same pine siding to frame the top and bottom of the wall. Cut the bottom piece slightly wider — at 3¼ inch — to match the height of the existing baseboards.
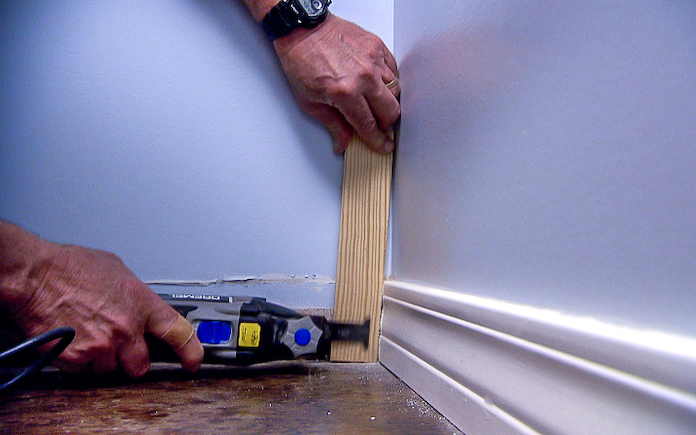
By using an oscillating saw, we don’t have to remove the baseboard to cut it. (3 Echoes Content Studio)
Use an oscillating saw to cut the baseboards on the adjacent walls back a half inch so the pine siding can slide in. Then, attach battens in each corner.
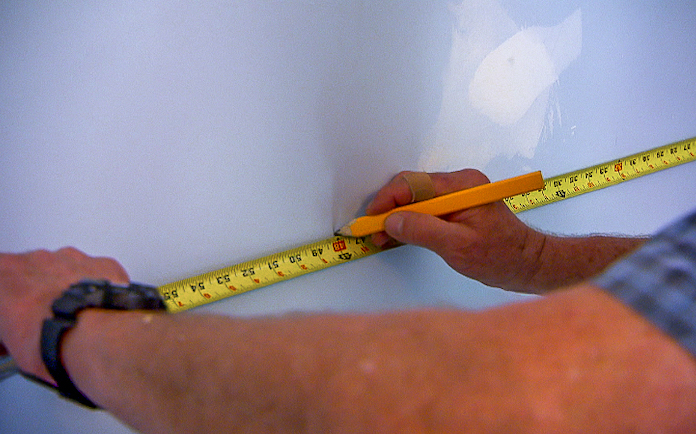
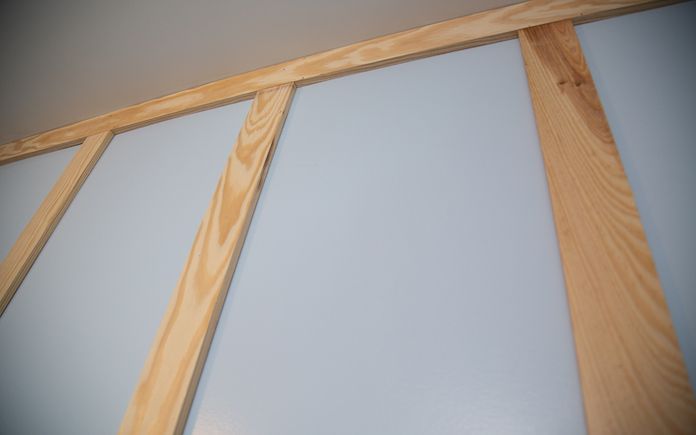
We’re spacing the battens 16 inches apart because that’s the typical spacing of wall studs. (3 Echoes Content Studio)
The remaining battens should be spaced on 16-inch centers. Before installing them, mark those dimensions on the wall with a pencil to be sure the spacing works before installing them.
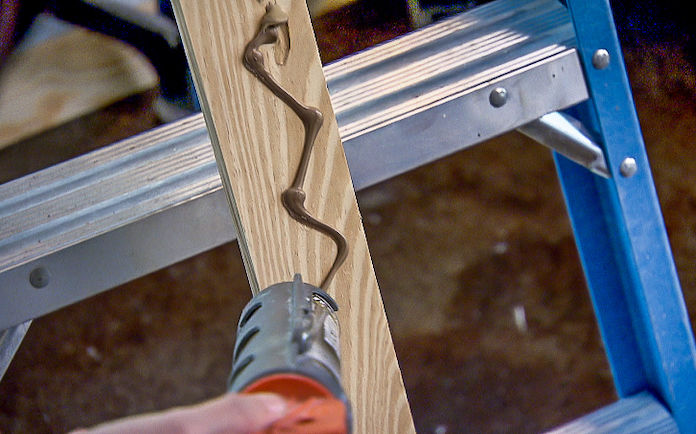
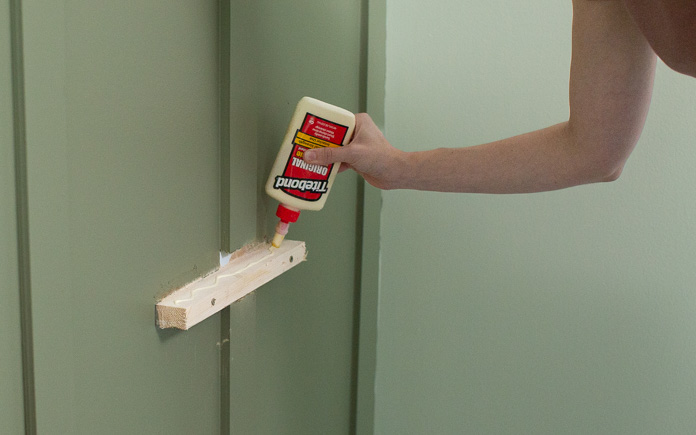
Applying construction adhesive ensures the board will stay put in case the finishing nails don’t penetrate a stud. (3 Echoes Content Studio)
Since we can’t be sure we’ll hit studs with every batten, coat the back of each batten with construction adhesive before tacking them in place with 2-inch finish nails.
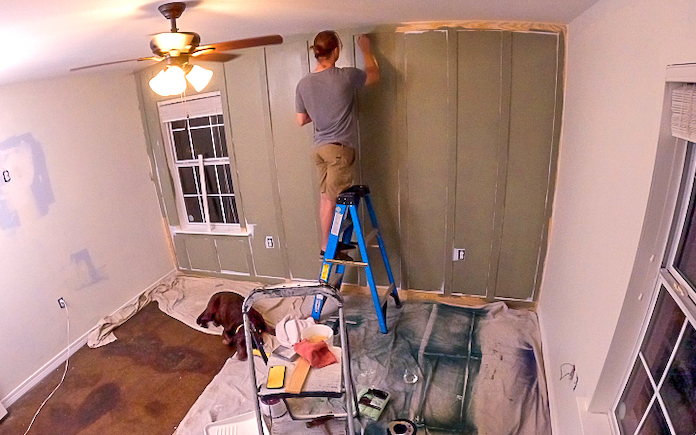
Corey and Grace really like a dark green color for the guest bedroom, so to keep the room from feeling dark and uninviting, they’re only going to use that color for an accent wall.
And to add some visual interest to the accent wall, we’re going to add some board and batten.
We space each batten about 16 inches apart — about the standard width each stud is spaced. (3 Echoes Content Studio)
For the battens, we space out ½-inch by 2¾-inch boards about 16 inches apart on the wall, then attach them with finishing nails and construction adhesive.
Once all the battens are in place, we caulk the edges and apply two coats of paint to the whole wall.
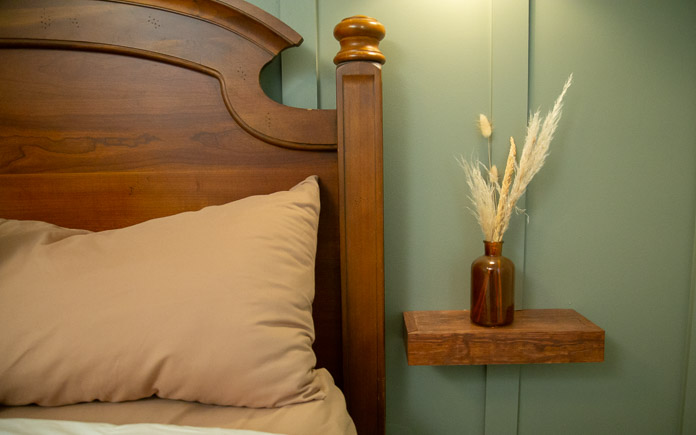
To save space, we install floating shelves next to the bed instead of placing bulky nightstands. (3 Echoes Content Studio)
Build/Install Floating Shelves
Bulky nightstands can make this guest room feel cluttered, so instead, we’re attaching floating shelves to the sides of the bed.
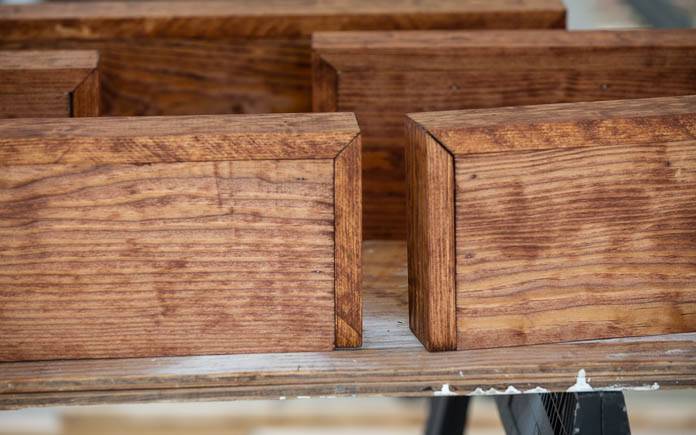
The floating shelves are essentially a box made from To make the floating shelves, we build a box with a 1-by-6 board on top, a half-inch-by-6-inch board on the bottom, and 1-by-2 pieces wrapping the edges.
We mixed two stain shades to create a color that matches the headboard. (3 Echoes Content Studio)
Once assembled, we sand the shelves and stain them to match the headboard.
To keep the floating shelves secure, we add wood glue to the cleat before we slip them on. (3 Echoes Content Studio)
To hang the shelves, we first screw cleats into the wall, then slip the shelves on and secure them with finishing nails and wood glue.
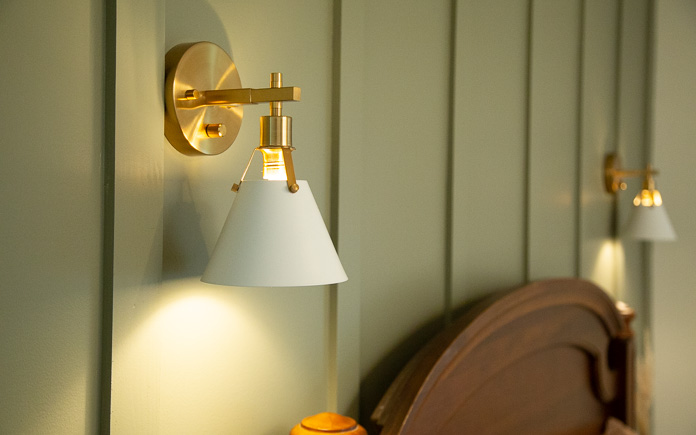
For additional lighting, we’re adding some wall-mounted sconces on either side of the bed.
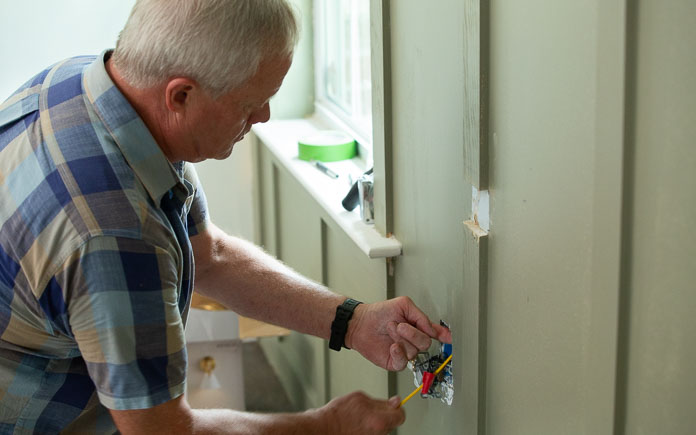
Rerouting the wiring was simple because the wall had two outlets where we needed to place our wall sconces. (3 Echoes Content Studio)
To do this, we first have to reroute the wiring from the electrical outlet to where the sconces will be hung on the wall. We cut a hole in the drywall where the sconces will be mounted, then fish the electrical wires up to the hole.
Once the wires are set, we follow the instructions to install them.
Corey’s extra bedroom was just that — it lacked any real identity. The hardware and paint color lifted by the previous homeowners didn’t make the welcoming statement they wanted for their guests.
But now, the room has a clear purpose and that’s to make guests feel right at home. The board and batten accent wall draws you into the space and the custom trim around the windows tells you they were intentional about making this room nice for you.
The floating shelves and nightstand are functional for short-term guests without taking up as much space as larger pieces of furniture. And the warm wood tones complement the cool green accent wall, just as the gold wall sconces do.
The ingeniously simple speed square is the most practical and useful hand tool for any carpenter or do-it-yourself.
Also called a rafter square, this multi-purpose triangular carpenters’ tool packs so many features into such a small tool that at first glance it might be confusing how to use it.
So, we’ve broken down its five uses for you:
Make accurate 90-degree or 45-degree cuts by lining up the saw with the edge of a speed square. (3 Echoes Content Studio)
1. Make accurate cuts. Because of its triangular shape, a speed square is great for making square crosscuts or 45-degree lines. Simply line up the edge to a board to cut the right angle every time.
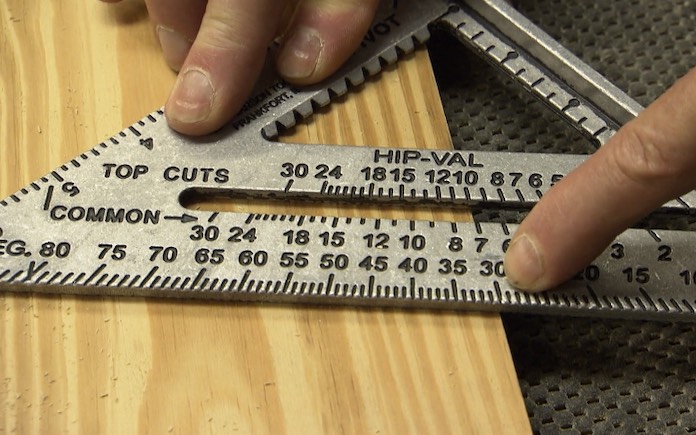
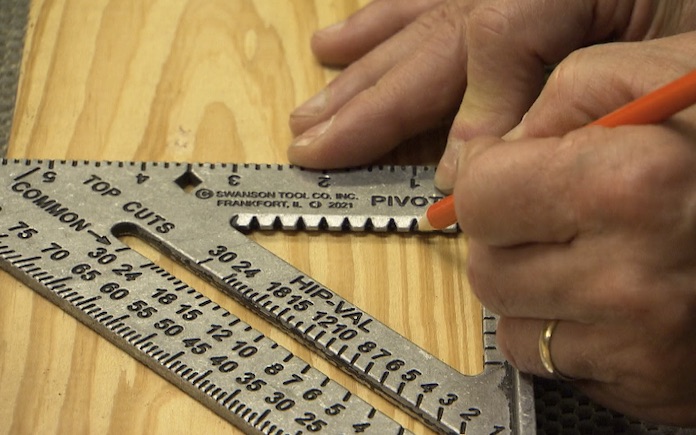
2. Mark angles. A speed square has a pivot point, so you hold it against the edge of the board and rotate it to mark any angle. For example, let’s say we want to mark a 30-degree angle. Simply hold the edge of the speed square against the edge of a board, then pivot it to line up with the 30-degree mark on the speed square.
Place a pencil in the quarter-inch notch, then slide the speed square along the board to draw a straight line. (3 Echoes Content Studio)
3. Use it as a scribing tool. Let’s say you want to make a parallel line one inch from the edge of a board. A speed square has quarter-inch notches on its inside, so you can put your pencil in the one-inch notch and slide it along the board. Then, you’ll have an even line one inch from the edge.
The diamond cutout is three and a half inches from the edge, the same width as a 2-by-4. (3 Echoes Content Studio)
4. Mark the width of 2-by-4.A speed square has a diamond cutout exactly three and a half inches to the edge of the square, which is exactly the width of a 2-by-4. So if you put your pencil in there and slide it along that line, this will is exactly the width of a two-by-four.
5. Use it as a saw guide. Probably the most useful and obviously practical application of a speed square is as a saw guide. Just take the square, hold it against the board’s edge and guide the saw right against the square. You’ll get a straight cut every time!