In this episode, we’re bringing a vintage 80s brick home into this decade with an exterior refresh.
Homeowner Kim Hetzman and her three children live in this home that her children have deemed ‘the hot dog stand.’ (The nickname comes from the awnings that resemble a hot dog kiosk.) Needless to say, Kim is ready for a change and we’re more than happy to help!
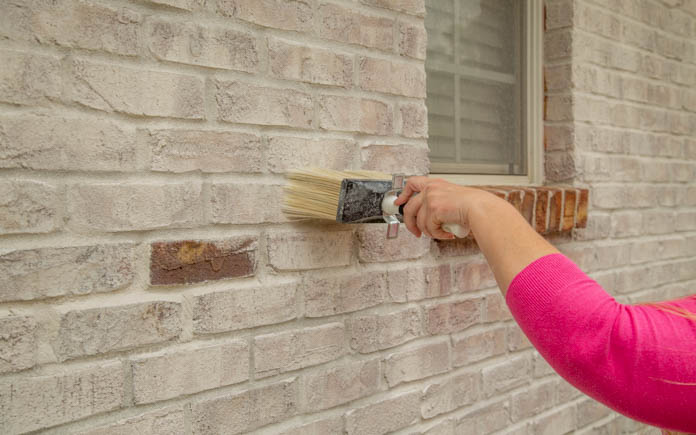
To make Kim’s home stand out and boost its curb appeal, we limewashed the exterior bricks.
Limewash is a mix of lime, minerals and water that applies directly to brick and actually soaks into the brick instead of sitting on top of it. It’s easy to apply and creates a beautiful rustic look on any brick surface.
The brick needs to be wet before applying the limewash. We used a sprayer to apply the limewash to speed up the process a little bit, but this can also be done with a masonry brush.
After letting it dry for about 15 minutes then you can go back and remove some of the limewash with water in selected spots.
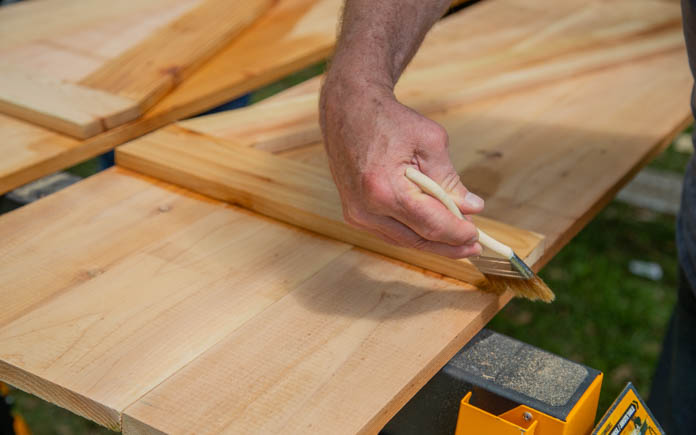
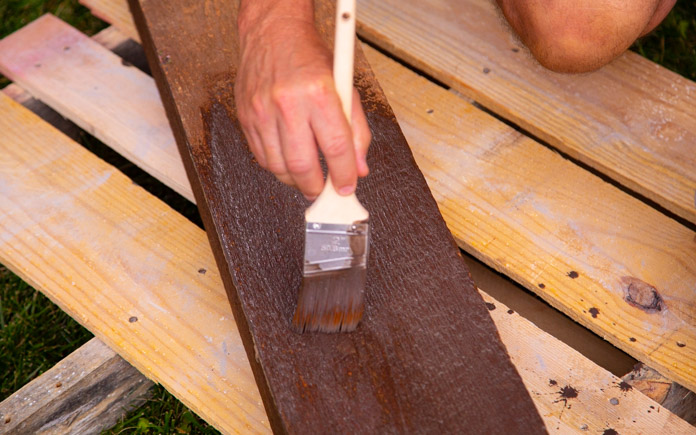
A clear sealer protects the shutters from water damage and maintains the wood’s natural color. (3 Echoes Content Studio)
Building New Shutters
Kim and Chelsea build new cedar shutters for Kim’s home. They look timeless and add some vintage charm.
Chelsea creates a jig using a few stop blocks to slide the shutter components in place and so she won’t have to measure every piece. The shutters are built upside down; this way, no nail holes are noticeable!
We build the shutters from three 1-by-6 cedar boards across and, using the same width, one 1-by-4 at the top and bottom. The diagonal accent piece is also 1-by-4.
When assembling the shutters, place the smooth side of the cedar down so it faces out once completed. Once all the boards are in place, Chelsea attaches the screws in from behind — this way, no nail heads will show on the outside of the shutter.
Note: Be sure the screws aren’t too long because the tip can come out of the front side of the shutter and ruin the project!
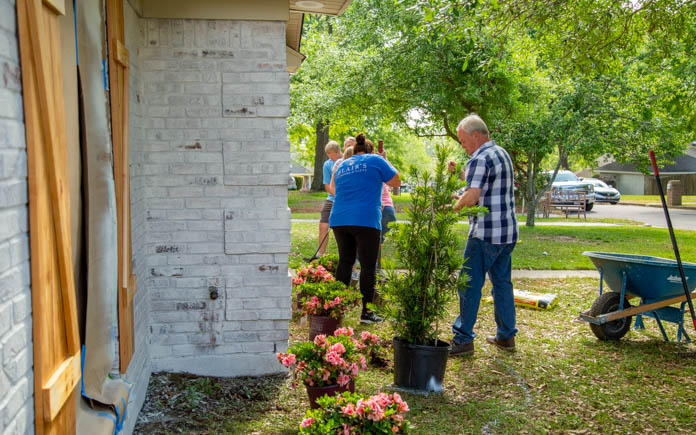
These small azaleas won’t grow as large as the ones originally in the yard. (3 Echoes Content Studio)
New Landscaping from Blair’s Nursery
To finish off Kim’s curb appeal update, we had help from our friends at Blair’s Nursery, a nursery located right here in Mobile, Alabama.
Owner, Blair Kovar, helps us create a beautiful landscape plan for Kim’s home that is low maintenance and accents the home.
Kim’s landscaping includes a variety of plants and flowers that you can check out at blairsnurseryandgifts.com.
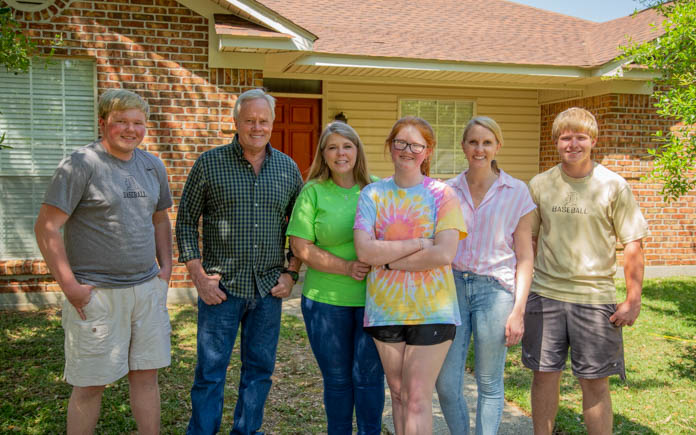
When we first arrived at Kim Hetzman’s home, or ‘hot dog stand’ as her three kids called it, it was a home in great shape for a 30-year-old home but didn’t fit her personality.
It was dated and dull but just needed some love added to it. Now the house is lighter, brighter and full of character thanks to the limewash added to the bricks. The rustic cedar shutters add warmth to the house making it comfortable and cozy.
The new landscaping adds depth and color that enhances Kim’s curb appeal!
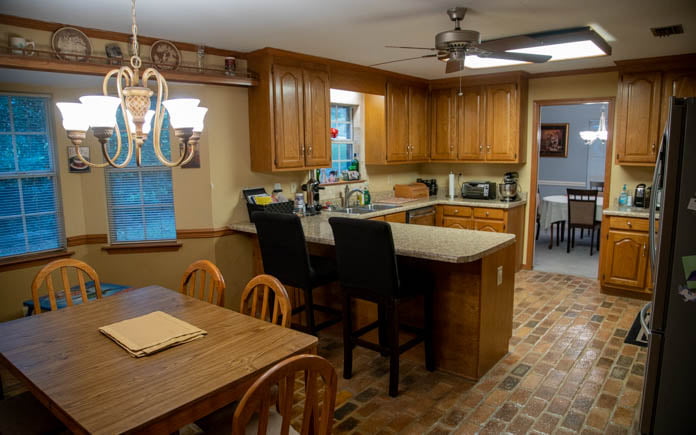
Homeowners Lloyd and Aimee Meyers and their two kids, Caroline and Landon, love their home, but they’re not so fond of their ’80s kitchen.
So, we’re helping this family with an inexpensive renovation — at just $1,200 in materials — that will leave a big impact!
We’re bringing this ’80s-style kitchen into the 21st century with a special two-part episode. This article covers part two of the project. (Missed part one? Catch up here!)
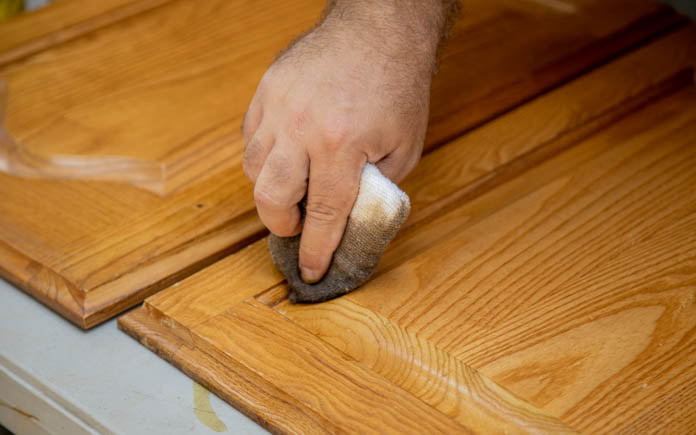
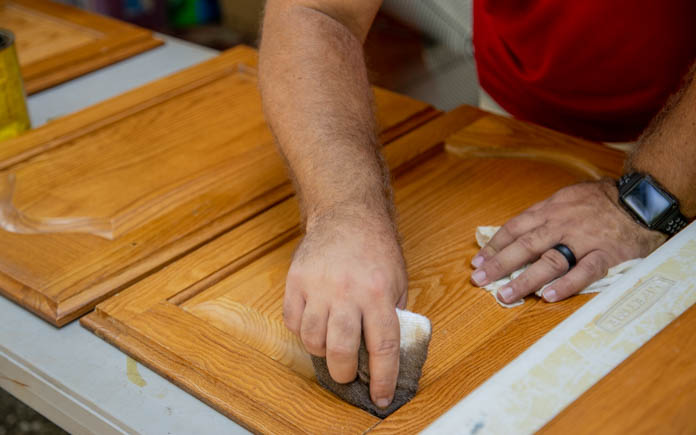
Don’t want to paint your cabinets? Touch up the stain and re-seal them for a like-new look!
Touching Up the Cabinets
Lloyd and Aimee’s cabinets, overall, are in great shape. However, they have a few unsightly scratches.
The homeowners don’t want to paint these cabinets because they love the rich wood grain. Instead, we’re touching up the stain and giving them a fresh coat of polyurethane.
In part one of this project, we cleaned and prepped the cabinets. In this episode, Chelsea shows Lloyd how to properly apply stain, waiting a few minutes for it to sink into the wood, before removing it.
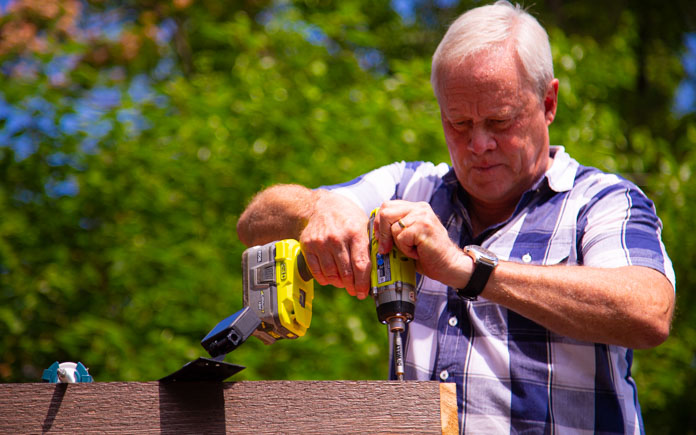
Refinishing the cabinets and installing new pulls make them look shiny and new.
After the polyurethane has dried, we place the cabinet doors back on the boxes and install new stylish pulls.
It’s such a simple change — adding new hardware — but one thing is certain: these cabinets no longer scream 1980s!
Best of all, Aimee loves how the refinished cabinets and new hardware completely transform her kitchen.
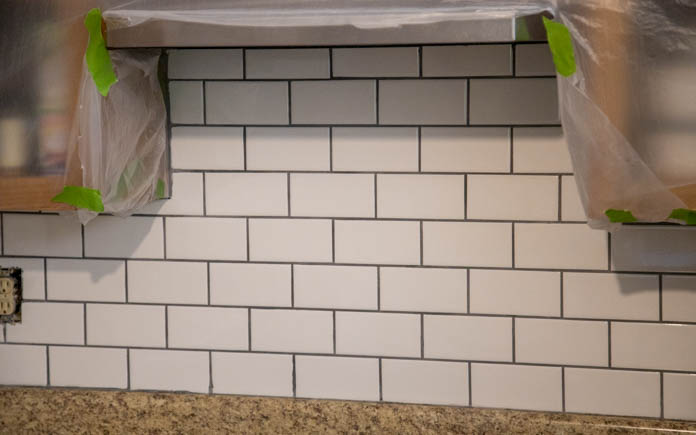
Sticking SimpleMat, from Custom Building Products, onto the walls and then sticking subway tiles on the innovative mat is much easier than the traditional way to install a backsplash.
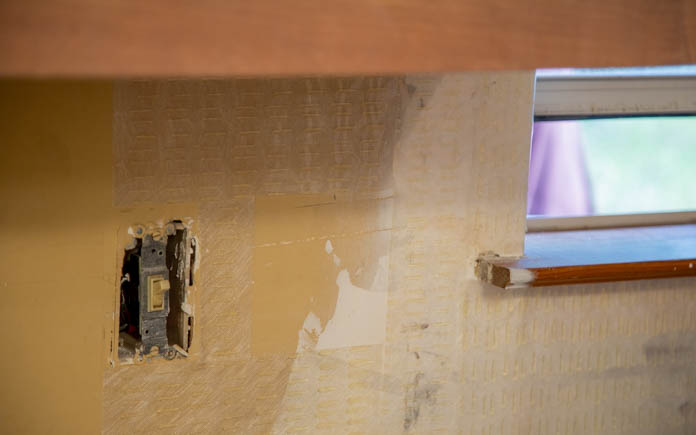
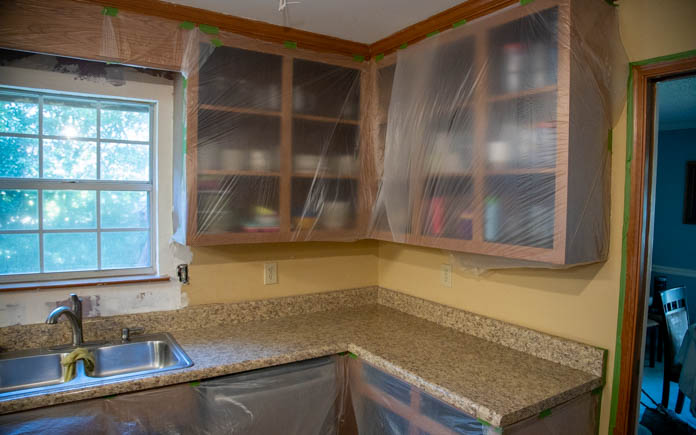
Replacing the Backsplash
Lloyd and Aimee’s kitchen had just two small backsplashes in the form of dated ceramic tile behind the sink and oven.
We’re replacing those with stylish subway tiles — and this new, sweeping backsplash will cover each wall in the workspace. The result will be a consistent look that leaves a dramatic impact.
We ran into just one stumbling block before starting work on the new backsplash. We removed the old backsplash and realized it removed portions of the wall.
Things don’t always go as planned during home improvements, but in this case, we just replaced the drywall. Simple enough!
This new subway tile backsplash is sleek, modern, and ties the whole kitchen together.
For the backsplash installation, we use SimpleMat from Custom Building Products. It’s basically a double-sided sticker. First, you apply SimpleMat to the wall. Then, remove the adhesive front and apply tiles to the SimpleMat. After that, grout the tiles and remove the excess.
You can learn more about the process in our how-to video.
This page contains affiliate links. If you purchase a product from these links, we will earn a small commission at no additional cost to you.
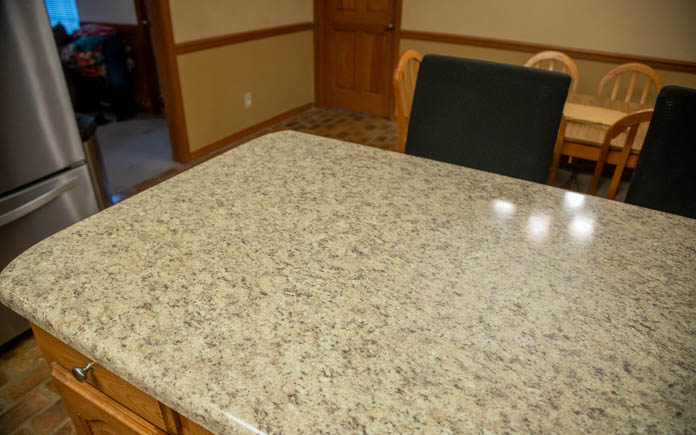
This plastic laminate countertop is in great shape, but it doesn’t match the homeowners’ current style. So we’re coating it with dark paint mixed with real stones.
Refinishing the Countertops
This kitchen’s countertops are in great shape, but the plastic laminate no longer wows Lloyd and Aimee. And these countertops won’t look good next to the bright white backsplash we’ve installed.
One simple decor trick is to update two adjacent surfaces with contrasting colors. The subway tiles are white, so these countertops will be black.
This product, seen in Volcanic Black, basically mixes dark paint with real stones for a stunning countertop makeover, and the application couldn’t be easier.
First, we sand the countertops to smooth out the laminate and remove any grime. Then we clean the countertop so primer will bond to it.
The countertops’ new dark coating contrasts nicely with the white backsplash.
Once the primer is dry, we apply the stone coating, as directed, and let it dry. Afterward, we sand it so the stone shines through, giving the countertop a gorgeous granite look.
Finally, we finish it off with sealer.
“Today’s Homeowner” hosts Danny Lipford and Chelsea Lipford Wolf, pictured with Lloyd and Aimee Meyers.
By painting over mustard-colored walls, replacing outdated light fixtures and installing a new backsplash, this kitchen is now in the 21st century!
The new wall color is lighter and brighter. The cabinets look new, with a fresh coat of polyurethane and stylish pulls. And the white subway tile backsplash contrasts beautifully with the dark countertops and light fixtures.
We’re bringing an ’80s-style kitchen into this decade with a special two-part episode.
Homeowners Lloyd and Aimee Meyers and their two kids love their home, but they want to make some updates to their kitchen.
We’re happy to help this family with a renovation that’s inexpensive, at just $1,200 in materials, but will leave a big impact!
This article covers part one of the project.
Lloyd and Aimee are looking to make several updates to their 80s style kitchen.
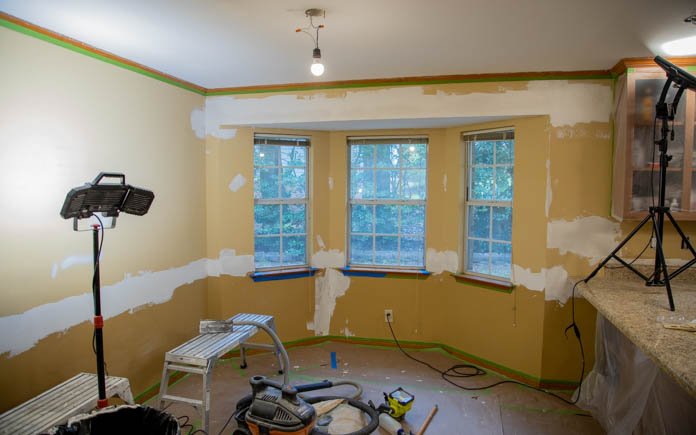
Preparing the Space
We begin by removing the galley rail above the windows in the dining area. It currently serves as a display shelf for decorative china, but modern homes don’t include this feature and it makes the room feel crowded.
The ceramic backsplash only protects the area behind the sink, so we will replace it with a subway tile backsplash that covers everything behind all the countertops. This consistent look will enhance the kitchen’s overall design.
We will replace the unsightly chandelier above the dining table, move the ceiling fan to a more functional location because Aimee cooks a lot, and remove the long fluorescent light above the work area.
Even the ceiling gets an update because this one has “popcorn,” or texture, that’s no longer in style. (Lloyd already removed some of the popcorn before we arrived.)
When removing a popcorn ceiling, I prefer using a metal scraper. The pros often sand off the scraper’s corners so the edges are rounded, which prevents damage.
After removing the galley rail and chair rail, we begin patching any holes with the joint compound.
Once we’ve removed everything, we use joint compound to cover any holes we found and install new drywall in place of the sink’s backsplash.
We removed the kitchen cabinets’ doors to give them an upgrade.
Touching Up the Cabinets
Painting wood cabinets is on-trend, but Lloyd and Aimee like their cabinets — they just want to freshen them up.
So, instead of replacing or painting the cabinets, we’re giving them a facelift. That just means taking the doors off the boxes, cleaning them, repairing any scratches and applying a fresh coat of polyurethane before installing new hardware.
Many homeowners paint their wood cabinets white, but if you want to keep the grain, just refinish them.
We will complete this project in episode two, but when all is said and done, the cabinets will look new and the hardware will complement them nicely!
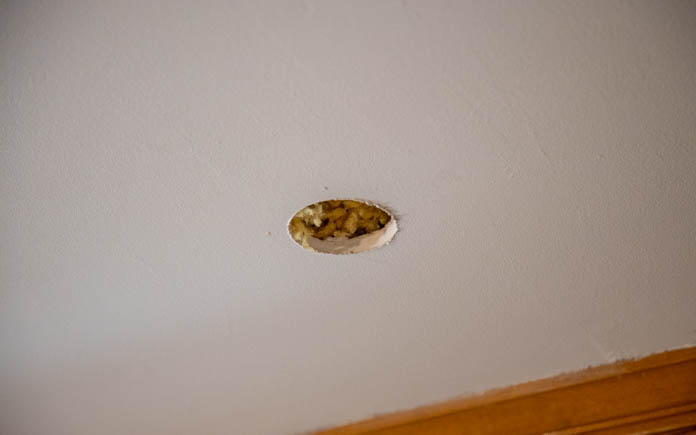
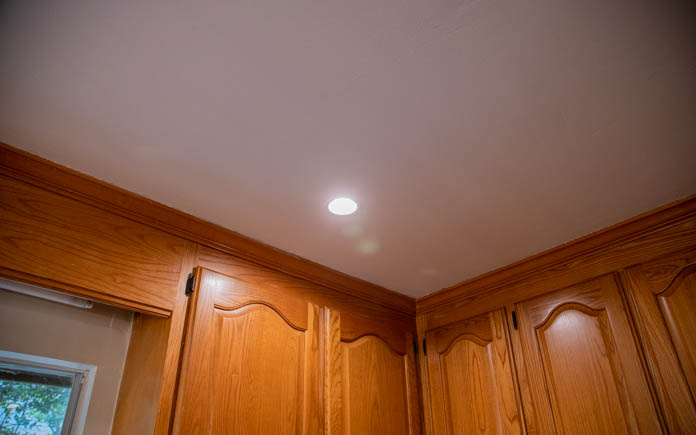
With a little know-how, canless recessed lights are easy to install.
Installing Canless Recessed Lighting
This kitchen had massive light fixtures that were dated, unattractive, and didn’t fit the space. We’re adding new light fixtures, including canless recessed lighting that will accent the room and add ambiance.
The LED lights we will install, from Commercial Electric, are small and don’t put out much heat, so they’re energy-efficient and attractive (a win-win).
This page contains affiliate links. If you purchase a product from these links, we will earn a small commission at no additional cost to you.
Installation is easy — all you have to do is cut a small hole in the ceiling with a hole saw, attach the wires to the junction box and push them up into the ceiling!
This week, we’re in Charlotte, North Carolina, to create a beautiful outdoor area for our Backyard Paradise contest winners.
Courtney Claugus was selected as the lucky winner of our Backyard Paradise contest, so we’re giving her and her husband Adam’s backyard a makeover with help from our friends at Quikrete and Pavestone.
Read on to learn about some of the projects we tackled.
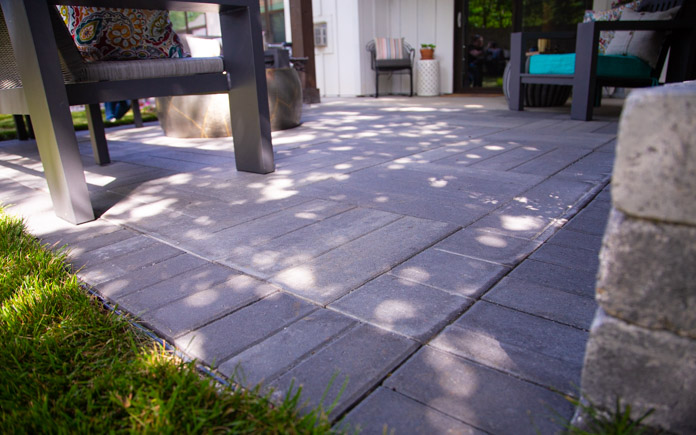
These large, gray linear pavers complement the Claugus’ contemporary home. (3 Echoes Content Studio)
Build Two Paver Patios
Two is better than one! And in this, case, two paver patios offer more space for outdoor living!
We designate one patio for seating and another for dining — like an open floor plan for the great outdoors.
Crews from Quikrete, Pavestone and a local construction company build the dual patio setup. The first patio extends from the existing concrete patio, and the second is on the other side of the house.
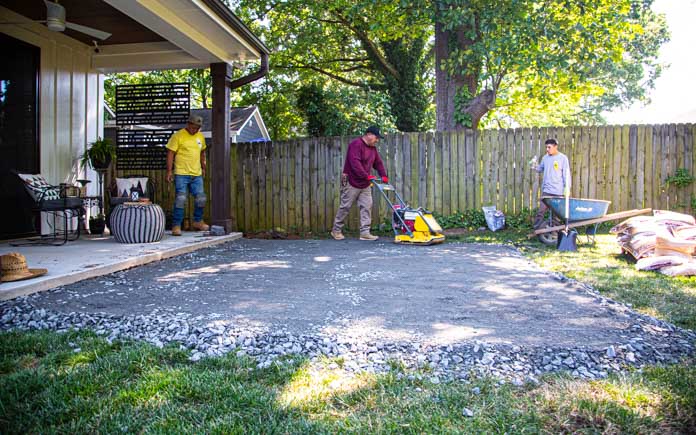
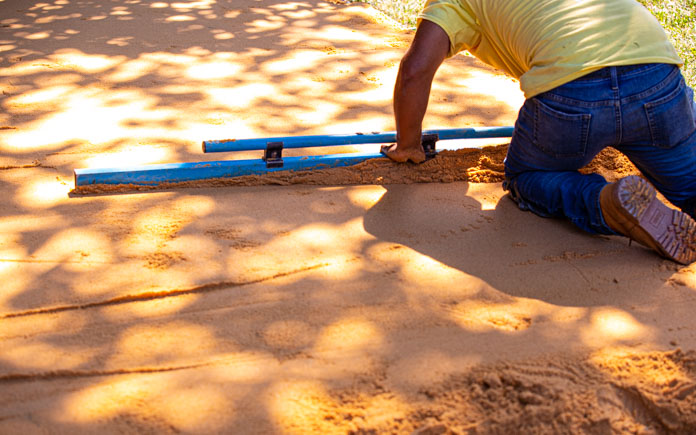
Paver base provides a solid foundation and also raises the pavers to be even with the concrete patio. (3 Echoes Content Studio)
They first lay out the footprint for the patios, then add four inches of paver base to establish the foundation.
After compacting the paver base, they add one inch of paver sand, then use a level to make the surface even.
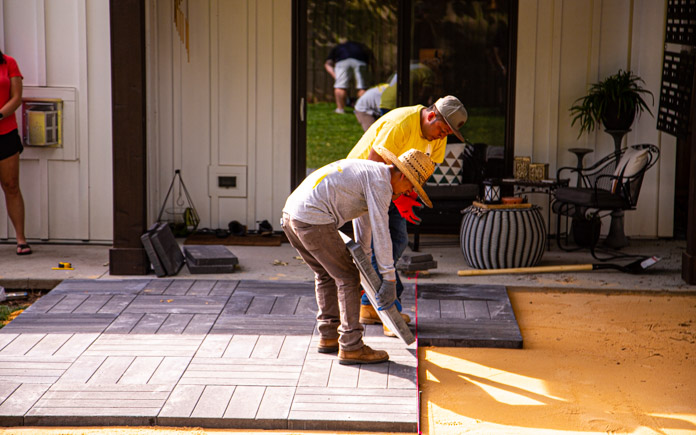
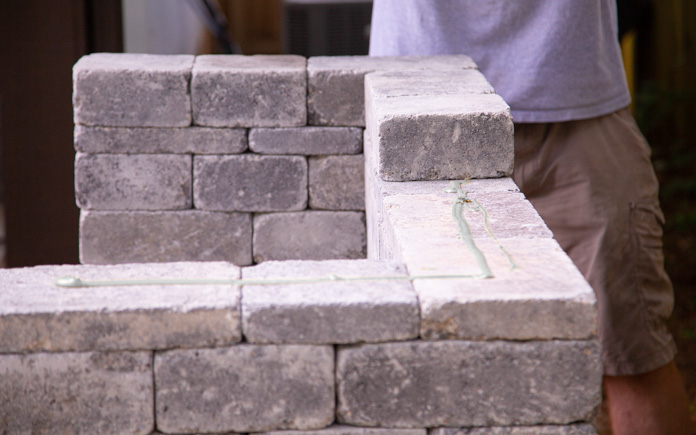
Workers use a string to ensure the lines stay even throughout the length of the patio. (3 Echoes Content Studio)
The patios are built with Pavestone’s Avant XL pavers. These large, 16-by-16-inch patio stones have the look of large format plank pavers. The false joints on the gray pavers create clean lines, so they go well with Adam and Courtney’s contemporary-style home. To add some line variety, the crew rotated each paver to create crisscrossed lines.
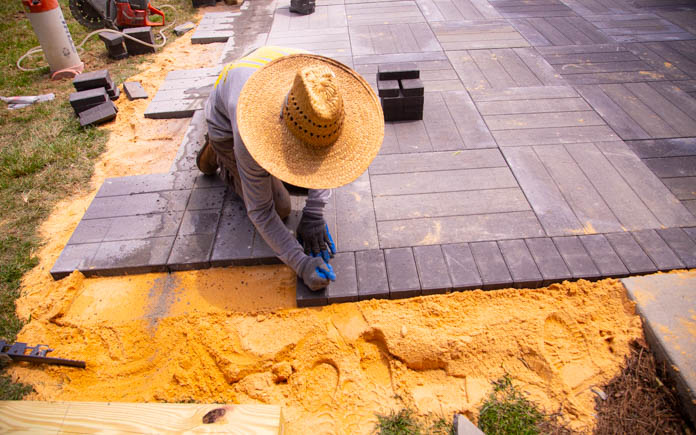
Once the large pavers are laid, the crew marks a line where the border will begin and cut it with a concrete saw. Then, they lay the smaller border pavers in a soldier course pattern.
Just like grout color matters when laying tile, paver sand color makes a difference on a patio. (3 Echoes Content Studio)
The last step is filling the joints. We use a granite screening to complement the pavers as well as the house’s color. for fine.
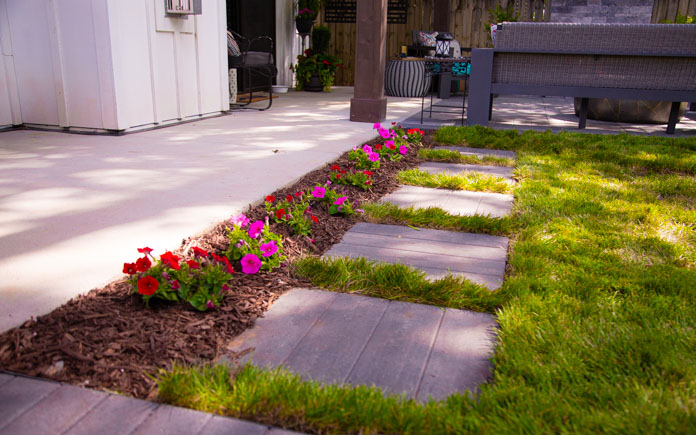
These matching pavers create stepping stones to unite the two patios. (3 Echoes Content Studio)
After the patios are complete, we place a few pavers between them to create stepping stones, so the two are united.
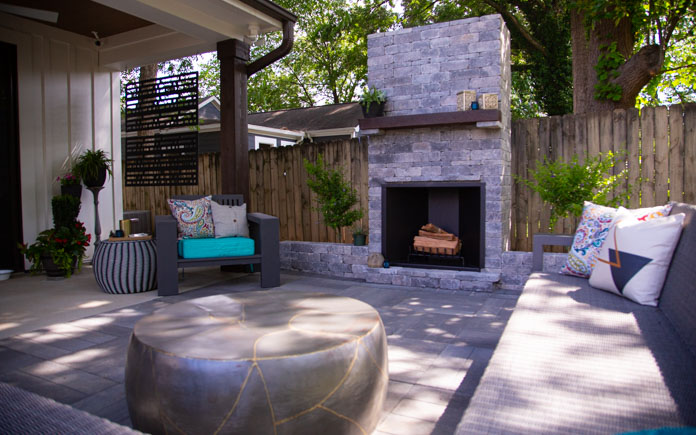
The outdoor fireplace becomes the perfect focal point for this seating area. (3 Echoes Content Studio)
Build Outdoor Fireplace
Every seating area needs a focal point, so we build an outdoor fireplace.
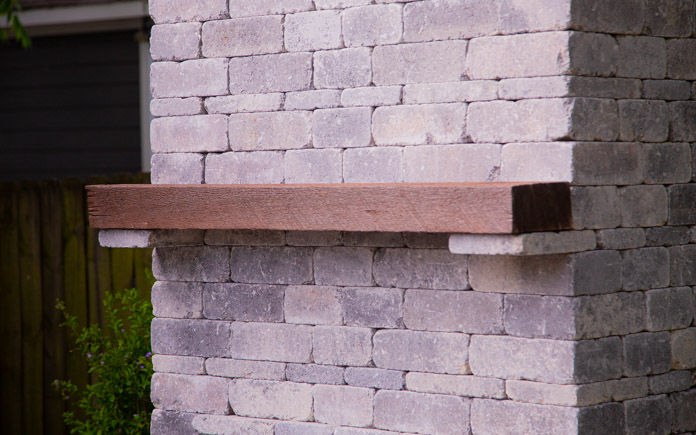
Pavestone representative Chris Claire found this wood mantel at his mother’s home. (3 Echoes Content Studio)
Once the fireplace is built, we add a mantel using a recycled piece of wood. It softens up the hard edges of the stone and warms up the space.
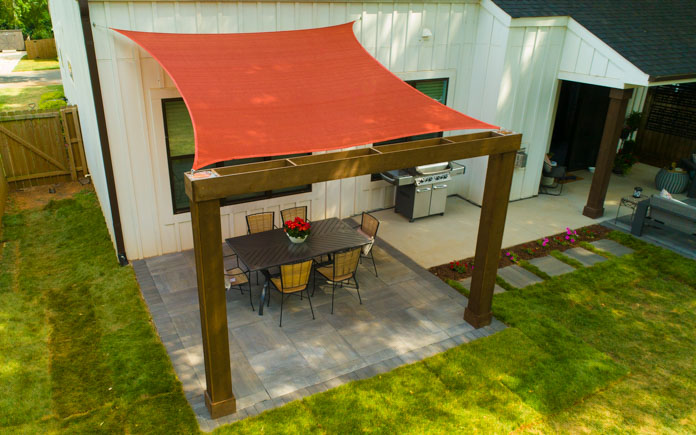
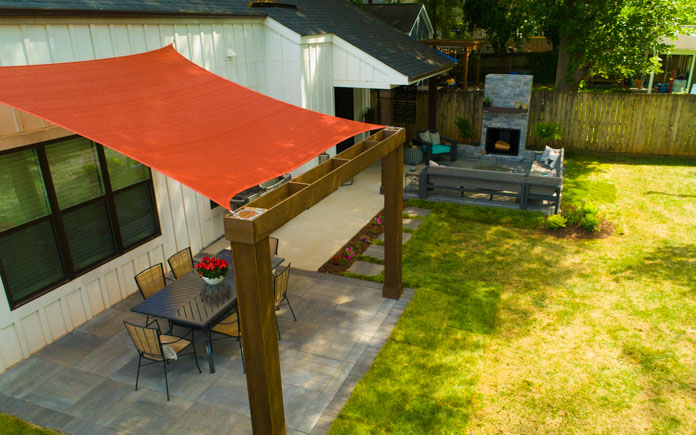
We install the shade sail hooks on the house slightly higher than the ones on the post so we can match the slope of the home’s roof. (3 Echoes Content Studio)
Install Shade Sail
The paver patio for dining offers little shade, so we install a shade sail to make the area more comfortable.
First, we dig holes for our two 6-by-6 posts that will support the shade sail. We set wood posts in the ground using Quikrete Fast-Setting Concrete, then surround them with pavers to match the patio.
To match the posts to the house columns, we stain pieces of rough-sawn cedar and wrap them over the wood columns. Before we nail the wood over the posts, we add some spacers to keep the cedar planks from bowing. Wrapping these 6-by-6 posts not only makes them look larger, but it also hides the cracks that are inevitable with solid posts.
To join the two columns, we build a horizontal box beam with longer pieces of 1-by-8-inch cedar on the ground before we lift it into place.
Next, we attach two hooks to the top of the posts for half of our shade sail, then attach another two to the side of the house for the other two corners of the shade sail.
Then, we install those hooks slightly higher to give the shade sail a slope and match the angle of the roof.
Danny Lipford and Chelsea Lipford Wolf with Backyard Paradise winners Adam and Courtney Claugus and their dog Kendrick. (3 Echoes Content Studio)
Post-Production Thoughts
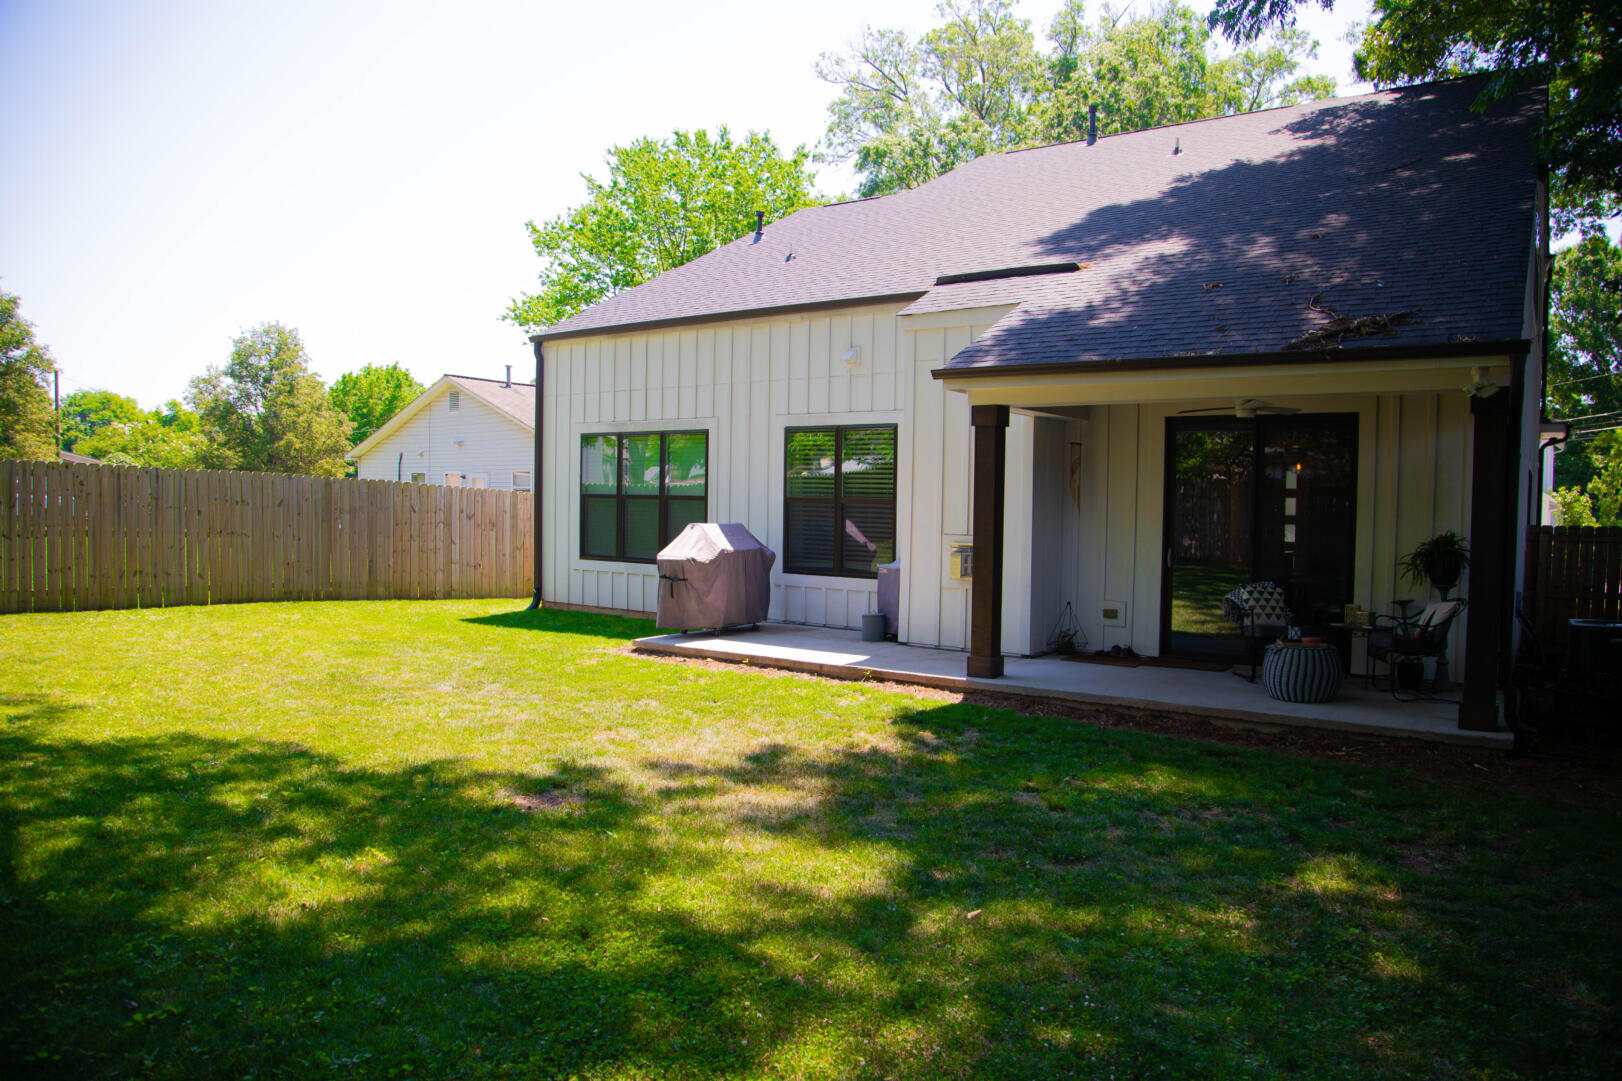
Courtney and Adam had a nice backyard, but they didn’t have much outdoor living space to enjoy it. With just a small covered concrete pad and a couple of chairs, their outdoor entertaining well was pretty limited.
Adam and Courtney had a big backyard but little room for entertaining. (3 Echoes Content Studio)
Now they have not one but two great Pavestone patios that offer plenty of space for entertainment. One is just the right size for outdoor dining under the cover of the shade sail we added, and the other offers a massive space to relax with friends.
By adding two paver patios, we’ve more than doubled the outdoor entertaining space in this backyard. (3 Echoes Content Studio)
The Rumblestone fireplace adds a focal point with loads of character and is bound to be very popular on those chilly nights. Plus, the large format pavers complement the contemporary home’s color and character.
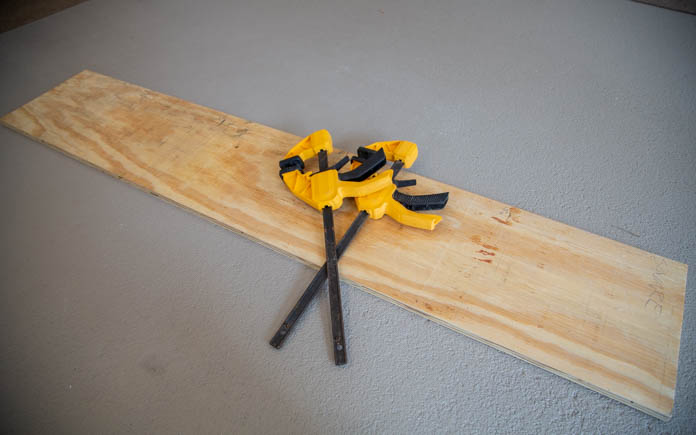
Bar clamps can act as a helping hand when you’re working solo on a wood project.
It’s not always possible to have a helper for every project. And for woodworkers and do-it-yourselfers, only having two hands to join two pieces of wood together can be frustrating.
If there’s nobody around to help you join two pieces of wood, there are a few alternative solutions to try. You could try holding both pieces with one hand and screwing them together with your free hand. However, this isn’t ideal.
Not only can you slip and injure your hand, but the awkward positioning can lead to a mistake, which in turn results in wasted materials, increased job time and even more frustration.
You also could use a shelf bracket, but not everyone has one of those to spare, especially if you aren’t building shelves.
This can be easily avoided with tools that you might already have lying around. To free up your hands and keep your project secure, use bar clamps!
Bar clamps, also known as F-clamps, are common tools in the woodworking field. They’re mainly used to hold pieces of wood in place as wood glue dries. They also have practical uses in welding.
Bar clamps are composed of a long metal or plastic rod and two parallel bars attached to it, forming the shape of the letter “F”.
Using a bar clamp is simple. All you have to do is unfasten the screw or whatever device is used to move the parallel bars. Then, adjust the bars to the width you need to fit the piece of wood you’re working with, and fasten the clamp back down.
This part is easy! Or, should I say, simple — like all my other Simple Solutions. All you need is two short bar clamps to use as outriggers to keep your piece of wood in place. Here’s how:
1. Fasten each clamp to the bottom of the piece of wood that you want to stand still, making sure that each bar is facing the opposite way.
2. Now, the piece of wood should be standing straight up on its own, balancing between the two clamps.
3. Line up the piece of wood you want to attach to your now free-standing board.
4. Use a drill and screw to attach the two pieces of wood together.