Pumice stone: To clean the buildup without using chemicals, use a pumice stone to scrub the calcium deposits away. It won’t harm pool water and its soft stone surface won’t scratch the pool coping.
Once the calcium build-up is gone, use a clear sealer to prevent it from coming back.
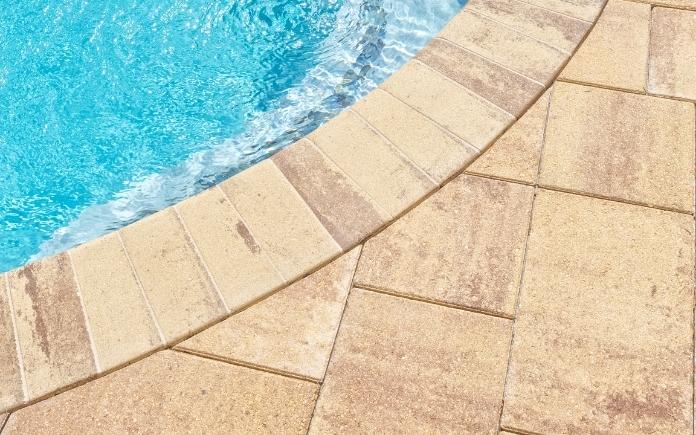
Concrete is the most cost-friendly material for pool coping. (edenexposed, Getty Images Signature)
FAQ About Pool Coping
What is the best coping to put around a pool?
Tile, brick, stone, concrete, composite, or even wood are used for pool coping. The most commonly used material is sandstone because of its non-slip properties.
Is pool coping expensive?
Pricing depends on the material used. Sandstone, the most common pool coping material, costs $40–$55 per linear foot. Conversely, cantilevered concrete coping typically costs $6–$10 per linear foot.
What goes between pool coping and concrete/pavers?
Whatever material you choose for your pool coping, the installation is basically the same. The coping is caulked or filled with elastomeric sealant onto the concrete surrounding the pool. An elastomeric sealant allows for some expansion and contraction, so the pool coping won’t crack during temperature shifts.
Skip to [25:05]for the full segment on the Today’s Homeowner Podcast.
Also on this episode:
Best New Product
Samsung’s new Smart Washer learns your laundry routine and washes clothes faster than ever! Learn more>>
Simple Solutions
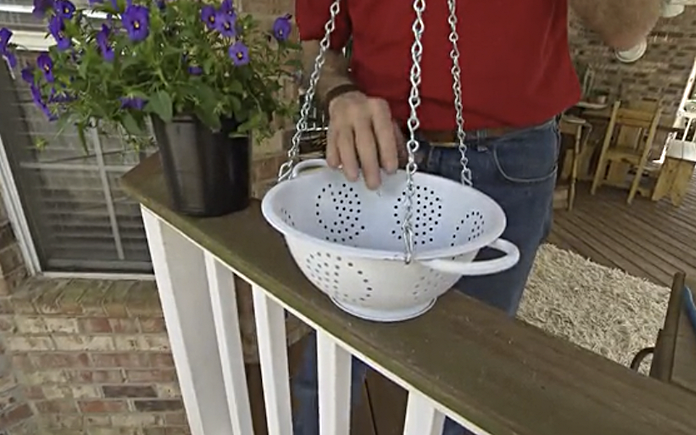
Give an old metal colander a new purpose by turning it into a hanging planter.
Hanging Colander Planter — Make a unique hanging planter out of a metal colander!
Start by drilling three holes evenly spaced around the rim of the colander.
Next, spray paint the colander to match the house trim.
Then, hang it with three 16-inch chains and S-hooks.
Line the colander with landscaping fabric or coffee filters before adding soil and plants.
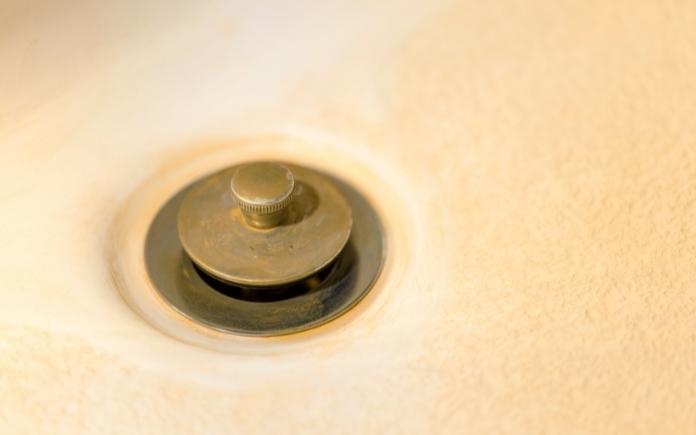
Remove hard water stains with household items you have on hand. (skhoward, Getty Images Signature)
Tub-Stain Remover — This recipe is great for removing stains from tubs, sinks and toilets.
Mix equal amounts of cream of tartar and baking soda with enough lemon juice to make a paste.
Rub the mixture into the stain with your fingers or a soft cloth.
Let sit for a half-hour, then rinse with water.
Other Products and Links Mentioned
This page contains affiliate links. If you purchase a product from these links, we will earn a small commission at no additional cost to you.
Further Reading
Ask a Question! (Podcast)
Ask a question and we could answer it on the “Today’s Homeowner Podcast!” We also may use it on our nationally syndicated radio broadcast or on todayshomeowner.com.
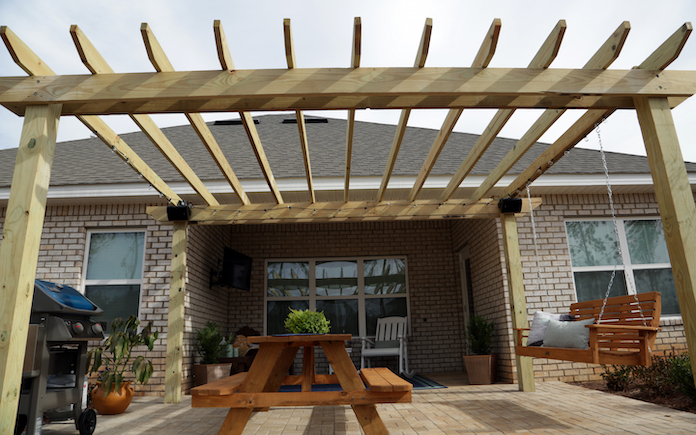
You can use your outdoor space even when it’s raining by adding a roof to a pergola.
A pergola roof protects you from pop-up storms, so you can extend your time outdoors.
Tyler Schwall in Mobile, Ala., wants to install a tin roof over his pergola. But before he does this, he wants to know the best way to put the roof so it has a pitch for rainwater.
First, buy some pressure-treated 2-by-4s to cover each slat on the pergola. Make sure these boards are the same length as the ones on the pergola.
Then, rip each 2-by-4 at a slight angle from its full width down to nothing. Ripping a board means cutting it along its length. This will create a tapered strip. Make sure the pitch of the roof is at least two inches so the rain will properly flow off of it.
Next, apply some construction adhesive on the slats and place the ripped boards on top of them. This will add some extra waterproofing protection and keep them secure when you’re installing the tin roof.
After you’ve placed the ripped boards on the pergola, secure them with wood screws. To keep the tin roof from sagging, lay some 2-by-4s perpendicular to those.
Once all the boards are secure, install the tin roof.
Now, you can sit outside under your covered pergola and enjoy the sound of the rain dancing on the tin roof.
Skip to [21:58]for the full segment on the Today’s Homeowner Podcast.
Also in this episode:
Best New Product
Whether you want to protect your lawn from pets digging or create a space for them to roam, Lifeproof Premium Pet Turf has you covered. Learn more>>
Simple Solutions
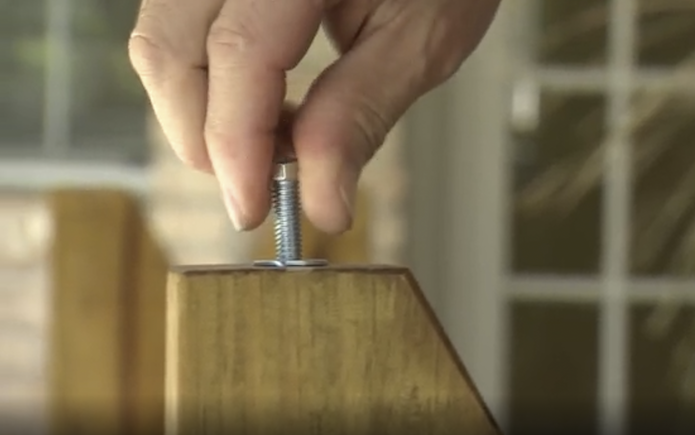
This Simple Solution levels patio furniture and helps prevent wood rot.
Leveling Wood Patio Furniture — Start by boring a 3/8-inch diameter hole into the bottom of each table or bench leg.
Then, use a hammer to tap a T-nut into each hole.
Thread a hex-head machine bolt into each T-nut.
The bolts lift the bench off the patio to prevent rot, and they are adjustable to ensure the bench is level.
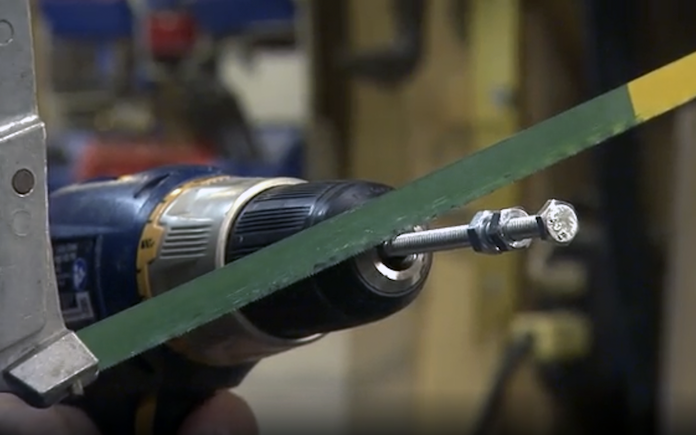
If you need to cut a bolt to size, let a cordless drill do most of the work for you.
Clean-Cut Bolts — Here’s how to shorten a machine bolt — threaded rod or carriage bolt — without messing up the threads.
First, thread two hex nuts onto the bolt, then make the cut using a hacksaw or jigsaw with a metal-cutting blade.
Then, spin off the nuts, one at a time, using a wrench if necessary.
When the nuts come off the end of the bolt, they’ll re-cut and straighten out any threads that were damaged by the saw, making it easy to thread the nut back on.
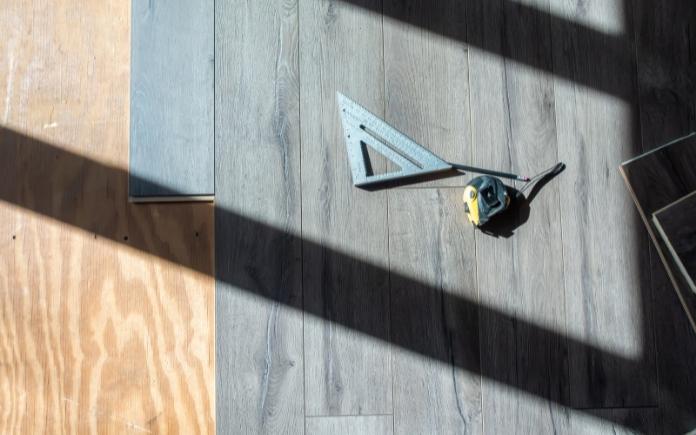
Engineered wood flooring drastically changes the look of the room, but you must have the right plank size before you begin. (digidreamgrafix, Getty Images)
Question of the Week
Q: I just bought my first house and I’m about to install some engineered wood flooring.
According to the installation instructions, the last row of flooring must not be less than half the width of the planks. (The planks are five inches wide.) But the instructions don’t tell you how to determine the width of the last row.
Can you please tell me how to figure that out?
A: When installing flooring, the initial layout is going to define the success of the project. Don’t start with a full-width plank and hope the last row is wide enough.
First, measure the width of the room and divide by five, the width of the plank. That will give you the number of full-width planks plus any fractions.
If the last row is less than 2½ inches, reduce the width of the first plank.
Skip to [36:22]for the full segment on the Today’s Homeowner Podcast.
Other Products and Links Mentioned
Further Reading
Ask a Question! (Podcast)
Ask a question and we could answer it on the “Today’s Homeowner Podcast!” We also may use it on our nationally syndicated radio broadcast or on todayshomeowner.com.
Repointing the brick on this historic home will help the exterior upkeep for longer. (Photo by Scott Evans)
Repointing brick is the process of renewing the pointing, or external mortar joints, in between them. Over time, weather deteriorates the mortar, which could then cause water to leak inside the brick wall.
Repointing a historic brick home requires a different type of mortar so it will last for years to come.
Scott Evans in Rochester, Ill., has begun repointing his 155-year-old brick home in Rochester, Ill., but the mortar is popping out.
So, what’s the solution?
Scott’s problem has to do with the type of mortar he used.
When repointing an older brick home, you don’t want a mortar that will cure harder than the brick itself.
Older bricks are soft, and they tend to expand and contract more in temperature and humidity changes than newer, harder bricks.
Use type O mortar — a high-lime mortar with low compression strength. It contains less Portland cement and more lime, which makes it softer and also more waterproof.
Here are the basics for repointing brick:
Use a chisel or handheld grout saw to remove the mortar.
Wet the bricks and let them soak overnight. Keeping them hydrated will prevent the bricks from soaking up too much of the water in the mortar mix.
Next, mix the mortar. The general rule for mixing mortar is to use three parts sand to one part mortar mix. Combine the mix with water until it reaches the consistency of cake frosting. Work in small batches so the mortar doesn’t dry out before you apply it.
Work the mortar between the bricks using a pointing trowel. Use the flat end of the trowel to scrape away any excess on the face of the brick.
For the next three days, mist the mortar daily so it dries slowly and won’t crack.
Skip to [9:35]for the full segment on the Today’s Homeowner Podcast.
Also on this episode:
Best New Product
LG’s new convection oven with air fry capability saves on counter space and can cook for a crowd. Learn more>>
Simple Solutions
Adding Epsom salt to your tomato plant soil will improve its health and taste. (pixabay)
Epsom Salt in the Garden — Epsom salt is magnesium sulfate, which is rich in minerals that plants need.
By adding Epsom salt to your garden, the plants will absorb much more nutrients from the soil and fertilizer.
Here are three ways to grow healthy plants with Epsom salt:
1) Plants in the nightshade family — tomatoes, peppers, eggplants, potatoes — need magnesium to produce greater yields and more flavorful fruits and vegetables. Sprinkle 1 tablespoon of Epsom salt around the base of your plants. Or, mix the salt with a gallon of water and water the plants with the mixture. Repeat every two weeks.
2) Is your lawn looking dull? Add three pounds of Epsom salt for every 1,250 square feet of grass and then water your lawn.
3) Want robust roses? Sprinkle Epsom salt at the time of planting and when the flowers are in bloom. The salt encourages the rose bushes to produce larger flowers with deeper colors.
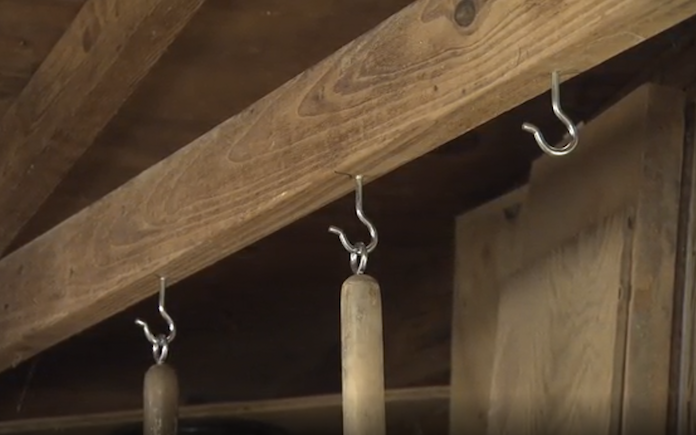
Hanging tools on screw hooks keeps them off the floor and out of the way.
Storing Garden Tools — Here’s an easy and effective way to store long-handled garden tools in a shed or garage:
Drill a pilot hole in an overhead joist and twist in a screw hook.
Then, drill a pilot hole in every end of the tool’s handle, and twist in a screw eye.
Now you can simply suspend the tools from the overhead hooks.
Q: I live in north Georgia where the soil is comprised almost entirely of red clay, so it’s nearly impossible to grow flowers and vegetables in my gardens. I tried tilling the soil and using fertilizers, but nothing seems to grow, except weeds. Do you have any suggestions?
A: Clay soil has poor drainage and is compacted tightly, so roots won’t hold well.
Typically, tilling the clay soil and adding a layer of topsoil is enough for grass to grow. However, for plants with deeper root systems, like vegetables and flowers, you’ll need to do a fair amount of work to make that clay soil suitable.
First, till the soil and aerate it as much as possible. Then, sprinkle about an inch of expanded shale over the soil.
Till the expanded shale into the clay soil, and then spread two to three inches of compost over it.
Finally, till the compost into the shale and clay soil mixture.
Once your soil is prepped, make sure the pH is correct for whatever plants you choose.
Skip to [33:50]for the full segment on the Today’s Homeowner Podcast.
Other Products and Links Mentioned
Further Reading
Ask a Question! (Podcast)
Ask a question and we could answer it on the “Today’s Homeowner Podcast!” We also may use it on our nationally syndicated radio broadcast or on todayshomeowner.com.
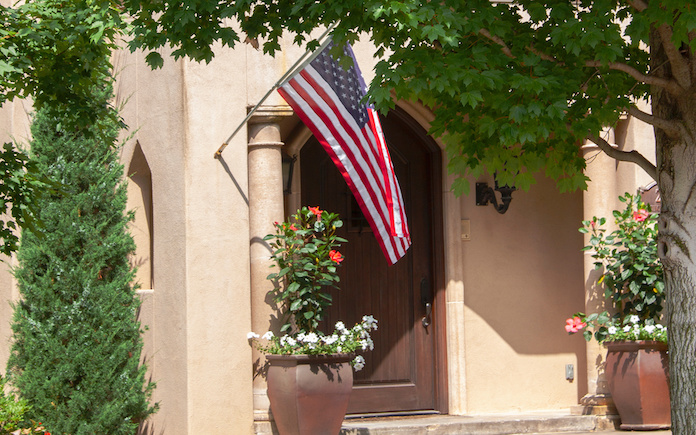
Epoxy keeps a flag holder installed in stucco secure. (Adobe Stock)
Want to display your patriotism, team pride, or personality? Fly a flag on the front of your home! But first, you’ll need to install a flag holder.
If you live in a house with wood siding, it’s pretty straightforward to do. But what about stucco homes?
Bob DeHuff, in Reno, Nev., wants to do just that at his stucco home. He’s wondering if he could just use adhesive, not screws, to attach it.
To install a flag holder on stucco, you’ll need to use both.
First, drill lead anchors into the stucco.
Next, put two-part epoxy on the back surface of the flag holder and in the anchors.
Then, screw the flag holder into the anchors.
Use some painter’s tape to keep the flag holder in place while the epoxy dries overnight.
Because it’s stucco, you’ll want to caulk around the flange of the holder to reduce any chance of water getting into the anchor holes.
I recommend getting a good-quality metal flag holder and not a plastic one. The plastic flag holders I’ve had in the past have gone with the wind.
With a higher quality flag holder, you’ll have more surface that attaches to the wall. So, you’ll have more space to apply epoxy.
A marine supply house should have a nice brass flag holder that will hold up to strong winds.
Skip to [6:19] for the full segment on the Today’s Homeowner Podcast.
Also on this episode:
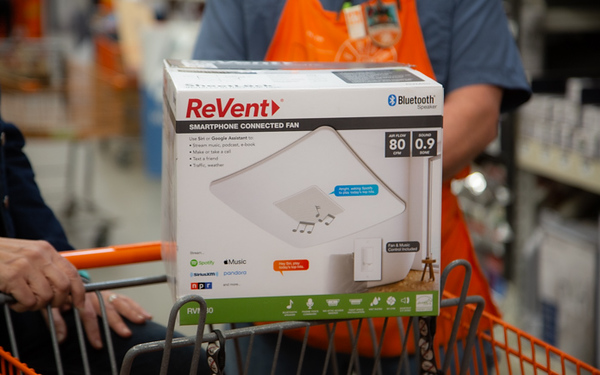
Best New Product
ReVent has created its first smart speaker fan — a bathroom exhaust fan with dual microphone technology and Bluetooth connection. Learn more>>
Simple Solutions
Make longer cuts on a miter saw with this Simple Solution.
Framing Square Stop Block — A power miter saw is ideally suited for making accurate repetitive cuts to all the same exact length. All you need to do is position a stop block at the desired distance from the saw blade and then clamp it to the saw’s fence.
The only drawback is that miter saws have relatively short fences, so you can only make repetitive cuts that are 8 to 10 inches long.
Here’s how to use a framing square to extend the repetitive-cutting capacity of the saw.
Use two spring clamps or short bar clamps to secure the framing square to the saw’s fence.
Position the square with its narrow tongue facing down.
Extend the square out to the length of the desired cut and clamp it to the saw fence. With this technique, you can make repetitive cuts ranging from about 16 to 23 inches long.
Once the square is clamped in place, carefully slide the board up against the square’s tongue and make the cut.
Repeat to make repetitive cuts of all the same exact length.
Droughts can severely damage grass, but there are precautions you can take to salvage it. (Supersmario/Getty Images Signature)
Question of the Week
Q: Last summer, we had one of the longest droughts on record, and our lawn got burnt to a crisp. What can we do to help our lawn survive this summer?
A: The first step to protecting your lawn during a drought is to install an efficient home irrigation system.
Efficiency is key here. Many people set their sprinklers to turn on early in the morning, so they don’t see where the water is spraying. Make sure they’re spraying only your lawn, not the street and driveway.
Here’s what else you need to do during a drought:
Dethatch your lawn
Aerate
Continue to mow as necessary (Don’t bag clippings — this will give your lawn extra moisture and nutrition.)
Stay off the lawn as much as possible
Skip to [26:36] for the full segment on the Today’s Homeowner Podcast.
Other Products and Links Mentioned
This page contains affiliate links. If you purchase a product from these links, we will earn a small commission at no additional cost to you.
Further Reading
Ask a Question! (Podcast)
Ask a question and we could answer it on the “Today’s Homeowner Podcast!” We also may use it on our nationally syndicated radio broadcast or on todayshomeowner.com.
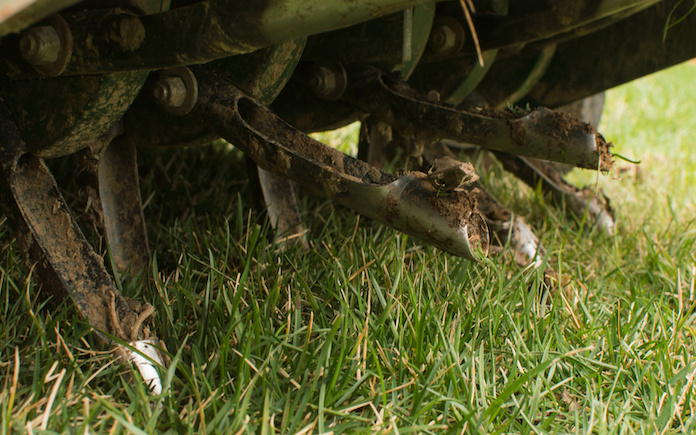
Lawn plug aerators are a great way to give your yard some breathing room, but they damage sprinkler heads. (stock.adobe.com)
Lawn plug aerators are a great tool to get your yard looking its best. But before you start giving your lawn some breathing room, make sure your sprinklers won’t get damaged.
A lawn plug aerator injects plugs into the lawn’s surface and removes a core (or plug) of grass and soil. This loosens up the soil and allows the grassroots to breathe. It’s also used for fertilizing and seeding.
These kinds of aerators are great for large yards with highly compacted soil. For smaller lawns, a spike aerator is best.
Lawn plug aerators can easily tear up your underground sprinkler system, so before you use this aerator, go to the home center and buy some flags.
Turn on your sprinkler system and find all the sprinkler heads throughout the yard. Mark them with the flags so you know the areas to avoid while aerating.
Lawn plug aerators typically don’t penetrate far into the soil — usually about three inches deep.
Most irrigation lines are at least 5-6 inches deep. To be sure you don’t do any damage, you can dig around a sprinkler head until you reach the drainage line and measure the depth.
While aerating, be cautious and leave plenty of room around the sprinkler heads.
Skip to [21:27]for the full segment on the Today’s Homeowner Podcast.
Also on this episode:
Best New Product
This DeWalt Compact Impact Driver makes working in cramped spaces easy! Learn more>>
Simple Solutions
Fast Fix for Stripped Screw Holes — Here’s a quick and clever way to fix a stripped screw hole using a cable tie (a.k.a.: zip-tie).
First, remove the screw from the stripped hole, then snip off the end of a cable tie, which is smooth. For this tip, you need to use the ridged part of the cable tie.
Press the snipped end of the cable tie into the hole until it bottoms out.
Then, cut the cable tie to length, matching the depth of the screw hole. Put the piece of cable tie into the stripped screw hole, then drive in the screw.
The ridges in the cable tie give the screw something to bite into, securely holding the screw in place.
Homemade furniture polish — Make an affordable, nontoxic furniture polish by mixing 1 cup white vinegar, 1/4 cup olive oil, and 1/8 cup of lemon juice.
Pour the solution into a plant mister and spray it onto wood surfaces. Rub in circles with a dry cotton cloth to remove dust, dirt and grime.
Then, use a second cloth to polish the surface in straight lines parallel with the direction of the wood grain.
Q:I’m installing a new mailbox. How deep and wide should I dig the hole, and how do I mix the concrete for it?
A: For a mailbox post, you’ll typically use a 4-by-4 or 6-by-6 post. You should dig the hole at least three times wider than the post and at least two feet deep.
At least a third of the post should be below ground. The United States Postal Service requires mailboxes to be 41-45 inches above the ground, so take this into consideration when buying the post.
To set the post with concrete, use a bag of Quikrete Fast-Setting Concrete Mix. Just pour the dry concrete mix into the hole and pour water on top until the mix is saturated. Watch how to do this here.
You can also try Sika PostFix. It’s a two-part expanding polyurethane foam that fills the post hole and hardens in three minutes. All you have to do is roll the bag to mix up the foam, snip off the corner, and pour it into the hole.
Skip to [29:20]for the full segment on the Today’s Homeowner Podcast.
Other Products and Links Mentioned
Further Reading
Ask a Question! (Podcast)
Ask a question and we could answer it on the “Today’s Homeowner Podcast!” We also may use it on our nationally syndicated radio broadcast or on todayshomeowner.com.