Hosting An Outdoor Movie Night – All Of The Equipment You Need For Under $200

Hosting An Outdoor Movie Night – All Of The Equipment You Need For Under $200

I’ve daydreamed about buying a backyard movie set-up (projector, screen, etc) for several summers now. But the logistics and potential expense always stopped me… until last month!

And now I feel silly for waiting, because we pulled it off with just 3 pieces of equipment that cost less than $200 total. That’s cheaper than the cost of some projectors alone… or a few family trips to the movie theater.

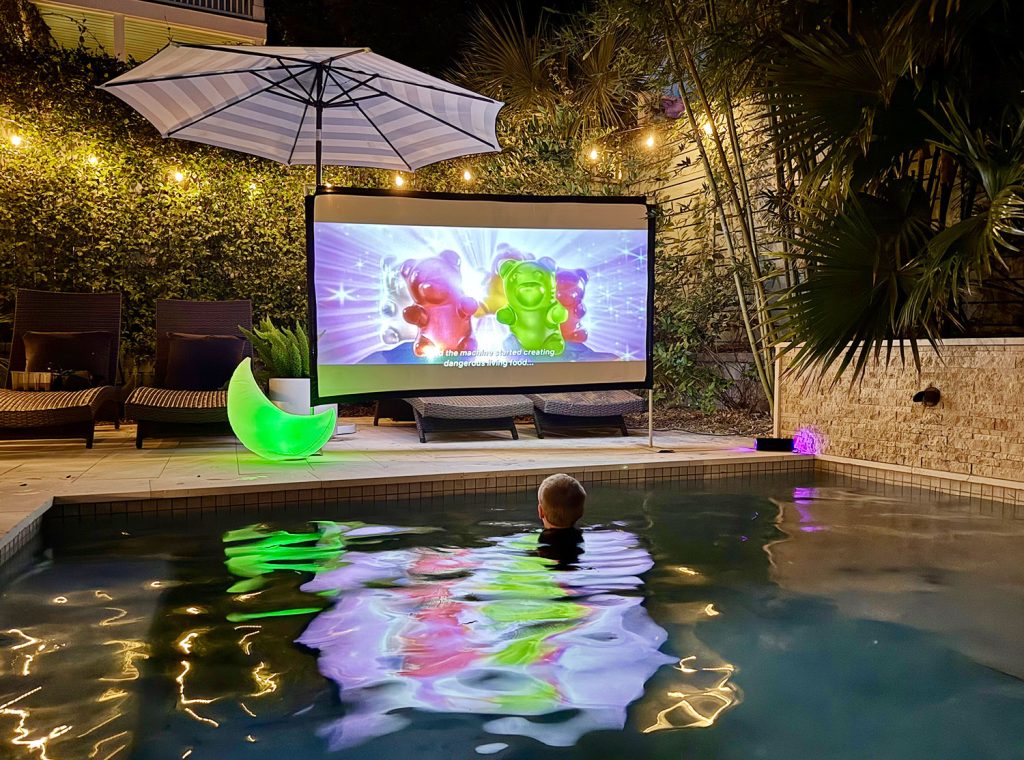
Outdoor Movie Night In Pool With Projector And Screen

In addition to not spending a lot, we also wanted equipment that would be easy to set up. So in this post we’ll cover:

  • The 3 items we purchased (one is optional!)
  • How to set up your outdoor movie night
  • Tips we learned along the way

Equipment For An Outdoor Movie Night

Here are the 3 pieces of equipment we purchased – and how much we paid! – to set-up an outdoor cinema in our backyard:

  1. Smart Projector ($99)
  2. Collapsible Outdoor Movie Screen ($39)
  3. Bluetooth Speakers ($46 for 2)*
3 Items needed for an outdoor movie night collapsible screen smart projector and bluetooth speakers

*The speakers are optional because the projector has built-in speakers. However, connecting portable speakers will give you more flexibility over your setup, including creating a “surround sound” effect.

You can watch how fast it is to set everything up in this time-lapse video we filmed the other night. I had the screen assembled in less than 3 minutes! Don’t worry, we still sped it up for you…

Note: You can also watch this video on YouTube

1. Smart Projector

Aurzen Smart Projector With Remote and Wifi

We chose the Aurzen EAZZE D1 Smart Projector, which was marked down from $149 to $99 when we purchased it. I came across cheaper and pricier options in my research, and landed on this middle-ground option for a few reasons:

  • It’s WiFi-enabled, meaning it can stream services like Netflix without having to connect other cords or devices.
  • It’s Bluetooth-enabled, allowing you to enhance your audio experience with external speakers.
  • It auto-adjusts the picture, meaning things like focus and keystoning (when the image looks skewed) are adjusted for you. You can manually adjust them as well.
  • It can project from in front OR behind the screen, which gives you more placement options.

These 4 features were important because I wanted the setup to be flexible, low-stress, and not involve a lot of extra cords. And overall, we’re EXTREMELY PLEASED with this purchase. There are some minor drawbacks (which I’ll share in the “tips” section) but they’d be issues with any projector, and they’re easy to overcome.

2. Collapsible Outdoor Movie Screen

Collapsible Screen Set Up By Pool For Outdoor Movie Night

We considered a DIY screen made from PVC and a bed sheet or drop cloth, but decided to “splurge” on this $39 outdoor projector screen instead. We chose the 80″ size (measured diagonally), but it also comes in 100″, 120″, and 150″ versions. Depending on sales, the larger versions are sometimes cheaper! So just go with what you think will fit your space the best.

We chose this type of screen because:

  • It’s freestanding, so no need to put hooks or holes in your house
  • It’s straightforward to assemble
  • It fits into a zippered storage case when collapsed (see below)
  • It also comes with ground stakes, water bags, and tie-down cords to help anchor it in place. We haven’t needed any of these yet.
Supplies included in collapsible outdoor movie screen kid included stands weights rope and more

We had a few ideas about where we’d set everything up in our yard, and none involved projecting onto a wall or surface where we could hang something. So having a freestanding screen on a stand allowed us to easily test out a couple of arrangements.

Plus, when the summer months pass, we love the option of positioning the screen around the firepit instead of the pool. I’m already excited about cozy movies with blankets and a roaring fire!

3. Bluetooth Speakers

After our first few nights using the built-in speaker on the projector, we decided to buy two of these budget-friendly Bluetooth speakers ($23 each at the time). The built-in speaker wasn’t bad. In fact, it was quite loud (and easily adjustable) – so these are definitely not required.

Why’d we buy them then? Keeping the projector within earshot of the pool meant a greater risk of it getting splashed, walked into, or stood in front of. So switching to wateproof Bluetooth speakers allows us to place the projector out of the way, while not sacrificing our ability to hear the movie.

BolaButty Waterproof Bluetooth Speakers

We chose these specific speakers because they can pair with each other, meaning we can create a surround sound experience (without spending big money on a Sonos system or another more pricey option). They also give us lots of placement flexibility depending where we are and what we’re doing. For example, we could move one next to the hot tub or even by the firepit if some people are staying dry that night.

Outdoor Movie Night Bluetooth Speaker Location Set-Up

One thing to note is that connecting Bluetooth speakers disables the projector’s built-in speakers, so don’t expect it to be a third sound source in this set-up. Two speakers has been plenty of us, so that’s just a heads up!

Setting Up A Backyard Movie Night

Our goal was to keep the setup process easy and painless, because we knew anything complicated would discourage us from actually using it. So here’s a quick rundown of what we do:

Step 1: Assemble The Movie Screen

First, you want to set-up your screen. That way you’ll have your projection surface ready when it comes time to adjust the picture on the projector.

Screen assembly takes less than 5 minutes. It’s kind of like putting up a tent – only much easier! The frame is made from PVC pipes that pop together with the provided connectors. Slide each section through the fabric sleeves on the edges of the screen, connect the corners, and set it onto the metal stands. That’s it.

Two Steps to Assembling A Pop Up Outdoor Movie Screen With PVC Pipes

We left off one section of PVC on each vertical side so that our screen sits closer to the pool level. That’s why ours looks shorter than what’s pictured online. We found that to be the more comfortable viewing from in the pool.

Step 2: Position & Power Up Your Projector

Next, find a good spot for your projector. This may be straightforward for some, and more challenging for others. But here are some things to keep in mind:

  • Know your power source (we use an extension cord plugged into an exterior outlet).
  • Make sure your cords don’t become tripping hazards in the dark.
  • Place the projector on an elevated, flat surface, like a side table or sturdy box (we temporarily move our pool toy storage box).
  • There is an adjustable foot under the front of projector, but you may also need a book or other object to angle it to the right height.
  • Consider projecting from behind your screen to minimize obstructions & hazards.
  • Your projector does NOT need to be exactly straight on, thanks to keystone correction in the settings. This is EXTREMELY HELPFUL!
Portable Smart Projector On Box For Outdoor Movie Night

Once it’s generally in the right spot, turn on your projector so you can calibrate everything more precisely.

Step 3: Adjust Your Picture

The projector we bought automatically adjusts focus and keystone as soon as it turns on. You can reset or fine-tune these later if needed, but we found this feature to be very helpful! It works better when it’s dark enough outside, so you may need to be patient.

Side by Side of Project Auto Focus and Auto Keystone Settings On Screen

If the projector does not take you to a set-up menu, you can access it in the top corner of the home screen. Here’s where you can find important settings like:

  • Wifi Connection
  • Bluetooth Pairing
  • Zoom
  • Front or Rear Projection (rear projection will mirror the image)
  • Keystone (manual adjustments OR redo the auto-adjustments)
  • Focus (manual OR auto)

The projector comes with a standard remote control to navigate. Also, any time the projector detects that you’ve shifted its placement, it will redo the auto-focus and auto-keystone. My only complaint is that when that happens, it undoes any manual settings (like zoom).

Step 4: Connect Your Speakers

This step isn’t necessary if you’re using the projector’s built-in speakers. But if you’re connecting a Bluetooth speaker – like the pair we bought – you’ll need to connect them to the projector from the Settings menu.

Bluetooth Pairing Wireless Speakers to Outdoor Movie Projector

With these specific speakers, you’ll need to pair them to each other before pairing them to the projector. That’s how you’ll be able to achieve a “surround sound” style by placing each speaker on opposite sides of the viewing area.

Step 5: Stream Your Movie

Because of the projector’s built-in Wifi, you can easily sign into your Netflix, YouTube, or Prime Video accounts and stream directly from the projector.

Outdoor Movie Screen With Netflix Prime Video and YouTube

However, if you want to stream from other services like HBO Max, Hulu, Disney+, etc, you’ll need to connect a separate device (like your phone, laptop, Roku or Fire TV stick). This is due to licensing restrictions, and the projector manufacturer only has authorization for Netflix, YouTube, and Prime Video. The projector has 2 USB ports and 1 HDMI port.

Laptop Connected To Outdoor Movie Projector via HDMI adapter

The projector comes with a short HDMI cable, so you can use something like this $10 adapter cord to connect a laptop. You also may be able to screen mirror some videos from your phone, but we didn’t have luck with that.

Step 6: Enjoy!

People Watching Movie on Outdoor Screen From Pool

Grab your chairs, floats, drinks, popcorn, or whatever else and enjoy!

Step 7: Pack It Up!

Being able to break down quickly was another big must for us. Especially since we’re usually tired by the end of the evening (can’t start the movie until it’s dark, so movie nights often end pretty late!). But we also don’t want to leave stuff out overnight to get wet or dewy.

The projector is easy to put away – just turn off and unplug! Same with the speakers. The screen takes a little more time to disassemble and arrange back into the carrying pouch, so we often just pull the screen apart at the corners so it can be tossed inside for the night (shown below). Then in the morning we can carefully pack it away when we’re more awake!

Outdoor Movie Screen Broken Down And In Hallway

It really does collapse down to be very small and easy to store. Everything fits nicely in my closet when not in use.

All in all, we’d say set-up takes around 15 minutes (depending on how much futzing you need to do with your picture) and less than 5 minutes to break down.

Helpful Tips / Things to Know

Here are a few things that we wish we knew upfront about this outdoor movie set-up.

Wait for a dark sky

With late summer sunsets, it’s tempting to get started as soon as the sun is down (if not sooner). But unless your screen sits under a covered porch, we suggest waiting for full darkness for the best picture experience. Here’s an idea of how much clearer the picture is by just waiting 10 minutes.

Outdoor screen projection in low light after sunset and full darkness after sunset

Keep this – plus the length of your film – in mind when planning your outdoor movie night. We were out until nearly 11pm the first time!

The auto adjustments are helpful, but not perfect

While I’m really grateful for the auto-focus and auto-keystone features, I usually fine tune both manually. It’s fairly easy to do from the settings menu. Once you make your manual adjustments, you may want to turn off the automatic features because any movement – say someone bumps into the projector or the wind blows your screen over – will trigger the auto-adjust and reset your manual settings.

Your first set-up is the slowest

Setting up took me about 40 mins the first time and maybe 25 minutes the second time. But I have become more efficient each time as I refine my arrangement & streamline my process. You’ll learn the best spot for your projector, the perfect angle of your screen, and optimal speaker placements over a few movie nights. So be patient with yourself. Now I’ve got it down to about 10 mins!

Projector Set Up Behind Outdoor Movie Screen

Be open to renting your movie

The biggest drawback to this projector is not being able to stream services like HBOMax, Peacock, or AppleTV. Yes, I can connect my laptop via USB or HDMI adapter. But that’s an extra step (and extra cords) I’d rather not bother with most nights. So even if I can access a movie for free on one of those services, we usually spend the $4 to rent it through one of the built-in apps like Amazon Prime or YouTube instead.

Think about seating options / viewing angles

Backyard Pool Area With Firepit And Outdoor Movie Screen

We’ve only used this in the warm summer months, so the pool has been the favorite viewing spot so far. But we still angle the screen so folks can watch from dryer / warmer spots, like by the fire pit. As the weather cools we’ll probably move the screen closer to the fire (or hot tub!) and will bring out some cozy blankets to cuddle up with. Actually can’t wait for that.

So far, the only regret we have is not buying these supplies a few summers ago!

Other Posts You Might Enjoy

Here are some related posts you might find helpful – from more technology we love to details on our backyard pool makeover.

Overhead View Of Backyard Straight On With Large Concrete Paver Stones

*This post contains affiliate links, so we may earn a small commission when you make a purchase through links on our site at no additional cost to you.

Our Small Kitchen With Attached Living Area

Our Small Kitchen With Attached Living Area

By now you know that we deeply believe that a house always evolves to work with a family’s changing needs, but I’d say this kitchen and attached sitting area are as close to absolutely done as ever. In fact over the last two years they’ve held pretty steady – we did update the kitchen light to my dream chandelier that looks like bubbles at a beach sunset. And before that we finally settled on the right seating that fit perfectly into the seating area. But yeah, since then… settled! Blissfully so! Other than a few tiny accessory changes like a new toaster that I got for Christmas. We shot the photos for this post before that… yes it takes us half a year to write these big posts sometimes.

Since our old kitchen posts don’t reflect those updates, we figured this updated kitchen rundown made sense. We also thought sharing what works for us might help others with a similar space because it feels remarkably efficient for our family. We spend so much time in this room, and it meets SO MANY functions (hanging out before school, eating and cooking meals, storing all the cooking & serving stuff, a place for the grown ups to hang when we entertain while the kids run upstairs and do crafts, play games, or watch a movie, etc).

Video Tour

And because a video truly feels like it’s worth a thousand words (and still photos!), since you can so much better visualize walking through the space, here’s a video walk-through of our small kitchen with the attached living area. It feels so good to have two loveseats in there after wrestling with how to best handle the sitting area for the first few years of living here. It’s that dang bedroom doorway (and front door) in the middle of the sitting area that made things tricky for a while.

A Truly Multi-Function Space

It’s fitting that they call the kitchen the heart of the home, because ours is truly in the middle of our floor plan and it really is the spot where we all gather at the beginning of the day and the end of the night (usually lounging on the sofas or playing a family game at the kitchen table). Not to mention coming together for meals in here too.

This room is also the main entry point for our family – no formal foyer here! It even has our laundry area and houses all the backpacks and jackets too – no laundry room or mudroom either! The porch off the kitchen comes in clutch for us by holding all of our outdoor cooking supplies and our grill (as well as a closed cabinet for a bunch of our shoes). Here’s a full tour of our kitchen porch.

So yeah, it’s a workhorse of a space and we are very grateful for all the uses it fulfills.

Kitchen Before & After

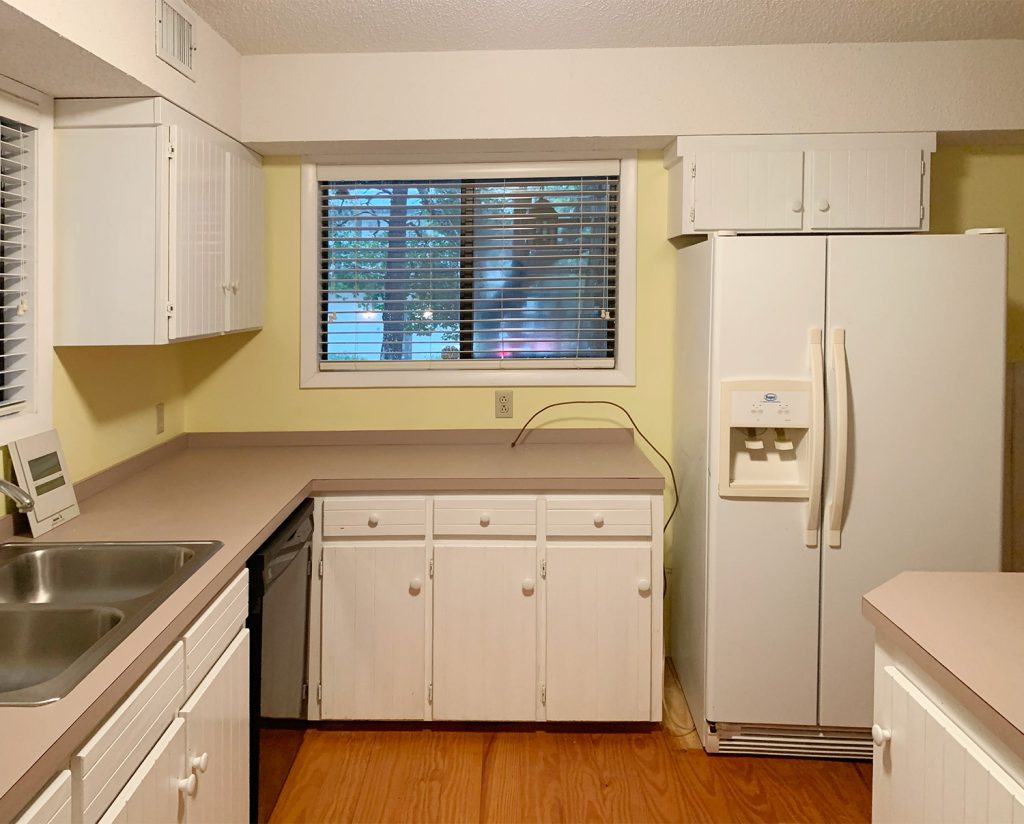
Since we love a before and after, let’s start there. This is a before shot of the window that we later transformed into a door that leads to the super functional kitchen porch we mentioned above.

Kitchen Before Photo With Pink Counters And Yellow Walls

Here’s an after shot from the same angle:

If we want to rewind to the first few weeks of living here, this is how we placed things when we initially landed. It wasn’t great, but it worked while we gained our bearings and learned more about what we wanted from the space.

Before Photo Of Kitchen With White Fridge And Ikea Shelving

And here’s an after shot from that same POV:

Here’s another before shot from February of 2020 when we first laid eyes on this house (see ALLLLL of the before photos here):

Before photo of kitchen with wide open doorway into former living room

And here’s an after from the same point of view:

One more, just because we can’t resist. It really has come a long way in here:

Before photo of kitchen with yellow walls and stairs

This shot isn’t as wide (sorry stairs!) but here is an after photo from that same angle:

We really love how the sitting area is fully open to the kitchen. I can’t tell you how often there are people hanging around while someone else cooks and we all chat). We also really like having a dining table instead of an island (we had island seating in many of our previous homes and really like sitting in actual chairs and looking at each other’s faces instead of all sitting in a line facing the same way).

Truly all of that is subjective, so I mention those factors not to say they’re any better than another way of doing things, but just to remind you: it’s not weird to consider how you want to live and eat and interact in your home and make it work for that. Yes, even if the rest of the world loves a kitchen island and might tell you you may be “hurting your resale value” by forgoing it for a table. Trends come and go (remember when two islands were trending?! It really does get wild), but figuring out how you want to live in your own home really is priceless. Speaking of which…

A New Chandelier

Moment of silence for the chandelier that found me on Pinterest. Truly, that algorithm is unmatched.

Glass Bubble Light Fixture In Purple And Pink Above Kitchen Table

We took these photos ages ago – literally more than a year ago I think! We found all of these flowers discarded on the ground in a public walking path behind a wedding venue near our house. So we grabbed a bunch and texted all of our friends to come rescue them too!

Modern White Breakfast Table In Kitchen With Mauve Cabinets And Bubble Glass Light Fixture

And naturally, we couldn’t resist snapping a bunch of photos and video with our kitchen all decked out with fresh florals!

Patience Pays Off

I still remember so many neighbors stopping by after we bought our house and saying “we walked through this house! We just couldn’t see how to make it make sense!” I am so grateful that we walked in and immediately felt the pull to fix up this house. We just felt like it oozed with potential – even with before shots like this:

Before photo of kitchen with yellow walls and hole in floor

This is the same view now. Small houses can definitely live larger with a little rearranging, brainstorming, and of course that priceless gift of time! We didn’t settle on the right spots for everything right away (like this awkward stage the sitting area went through). It took us 2 years to finally start a proper kitchen reno, but now at year 5 here, we’re fully settled and feel like we are coasting.

Small Ikea Kitchen With Mauve Cabinets And Glass Bubble Light Fixture

So give yourself some time and absolute permission to see how things work for you over the months and years that you live somewhere. Truly, our biggest piece of home advice would be: never rush into a kitchen reno! That time to really be thoughtful about how you want a room to function for you, and what you’ll actually use (versus what the world tells you “should be in a kitchen or sitting room”) really is priceless.

Looking Beyond The Kitchen

One last thing! Another challenge that we encountered with this kitchen is that it looks right into our bedroom. To avoid awkwardly looking at a bed or closet, we added storage and floating shelves so it would look like an extension of a living area.

Sitting Area With Loveseats And Doorway Intro Bedroom With Colorful Shelves

You can see more peeks into our bedroom in the video tour above, including glimpses of custom built-ins and DIY fireplace mantle we made. You can also see full bedroom tour here.

More On Our Kitchen Reno

Collage of John and Sherry Working On Kitchen Progress

I know I covered a lot today, so here are all of the links related to this multi-year (and multi-room) renovation:

*This post contains affiliate links, so we may earn a small commission when you make a purchase through links on our site at no additional cost to you.

Downsizing Update: Almost 5 Years Later

Downsizing Update: Almost 5 Years Later

In November of 2020, we published a post called “What’s It Like To Downsize” after living in our smaller home for 6 months. We covered a range of experiences – like the good things about moving to a smaller home (owning less stuff! saving money!) and some of its challenges, especially in the initial stages of downsizing (paring down! figuring out storage!). We still agree with everything in that post, but it had only been six months… and since it has now been over 4.5 years (!!!), we feel like we have a few more to add about the long-haul downsizing experience. Let’s get into it.

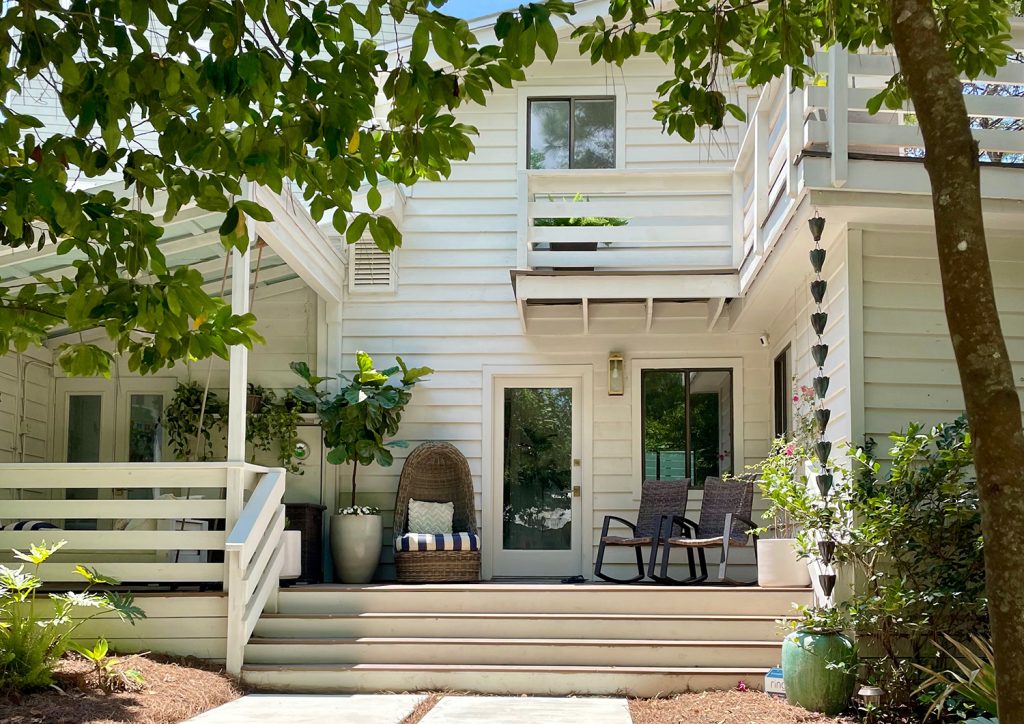
Exterior Of White Beach House

I won’t recap our entire decision to downsize (you can see the full explanation here) but the highlights are:

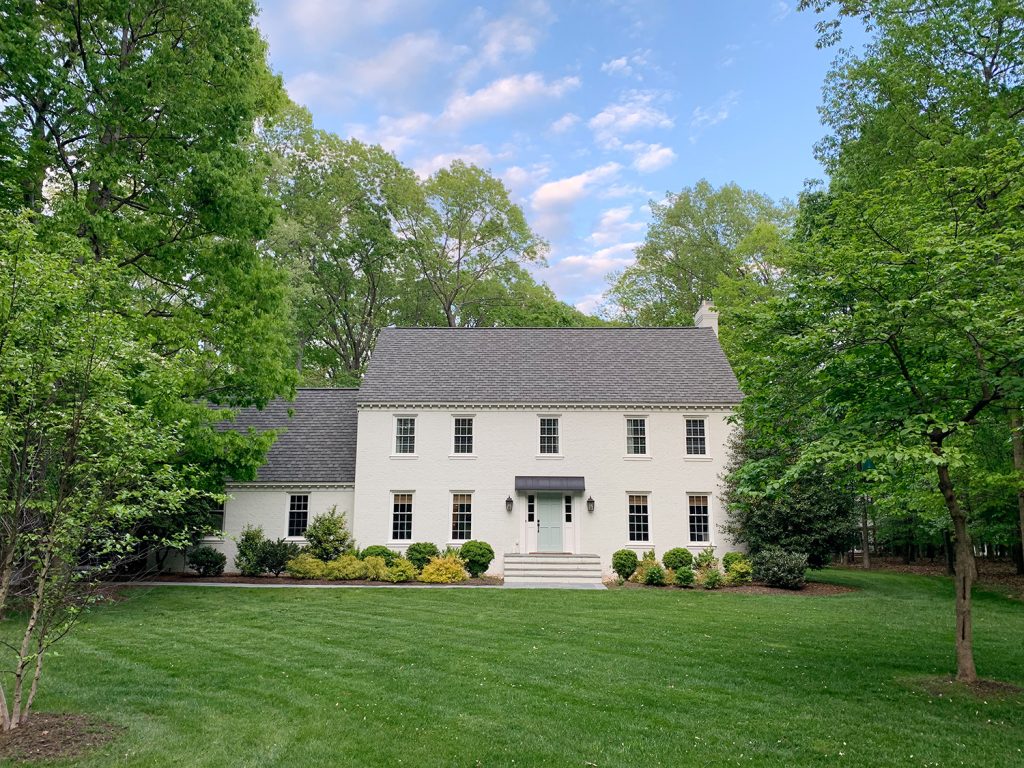
  • We used to live in a 3,150 sq. ft. home in suburban Richmond, Virginia
  • Now we live in a 1,400 sq. ft. home a few blocks from the Gulf of Mexico
  • We have 6 rooms (including just 1 bathroom)
  • Our current house’s lot is 1/10th the size of our last house’s lot
  • We don’t have a garage, attic, or basement (but we do have a pool/hot tub/firepit)
  • We wanted a house that’s “walkable” & can now walk to shops/restaurants/the beach
  • Our family downsizing motto has been to “live with less & be outside more” (alternative motto: “spend less time cleaning & more time in the pool”)

After 4.5 years, we can still confidently say that downsizing was a great decision for us. We devote a lot less time, money, and energy into homeownership (maintenance, renovation, furnishing, cleaning) than ever before – which has freed us up to focus on family, hobbies, nature, and a better work-life balance. Financially it has also been beneficial (we made a whole chart about saving $$$, because although our house is in a warmer location, it’s a lot easier to heat & cool). You can see that breakdown in our original downsizing recap.

We’ve also had our current home longer than our first house, our second house, our beach house, or our duplex at this point (time is wild!). So our downsized lifestyle is hardly a “blip” and we certainly would have changed things by now if it wasn’t a good fit.

Sunken firepit area in larger backyard next to pool

So what new advice do we have after nearly 5 years of downsized life? The two things that come to mind are somewhat contradictory thoughts, so bear with me as I explain.

  1. It’s easy to forget you downsized
  2. It’s easy to be reminded you downsized

And yes, these are both more about the mental side of downsizing, but it’s a funny phenomenon that others who have downsized have also seemed to experience (we love talking to neighbors & friends who also moved from larger homes to smaller ones by the beach).

Forgetting You Downsized

Most days it’s easy to forget that we ever lived with (or believed we needed) more space. We’ve lived in this house long enough to fully adjust (both mentally and logistically) to having 1400 square feet. What once felt like an “unconventional” or “different” lifestyle change feels normal and unremarkable. So much so that it’s a little difficult to write this post. We’ve become a little blind to what’s interesting or unique about it!

John Sitting In Kitchen Sitting Area With Two Loveseats

So why do we draw attention to the “forgettableness” of downsizing? Well, for a couple of reasons.

1. Transitions Are Temporary

First, we hope this reassures anyone facing a similar transition, whether by choice or not. Downsizing can feel challenging at times, but the challenges don’t last forever. Because just like any transition in life – going to college, starting a job, having a baby – the adjustment period is often the hardest part. So let us be an example that, at some point, you’ll be on the other side. You will adjust.

Mattress on the floor of an empty bedroom

That’s not to say the adjustment is always fast or easy. And different parts may be difficult for different people. We enjoyed paring down our belongings, so that part wasn’t too rough for us (dare I say, exciting?). But after moving into our smaller home, it took us 2-3 years to:

  • figure out furniture arrangements in a few trickier spaces
  • fully implement sufficient storage solutions (like adding closets)

So there was an initial “sticking point” in finding the best way to store certain things (or a literal waiting period while we built the storage cabinets or closets that we needed). But now that we’ve figured those things out, everything has a place to live, and it’s a lot more autopilot around here. In fact, if pressed to recall what we struggled with storing or what took the longest to figure out, it might take a 10-minute brainstorming session to actually remember.

2. It Was The Right Move For Us

Secondly (and more personally), the “forgettableness” of our decision tells us we did the right thing. Downsizing isn’t for everyone, so the fact that it has become so normalized for our family is immensely reassuring. We still have people over (our pool & proximity to the beach is a real draw). We spend a lot more time outside as a family. We clean the house together every Sunday in about 30 minutes (all 4 of us have our fav jobs). Six rooms total (and only one bathroom) really have a plethora of upsides.

Dog Making John And Sherry Laugh On King Size Bed With White Bedding

That’s not to say we don’t sometimes feel the limitations of a smaller home (here is where I would argue that limitations aren’t always bad – like do we want a house with enough space to store literally *anything* we have ever wanted?).

To pick an example of a storage limitation, a few years ago Sherry wanted a few of those 6′ skeletons to hang from our second floor deck each Halloween. She proposed storing them in the crawl space (which could have worked – although skeletons under the house might be a little creepy if someone ever came upon them during an inspection or something). After some thought, Sherry ended up getting four smaller skeletons that fold at the waist and can easily be stored in a basket inside. The kids get a kick out of repositioning them every October (rain chain Miley-Cyrus-In-Wreckingball scenes have been created) so there is no shortage of joy, and it hasn’t ever really felt like a “sacrifice.” You adjust. You pivot. All is ok.

Skeletons On Front Porch Posed In Different Positions

Actually, there’s a peace that comes with a resolute “nope, it won’t fit in our house” that helps us walk away from lots of things without much internal debate (and with money remaining in our pocket). Also, lots of people live without 6-foot skeletons… which is kinda the point. The longer we live here, the less frequently we let our space limitations distract from the positives of downsizing. It’s just a fact of life that we’re happy to live with in exchange for the other things we’ve gained.

Being Reminded You Downsized

Like I said before, this next section sounds like a direct contradiction to everything I just said. How can it be easy to forget we downsized… but also be regularly reminded of that fact? This interesting dichotomy just seems to be a part of downsizing, so I thought I’d attempt to put it into words for anyone who’s contemplating a downsizing adventure.

Multistory homes on street with palm trees

Since the day-to-day of living in a smaller home over the last 4.5 years has become so normalized to us, there are funny little moments when we’re reminded that our decision isn’t everyone’s norm. One of those funny reminders might be when another person asks us about downsizing and says they could never live without their guest room & their double garage (we usually chat about how downsizing definitely isn’t for everyone – and each person has different things they couldn’t live without).

Small Ikea Kitchen With Mauve Cabinets And Seating Area With Terrazzo Coffee Table

Sometimes it’s just this moment of being in a larger home while visiting a friend and noticing they have 12 closets or a giant laundry room. It’s not a bad sensation – it’s just a noticeable moment of “oh yeah, some people have all this room! I wonder if they think our house is weird, even though we’re so used to it.”

Sherry and friend in new large kitchen

To take this one step further, comparison is a near-universal truth of homeownership, whether you’re comparing your home to a house across the street or a home that’s featured on the internet or in a magazine. This isn’t specific to downsizing AT ALL. I’m sure many of you in larger homes have envied someone’s even more spacious house at some point. And you may even have felt a pang of yearning for a smaller and more simple home, but don’t actually want to live in one. It can just be a little momentary feeling.

My main point here is that lots of little desires or yearnings can exist at once in your mind, and those momentary pangs don’t mean you hate what you already have or must change things. Insert that quote about the grass always being greener. So if you’re thinking about downsizing, it would be smart to take stock of how these comparisons really make you feel over a longer period of time (fleeting desires aside).

Large White Shingle House Among Trees

If you’re someone who can say “that’s so cool for them, but I don’t think I’d want to clean those four extra rooms” – you might really be ready (and excited!) to downsize. But if seeing those grander homes stirs up some kind of burning desire (versus being a passing moment of “woah, they have a theater room!”), maybe take some time to dive deeper and ponder if downsizing actually feels right for you.

When we walk into giant open houses or showhomes, we are very happy to soak up all the inspiration & appreciate every detail and then happily return to our cozy little house. Touring these “bigger and better houses” is fun for us, and it’s also an exercise that reaffirms our choice every time.

John and Son Walking Into Fancy Open House

Again, for us, living with less = needing less money = working/cleaning/maintaining/organizing less = more time for family/friends/hobbies/nature. There is a big “why” behind our choice. So seeing someone’s bigger/nicer house often becomes a good moment to savor the clarity we have around our goals. Is it beautiful? Yes. Is it worth spending more time maintaining it and working longer hours to afford it? Not for us.

John and kids swimming in backyard pool

I’m especially grateful for that clarity given the wide variety of homes around us. One unique thing about living here is the wide range of house sizes (and, shall we say, fancy-factor?). The homes in all of our previous neighborhoods were relatively the same. Some might have a newer kitchen or bathroom, a finished attic, or an addition on the back, but the differences usually weren’t more than a renovation away from the house next door.

In our current area, however, the range is truly WILD. You can find lavish & large waterfront homes worth eight figures just a short walk away. Every day we see everything from little cottages like ours to towering multi-family vacation homes. Thankfully that wide range doesn’t make us second-guess anything about our decision to downsize. But I imagine it would be harder to handle if we felt like our house really was too small and we were squeezed in there like sardines while those around us had all that room and then some.

Large waterfront homes on the gulf of mexico

All this to say, I would not choose a neighborhood like ours if you’re prone to house-size envy or if you worry you’ll second-guess your decision to downsize. Sherry and I actually enjoy that our house “stands out” in our neighborhood as being one of just around two dozen “original cottages” that were built earlier on when our streets were sleepy and slow (it’s a great conversation starter!). But I think a younger me who was less sure in my choices might’ve preferred to blend in and keep up with the Joneses a little more. I think that would’ve made this process more difficult. So… know thyself.

Would We Still Choose Downsizing?

If it isn’t already glaringly obvious, YES!

In the almost half a decade since making this choice, we’ve only grown more steadfast in our decision. We were so focused on the logistical and financial aspects of downsizing in our earlier downsizing recap, I don’t think we had really digested these mental aspects enough to explain them. We were also only 6 months in, and very much loving our new home, new location, and new lifestyle – but it would not have been easy to see it from as wide of a lens as we can today.

And now, 4.5 years after downsizing, any sort of honeymoon period that may have occurred is over and we’re still very happily married to it. We’re amazed by how normalized it has become to us, and how easy it is to brush off any “temptations” around us. Sherry says that like getting tattoos, paring down and simplifying is addicting. Except I guess when it comes to the occasional jonesing for large skeletons. But even that can turn out ok…

More Posts About Downsizing

Light filled upstairs family room with Ikea fjalkinge shleves and west elm Parsons desk

Want to read more about our experience downsizing to a smaller home?

How To Make An Ikea Pax Wardrobe Look Built-In (Plus A Bedroom Closet Update!)

How To Make An Ikea Pax Wardrobe Look Built-In (Plus A Bedroom Closet Update!)

Raise your hand if you remember how much closet space our bedroom had when we moved in. The answer is zero. We used dressers for a while (and borrowed the tiny closet in our son’s room for our hanging stuff) and eventually added some floor-to-ceiling Ikea Pax wardrobes to our bedroom after about 10 months, which felt like we had arrived. A bedroom closet is so nice to have. And – big news! – as of writing this post, we’ve added another Ikea wardrobe to that wall… which means we have just as much storage in our current bedroom as we had in our last house’s FANCY WALK-IN CLOSET! I know. It’s downright mind-blowing.

For comparison, this is our last house’s walk-in closet (it was an 8′ x 6′ room). Each side had one 29″ cabinet in the middle and two 19″ cabinets on each side of that. That’s 67″ of linear closet space on each wall, for a total of 134″ in the whole closet.

Full Shot Of New Ikea Pax Closet With Sherry And Tripod In Gold West Elm Arch Mirror

Here we used the exact same Pax systems (floor to ceiling, 8′ height again, same 24″ depth) but in our current smaller bedroom we just ran them along the left wall of our room. The configuration here is three 39″ wardrobes plus one 19″ wardrobe on the end, for a total of 136″ linear inches.

John Putting Away Clothes In Ikea Pax Wardrobe

It’s wild to us that our last house had a dedicated 100+ square foot room to accommodate this amount of storage, and in our smaller closet-less room we just ran the wardrobes along a wall, and still managed to work in a bigger bed than we’ve ever had! Talk about living large, even while downsizing. It’s pretty amazing.

So this post is to show you how we got all of that storage into our smaller bedroom – and to detail exactly how we make them look completely built-in. Plus, we took a bunch of updated pictures of our room for you too (there’s a sneak peek of our new chair and a shot of the glass doors open).

First up, a little background…

Why Use Ikea Pax Closets?

We fell in love with the Ikea Pax closet system 15 years ago when we first used them to add clothing storage AND create a cozy sleeping nook in our first house. Not only are they a budget-friendly solution, they also offer a lot of customization and organization options so you can really tailor your Pax to your needs. That’s why we’ve used them again and again, including for our “fanciest” closet makeover in our last house.

Sherry Getting Clothes Off Hanging Bar In Ikea Pax Closet

You can check out that closet reveal post for all the details (how much it cost, before & afters, how we organized it, and even a video tour), but back to our current house…

Why Add Another Closet Now?

When we originally added the Pax wardrobes to our current bedroom back in 2021, we left space on one end for a doorway that we were planning to move there eventually (currently it’s just around the corner of that wall below). At the time, we thought moving the entry point to our bedroom over there would be an upgrade, but after living here a while we realized seeing the bed through a doorway from the entryway/casual sitting area where we often entertain doesn’t feel like an upgrade at all.

Row Of Ikea Pax Wardrobes Before Additional Close Is Added

Currently, the door to our bedroom looks in on the opposite wall where we just have a dresser – so it doesn’t feel as “intimate” as seeing a bed from the front door or the hangout zone downstairs. So we’re glad we waited it out and didn’t move that doorway prematurely. I literally think if we did we would have moved it back to this spot later.

View Into Bedroom From Kitchen With Dresser Through Doorway

So with that crystal clear realization of “Nope. No door here!” – we knew this corner of the room would look a lot better with one more wardrobe running along that wall, rather than squishing the inlay dresser you see below in that spot (you can see from the photo above that it now lives on the wall that’s seen from the kitchen/sitting area).

Former row of closets with dresser in empty spot next to two close doors

Adding one more closet on that end definitely makes the wall look more complete.

Row of Ikea Pax Wardrobe Closets In Bedrom With Gold Knobs

Again, here’s that difference. Goodbye random enclave at the end of that wall, hello more closet space!

Before And After Of Added Ikea Pax Wardrobe In Bedroom

I know the pictures above make it look like the closet overhangs the wall, but it doesn’t. It actually leaves the same amount of wall space that we already had next to the bedroom door, so that corner actually looks pretty balanced – like it has always been this way.

Corner of Wall of Ikea Pax Wardrobe Closets With Grimo Doors

We definitely considered using some super thick filler pieces on each end to make the closets fully flush to the door wall, but ultimately decided we liked it better this way without bulky end pieces flanking the closets.

Row of Ikea Pax Wardrobe Closets In Bedrom With Gold Knobs

I’ll share some more pictures of how the space fits together at the end of this post, but let’s dive into the building process.

Making An Ikea Pax Closet Look Built-In

Pax wardrobes are actually one of the easier Ikea pieces to hack if your goal is to make them look more like a custom built-in closet. The main trick is to use trim or molding for that fully floor-to-ceiling look. The Pax system comes in either 79″ or 93″ heights, so if you’ve got 8ft ceilings (96″) like us, all you have to do is fill that 3-ish inch gap. You may need to do some gap filling on the sides too if you also want it to go wall-to-wall (which we did here). That process is pretty much the same one we’re sharing in this post).

Sherry Opening Ikea Pax Wardrobe With Penny Chihuahua On Bed

We actually captured the entire process – from unboxing to painting! – on a timelapse video that you can watch below. We’ve also got a more detailed step-by-step tutorial after the video as well.

Building-In A Pax Wardrobe: Timelapse Video

We condensed this process down to just 5 minutes, but in real time it stretched over the course of about 4 afternoons. The first 2 were more labor intensive with assembling and building in the closet, while the second 2 were mostly just waiting for caulk and paint to dry. So it’s definitely something you could mostly complete in a weekend.

Note: You can also view this video on YouTube.

Tools & Materials Needed

In addition to your Pax wardrobe pieces themselves (wardrobe box, doors, hinges, interior fittings, etc) you’ll also want to have the following items available:

I’m going to skip over the actual wardrobe assembly and installation parts, since Ikea covers that pretty well in their instructions. You can watch them in the timelapse above if you’d like to see them in action. and we added some notes to the video for you, like how I added an outlet hole. Below we’re going to start at the stage where you’ve already got your Pax in place and secured to the wall.

Step 1: Make Your Plan

Like I said, the main trick to making it look built in is just filling the gap between the top of the Pax to the ceiling. Almost like you’re creating some crown molding around your closets.

Nailing Trim To Top Of Built In Ikea Pax Wardrobe

The challenge is that the Ikea doors go all the way to the top of the box, leaving no exposed surface to nail your molding into. So before you add your trim, you’ve gotta add a “backer piece” that it can attach to. Here’s a little overhead view of how we solved this. What you see me nailing in the photo above is the piece that is labeled “trim” in the photo below:

Layout Of Trim Pieces For Building Ikea Pax Wardrobe To Ceiling

The “backer piece” is just some spare 1×3 I had laying around, but it can really be anything. It will attach flat against the top of the closet (nailed in from underneath). Then whatever you use as your visible trim can be nailed into the 1″ side of the backer. I promise this will make more sense as we go.

Step 2: Align & Attach Your Backer Piece

First, we used the miter saw to cut our 1×3″ backer pieces – one for each side – to size. Next came the tricky part: getting the placement of the backer just right.

Assuming, like us, you want the trim to be flush with your closet doors – resist your instinct to install this piece flush with the front edge of the wardrobe box. That would only work if your trim were exactly as thick as your closet door. Since it’s not, we’ve always had to mock something up to get our placement just right. That’s where this puppy comes in handy.

Backer Piece Of Scrap Wood With Blocks Taped To Front For Precise Placement

What I’ve done here is taped a couple of pieces of scrap trim (aka, the same 1×2″ that I’ll be using as my final molding) to the front of my backer piece. That way I could hold up my backer piece and double-check that my final trim would end up exactly where I wanted it. In this case, it would be flush with my existing trim (since we were adding this last wardrobe to an existing one here) as well as flush with my doors.

Scrap Piece Of Trim Taped To Backer Piece To Find Placement

With the backer firmly held in place with my hand, I secured it with a couple of nails using my nail gun. You can also see this part in action during the timelapse video above.

Nailing Backer Piece To Top Of Ikea Wardrobe Using Nail Gun

Here’s another view of that process, as repeated on the other end of the closet. You can see how the scrap piece of trim helped us ensure the backer piece got attached in precisely the right spot. Because on this side, I wanted the trim to be exactly flush with the side of the Pax box.

Diagram Of Back Piece Installed On The Top Of Ikea Pax Wardrobe

You can also see above that we had already attached the trim on the front of the closet. Notice how much it hangs over the wardrobe box? But as you’ll see below, it’s perfectly flush with the door when it’s closed.

Step 3: Cut & Attach Your Trim

Once your backer piece is nailed into place, you can cut and nail in your trim (aka: the molding that will actually be visible and give your closet a built-in look). Since we have an exposed corner, we chose to miter cut ours on an angle for the most polished look.

Cutting Trim At An Angle Using A Miter Saw

Then we nailed the trim pieces into the backer, as you can see below. Don’t worry about the nail holes. You can fill them later with caulk or wood filler.

Nailing Trim To Top Of Built In Ikea Pax Wardrobe

Step 4: Adding Quarter Round To Finish It Off

As you can see above, our 1×2″ molding wasn’t tall enough to fill the gap to the ceiling entirely (and a 1×3″ was too big). But luckily a piece of quarter round was enough to close the gap. Depending on your ceiling, you may have to get creative with what molding or combination of trim works best. You also can always use a table or circular saw to rip a larger piece of wood to size.

Finished and painted quarter round molding that makes Ikea Pax Wardrobes look built in

In the photo above we’ve actually already completed the last step, which is…

Step 5: Caulk & Paint

Once everything is built, use paintable caulk to fill any nail holes, gaps, or seams – like where your moldings meet the wall, the ceiling, and each other. From there you can paint your trim to match. I’ll admit we’ve yet to find a paint that perfectly matches Ikea’s white (especially since different Ikea products are different whites). But we’ve found that our wall & ceiling color – Sherwin-Williams Pure White – is a pretty close match. We’ve just been using it because, if nothing else, at least it’s a perfect match to the adjacent surface in our room.

The Finished Built-In Closet

We finished this project a month or two ago, and it’s been so great having the “bonus” storage. Not to mention that the wall doesn’t feel in limbo anymore.

Sherry Opening Ikea Pax Wardrobe With Penny Chihuahua On Bed

We’re also working on a closet organization post because we know people like to see specific interior components of the Pax wardrobes and how we’ve chosen to store stuff in ours. Maybe Sherry will do the whole video tour deal.

John Putting Away Clothes In Ikea Pax Wardrobe

The biggest takeaway from this many-years-long closet evolution is that wild realization that we didn’t actually end up giving up a whole lot when we moved to a house that’s half the size of our last one. Back when we decided to downsize, we assumed that we’d constantly be cutting corners and sacrificing space, so the fact that our current bedroom has just as much closet space as our last house (which had a 100 square-foot walk-in closet!) – it just shocks us. And to now be luxuriating in the largest bed we’ve ever owned… we just didn’t see that coming.

We also laugh about how, in our old walk-in closet, we seriously contemplated sacrificing some wall space to add a window for some natural light in there. And now, even though our current closet is a little less traditional (wardrobes along the wall of the bedroom versus having an actual closet), we’ve got sunlight in spades!

Bedroom With King Bed And Open French Doors To Garden

Now that you’ve seen how we added to our built-in closets, we’ll be back with a whole-shebang tour of how we’ve organized them inside (that has been a bit of a moving target as we continue to optimize it, but it’s on our to-do list!). In the meantime, feel free to check out the other side of the room and the other Ikea storage we customized and our last house’s closet, which was full of favorite Pax components!

Other Ikea Customization Projects

Wanna see some other Ikea hacks? Here are a few of our favorite customizations:

Side by side of built in book case Ikea Hack and brass spray painted glass shelf

*This post contains affiliate links, so we may earn a small commission when you make a purchase through links on our site at no additional cost to you.

Fitting A King Bed Into A Smaller Bedroom

Fitting A King Bed Into A Smaller Bedroom

This is a meandering journey of a post, so make yourself comfortable. We mentioned in this side table post that we traded our queen-size bed for a bigger king-size one. The reason might seem obvious – because it’s bigger, duh! – but as for why we happily sailed through over 17 years together without wanting one – and then suddenly pulled an about-face last fall… well, it essentially boiled down to: “the things we do for our dog” (more on that in a second).

We also had to carefully plan how we’d squeeze the biggest bed we’ve ever owned into our smaller bedroom. And we had a big realization about larger furniture in a smaller house (it’s probably not what you think!). Plus we had some fun with photoshop.

John And Sherry Looking At Phone With Dog On King Size Bed
bed frame | nightstands | lamps | pink sheets | pillow | rug | ottomans | curtains

When we told one of our friends about the change, they were stunned – neigh, SHOCKED – to hear we didn’t already have a king bed. In fact, we’ve heard this sentiment several times over our decade and a half of blogging. As if two adults sleeping in a queen was akin to sharing bunk beds or something. We never really understood that reaction because we were always perfectly content in our queen bed – especially because we shared many smaller beds in our earlier days together.

Bedroom with Queen Size Bed Next To Wall of Windows With Chihuahua sleeping on it

You see, a queen was a big improvement from where we started our relationship – with me sleeping on a futon in the living room of a one-bedroom apartment that I shared with 2 other guys in Queens. If you do the math, that meant 1 person was in the bedroom and 2 of us slept in the living room on futons, hence my Pinterest-worthy setup below. Yes, I won Sherry’s heart despite this “bedroom” situation:

Cramped NYC Apartment Futon With Clothing Rack

Pretty soon after that I moved to a different apartment on the Upper West Side where I was finally able to upgrade to a full-size bed. You can watch a video tour of that apartment and see Sherry’s NYC apartment in The Village (which also sported a full-size bed).

Trading up to a queen-size bed in our first Richmond apartment together (shown below) was quite a luxury because we had been sharing full-size beds for a year or so at that point. These side tables and $5 Ikea lamps, though? Not quite luxury.

Old Apartment with Messy Queen Size Bed And Bold Color Accents

Over many (many) years we never really felt cramped sleeping in a queen-size bed. So although some of our friends and a large portion of the internet were like “I cannot live without my king bed”, it seemed unnecessary to us to spend the extra money on a bigger mattress/sheets/duvet since we were perfectly happy with our queen. It was frugality meets a classic case of “If it ain’t broke…”

Then when we moved here a series of things started to slowly change our minds. The first one wasn’t a width issue that was bothering us – it was a height issue. And not for us, but for our old dog, Burger.

Burger the chihuahua sleeping on the end of a bed with cream headboard

Like most aging dogs, jumping up and down became harder for him as he got older (he was 15 when he passed in 2021). He loved being on the bed but was often too stubborn to use a bench or other “helper surfaces” to get up and down (we had a floor pouf + bench version of Doggy Steps going on but about half the time he ignored them in favor of the kamikaze method).

Closer View Of Bedroom with Queen Size Bed Next To Wall of Windows With Chihuahua sleeping on it

In true “small-dog-who-thinks-he’s big” fashion, he’d attempt to spring from the floor to the side of the bed in one chaotic jump – and preferred to get down the same way. He’d always make it (although getting up sometimes took a few tries), and we would happily lift him up and down whenever he’d let us – but we worried about the toll it was taking on his legs and back.

At first we just considered getting a lower bed frame (like a platform) to shorten the distance for him since we had made other Burger-mobility changes to the house already (like installing a stair runner over our wood steps) but he sadly left us suddenly in the fall of 2021 due to a longstanding heart condition.

Chihuahua Dog Running Down Staircase With Sisal Runner

The whole bed-height consideration became top of mind again when Penny entered our lives last year. She fancies herself some combination of a cat / ninja / mountain goat / daredevil and leaps up & down from the chairs, couches, and – in particular – our bed with absolute reckless abandon.

Penny Chorkie Mix Standing On Couch

She’s still young and spry (she’s 3), but we know that lowering our bed will help her legs and back over the long run. And the reason that our brains seemed to slowly shift from “let’s just lower our queen bed” to “what if we got a lower bed that’s also king-size” = this dog sleeps like she’s impersonating that equals sign I just used. Burger used to curl into a small ball and tuck in behind Sherry’s legs or up on my pillow by my head, but Penny likes to stretch out horizontally like she’s impersonating a twizzler, and because our bed isn’t extra wide, that means she pretty regularly smashes into both of us in the process. Essentially we all form the letter H. Sherry and I are the sides of the H and Penny is the middle dash if you can picture it.

Penny the chihuahua yorkie mix enjoying a sun spot on the couch

It suddenly made a queen bed feel… not so roomy. And sometimes her arms poke out in front of her like this, and her face rests between them, resulting in some claws and a cold nose to whoever is the lucky side of the H at that moment.

Penny The Chorkie Sitting In Sun Panting In Tulum Mexico

Then this past summer we went to Mexico. Whenever we go on a big trip, we always seem to take some sort of house or lifestyle inspiration back with us. We can pinpoint the spring break trip that started our minimizing efforts, our Costa Rica trip kicked our Florida move into gear – and well, our Mexico trip made us want a king-size bed.

Kids And Dog In Tulum Airbnb

Somehow we managed to take zero photos of the specific bed that wooed us, but here it is below from the Airbnb listing. It doesn’t look particularly spacious from this angle, but it was one of the first times I remember registering “so THIS is why people love king-sized beds.” Upon further reflection, I’m sure the realization was hitting us because it was the first time in many months that we slept without a rigid stretched-out dog poking into each side of our bodies. It was great. We slept SO WELL. Penny included.

King Size Bed In Tulum Mexico Airbnb With White Wall And Wood Accents

You can also see a bit more of the space in this video tour Sherry took of the Airbnb right after we checked in. You know, before we had suitcases and various vacation stuff everywhere (which is probably why I never took photos of this room).

Note: You can also view this video on YouTube.

Bottom line: we came home from Mexico with an extremely strong desire to figure out a way to make a king-size bed work in our bedroom, even though we worried that we didn’t actually have the room (details, details). A king mattress is 16″ wider than a queen, which felt like space we didn’t have – especially considering that we needed to leave room to access our closets along that left wall. This is the room with a queen bed below:

Open Closet Door To Ikea Pax Wardrobe System Next To Bed

Instead of immediately giving up, we decided to do some careful measuring and planning – even turning our queen bed sideways at one point to visualize the wider king mattress – which helped us determine that we could actually make it work! More on that in a second.

The King Bed We Chose

We considered a lot of options for our lower wider bedframe and ended up with this Tessu upholstered platform bed frame from Article. We really like how solid a bed feels when the headboard and frame are built as one, especially since both Burger and Penny like to hang out under the bed sometimes too – so that also makes you want something that doesn’t feel rickety. Are we too obsessed with our dogs? The answer is: that’s not possible and dogs are the best. And yes, even though this bed is so much lower than our last one, Penny loves to army crawl under it and assume her Twizzler-like sleeping position.

Taupe Upholstered King Bed From Article

Looks/function-wise we also liked that the legs of this bed were inset from the corners so they basically disappear with the duvet on the bed (especially since the walnut finish didn’t match our room). Plus, they don’t become a toe-stubbing hazard!

We got it in the Taupe Clay color, which is a nice medium warm gray (it also comes in navy and deeper gray). We’ve been really, really happy with it! Basically goes with everything.

View Of Top Of Butcher Block Nightstand With Modern Lamp

How We Got A Bigger Bed To Fit Into Our Smaller Room

We covered some of this in our post about our DIY wood nightstands, but I wanted to reiterate it here because the “fit” of this bed was really important to us. Even I, who was the most worried about cramping this bedroom with a bigger bed, am thrilled with the result. And yes, we definitely still have room to get into our closets without issue. We’re in them multiple times a day, so I was unwavering in my dedication to making that not-annoying.

John Standing At Open Closet Door Next To King Bed In Small Bedroom

Essentially the key was that we had to shift the bed over and build smaller nightstands (and the one on Sherry’s side had to be even smaller than mine). That concession bought us enough space to make the closet access completely workable – and it was well worth it to have such a giant bed, which makes this room feel like it lives a lot larger than it did before!

I also can’t say enough about using whatever you have in creative ways to help “feel” what a room might feel like with that new larger item. When we learned that a king bed’s width (76″) was similar to the length of a queen bed (80″), we knew that turning our queen bed sideways was a great way to experiene how it would feel to access our closets with something that wide in the room.

You can see how everything fits together in the video below that we made for the nightstand post.

Note: You can also watch this video on YouTube.

Not only does it fit logistically, we both feel like it aesthetically fits better as well. You may have heard that sometimes the trick to making small spaces look bigger is to use larger furniture. It seems counterintuitive, but sometimes small-scale furniture can emphasize the smallness of a room. Plus, in the case of our bed, the lower height makes the room feel taller and airier.

I mean really – look how the queen-size bed just made the whole room feel smaller and less airy. I wish this was taken from the exact same POV, but you get the idea:

Closer View Of Bedroom with Queen Size Bed Next To Wall of Windows With Chihuahua sleeping on it

As for how it feels to finally join the king bed club, it definitely feels straight-up luxurious. The five of us (kids and dog included) can all find a spot on weekend mornings. Penny can move around at night without waking us up (and vice versa). We are no longer a human-dog-human conga line. Except apparently for this photo:

Dog Making John And Sherry Laugh On King Size Bed With White Bedding

And in case you’re worried about the fate of our old bed, everything lives on (we sold the frame and headboard on a neighborhood buy-sell-trade board and donated the mattress there too). Within one day of listing it, everything was picked up!

Now that the new bed is in place, we’ve been contemplating a little bit of color or texture on the wall behind it – especially since more of it is exposed now with the lower-lying headboard.

Bright Modern Bedroom With Platform King Bed And Colorful Abstract Painting

We love how light and bright this room is, so we don’t think we want to paint the whole thing, but we’re debating doing something with that wall behind the bed. These are just photoshop renderings, but we thought about maybe using a muted pink…

Photo Mock Up Of Bedroom With Pink Accent Wall Behind Platform Bed

…or a soft blue-green to complement all of the greenery we have outside the wall of glass doors.

Photo Mock Up Of Muted Blue Wall Behind King Platform Bed

We’ve even debated doing something more textured, like grasscloth wallpaper or a wood slat wall. This was our best approximation of one where we might stain the wood a soft tone. Again: this is photoshop so everything looks jarring. Please squint A LOT.

Photo Mock Up Of Wood Slat Wall Behind King Platform Bed

Honestly, some days we just love how simple and expansive the white wall with the bright art feels. There’s a pretty great view out the entire wall of glass doors to the right of the bed, so sometimes we think: that’s the accent. Sorry, walls – you can’t compete.

So who knows! We’ll definitely share if and when we do something. And in the meantime, we’ve already made another functional upgrade to the room that we’ll share in a future post. Spoiler: it involves earning even more storage! Like AS MUCH STORGE AS OUR LAST HOUSE’S HUGE WALK-IN CLOSET.

Wall Of Ikea Pax Wardrobes Next to King Size Bed With Colorful Painting

If you take one thing from this post I hope it’s: “don’t give up if you think something won’t fit in a smaller room.” If we hadn’t turned our queen bed sideways and experimented with how it would work if we shifted the bed over and gave Sherry a smaller side table, well, our king bed dreams would have been just that – a dream that never became reality.

And the entire concept that larger items of furniture in smaller rooms can often make them feel bigger is TRULY WILD. In fact, this bed change inspired an upcoming sitting room change that we’re making based on that finding – so stay tuned (furniture takes like 15+ weeks lately, but as soon as we have something to show you I’m sure Sherry will be on IG stories sharing it all).

*This post contains affiliate links, so we may earn a small commission when you make a purchase through links on our site at no additional cost to you.