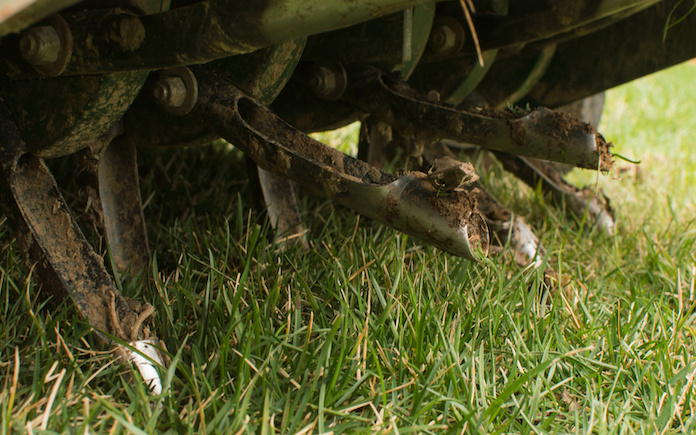
Lawn plug aerators are a great way to give your yard some breathing room, but they damage sprinkler heads. (stock.adobe.com)
Lawn plug aerators are a great tool to get your yard looking its best. But before you start giving your lawn some breathing room, make sure your sprinklers won’t get damaged.
A lawn plug aerator injects plugs into the lawn’s surface and removes a core (or plug) of grass and soil. This loosens up the soil and allows the grassroots to breathe. It’s also used for fertilizing and seeding.
These kinds of aerators are great for large yards with highly compacted soil. For smaller lawns, a spike aerator is best.
Lawn plug aerators can easily tear up your underground sprinkler system, so before you use this aerator, go to the home center and buy some flags.
Turn on your sprinkler system and find all the sprinkler heads throughout the yard. Mark them with the flags so you know the areas to avoid while aerating.
Lawn plug aerators typically don’t penetrate far into the soil — usually about three inches deep.
Most irrigation lines are at least 5-6 inches deep. To be sure you don’t do any damage, you can dig around a sprinkler head until you reach the drainage line and measure the depth.
While aerating, be cautious and leave plenty of room around the sprinkler heads.
Skip to [21:27]for the full segment on the Today’s Homeowner Podcast.
Also on this episode:
Best New Product
This DeWalt Compact Impact Driver makes working in cramped spaces easy! Learn more>>
Simple Solutions
Fast Fix for Stripped Screw Holes — Here’s a quick and clever way to fix a stripped screw hole using a cable tie (a.k.a.: zip-tie).
First, remove the screw from the stripped hole, then snip off the end of a cable tie, which is smooth. For this tip, you need to use the ridged part of the cable tie.
Press the snipped end of the cable tie into the hole until it bottoms out.
Then, cut the cable tie to length, matching the depth of the screw hole. Put the piece of cable tie into the stripped screw hole, then drive in the screw.
The ridges in the cable tie give the screw something to bite into, securely holding the screw in place.
Homemade furniture polish — Make an affordable, nontoxic furniture polish by mixing 1 cup white vinegar, 1/4 cup olive oil, and 1/8 cup of lemon juice.
Pour the solution into a plant mister and spray it onto wood surfaces. Rub in circles with a dry cotton cloth to remove dust, dirt and grime.
Then, use a second cloth to polish the surface in straight lines parallel with the direction of the wood grain.
Q:I’m installing a new mailbox. How deep and wide should I dig the hole, and how do I mix the concrete for it?
A: For a mailbox post, you’ll typically use a 4-by-4 or 6-by-6 post. You should dig the hole at least three times wider than the post and at least two feet deep.
At least a third of the post should be below ground. The United States Postal Service requires mailboxes to be 41-45 inches above the ground, so take this into consideration when buying the post.
To set the post with concrete, use a bag of Quikrete Fast-Setting Concrete Mix. Just pour the dry concrete mix into the hole and pour water on top until the mix is saturated. Watch how to do this here.
You can also try Sika PostFix. It’s a two-part expanding polyurethane foam that fills the post hole and hardens in three minutes. All you have to do is roll the bag to mix up the foam, snip off the corner, and pour it into the hole.
Skip to [29:20]for the full segment on the Today’s Homeowner Podcast.
Other Products and Links Mentioned
Further Reading
Ask a Question! (Podcast)
Ask a question and we could answer it on the “Today’s Homeowner Podcast!” We also may use it on our nationally syndicated radio broadcast or on todayshomeowner.com.
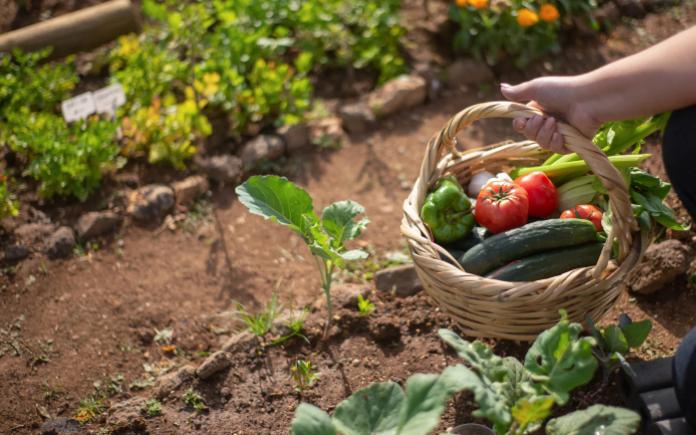
Modern-day victory gardens are a way for people to become more self-sufficient. (Kampus Production/Pexels)
Victory gardens are experiencing a resurgence as the effects of the COVID-19 pandemic are still lingering two years on.
The renewed interest in victory gardens began at the onset of the COVID-19 pandemic. Online searches for victory gardens surged in April 2020, the start of lockdown. As people were quarantined, they were looking for ways to channel emotional energy in a positive way, while also securing a safe source of fresh produce.
Now, victory gardens are experiencing a second wave of popularity. Supply chain issues and food shortages have more people than ever unsure if they will be able to purchase their food when they need it.
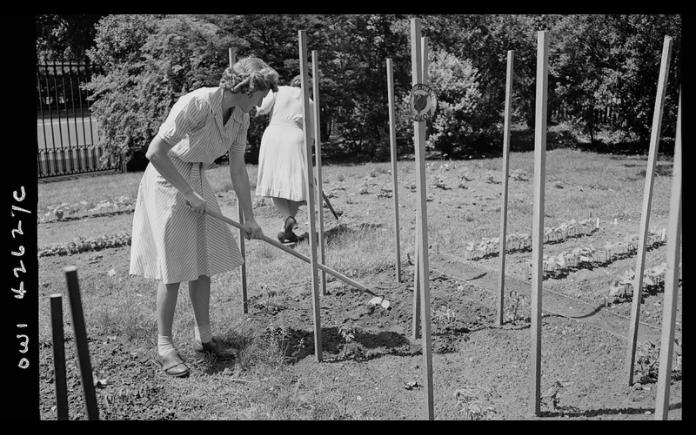
A woman tends to a victory garden in New York City in June 1944. (Farm Security Administration – Office of War Information photograph collection/Library of Congress)
History of Victory Gardens
Victory gardens were vegetable gardens planted during World War II in order to ensure an adequate food supply for civilians and troops.
The goal of the Victory Garden Program, which started in 1942, was to reduce demand for commercially grown vegetables by encouraging Americans to grow their own produce and preserve and can their surplus harvest. By empowering people to grow their own food, victory gardens made Americans feel part of a greater cause.
Victory gardens supplied 40 percent of the nation’s produce by 1944. By the time the war ended the next year, American families had grown about 8 million tons of food.
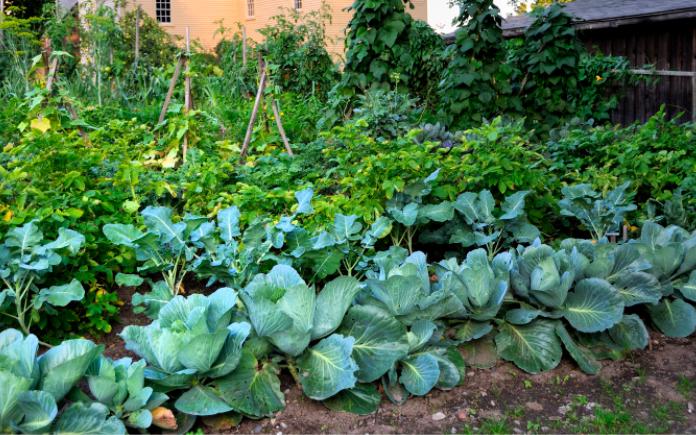
With the preparations, you can have your own bountiful victory garden. (MikeCheram/Getty Images Signature)
Starting a Victory Garden
With proper planning and regular maintenance, you too can have a bountiful victory garden.
Choose a place where your plants can get at least six full hours of sun. Don’t plant your victory garden near trees or shrubs, as those can compete for nutrients and water.
Also, make sure you will have easy access to water. Consider a raised bed or container gardening if you don’t have much space.
Browse through garden catalogs and check out garden stores to help you choose what you want to plant.
Because what you can grow is highly dependent on the climate where you live, refer to the USDA Plant Hardiness Zone Map to find what vegetables are good to grow in your environment.
Historically, some of the most popular produce grown in victory gardens included beans, beets, cabbage, carrots, kale, kohlrabi, lettuce, peas, tomatoes, turnips, squash and Swiss chard.
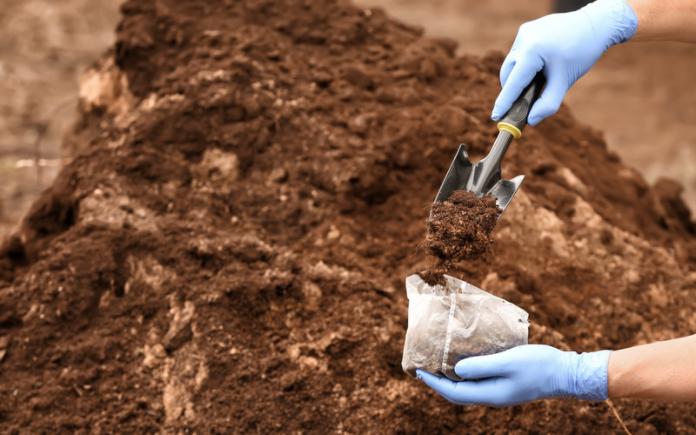
To ensure your victory garden plants grow at their best, do a soil test and amend it to suit your crops. (pixelshot)
Prepping for Your Garden
Remove grass and sod and till the upper layers of soil in your garden area.
Then, be sure to add four to eight inches of organic matter for the first year or two in new gardens if the soil is of poor quality. Home-made or store-bought compost provides good options for adding organic matter.
Perform a soil test to provide information about the pH (acidity and alkalinity) and available nutrients in your soil. A soil test also provides recommendations on how to amend your soil to better support plant growth.
Add compost as top-dressing or mulch throughout the growing season but incorporate it lightly to keep it from washing away. Add 1-2 inches of compost each year after you’ve started your garden.
Gardens that have yearly additions of organic matter may have enough nutrients to grow most crops without the need for supplemental fertilizer.
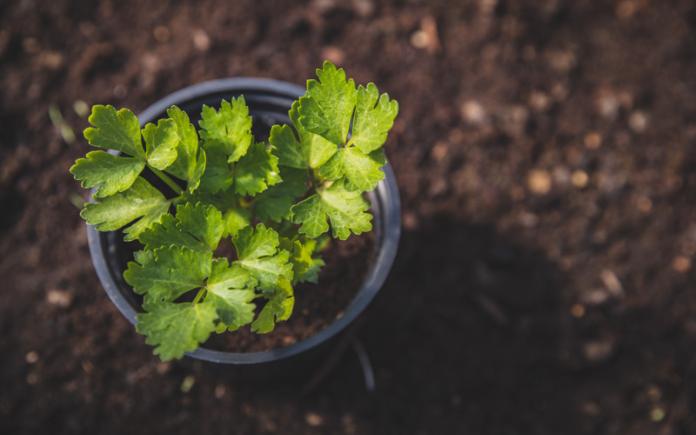
When transplanting plants, handle them carefully so you don’t bruise the stems or damage the roots. (Eva-Foreman/Getty Images)
Planting a Victory Garden
Plant your seeds according to the instructions on the packet. Firm the soil over your seeds to increase soil contact and speed up germination.
If you don’t want to start your victory garden from seed, buy transplants from a garden center. Choose vegetable plants that are stocky, disease-free, insect-free, and have good roots.
Plant transplants on a cloudy, windless day in the late afternoon or early evening to prevent wilting. Water the plants several hours before transplanting so the roots won’t dry out.
Dig a hole large enough to hold the roots and set the plant just slightly deeper than previously planted.
One exception is tomatoes. They should be planted deep enough to leave only two or three sets or leaves exposed because they will develop new roots along the stems.
Press the soil firmly around the roots of the transplant. Water, then pour starter solution around the roots per instructions on the starter solution label.
Plant the remaining plants, and keep them spread apart according to their recommended spacing.
To protect the new plants from wind and direct sun, cover them with a plastic jug for a few days. Make sure there is adequate ventilation so the plants do not overheat.
Pickling is one method of preserving vegetables harvested from a victory garden. (Nahhan/Getty Images)
Preserving Your Victory Garden Produce
If you’ve properly cared for the plants in your victory garden, you might find you have too big of a harvest to eat before it goes bad. Here are some ways to preserve your produce:
Canning: Canned vegetables are heated hot enough and long enough in a jar to destroy organisms that can make people sick and spoil food quality.
Pressure canning is the only safe method of canning all vegetables, except tomatoes. Jars of food are placed in a pressure canner which is heated to an internal temperature of at least 240°F. This temperature can be reached only in a pressure canner.
Drying: The University of Georgia rates carrots, sweet corn, garlic, mushrooms, onions, parsley, parsnips, peppers and potatoes as “excellent” or “good” for their quality after drying.
You can dry out these vegetables in the oven or a food dehydrator. Before drying, blanch the vegetables in boiling water to destroy enzymes that can cause color and flavor issues.
Properly stored, dried vegetables keep well for six to 12 months, and a great to use in soups, stews, sauces and dips.
Pickling: Pickling uses vinegar and other acids to preserve food. Mix in some herbs and spices to add extra flavor.
Companion planting is an ancient practice where two different plants, often vegetables, are planted together to benefit one or both of them. Because of that, this simple gardening technique will have you enjoying a harvest you’ve only ever dreamed of.
One of the best examples of companion planting is the Three Sisters method, according to the Master Gardners of San Diego County. Centuries ago, early American colonists observed Native Americans planting corn, pole beans and squash in the same plot. Contrarily, Europeans would typically plant these three plants in separate beds. Planting the three together not only conserved garden space but also benefited one another:
Corn provided support for the bean vines as they grew.
Beans, which have symbiotic bacteria on their roots, are “nitrogen fixers” and added this essential macronutrient back into the soil for the benefit of other plants, especially the corn.
The squash leaves provided shade and increased soil moisture retention while discouraging pests with their prickly leaves.
This biodiversity helps each crop grow to its full potential. If you’re looking to find your plant a companion, don’t worry — you’re not limited to these three sisters.
Deciding which plants go together is no sweat at all. All it takes is a little research! Refer to this helpful companion planting chart for an in-depth look at all the plants that you should and shouldn’t plant together.
Marigolds and tomatoes make the best neighbors when companion planting. (vandervelden/Getty Images Signature)
Companion Planting Do’s
The most grown crops — tomatoes, corn, beans and squash — go great together.
Planting marigolds and tomatoes in close proximity helps repel predatory bugs that like eating tomatoes and spreading blight.
Squash and corn go great together because corn provides some necessary afternoon shade to the growing squash.
Beans and corn also make a perfect pair because the corn acts as a natural trellis for the beans — giving them a structured place to grow upward and climb!
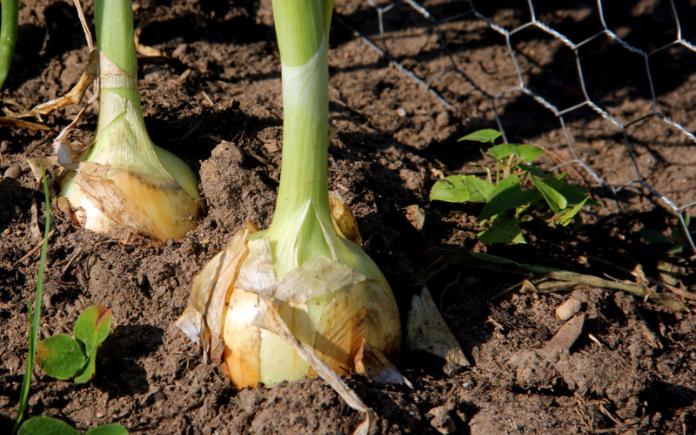
Some plants don’t make great neighbors, so refer to this guide when choosing which plants to pair. (Dcwcreations/Getty Images)
Companion Planting Don’ts
While planting certain plants together does help growth, some plants are bullies towards others — acting just like the nasty bugs, weeds and soil disease that are also trying to harm your plants.
For example, planting garlic and onions near beans is a big no-no. Both absorb nutrients from the soil that will stunt — and inevitably kill — the beans. Watch out for bullies like these!
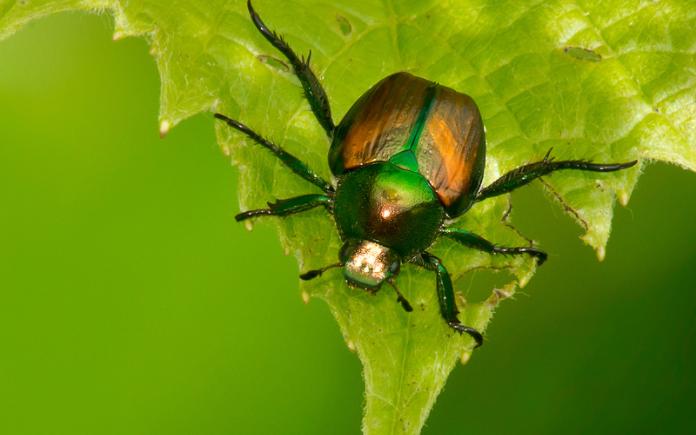
Some plants will draw the attention of pests, like this Japanese beetle, away from your prized produce. (PaulReevesPhotography/Getty Images)
Use Four O’clock flowers to attract Japanese beetles out of roses.
Plant mustard to deter cabbage worms and harlequin bugs from cabbages, broccoli, cauliflower, Brussels sprouts.
Garlic deters rabbits as well as tree borers, aphids, cabbage looper, codling moths, Japanese beetles, snails, carrot root flies, ants and cabbage maggots. What’s more, it’s especially beneficial when planted near, roses, cucumbers, peas, lettuce or celery.
Plant spearmint and peppermint to attract bees and repel black flea beetles, ants, mosquitoes, white cabbage butterflies, aphids, and cabbage maggots. Do not plant mint near parsley. Plant mints in containers as they can easily get out of control.
For squash bugs, plant mint, chives, garlic, onion, tansy, radishes, nasturtiums, marigolds and bee balm near and among vines of winter and summer squash.
Watch this Backyard Smart video to learn about companion planting and take your first steps into a wider world of gardening.
The more you fall in love with having a great backyard, the more you realize how much you don’t know. Exmark’s Backyard Smart answers the lawn-and-garden questions homeowners are looking for.
Zoysia grass can be a great option for your lawn, but be sure to take certain care measures to keep brown patches from forming.
Zoysia grass is a warm-season turf from Asia made of several species. This coarse grass— which thrives in central and southern states — is not shade-loving and prefers the sun.
Still, even with the best care, drought and pest damage can cause grass blades to turn brown or go dormant. If extensive damage occurs, and bare spots form, overseeding zoysia grass in the fall can help restore the turf.
To that end, here’s what makes zoysia grow patchy, how to overseed your zoysia lawn, and how to ensure the best results.
Zoysia grass can become brown and patchy if certain pests or fungi are present. (Getty Images Signature)
What Makes Zoysia Grass Patchy?
Before overseeding zoysia grass, you’ll need to identify the root cause of the damage. Drought is the often leading factor, but pests such as Chinch bugs, Hunting billbugs, and fungal pathogens like Rhizoctonia solani could also be culprits.
Here’s a breakdown of how pests and pathogens affect zoysia lawns:
Chinch bugs begin damaging grass from one side and expand as populations increase. (Getty Images)
Chinch Bugs
Chinch bugs — the most common pests of zoysia grass — spread rapidly to destroy major lawn areas. These insects inflict damage during the hot and dry summer months, and it’s tough to distinguish their visits from drought effects. Still, their patterns are predictable. Chinch bugs begin damaging grass from one side and expand as populations increase. As a result, damage is the most severe along lawn boundaries, like sidewalks and driveways.
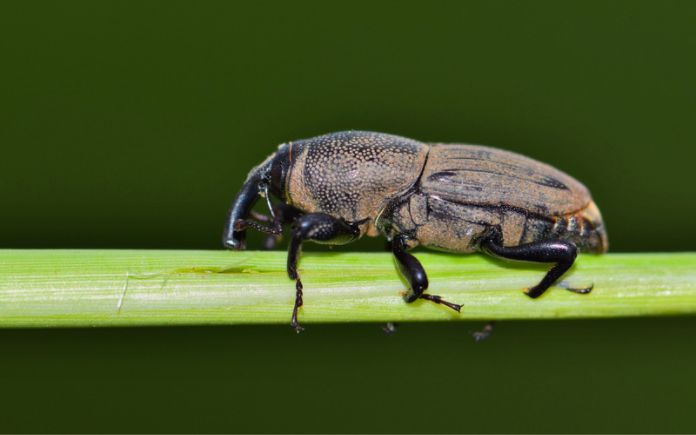
Hunting billbugs feed on plant stems and grass blades. (Getty Images)
Hunting Billbugs
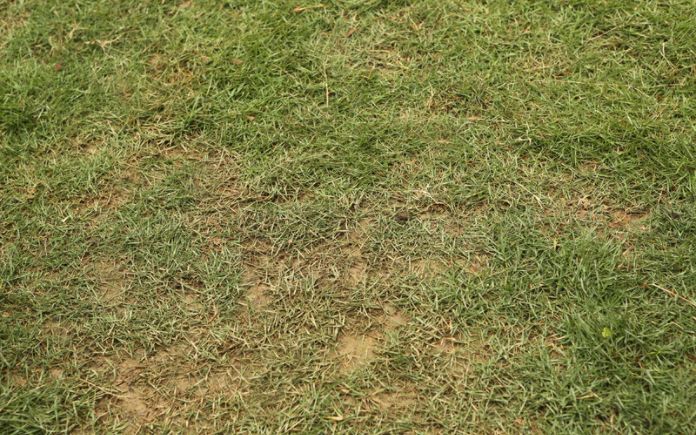
Hunting billbugs are most active during the night and early morning. Their damage is more common in mid- to late spring and early summer, when billbug larvae bore into the zoysia’s lower leaf stem and flourish. The turning point comes when growing larvae feed on stolons in the early summer, and grass shows symptoms of yellow areas that eventually brown and die out.
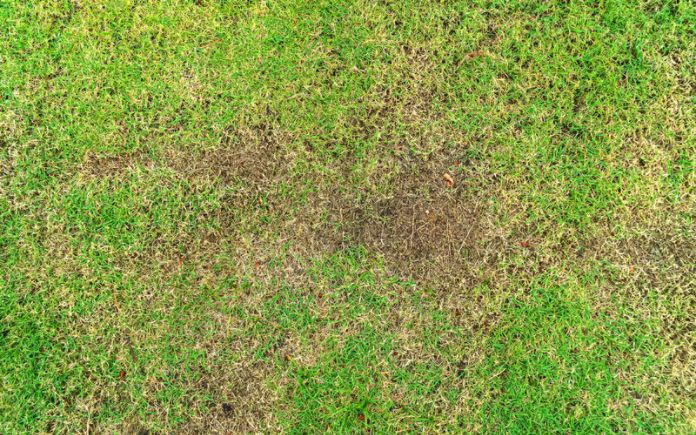
Rhizoctonia solani, a soil-borne fungal pathogen, causes large brown patches in zoysia grass. (Getty Images)
Rhizoctonia Solani – Fungal Pathogen
The third most common zoysia grass nuisance is Rhizoctonia solani, a soil-borne fungal pathogen. The large-patch symptoms appear in the fall and are most severe as zoysia grass growth slows due to cool temperature. This fungal pathogen can affect patches ranging from 6 inches to many feet in diameter.
Aerate your lawn so your seeds can penetrate deeper into the soil.
How to Overseed Zoysia Grass — Easy Steps
Overseeding zoysia grass is necessary to cover bald lawn patches and create a healthy lawn. You should overseed lawns in the late spring or early fall as temperatures are favorable for seed germination. If you overseed in the fall, spread seeds at least 60 days before the first frost.
To prepare a zoysia lawn for overseeding, follow these steps:
Collect debris. The first step of seedbed preparation is removing debris, stones, rocks, pinecones, straws or any other ground cover. Use a rake to collect and remove smaller pieces of debris. If you’re seeding a bare spot, remove any dead grass to expose the soil.
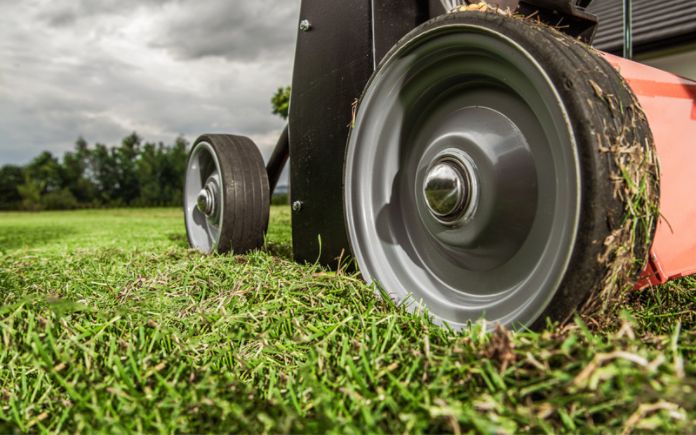
Mow. Cut the grass to about 1-inch tall, ensuring appropriate seed-to-soil contact. When grass is high, seeds get stuck in the blades and may not reach the soil. Maintaining low blade height is mandatory for the successful overseeding of zoysia grass.
Aerate. This involves punching holes into the ground to loosen compacted soil. Adequate air circulation allows water to penetrate deeper to reach roots, and aerated soils can allow for greater seed-to-soil contact.
Dethatch. Whereas aeration prepares the soil, dethatching prepares existing turf. Thatch— consisting of dead grass under actively growing turf — accumulates over time. It limits water, fertilizer and grass seed from reaching the soil. Even if the lawns are mowed and aerated, don’t overlook dethatching before overseeding zoysia.
Fertilize. Before distributing seeds, check the soil for nutrient deficiencies and apply a fertilizer based on recommendations from a soil test.
Zoysia needs more nitrogen, little to no phosphorous and less potassium. Always keep in mind that the best Zoysia grass fertilizers will have high nitrogen content.
Distribute seeds. Zoysia needs 2 pounds of seed per 1,000 square feet for optimal overseeding. Calculate the amount of seed needed by dividing your lawn area by the recommended seeding rate.
Typically, a hand spreader or push spreader is the best tool to spread seed. Either one will help ensure that seeds are dispersed uniformly, so that revived lawn is equally covered.
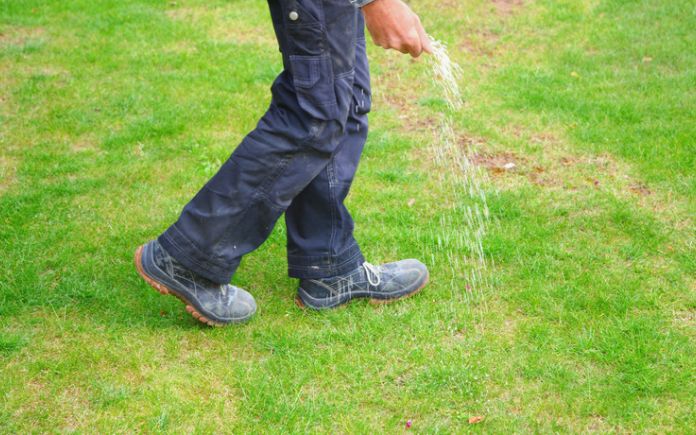
Fertilizing your lawn will make grass blades thicker and give denser growth. (Getty Images)
So, you’ve overseeded your zoysia grass—now what? Here are some pointers.
Overseeded zoysia lawns need good moisture to sprout seed. Initially, water daily until germination. The recommended rate is 1 inch of water per week, including rainfall.
Remember: Overwatering attracts pests to the lawn. Take regular measurements of water for optimal results.
Fertilization helps lawns thrive and indirectly helps to reduce the risk of insect damage. Proper fertilization makes grass blades thick and gives denser growth. When there is a thick layer of grass above the soil surface, insects have less access to the nutrients found in the roots of the turf, and the lawn is more likely to grow insect-free.
Mow the overseeded lawn when grass gets to a height of 2 inches or more. Under ideal conditions, you will start to see growth in 14 to 21 days.
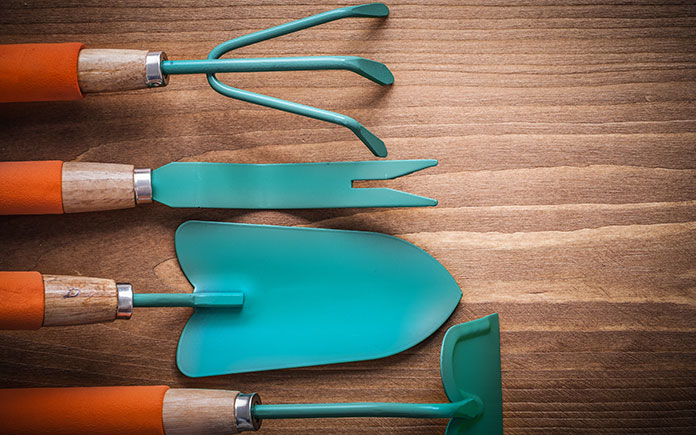
Gardening tools are essential not only for your safety and comfort but also for productivity. With the right tools in hand, you’ll be able to work more efficiently and effectively, yielding bigger and healthier harvests.
Sharp garden tools work more efficiently, effectively, and save you energy. (DepositPhotos)
As you move through this checklist of essential gardening tools, keep in mind that different products offer a wide selection of features, as well as varying degrees of quality.
How tall are you? Can you kneel to work? How large is your garden?
These are just a few questions to ask yourself as you move through all your options.
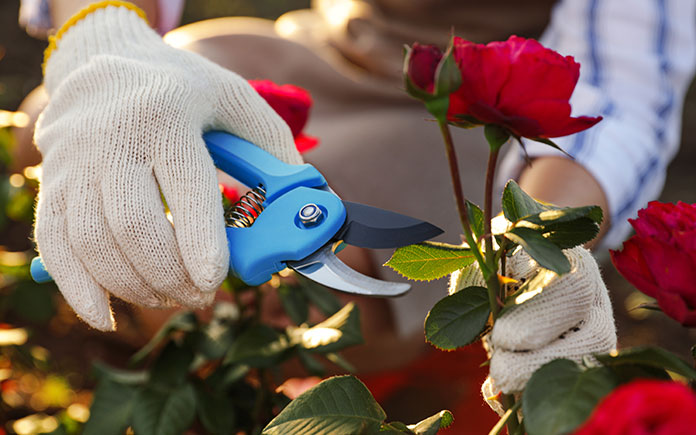
A good pair of gardening gloves will protect your hands from a number of hazards, including thorns, chemicals, and adverse weather conditions. They’ll also keep your hands and nails clean.
Choose gloves based on the task you’ll be performing — for instance, pruning roses and planting seeds make for two very different gardening experiences.
So, if you’re an avid gardener, you’ll want to have different pairs of gloves to tackle various jobs.
This handy gardening tool will prove invaluable for cutting smaller vines and branches. Even vegetable gardeners like to use pruning shears to harvest tomatoes, peppers, melons and other yields that don’t easily pop off the vine.
When choosing your pruning shears, make sure the grips are comfortable and the blades are sharp.
It takes just a few minutes to sharpen shears with grinders, files or sharpening stones. You just need to disassemble the tool, clean it, sharpen it, reassemble it, and clean the assembled tool for optimal performance.
And once you start using pruning shears, you might be surprised at how many miles you put on these handy little devices!
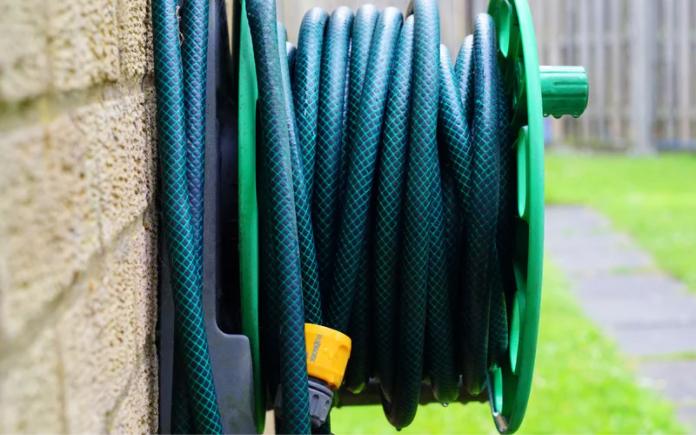
Everyone knows you need a garden hose, but did you also know some plants require a soaker hose?
3. Garden Hose
Your plants will need water — and unless you plan on hauling it in buckets, you’ll need a hose that reaches the farthest end of your garden.
Some plants, particularly perennials, don’t thrive with wet foliage, so you’ll also want a soaker hose, which slowly releases water so it soaks deeply into the soil.
Best of all? You can hide a soaker hose beneath your mulch and set it with a timer to turn on and off as needed.
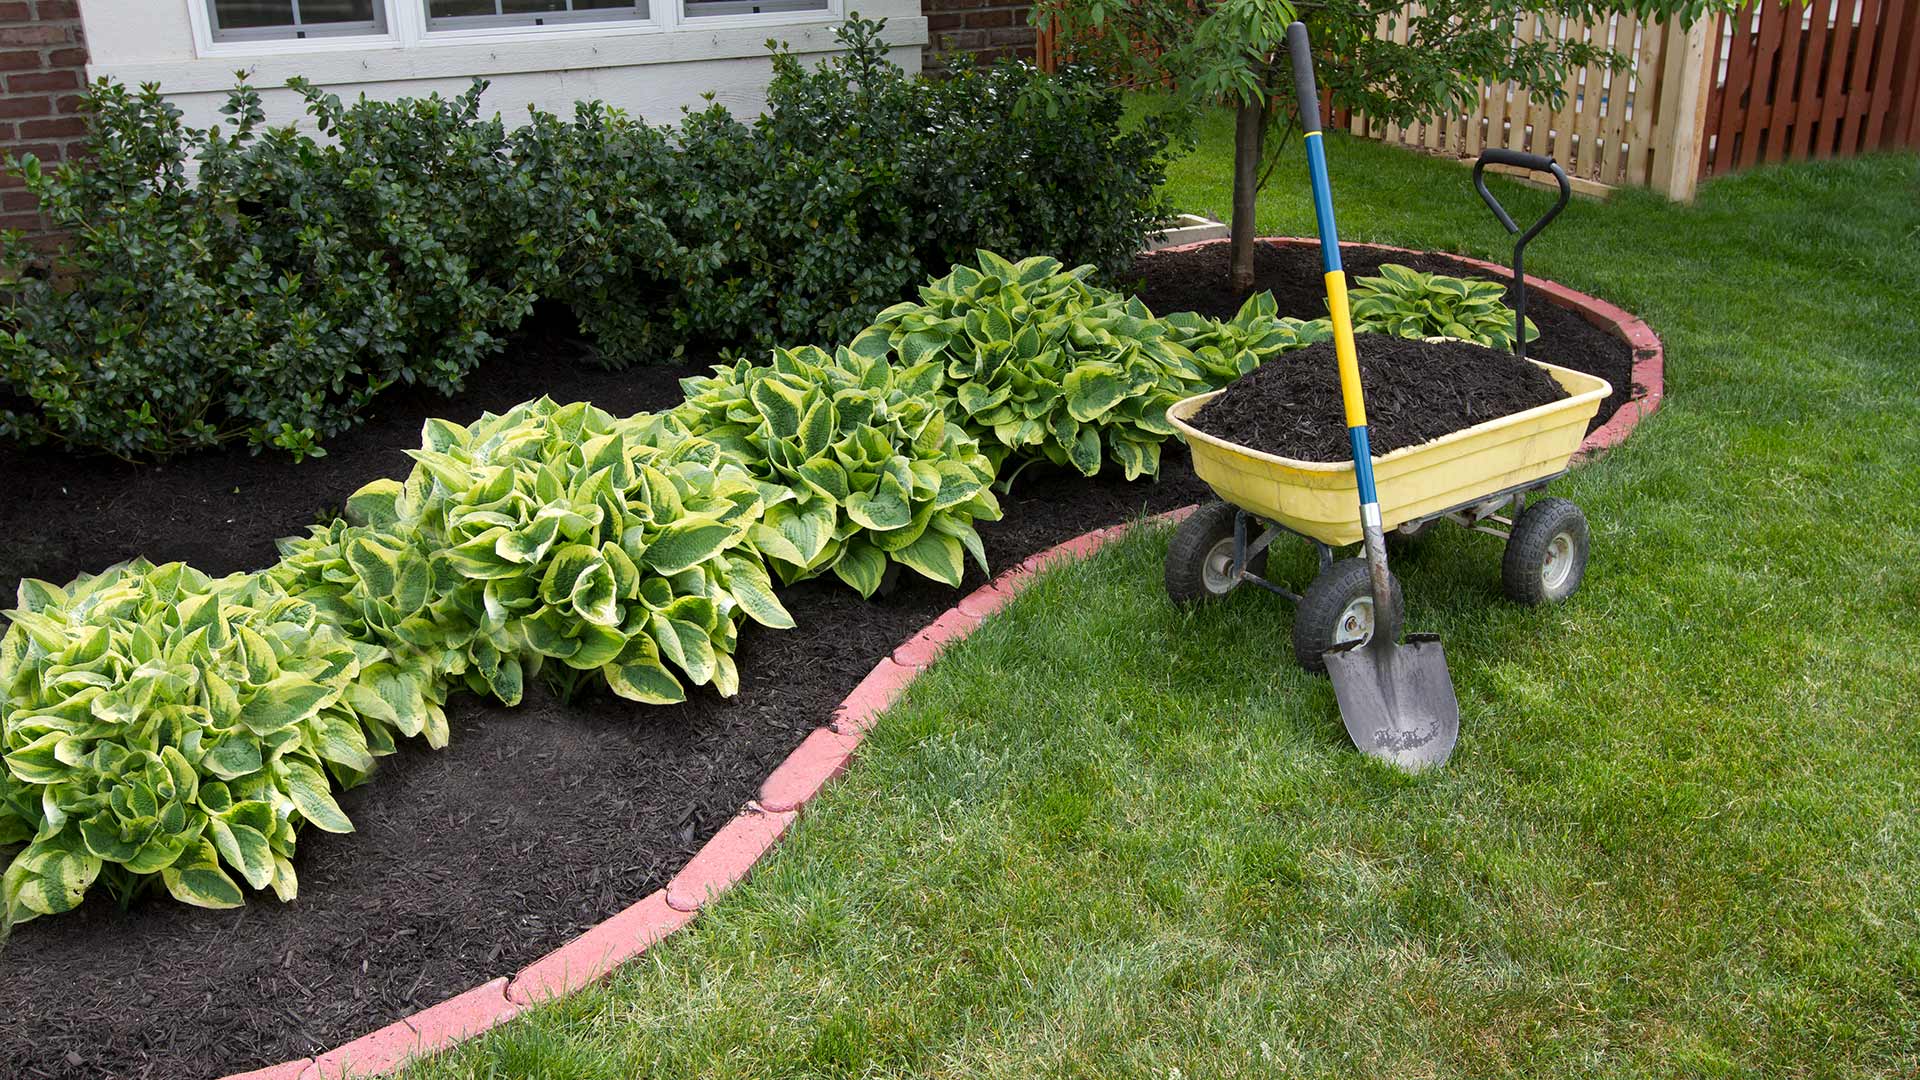
A wheelbarrow is essential for moving around soil, plants and tools while gardening.
4. Wheelbarrow
Chances are you’ll need to move dirt, clippings, compost, rocks — and the tools listed in this article. A wheelbarrow (or a garden cart or sled) will come in handy. Choose one that feels sturdy and balanced.
Pro Tips:
• Replace the wheelbarrow’s tire with a solid, universal tire that’s not inflated with air and can never go flat.
• Before you load up a wheelbarrow, point it toward the direction of travel. This will prevent you from pivoting with a heavy load
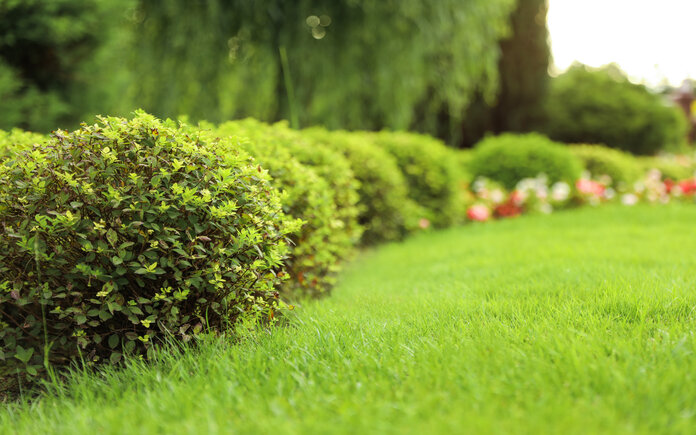
If you’re removing vines and branches, you’ll need garden shears.
5. Garden Shears
Lawn/shrub/garden shears, which are larger than pruning shears, are designed to trim shrubs and cut larger vines and branches. Choose a model that’s sturdy, yet light enough to be ergonomic.
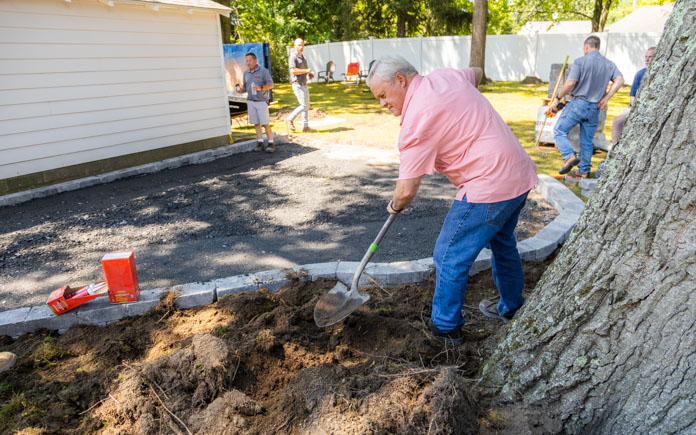
Whether you’re digging trenches or transplanting seedlings, one thing is certain: You’re going to need a shovel.
6. Shovel
Whether you’re digging out old shrubs, root balls or rocks, transplanting seedlings or filling a bed with soil or mulch, you’ll need a shovel or spade.
Choose one with a sharp edge, comfortable handle and a shaft that’s the right height for you.
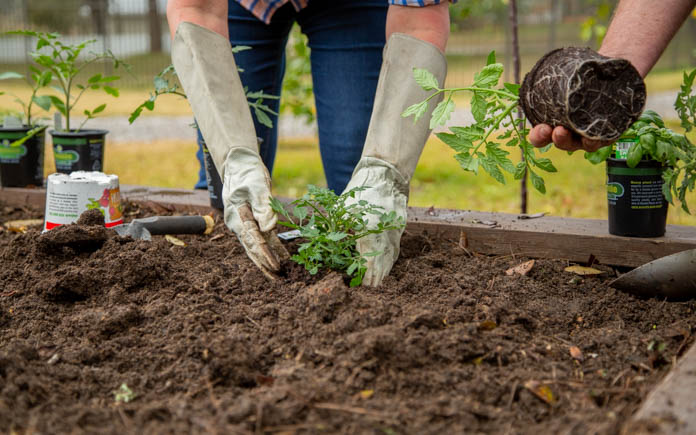
Carving out holes for plants in a raised garden bed? You don’t need a big tool — do it with a hand trowel!
7. Hand Trowel
This is much like a shovel, but it’s small enough to fit in one hand. Select a hand trowel that feels good in your grip, with a steady blade that won’t bend. Then use it to carve out holes for small plants, dig up weeds and extract plants for overwintering.
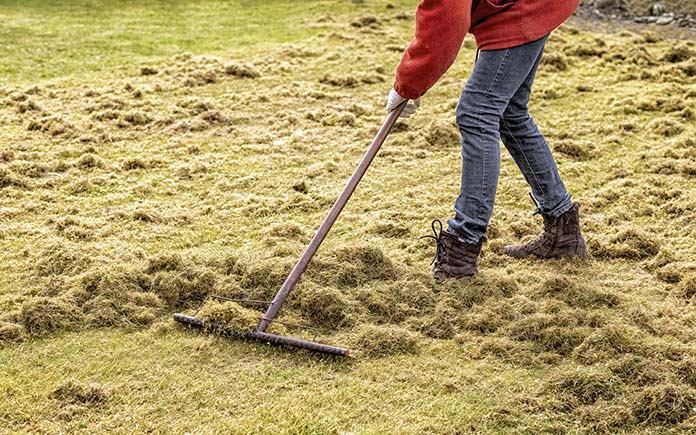
Whether you need to smooth out soil after it’s been tilled, comb rocks from the dirt or level out mulch, a garden rake with metal tines is a necessity.
You may need multiple rakes, depending on your lawn and garden’s needs. The three most common options are bow, leaf and shrub rakes.
Bow rakes help with smoothing out soil in a garden; leaf rakes are perfect for gathering leaves or pine straw; and small shrub rakes come in handy for placing mulch in tight spaces.
Pro Tip: Rake leaves fast with a tarp and two wooden dowels that make it easy to transport piles of leaves to a garbage can.
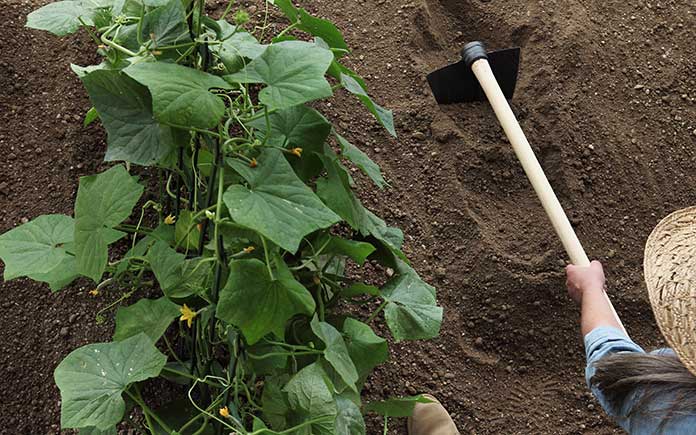
When it’s time to create furrows, plant seeds, mound up soil and dig weeds or root vegetables, a garden hoe is the tool you’ll need.
Choosing the right garden hoe will require a bit of research. If eliminating weeds is at the top of your list, a scuffle hoe, swoe or serpentine hoe might be the best choice.
For planting seeds, go with a warren hoe; and for tougher jobs that require more earth-moving, the draw hoe will be your multi-purpose friend.
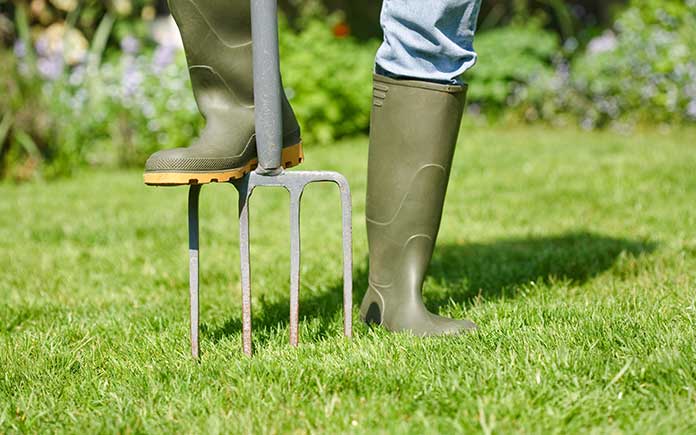
Need to aerate your lawn? If you don’t have a machine to do it, a simple garden fork works, too!(DepositPhotos)
10. Garden Fork
This tool is great for breaking up compacted soil. Choose a garden fork with sturdy tines that won’t bend if you hit a rock. If you plan to move mulch or compost, pick one with curved tines so you can use it as a shovel.
Having the right gardening tools helps you to take better care of your lawn and garden.
When you have just the right gardening tool for every job, you will move quickly through tasks, your garden will look beautiful, and you’ll be better equipped to care for plants.
Choose tools that will work best for you and your garden, but also those you can expect to last for years to come.
And remember: Inexpensive tools might seem attractive at first, but nothing beats reliability and longevity.
Barb Abrahms is the CEO and co-founder of PalmFlex. Abrahms has over 20 years of experience consulting her team and customers on their ideal personal protective equipment needs for a variety of industries and applications.