This week, learn tips for preventing buckling floors and removing wall mirrors. (Banepx, Getty Images/DmitriiSimakov, Getty Images)
Hour 1
In Hour 1, listen to learn about fire concerns with open floor plans, fixing a sticky vinyl floor and more.
Fire Safety and Open Floor Plans
Open floor plans are easy on the eyes, but they also make it easy for a fire to spread. (PC Photography, Getty Images)
Nowadays, everyone wants an open floor plan, but keep this in mind: The National Fire Protection Association warns about fire concerns that go along with them.
Since 1980, the number of house fires has been cut in half, due to smoke alarms, but since 2010, house fire deaths have been on the rise.
Part of the reason for this is open floor plans. With fewer walls, fires can spread more quickly. Also, modern homes are built mostly with synthetic materials that burn much faster than natural materials.
30 years ago, you had about 15-17 minutes to escape a house fire. Today, the National Fire Protection Association says you only have about three to five minutes.
To increase your chances of surviving a house fire, make sure your smoke alarms are in working order. You should check them at least twice a year. A good time to do this is when time changes in the spring and fall.
The National Fire Protection Association also recommends new homeowners go a step further and seek out homes with fire sprinklers or ask for this technology when building a new home.
Having a combination of smoke alarms and fire sprinklers in a home can significantly cut your risk of injury or worse from fire; the home fire death rate is an astounding 90 percent lower when hardwired smoke alarms and fire sprinklers are present.
And of course, make sure your family has an escape plan.
Sticky Vinyl Floor
A sticky vinyl floor might mean its protective coating has worn off. (Adobe Stock)
Jeffery Winig has 20-year-old vinyl flooring in his Saratoga Springs, N.Y., home.
“I’m having problems trying to keep the floors clean and non-sticky. Any suggestions on products that will clean and/or seal the floors would be greatly appreciated,” he asks.
It sounds like the protective coating on the vinyl floor has probably worn off.
All vinyl floors have a clear wear layer on the top to protect the floor. Over time, it can wear off and expose the flooring’s resilient core. This can make the floor feel sticky, which then attracts dirt and makes them harder to clean.
The easy way to tell if the wear layer is missing is to test a spot that hasn’t had a lot of foot traffic. If that spot is easier to clean, then the coating has probably worn off.
Try installing luxury vinyl tiling over the existing vinyl floor. It’s fairly easy to install and holds up great to foot traffic.
Hour 2
In Hour 2, hear how to prevent laminate floors from buckling, remove floor-to-ceiling mirrors, get rid of moles and more.
Preventing Laminate Floor Buckling
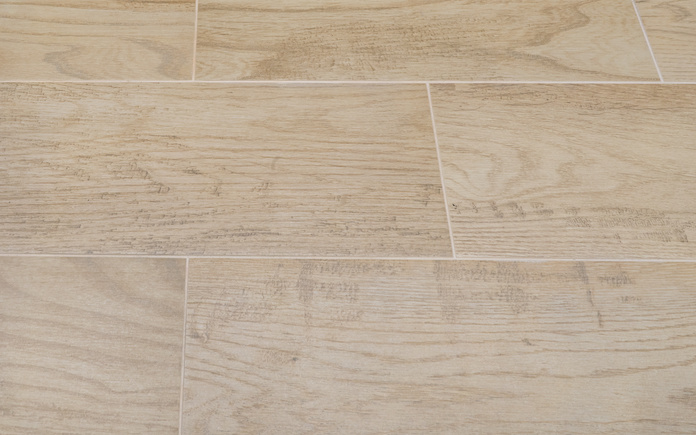
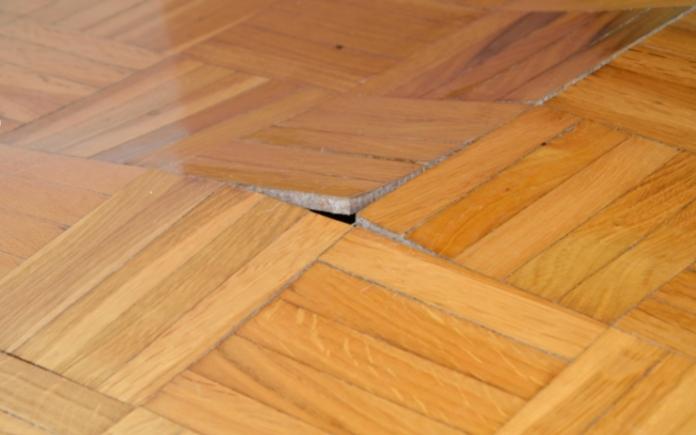
Buckling floors can be caused by too much moisture in the air. (Banepx, Getty Images)
A listener has a vacation home that’s only occupied a few months out of the year, and he wants to know the best way to prevent buckling and shrinking on the laminate floor.
“What should I keep the A/C unit set to as far as the high and the low settings?” he asks.
Preventing buckling has more to do with humidity than temperature. Moisture in the air causes expansion and contraction, so get a dehumidifier to remove as much of it as possible.
Since this is your vacation home and you’re not there all the time, get a small one that can be set on your countertop and have the drain directed toward the sink. That way there’s no chance of any overflow causing water damage to the floor.
Also, keep this in mind: buckling usually happens if there isn’t enough expansion space left around the perimeter of the room. Check to see if there is enough space between the flooring and the wall for the boards to naturally expand.
As for the temperature setting, I keep the air conditioner in my vacation home set at 76 degrees Fahrenheit. At one time, I set it at 78 degrees Fahrenheit, but mold and mildew started to form. I’ve found that at 76 degrees Fahrenheit, there’s enough air exchange to prevent that.
Removing a Mirror From a Wall
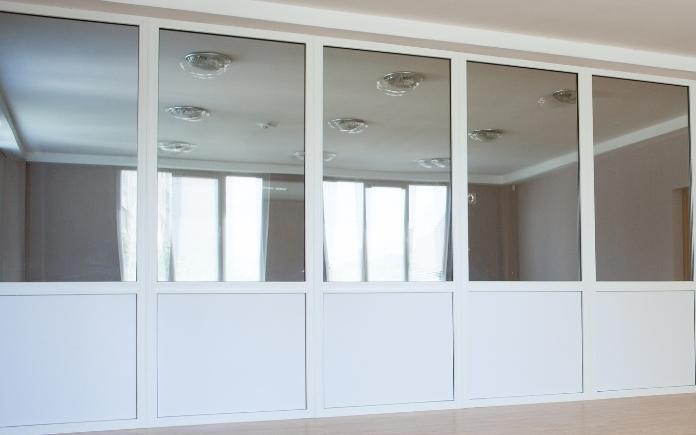
Large wall mirrors can be dangerous to remove. (DmitriiSimakov, Getty Images)
Shirley in Anchorage, Alaska says: “One wall in our dining area has floor-to-ceiling mirrors, and I hate them. Is there an easy, safe way to remove them?”
Removing floor-to-ceiling mirrors can be dangerous, because broken glass can cause serious injuries.
Take all precautions to protect yourself. Wear long sleeves, leather gloves, and a full face shield so you won’t get injured if any glass breaks away.
Use a large putty knife to pry off the edge of the mirror to see how they’re fastened. Most of the time, there’s more than one way it’s fastened to the wall. They could be glued or held in place by clips.
If they’re clipped to the wall, simply unscrew the clips to remove the mirror.
If the mirrors are glued to the wall, take a putty knife and slip it behind the mirror. Sooner or later, the drywall or glue will eventually give, but it could shatter.
You also can try running a nylon string or a piano wire behind it. There’s also a tool you can get from the auto parts store called a windshield cutout wire. It’s a long wire with teeth on it and handles on the end. Run it behind the mirror and saw it back and forth to remove it.
If you’re not comfortable with removing it yourself, call a professional.
Moles Vs. Voles
Moles and voles — both can wreak havoc on your lawn. (Tuned_In, Getty Images/Leopardinatree, Getty Images Signature)
William recently purchased a home with a small pond, and he says he has a large vole problem. He’s tried sonic noise devices, but they haven’t had any effect.
“Is there a non-toxic way to get rid of the voles and grubs they eat? I don’t want to harm the fish in the pond,” William asks.
One part of eliminating any rodent problem is to get rid of their food source.
One clue here is when William mentions “the grubs they eat.” Voles are vegetarians, so the problem might be moles, not voles.
Here’s an easy way to remember the difference between the two: Voles are vegetarians, and their name starts with a “v.” Moles are meat-eaters, and their name starts with an “m.”
Voles look like field mice with short tails, compact heavy bodies, small eyes, and partially hidden ears, according to Clemson Cooperative Extension. They are 5-8 inches long and have prominent orange teeth for gnawing plant roots and stems.
Moles, on the other hand, are 4-7 inches long with paddle-shaped feet and prominent digging claws. They have an elongated head and snout, small eyes, and no external ears.
You can try treating your lawn with an herbicide to kill the grubs. However, this will only help slightly, because moles eat other insects as well.
If you really want to get rid of the moles in your yard, the only surefire way is to trap them. Follow trap directions exactly, because improper placement of the trap will doom your efforts!
While you can’t control whether or not new moles will move in, trapping lets you know for sure that you’ve eliminated the ones you have. Before you begin, make sure mole trapping is legal in your state.
Alta Forest Products Premium Treated Dog-Ear Fence Pickets are wider, so you need fewer boards for a privacy fence. Learn more >>
Simple Solutions
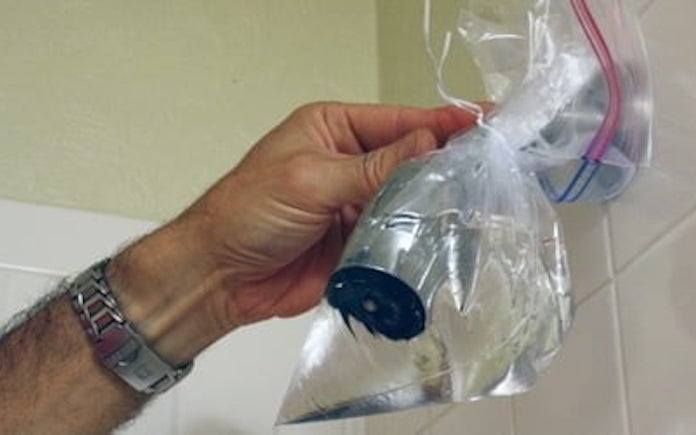
Using vinegar to clean a clogged showerhead. (3 Echoes Content Studio)
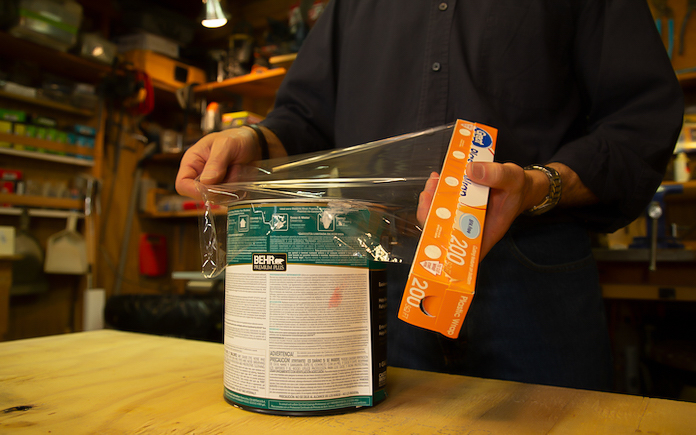
Unclogging Showerheads — High mineral content in water can create a crusty buildup on showerheads, creating a weak, erratic spray. Fix this by soaking the showerhead in white distilled vinegar.
You can remove the showerhead and submerge it in a bucket of vinegar, or fill a plastic food-storage bag with vinegar, slip it over the showerhead and secure it with twine or twist-ties.
Allow the showerhead to soak in vinegar for 24-48 hours.
Mount a PVC pipe underneath a shelf to conveniently store cordless tools. (3 Echoes Content Studio)
Cordless Drill Holster — Make a convenient storage holster for your cordless drill from a 12-inch length of 3-inch-diameter PVC pipe.
Use a jigsaw to cut a slot in the pipe slightly wider than the tool’s handle, and about 6 inches long. Then screw the pipe to the underside of a shelf.
Now, slide the drill into the slot, leaving the handle hanging below. This is a great way to save shelf space and keep the tool at the ready.
If you’ve ever installed a privacy fence you know how tedious it can be to attach one picket after another. And it’s even worse with warped or twisted wood.
This page contains affiliate links. If you purchase a product from these links, we will earn a small commission at no additional cost to you.
These pickets are wider than most, so you can use fewer to build a fence. (Image via The Home Depot)
Easy Installation
Most fence pickets are only three to five inches wide. Alta’s Premium Treated Dog-Ear Fence Picket, however, is a full six inches wide, allowing for faster installation and requiring fewer fasteners and labor.
It’s also a full 3/4 inch thick which combined with the addition of a wood stabilizing additive makes this product extremely stable and minimizes the amount of warp and twist typically seen in other products.
These fence pickets ends are sealed to resist splits and checks, for a stronger, longer-lasting fence.
Alta’s Premium Treated pickets come with a 10-year warranty that protects against rot, decay and wood ingesting insects, including Formosan termites.
Because each picket is individually treated and stained, your fence will have a more uniform appearance. (Image via The Home Depot)
Lasting Beauty
Each picket is individually treated and stained — saving you time and money. Plus, your completed fence will have a more uniform appearance.
They also come with a two-year color fade warranty, so your fence will stay looking new longer.
More Details
Alta Premium Treated pickets are non-toxic, so there are no special handling or disposal requirements, making this the safe alternative to cedar and pressure-treated wood pickets.
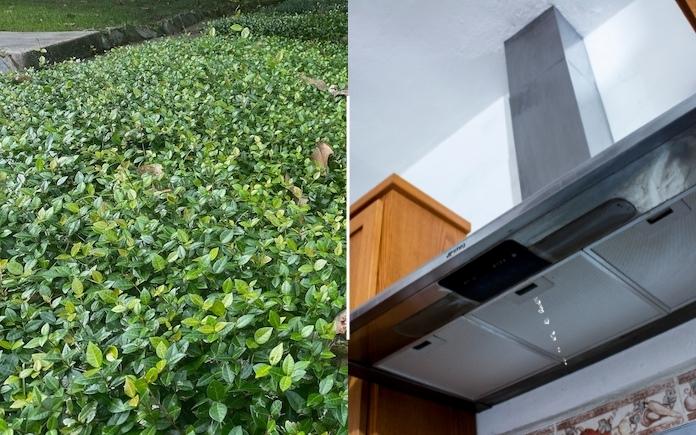
In this week’s episode, we provide solutions for out-of-control Asiatic jasmine and a dripping range hood. (Carey Bradley, Today’s Homeowner Media/Osvaldo Maldonado, Getty Images/BillionPhotos)
Hour 1
In Hour 1, we share a listener’s tip on how to track down rats in an attic, offer solutions for an invasive ground cover and more.
Tracking Down Rats in an Attic
Find where rats have been in your attic by using a black light. (Photo illustration: MikeLane45, Getty Images Pro/Adobe Stock)
In the July 30 show, Chris Welsh in Florida called to ask about eliminating the rat urine smell in his attic. He wanted to install new insulation and asked us if he should remove the old, soiled insulation before he installs new.
We told Chris that since it’s been a few years and the smell is still there, plus he’s already going to install new insulation, he should get rid of the soiled insulation. Although it can dissipate over time, there’s no guarantee. Plus, this could be his only chance to remove it, because once the new insulation is installed, it’s there for good.
One of our listeners, Dean, heard this and called to give this tip: Use a black light to find rat urine in an attic.
This is a great tip because it’s often hard to see how widespread the rat infestation is on smell alone.
According to chemistry expert Anne Marie Helmenstine, Ph.D., urine glows under a black light primarily because it contains the element phosphorus. Phosphorus glows yellowish green in the presence of oxygen, with or without black light, but the light imparts additional energy that makes the chemiluminescence easier to see.
A black light also works well to find pet urine. So if you have a problem cat that’s not keeping its business in the litterbox, use a black light to find urine spots.
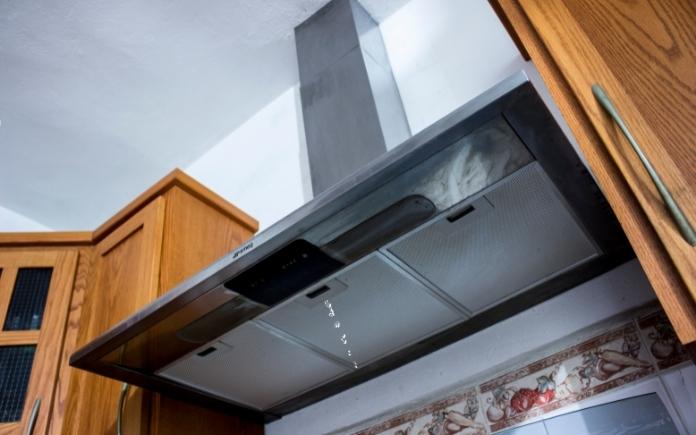
Water Dripping from a Range Hood
Water dripping from a range hood indicates an insulation problem. (Photo illustration; Osvaldo Maldonado, Getty Images/BillionPhotos)
Water is constantly dripping from the range hood in David Henderson’s kitchen. He’s spending a small fortune on paper towels to absorb the drips on the stovetop.
The duct vents to the outside of the house, he maintains a steady temperature inside, and the new roof he just had installed didn’t make a difference.
“I’ve been beating my brains out trying to figure it out,” David says. “I am 69 years old and have lived in many houses in my life but have never seen this before.”
The vast majority of the time, when a vent pipe is dripping water down through the range hood, it means condensation isn’t forming on the outside but on the inside.
Install some duct wrap insulation on the pipe to minimize the difference in temperature inside the pipe and in the attic. Since the pipe is already in place, get the type that comes on a roll, not a cylindrical form. That way you won’t have to disconnect the pipe to slide the insulation over it.
This will stop the dripping and you’ll also greatly reduce your paper towel budget!
Controlling Asiatic Jasmine
Asiatic jasmine is a great groundcover, but it can get out of control if not properly maintained. (Carey Bradley, Today’s Homeowner Media)
Sue wants to know: How can I get rid of Asiatic jasmine that is taking over our yard?
“It has spread from the neighbors on each side of us. Pulling it up is a never-ending task and we have gotten too old to deal with it. Help!” Sue says
Asiatic jasmine is a perennial evergreen vine that makes for a wonderful ground cover, but it’s very invasive.
First, try cutting it right at the bed, and keep it under control with a string trimmer.
We don’t often recommend using herbicides, but you might need them in this case. Cut it back as far as you can, then spray on an herbicide.
If you don’t want to use an herbicide, spray it with home and garden vinegar.
Hour 2
In Hour 2, learn how to paint unfinished cabinets yourself, when to paint walls in a new house and more.
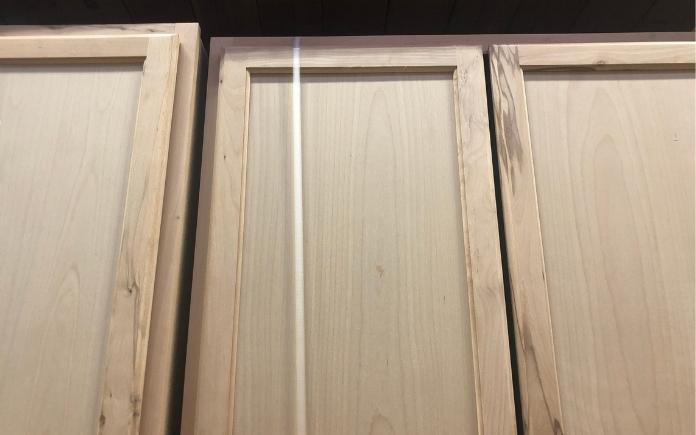
Painting Unfinished Cabinets
You can get the look of professionally painted kitchen cabinets yourself if you make the right preparations. (Kameleon007, Getty Images Signature)
A caller wants her unfinished cabinets professionally painted, but the professionals have given her “outrageous” estimates.
“Can I do this myself, and what kind of sprayer should I get?” she asks.
It is a fair amount of work to finish cabinets yourself, but the end result is very gratifying.
Because the cabinets are unfinished, you won’t have to worry about removing any old paint.
Basically, here’s what you need to do.
Sand the cabinets so the paint will stick.
Smooth out any imperfections with water putty or epoxy finish
Prime the cabinets with a bonding primer
Apply two coats of acrylic latex paint in either a semi-gloss or eggshell finish
Don’t wait for your house to “settle” to start painting it. (Curtis Adams, Pexels)
Robert Lang in Kentucky just bought his first home — a new build that was completed in February 2022.
“I want to paint the interior to not only change the color but use a better grade of paint. I’ve read that I should wait before painting. If this is true, how long should I wait? Do I need to allow the house to settle before I attempt to paint?” Robert asks.
There’s no reason to wait to paint in a newly built home. There’s no way to know how much settling or expansion and contraction are going to happen.
There are so many factors that could influence it, like how wet the framing got during the building process or how many screws were used versus nails.
If there is going to be some settling, it probably won’t show up for at least five years.
Go ahead and make the house your own. Just, make sure the walls are nice and clean before you paint them.
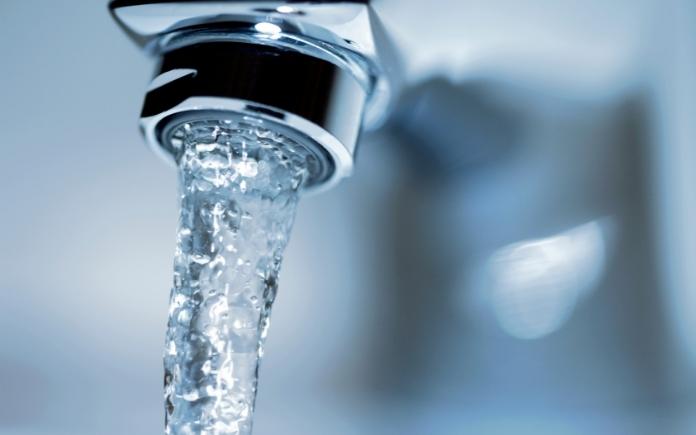
Simple lifestyle changes can conserve water, one of our most precious resources, and save money. (aristotoo, Getty Images Signature)
Water conservation is fast becoming a priority for many homeowners.
The Environmental Protection Agency estimates that leaks account for 9,400 gallons of water wasted each year. That’s about the amount of water needed to wash more than 300 loads of laundry.
Whether your reason for conserving water is mandated because of a drought or to combat high utility bills, adopt these simple water-saving measures to dramatically cut your home’s water usage.
Here are the 5 hot spots to tackle.
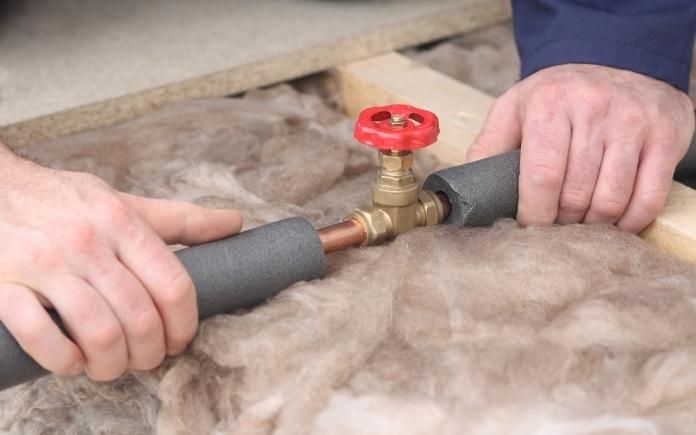
Insulating water pipes with foam helps water heat up faster, so you waste less time waiting for hot water. (nsj-images, Getty Images Signature)
1. Home Infrastructure and Appliances
To conserve more water in your home, start at the source.
First, check for leaks in the pipes. A visual inspection can quickly reveal any problems that need repairs.
In addition, read your water meter when no water is being used, then look at it again after a few hours to see if the gauge has changed.
Fixing the leak could be as simple as replacing a faucet washer, or you may discover a more serious problem such as an unseen leak in a pipe.
Here’s a win-win solution: Installing foam insulation on hot water pipes saves both water and energy by providing hot water faster and keeping it hot longer. This reduces the water wasted from running the tap to heat it up.
Finally, when replacing appliances like dishwashers or washing machines, look for models that have earned the U.S. government’s Energy Star rating, certifying they use less water and energy.
Plumbing fixtures such as faucets and toilets that carry the Environmental Protection Agency WaterSense label use, on average, 20 percent less water than conventional fixtures.
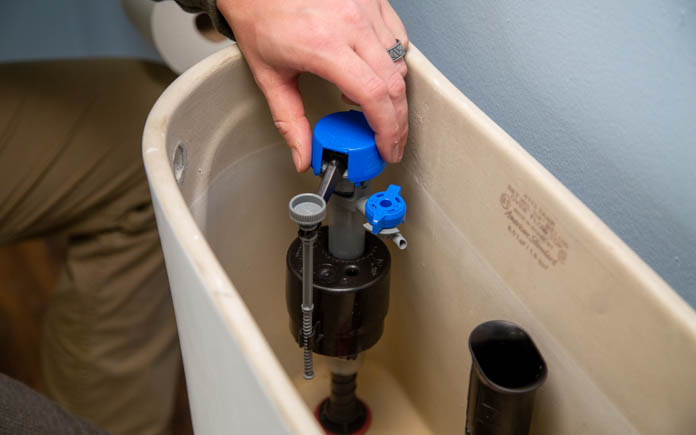
Fluidmaster’s 400H Toilet Fill Valve fixes a constantly running, noisy or slow-filling toilet and is one of the quietest fill valves available. (3 Echoes Content Studio)
2. Your Bathrooms
Toilets are the largest users of water in the home — but some of them are more efficient than others. Look on the bottom of the tank lid, or inside the tank wall, to find the date your toilet was manufactured. Toilets made before 1993 use two to three times the water of new ones.
If you have an older model, consider replacing it with a new low-flush or a dual-flush toilet that can use as little as 1 gallon per flush for maximum water conservation.
If replacing a toilet isn’t in your budget, add a few inches of gravel or sand to a plastic soft drink bottle, fill it with water, screw on the cap, and put it in the tank away from the float and flapper. The increased volume from the bottle reduces the amount of water in the tank, so less is used per flush.
If you notice your toilet refilling periodically when it hasn’t been flushed, it’s a sure sign your toilet has a leak. These leaks can waste thousands of gallons of water if not repaired.
A constantly running toilet, weak or incomplete flushing and a slow-filling tank aren’t just frustrating — they can also increase your water usage.
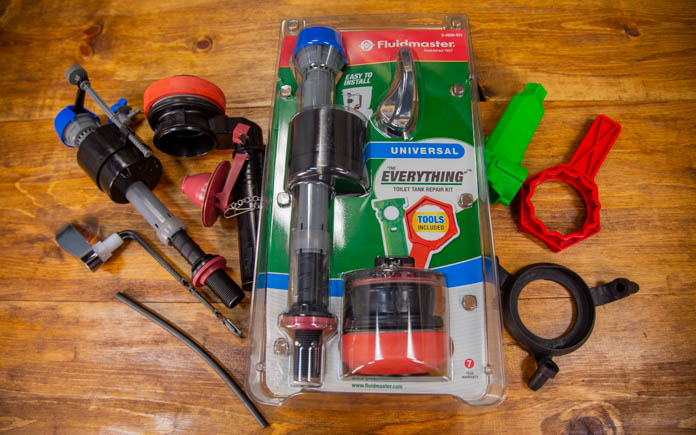
The DIY-friendly kit comes with a toilet fill valve, flush valve with stainless-steel bolts, Tank-To-Bowl Gasket and color-coded tools for the fastest installation possible and, if necessary, a complete tank rebuild. It eliminates the need for extra trips to the store for an unknown part or tool — and that saves time, money and frustration.
To conserve more water, change up your hygiene routine. Reducing time spent in the shower can save 2 to 5 gallons of water per minute, or GPM. Installing a water-saving showerhead will prevent thousands of gallons a year from going down the drain.
To see if you need a new showerhead, put a 5-gallon bucket in the shower and turn on the water. If it fills in less than two minutes, consider replacing the showerhead with a water-saving model that uses two GPM or less.
Finally, leaving the faucet running while you shave or brush your teeth wastes water. Turn the water off while you brush and fill the sink to rinse your razor.
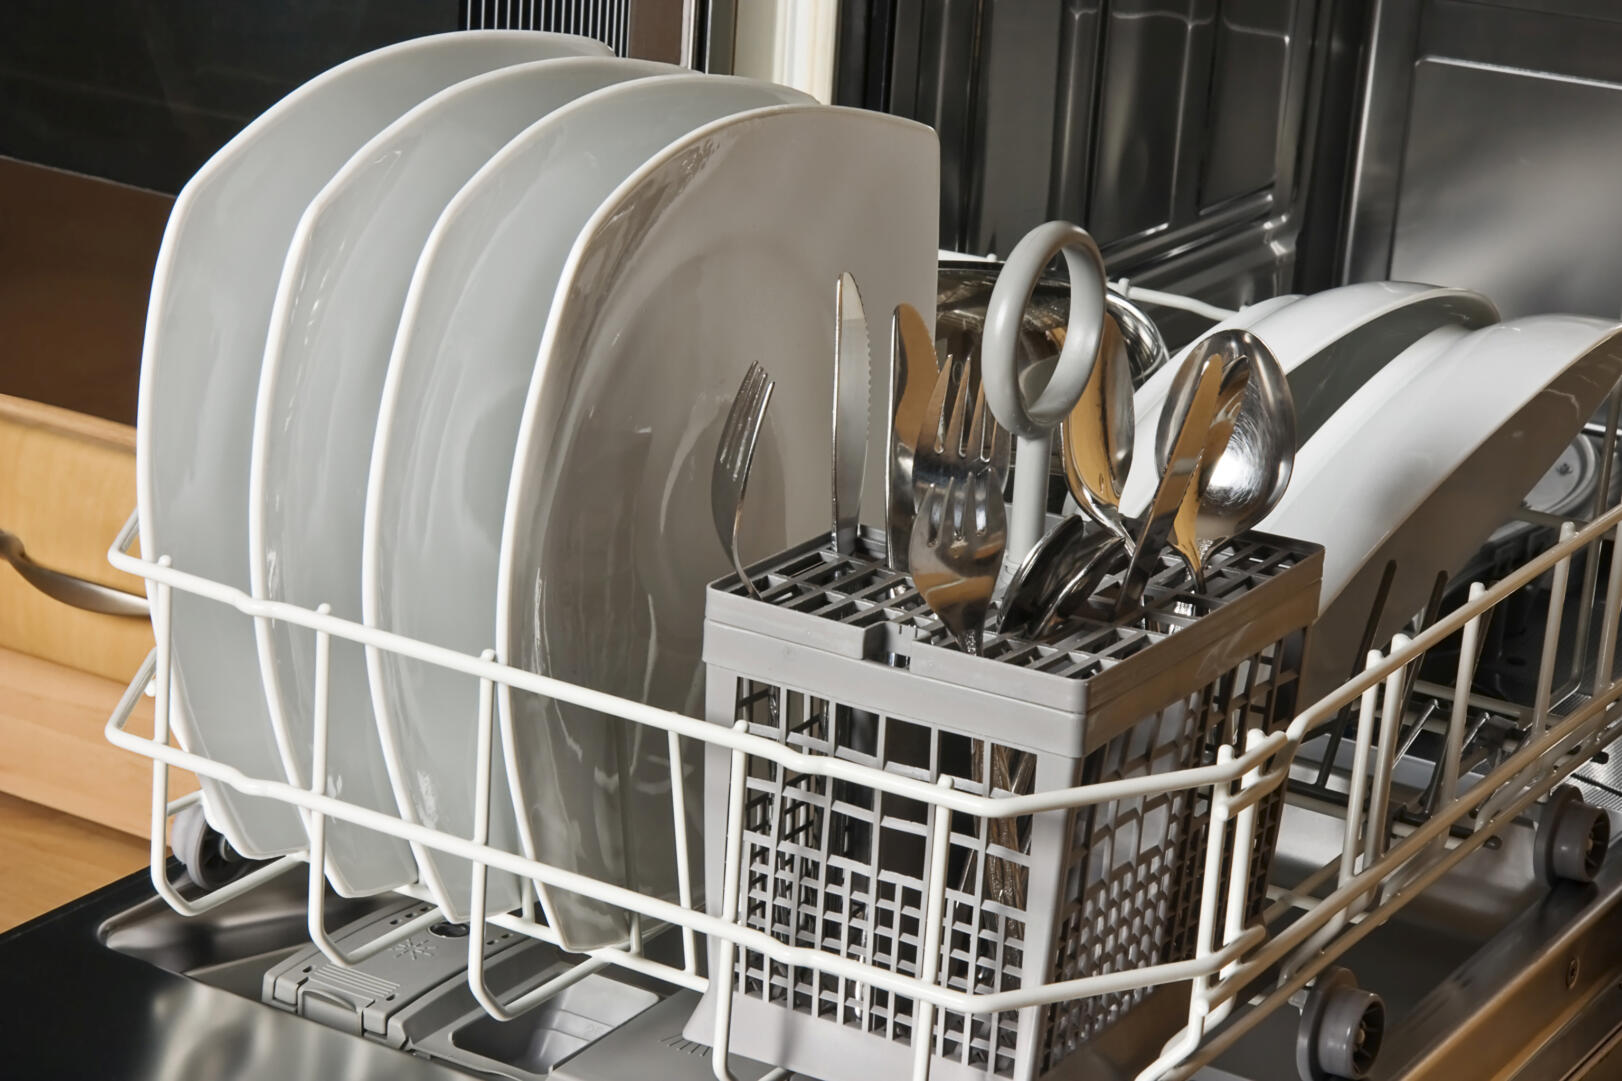
Only running a dishwasher when it’s full can save nearly 320 gallons of water annually. (Irina Drazowa-Fischer, Getty Images)
3. The Kitchen
A few changes in the kitchen can significantly cut down your water usage. For instance, thaw frozen food in the refrigerator overnight instead of using a running tap of hot water — it’s not necessary.
When used properly, a dishwasher uses less water than hand-washing. Run your dishwasher only when it’s full and use water-saving settings for more efficiency. Doing this saves the average family nearly 320 gallons of water annually.
If you hand-wash, fill one side of a double sink with soapy water for washing and the other with clean water for rinsing. Letting your faucet run for five minutes while washing dishes can waste 10 gallons of water.
Also, install low-flow aerators on faucets — these reduce water flow to one gallon per minute or less.
Finally, do you drink a lot of tap water? If so, don’t keep the water running until it cools off for drinking. Instead, fill a pitcher or bottle and keep it in the fridge.
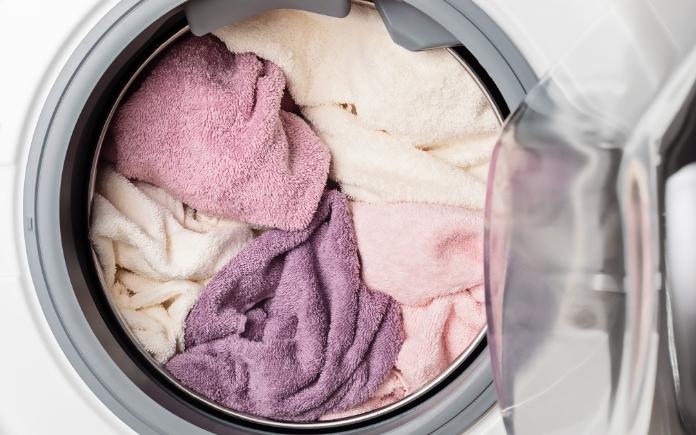
Don’t do laundry until you have enough clothes for a full load. (Oksana Vejus via Canva)
4. Your Laundry Room
Washing clothes accounts for the second-largest water use in the home. Put off doing laundry for the sake of water conservation.
Only run the washer with a full load of clothes and use the shortest cycle for lightly soiled clothing. And if you really want to reduce water use, avoid the permanent press cycle, which uses up to 5 gallons more water per load.
While washing clothes in cold water saves energy by reducing water heating, it uses the same amount of water as warm or hot settings.
Every year, we waste billions of gallons of water to keep our lawns and gardens green. Much of this water is lost due to overwatering, evaporation, poor sprinkler design or lack of maintenance.
Use a drip irrigation system or a soaker hose to reduce water use. These methods deliver water slowly and directly to the plant’s roots, and much less water is lost to evaporation.
If you have a programmable irrigation system, install a rain sensor. It will interrupt the program cycle when it rains, so you won’t overwater your lawn.
Better yet, start at the ground level to keep your water use at a minimum. Choose native and drought-tolerant plants to create a water-smart landscape that’s beautiful and efficient.
Here are some other water conservation options for the yard:
Sweep driveways, sidewalks and steps rather than hosing them down.
Wash the car with water from a bucket, or consider using a commercial car wash that recycles water.
If you have a pool, use a cover to reduce evaporation when it’s not in use.
Following these water-saving tips can reduce household water use by 30 percent or more.
Start simple by changing wasteful habits and fixing leaks, then move up to installing water-saving fixtures and appliances.
Not only will it save money, but you’ll also reduce the needless drain on one of our most precious resources.
Water conservation is fast becoming a priority for many homeowners.
The Environmental Protection Agency estimates that leaks account for 9,400 gallons of water wasted each year. That’s about the amount of water needed to wash more than 300 loads of laundry.
Whether your reason for conserving water is mandated because of a drought or to combat high utility bills, adopt these simple water-saving measures to dramatically cut your home’s water usage.
Here are the 5 hot spots to tackle.
Insulating water pipes with foam helps water heat up faster, so you waste less time waiting for hot water. (nsj-images, Getty Images Signature)
1. Check Fixtures and Appliances
To conserve more water in your home, start at the source.
First, check for leaks in the pipes. A visual inspection can quickly reveal any problems that need repairs.
In addition, read your water meter when no water is being used, then look at it again after a few hours to see if the gauge has changed.
Fixing the leak could be as simple as replacing a faucet washer, or you may discover a more serious problem such as an unseen leak in a pipe.
Here’s a win-win solution: Installing foam insulation on hot water pipes saves both water and energy by providing hot water faster and keeping it hot longer. This reduces the water wasted from running the tap to heat it up.
Finally, when replacing appliances like dishwashers or washing machines, look for models that have earned the U.S. government’s Energy Star rating, certifying they use less water and energy.
Plumbing fixtures such as faucets and toilets that carry the Environmental Protection Agency WaterSense label use, on average, 20 percent less water than conventional fixtures.
Fluidmaster’s 400H Toilet Fill Valve fixes a constantly running, noisy or slow-filling toilet and is one of the quietest fill valves available. (3 Echoes Content Studio)
2. Improve Your Toilets
Toilets are the largest users of water in the home — but some of them are more efficient than others. Look on the bottom of the tank lid, or inside the tank wall, to find the date your toilet was manufactured. Toilets made before 1993 use two to three times the water of new ones.
If you have an older model, consider replacing it with a new low-flush or a dual-flush toilet that can use as little as 1 gallon per flush for maximum water conservation.
If replacing a toilet isn’t in your budget, add a few inches of gravel or sand to a plastic soft drink bottle, fill it with water, screw on the cap, and put it in the tank away from the float and flapper. The increased volume from the bottle reduces the amount of water in the tank, so less is used per flush.
If you notice your toilet refilling periodically when it hasn’t been flushed, it’s a sure sign your toilet has a leak. These leaks can waste thousands of gallons of water if not repaired.
A constantly running toilet, weak or incomplete flushing and a slow-filling tank aren’t just frustrating — they can also increase your water usage.
The DIY-friendly kit comes with a toilet fill valve, flush valve with stainless-steel bolts, Tank-To-Bowl Gasket and color-coded tools for the fastest installation possible and, if necessary, a complete tank rebuild. It eliminates the need for extra trips to the store for an unknown part or tool — and that saves time, money and frustration.
To conserve more water, change up your hygiene routine. Reducing time spent in the shower can save 2 to 5 gallons of water per minute, or GPM. Installing a water-saving showerhead will prevent thousands of gallons a year from going down the drain.
To see if you need a new showerhead, put a 5-gallon bucket in the shower and turn on the water. If it fills in less than two minutes, consider replacing the showerhead with a water-saving model that uses two GPM or less.
Finally, leaving the faucet running while you shave or brush your teeth wastes water. Turn the water off while you brush and fill the sink to rinse your razor.
Only running a dishwasher when it’s full can save nearly 320 gallons of water annually. (Irina Drazowa-Fischer, Getty Images)
3. Make Changes in the Kitchen
A few changes in the kitchen can significantly cut down your water usage. For instance, thaw frozen food in the refrigerator overnight instead of using a running tap of hot water — it’s not necessary.
When used properly, a dishwasher uses less water than hand-washing. Run your dishwasher only when it’s full and use water-saving settings for more efficiency. Doing this saves the average family nearly 320 gallons of water annually.
If you hand-wash, fill one side of a double sink with soapy water for washing and the other with clean water for rinsing. Letting your faucet run for five minutes while washing dishes can waste 10 gallons of water.
Also, install low-flow aerators on faucets — these reduce water flow to one gallon per minute or less.
Finally, do you drink a lot of tap water? If so, don’t keep the water running until it cools off for drinking. Instead, fill a pitcher or bottle and keep it in the fridge.
Don’t do laundry until you have enough clothes for a full load. (Oksana Vejus via Canva)
4. Adjust Your Laundry Room Routine
Washing clothes accounts for the second-largest water use in the home. Put off doing laundry for the sake of water conservation.
Only run the washer with a full load of clothes and use the shortest cycle for lightly soiled clothing. And if you really want to reduce water use, avoid the permanent press cycle, which uses up to 5 gallons more water per load.
While washing clothes in cold water saves energy by reducing water heating, it uses the same amount of water as warm or hot settings.
Every year, we waste billions of gallons of water to keep our lawns and gardens green. Much of this water is lost due to overwatering, evaporation, poor sprinkler design or lack of maintenance.
Use a drip irrigation system or a soaker hose to reduce water use. These methods deliver water slowly and directly to the plant’s roots, and much less water is lost to evaporation.
If you have a programmable irrigation system, install a rain sensor. It will interrupt the program cycle when it rains, so you won’t overwater your lawn.
Better yet, start at the ground level to keep your water use at a minimum. Choose native and drought-tolerant plants to create a water-smart landscape that’s beautiful and efficient.
Here are some other water conservation options for the yard:
Sweep driveways, sidewalks and steps rather than hosing them down.
Wash the car with water from a bucket, or consider using a commercial car wash that recycles water.
If you have a pool, use a cover to reduce evaporation when it’s not in use.
Following these water-saving tips can reduce household water use by 30 percent or more.
Start simple by changing wasteful habits and fixing leaks, then move up to installing water-saving fixtures and appliances.
Not only will it save money, but you’ll also reduce the needless drain on one of our most precious resources.