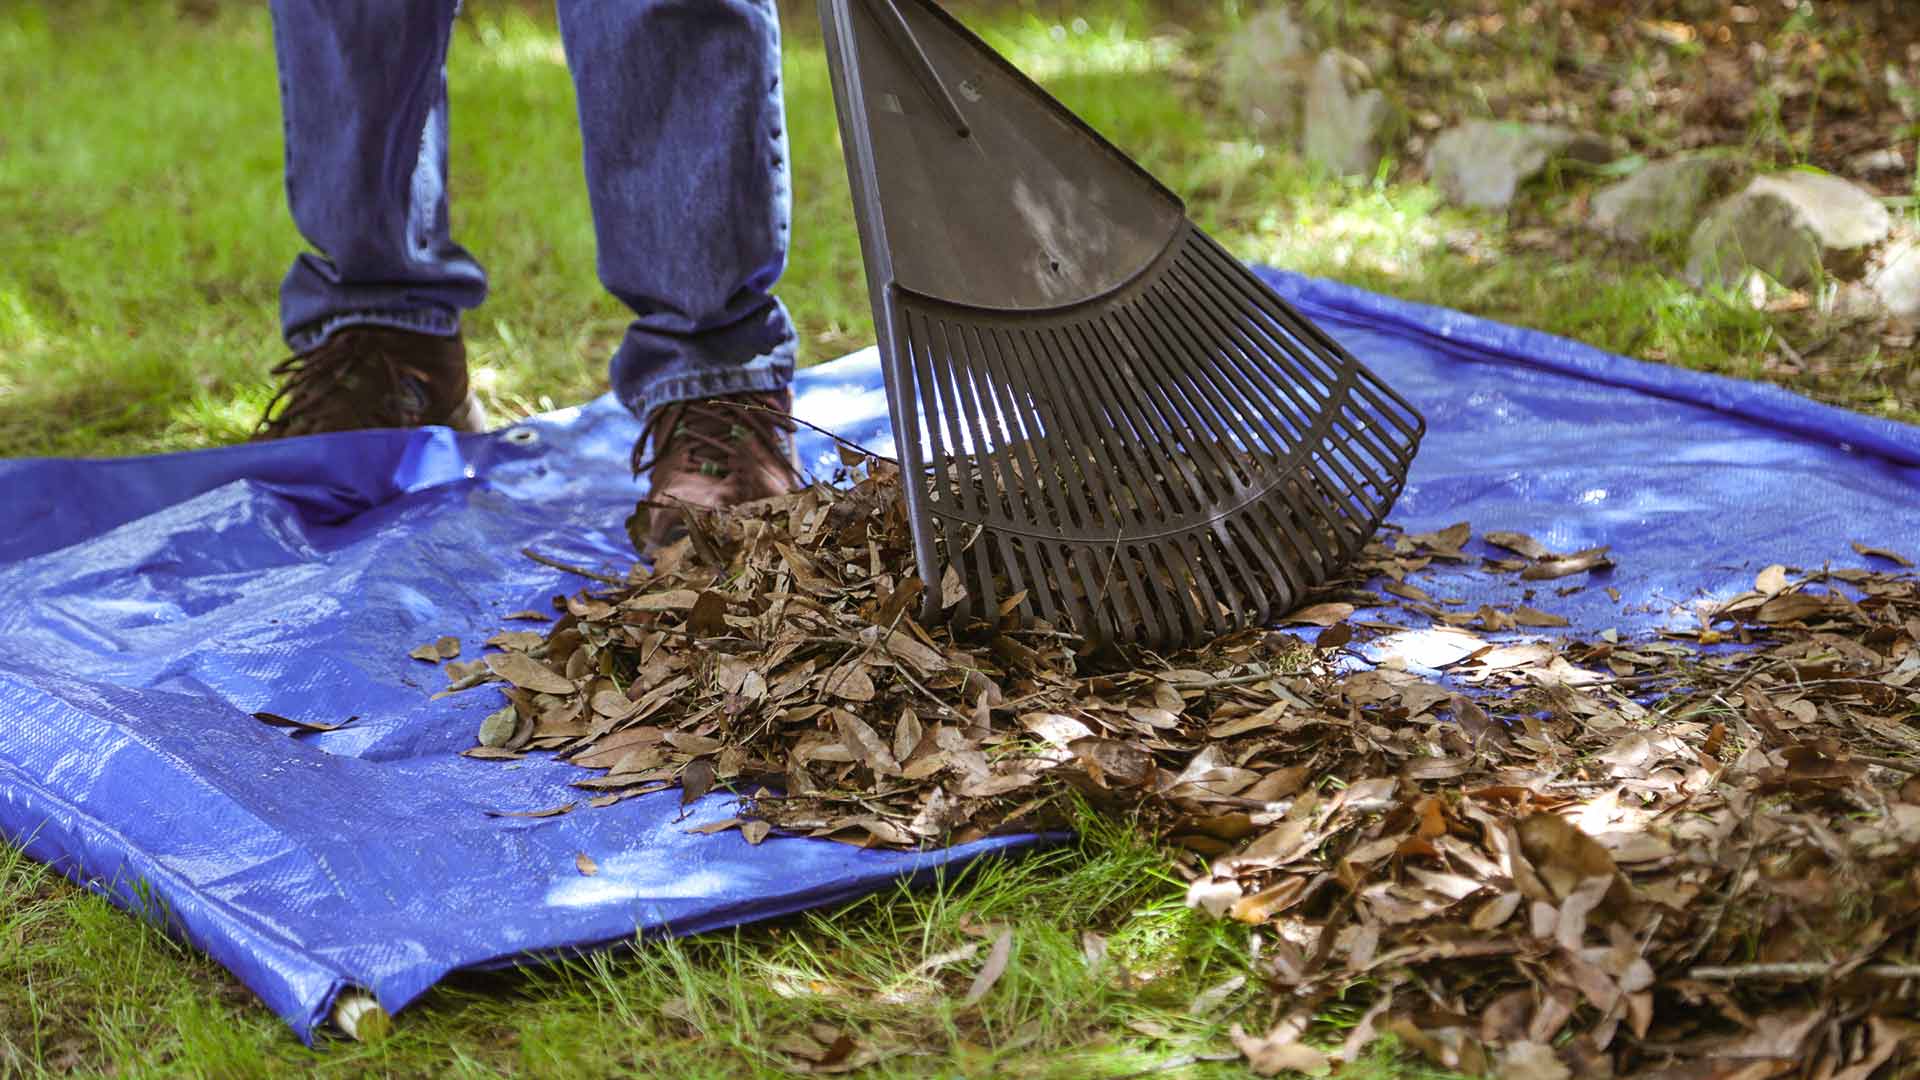
When raking leaves and putting them into a trashcan lined with a plastic bag, the weight of the leaves tends to pull the bag down inside the can. Every time you dump in leaves, you have to readjust the bag.
To prevent this from happening, put the bag in the trash can and fold its open end over the can, as usual.
Next, stretch a bicycle inner tube around the outside of the trash can to securely hold the bag in place.
Bike inner tubes are available in sizes up to about 26-inch diameter, so you should be able to find one to fit your trash can.
A leaf blower and some plastic downspout are all you need for the fastest and best way to clean gutters. (3 Echoes Content Studio)
3. Fast Way to Clean Gutters
Our next Fall Simple Solution is a clever way to clean gutters using a 10-foot length of a vinyl downspout.
Start by using a pair of snips to cut the end of the downspout, then pinch it closed with duct tape. This will create more power and pressure at the end.
Now, slip the opposite end of the downspout onto the leaf blower and you’re ready to power-blast your gutters clean.
You can blow out 8 to 10 feet of gutter from one position to either side, meaning you’ll only have to move the ladder maybe once or twice to clean the gutters along the entire house.
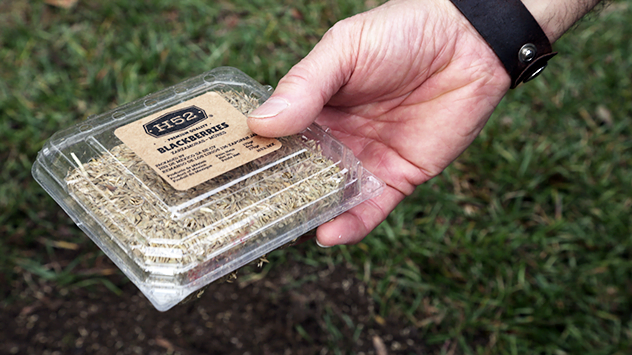
A slotted berry container is a perfect tool to evenly distribute grass seeds. (3 Echoes Content Studio)
4. DIY Grass Seed Shaker
Fall is the best time of year to sow grass seed because of the mix of warm soil and cool air.
Here’s a tip for over-seeding any bare or thin spots on your lawn.
Begin by getting a small plastic clam-shell berry container, the kind that supermarkets use to sell blueberries and raspberries. The containers have small slotted drainage slots that are perfect for distributing grass seeds.
Just dip the berry container in a seed bag, close the lid, and gently shake it over the bare spots. You’ll get a nice, even distribution of seeds, without wasting seeds.
Next, rake the seeds into the soil, water the area, and cover with mulch hay.
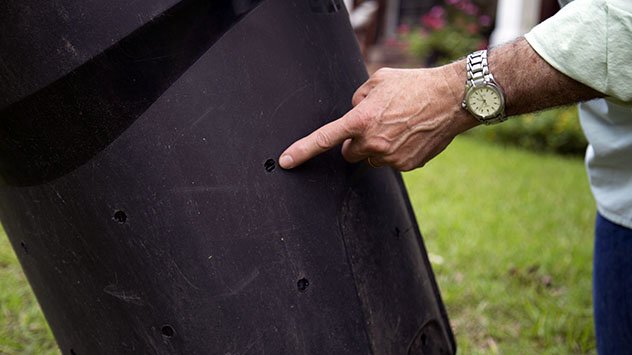
Drilling holes into the side of a garbage can is a quick and easy way to relieve suction. (3 Echoes Content Studio)
5. Non-Suctioning Garbage Can
Most people collect leaves by simply dumping them into a large plastic bag inside a trash can.
And there’s nothing wrong with that except when you go to remove the full bag of leaves — the bag forms suction at the bottom, making it difficult to yank out the bag.
So, here’s how to break that vacuum so the bag slides right out: Take a 5/8-inch diameter drill bit and drilled a series of holes around the outside of the can and also in the bottom.
The holes will allow air to flow into the can, breaking the vacuum.
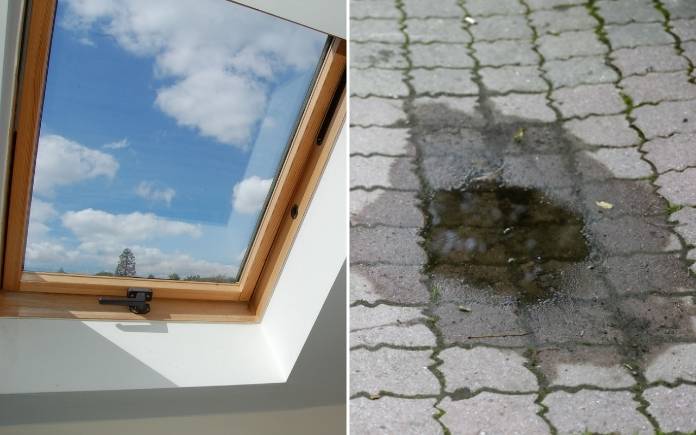
This week, hear our thoughts on the best spot for a skylight, plus how to fix puddling on a concrete patio. (KM6064/temmuzcan, Getty Images Signature)
Hour 1
In Hour 1, hear how to prevent wasps from swarming around fruit trees, tips for cooling off a hot attic and more.
Controlling Wasps Around Fruit Trees
Wasps are attracted to the sugar in ripe fruit. (TAs3, Getty Images)
Wasps are swarming around the apple and pear trees in Valerie’s front yard.
“Each fallen fruit attracts about five or more wasps, such that I can’t (well, I don’t WANT to) touch the fruit to move it away to cut my grass,” she says.
Valerie wants to know: “What time of day should I pick up the fruit?”
Wasps, as well as bees, are attracted to the sugar in rotten fruit.
Don’t spray any poison around the trees because it won’t just kill the wasps —it will also kill honey bees, precious pollinators that are dying at an alarming rate.
Unfortunately, there’s not much you can do, other than:
Pick the fruit as soon as it’s ripe.
Don’t let it fall to the ground. We know it’s impossible to prevent every fruit from landing in the dirt but check on the trees frequently.
Rake up the fruit on the ground with a long-handled rake to avoid any stings.
Bees and wasps aren’t as active at night or very early in the morning, so pick up the fallen fruit then.
A renovated attic like this one can be hard to insulate because there’s not much space between the walls and the roof. (chuckcollier, Getty Images Signature)
Leslie Trippe’s 1953 home in Huntsville, Ala., has a finished attic space with two bedrooms and a bathroom.
The ceilings are only seven feet tall and angled in the bedrooms, plus there’s no extra space in between the drywall and the roof.
“When the wall or ceiling is touched the heat can be felt coming through the drywall. We currently use portable air conditioners to keep the space cooler. Is there a way to cool off this space?” she asks.
This is a very common problem in attics that have been converted into living spaces. When people are slowly renovating their home, they forget to take into consideration how hot the attic can get.
Most of the time, it’s almost impossible to add insulation without doing some demolition. Any added insulation in the space between the drywall and the roof will help.
See if any contractors in your area do blow-in cellulose insulation. It’s a mix of wood or paper-based products and glue that’s pumped into the cavities behind walls and ceilings. The contractor would need to cut a small area of drywall to pump it into the small space, but this can easily be repaired.
Besides adding insulation, call an HVAC professional and see if they can set up some zoning for your air conditioning system. This allows you to pump more air conditioning into certain areas.
You can also invest in a ductless air conditioner. This has its own separate system that attaches to the wall.
Hour 2
In Hour 2, hear our thoughts on the best spot for a skylight, keeping water from pooling on a patio, and more.
The Best Spot for a Skylight
Consider two things when installing a skylight: What room that you want it in, and how much sun do you want shining through. (KM6064, Getty Images Signature)
A hotline caller wants to use skylights for ventilation more so than sunlight.
He wants to know: What direction should the skylights face: north, south, east or west?
There’s a lot to consider when placing skylights. Start by asking where do you want the light on the inside.
Then run a plumb line up along the ceiling in the attic and see if you run into any valleys or if the light tunnel will be exceptionally long.
In terms of directional exposure, I don’t think that’s a big deal to worry about if you have a quality skylight with shade capabilities. Just make sure it looks good from the inside and doesn’t affect your home’s structure.
In often cases, people don’t put it on the front of the house for aesthetic purposes. They’re often placed on the north-facing roof plane because it provides the most indirect light, so you won’t get a lot of glare or heat build-up.
If you live in a northern climate, you might want to place them on the south-facing side for some extra heating.
Buy a glass skylight, not an acrylic one. Those can lead to water damage and intense heat if they don’t have the proper curving or seamless flashing.
Stopping Pooling Water on a Patio
Pooling water on an uneven patio can weaken the concrete’s structure. (temmuzcan, Getty Images Signature)
Fifteen years ago, Jane Pierce’s husband used a concrete leveler to correct a low spot on her patio that was collecting water.
“It’s held up very well until now. It is cracking and chipping off. How can I fix this?” she asks.
Here’s how to fix this:
Chip away as much from the surface as you possibly can. You don’t have to be too aggressive with it — just get all of the material that’s separated from the original patio.
Next, get some Quikrete ReCap Concrete Resurfacer. Use Quikrete’s Concrete Calculator to determine how many bags you’ll need.
Then, mix it according to the directions on the package and pour it onto your patio.
Use a large rubber squeegee (about a foot to 16 inches wide) to spread the mix. Cover the entire patio to ensure it’s level.
Before it dries, drag a broom across it to add some texture for a slip-resistant surface
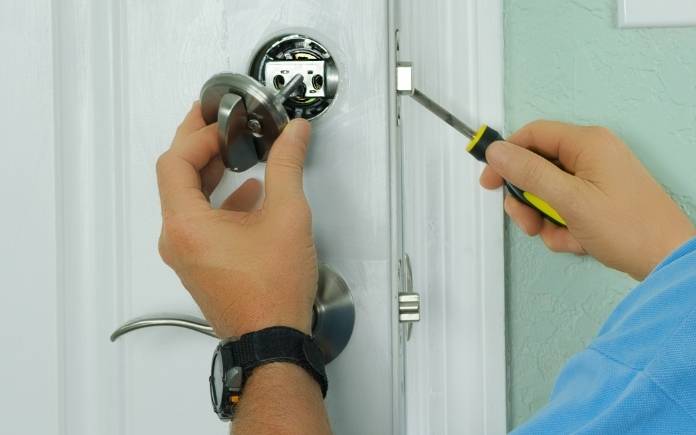
A regular screwdriver can loosen any stuck parts inside a deadbolt. (mokee81, Getty Images)
How do you fix a deadbolt that’s stuck in the locked position? That’s what Marlene Lauer in Neenah, Wisconsin, wants to know.
She says, “We removed the doorknob, but couldn’t move any of the parts to slide the bolt. We tried to take the door off and that did not work. My son wants to saw through the bolt. Is that our only option?”
Usually, a small piece inside the doorknob has broken and is lodged inside, keeping it locked.
Use a hammer to tap a screwdriver or nail punch to the right and left inside the keyhole to loosen the jammed part. Then, try tapping the screwdriver a bit with a hammer to loosen what’s stuck inside.
If this doesn’t fix it, call a locksmith.
Best New Products
Lutron’s Dimmer Switch Starter Kit gives your home lighting a smart upgrade, without competing for a signal with other devices. Learn more >>
Simple Solutions
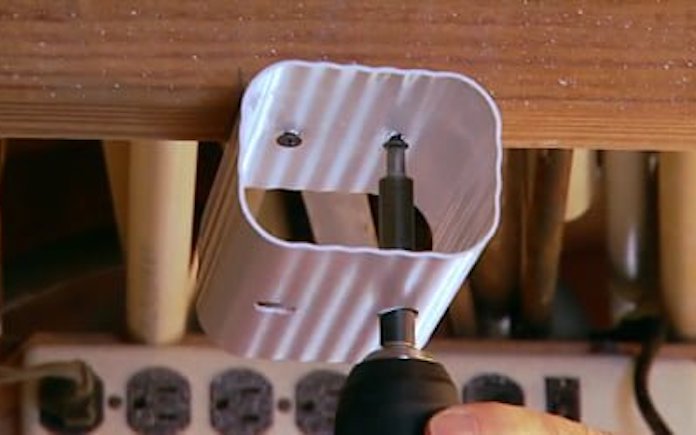
Attaching a section of downspout to a ceiling joist creates easy storage for long and narrow items. (3 Echoes Content Studio)
Easy Overhead Storage — Here’s how to make an overhead rack in your garage workshop, or shed for storing small-diameter pipe, narrow moldings, and even fishing rods.
Cut two 5-in.-long pieces from a length of vinyl downspout.
Then screw the downspout pieces to an overhead ceiling joist, spacing them about 4 feet apart.
Now, simply slide moldings and pipes into the short downspout sections. The parts will be up and out of the way, but easily accessible when you need them.
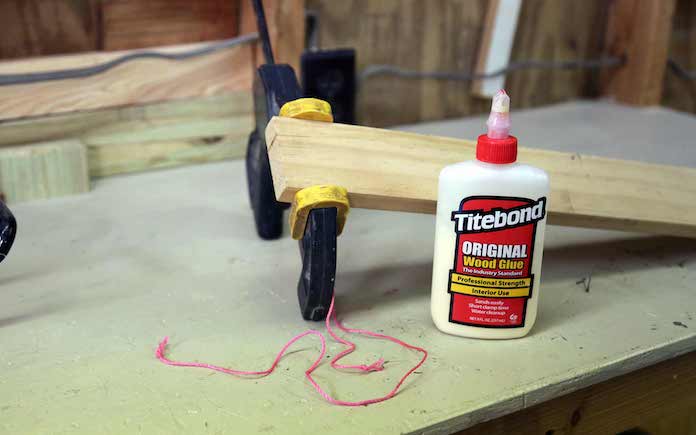
Have a split chair leg or a tabletop? Here’s how to get the wood glue in tight spaces when you fix it, and coat both sides evenly! (3 Echoes Content Studio)
Gluing Tight Cracks — When fixing a split chair rail, cracked baluster, or similar object, it’s difficult to apply glue because the crack is so tight. Try this:
Wedge open the crack with a small flat-blade screwdriver.
Then, squeeze in some glue and use a length of dental floss to work the glue deep into the crack.
Pull out the screwdriver, wipe away the excess glue and clamp the repair.
It all started in 2015 when a swingset broke in Jeff Headrick’s backyard.
So Jeff, a master carpenter, decided to use his decades’ worth of building experience to construct a new place for his grandchildren to have fun outside.
When asked what kind of playhouse his grandchildren wanted, the kids, aged 1-9, decided on a miniature pirate ship.
Jeff’s wife Debbie says he drew up some rough sketches for the playhouse and constructed and deconstructed parts along the way. He wanted the project to “not only be perfectly square, but safe for his grandsons.”
In this 2017 photo, Jeff and Debbie Headrick had just applied the first coat of stain to the pirate ship playhouse. (Pirate Ship Playhouse Facebook)
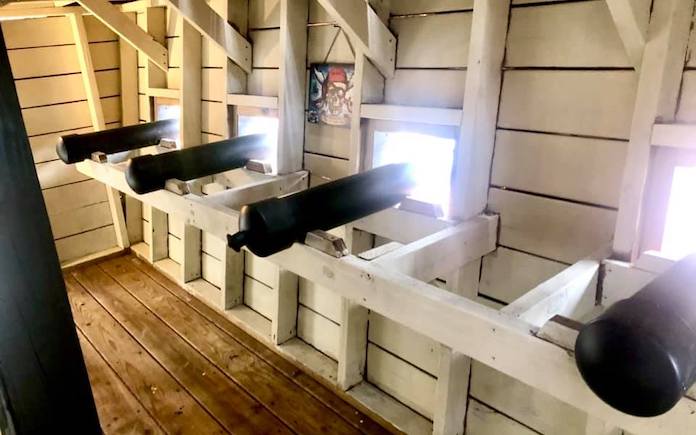
Over the years, multiple levels were added and it grew bigger and bigger.
Now, the “miniature” pirate ship is held into the ground by 10 concrete piers, 25,000 screws, and has multiple levels that are large enough for an adult to stand up in.
So, how long did it take to complete this pirate ship? About five years — four years to construct the playhouse, and then another year or so to finish the surrounding features.
The couple is also adding extra details surrounding the ship, like an under-the-sea mural on the fence. Debbie used more than a dozen cans of spray paint and real starfish she got on a trip to the Bahamas.
But, it’s all worth it, they say, because of the enjoyment their grandchildren, and neighbors, get out of the playhouse.
At this point, the “playhouse” in the Headricks’ backyard is more than just a playhouse. They see it as a small second house that they occasionally open to large audiences on special occasions.
The Headricks have opened up their backyard for Halloween for the past two years. In just four hours, 475 people came through to see the pirate ship in 2020 and 600 in 2021.
The family goes all-out for the occasion by dressing up in pirate costumes, providing a stockade for photo ops, treasure chests, spooky music, and more.
The couple has been very firm with keeping the ship private and only open for Halloween fun. However, they will give tours to those who ask and let children play.
“You’d be amazed at how many adults stop and ask if they can see it and take photos,” Debbie says.
Jeff and Debbie say their backyard “Peter Pan/Pirates of the Caribbean theme park” will continue on for future generations. Their five grown children have even bigger plans for the property when they inherit the property.
The wood and everything else will receive the same regular upkeep that it’s had over the past years, but there are plans to convert the backyard, which includes a pool, into a rental Airbnb property.
The children promise they’ll never sell the property and also have plans to convert two other backyard buildings (currently used as Halloween storage and another as a small record studio) into small cabins for renters as well.
The Headricks say there were some regrets after converting their backyard into a theme park, but they’re outweighed by the joy it brings their grandchildren.
Debbie advises that if someone else wants to do this, plan for regular maintenance and have someone else do the building.
There aren’t any blueprints for this pirate playhouse, so if you want to build one yourself, you’ll have to use your imagination.
However, if you do decide to build one, the couple has these words of advice: Be prepared for many people to stop and take pictures.
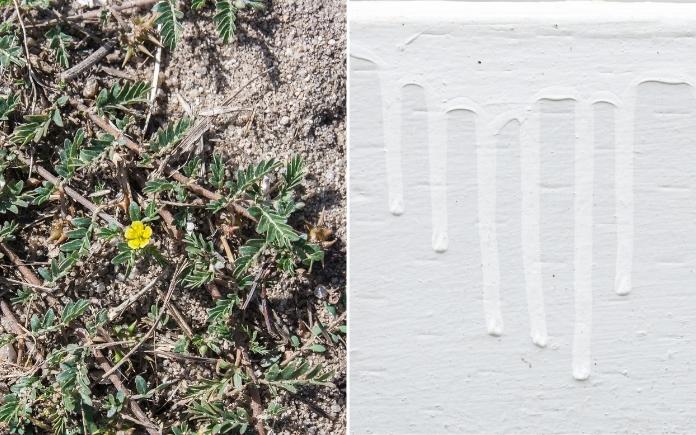
This week, learn how to remove thorny goathead weed and free a window that’s been painted shut. (arousa, Getty Images/N8tureGrl, Getty Images)
Hour 1
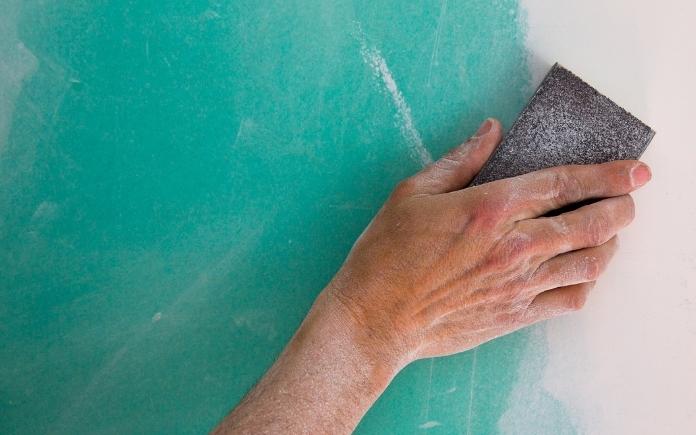
In Hour 1, learn how to repair drywall cracks, eliminate funky front-loading washer odor and more.
Repairing Cracked Drywall
Small drywall cracks can be repaired with some light sanding and a thin coat of joint compound. (Lunamaria via Canva)
Lisa Baker in Columbus, Mo., owns a two-story house with a fully finished basement, and she’s noticed horizontal cracks along a few drywall seams.
“I understand that this is from the house settling. What’s the easiest way to fix these cracks?” she asks.
If your house is “settling,” it doesn’t necessarily mean the structure is dropping. This could just be some minor expansion and contraction. If you have uneven settling, it usually results in a vertical crack, and it may indicate structural damage. Call a foundation specialist if:
The crack has a 3/16-inch or wider gap.
One side of the wall is higher than the other.
Your doors no longer close in the frame.
In Lisa’s case, the drywall was most likely installed horizontally, so that’s why the cracks are forming in that direction.
Assuming the drywall tape is still in place, lightly sand the cracks, vacuum off all the dust and apply a thin coat of joint compound. Do this in a small area first to make sure this corrects the problem.
If the tape is peeling, adhere it back to the wall with some glue or joint compound. If that doesn’t work, you’ll have to remove the tape and apply new.
First, apply joint compound and cover the crack with paper drywall tape pressed into the wet compound. Then cover the tape with more joint compound, and allow it to dry before sanding.
It’s an easy fix, but it’s can be tedious. After every load, use a towel to dry the inside of the door and the rubber gasket. This removes the moisture, preventing mold and mildew from growing and emitting that awful smell.
Keep the door open for a while to let the air circulate inside the washer. Keep an eye on children and pets when you do this because they can easily climb inside.
For good measure, run an empty load with a cup of bleach every three to four months to disinfect the entire washer drum.
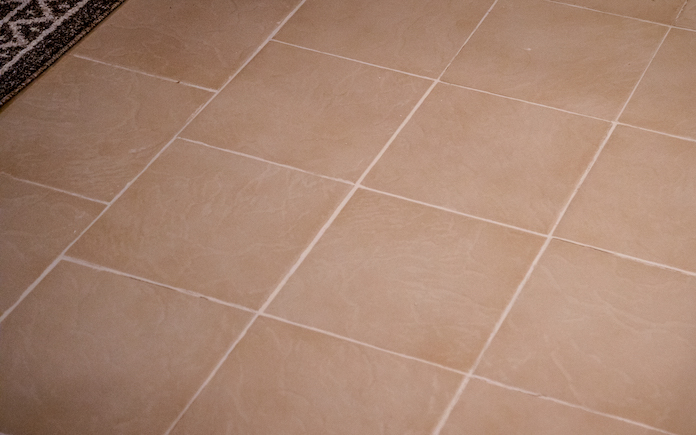
It’s possible to restore the white color of grout without needing to be a specialized cleaning product. (3 Echoes Content Studio)
Restoring White Grout
Suzanne Lewis in Wilmington, N.C. says, “I have off-white tile in my bathroom with off-white grout. The grout is beginning to discolor to a more brown color. What do you suggest to clean the grout?”
If grout isn’t sealed properly when it’s installed, it will eventually become discolored. You can restore the grout to its original color and prevent the stains from returning. Here’s how:
Mix a 50-50 solution of oxygen bleach and hot water. It’s important to use hot water for the oxygen bleach to dissolve.
Apply it to the grout joints with a sponge and wait 10 minutes.
Soak the grout one more time with more bleach solution and wait another 10 minutes.
Scrub the grout and rinse it with clean water.
Once the stains are gone, cover the grout with a clear silicone sealer. Use an artist’s brush to fill in every single grout joint.
Hour 2
In Hour 2, hear how to get rid of goathead weed stickers, open a window that’s painted shut and more.
Getting Rid of Goathead Weed
Goathead weed is an invasive plant that has sharp stickers. (arousa, Getty Images)
Christie Svoger in Oregon has a sticky problem on her lawn.
Her lawn is covered in goathead weed stickers. Goathead weed, or puncturevine, is an invasive toxic plant. The spines on its fruit are sharp enough to puncture bicycle tires and shoes, according to Washington State’s Noxious Weed Control Board.
“How do I get rid of them? I don’t want them on my lawn!” she asks.
Hand-pulling goat’s head weed won’t be effective because they have such a strong root system and will grow right back. Use a tool like a weed puller to get down deep to remove the roots.
You’ll have to take some extra measures to ensure it won’t return. Use a strong pre-emergent weed herbicide or try this home remedy: dilute 1/2 cup each of Epsom salts and vinegar in a gallon of water and spray thoroughly.
Another effective method is to use a weed-burning propane torch. Just be sure to check your local laws regarding the use of these devices and have a fire extinguisher nearby.
A one-time treatment won’t work, so be vigilant in killing it when more pop up.
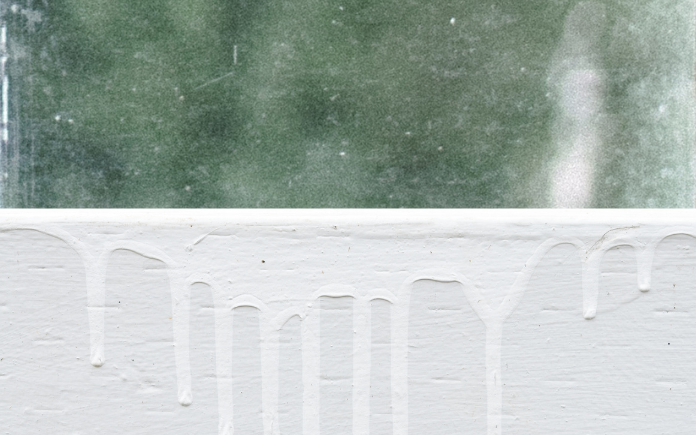
Fixing a Window That’s Painted Shut
If a window is painted shut, you need a thin-bladed putty knife to cut the layer of paint off. (Photo Illustration: StockSnap, Pixabay/N8tureGrl, Getty Images)
The windows in Bob Haskins’s home in Medford, Mass., appear to have been given the “landlord special” treatment. They’re painted shut and are impossible to open.
The term “landlord special” has become popular with renters who are referring to bad home improvement projects often done by landlords instead of professionals to save money.
Typical examples of the “landlord special” are painted-over electrical outlets and windows, shoddy plumbing or odd “fixes” that don’t really improve anything.
“How can I break them loose without breaking the window?” Bob asks.
First, be very careful working around glass and take your time. Wear eye protection and gloves, and if you’re on a ladder, practice the recommended safety measures.
Think about what’s holding the window shut: paint residue all around the perimeter. Use a thin-bladed putty knife to break the seal on the inside and the outside. Do it carefully and you’ll find the point where the window sash goes up against the molding or trim.
Slide the putty knife down the side, bottom and all the way around the window to where the two sashes meet together. Then, cut the paint out. Take your time and try to eliminate any contact points.
Next, take a flat bar and pry up the window. Don’t put too much pressure on one side or the other. Even pressure will lessen the chance of the window cracking.
In the Aisles of The Home Depot
October is National Fire Prevention Month, so it’s the perfect time to brush up on fire safety practices with your family. (rattanakun, Canva)
Fire can strike anywhere, anytime, and can start in a variety of ways. Fire safety equipment such as fire extinguishers, smoke detectors and carbon monoxide detectors, are essential must-have products for any home. The Home Depot has all different types of fire safety equipment plus other important fire safety tips for protecting your family and home.
Fire Education
Have a plan in place to keep you and your loved ones safe. Establishing a family fire escape plan will encourage everyone to remember a safe meeting spot outside of your home.
You and your family should practice a fire escape plan twice a year. Everyone should know how to get out and where to go in case of a fire.
Practice fire drills together and make sure children know what the smoke alarm sounds like and what to do when they hear one.
A fire extinguisher can be lifesaving when water cannot put out a fire, as is the case with most kitchen fires. Having a fire extinguisher within reach can help put out small, contained fires and create a path to safety.
Never rely solely on a fire extinguisher. This tool should be just one part of your home fire safety plan, alongside smoke alarms and an emergency evacuation plan.
Fire extinguishers are classified by ratings of A, B, C and D. These ratings determine the size and type of fire that the extinguisher can put out. Do your research to determine which is best for your needs. Some fire extinguishers are multi-purpose and have two or more ratings, such as A-B or A-B-C. Generally, multi-purpose fire extinguishers are the best types of fire extinguishers for the home.
Class A fires are a result of trash, wood, or paper.
Class B fires are a result of liquids or gases.
Class C fires are caused by energized electrical equipment
Class D fires are caused by combustible metals – due to their severe nature, class D fires are best handled by professional firefighters.
When using a fire extinguisher, remember the PASS method to operate the extinguisher properly:
Pull the pin.
Aim the nozzle toward the base of the fire.
Squeeze the lever slowly.
Sweep the nozzle from side-to-side, while moving toward the fire.
Smoke Alarms
Smoke alarms are a safety essential for every home.
When placing your smoke alarm, it is important to have at least one smoke alarm on every level of the home (including basements), in every bedroom, and outside each sleeping area.
Test monthly and use daylight savings time as a reminder to install new batteries in smoke detectors.
Carbon Monoxide (CO) Monitors
Every home with at least one fuel-burning appliance, attached garage or fireplace should have carbon monoxide alarms.
Having a fireplace with a gas valve or a potentially blocked chimney poses a risk for carbon monoxide (CO) poisoning, so include CO monitors in your fire safety equipment, especially since CO is undetectable via smell or sight.
Just like a smoke detector, it is important to place the monitors in every level of the home, kitchen, and bedrooms, with the addition of placing them at least fifteen feet above a fireplace.
The new Kidde HomeSafe suite of products includes the Kidde Smoke and Carbon Monoxide Detector, Hardwired with Smart Features and Voice Alert — an industry-first alarm that detects smoke, CO, adverse temperature, humidity levels and total volatile organic compounds (TVOCs), which include harmful particles in the air that can lead to health issues.
Kidde HomeSafe Wi-Fi-enabled devices include smart features that can be connected to consumers’ Kidde app, providing instant notifications of home safety threats directly to your smart phone.
Don’t stall a project just because you don’t have the right tool. This six-piece combo kit has all Ryobi cordless tools you need. Learn more >>
Simple Solutions
Wiping cement backer board with a damp sponge will help mesh tape adhere better. (Jupiterimages, PhotoImages/Lolostock)
Sure-Stick Mesh Tape — Seams in cement backer board must be covered with adhesive-backed mesh tape and then skim-coated with thin-set mortar. However, the tape doesn’t always adhere well to the backboard because it’s often covered with dust.
So, before applying the tape, wipe down the backer board along the seams with a damp sponge. Then, wait a few minutes for the surface to dry, then stick down the tape.
By the way, this Simple Solution also works well when using mesh tape to repair drywall damage.
Use a hacksaw to cut a 9-inch paint roller into three 3-inch rollers. (Kikoncos, Getty Images)
Making Mini Paint Rollers — When rolling paint onto narrow spaces, it’s best to use a 3-inch paint roller. The problem is that 3-inch roller sleeves cost $2-3 apiece.
You can make your own by simply buying a standard 9-inch roller sleeve and then using a hacksaw to cut it in thirds to create three 3-inch-long using a hacksaw. Trim any rough edges of the nap with scissors.
A 4-pack of 9-inch roller sleeves costs about $9, so each custom-cut 3-in. sleeve will cost just 75 cents.
Products and Links Mentioned
Further Reading
Radio Show & Podcast: Send us your question!
If you have a comment, general question about home improvement, or something we’ve featured on Today’s Homeowner, please fill in this form:
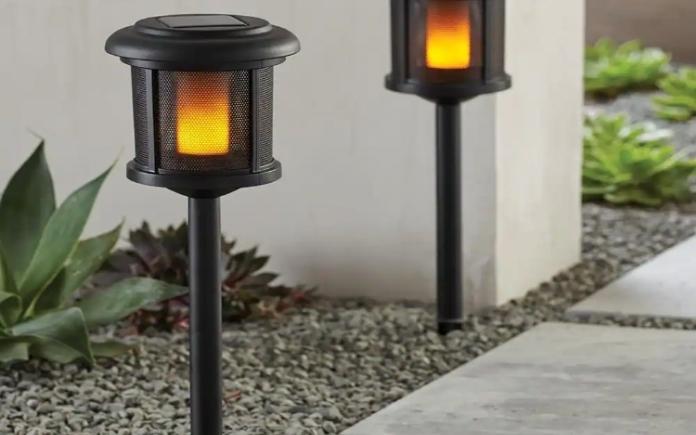
Steps, walkways and heavily trafficked areas of your yard often require path lights to prevent accidents, but the cheap plastic models often don’t last and look somewhat haphazard.
This page contains affiliate links. If you purchase a product from these links, we will earn a small commission at no additional cost to you.
These lights create the illusion of a flame inside their housing for a flickering effect. (The Home Depot)
Real-Flame Look
Adding path lights is an easy way to ensure that guests and family members can see where they are going and avoid any obstacles, so why not also add some style along with safety?
Hampton Bay’s Solar LED Flicker Flame Path Lights add a touch of flair to your landscape. The “flicker feature “ in these lights creates the illusion of an actual flame inside the mesh-textured light housing.
These realistic-flame lights are perfect for enhancing entryways, pathways, and garden areas. They’re also great for creating the perfect ambiance for an evening poolside barbecue.
Each light includes a solar rechargeable battery and features an option to set the light to flame effect or steady, solid light. (The Home Depot)
Built to Last
These black-finish path lights are made from weather-resistant aluminum, so they’ll last. And, because they are solar-powered, no wiring or tools are necessary, so installation is a snap.
Each light includes a solar rechargeable battery and features an option to set the light to flame effect or steady, solid light.
This integrated LED light produces six Lumens of light and automatically turns on at dusk delivering up to eight-hour run time on a full charge.