The Ryobi Cordless Electric Snow Blower combines the convenience of cordless with a powerful brushless motor to deliver instant power at the push of a button. (Ryobi)
If dealing with snow is part of regular chores this time of year, you know the hassles of shoveling or starting a snow blower on cold mornings. That’s what makes the Ryobi Cordless Electric Snow Blower such a convenient option.
This page contains affiliate links. If you purchase a product from these links, we will earn a small commission at no additional cost to you.
It features a powerful brushless motor that delivers instant power at the push of a button to clear driveways and sidewalks up to 10 inches deep in an 18-inch-wide path. All this without the hassle or maintenance of gas!
The adjustable 180-degree directional chute lets you control where snow is thrown up to 25 feet away.
And its LED lightbar increases visibility, so you can clear snow at any time of day.
Cordless Convenience
With its cordless design, you can quickly clear snow from large areas without worrying about cords getting in the way.
Ryobi 40V HP Brushless tools deliver superior run time and performance to give you provide from gas-powered lawn and garden equipment.
Plus, its 40V 6 Ah battery and 40-Volt Charger are compatible with more than 75 other Ryobi 40-Volt products.
Other Features
When the job is done, the folding steel tube handles allow you to store it away in the garage conveniently, for increased durability and storage in tight places.
Plus, it also comes with a 5-year limited tool warranty and a 3-year battery warranty for peace of mind.
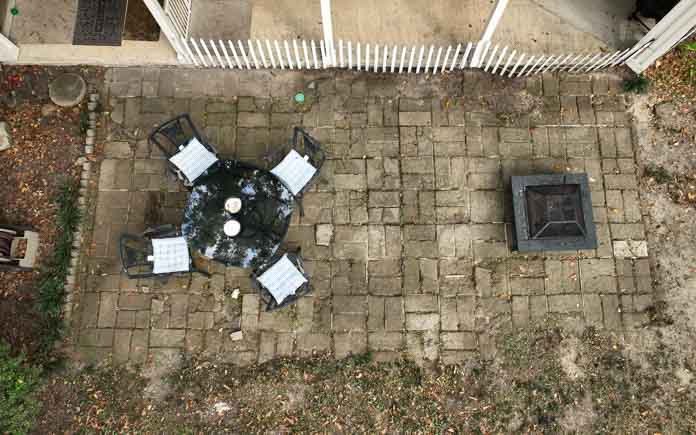
This week, a poured concrete patio turns a decaying patio into an outdoor living space this homeowner can truly love.
Gretchen Bayley lives alone in her mid-century home, but the house is always full of friends and family. We’re transforming her old, crumbling patio into an outdoor living space to give her more room to entertain.
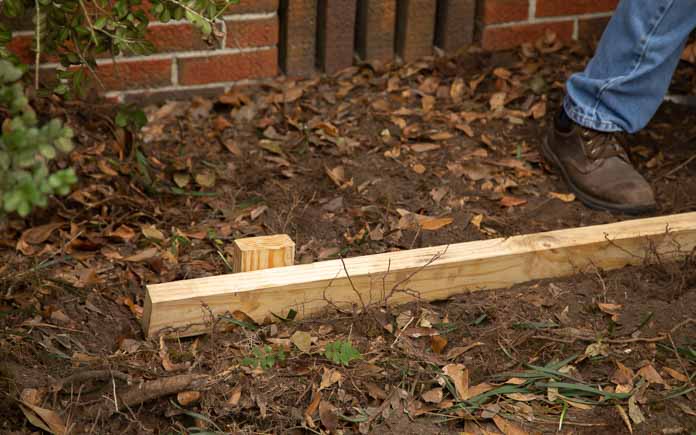
First, frame the area 12-by-23-foot area with 2-by-4s. Place the boards level with the existing carport concrete slab, then slope slightly downward so water will flow away from the carport.
Use a framing square to ensure each corner is at a 90-degree angle. To keep the form boards in place, screw them to evenly spaced wooden 2-by-4 stakes.
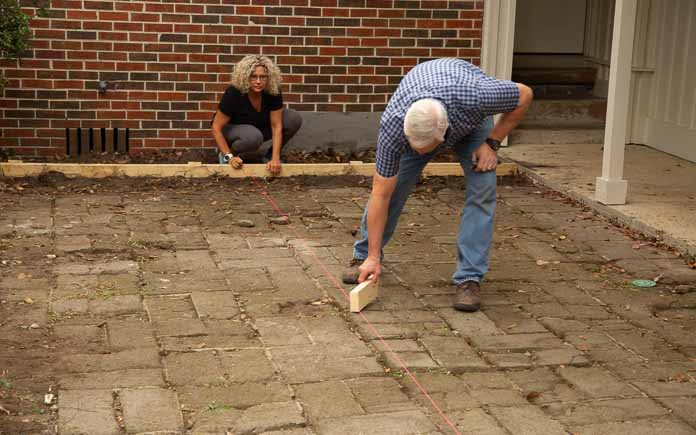
We use a masonry line to make sure the depth of the newly poured concrete patio will match the existing one. (3 Echoes Content Studio)
Once the final form board is installed, check the depth across the space to ensure there’s enough depth to use the old patio as a foundation and pour the new slab directly over it.
(Because the pavers are below the top edge of the carport concrete slab, we don’t need to dig them up.)
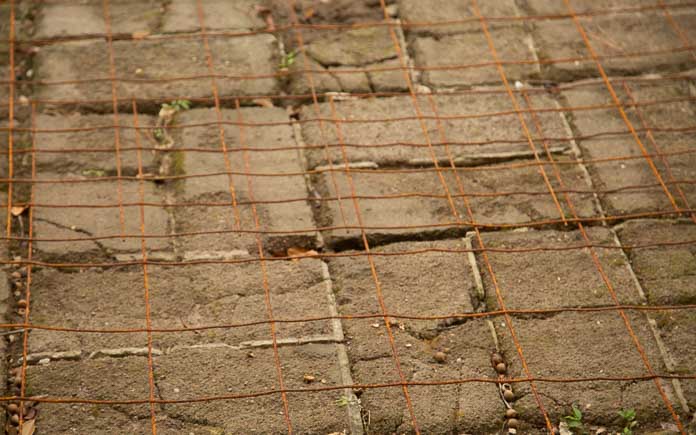
Finally, lay the reinforcement wire.
Steel reinforcement wire adds strength to the newly poured concrete patio. (3 Echoes Content Studio)
Once the forms are complete, a professional concrete finisher pours the slab. As the forms fill up, we tap the outside of them to release the air bubbles trapped in the concrete.
The concrete finisher moves a bull float over the freshly poured slab to smooth the surface. (3 Echoes Content Studio)
The concrete finisher uses special tools to smooth the top of the slab and create expansion joint lines to prevent cracking.
Once the concrete has cured for a bit, we drag a broom over it to create a textured finish.
The new picket fence has a functioning gate that’s easier to open and close. (3 Echoes Content Studio)
Add Picket Fence Panels
Gretchen’s improvised roll fencing serves its purpose of containing her dogs in the backyard, but it’s not pretty. So, we’re adding some prettier (and sturdier) white picket fence panels.
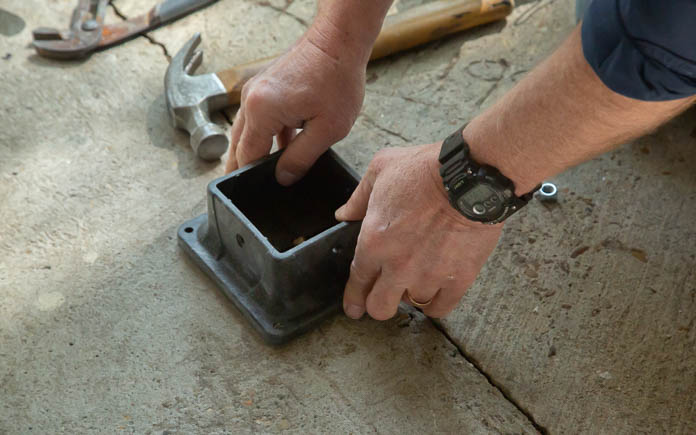
This post anchor allows us to secure the fence right onto the concrete slab. (3 Echoes Content Studio)
Instead of using a zip tie to keep the fence closed, we’re adding a gate at the corner of the carport to offer easier access to the new patio. To secure the post for the gate, we place it in a post anchor that can be drilled into the concrete.
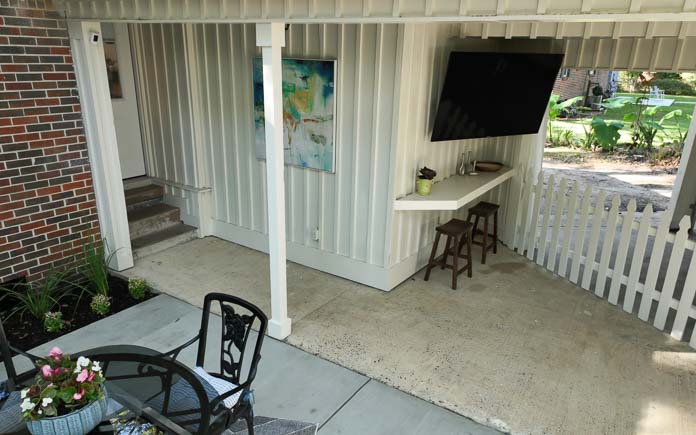
The new outdoor entertainment area features bar seating and an adjustable TV. (3 Echoes Content Studio)
Create Entertainment Area
Two large, empty shelves are wasting space in Gretchen’s carport. So, we remove the top one to make room for an outdoor TV and use the bottom one for bar seating.
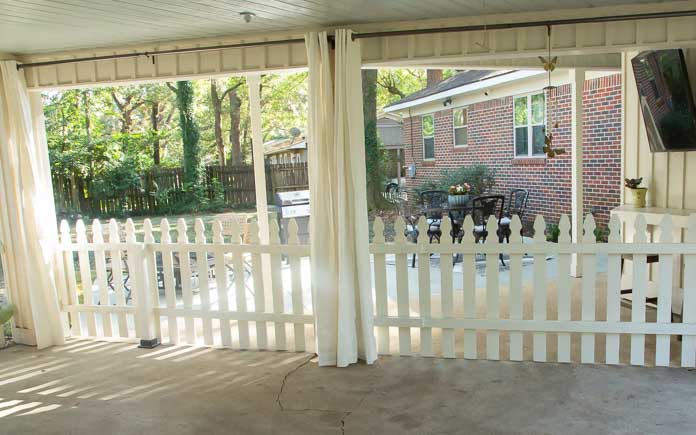
These drop cloth curtains give this outdoor entertainment area warmth, texture, and the option for privacy. (3 Echoes Content Studio)
To create even more separation between the carport and the new outdoor entertainment area, Chelsea hangs drop-cloth curtains.
The curtains not only add some extra texture to the space but they also can be closed to hide Gretchen’s car when she’s entertaining.
Chelsea Lipford Wolf and Danny Lipford pose with homeowner Gretchen Bayley. (3 Echoes Content Studio)
Post-Production Thoughts
Even though it was a good size, Gretchen’s patio was decades past its prime. The crumbling pavers were more than unattractive — they were downright dangerous.
The roll fencing added along the edge to contain the dogs wasn’t helping the look of the space either. There was nothing about this outdoor living space that invited you to enjoy the spacious backyard.
But now, the new poured concrete patio that replaced the old patio is both stable and attractive. Its clean edges clearly define the space, while it flows almost seamlessly into the existing covered area.
The new fence suits the yard perfectly and its new location creates the ideal boundary between the carport and the covered patio area.
Chelsea’s curtains help reinforce that line while they soften the edges and add refinement. What was an overbuilt shelf has become a modest bar top and the refurbished patio furniture creates plenty of comfortable seating to enjoy the expansive backyard.
Other Tips From This Episode
Products Featured in This Episode
This page contains affiliate links. If you purchase a product from these links, we will earn a small commission at no additional cost to you.
Did you know you can recycle coffee grounds for plants to use in your garden?
Horticulturists praise coffee grounds for acidifying soil and enhancing plant growth.
Coffee grounds are slightly acidic (5.5 to 6.8 pH), so certain acid-loving plants like azaleas, rhododendrons and gardenias love them.
Azaleas prefer soil with a pH of 5 to 6.5. (c11yg, Getty Images)
They contain about 2 percent nitrogen, 0.06 percent phosphorus, and 0.6 percent potassium by volume, according to the University of Wyoming Extension. They also contain many micronutrients including calcium, magnesium, boron, copper, iron, and zinc.
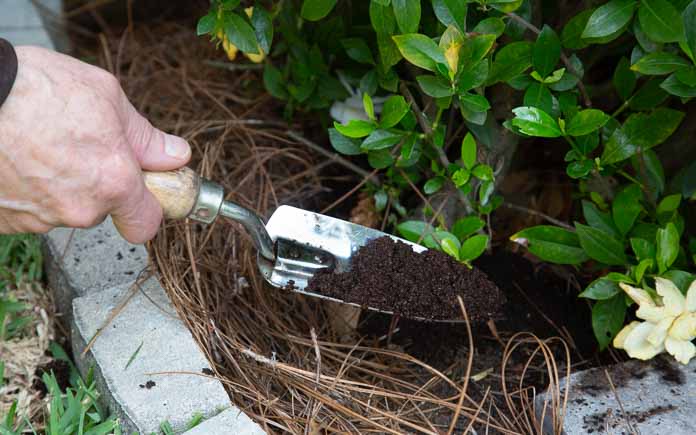
Use a garden shovel to spread a thin layer of coffee grounds around the base of acid-loving plants. (3 Echoes Content Studio)
Here’s how to use them in your garden:
After you’ve had your morning cup of joe, save the used coffee grounds in a plastic container. You should have enough grounds after about a week or so to use in your garden.
To use them as a soil amendment for your plants, rake back the mulch to expose the soil. Then, use a small garden trowel to spread the coffee grounds around the base of the plant. Only spread the grounds about a quarter of an inch thick.
And then, of course, rake the mulch back just to protect the soil and keep the weeds down.
Add a thin layer of grounds to the plants about once a month, and you’ll see a much healthier plant with many more blooms.
By the way, if you don’t have coffee, you can also use tea leaves just be sure to take it out of the tea bag first.
Did you know you can recycle coffee grounds for plants to use in your garden?
Horticulturists praise coffee grounds for acidifying soil and enhancing plant growth.
Coffee grounds are slightly acidic (5.5 to 6.8 pH), so certain acid-loving plants like azaleas, rhododendrons and gardenias love them.
Azaleas prefer soil with a pH of 5 to 6.5. (c11yg, Getty Images)
They contain about 2 percent nitrogen, 0.06 percent phosphorus, and 0.6 percent potassium by volume, according to the University of Wyoming Extension. They also contain many micronutrients including calcium, magnesium, boron, copper, iron, and zinc.
Use a garden shovel to spread a thin layer of coffee grounds around the base of acid-loving plants. (3 Echoes Content Studio)
Here’s how to use them in your garden:
After you’ve had your morning cup of joe, save the used coffee grounds in a plastic container. You should have enough grounds after about a week or so to use in your garden.
To use them as a soil amendment for your plants, rake back the mulch to expose the soil. Then, use a small garden trowel to spread the coffee grounds around the base of the plant. Only spread the grounds about a quarter of an inch thick.
And then, of course, rake the mulch back just to protect the soil and keep the weeds down.
Add a thin layer of grounds to the plants about once a month, and you’ll see a much healthier plant with many more blooms.
By the way, if you don’t have coffee, you can also use tea leaves just be sure to take it out of the tea bag first.
This week, we’re transforming a breezeway that looks almost accidental into a more inviting entrance.
Delane Caldwell’s breezeway to her front door is just a narrow hallway to the backyard, but we’re going to find a way to incorporate it more as a living space.
The Projects
Grinding the concrete smooths out the uneven surfaces of the patchwork slabs. (3 Echoes Content Studio)
Refinish the Concrete Slab
The concrete in the breezeway looked like a patchwork of slabs. So, to create a uniform-looking slab, we smooth the concrete surface with a grinder.
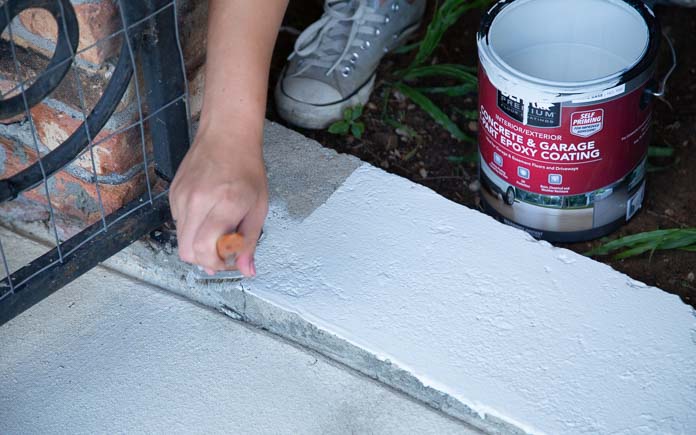
Coating the breezeway with concrete epoxy paint creates a uniform color throughout the breezeway. (3 Echoes Content Studio)
After we sweep the dust away and rinse the slab off with a water hose, we paint the new smooth slab with a base coat of white epoxy paint.
After the base coat dries, we pop a chalk layout line on the slab to start our stenciling.
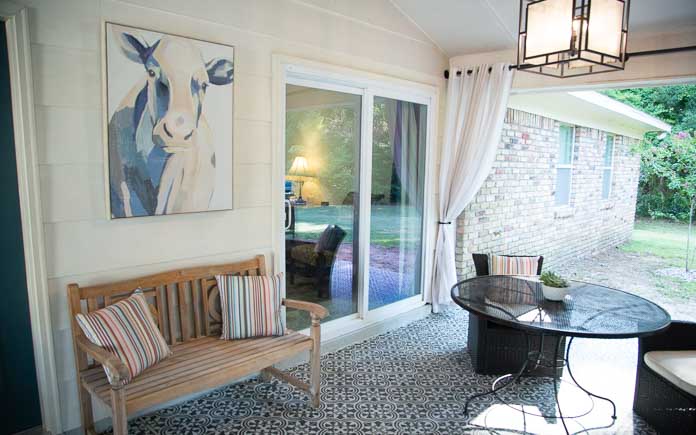
This stencil pattern is based on traditional Portuguese Azulejos tile designs. We used black epoxy paint to fill in the tile pattern on the concrete.
Curtains make this space feel more like an outdoor living room than a breezeway. (3 Echoes Content Studio)
Hang Curtains
To make the breezeway feel more like a living space, we remove the chain link fence at the end and add curtains.
The fence posts are set in concrete, so to remove them, we’ll need some leverage. After digging up the dirt around the base, we place a concrete block next to the post to act as a fulcrum for our shovel.
To make the curtain rod wide enough to fill the breezeway, we connected two galvanized pipes together with a tee fitting. (3 Echoes Content Studio)
Our curtains are going to hang the curtains from a galvanized threaded rod. We first measure the breezeway to ensure our rod is long enough to span the entire opening.
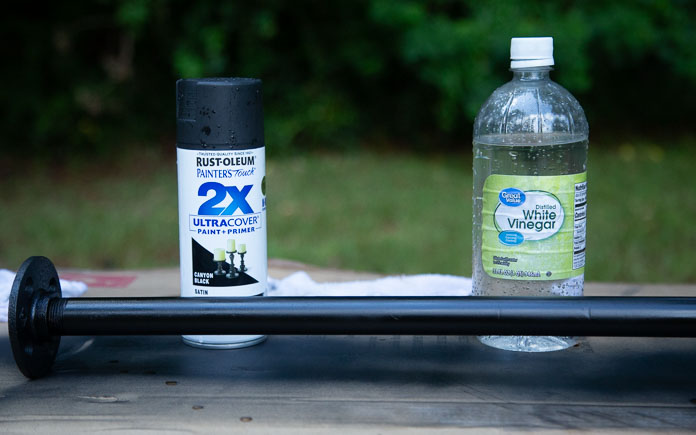
Etching the galvanzied pipe with vinegar ensures the spray paint will stick. (3 Echoes Content Studio)
Before we install the rod, we paint it black to match the wrought iron. But, before we can paint, we have to etch the rod with vinegar to ensure the spray paint adheres to it.
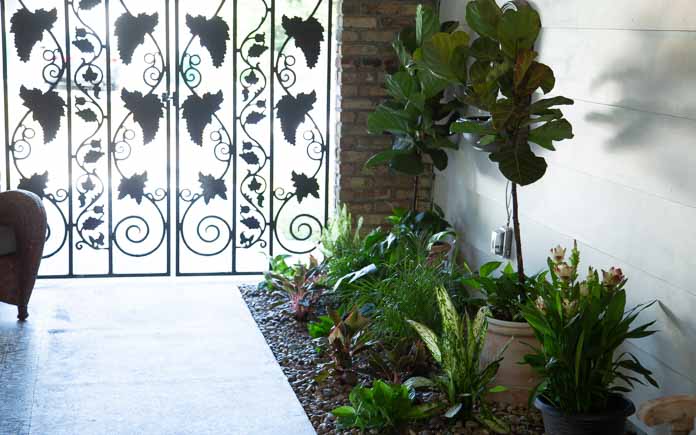
Green leafy plants with varying heighth add depth and breadth to the garden space. (3 Echoes Content Studio)
Fill Garden Bed
Our next project is to transform the garden bed inside the breezeway from a dirt pit to a green oasis.
We add a mix of green, leafy plants to fill the once-defunct garden space.
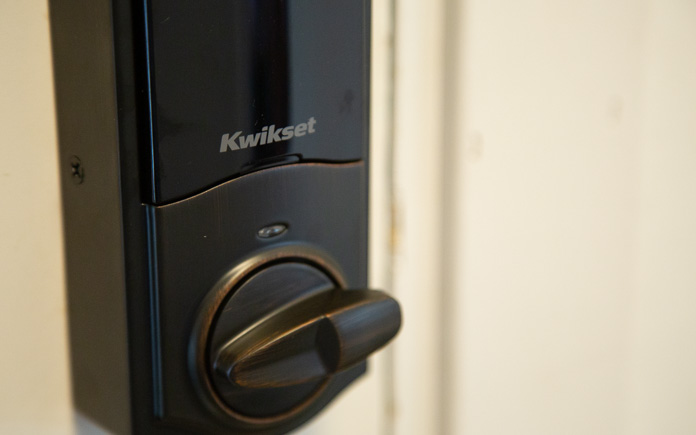
We surprised Delane with a smart lock deadbolt to not only dress up her front door but also make her home a little more secure.
The Kwikset Halo Touch Wi-Fi Fingerprint Smart Lock uses Delane’s unique fingerprint to open and lock her front door. This single-cylinder deadbolt also can be locked or unlocked by using the keypad or key from the outside as well as the turn button from the inside.
The smart lock has built-in Wi-Fi that connects directly to the home Wi-Fi network and smartphone for a secure smart home that does not require a third-party smart home hub, panel or subscription.
We also:
Touched up the paint on ironwork with spray paint
Painted front door and patio door dark teal
Today’s Homeowner TV host Danny Lipford and co-host Chelsea Lipford Wolf pose with Delane Caldwell and her father, Tim Caldwell. (3 Echoes Content Studio)
Post-Production Thoughts
Delane’s breezeway is the main entrance to her home, but before it had a very tired and haphazard feel to it the random collection of different slabs on the floor only left visitors with questions about what the space was supposed to be.
The sad empty planting bed made the house feel a lot older than it actually was, and the chain link fence made it feel more like a cage than a relaxing space.
But now, the whole Space is taken on the field of a courtyard in a fancy hotel the consistency of the stencil floor ties everything together from the wrought iron gates to the lush green planting beds.
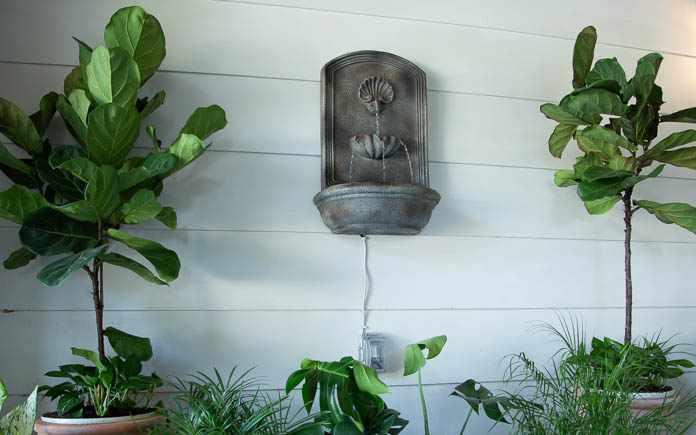
The door adds a pop of color while the fountain adds a cool visual element and a peaceful soundtrack for the space.
The simple curtain rod and the curtains frame the backyard and somehow make it all feel like a resort and we did it all for less than $1,200.