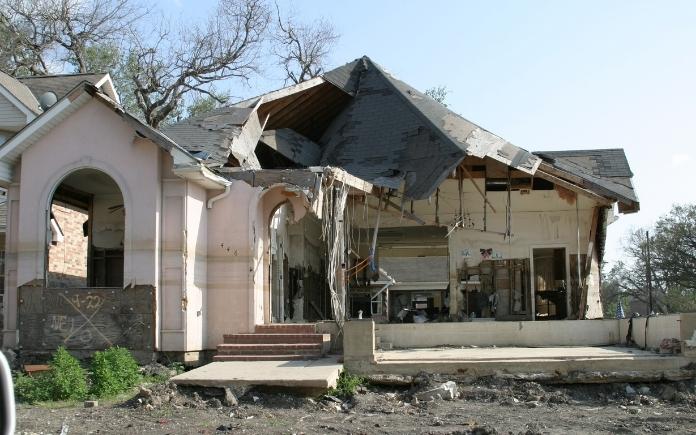
If disaster strikes, will your homeowners insurance cover the cost to replace your home? A basic policy might not be enough to provide peace of mind — you need guaranteed replacement cost coverage.
If your home insurance is lacking, you might be paying out of pocket to rebuild your home. (bjunda, Getty Images Signature)
What is Guaranteed Replacement Cost?
When something goes wrong, such as a natural disaster or a fire, the insurance company will cover your loss—or at least, up to a certain dollar amount—after you pay a deductible based on your policy’s terms and conditions.
Many people believe an insurance policy will cover all the damage after a disaster. Unfortunately, this isn’t automatically true — and many people don’t realize it until it’s too late.
For example, if an electrical fire claimed your home, depending on the type of insurance coverage you have, your policy might only cover the home’s current value minus depreciation and wear and tear. That means the insurance company wouldn’t write a check to cover the entire cost of building a new house if construction costs significantly increased due to inflation or unforeseen circumstances.
You could pay out of pocket to cover the remainder — or cut costs by sacrificing some of your old home’s features. But those options add steps and stress to the project during an already difficult time.
Guaranteed replacement cost, on the other hand, covers the amount to repair or replace your home after a covered loss — even if it would cost more to rebuild your home today than it did when you bought it.
With Erie Insurance’s Guaranteed Replacement Cost coverage, you’re covered even if you have to build a new home.
Of course, there are some important terms and conditions.
Under Guaranteed Replacement Cost coverage, you must report home improvements over $5,000 — such as, say, new construction on an addition — within 90 days. Depreciation may be deducted until repair or replacement is.
In addition, the coverage of costs is subject to limits and must comply with laws or ordinances, so terms may vary based on where you live.
Guaranteed Replacement Cost Coverage is not available in all states, so check with your insurance agent to see if you qualify.
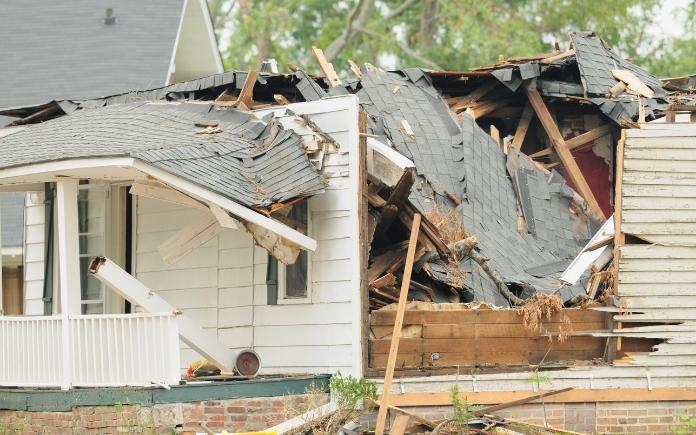
Guaranteed Replacement Cost covers the amount to rebuild your home, even if it costs more to rebuild today than when you bought it. (brittak, Getty Images Signature)
Why You Need Guaranteed Replacement Cost
Even if your homeowners insurance has a high limit, the cost to repair or rebuild is always in flux.
Your policy’s current limit might allow you to completely rebuild your home this year, but if building costs and inflation rise, it may only cover a portion of that next year.
Guaranteed replacement cost coverage, then, provides greater peace of mind than policies that deduct for depreciation when calculating reimbursement.
If you don’t have guaranteed replacement cost coverage, the work stops when the money runs out. So, you’re left with an incomplete project that you must pay out of pocket to finish.
Having this coverage could potentially save you thousands of dollars after a disaster.
Insurance can be complicated, so speak with an Erie Insurance agent to find the best policy for you. (Pixelshot)
Which Insurance Policy is the Best?
Now that you know what guaranteed replacement cost is, it’s time to consider what type of policy you need to accompany it.
A common question is, “How much coverage should I get for my home?” The answer boils down to how much you’re willing to sacrifice — which should be nothing.
Always opt for full coverage. If you go with any less, you could potentially lose tens to hundreds of thousands of dollars if something goes wrong — just to save a couple of hundred dollars in an annual premium.
Home insurance can be complicated, so let an experienced agent help you assess your needs and risk tolerance to find the right coverage.
Erie Insurance, established in 1925, has claims adjusters who are trained to know how different homes are constructed, the materials used, and which kinds of damage can occur.
Their independent agents provide 24-7 support, a wide array of coverages, and no gray areas so that you’re provided with a full understanding of your policy.
Need more living space for your growing family? Don’t immediately call a real estate agent or contractor — first, talk with an independent insurance agent before you move or renovate.
The Importance of Working with a Pro
Your home is your most valuable asset. Homeowners insurance provides financial protection in the event the structure is damaged such as by fire or severe weather. It can provide peace of mind but choosing a policy can be complicated.
For instance, how much coverage do you need for the structure? What about your valuables? What is a good deductible? Do you need guaranteed replacement cost coverage? It’s also important to understand a policy’s exclusions, and whether an additional policy is needed for special events like floods and earthquakes.
An independent insurance agent can remove all the guesswork, guide you through the different coverage options, and match you with the protection that fits your needs and lifestyle.
Independent insurance agents can help you find the coverage you need and, often, save you money. (Adobe Stock Photo)
Why Work with an Independent Insurance Agent
There’s no shortage of homeowners insurance providers and coverage options. Some providers have offices in your community; otherwise have out-of-state headquarters; and still, others have international offices with U.S. branches and licenses for local coverage.
You could search the web for companies that cover your area, but the results might be daunting — and where would you even start?
Instead, you can save a lot of time by contacting an expert who can ask you questions about your home and identify the necessary protection.
Independent agents can represent multiple insurance providers, as opposed to so-called “captive” agents who usually represent just one company. So, they can help you find the right insurance company and coverage for your needs at competitive rates.
Not only will they compare premiums — the amount you must pay every year to keep a policy active — but they also will compare policy coverage and limitations.
First, it’s important to find a quality agent with a reputable company.
For instance, Erie Insurance, this post’s sponsor, was founded in 1925 and serves 12 states — Illinois, Indiana, Kentucky, Maryland, New York, North Carolina, Ohio, Pennsylvania, Tennessee, Virginia, West Virginia and Wisconsin, along with the District of Columbia.
The company has a long track record and its property/casualty companies are rated A+ (Superior) by A.M. Best, a global credit rating agency with a focus on the insurance industry.
Independent insurance agents live in the communities they serve, so they know which types of risks need to be covered. (sshepard, Getty Images Signature)
Why Local Knowledge Matters
A homeowners insurance policy is not a one-size-fits-all situation — that’s why you need local knowledge to build the best plan.
Different areas have different risks — for instance, the U.S. Atlantic Ocean and Gulf of Mexico coasts are prone to hurricanes, whereas California sees more earthquakes than other states; and areas across the country have tornadoes.
Also, houses are built differently based on the location — for instance, homes in the southern United States may have slab foundations, whereas many northern U.S. homes have basements — and each requires the right coverage.
Independent insurance agents have offices in your neighborhood and are a part of your community, so you’ll know you’re working with someone who understands local home construction, the area’s typical weather, and the coverage you need.
Erie Insurance agents, for instance, often check in with customers to touch base and make sure their coverage is up-to-date.
Talk to an insurance agent to make sure your policy covers a home addition. (Willowpix, Getty Images Signature)
Filling in the Gaps
Whether you’re buying your first home, moving to a new one or just making improvements, it’s important to contact an independent insurance agent.
If you’re buying a new house, you need to consider moving insurance, especially for long-distance moves that involve interstate or cross-country travel. It will cover you during the move and it’s usually not necessary to purchase an additional policy.
Keep in mind there are limits for certain kinds of misplaced, lost or stolen personal property. Your insurance agent can help you find the best coverage and set expectations before the big move.
If you’re building an addition to your home to create more living space or making major improvements, let your insurance agent know. An addition can increase your home’s value — your agent will advise on whether your insurance policy has enough coverage to keep up.
It’s just one more reason why it pays — literally — to work with an independent insurance agent.
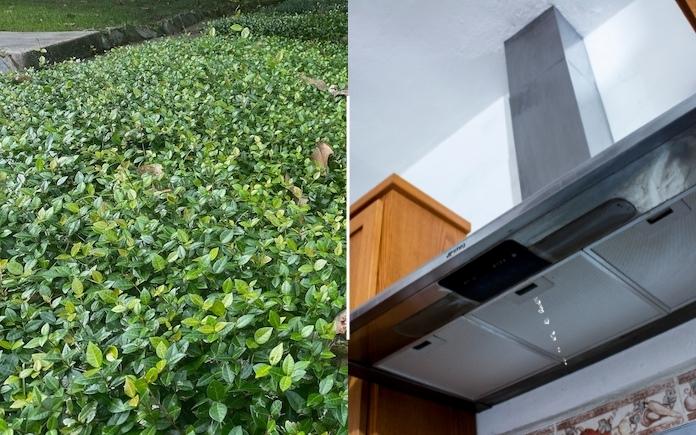
In this week’s episode, we provide solutions for out-of-control Asiatic jasmine and a dripping range hood. (Carey Bradley, Today’s Homeowner Media/Osvaldo Maldonado, Getty Images/BillionPhotos)
Hour 1
In Hour 1, we share a listener’s tip on how to track down rats in an attic, offer solutions for an invasive ground cover and more.
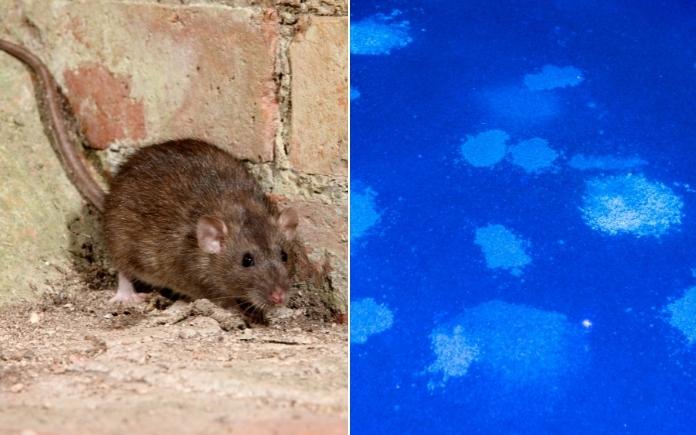
Tracking Down Rats in an Attic
Find where rats have been in your attic by using a black light. (Photo illustration: MikeLane45, Getty Images Pro/Adobe Stock)
In the July 30 show, Chris Welsh in Florida called to ask about eliminating the rat urine smell in his attic. He wanted to install new insulation and asked us if he should remove the old, soiled insulation before he installs new.
We told Chris that since it’s been a few years and the smell is still there, plus he’s already going to install new insulation, he should get rid of the soiled insulation. Although it can dissipate over time, there’s no guarantee. Plus, this could be his only chance to remove it, because once the new insulation is installed, it’s there for good.
One of our listeners, Dean, heard this and called to give this tip: Use a black light to find rat urine in an attic.
This is a great tip because it’s often hard to see how widespread the rat infestation is on smell alone.
According to chemistry expert Anne Marie Helmenstine, Ph.D., urine glows under a black light primarily because it contains the element phosphorus. Phosphorus glows yellowish green in the presence of oxygen, with or without black light, but the light imparts additional energy that makes the chemiluminescence easier to see.
A black light also works well to find pet urine. So if you have a problem cat that’s not keeping its business in the litterbox, use a black light to find urine spots.
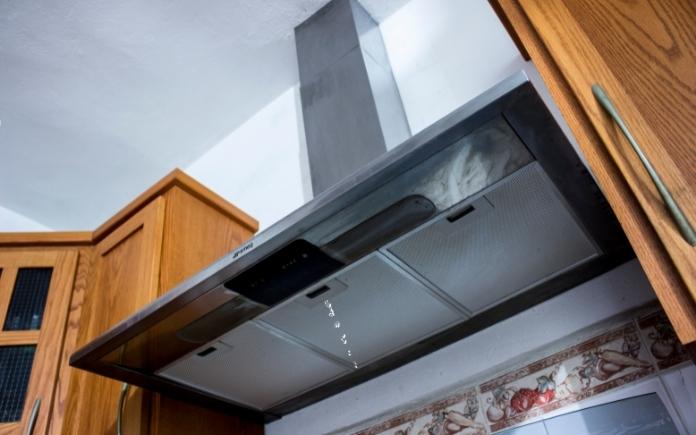
Water Dripping from a Range Hood
Water dripping from a range hood indicates an insulation problem. (Photo illustration; Osvaldo Maldonado, Getty Images/BillionPhotos)
Water is constantly dripping from the range hood in David Henderson’s kitchen. He’s spending a small fortune on paper towels to absorb the drips on the stovetop.
The duct vents to the outside of the house, he maintains a steady temperature inside, and the new roof he just had installed didn’t make a difference.
“I’ve been beating my brains out trying to figure it out,” David says. “I am 69 years old and have lived in many houses in my life but have never seen this before.”
The vast majority of the time, when a vent pipe is dripping water down through the range hood, it means condensation isn’t forming on the outside but on the inside.
Install some duct wrap insulation on the pipe to minimize the difference in temperature inside the pipe and in the attic. Since the pipe is already in place, get the type that comes on a roll, not a cylindrical form. That way you won’t have to disconnect the pipe to slide the insulation over it.
This will stop the dripping and you’ll also greatly reduce your paper towel budget!
Controlling Asiatic Jasmine
Asiatic jasmine is a great groundcover, but it can get out of control if not properly maintained. (Carey Bradley, Today’s Homeowner Media)
Sue wants to know: How can I get rid of Asiatic jasmine that is taking over our yard?
“It has spread from the neighbors on each side of us. Pulling it up is a never-ending task and we have gotten too old to deal with it. Help!” Sue says
Asiatic jasmine is a perennial evergreen vine that makes for a wonderful ground cover, but it’s very invasive.
First, try cutting it right at the bed, and keep it under control with a string trimmer.
We don’t often recommend using herbicides, but you might need them in this case. Cut it back as far as you can, then spray on an herbicide.
If you don’t want to use an herbicide, spray it with home and garden vinegar.
Hour 2
In Hour 2, learn how to paint unfinished cabinets yourself, when to paint walls in a new house and more.
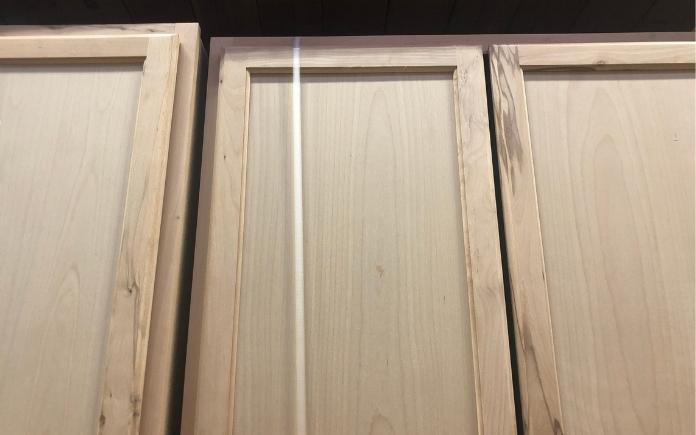
Painting Unfinished Cabinets
You can get the look of professionally painted kitchen cabinets yourself if you make the right preparations. (Kameleon007, Getty Images Signature)
A caller wants her unfinished cabinets professionally painted, but the professionals have given her “outrageous” estimates.
“Can I do this myself, and what kind of sprayer should I get?” she asks.
It is a fair amount of work to finish cabinets yourself, but the end result is very gratifying.
Because the cabinets are unfinished, you won’t have to worry about removing any old paint.
Basically, here’s what you need to do.
Sand the cabinets so the paint will stick.
Smooth out any imperfections with water putty or epoxy finish
Prime the cabinets with a bonding primer
Apply two coats of acrylic latex paint in either a semi-gloss or eggshell finish
Don’t wait for your house to “settle” to start painting it. (Curtis Adams, Pexels)
Robert Lang in Kentucky just bought his first home — a new build that was completed in February 2022.
“I want to paint the interior to not only change the color but use a better grade of paint. I’ve read that I should wait before painting. If this is true, how long should I wait? Do I need to allow the house to settle before I attempt to paint?” Robert asks.
There’s no reason to wait to paint in a newly built home. There’s no way to know how much settling or expansion and contraction are going to happen.
There are so many factors that could influence it, like how wet the framing got during the building process or how many screws were used versus nails.
If there is going to be some settling, it probably won’t show up for at least five years.
Go ahead and make the house your own. Just, make sure the walls are nice and clean before you paint them.
This week, learn how to clean old wallpaper and protect a wood-framed shower window from water damage. (Sandy Knollenburg/simplyzel, Getty Images)
Hour 1
In Hour 1, hear our suggestions for matching wood posts to vinyl, cleaning old wallpaper, and more.
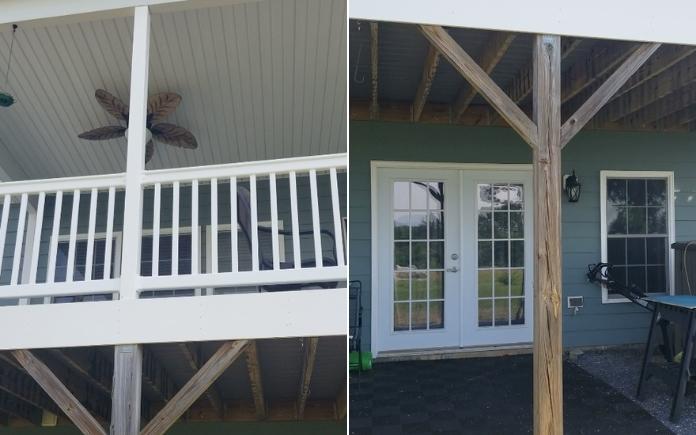
Matching Wood Posts to Vinyl
Matching these wooden support posts to the vinyl posts is as easy as applying a coat of paint. (Photos by Doug May)
Doug May has a great view of the Blue Ridge Mountains on his covered back porch. But, the view of his porch isn’t as pleasing.
“The upper part has vinyl sleeves over the top of the posts. Everything’s covered and it’s nice and smooth and white. But down below, it’s just pressure-treated wood, with all the cracks and gaps,” Doug says.
He wants the wooden support posts on the ground to match the white vinyl posts on the porch above. What’s stopping him from covering the wood posts with vinyl is the diagonal wood braces. He’s worried about the hassle of connecting the many vinyl pieces on the diagonals and sealing them.
“What I want is the smooth look and feel of the vinyl on the posts below. Is there a way to do that?” Doug asks.
Vinyl sleeves are expensive! If you want the posts to match, try this budget-friendly option:
First, clean the wood posts and apply a coat of primer.
Then, use auto body filler (like Bondo) to skim out the cracks. Once that dries, lightly sand the posts.
Then, caulk the areas where the diagonal braces meet the vertical posts.
Finally, apply two coats of acrylic latex paint.
Once you do this, no one will know one set of posts is vinyl and the other set isn’t! The acrylic paint will give it a glossy look and seal the joints.
If you decide you want to cover the posts with vinyl, remove one post at a time, including the diagonal supports, and attach the vinyl sleeves to each piece.
Miter cut the ends of the sleeves to fit the diagonal brace posts, and thoroughly caulk each seam so water doesn’t get in.
Don’t caulk the bottom of the diagonal brace pieces where the wood meets the post. If water were to get inside the vinyl, you want it to be able to drain out and dry.
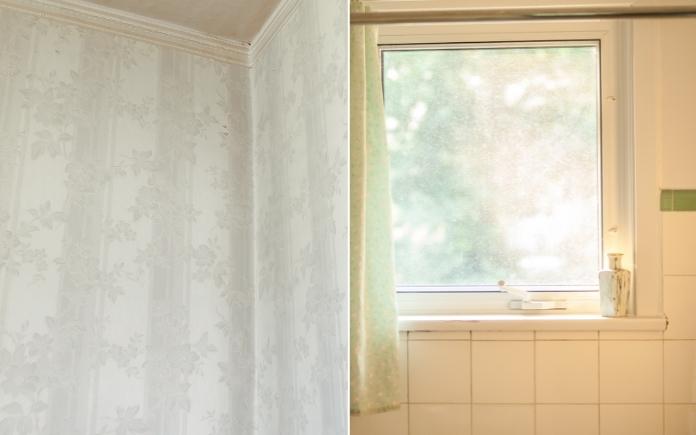
Original wallpaper keeps an old home’s character true to its age. (Photo by Sandy Knollenburg)
How to Clean Old Wallpaper
Sandi Knollenburg bought a 100-year-old farmhouse in Bloomington, Ill., five years ago, and she’s been renovating it little by little.
Right now, she’s working on the stairwell area. The walls that extend from the first floor to the second are covered in wallpaper from the 1960s. She loves the pattern, and the wallpaper is still in pretty good shape! All it needs is a good cleaning.
She asks, “What’s the best way to clean and preserve the wallpaper?”
Most modern wallpapers have an acrylic or latex coating that makes them washable and, in some cases, scrubbable. Older wallpaper is just plain paper, so you don’t want to get it wet. If you do, it will peel off the wall.
Try these options to remove the dirt and dust:
Wipe the wallpaper with a large, dry sponge.
Use a vacuum cleaner.
Attach a microfiber cloth to a Swiffer-type mop for hard-to-reach spots.
To remove skids and scuffs, use a gum eraser. You can buy these at an art supply store. Another option is a dry Magic Eraser. If that doesn’t work, lightly dampen it.
Hour 2
In Hour 2, learn how to prevent wood rot in a shower window, remove sediment from water, and more.
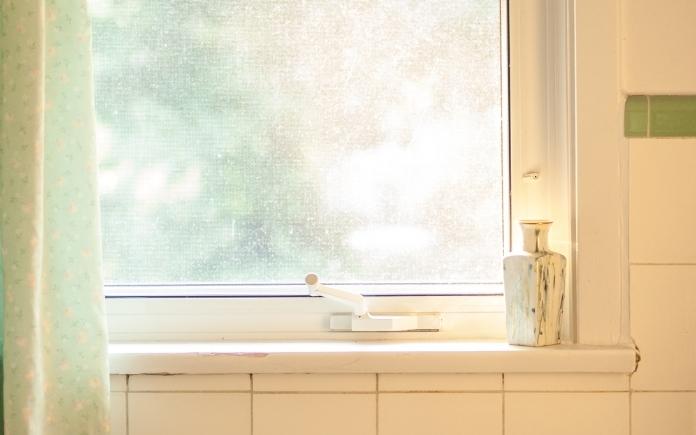
Worried about water damaging a wood-framed shower window? Protect it with tile. (simplyzel, Getty Images)
Protecting a Wood Window Frame in a Shower
A caller needs advice on tiling around a window in his shower. The wood frame sticks out slightly, so he can’t tile over it.
“What do you do to treat that to make it so that the water is not damaging that wood and causing wood rot, and more importantly that water is not getting behind that and causing damage to the shower?” he asks.
A lot of older houses have this problem. Typically, at one point in time, the bathroom had just a tub with a window above it. Then somewhere along the way, a shower was installed.
I’ve seen a lot of homeowners put a shower curtain over the window but rarely does that last long.
To protect the wood frame from water damage, encapsulate the window frame with the tile.
Before you lay the tile, be sure to caulk and paint the frame. Bring the tile up to the wood and then overlap extra tile over the window frame. This will protect the frame from the water and give it a nice, pronounced look.
If water can still hit it directly, install a waterproof window.
To completely eliminate any chance of rood rot, remove the window and replace it with a vinyl one.
Sick of sediment in your water? It’s time for a new water filter. (pixelshot)
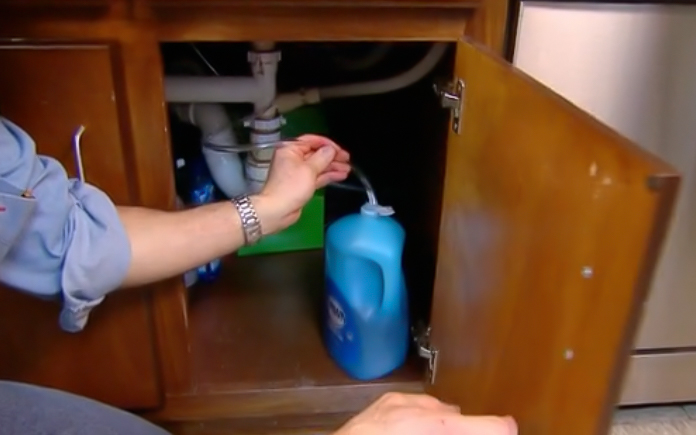
Sediment in Water
Pablo Sandoval in Willow Creek, Calif., is sick of sediment in his water. His home draws water from a deep well and all wastewater flows into a septic tank.
“For most of the year, the water supply is good, but every summer we have a problem with sediment that clogs aerators at sinks and showerheads. Plus, the washing machine takes forever to fill with water. What can we do to alleviate these issues?” he asks.
Sediment problems are more frequent in the summer because water levels are usually lower. There’s less water but the same amount of sediment in the system, so it finds its way to the pump and into your house.
You’ll need to have a well water contractor take a look at your pump. You might need a new screening.
Also, here are two options to consider:
Have a water well contractor install a sand separator on your pump. This device uses centrifugal force to push dirt, sand and debris outward to the separator wall and downward in a spiral motion. The cleaned water then rises and returns back to your plumbing system.
If your home’s primary entrance is in the garage, then you’ll want Chamberlain’s new garage door opener with an integrated camera. Learn More >>
Simple Solutions
This Simple Solution keeps you from constantly refilling your kitchen soap dispenser. (3 Echoes Content Studio)
Improved Soap Dispenser — Kitchen-sink soap dispensers hold such a small amount of liquid soap that it requires you to constantly refill the reservoir bottle. Here’s a better option:
Lift off the hand pump from the dispenser, pull off the plastic fill tube, and replace it with a long flexible quarter-inch-diameter tubing.
Feed the opposite end of the tubing down through the hole in the sink deck and place it in a large jug of liquid soap.
Now you’ll never have to refill the dispenser; simply replace the soap jug once it’s empty.
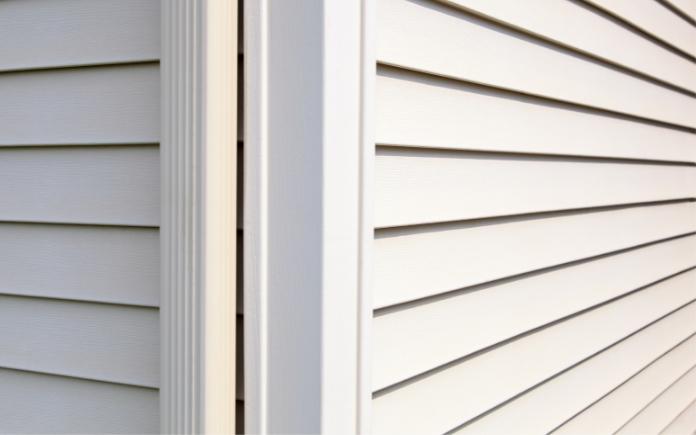
If you’re installing gutters on vinyl siding, run the drill in reverse for smooth holes. (Garrett Aitken, Getty Images)
Smooth Cut in Vinyl Siding — When using a hole saw to drill through vinyl siding, run the drill in reverse. That way, the hole saw will create a nice clean hole with no rough edges.
Once you cut through the siding, switch the drill to forward and bore through the wall sheathing.
Other Products & Links Mentioned
Further Reading
Radio Show & Podcast: Send us your question!
If you have a comment, general question about home improvement, or something we’ve featured on Today’s Homeowner, please fill in this form:
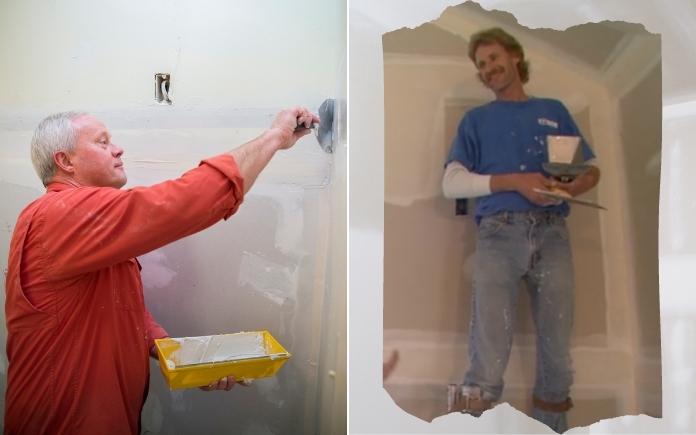
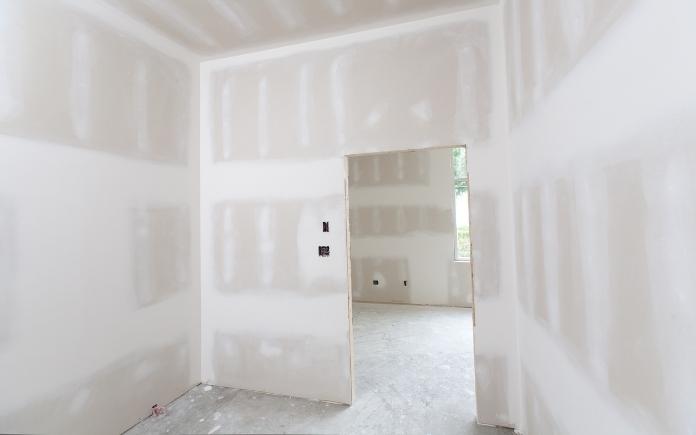
In this episode of “Ask Danny,” drywall expert Mark Rutherford shares his tips and techniques. (3 Echoes Content Studio)
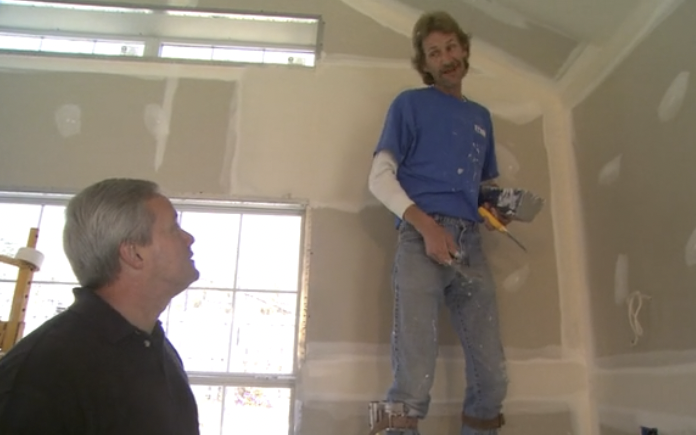
In Episode 4 of “Ask Danny,” I’m talking with my longtime friend and drywall expert Mark Rutherford — “The Drywall Guru.”
Mark Rutherford installs drywall in a classic episode of Today’s Homeowner TV. (3 Echoes Content Studio)
About Mark Rutherford
Mark Rutherford has worked with drywall on new construction and remodeling projects for 40 years.
I first met Mark in 2007 while working on a game room addition for an episode of Today’s Homeowner TV.
He currently lives in southwest Pennsylvania.
To prevent a drywall nail pop from reappearing, replace the nail with a screw. (3 Echoes Content Studio)
Drywall Nail Pops
Why does a nail pop happen, and what’s the best way to correct it?
Mark: Nail pops happen when a nail or screw comes loose under drywall and creates a bulge or “pop” in the wall.
They usually happen with new construction within the first year. That’s because everything is drying out and settling — the house is really “finding itself.” I always say it’s kind of like a living person.
Nail pops are common around stairways because the frequent stepping movement loosens up the nails.
To repair a nail pop, first tap it with a hammer. If it feels spongy, that means the installer missed the stud. Pull it out, and drive a drywall screw into the stud or joist near the hole, with the head of the screw just below the surface.
If you can’t extract the loose nail, tap in another drywall nail right beside it so the head of that nail catches the existing nail. This keeps the nail from popping back out again.
If a screw is causing the pop, use a screwdriver to drive it in deep so it’s flush with the wall’s surface.
Once the nail or screw is below the drywall surface, use the back of a drywall knife to flush the drywall paper with the surface, and then cover it with a coat of drywall mud.
Let the mud dry for 24 hours, then apply another coat. After the second coat dries, sand it and use a shop vac as you work to suck up any dust.
Tip: Keep your nail pop repair area as small as possible — the less mud you use, the less sanding you’ll need to do.
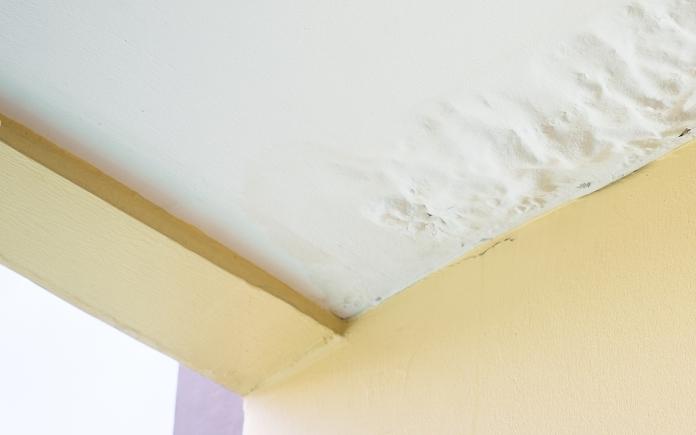
Water damage is the most common cause of drywall puckering. (spyarm, Getty Images)
Drywall Puckering
How do you fix drywall puckering?
Mark: Water damage is the most common cause of drywall pucker, but improper installation can also cause it. In some cases, the installer didn’t leave enough mud left behind or didn’t use any in that spot.
For major drywall puckering, remove the tape to patch and repair. Lay down mesh tape and apply a fresh coat of drywall mud.
For slight puckering, use the corner of a drywall knife to lift the loose tape and apply a thin layer of all-purpose mud under the tape. Smooth the tape out and put a light coat of drywall mud over the edge of the tape.
For popcorn ceilings, use the same technique, but be extra careful to not damage the texture.
If it’s a significant crack or older ceiling, the popcorn ceiling texture will come off. In that case, you’ll need to apply a coat of sprayed acoustic texture.
You can buy this material in a can, but it can be tricky to apply. Follow the directions and practice on a piece of cardboard first.
If you can’t match the texture, call a professional.
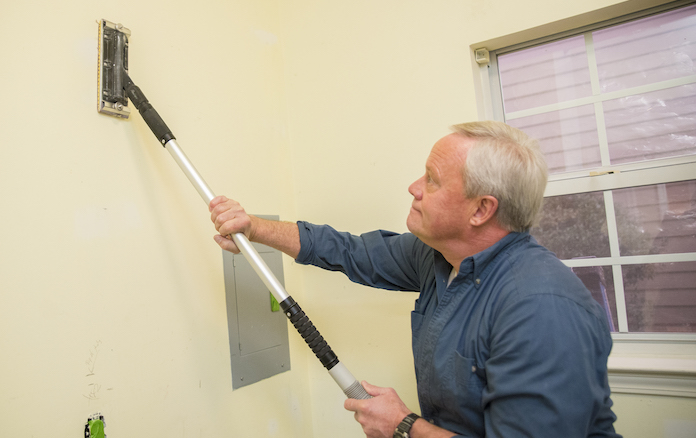
Make less of a mess when sanding drywall by using a dustless sander. (3 Echoes Content Studio)
Controlling Dust
What are some tips to minimize dust when sanding drywall?
Mark: To minimize the mess while sanding drywall, I basically create an oxygen tent.
Using 2-inch wide masking tape, I encase the area with plastic. I start taping at the ceiling, then bring it down the wall and to the floor. Everything is connected.
Then, I create a door underneath to crawl into. Once I’m finished sanding, I let the dust settle, dust myself off and crawl out the door.
Always turn off your HVAC system when sanding drywall. When the vents come on, the plastic and dust will blow around, and the dust will work its way into your system.
Last but not least, always wear a good mask while you’re sanding.
Recycling is great when you want to go green, but using found drywall is never a good idea. (tanyss, Getty Images)
A Drywall Disaster
Some jobs you don’t have to think twice about turning down.
One time, a builder approached Mark at a job site and asked him to look at another house in the subdivision.
No big deal, right? Well, wrong. The whole house was hung with pieces of scrap drywall. Turns out, the homeowners had been collecting the drywall from the dumpsters in the subdivision to build the home. It didn’t matter if the drywall was a corner piece or angled, or even wet and damaged.
“When I walked into that house, it looked like a 2,000-piece jigsaw puzzle,” Mark said.
The biggest piece of drywall in the house was probably about 2×4 feet, and in some spots, there were gaps as big as an inch wide in places.
“That was a big no from me,” Mark said.
With a little patience, you can install drywall just as well as a pro. (Spinkle, Getty Images Signature)
Mark’s Drywall Tips
If you’re working near cabinets or baseboards, put tape/plastic down to protect those areas.
Make sure you’re using the correct drywall mud. Go with a green lid or black lid bucket. Use an all-purpose mud and read the bucket. One type of mud may be good for coating but not for taping.
Be patient and work in stages. Let the mud dry then add additional coats.
Ask a question and we could answer it on the “Today’s Homeowner Podcast!” We also may use it on our nationally syndicated radio broadcast or on todayshomeowner.com.