Danny Lipford chats about home fire safety with Steven Millhouse and Dwight Smith with Mobile Fire-Rescue. (3 Echoes Content Studio)
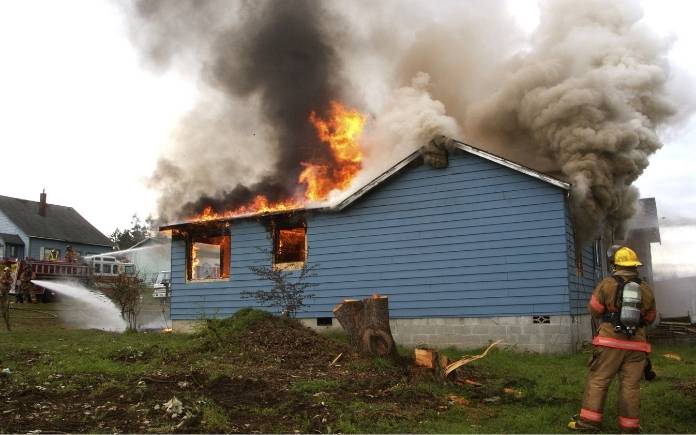
October is National Fire Prevention Month, so this week, I’m chatting with Capt. Dwight Smith and Steven Millhouse with Mobile Fire-Rescue in Alabama about their top fire safety tips for homeowners.
Once you’ve escaped a house fire, never go back inside to retrieve any items. (davelogan, Getty Images Signature)
Stephen: The first thing is to actually have a plan. Many don’t even consider it until an emergency happens. You want to have a plan in place especially if you have small children or elderly people living with you as well.
Know the sound of the smoke alarm.
Practice escaping the home safely.
Know your means of egress, whether it’s the nearest door or window if you have a multi-story home.
Let your children practice crawling. You can make it like a game to make it fun for them.
Have a safe meeting spot outside, whether it’s the mailbox, a big tree at the end of the driveway, or a neighbor’s house.
Get out and stay out. Don’t run back in for pets, photo albums or anything like that. Call 911 and let the professionals do their job.
Dwight: To expand on having children practice crawling, making it like a game also makes it a reality to them because it makes them familiar with what they need to do.
Direct them to feel on doors, and tell them if it feels hot, then they should go to the window.
Even though you’re teaching this to them as a game, you’re familiarizing them on how to get out of the house in case there’s a fire.
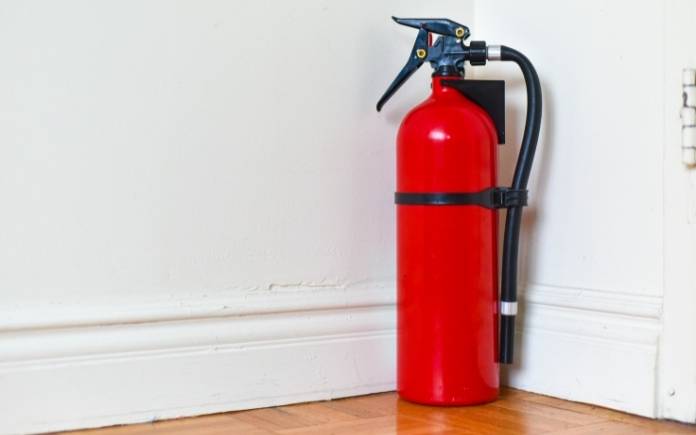
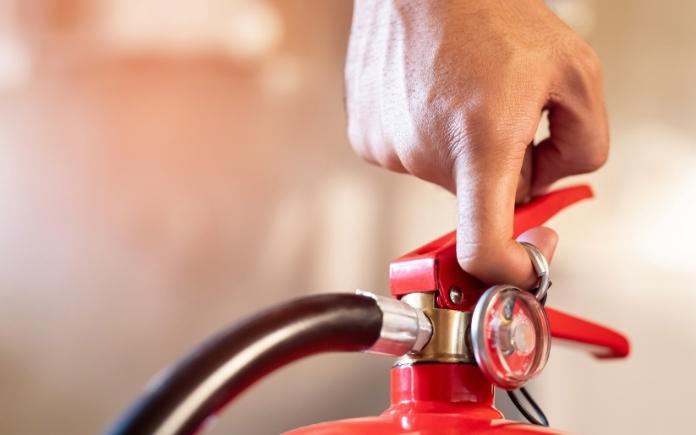
Every home needs a multi-purpose fire extinguisher. (photo_chaz, Getty Images Signature)
Dwight: A typical home should have at least two fire extinguishers: one for the laundry room and one for the kitchen.
Know what type of fire extinguisher you need. Fire extinguishers are categorized according to the class of fire they extinguish — Class A, Class B, Class C, Class, D, and Class K.
Class of Fire
Description
Class A Fires
Fires in ordinary combustible materials, such as wood, cloth, paper, rubber, and many plastics.
Class B Fires
Fires in flammable liquids, combustible liquids, petroleum greases, tars, oils, oil-based paints, solvents, lacquers, alcohols, and flammable gases.
Class C Fires
Fires that involve energized electrical equipment.
Class D Fires
Fires in combustible metals, such as magnesium, titanium, zirconium, sodium, lithium, and potassium.
Class K Fires
Fires in cooking appliances that involve combustible cooking media (vegetable or animal oils and fats).
In most cases, homeowners need a multiple-purpose fire extinguisher, which is classified as A, B and C.
The number one cause of fires in a home is unattended cooking. (Pears2295, Getty Images Signature)
House Fires
What are some of the hazards that lead to a house fire?
Stephen: The number one cause of fires in a home is unattended cooking. This usually happens in the kitchen, but depending on the time of year it could happen outside.
During football season and summer when people are grilling, a fire could easily happen outside. If you’re using a deep frier, grill or smoker, you can’t cook if you’re not in that area.
As a fire safety precaution, stay there and attend to whatever you’re cooking, and have an outdoor fire extinguisher nearby, so you’re prepared in case something happens.
Also, before you leave your home, add making sure your iron and oven are off to your mental checklist of things you need to do.
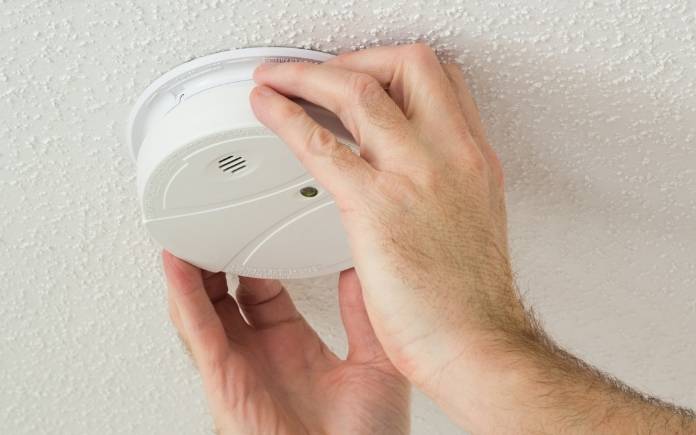
The batteries in most modern smoke detectors last for 10 years, but you should still regularly check them. (Kevin Brine, Getty Images)
Smoke Detectors
What’s some smoke detector maintenance homeowners should know?
Dwight: You should replace your smoke detector after 10 years. Mobile Fire-Rescue has a program to change out smoke alarms and batteries for citizens, and we’ve seen a lot of smoke alarms that are more than 20 years old that are not working.
Stephen: Test your smoke alarm to make sure it’s still operational.If you hear that chirping sound, don’t ignore it. That means it’s time to change out your smoke alarm batteries.
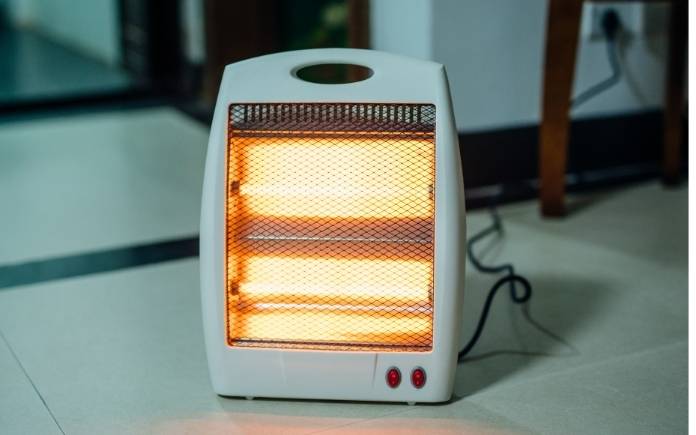
Always place a space heater on a hard, flat surface. (-aniaostudio-, Getty Images
Space Heaters
What are some fire safety tips for space heaters?
Stephen: The best thing you can do when using a space heater is follow the manufacturer’s guidelines and give it space.
You can’t operate a space heater if you’re not in that room. It’s supplemental heat for a small area, so it’s not meant to heat an entire room or home.
Plug the space heater directly into a wall outlet and never into an extension cord.
Keep it at least 3 feet away from anything.
Operate it on a flat, hard surface. Don’t put it on a carpet or rug or anywhere it might tip over.
Don’t put it on a table or under a desk. It’s tempting to do this in an office setting to warm your feet, but it’s easy to forget that it’s there.
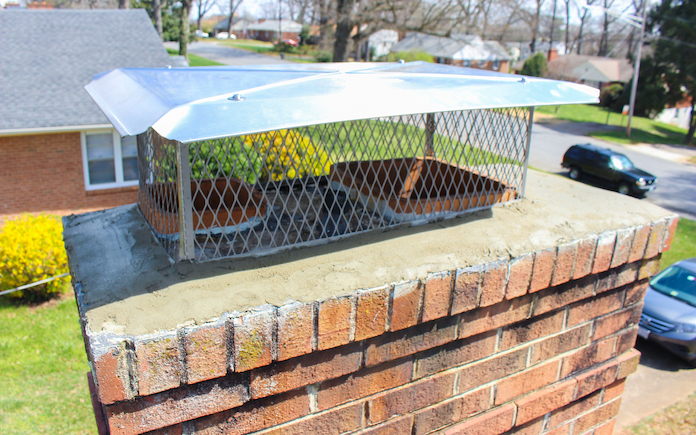
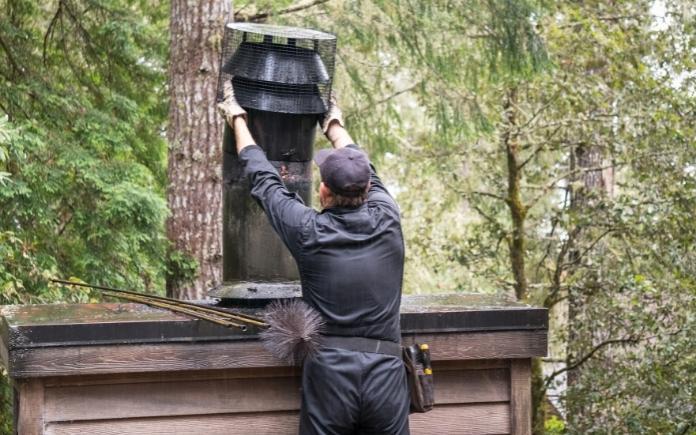
Stephen: An important part of fire safety is sweeping your chimney at least once a year, especially just before you light it at the start of a new season.
Every season, there are all kinds of things that could be in that chimney — squirrels, birds, leaves, sticks, brush, anything that’s accumulated while you haven’t been using it.
Have it professionally inspected, cleaned and swept before you light it for cold weather months.
Further Reading
Ask a Question! (Podcast)
Ask a question and we could answer it on the “Today’s Homeowner Podcast!” We also may use it on our nationally syndicated radio broadcast or on todayshomeowner.com.
This page contains affiliate links. If you purchase a product from these links, we will earn a small commission at no additional cost to you.
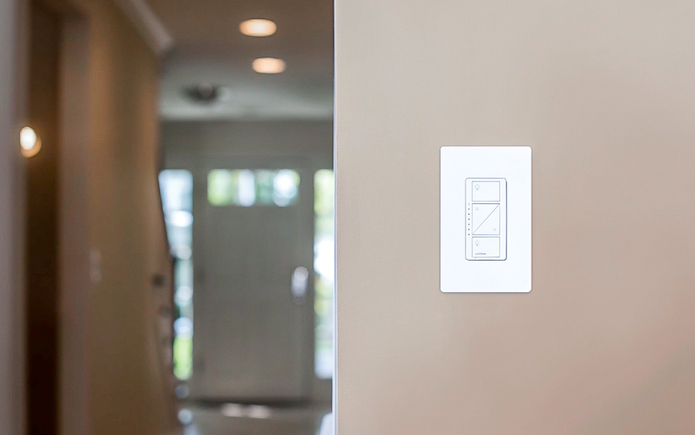
One Caseta switch can make bulbs or fixtures smart, even existing ones. (The Home Depot)
Smarter Lighting
Lutron’s smart dimmer switches and fan controls attach to existing rocker or paddle-style switches found in millions of homes today and allow you to build a system you can control with your smartphone, a remote or even your voice.
You can even mount the Pico remote control directly to the wall for multi-location dimming — no cutting holes or wiring required!
Lutron dimmer switches give you the ability to set the right light for any activity whether it’s reading, watching TV, entertaining, or having a casual dinner.
Manage your lighting schedule from your smartphone so you always come back to a well-lit home, or set a timer for extra security while you’re away.
One Caseta smart switch can control many bulbs at once, even your existing ones. So, you don’t have to buy individual smart bulbs for each light in your home!
Get smart control of multiple styles of dimmable LED, incandescent and halogen bulbs
The dimmer works up to 600 watts of incandescent or halogen and 150 watts of dimmable LED or dimmable CFL.
The Lutron Caseta Wireless Dimmer Smart Bridge won’t compete for a signal with other devices on your Wi-Fi network. (The Home Depot)
Easy Installation
Caseta dimmers install in as little as 15-minutes with just two wires and there’s no neutral wire, so they work in homes of all ages.
Plug the smart bridge into your home’s internet router, and it ensures your wireless communication between devices will always work.
And, the Caseta products won’t compete for signal with all the other devices on your Wi-Fi network, and more importantly, your lights will still work if that signal drops.
Watch the video to learn all about this Best New Product!
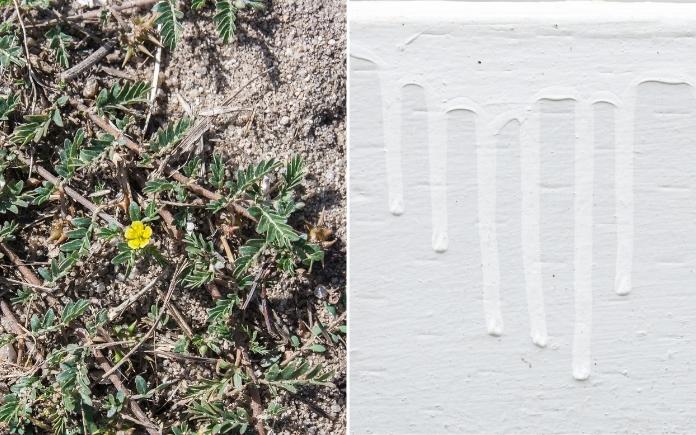
This week, learn how to remove thorny goathead weed and free a window that’s been painted shut. (arousa, Getty Images/N8tureGrl, Getty Images)
Hour 1
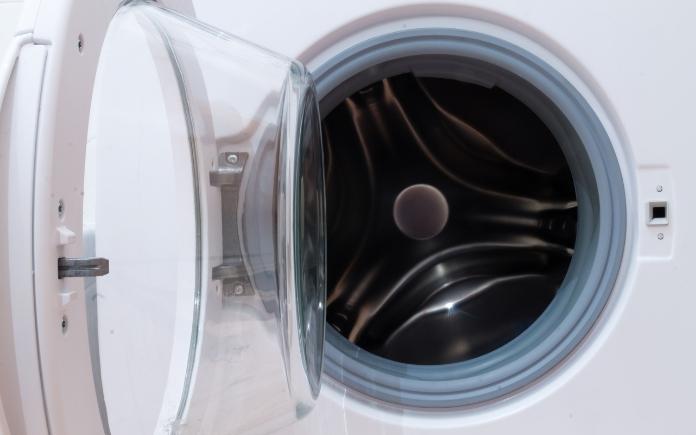
In Hour 1, learn how to repair drywall cracks, eliminate funky front-loading washer odor and more.
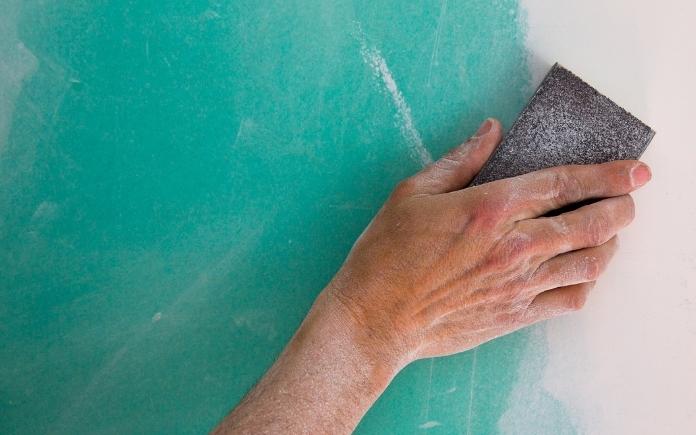
Repairing Cracked Drywall
Small drywall cracks can be repaired with some light sanding and a thin coat of joint compound. (Lunamaria via Canva)
Lisa Baker in Columbus, Mo., owns a two-story house with a fully finished basement, and she’s noticed horizontal cracks along a few drywall seams.
“I understand that this is from the house settling. What’s the easiest way to fix these cracks?” she asks.
If your house is “settling,” it doesn’t necessarily mean the structure is dropping. This could just be some minor expansion and contraction. If you have uneven settling, it usually results in a vertical crack, and it may indicate structural damage. Call a foundation specialist if:
The crack has a 3/16-inch or wider gap.
One side of the wall is higher than the other.
Your doors no longer close in the frame.
In Lisa’s case, the drywall was most likely installed horizontally, so that’s why the cracks are forming in that direction.
Assuming the drywall tape is still in place, lightly sand the cracks, vacuum off all the dust and apply a thin coat of joint compound. Do this in a small area first to make sure this corrects the problem.
If the tape is peeling, adhere it back to the wall with some glue or joint compound. If that doesn’t work, you’ll have to remove the tape and apply new.
First, apply joint compound and cover the crack with paper drywall tape pressed into the wet compound. Then cover the tape with more joint compound, and allow it to dry before sanding.
It’s an easy fix, but it’s can be tedious. After every load, use a towel to dry the inside of the door and the rubber gasket. This removes the moisture, preventing mold and mildew from growing and emitting that awful smell.
Keep the door open for a while to let the air circulate inside the washer. Keep an eye on children and pets when you do this because they can easily climb inside.
For good measure, run an empty load with a cup of bleach every three to four months to disinfect the entire washer drum.
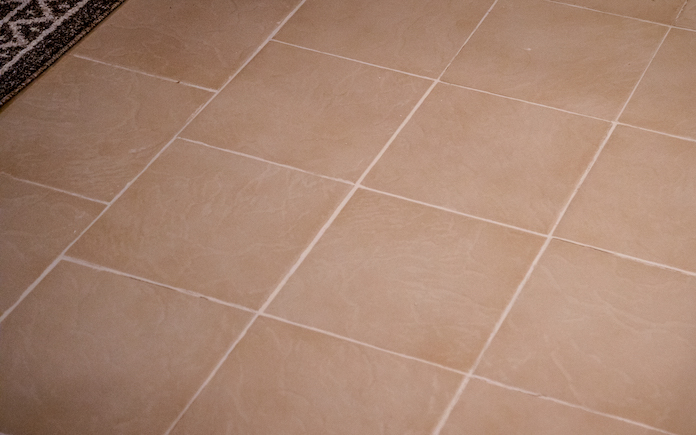
It’s possible to restore the white color of grout without needing to be a specialized cleaning product. (3 Echoes Content Studio)
Restoring White Grout
Suzanne Lewis in Wilmington, N.C. says, “I have off-white tile in my bathroom with off-white grout. The grout is beginning to discolor to a more brown color. What do you suggest to clean the grout?”
If grout isn’t sealed properly when it’s installed, it will eventually become discolored. You can restore the grout to its original color and prevent the stains from returning. Here’s how:
Mix a 50-50 solution of oxygen bleach and hot water. It’s important to use hot water for the oxygen bleach to dissolve.
Apply it to the grout joints with a sponge and wait 10 minutes.
Soak the grout one more time with more bleach solution and wait another 10 minutes.
Scrub the grout and rinse it with clean water.
Once the stains are gone, cover the grout with a clear silicone sealer. Use an artist’s brush to fill in every single grout joint.
Hour 2
In Hour 2, hear how to get rid of goathead weed stickers, open a window that’s painted shut and more.
Getting Rid of Goathead Weed
Goathead weed is an invasive plant that has sharp stickers. (arousa, Getty Images)
Christie Svoger in Oregon has a sticky problem on her lawn.
Her lawn is covered in goathead weed stickers. Goathead weed, or puncturevine, is an invasive toxic plant. The spines on its fruit are sharp enough to puncture bicycle tires and shoes, according to Washington State’s Noxious Weed Control Board.
“How do I get rid of them? I don’t want them on my lawn!” she asks.
Hand-pulling goat’s head weed won’t be effective because they have such a strong root system and will grow right back. Use a tool like a weed puller to get down deep to remove the roots.
You’ll have to take some extra measures to ensure it won’t return. Use a strong pre-emergent weed herbicide or try this home remedy: dilute 1/2 cup each of Epsom salts and vinegar in a gallon of water and spray thoroughly.
Another effective method is to use a weed-burning propane torch. Just be sure to check your local laws regarding the use of these devices and have a fire extinguisher nearby.
A one-time treatment won’t work, so be vigilant in killing it when more pop up.
Fixing a Window That’s Painted Shut
If a window is painted shut, you need a thin-bladed putty knife to cut the layer of paint off. (Photo Illustration: StockSnap, Pixabay/N8tureGrl, Getty Images)
The windows in Bob Haskins’s home in Medford, Mass., appear to have been given the “landlord special” treatment. They’re painted shut and are impossible to open.
The term “landlord special” has become popular with renters who are referring to bad home improvement projects often done by landlords instead of professionals to save money.
Typical examples of the “landlord special” are painted-over electrical outlets and windows, shoddy plumbing or odd “fixes” that don’t really improve anything.
“How can I break them loose without breaking the window?” Bob asks.
First, be very careful working around glass and take your time. Wear eye protection and gloves, and if you’re on a ladder, practice the recommended safety measures.
Think about what’s holding the window shut: paint residue all around the perimeter. Use a thin-bladed putty knife to break the seal on the inside and the outside. Do it carefully and you’ll find the point where the window sash goes up against the molding or trim.
Slide the putty knife down the side, bottom and all the way around the window to where the two sashes meet together. Then, cut the paint out. Take your time and try to eliminate any contact points.
Next, take a flat bar and pry up the window. Don’t put too much pressure on one side or the other. Even pressure will lessen the chance of the window cracking.
In the Aisles of The Home Depot
October is National Fire Prevention Month, so it’s the perfect time to brush up on fire safety practices with your family. (rattanakun, Canva)
Fire can strike anywhere, anytime, and can start in a variety of ways. Fire safety equipment such as fire extinguishers, smoke detectors and carbon monoxide detectors, are essential must-have products for any home. The Home Depot has all different types of fire safety equipment plus other important fire safety tips for protecting your family and home.
Fire Education
Have a plan in place to keep you and your loved ones safe. Establishing a family fire escape plan will encourage everyone to remember a safe meeting spot outside of your home.
You and your family should practice a fire escape plan twice a year. Everyone should know how to get out and where to go in case of a fire.
Practice fire drills together and make sure children know what the smoke alarm sounds like and what to do when they hear one.
A fire extinguisher can be lifesaving when water cannot put out a fire, as is the case with most kitchen fires. Having a fire extinguisher within reach can help put out small, contained fires and create a path to safety.
Never rely solely on a fire extinguisher. This tool should be just one part of your home fire safety plan, alongside smoke alarms and an emergency evacuation plan.
Fire extinguishers are classified by ratings of A, B, C and D. These ratings determine the size and type of fire that the extinguisher can put out. Do your research to determine which is best for your needs. Some fire extinguishers are multi-purpose and have two or more ratings, such as A-B or A-B-C. Generally, multi-purpose fire extinguishers are the best types of fire extinguishers for the home.
Class A fires are a result of trash, wood, or paper.
Class B fires are a result of liquids or gases.
Class C fires are caused by energized electrical equipment
Class D fires are caused by combustible metals – due to their severe nature, class D fires are best handled by professional firefighters.
When using a fire extinguisher, remember the PASS method to operate the extinguisher properly:
Pull the pin.
Aim the nozzle toward the base of the fire.
Squeeze the lever slowly.
Sweep the nozzle from side-to-side, while moving toward the fire.
Smoke Alarms
Smoke alarms are a safety essential for every home.
When placing your smoke alarm, it is important to have at least one smoke alarm on every level of the home (including basements), in every bedroom, and outside each sleeping area.
Test monthly and use daylight savings time as a reminder to install new batteries in smoke detectors.
Carbon Monoxide (CO) Monitors
Every home with at least one fuel-burning appliance, attached garage or fireplace should have carbon monoxide alarms.
Having a fireplace with a gas valve or a potentially blocked chimney poses a risk for carbon monoxide (CO) poisoning, so include CO monitors in your fire safety equipment, especially since CO is undetectable via smell or sight.
Just like a smoke detector, it is important to place the monitors in every level of the home, kitchen, and bedrooms, with the addition of placing them at least fifteen feet above a fireplace.
The new Kidde HomeSafe suite of products includes the Kidde Smoke and Carbon Monoxide Detector, Hardwired with Smart Features and Voice Alert — an industry-first alarm that detects smoke, CO, adverse temperature, humidity levels and total volatile organic compounds (TVOCs), which include harmful particles in the air that can lead to health issues.
Kidde HomeSafe Wi-Fi-enabled devices include smart features that can be connected to consumers’ Kidde app, providing instant notifications of home safety threats directly to your smart phone.
Don’t stall a project just because you don’t have the right tool. This six-piece combo kit has all Ryobi cordless tools you need. Learn more >>
Simple Solutions
Wiping cement backer board with a damp sponge will help mesh tape adhere better. (Jupiterimages, PhotoImages/Lolostock)
Sure-Stick Mesh Tape — Seams in cement backer board must be covered with adhesive-backed mesh tape and then skim-coated with thin-set mortar. However, the tape doesn’t always adhere well to the backboard because it’s often covered with dust.
So, before applying the tape, wipe down the backer board along the seams with a damp sponge. Then, wait a few minutes for the surface to dry, then stick down the tape.
By the way, this Simple Solution also works well when using mesh tape to repair drywall damage.
Use a hacksaw to cut a 9-inch paint roller into three 3-inch rollers. (Kikoncos, Getty Images)
Making Mini Paint Rollers — When rolling paint onto narrow spaces, it’s best to use a 3-inch paint roller. The problem is that 3-inch roller sleeves cost $2-3 apiece.
You can make your own by simply buying a standard 9-inch roller sleeve and then using a hacksaw to cut it in thirds to create three 3-inch-long using a hacksaw. Trim any rough edges of the nap with scissors.
A 4-pack of 9-inch roller sleeves costs about $9, so each custom-cut 3-in. sleeve will cost just 75 cents.
Products and Links Mentioned
Further Reading
Radio Show & Podcast: Send us your question!
If you have a comment, general question about home improvement, or something we’ve featured on Today’s Homeowner, please fill in this form:
This week, we’re talking about chimneys and fireplaces with Mitchell Lovell, a second-generation certified chimney sweep with Coastal Chimney Sweeps.
In 2009, Mitchell started working at Coastal Chimney Sweeps, the company his father founded in 1979. Like his father, Thomas, he is dedicated to doing the best work to keep customers safe.
A special vacuum is used to clean soot from a fireplace and chimney. (Henfaes, Getty Images)
Cleaning and Inspection
What all’s involved in cleaning a chimney?
Mitchell: First, we move all the furniture out of the way and lay down a drop cloth around the chimney.
Then clean the chimney with a specially made vacuum with a three-stage filter and HEPA filter. This contains the soot and keeps the inside air clean.
We can get anywhere from five to 10 gallons of soot out of some chimneys!
At Coastal Chimney Sweeps, we perform a certified inspection for every scheduled cleaning. If needed, we’ll do an inspection with a Chim-Scan Video. This is a camera inspection system that scans every joint and connection to make sure everything is functioning properly.
Flexible stainless steel chimney lining is easier to maneuver than masonry liner. (PaulMaguire, Getty Images)
Relining a Chimney
What’s involved in relining a chimney?
Mitchell: A chimney liner prevents the transfer of heat to combustible parts that surround a chimney. Over time, the liner deteriorates, and this increases your risk of a house fire.
Basically, there are two types of chimney lining: masonry and stainless steel.
For a masonry liner, we use a bladder (chimney balloon) to block the bottom of the chimney, then spray firebrick cement inside to line it. Once the cement is dry, we deflate the bladder.
With a stainless steel liner, we run a flex-pipe metal liner through the chimney and connect it to block-off plates on the bottom and the top.
Stainless steel liners work well in older houses with multiple chimneys or chimneys with a lot of offsets.
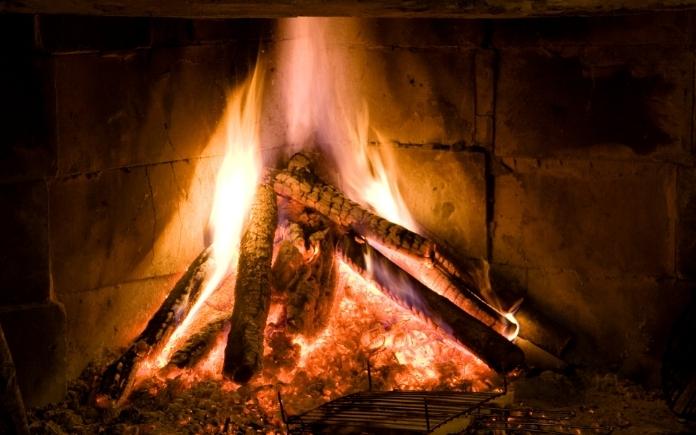
Always use dry wood in a fireplace. (Angelafoto, Getty Images Signature)
Preventative Maintenance
What are some general rules for preventative maintenance?
Mitchell: Most importantly, have your chimney inspected once or twice a year if you use it frequently.
Next, make sure your wood is dry and don’t use pressure-treated wood. Burning green wood, or wood that has a lot of moisture, creates a lot of smoke. Not only will it ruin your indoor air quality, but it will also clog up your chimney faster.
Also, sparingly burn lighter knot wood, also known as fatwood. This type of firewood comes from the heartwood of pine trees and is saturated in sap, so it burns easily. However, it has a strong smell and will clog up your chimney with a creosote coating very quickly.
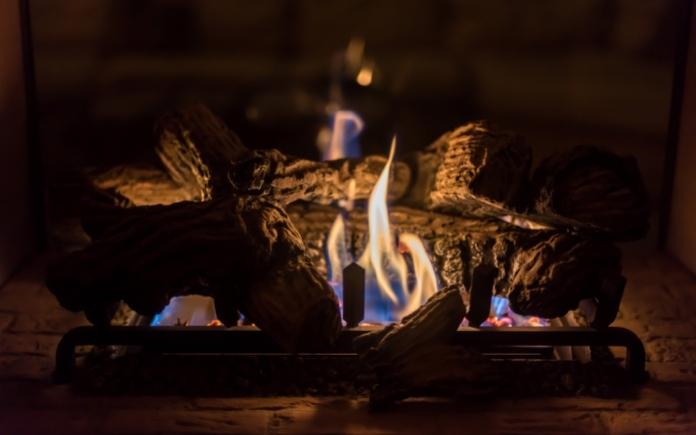
Gas fireplaces need to be inspected just like wood-burning fireplaces. (DavidPrahl, Getty Images)
Gas Fireplaces
What about gas fireplaces?
Mitchell:Gas fireplaces need to be inspected just like wood-burning fireplaces.
The embers and filter sand will burn up eventually and clog the gas lines and block the heat sensors.
If your gas fireplace isn’t lighting, the heat sensor is probably blocked.
Mitchell: Squirrels and birds will often build nests on top of a chimney if the screen is broken, which could then lead to a build-up of a lot of combustible material inside.
I’ve seen one chimney with eight feet of twigs built up inside it from squirrels.
Also, these nests can fall down on top of the damper and block the whole chimney.
Have your chimney inspected regularly to make sure nothing is hiding in it and the screen is still doing its job.
Don’t wait until a problem happens to have your chimney inspected. (Bill Oxford, Getty Images Signature)
Best Time for a Chimney Inspection
When’s the best time to have your chimney inspected?
Mitchell: Spring is the best time for a certified chimney sweep to inspect your chimney.
Business at Coastal Chimney Sweeps usually picks up at the end of summer, and by November, we book appointments three to four weeks out. So, by the time you notice the problem, you’re waiting for almost another month.
Clogged dryer vents can not only start a fire, but they also keep your dryer from running efficiently. (JodiJacobson, Getty Images Signature)
Dryer Vent Cleaning
What about dryer vent cleaning?
Mitchell: If your clothes take longer than one cycle to dry, you need to clean your dryer vent most likely.
Some dryer vents run 20 or 30 feet underneath a home’s slab foundation, which makes it easier for the vents to clog with not only lint but also water.
Also, if you don’t clean your vent out for years, the lint can solidify and completely block the pipe.
We use air pressure and agitation tools along with a vacuum to clean the entire vent. Dryer vent cleaning cleans the line that travels through the walls and ceilings to the outside vent of your home.
Once cleaned, we will clean out the connection piece, re-attach your dryer and re-check the vent while your dryer is operating.
Cleaning out your dryer vent extends the life of your dryer, reduces operation costs and makes your home safer for your you and family.
Further Reading
Ask a Question! (Podcast)
Ask a question and we could answer it on the “Today’s Homeowner Podcast!” We also may use it on our nationally syndicated radio broadcast or on todayshomeowner.com.
This week, I’m chatting with painting expert Brian Santos, a.k.a the “Wall Wizard.”
Brian is a fourth-generation painting contractor, author of best-selling home improvement books, and has toured for more than 25 years with his “Wizard Workshops” that empower audiences with simple tips, tricks, and techniques for successful home improvement projects.
He has shared his expertise on national TV, including “Good Morning America,” “Today,” and HGTV’s “Smart Solutions,” as well as on TLC and the Discovery Channel.
Brian is also the Director of Education for Fresh Coat Painters, the only role of this kind within any painting or home improvement franchise.
Brian was brought on to the Fresh Coat Painters team to educate and share his knowledge of the industry and business ownership within the industry to new and established franchise owners.
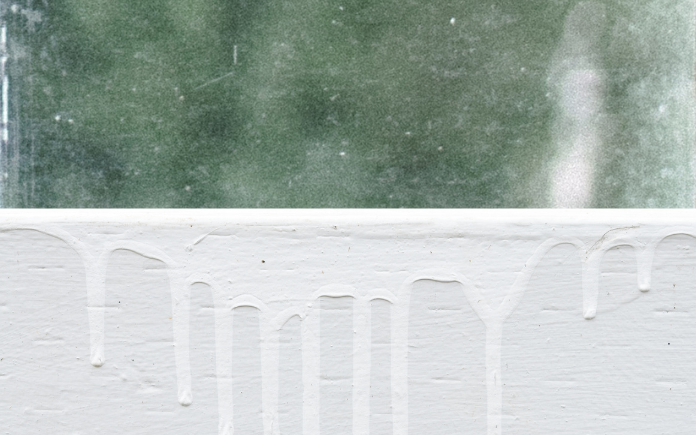
Less is more when using spray paint — apply two thin coats of paint instead of one heavy coat. (blueclue, Getty Images Signature)
Best Spray Painting Techniques
What are some of the tips you’ve learned over the years when working with spray paint?
Brian: The best spray painting tip I can give is to read the instructions. I know it’s a lot of information in tiny print, but it’s the key to your project’s success. Here are a few more tips:
Prepare properly. Don’t spray in the sun, clean the surface correctly, and make sure you hold the can correctly at the right angle.
Shake the can. It takes 30 seconds to two minutes to get the rattle inside to start moving. This is critical for thoroughly mixing the materials and aerosols so the paint sprays correctly.
Use a spray paint handle. It snaps over the top of the can, and when you pull the trigger, it’s like a gun. It depresses the spray nozzle and puts out the material correctly.
Apply two thin coats of paint instead of one heavy coat. This prevents any runs and drips, and also allows the chemicals to evaporate enough to allow the second coat to bond correctly.
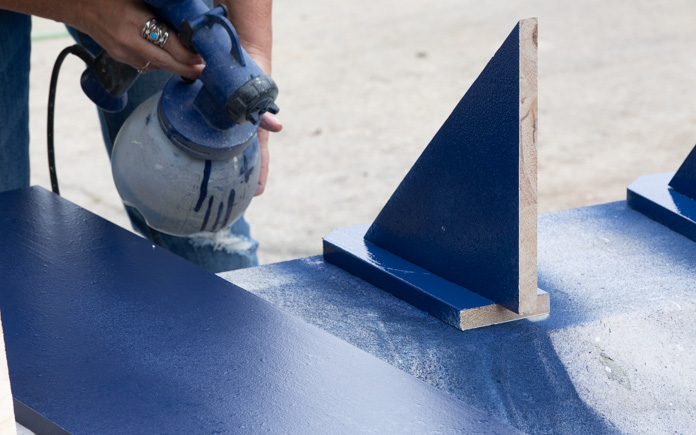
High-volume low-pressure paint sprayers apply a smooth and even coat. (3 Echoes Content Studio)
High-Volume Low-Pressure Sprayers
Tell us more about high volume low pressure (HVLP) sprayers and some of the applications they work well in.
Brian: I love these things — HVLP sprayers are almost like airbrushes. What they’re designed to do is atomize the material and you can control the flow and pressure.
The best one I can recommend is the Wagner Flexio 3000 HVLP Paint Sprayer*, which is available at Home Depot. It has a trigger and a dial for you to adjust the pressure, plus it has a corded and cordless option.
*This is an affiliate link. If you purchase this product, we will earn a small commission at no additional cost to you.
For the DIYer, this is probably one of the best tools you can have, but you have to maintain it and clean it regularly.
Here’s a tip for cleaning it: Put about three drops of fabric softener per quart of water in the sprayer and flush it out. This helps clean the sprayer between coats and lubricates the inside.
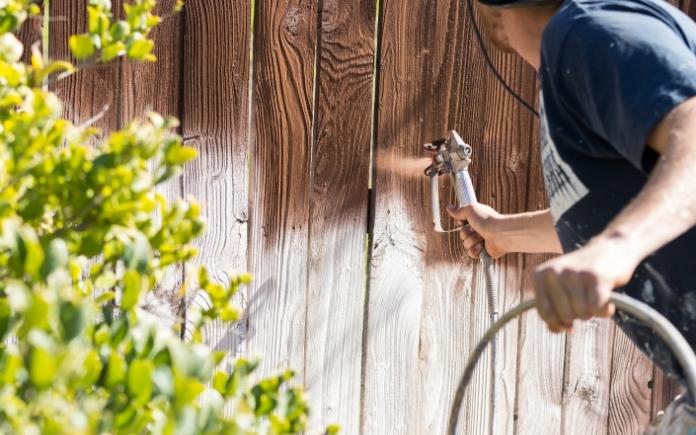
Airless paint sprayers speed up painting larger projects like fences. (Andy Dean Photography)
Painting a Fence With an Airless Paint Sprayer
What do you recommend for painting a fence?
Brian: An airless paint sprayer is great for painting a fence. You can typically find them at any tool rental center, and what I like about renting them is that they are maintained. Plus, if you were to go out and buy this, it would cost you anywhere from $500-$1,200.
When renting one, be sure to get one that has enough volume flow for your project. And while you’re at the tool rental center, ask an employee for a demonstration so you can see how to properly operate it.
Like I said before, always read the instructions and make sure the sprayer is primed correctly.
Properly clean the fence before painting. Use a garden hose and a cleaner to remove any algae, grease, grime and oxidation. The paint is only as good as the surface it’s bonding to.
You don’t need to use any primer because fence stains are designed to penetrate into wood fiber. There are also clear coatings, semi-transparent stains and solid stains that homogenize to even out any irregularities.
The important thing is to keep moving and backbrush along the way. Spray the paint or stain on, then have someone go with a brush behind it and work that paint or stain into the surface. This will make sure the paint or stain bonds correctly.
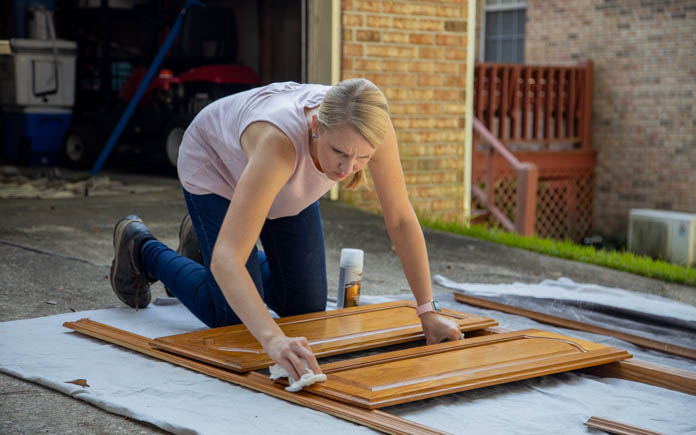
Brian: Replacing kitchen cabinets can cost you up to $20,000, so painting is definitely cost-effective.
A paint job is only as good as the surface you’re preparing, so first, ask yourself if you want to see the grain in your cabinets or not. All woods have a grain, and if the surface isn’t prepped currently, that grain will show through. If you don’t want to see any grain, call a professional to do the job.
For the DIYer who wants to do a little refreshing, here are the standard operating procedures on how to do it:
Clean the surface of the cabinets. Wet sand the cabinets with a Scotch Brite pad and an alkaline cleaner called Simple Green HD. This will break down the grease and lightly sand the surface at the same time, eliminating a lot of dust.
Degrease the surface of the cabinets after cleaning. Rinse the surface with 91-proof rubbing alcohol. Rubbing alcohol is a natural degreaser and deglosser. It evaporates and forces out the moisture that might be in the wood. This will create a sterile surface that’s ready for primer.
Prime the cabinets. The type of primer to use depends on if it’s a lacquer-coated or painted surface. Take a drawer face or part of the cabinet to a paint store and ask the professional to see what type of surface it is, and they can recommend what type of primer to use. Apply two thin coats of primer and lightly sand between each coat with 300-grit sandpaper.
Spackle and caulk between the two coats or primer. If you have floating cabinets, do not caulk between the floating panels. The wood needs to expand and contract with the normal humidity in the house, so caulking can cause the cabinets to crack.
Lastly, apply two even coats of paint to the cabinets.
To protect hardware on cabinets, use rubber cement. After painting, you can peel it off.
If you need to reset hardware, particularly hand pulls, use Bondo, not wood filler. If you slam the cabinet, the wood filler plug could pop out.
Protect surfaces around your painting area to prevent damaging spills. (travellinglight, Getty Images)
Common Mistakes
What is the biggest mistake homeowners make when tackling any paint project?
Brian: Not preparing a surface correctly. And also, not protecting other surfaces. It’s amazing how the paint will splatter if you’re spray painting, or dust will waft through the house.
Create a containment system, and make sure to put a new filter in the HVAC system after you’re done to lessen dust spreading throughout the house. The more you can contain and control, the better result.
Also, clean between steps. That’s where a lot of dust and debris can get into a paint project and the results are not as good as they could be.
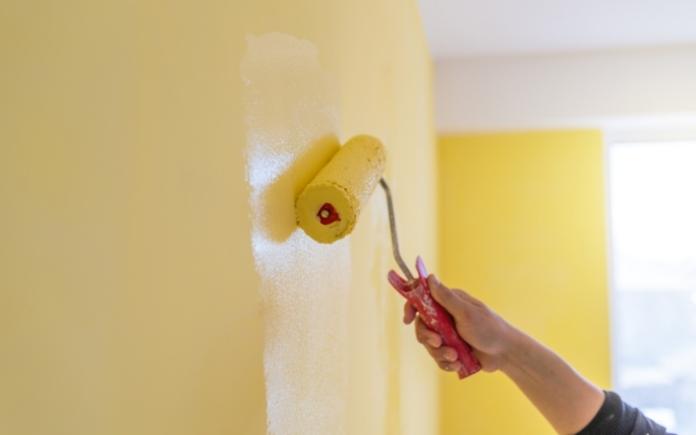
If you’re painting with a roller, the last stroke you do should be in the same direction, so you get the proper sheen and the right effect with the color. (cavanimages via Canva)
Brian’s Advice
“Wizards Work Wet:” It’s critical to do the entire surface while materials are wet. Have someone cutting in as another person is rolling paint to keep that wet edge so the color is consistent.
Also, if you’re painting with a roller, the last stroke you do should be in the same direction, so you get the proper sheen and the right effect with the color.