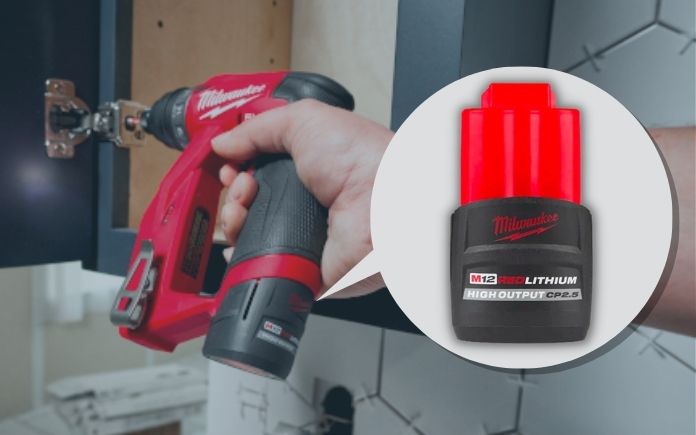
The 2.5 Ah capacity provides longer runtime and more power for demanding applications, allowing you to work longer without interruption. (Milwaukee)
Cordless tools increase your mobility to work on projects by freeing you from being tethered to an outlet. However, one of their downsides is they rely on battery power, which can run out quickly, especially when working on bigger projects. This is where a battery pack comes in.
This battery pack is compatible with all Milwaukee M12 tools, giving you the flexibility to use it with multiple tools for different projects. (Milwaukee)
Better Performance
The lithium-ion battery pack charges in about an hour, so you can get back to working on your project sooner.
And not only does it charge quickly, but it also delivers 25 percent more power and runs 25 percent cooler versus their other M12 Red lithium battery packs.
This increased performance gives you the same power and runtime in a lighter and more compact package. That means you can do more work with fade-free power.
Plus, the battery continues to perform well in temperatures as low as 0 degrees Fahrenheit.
We thought frozen pipes were a worry we’d left behind by moving to Florida, but last month’s arctic blast sent our temperatures plummeting into the low 20s for three nights in a row (with an all-time low of 18 degrees, which they’re calling a once-in-a-century event here in Northwest, FL).
This was especially concerning because Florida homes in our area aren’t always constructed with this weather in mind. Frozen pipes are bad news because water expands when it freezes, potentially causing pipes to burst or crack, leading to leaking or flooding.
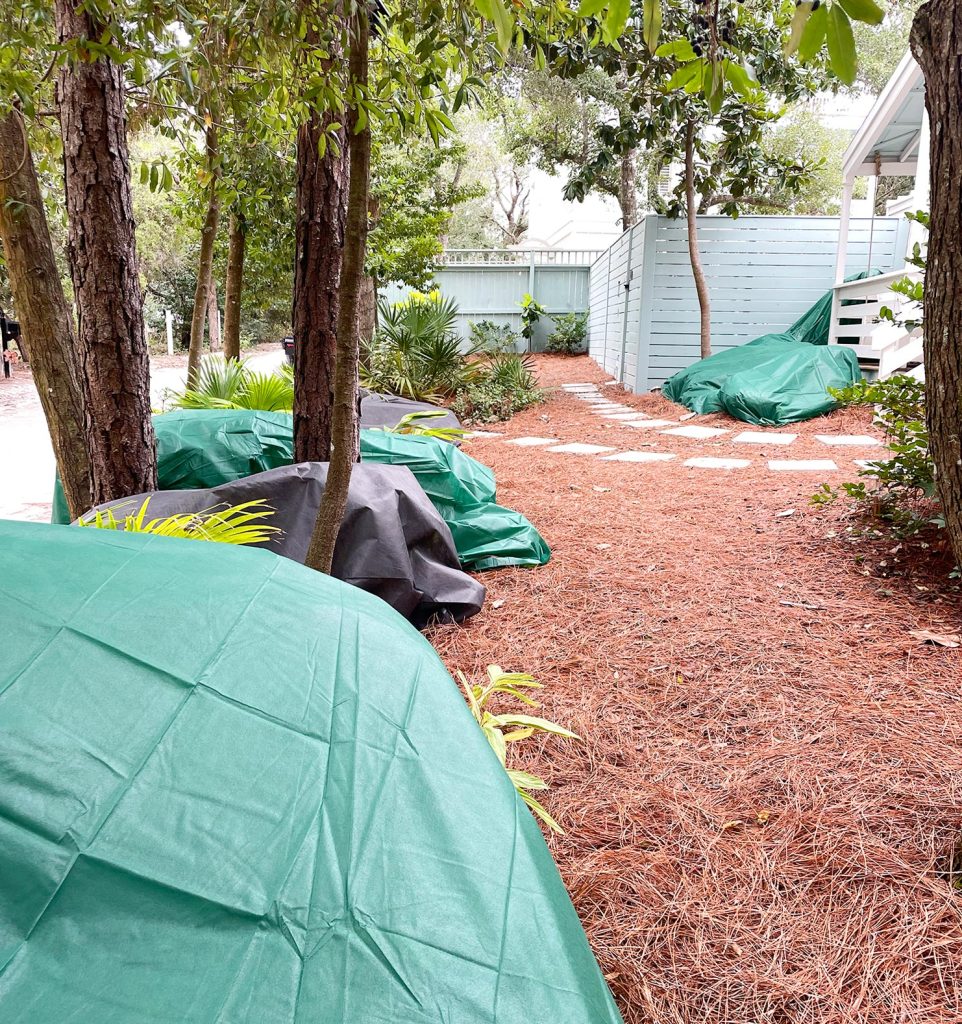
Luckily, with a few easy prevention steps we successfully kept our pipes from freezing! Which, sadly, isn’t something a lot of our neighbors can say. Many people we know had an issue with a pipe or two bursting – so we’re extremely grateful that the steps we took kept ours protected. Here are 5 things that worked for us, including a tip from a local plumber that saved our outdoor shower!
Tip 1: Identify Your Problem Pipes
The first thing to do is assess the plumbing in your home for spots that are especially prone to freezing. This step helps you to prioritize your efforts and tells you what areas you should keep a close eye on once the temperatures drop. This includes but isn’t limited to:
Outdoor plumbing fixtures like hose bibs or outdoor showers
Pipes in unconditioned areas like garages, attics, or crawl spaces
Plumbing on exterior walls
Pipes closed off from heat sources, like in indoor cabinetry or closets
Pipes exposed to wind, like on docks
Uninsulated pipes anywhere
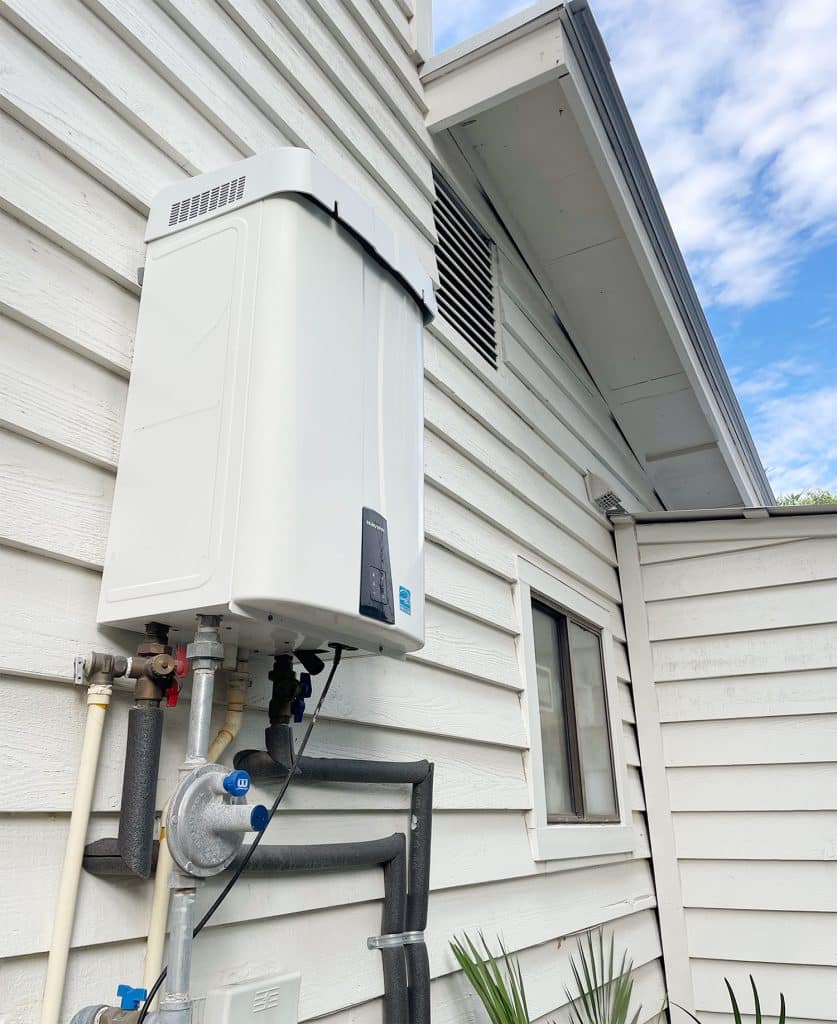
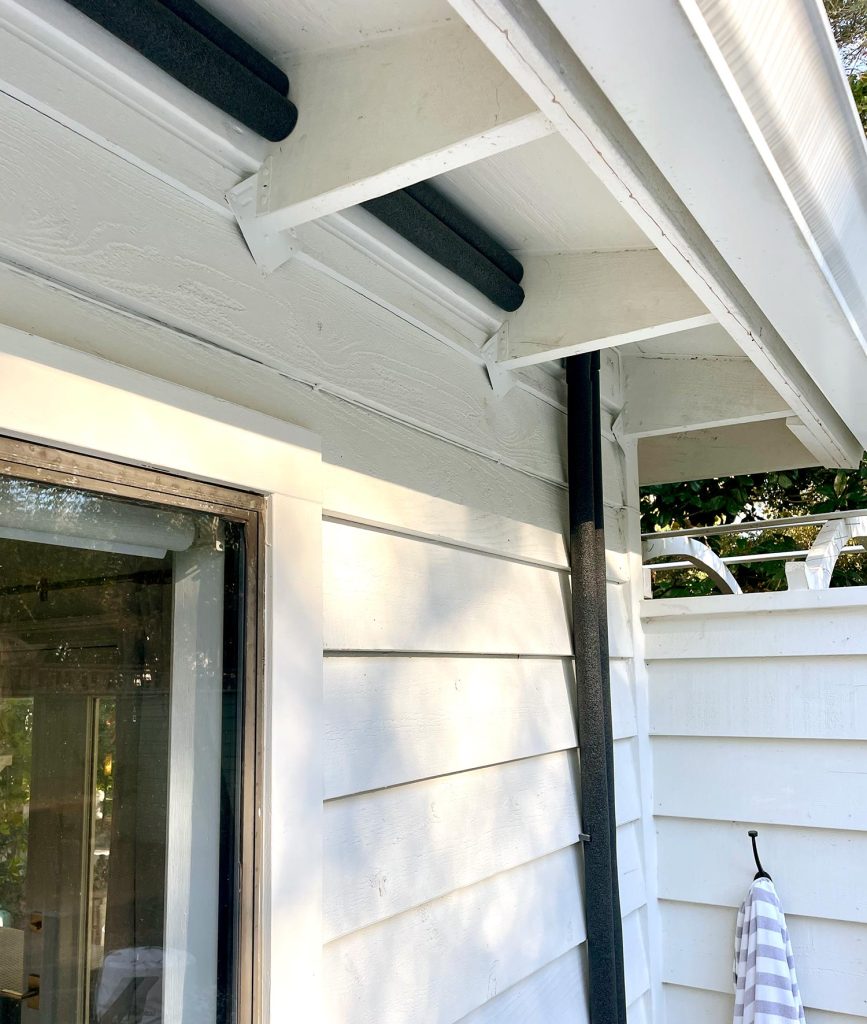
For us, our primary concern was our exterior plumbing – namely our water heater (seen above), outdoor shower, and hose bibs. We were less concerned about our interior plumbing because we were unlikely to lose power/heat (thanks to our whole-house generator & the peace of mind that gives us), and losing interior heat is usually what endangers indoor pipes. But here are some tips for preventing frozen pipes when your heat goes out, just in case.
Tip 2: Add Insulation To Your Pipes
Some of our exterior pipes were already insulated, like the water heater shown above. But many of them were not, including a long section of copper pipe running to our outdoor shower (you can see it exposed in this post). So as soon as we saw the forecast, we beat the rush to the store and bought several lengths of self-sealing foam tubular pipe insulation. They’re easy to install and only cost about $3 for a 6-foot tube. Just be sure to pick up some elbows and tees as needed too
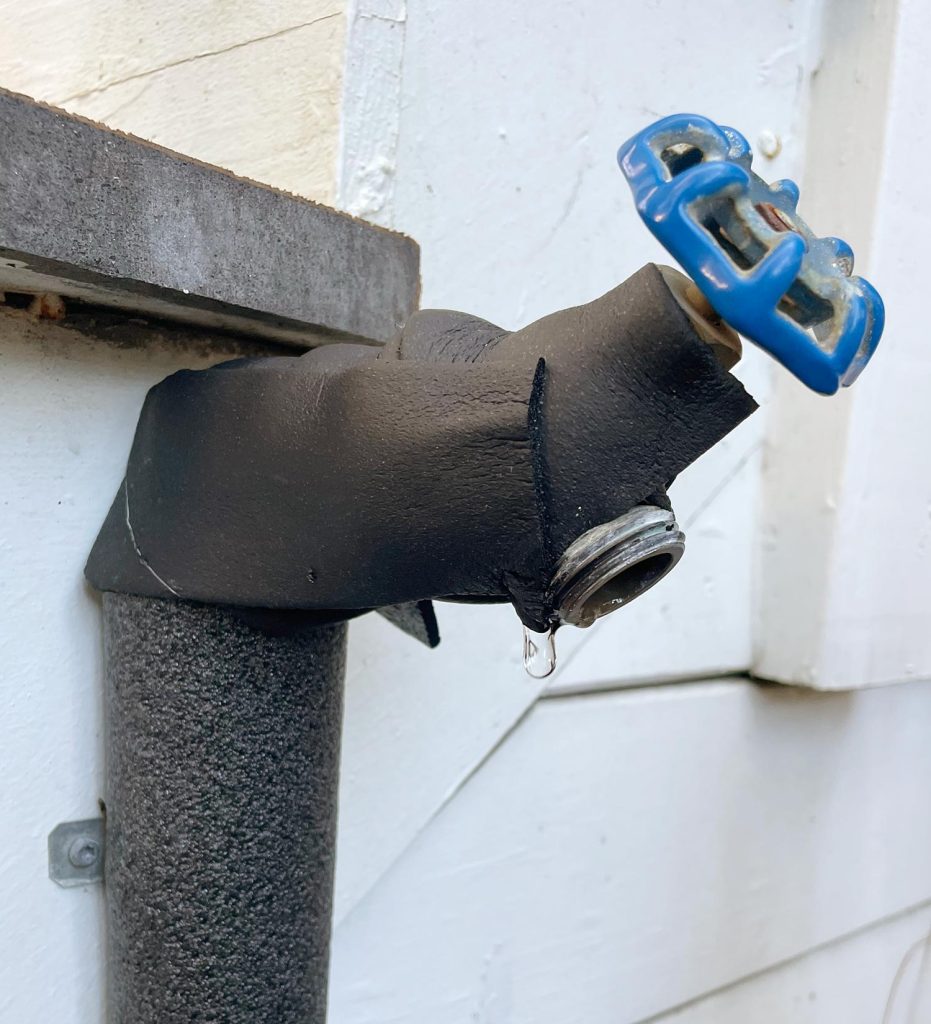
It took us about 15 minutes to install the foam tubes on any uninsulated outdoor pipes. In spots where we couldn’t fit a full tube, we used some of this adhesive insulating tape instead. This worked well on some of the knobby sections of certain hose bibs or where some pipes were installed snugly to the siding.
Lastly, we also double-checked some of the plumbing in our attic to make sure it was sufficiently covered in insulation. We have blown insulation up there and some of it had gotten moved off of a section of pipe, so we just brushed it back over. We read over and over again that even if your plumbing is inside, if it’s uninsulated and in an attic, basement, or garage it can still freeze and burst (in fact my aunt in Richmond had that issue with a pipe in her garage last year when it got extra cold up there).
Tip 3: Drip Your Faucets
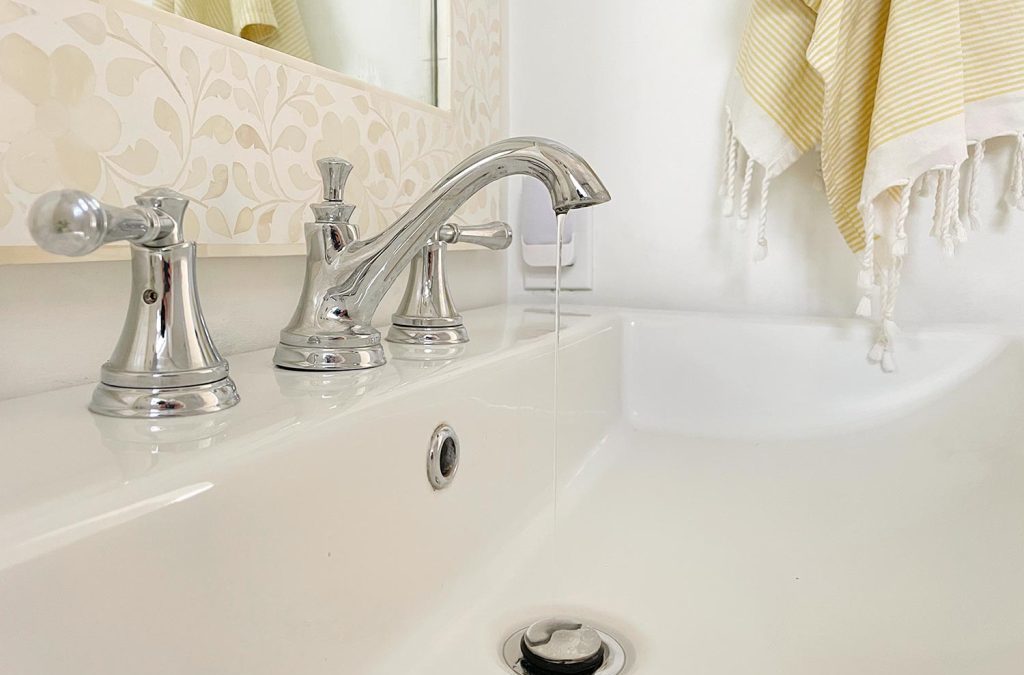
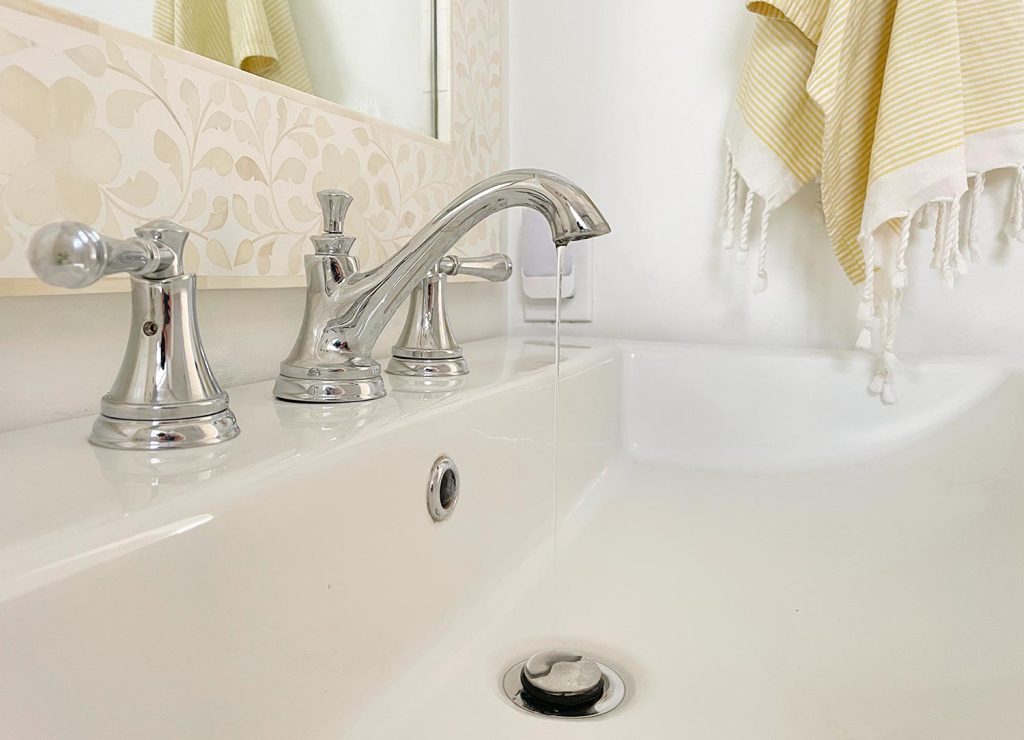
This tip is an oldie, but a goodie. Moving water can’t freeze as quickly as stagnant water, so forcing your pipes to keep flowing – even just a trickle! – is a great way to prevent frozen pipes. Just don’t forget to drip both your cold and hot water lines. We read quite a few articles that said you just need to drip the cold, but that definitely tripped up a couple of our neighbors and they had the hot water lines burst! So we definitely had a completely successful result by slightly dripping both.
It was easy to drip the hot and cold water lines inside. In the bathroom, we just turned both the hot & cold levers on slightly. And in the kitchen, we set our faucet halfway between hot & cold and opened it to a tiny trickle.
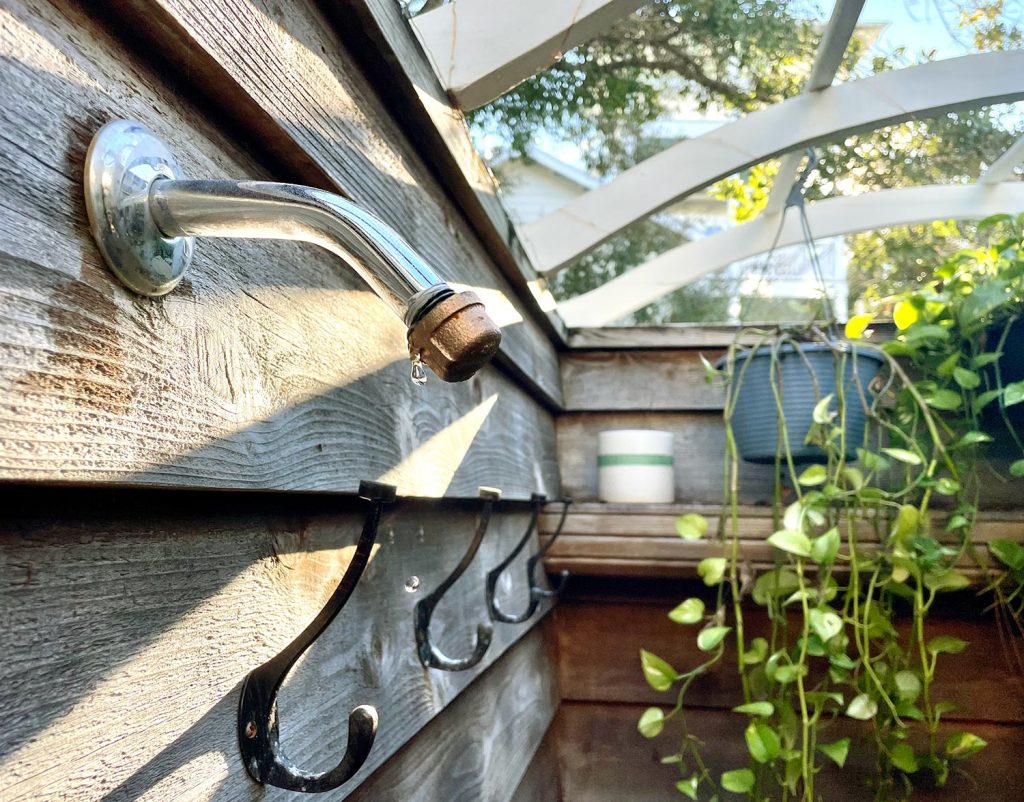
Our outdoor shower was a bit trickier because engaging the hot water would mean turning the shower on to a full spray, which was not something we were eager to do for 3 days straight while it wavered between lows of 18 and 22 degrees. Luckily, a local plumber gave us the tip to remove the showerhead and put a cap on it instead. Buuuuuuut, instead of screwing the cap on tightly, just hand-tighten it so that a little bit of water can still leak out. This allowed us to set the shower to a middle temperature (which ensured that water was slightly moving through the hot water and the cold water line), but still only let it drip instead of fully spraying 3 nights in a row. One of our friends had their outdoor showers break during the deep freeze and he later realized he had only let his cold water drip, so the hot water line was the one that froze and burst. And our neighbor across the street didn’t drip anything outside, so both of her shower lines burst.
Just to be safe, we kept all of our interior and exterior fixtures very slightly dripping for the full 3 days of our cold snap. We regularly checked our outdoor fixtures to make sure they were still lightly dripping and there wasn’t any ice build-up or blockage. We even put signs on our indoor sinks to remind our kids (and ourselves!) not to turn things off in an early morning haze or late-night bout of forgetfulness.
And while it may feel like a big “waste” of water to leave faucets on for so long, dripping should have negligible effects on your water bill. I read a few articles that said it was around 2-5 cents per sink per day. And think of it this way: it uses a lot less water than having a big leak that floods your house or yard!
Tip 4: Turn Your Water Fully Off
An alternate strategy is to just fully turn the water off to your home or portions of your home. For instance, if we had had a separate shut-off for our outdoor shower, we likely would’ve done that instead. It’s not like anyone was going to shower outside in that weather! It’s also a great option if you’re leaving town and won’t be home to keep your faucets dripping or to monitor for leaks. We actually turn off our main water anytime we go on a trip because burst pipes can happen in any weather (we have a friend who came home to a flooded first floor in the summer! AWFUL!).
Just remember that after shutting off the water, you still need to release the pressure of the water that’s still sitting in the pipes. Find your lowest plumbing fixture (usually an outdoor hose bib) and open it for several seconds until the flow slows down. This was a tip from a plumber friend in Cape Charles who told us that sometimes people turn off the water but don’t remember to relieve the pressure and they still come back to frozen pipes that have burst.
Tip 5: A Pool Looks Vulnerable But Can Typically Handle It
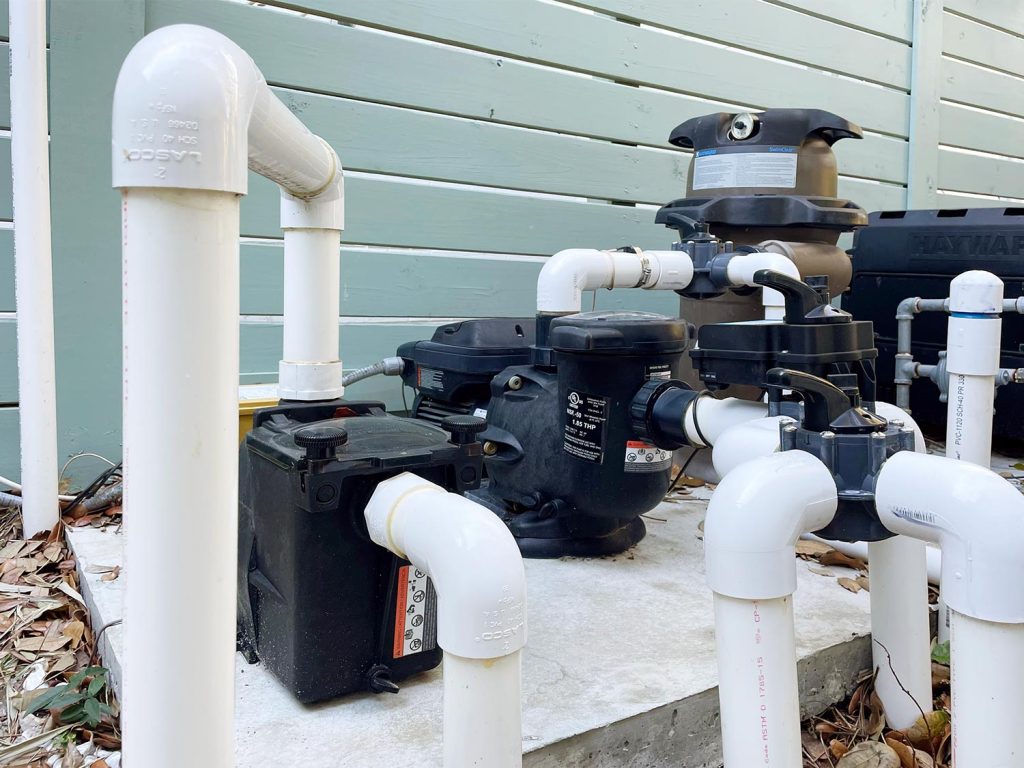
Like many Floridians, we have a pool that we use year-round. It’s not covered or winterized or anything else that is typical in colder climates (an open-year-round pool is the norm here). This was our first significant cold snap since our pool was completed so we were pretty worried at first. We saw a lot of EXPOSED and UNSINULATED plumbing around our pool equipment. Gulp.
But after speaking with our pool cleaner (who’s from Kansas, so he knows cold), we were assured that our system would be fine. Our Hayward controller has a built-in “Freeze Protect” mode that automatically engages whenever the air temperature drops below 36 degrees. This keeps the pumps, fountains, spa jets, and pool heater running on continuous cycles to ensure that the water never sits too long or gets too cold. Plus, he reassured us, that if the controller were to fail, it would take a long time for our large PVC pipes to freeze fully through and crack. Even older pools without “Freeze Protect” can usually just be manually set to cycle water and use the pumps to keep things from freezing, so that’s nice to know.
While we’d never advise you not to worry about your pool at all, we found a lot of comfort in watching our pool keep itself safe during the cold weather. We did absolutely nothing and it just kicked things on and off and moved water around for four solid days. We still checked on it to make sure we saw the fountains flowing and spa bubbling periodically – but it was completely self-sufficient and did a great job. So definitely check your system or consult your pool company before cold weather to know what to expect from your particular pool, but if it has somewhat recent technology (like Freeze Protect) OR you can just manually turn it on to keep water flowing, you should hopefully be all good. Oh and it really helps to ensure that you’ll likely maintain power. Lots of people have back-up generators here for that peace of mind.
Tip #6: Nothing’s Foolproof…
In general, these tips may not be enough to stop every single possible problem with pipes freezing depending on your particular situation and weather event, but we’re extremely glad we took these precautions and they definitely helped us feel a lot better about going into this latest arctic blast and, for us at least, they kept us from experiencing any plumbing issues at all.
More Freezing Weather Preparations
In addition to prepping our pipes for this unusually cold Florida weather, we also took several steps to protect our plants from freezing. You can read the 6 steps we took, including which ones worked better than others right here in this post.
*This post contains affiliate links, so we may earn a small commission when you make a purchase through links on our site at no additional cost to you.
This week, hear how to replace rotten soffit and keep an old paint color from showing through. (LindaCharlton, Getty Images Signature/georgejportfolio, Canva)
Hour 1
Hear how to keep an old paint color from showing through, what to do about peeling paint on a bathtub and more.
Covering Old Paint Color
Proper prepwork and the right primer is key to making sure the old paint color won’t show through the new. (georgejportfolio, Canva)
A homeowner is trying to change the paint color in a room, but the old color keeps coming back.
“I have now put three coats of primer on the walls, and the old color is still shining through. Is there anything I can do to cover up that paint successfully?”
There are a few steps you can take to try to improve the coverage of the primer:
Sand the walls: Sanding the walls will create a rough surface for the primer to adhere to, which may improve its coverage. Be sure to wipe down the walls with a damp cloth to remove any dust after sanding.
Use a high-quality, high-adhesion primer: Some primers are specifically formulated to adhere to difficult surfaces, such as glossy paint or oil-based paint. Using a high-quality, high-adhesion primer may improve the coverage of the old paint.
Use bonding primer: Bonding primer, also known as adhesion primer or glue primer, is a type of primer that is specifically formulated to adhere to difficult surfaces. It is designed to bond to surfaces that are otherwise hard for paint to stick to, such as glossy paint, metal, or plastic. Be sure to allow each coat to dry thoroughly before applying the next.
Tint the primer: This type of primer has been mixed with a small amount of paint pigment to give it a slight color. Tinted primer can be used to help cover up dark colors or imperfections on a surface, or to improve the overall appearance of the finished paint job.
If the paint is still showing through, you may need to paint the walls a dark color to conceal the old paint.
Peeling Paint on a Tub
Cracking paint on a cast iron tub can be caused by a variety of factors, including age, wear and tear, and exposure to water and other elements. (Hemera Technologies, Photo Images)
The paint is peeling like crazy in a new homeowner’s bathtub.
She says, “It has been like this since they moved in, and we’re wondering if it’s okay to take it all off.”
It is generally not a good idea to remove all of the paint from a bathtub. If the paint is peeling, it is likely that the underlying layer is not well adhered to the tub surface, which could cause further peeling and damage.
One option is to remove loose and flaking paint using a scraper or wire brush. Then, sand the surface to create a rough, porous surface for the new paint to adhere to. The tub should then be thoroughly cleaned and dried before applying a new coat of paint.
If the paint is in poor condition and cannot be salvaged, remove all of the paint and start fresh. However, this can be a time-consuming and labor-intensive process. It’s also important to be aware that the underlying surface may not be in good condition.
Before beginning any work on the tub, it is important to protect yourself and the surrounding area. Wear protective gear and cover any nearby surfaces with drop cloths.
If you are not comfortable refinishing the tub on your own, you may want to consider hiring a professional to refinish the tub for you.
Hour 2
Listen to learn the pros and cons of tankless water heaters, how to repair rotten soffit, how to keep snow from getting into ridge vents and more.
Pros and Cons of Tankless Water Heaters
Tankless water heaters are much more compact than traditional tank water heaters, making them a good choice for small homes or apartments. (djedzura, Getty Images)
A homeowner is thinking about replacing his standard water heater with an electric tankless water heater and wants to know the pros and cons.
Pros of tankless water heaters:
They can provide an endless supply of hot water: Because tankless water heaters heat water on demand, you’ll never run out of hot water.
They’re more energy efficient: Tankless water heaters only heat water when you need it, so they’re more energy efficient than traditional tank water heaters. This can result in energy savings of up to 40 percent.
They have a longer lifespan: Tankless water heaters have a longer lifespan than traditional tank water heaters because they don’t have a tank that can rust or corrode.
They’re more compact: Tankless water heaters are much more compact than traditional tank water heaters, making them a good choice for small homes or apartments.
Cons of tankless water heaters:
They have a higher upfront cost: Tankless water heaters have a higher upfront cost than traditional tank water heaters. However, the energy savings over time can offset this initial investment.
They require more maintenance: Tankless water heaters require more frequent maintenance than traditional tank water heaters. This includes cleaning the burners and replacing the filter.
They may not be suitable for large households: Tankless water heaters may not be able to provide enough hot water for large households with multiple showers and appliances running simultaneously.
They may not be suitable for homes with low water pressure: Tankless water heaters require a certain minimum water flow rate to operate effectively. If your home has low water pressure, a tankless water heater may not be a good choice.
Replacing Rotten Soffits
Left unrepaired, a rotten soffit can lead to further damage to the roof and the structure of the house. (LindaCharlton, Getty Images Signature)
A homeowner’s soffits are bowing downward and rotting. He asks: “I’m not sure what to replace them with. What do you suggest?”
It sounds like you may have an issue with the structural integrity of your soffits. Bowing and rotting soffits can be a sign of water damage or poor ventilation. If the damage is extensive, it may be necessary to replace the soffits entirely.
There are several options for replacing soffits:
Wood: Wood is a traditional material for soffits, but it requires regular painting or staining to maintain its appearance. It can also rot or become infested with pests if not properly maintained.
Vinyl: Vinyl soffits are low maintenance and resist rotting, but they may become brittle over time and can be prone to cracking in extreme temperatures.
Aluminum: Aluminum soffits are durable and resist rust, but they can be prone to dents and may require periodic painting.
Fiber cement: Fiber cement soffits are a more expensive option, but they are extremely durable and resist rotting, warping, and insect infestations.
Preventing Snow from Entering Ridge Vents
A ridge vent is designed to allow hot air and moisture to escape from the attic, helping to regulate the temperature and humidity inside the home. (skhoward, Getty Images Signature)
Snow keeps getting into a homeowner’s attic space through the ridge vents every time there is a blizzard with strong winds.
He says, “There is enough snow that I have to use a shovel to remove it. Snow gathers on the beam under the ridge vent where light bulbs are affixed. How do I alleviate this problem?”
There are a few steps you can take to prevent snow from entering your attic through the ridge vents:
Install snow guards: Snow guards are devices that are installed on the roof to prevent snow and ice from sliding off and accumulating at the eaves.
Install heat cables: Heat cables, also known as roof de-icing cables, can be installed along the eaves and the ridge to prevent snow and ice from accumulating. The cables use electricity to generate heat, which melts the snow and ice on contact.
Install a snow fence: A snow fence is a physical barrier that is installed on the roof to block the wind and prevent snow from blowing into the attic through the ridge vents.
Insulate the attic: Proper insulation in the attic can help prevent snow from melting and refreezing at the eaves, which can cause ice dams.
It may also be helpful to have a professional inspect your roof to ensure that it is properly sealed and in good condition. If the snow is entering through gaps or openings in the roof, these issues will need to be addressed in order to prevent future snow accumulation in the attic.
Best New Products
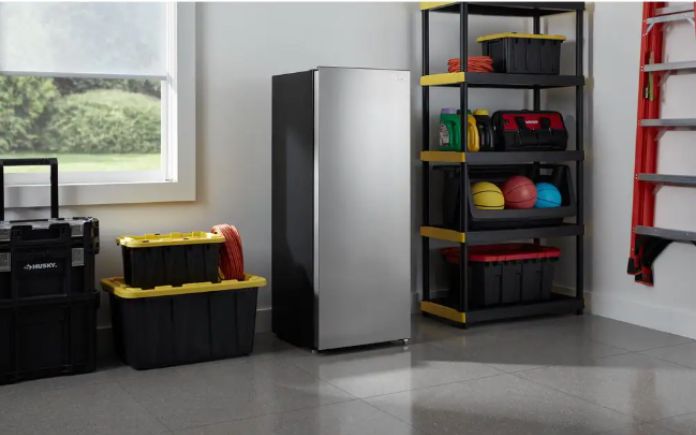
Whether you need to store frozen foods, produce, or beverages, the Vissani convertible freezer/refrigerator can handle it all. Learn more >>
Simple Solutions
Whether you need to tighten or loosen nuts or bolts, here’s the Simple Solution. (3 Echoes Content Studio)
Wrong Size Wrench? No Problem! — What do you do when an open-end wrench is a bit too large for the nut or bolt you’re trying to loosen or tighten? This happens when working on a metric fastener and you’ve only got a standard-size wrench or visa versa.
Well, you may have heard of the trick of using metal washer or coin to fill the gap in the wrench. And while that does work — sometimes — here’s a better solution:
Place the too-large wrench onto the nut or bolt and then jam a slotted screwdriver into the gap between the fastener and wrench.
The wedge-shaped tip of the screwdriver tightens up the fit and really locks the wrench in place.
To easily clean a microwave, pour 1 cup of water and 1 cup of vinegar into a bowl. (3 Echoes Content Studio)
Steam Clean Your Microwave Oven — Here’s an easy, effortless way to clean the inside of your microwave oven:
Pour a 50/50 solution of water and white vinegar into a glass bowl.
Set the bowl in the oven and microwave on high for several minutes.
Carefully remove the bowl, then scrub the inside of the oven with a scouring sponge. The steam created by the water and vinegar will loosen even the most stubborn, caked-on stains.
With grocery prices skyrocketing, it’s a great idea to buy items in bulk when you come across a good deal. However, you can only buy so much until you run out of cold storage space. That’s why having an extra convertible freezer/refrigerator is a great investment.
Think you have enough space in the fridge or freezer on a daily basis? All it takes is a party or family gathering to realize you need more of one or the other.
Whether you need to store frozen foods, produce, or beverages, this appliance can handle it all. And because it can switch between freezer and refrigerator modes, you can use it to store a wide variety of items, from ice cream to leftovers to party platters.