Having enough seating for your outdoor entertaining space is essential to ensure your guests are comfortable.
These chairs made from RumbleStone blocks make a great addition to any patio, particularly those made of pavers.
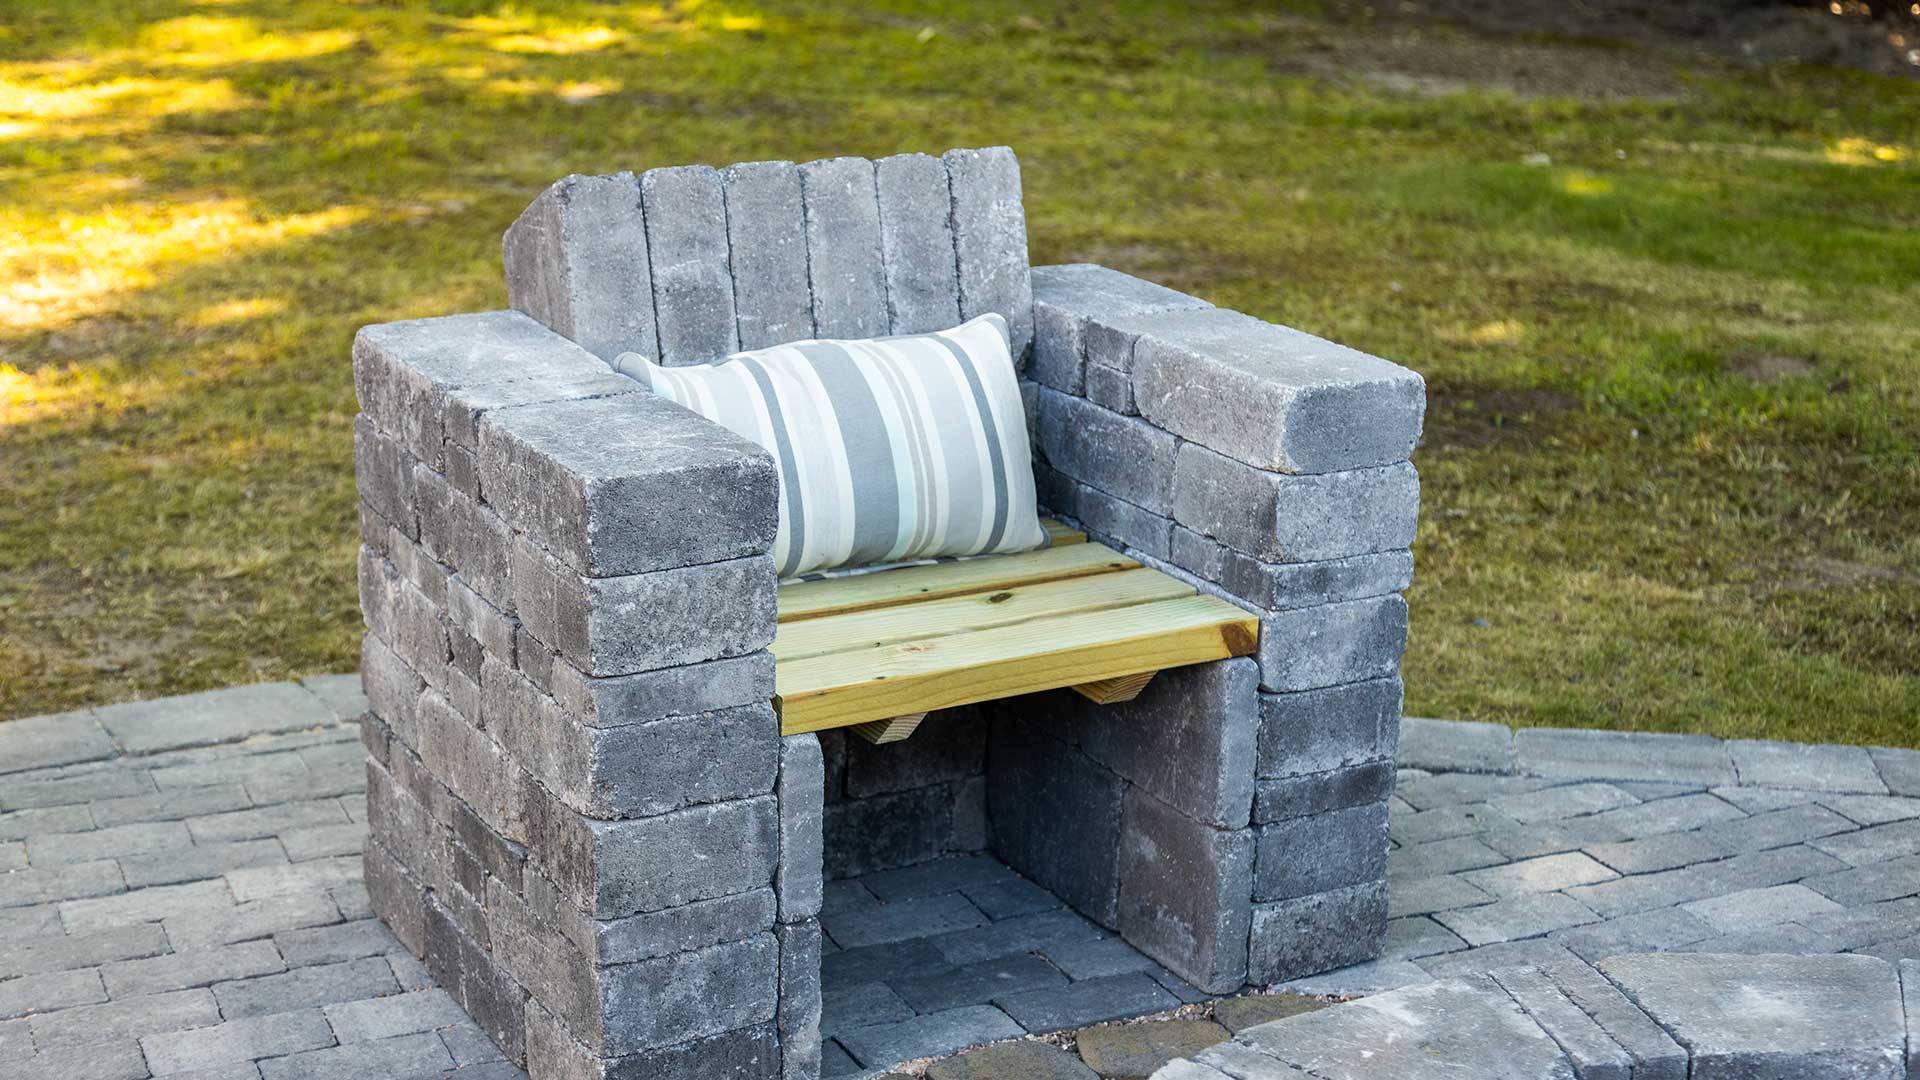
To create your own paver patio chair, first take small, medium, and large RumbleStone blocks and lay them out in a U shape. These are 24 1/2 inches deep, 35 inches wide.
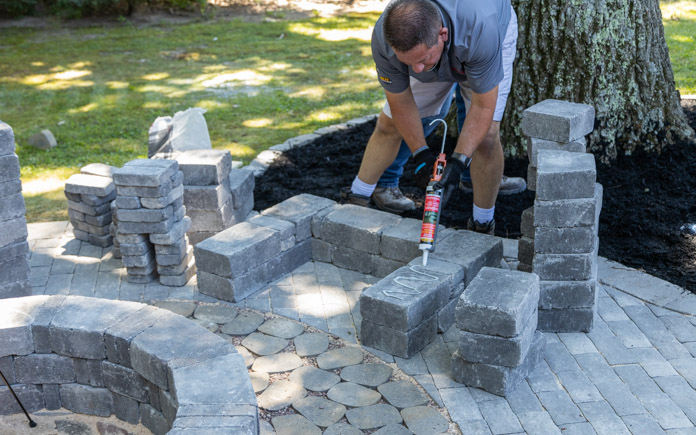
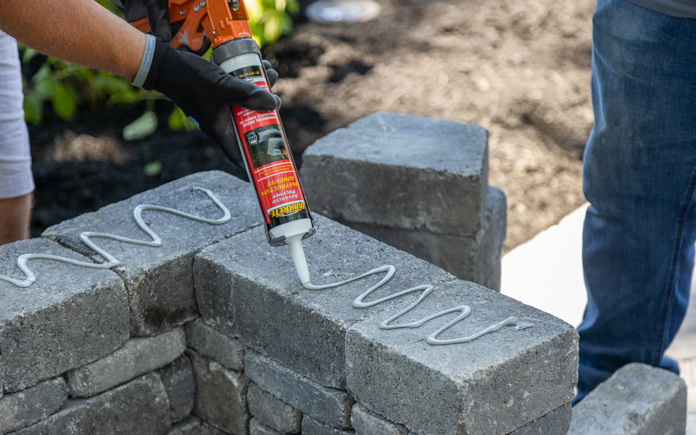
Next, apply polyurethane construction adhesive before the next row of stones are applied on top of the other stones.
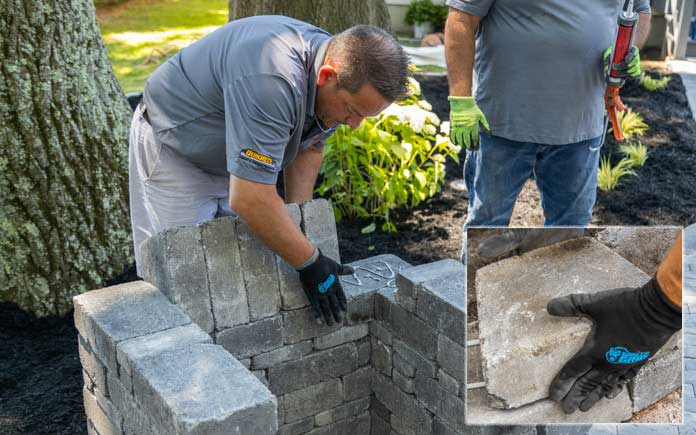
Be sure that the pattern of the stones varies for each new row. This way, no continuous seams will be seen from the bottom to the top of the chair. Also, this makes the chair stronger and visually appealing.
Use trapezoid blocks to fill in the back of the chair once it reaches 24 inches high. Apply construction adhesive to the bottoms and the sides of these blocks to form the back of your chair.
Inside the legs of the chair, glue four 45-millimeter-large blocks vertically to support the seat of the chair. For the seat, use four 2×4 wood planks and a couple of 2×2 pleats.
The result will give you complimentary paver chairs to go along with your paver patio!
Patio seating comes in many materials and price ranges — which can be good and bad.
For instance, ready-to-assemble outdoor furniture may be functional, but it also looks off-the-rack. And like everybody else’s outdoor furniture.
Whether you entertain a lot or just want a backyard paradise to personally enjoy, creating a set of paver chairs is a surefire way to do that.
Pavestone RumbleStone blocks, made of durable concrete, are engineered to mimic the appearance of weathered cut stone. They have a natural look and feel and give any outdoor living space texture and depth.
Best of all, they resist decaying and fading and don’t attract pests.
Patio seating made from these rustic building blocks is sure to be a crowd-pleaser and a conversation piece.
Follow this guide as inspiration to create your own paver chairs.
What You’ll Need
Start your paver chair with a U formation of building blocks.
How to Build Paver Chairs
1. Create a ‘U.’ Lay small, medium and large RumbleStone blocks in a U shape. Choose the size that works for you and cut any of the blocks as needed with a circular saw. (Just wear protective eyewear before you do.) This chair’s U shape is 24 1/2 inches deep and 35 inches wide.
Apply Quikrete Advanced Polymer Construction Adhesive to secure each bottom row of pavers to the one above it.
2. Bond the blocks together. Apply construction adhesive on top of each row of stones before you add the next row of stones.
3. Mix it up. Vary the pattern of stones for each new row. This way, no continuous seams will be seen from the bottom to the top of the chair. Also, this makes the chair stronger and more visually appealing.
Cut RumbleStone blocks into trapezoids to fill in the back of the chair.
4.Fill it in. Use trapezoid blocks to fill in the back of the chair once it reaches 24 inches high. Apply construction adhesive to the bottoms and the sides of these blocks to form the back of your chair.
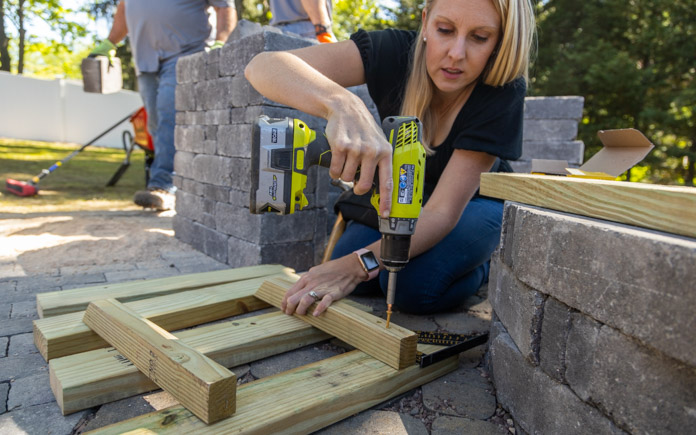
Secure two 2-by-2 cleats to four 2-by-4 planks with a power drill and deck screws.
5.Add the seat. Patio seating is nothing without the seat! So, inside the legs of the chair, glue four 45-millimeter-large blocks vertically to support the seat of the chair. Then, to create the seat, secure four 2-by-4 wood planks to a couple of 2-by-2 cleats with a power drill and deck screws.
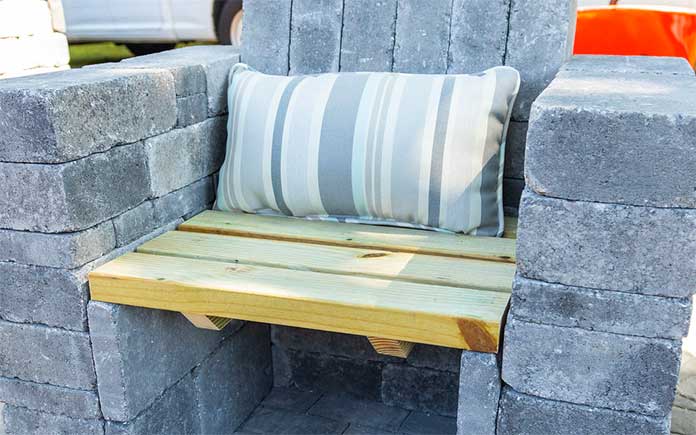
Buy a lumbar pillow or a full back cushion for each chair to soften its appearance and add comfort.
Make them Comfortable
These chairs add instant elegance to your outdoor living space, especially if you have a paver patio. Now there’s just one thing left to do: add cushions!
You can add a back cushion and leave the wooden seat as is, or you can add a matching seat cushion to soften the chair’s appearance and enhance your comfort.
Need shade? Add a matching patio umbrella or shade sail overhead to tie the look together, so your hardscape elements (the paver patio and paver chairs) match, and your cloth elements (the cushions and shade) complement each other, too!
The result is sure to rival your neighbors’ patio seating, and will make your outdoor living space the best-looking one on the block.
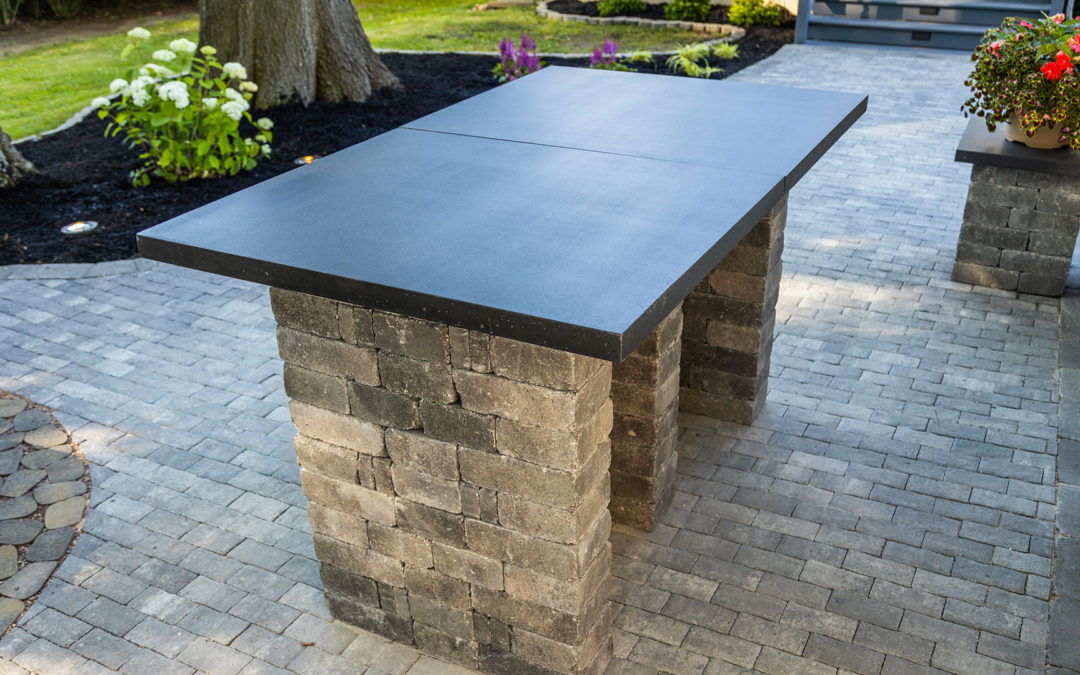
If your outdoor space needs a countertop, look no further than concrete mix to make one that’s stylish and will stand the test of time.
Concrete is durable and easy to clean, which makes it the perfect building material for a countertop, especially one that you will use outdoors.
So, whether you need a prep station for grilling or an outdoor table for eating, concrete is a great material.
Steps to Make the Countertop
Shape the forms. A sheet of melamine is perfect for the base because of its smooth surface. Screw strips of vinyl molding to the melamine for the edges, and then seal the seams with caulk. Also, coat the entire piece with lubricant so the concrete will release easily.
Add color. Stir in Quikrete Liquid Cement Colorto a bucket of water before mixing in some Quikrete Countertop Mix, as directed. Next, mix all of this thoroughly and add steel reinforcement to the melamine mold before pouring.
Pour the concrete. Now for the fun part. Pour the concrete mix into the mold — the steel reinforcement will need to be lifted up from the bottom of the mold before smoothing the top off-level with the top of the mold. Tap around the edges with a rubber mallet or hammer to release air bubbles.
Let this dry for a few days and then you have a ready-to-install concrete countertop!