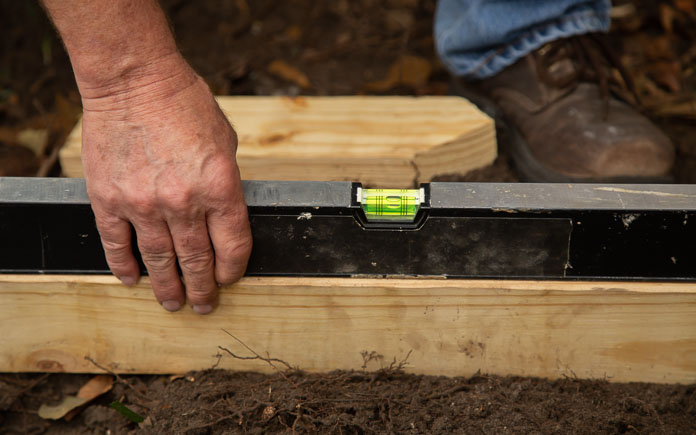
When you’re planning a concrete slab, it’s important to consider drainage. If it’s exposed to the elements, the slab should have enough slope so water can drain off of it.
For example, in the video above, we want the new concrete patio to be flush with an existing slab, so we slope the forms in the opposite direction by about one or two percent.
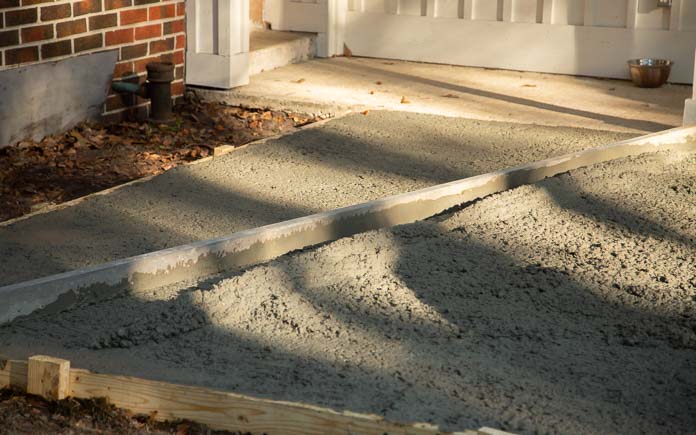
It’s also important that a slab be thick enough to be durable.
The thickness depends on what you’ll be using the slab for. Concrete driveways and patios need to be at least 4 inches thick, whereas concrete countertops only need to be one and a half inches thick.
In the video above, we want this patio to be at least 3-1/2 inches thick because we’re pouring the concrete over old pavers. So, we use a 2-by-4 gauge block to ensure we have that clearance.
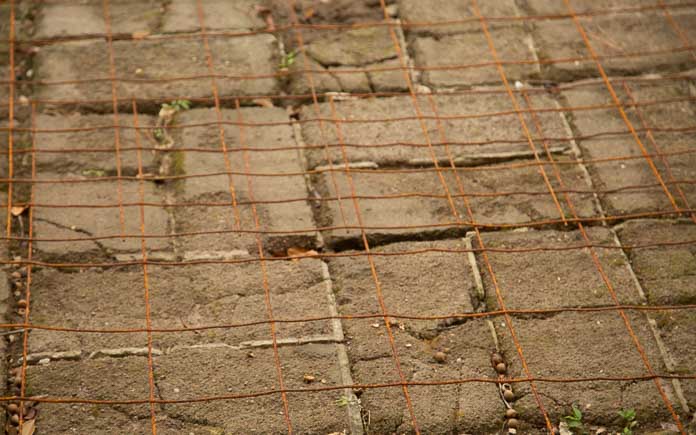
Steel reinforcement wire helps to keep the concrete slab from crumbling. (3 Echoes Content Studio)
3. Forgetting Reinforcement
Concrete slabs are high in compressive strength, which makes them great at resisting compression forces and impact. But when it comes to tensile strength, or the capacity to resist pulling-apart forces, concrete doesn’t fare as well, according to ConcreteNetwork.com.
This is where steel reinforcement wire can help. Steel reinforcement provides additional structural support for concrete slabs. This is especially important if it will be exposed to heavy traffic.
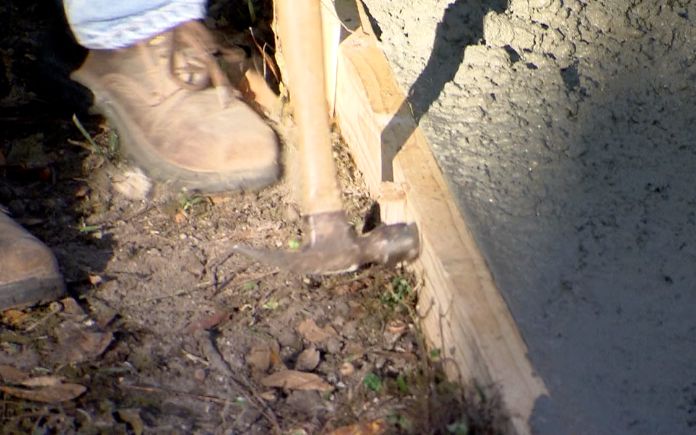
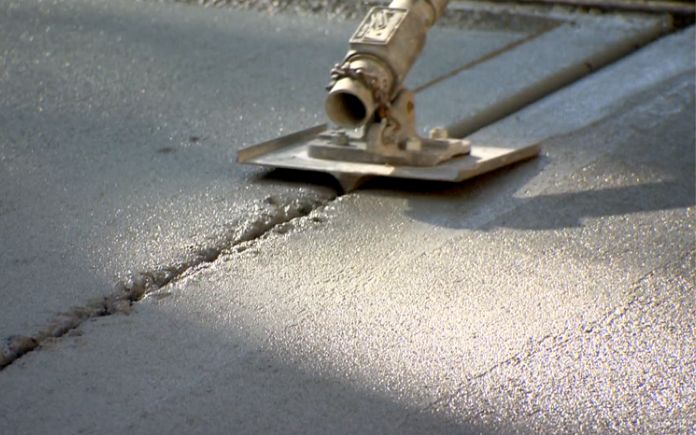
It’s not uncommon for air bubbles to develop inside the slab as the concrete is poured. So, it’s a good idea to tap the exterior of the forms to help release them and improve the slab’s strength.
As the concrete cures, it will shrink some and may crack. To accommodate for this shrinkage, use a concrete groover to add some expansion joints as the slab cures. This way, if the slab expands, it’s more likely to do it inside these shallow grooves, where it mars the finished surface of the slab.
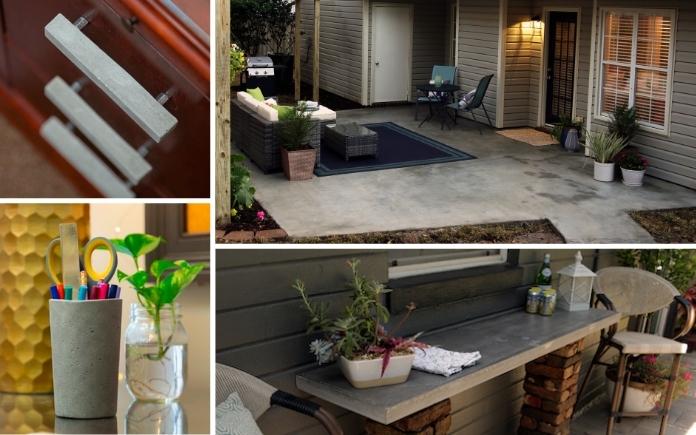
Think outside the box and use Quikrete concrete products for more than just sidewalks. (3 Echoes Content Studio)
Concrete products have evolved over the years and now you can use them for more than just driveways and patios.
In this special-edition Today’s Homeowner Podcast, Danny speaks with Allison Hunt, social media director and marketing project manager for the Quikrete Companies, the event’s sponsor.
Once you learn about Quikrete’s innovative products, you’ll rethink how you can use concrete.
This product provides a new, durable and wear-resistant surface over worn or scaled concrete. Because it has such great bonding strength, it will hold together even if the concrete under it fails.
Concrete countertops can be used in more settings than outdoor kitchens. (3 Echoes Content Studio)
Concrete Countertops
Want a one-of-a-kind countertop surface? Use concrete!
Quikrete Countertop Mix, specially made for casting concrete countertops, requires only a do-it-yourself attitude and the addition of water.
This concrete product, available in classic gray and a tint-based white for a monochromatic look, suits any style.
Concrete countertops aren’t just for the outdoors. Install one in your kitchen or use concrete in your office for desk space! It’s as simple as buying two file cabinets (to support the slab) and adding the slab on top.
Feeling inspired to create with concrete, but don’t know where to start? Quikrete has quantity calculators and how-to videos to help you with your concrete project, so you’ll be confident every step of the way.
For this bench, I used five 80-pound bags of Quikrete Concrete Mix. Here are the dimensions:
Bench seat: 48 inches long by 16-1/2 inches wide
Legs: 16 inches tall and 15-1/2 inches wide
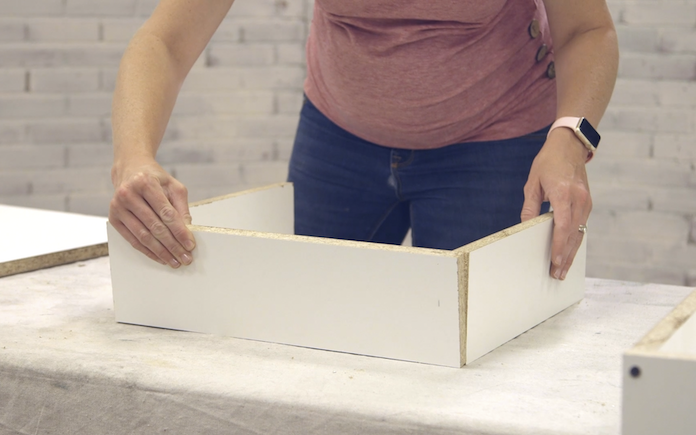
2. Build the Forms
Next, build forms for your concrete garden bench with pieces of melamine.
Melamine is an ideal material for concrete forms because it’s slick, releases well from concrete and leaves a smooth surface.
Cut the melamine to the dimensions you want for your concrete garden bench.
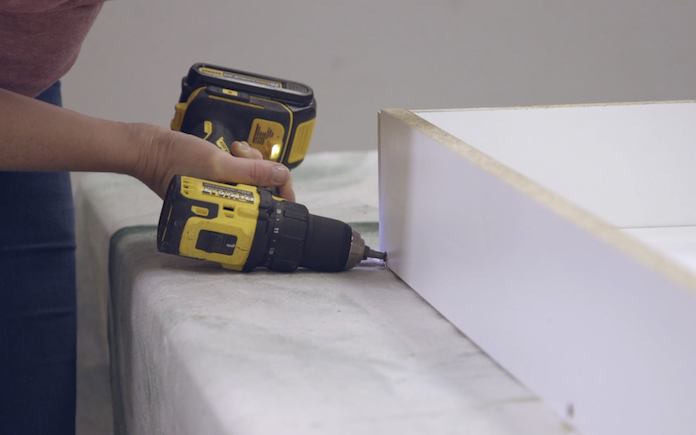
Use drywall screws to attach the sides of each form to the base. Your forms should look like an open box — the large piece will form the seat while the two smaller pieces will form the legs.
Next, seal the inside seams with caulk, cut reinforcement wire to fit into each form, and set the forms aside.
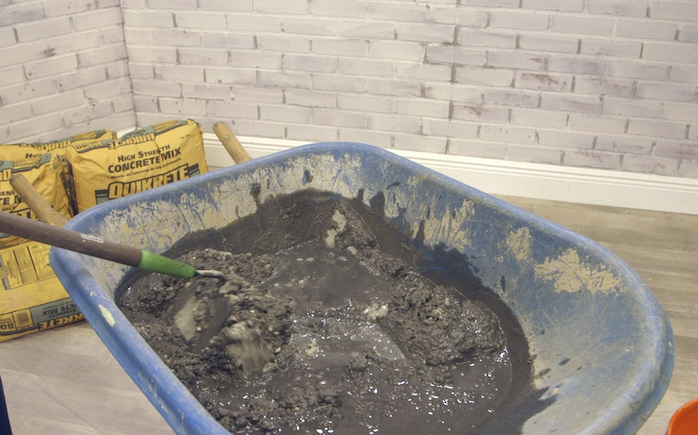
3. Mix the Concrete
For this amount of concrete, use a wheelbarrow and a garden hoe for mixing. Mixing in a wheelbarrow also makes it easier to pour the cement into the forms.
To get a deep gray finish for the concrete garden bench, add a 10-ounce bottle of Quikrete Liquid Cement Color in Charcoal to the water before mixing.
When mixing concrete, always use impervious gloves to protect your hands.
For each 80-pound bag of Quikrete Concrete Mix, add about 6 pints of clean water. Work the mix with the garden hoe and add water until it’s a stiff, moldable consistency.
Be sure there are no dry pockets of material and don’t leave standing puddles of water.
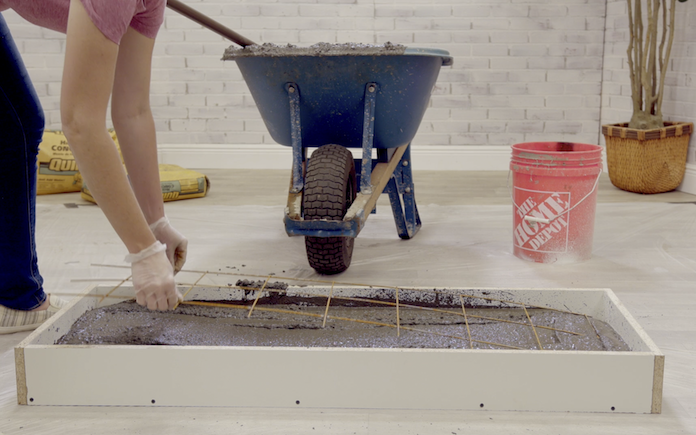
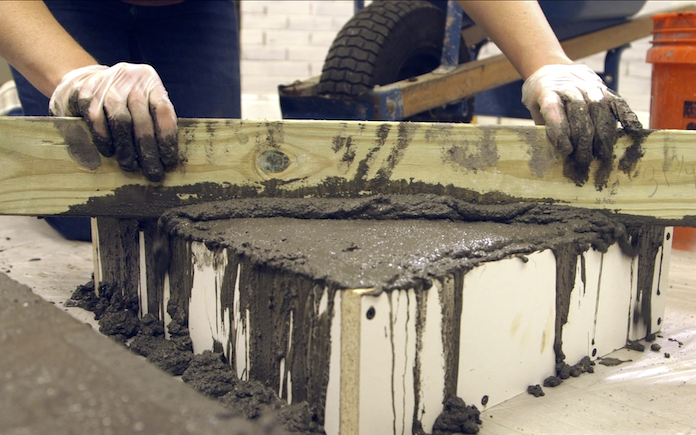
4. Pour Concrete Mix into the Forms
Pour the concrete mix into the melamine forms until half-full, and then add the reinforcement wire.
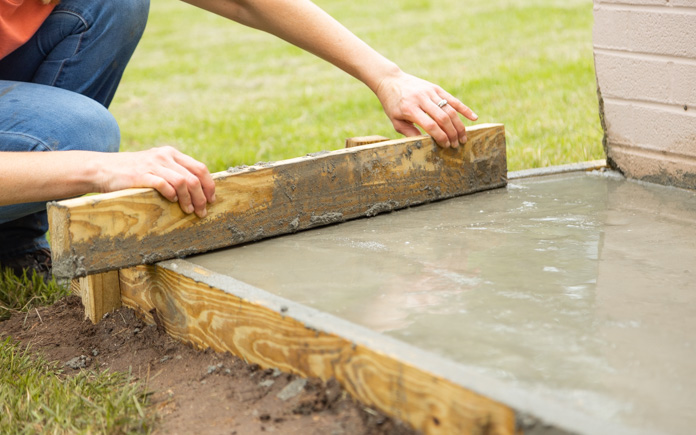
Fill the forms and screed off the excess with a 2-by-4 piece of wood.
Tap the forms on all sides to release air bubbles from the mix. Air bubbles would make the surface of your concrete bench look foamy once it’s dry, and nobody wants that!
Let your concrete dry for at least five days in warm weather at 70 degrees Fahrenheit or higher or seven days in colder weather at 50-70 degrees Fahrenheit.
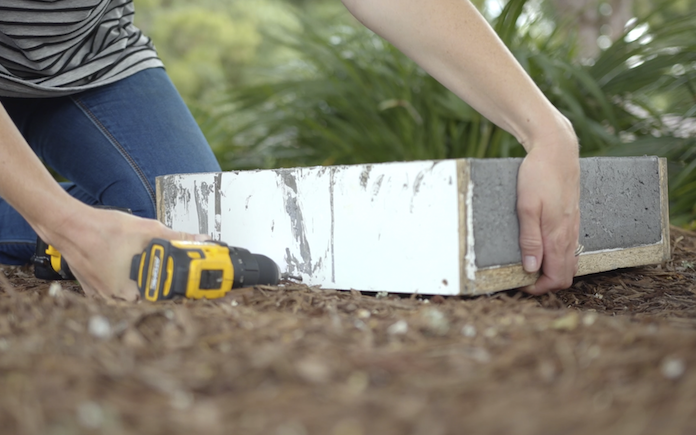
5. Remove the Forms and Assemble
Unscrew the drywall screws from the melamine forms to remove them once they’re dry.
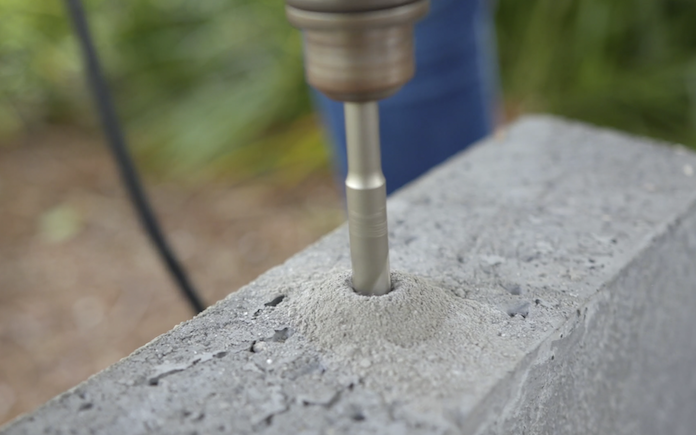
Set the legs upright and drill a hole in the top center of each leg. Then, drill two holes in the middle of the concrete seat to match the legs.
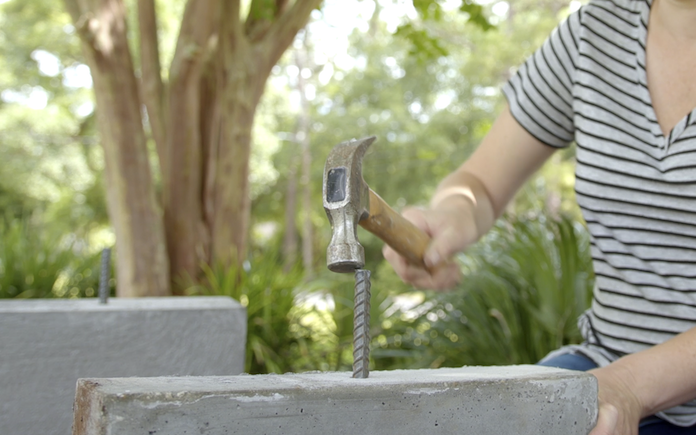
To secure the seat to the legs, hammer steel rebar pins into the leg holes and add Quikrete Advanced Polymer Construction Adhesive to the surface. This adhesive will keep the seat in place and prevent wobbling.
Now, attach the seat by lining up the pins with the holes in the seat. Use a level to make sure the bench is even.
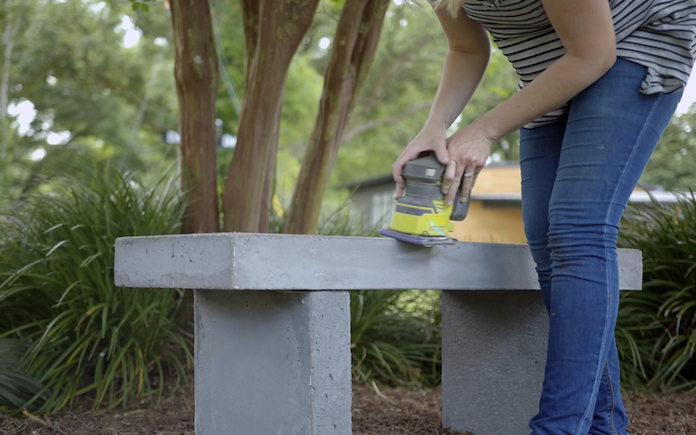
Use a sander with 120-grit sandpaper to smooth out any rough edges.
Finally (and this is my favorite part) enjoy your new concrete garden bench!
Whether a project is small, like steps, or large, like a patio, figuring how much concrete you need is calculated the same way. How the concrete makes its way to your home is another story.
Define Meausrements
Although most projects are expressed in square feet, when buying concrete, you measure in cubic yards — a project’s length, width and depth determine the amount needed.
Multiply the length by width (to find square feet), multiply that by depth or thickness (for cubic feet) and divide by 27 (the number of cubic feet in a cubic yard) to determine how much concrete (in cubic yards) is required.
Building material suppliers offer free conversion charts for the math-challenged. Or you can buy inexpensive “enter your dimensions” hand-held project calculators; and, there are project estimators on the Internet.
Once you’ve figured out how much concrete you’ll need, determine how to get it to the job.
Concrete is a mixture of sand, gravel, water and Portland cement. It can be obtained in three ways: separate dry ingredients that you mix on site, premixed in the sack where you just add water, and ready-mixed from a batch plant and delivered by truck.
There is a variation to the ready-mixed concrete, where you can haul a small amount using a trailer provided by the batch plant or a rental yard.
Of the three methods, raw materials mixed on site are used the least frequently due to the availability of premixed products.
Concrete Types for Different Projects
Small Projects
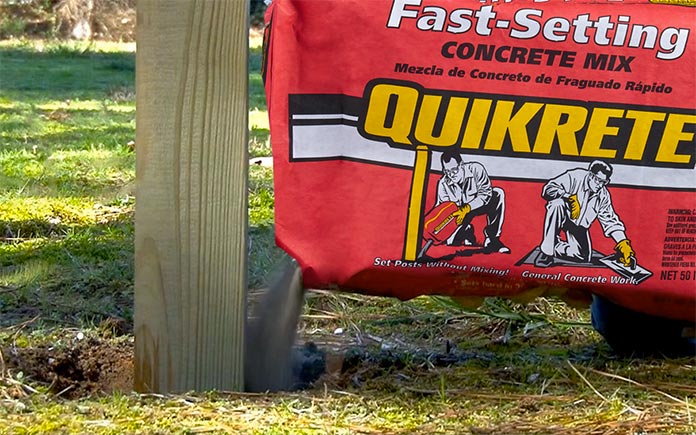
Premixed sack product is best for small projects like pouring a step or stoop, setting a few fence posts or making small repairs.
Premixed bags are reasonably priced. They’re available in two sizes: 60-pound (average $1.35-$1.80) and 90-pound ($2-$2.30). There are also a number of special mixes for setting fence posts and mailboxes.
They’re sold in 40- and 50-pound bags in two “no-mix” formats: 1) you dump the concrete into the hole, then add water, and 2) the reverse—first the water, then the concrete.
Patios and paths
Taking on a path, patio or other sizable project using anything other than ready-mix can be a disaster. There is a point of diminishing returns where the number of bags needed for larger projects simply overwhelms the economy of mixing it yourself.
For example, a 10-foot X 10-foot X 6-inch patio needs 1.85 cubic yards of concrete or about two yards, with waste. Using 60-pound bags that yield 1-half cubic foot per would require 100 bags. The concrete will set faster than you can mix and pour it, and you’ll end up with a poor pour and a nasty finish (unless you are willing to work in phases over time).
Ready-mix is a no-brainer for mid-sized to large projects, but what about cost? If you use 60-pound bags, concrete for a patio this size ranges from $135 to $180. But you’ll need to rent a mixer, which adds another $40 to $60 per day. While ready-mix reduces work, it also boosts the cost. Each cubic yard costs about $65. However, a fully loaded cement truck will hold 10 cubic yards—and partial “short” loads cost $15 to $20 extra for every cubic yard less than a full load.
So, our 1.85 cubic yard patio first requires purchasing two cubic yards (including waste) of ready-mix (2 X $65 = $130) plus another $135 for the “short load” (10 yards full load minus 2 yards = 8 yards “short” X $17 per yard average)—and now totals around $265. With assorted fees added (environmental impact, fuel surcharge, sales tax, etc.), the final cost is about $295.
For this project, ordering ready-mix would cost from $55 to $120 more than premixed — depending on where you buy your bags and rent your mixer. It’s a small price to pay to finish the job in a day and to avoid a concrete project going bad.
More on Ready-Mix
Beyond shopping price, there are things to know about ordering ready-mix. While some think a cement truck goes from site to site dumping concrete until it is empty, this is not how it works.
Rather, each batch is individually formulated and mixed for a specific use. The number of “sacks” of cement used per yard of concrete influences the strength of the fully cured product. For example, “five-sack” mix is stronger than “four-sack,” and so on.
Also, ready-mix concrete must be off-loaded within 90-minutes of being mixed or within 300 revolutions of the truck’s tank — whichever comes first. So, a supplier’s location is a key consideration. Too far away creates problems with “set” times and delivery cost increases.
Narrow your search to those companies closest to your home or job site, then go to work comparing costs and services. Also, determine the lead time needed.
The success of a project depends on knowing how much concrete you need and determining at what point a ready-mixed delivery makes more sense than premixed bags. Knowing there are other ready-mix options helps, too, such as:
“Short-load” services will mix from 1 to 9 cubic yard orders right on your job site. Average cost: $85 service charge plus $70 per cubic yard. Most charge only for what you use (in 1/4 yard increments).
Many building material suppliers and tool rental companies offer ready-mix concrete that can be hauled using a small trailer with about 1 cubic yard capacity that they will provide as part of the price. However, you’ll need to have a vehicle that is powerful enough to haul it and a project that won’t be foiled by the time it takes to go back and forth to the supplier, when more than one yard is needed. Average cost: 1 cubic yard, $75; 1/2, $65; 1/3, $55. Tip: When self-hauling ready-mix cement, regardless of distance, try to rent a “spin-tank” rig vs. “tub-type” trailer if possible—to avoid water separation.
The following tips can help determine the success (or failure) of a project:
Don’t get caught short when ordering material. Always add 10 percent to compensate for grade variations and spills. Trying to save a little can end up costing you a lot.
Concrete “cures” chemically over days. To prevent cracking, cover with plastic or damp fabric.
Additives strengthen, add color and speed or slow cure time. They are available for both premixed bags and ready-mix.
Concrete usually will require added support for strength—steel rebar, wire mesh, etc. Discuss project needs with a pro.
Cement is caustic. Wear eye protection and gloves, and wash off skin immediately. Do not breathe dust.
Concrete strength is measured in PSI (pounds per square inch) indicating the weight it can support or bear.
Strength is increased by adding more cement in the mix.
Weekend ready-mix delivery costs 5 percent to 10 percent more.
Ready-mix companies allow four to five minutes for each yard delivered. After that, the clock ticks at $2 per minute.
If concrete has to be pumped from truck to site, there are additional costs and charges. _Rather than ready-mix truck returning-disposing of order overages, plan ahead for additional use: fence posts, flag pole, stepping stones, etc. Why waste it?
One cubic yard of ready-mix yields nine contractor-size wheelbarrows of concrete.
Smooth concrete is not always best. Leave top of footings and foundations rough for better bond with mortars. Use a broom to texture walks and steps for safety.
So, you’ve decided to pour a concrete pathway, patio or slab — that’s the first step toward improving your home. But do you have the right tools to work with concrete?
I don’t mean the materials to make a form and fill it. For instance, you’d need lumber, gravel base, a level, concrete mix and a tamp, along with other stuff to make a slab. But rather, the basic gear and tools to complete just about any concrete job.
Before you start a concrete project, check this list. Chances are, you’ll need these tools.
Protective Gear
Remember, safety first! Exposure to concrete mix can irritate your skin, so always wear rubber boots, pants, a long-sleeve shirt and rubber gloves.
You’ll also need splash-proof, chemical-safe glasses to protect your eyes, and an N95 respirator to prevent inhaling concrete dust.
Finally, it’s a good idea to wear earplugs if you’re using a portable mixer. They can be noisy!
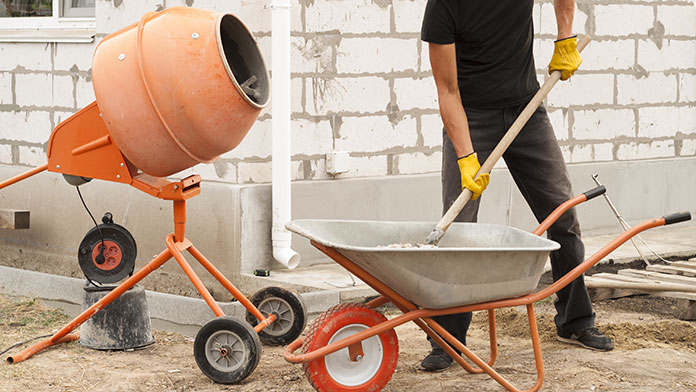
Wheelbarrow
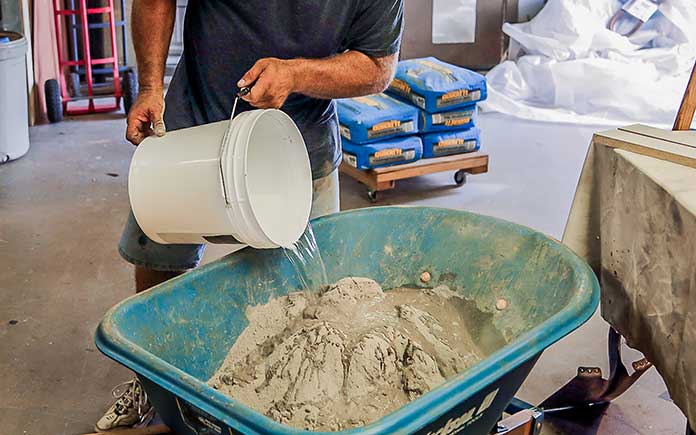
If you need to haul bags of cement or concrete mix around your yard, load them up in a wheelbarrow. Your back will thank you! Wheelbarrows are also perfect for mixing small amounts of concrete mix and water.
Just empty the concrete mix into a wheelbarrow and form a depression at the center of the mix. Then pour two-thirds of the recommended water amount into the depression. (An 80-pound bag of Quikrete concrete mix requires about 3 quarts of water.)
Finally, work the mix with a hoe and gradually add water until it has a uniform consistency and looks like thick oatmeal.
When it comes to mixing concrete, a wheelbarrow and hoe get the job done. But if you want to really speed up the process and save your energy, get a portable concrete mixer.
Ready-to-assemble mixers come with a stand, mixer barrel, mixing tines, wheels and hardware. A decent concrete mixer with a 5-cubic-foot barrel could cost $300 to buy, or you could rent one for a few hours for about $35.
Either way, this machine takes the guesswork — and elbow grease — out of mixing concrete. So you can focus on pouring a patio in record time!
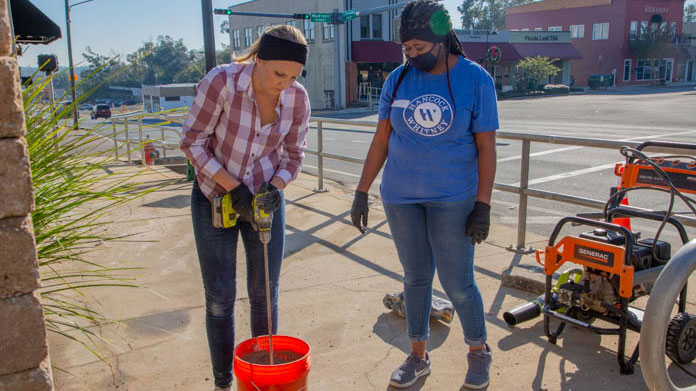
Bucket, Drill and Mixing Paddle
Looking for a low-budget portable concrete mixer? Look no farther than a 5-gallon plastic bucket, a drill and a mixing paddle.
Just attach the mixing paddle to the drill, pour the concrete mix and water into the plastic bucket and start drilling! Or, really, mixing.
If you’ve got a drill and a bucket on hand, you can buy a mixing paddle — compatible with a corded or cordless drill — for just $15. It’s the perfect DIY setup for small concrete projects!
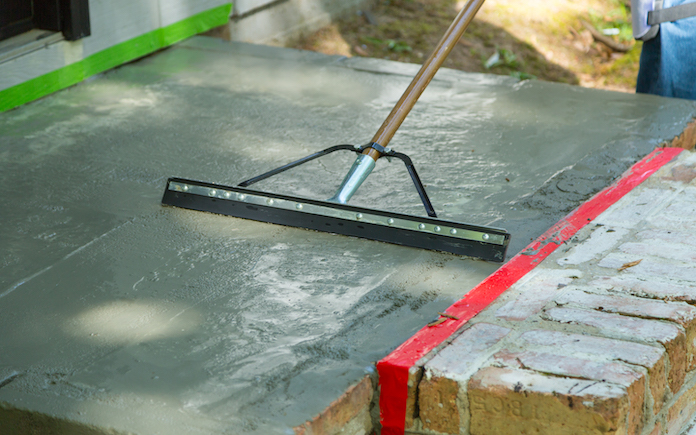
Screed
A screed is a long straight edge that you run back and forth over concrete to level it. Reinforced aluminum screeds, ranging from $30 to $100, are available at the home center in different sizes for most needs.
Or you can do what I do — save money and make your own!
You’ll need two pieces of wood: one strip should be long enough to extend over the form’s edges while a 1-by-4 nailed underneath it should be short enough to fit inside the form.
Just run the screed along the formwork edges to smooth the concrete surface, and remove any excess concrete mix.
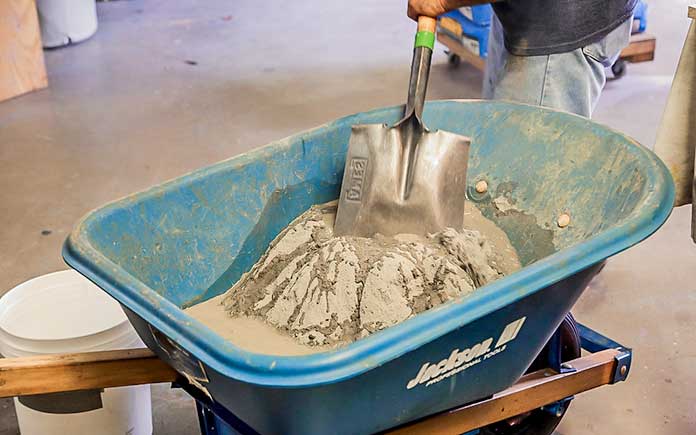
Shovel
No matter how many concrete projects you’ve worked on, there’s no such thing as a clean pour. You’ll always have voids to fill, and a shovel comes in handy to move small amounts of concrete.
In addition, remember that excess concrete mix from screeding the surface? You’ll need a shovel to remove and relocate it to needed areas.
Pro tip: A square shovel, as opposed to a rounded gardening shovel, is the best tool for this job. But in a pinch, any shovel will do.
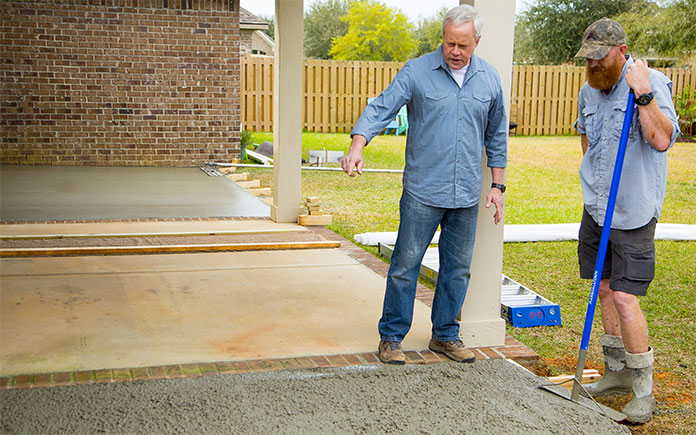
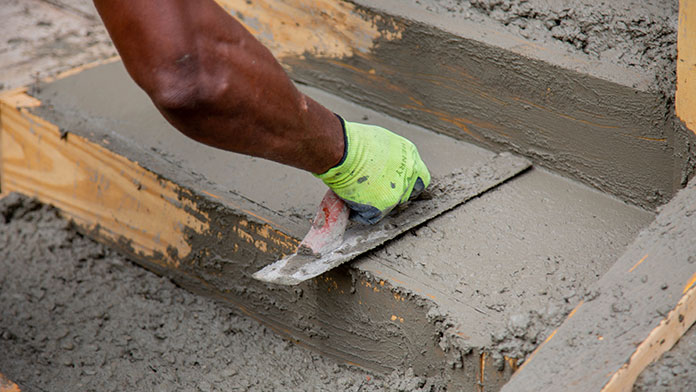
Float
Screeding poured concrete levels the surface, but you still have to deal with imperfections. That’s why you’ll need a float to help finish the job.
Just after the surface has lost its sheen, and the concrete starts to harden but is still workable, run the float over it with an arching motion.
Running a float over screeded concrete compacts the concrete — so it’s denser and stronger — and smooths the surface. It may cost $12 at the home center but the impact is priceless.
(Photo: The Home Depot)
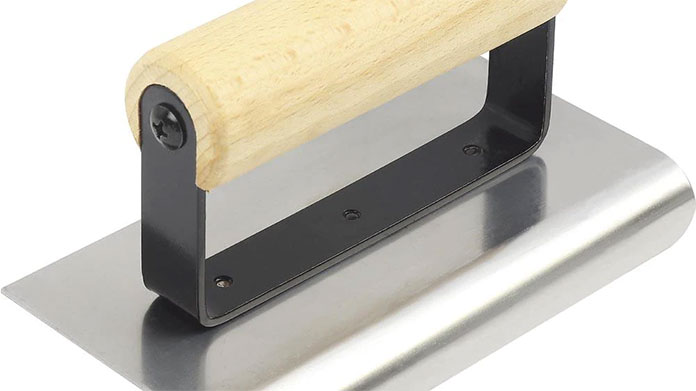
Edger
A concrete slab with rounded edges has a finished look that’s attractive and functional. Use a concrete edger (just $10 at the home center) to prevent chipping and spalling.
Wait until the concrete is firm and has lost its sheen, but is still workable, and then start edging.
This step isn’t necessary for a concrete subfloor that won’t be seen or directly walked on, but it’s a must for garbage can pads, patios and sidewalks.
Stiff-Bristle Broom
Whether you’re pouring a new concrete slab or resurfacing an old one, you need to texture the surface with a stiff-bristle broom. This gives the concrete a non-slip surface that’s uniform in appearance.
Applying the texture follows leveling the surface with a screed and smoothing it with a float. Wait until the concrete starts to turn solid, but while it’s still soft.
Stiff-bristle brooms range from $20 to $50 at the home center. Whichever option you choose, it’s a small price to pay for the peace of mind that comes from making the slab safer to walk on.
Groover or Saw
Concrete, like most building materials, expands and contracts as seasons change. It’s important to minimize the cracks in a slab to preserve its look and function.
One way to do that is to make straight-line control joints just after the concrete starts to harden and the surface has lost its sheen.
You can cut control joints using a groover and any straight board. Just hold the groover parallel to the board at predetermined locations and run it vertically down the slab.
Control joints should be cut to at least 1/4 the slab’s depth and at equal intervals. For instance, add grooves every 10 feet for a long driveaway and every 4 feet for a sidewalk.
Use a bronze or heavy-gauge stainless steel groover (approximately $25) to score freshly poured concrete. Or you can just saw cured concrete.
These are the basic tools needed to create and finish most concrete projects. What project are you working on? Let us know in the comments below!