If you want a good night’s sleep, some simple modifications around your home can help you rest easier.
Many of these changes don’t require a lot of extra effort and can make a big difference in your sleep patterns.
Here are some things that you can do to sleep tight at night.
A smart thermostat can meet your climate control needs, and help you optimize those to reduce your utility bill.
1. Set the Thermostat for Sleeping
Cooler is usually better than warmer when it comes to bedroom temperatures. A cooler room allows your body’s temperature to lower to a level that’s required for sleep.
According to WebMD, a temperature ranging between 65 and 72 degrees Fahrenheit is ideal for most people, but the right temperature for you may vary. To make your room as cool and comfortable as possible on hot summer nights, consider installing a ducted reverse-cycle air-conditioning system.
If you have a good air conditioner, but still aren’t getting quality sleep, your best bet is to purchase a smart thermostat. This device, controlled by a computer or mobile device, allows you to set your air conditioner to different temperatures based on your needs, day or night!
A darker bedroom makes relaxing easier. Too much light in a room can trick your brain into thinking it’s still daytime, and this causes disrupted sleep patterns.
A window shade that provides ample darkness in your bedroom is an excellent addition, as are blackout curtains.
If the bedroom’s still not dark enough, wear a sleep mask.
Your air filter needs to be replaced every 90 days, minimum.
3. Clean Your Home Often
Dirt, dust and dander buildup left to accumulate could interfere with your breathing patterns when you inhale these particles, which makes a sound night of sleep almost impossible.
Regularly vacuuming your bedroom carpet or wood floor can eliminate many of these particles.
Changing your sheets at least once per week is also advised.
National Gypsum’s SoundBreak Retrofit Board installs right over existing drywall to reduce sound transmission between spaces.
4. Install Soundproofing Drywall
Your bedroom should offer relief from all of the outside noise, right?
Well, it can, if you use the PURPLE SoundBreak family of products to help reduce the transfer of unwanted sound throughout your home.
For example, if you live in a multi-story home, SoundBreak Ceiling Board is a great choice to reduce the transmission of sound between floors. That means you can get to sleep even when the kids upstairs are still listening to music.
For older homes that need some peace and quiet, the SoundBreak Retrofit Board installs right over existing drywall to reduce sound transmission between spaces. At just over a quarter of an inch thick, it doesn’t require demolition or major modifications to install.
And for new construction or renovations, SoundBreak Wall Board is a great way to keep the sound “in“ a media room or “out” of a bedroom.
Whether you’re building or remodeling, when noise, or the lack of it, is important, the SoundBreak family of products provided by National Gypsum can help you keep the peace in your home.
If you have neurological issues such as headaches, finding it hard to focus, abridged attention span, loss of retention and faintness, it could indicate there is harmful mold developing in your home.
These mold toxicity symptoms should not be ignored: • Coughing or sneezing • Headaches or Migraines • Shortness of Breath • Irritation of Eyes • Chronic Fatigue • Vomiting or Nausea
The symptoms of mold toxicity are often misdiagnosed as the common cold or flu. That’s concerning because living with mold for extended periods has been linked to problems affecting the central or nervous system.
Mycotoxins, or toxic substances from molds such as Stachybotrys chartarum, can have severe intellectual effects. That’s why Dr. Rick Sponaugle, a mold specialist, believes mold and depression go hand-in-hand.
Long-term effects of black mold exposure are severe, debilitating and could be life-threatening.
By using the following ways of detecting mold, you will determine which types of mold are lurking in your home without employing a mold inspector.
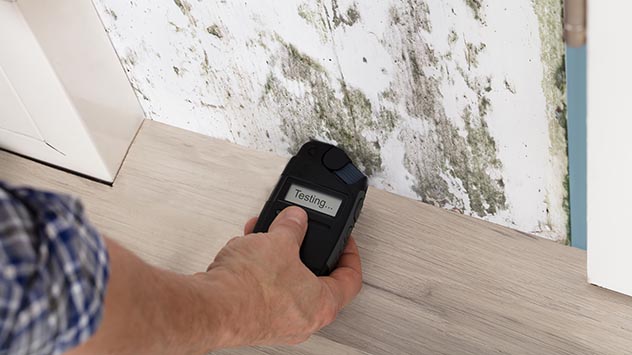
If you notice paint bubbling on the walls of your home, specifically on the walls of your bathroom or near the windows, the most common reason is moisture. And where there’s moisture, there’s probably mold.
For you to adequately cover it with a mold-killing primer, you need to identify the primary source of moisture. Once you answer the moisture concern, then you can repaint.
2. Bathroom Exhaust Fan Stops Working Properly
Mold is predominantly a common problem in bathrooms with inadequate ventilation. Your bathroom’s exhaust fan is an important device to keep toxic mold at bay — but it will not work if it is blocked or not running well.
If that’s the issue, you need to clean or replace your exhaust fan. Also, clean the walls regularly with a Wet and Forget, a mold-killing product.
No one likes the feel of a supposedly solid floor bouncing or sagging underfoot. If you can access the subfloor through a crawl space or basement, check for moisture. If that’s not possible, you will have to pull up a section of flooring.
That moisture — and any mold development — will ultimately spread. If the wood floor is decomposed, the entire flooring needs to be changed. If the flooring is still in good condition and only has a small quantity of mold, it can be detached with mold remover.
Mold that grows unnoticed can pose a real health risk; fortunately, mold can reveal itself through smell. Recognizing it and doing something about it immediately is especially true for the elderly. Senior citizens’ bodies are not as resistant compared to younger patients and usually have other medical problems that may slow or even block the cure.
Health Hazards
Long, direct contact to black mold can lead to symptoms such as depression, memory loss, trouble concentrating, anxiety and confusion.
Don’t let mold build up — in very unusual cases, mycotoxins have been connected to heart problems and memory issues. Even if your health isn’t in danger, your flooring, walls and appliances could be damaged.
For those exposed to mold, it will need to be removed; more exposure will lead to continuous health problems in the future.
How Quality Drywall Can Help
You know the saying: an ounce of prevention is worth a pound of cure. That’s certainly the case for mold and mildew.
These are some of the unique features that National Gypsum‘s PURPLE family of high-performance drywall products offer:
They’re mold and mildew-resistant.PURPLE drywall products have earned the best-possible score among materials testing for mold resistance. That’s important in bathrooms, kitchens, basements, garages and other places where moisture collects, because mold and mildew are among the leading causes of poor indoor air quality.
PURPLE drywall products are resistant to abuse. If you have kids or pets, you know how important this is. They can really do a number on walls in mudrooms, hallways and staircases. That resistance to scrapes, scratches and scuffs means you’ll spend less time making repairs and more time enjoying your family.
There’s sound resistance. If you’re building or remodeling a room where noise — or the lack of it — is important, SoundBreak Wall Board and SoundBreak Retrofit Board will be music to your ears. Both products offer sound-resistant properties that reduce noise transmission between rooms. That’s ideal for media rooms, bedrooms, nurseries and more.
All of these features can make your home safer, more durable, and more comfortable. So, get the performance you deserve from your drywall. Ask for Purple.
Home renovations can be costly, but making mistakes can be financially devastating and dangerous.(DepositPhotos)
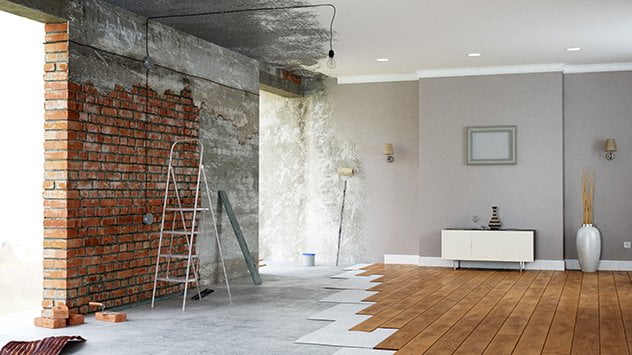
Renovations can be costly (with the average project ranging betweeen $2,000 and $4,000) and mistakes can be dangerous.
When people start a home renovation project, they are understandably full of questions, and many times those questions revolve around what’s on the outside of the walls: fixtures, appliances, or paint colors.
But it’s probably more important to pay attention to the foundational products that are more difficult to change in the years ahead.
One of those that is often overlooked is drywall. Not all drywall is created equal, and making the wrong choice now can create headaches down the road.
The Importance of Quality Drywall
For example, all gypsum-based drywall is naturally fire-resistant, but the PURPLE family of high-performance drywall products provided by National Gypsum is unique because it also resists moisture, mold and mildew.
That’s important to the health of your home and your family, whether you’re renovating a basement, a bathroom, or you simply live in a humid climate like I do.
On top of that, many PURPLE drywall products also stand up to scratches, scuffs and dents. That’s a big deal in garages and playrooms!
And some even minimize the transmission of sound between rooms. That’s important if you’re building a media room or want a quiet master suite.
So, if you’re planning a renovation, spend some of your time thinking about what goes under the paint and fixtures, and Ask for Purple.
When to DIY or Hire a Pro
While some projects are OK to do yourself, it’s important to know when to hire a pro — like anything requiring structural changes.
And even if you tackle the project alone, you need to know what’s behind your walls — never drill, cut or nail into a wall without first locating studs, live electrical wires and plumbing — before you hang anything.
This infographic outlines what DIYers should know before swinging that sledgehammer, or even hanging a picture.
In this week’s radio show, we’re talking about concrete! Read on to learn how to resolve these common concrete conundrums.
Fill in holes in a concrete slab with a vinyl concrete patcher to keep moisture out. (Courtesy Courtney from Mississippi)
Filling Air Pockets Under a Concrete Slab
Courtney from Mississippi is building a pole barn house, and air pockets in the concrete slab have caused holes in the foundation. The holes leave the wood sheathing exposed on the exterior and she’s worried about moisture problems.
The best way to remedy this is to first caulk the inside of the holes. Then, on the outside use a vinyl concrete patcher. This makes smooth repairs on damaged concrete.
Next, pull as much dirt back as you can away from the hole and apply the patcher. Use a trowel to pack it in. Once it’s firmly packed, smooth the patcher out and backfill the hole with dirt.
For extra moisture control, seal the slab all around the perimeter of the home and make sure the grade of the dirt goes away from the house to keep water away from the house.
Skip to [26:05] for the full segment on the Today’s Homeowner Radio Show.
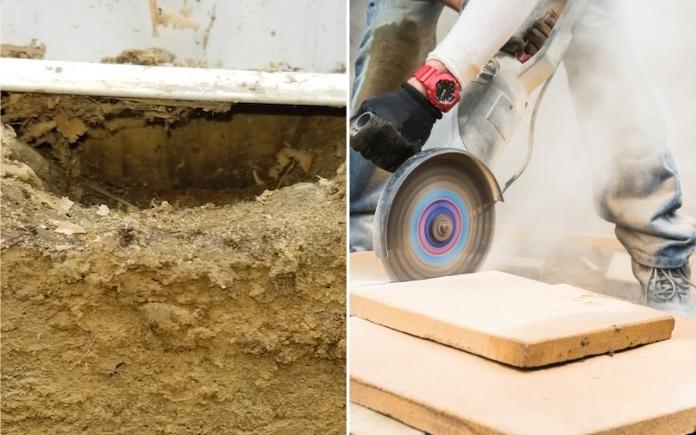
Sawing concrete creates clouds of dust, but there are less messy ways to get the job done.
Less Messy Way to Saw Concrete
Our friend Linda from the Today’s Homeowner TV Show episode “A New Aesthetic For an Outdoor Shed” called to ask about a less messy way to cut concrete. She had a plumbing failure in her home and now has to replace her hardwood flooring. Before doing so, she wants to install floor outlets on the concrete slab but is worried about the dusty mess that will create.
There is a way to minimize dust when sawing concrete, but you do need the right equipment.
In order to get electrical wires to floor outlets, an electrician will first have to saw a notch about an inch wide and a couple of inches deep into the concrete. To keep the dust from spreading throughout the house, open windows and doors and have fans flowing while sawing. Keep a shop vac handy to vacuum up dust as you go.
You can also use a wet saw, which is a concrete saw that’s hooked up to a hose and the water captures the dust particles. It keeps the dust down and prevents it from getting all around the house. However, on the downside, it produces lots of muddy cement.
Hilti makes a dustless saw with a vacuum. Check to see if any rental company has these types of saws to use for your project.
Skip to [52:37] for the full segment on the Today’s Homeowner Radio Show.
Before you build a shed, consider what material to use for the foundation.
Setting a Storage Shed: Concrete or Gravel?
Betty from Virginia is building an eight-by-eight-foot storage shed and wants to know if she should set the shed on a bed of gravel or a concrete slab.
There’s no better way as long as it’s done correctly. If you’re going to put down a concrete slab, you can just build it off the concrete slab with traditional wood framing and not worry about putting down the four-by-fours.
Since this eight-by-eight-foot shed is relatively small, it will be a lot less expensive to put down landscaping fabric first, a bit of gravel, compact it well, then lay out some four-by-fours and build the frame off of that.
Joe Truini wrote a book all about building sheds. It provides all the expert advice you need to construct a shed from start to finish. You can buy “Building Sheds” now on Amazon.
Skip to [1:01:54] for the full segment on the Today’s Homeowner Radio Show.
Also on this episode:
Best New Product
The O-Cedar Easywring Rinse Clean Microfiber Spin Mop ensures no shortage of clean water. Learn more>>
Other Products and Links Mentioned
This page contains affiliate links. If you purchase a product from these links, we will earn a small commission at no additional cost to you.
Further Reading
Radio Show: Send us your question!
If you have a comment, general question about home improvement, or something we’ve featured on Today’s Homeowner, please fill in this form:
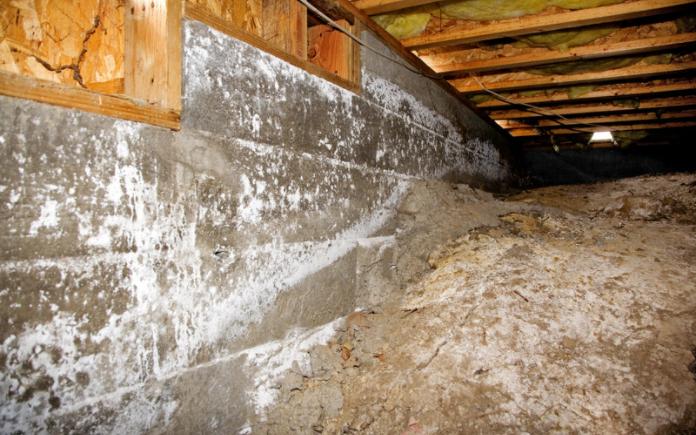
Crawl space moisture control is a constant worry for people living in high-humidity areas.
Moisture in your crawl space can lead to bigger home problems, like warped floorboards and mold, so it’s important to keep it under control.
Keeping water away is most important for crawl space moisture control.
Check for Drainage Issues
Sometimes natural groundwater migrates up into your home, and other times there’s a drainage issue you might not be aware of that could be contributing to your crawl space moisture.
Flowerbeds and other landscaping can end up damming rainwater and routing it under the house. Next time it’s raining, put on your rain gear and look around to see where that water is going when it comes off the roof or through your downspouts on your gutters.
Encourage the water to move away from the house by redirecting your downspouts.
Laying a sheet of plastic is the best crawl space moisture control.
Lay Down Plastic
If you don’t notice any drainage issues, the moisture could be coming from your heating and cooling unit. When your air conditioner or heat is running, it can pull moisture into cracks and crevices.
The most effective and least expensive way to control moisture in your crawl space is to lay down a piece of plastic right on the ground. A 6-mil plastic sheet will provide an adequate moisture barrier in your crawlspace.
Anchor the plastic sheet with gravel, rocks or bricks to prevent it from blowing if your crawlspace is open. This will keep ground moisture from migrating up into the house.
Keeping foundation vents open will help control moisture in your crawl space.
Open Up the Airflow
The more air you can get under your crawl space, the moisture control you will have. Be sure to keep any bushes and grass near your crawlspace well-trimmed so they don’t block the airflow. You can also try installing an electric foundation vent to blow air out.
If your crawlspace is closed and you have foundation vents, those should stay open all the time to allow the breeze to blow through.
Skip to [7:19]for the full segment on the Today’s Homeowner Podcast.
The O-Cedar Easywring Rinse Clean Microfiber Spin Mop ensures no shortage of clean water. Learn more>>
Simple Solutions
Filing System for Owner’s Manual — Here’s a quick, efficient way to organize owner’s manuals for all your tools. Rather than storing all the manuals in one box or drawer, place each one in a zip-lock plastic bag. Then, clip together the individual bags with a binder clip and hang them a nail above your workbench. You can even organize each group of bags into separate categories, such as portable power tools, hand tools and accessories, stationary machinery, and lawn and garden tools. The bags keep the manuals clean and you can easily see through the bags to find the manual you’re looking for.
Fast Furniture Assembly — Assembling kit furniture often requires the use of a hex-key wrench, also known as an Allen wrench, which is painfully slow. Here’s how to speed up the process: Secure the hex-key wrench in a vise and cut off the shorter end of the wrench with a hacksaw or grinder. Then, chuck the long straight section into a cordless drill. Adjust the drill’s torque setting to the lowest number, and drive in the fasteners in mere seconds.
Question of the Week
Q: We just bought a 1,200 square-foot condo that was built in 2010. It has popcorn ceilings throughout, which are in perfectly good shape. I don’t really mind the popcorn, but my wife hates it. Can I remove the popcorn myself or should I hire a contractor?
A: To remove popcorn ceiling, spray the ceiling with a mix of fabric softener and hot water in a pump-up sprayer. Once it’s softened, you can use a Homax Ceiling Texture Scraper to remove the popcorn. Be sure to lay down plastic drop cloths to collect the popcorn chunks. You can also clip on a garbage bag on the scraper to collect the popcorn as you’re scraping. Let it dry and fix any divots with joint compound before you prime and paint the ceiling. Other alternatives to scraping are covering the popcorn ceiling with drywall or a surface mount. (Note: Any popcorn ceiling installed before 1970 might contain asbestos, so purchase an asbestos test kit to see if it contains asbestos.)
Other Products and Links Mentioned
This page contains affiliate links. If you purchase a product from these links, we will earn a small commission at no additional cost to you.
Further Reading
Ask a Question! (Podcast)
Ask a question and we could answer it on the “Today’s Homeowner Podcast!” We also may use it on our nationally syndicated radio broadcast or on todayshomeowner.com.
A dark standing-seam metal roof complements this home’s clean lines with its unique Northwest modern style.
PORTLAND, Ore.— A home renovation in Portland, Ore., combines performance and aesthetics, and that’s why it won the Metal Roofing Alliance’s fourth-quarter Best Residential Metal Roofing Project competition for 2021.
Given the home’s location in a region that receives heavy rain and moisture in the winter and spring, but has hot, dry summers that make wildfire danger a serious threat, low-maintenance and protective metal roofing was their top choice.
The dark standing-seam metal roof complements the home’s clean lines with its unique Northwest modern style. It also provides maximum peace of mind, especially since trees surround the home’s site.
“This project demonstrates how choosing a quality metal roof can accentuate great architectural design and offer easy-to-care-for, low-maintenance protection for many years to come,” said Renee Ramey, MRA executive director. “The homeowners are thrilled with their choice. They appreciate their new roof so much. They also decided to use metal for siding on the upper story and chose metal roofing for their second home on the Oregon Coast as well.”
With the final 2021 quarterly winner selected, the 2022 Q-1 competition for MRA’s Best Residential Metal Roofing competition is open and the Alliance has some exciting changes this year.
The quarterly competition is open to all homeowners as well as builders, contractors and roofing installers in the U.S. and Canada (where allowable) who believe their metal roof project is the best based on either performance, style or both.
The MRA is offering a $300 cash prize to each quarter’s winner and will showcase them in the organization’s marketing efforts.
To enter MRA’s 2022 Best Residential Metal Roofing competition, simply upload a photo and a short project description at https://woobox.com/kz4fzh.
Representing the residential metal roofing industry in the United States and Canada, the Metal Roofing Alliance was formed to help educate consumers about the many benefits of metal roofing.
MRA’s main objective is to increase awareness of the beauty, durability and money-saving advantages of quality metal roofing among homeowners, as well as to provide support to the residential metal roofing industry.