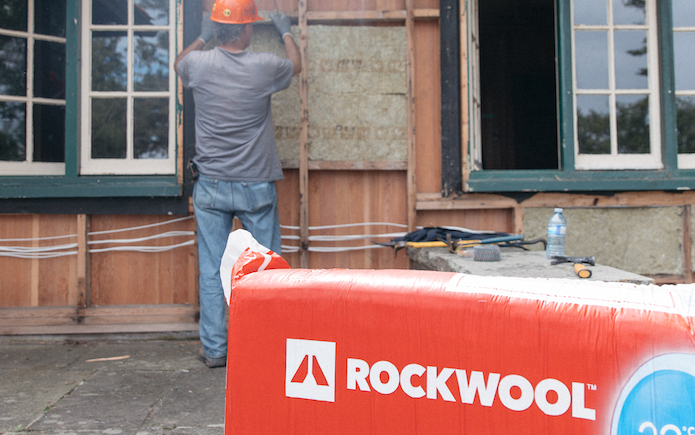
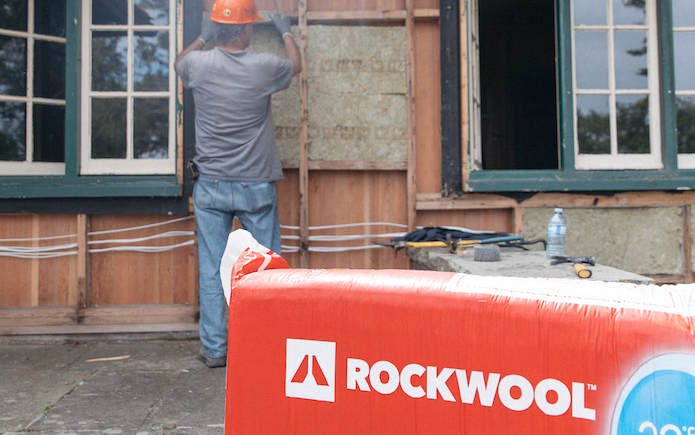
Stone wool’s sound-absorbing and fire-resistant properties make for effective insulation. (ROCKWOOL)
In this special Today’s Homeowner Podcast, we’re talking all about stone wool insulation with Dan Edelman, Rockwool’s National Business Development Manager.
Stone wool insulation is fire-resistant and non-combustible, giving your family more time to safely escape a house fire. (ROCKWOOL)
What is ROCKWOOL insulation?
Dan: ROCKWOOL insulation is a rock-based mineral fiber insulation comprised of Basalt rock and Recycled Slag. Basalt is a volcanic rock (abundant in the earth), and slag is a by-product of the steel and copper industry. The minerals are melted and spun into fibers.
ROCKWOOL products contain between 16% or 40% pre-consumer recycled material dependent on the ROCKWOOL manufacturing facility location.
The amount of recycled content is optimized to provide the ideal thermal, acoustic, and fire protection properties from ROCKWOOL products, while still maximizing the recycled content.
ROCKWOOL’s History
Rockwool’s manufacturing facility in Byhalia, Miss., was the company’s first production operation in the United States. (3 Echoes Content Studio)
Dan: ROCKWOOL company began in 1937 in Copenhagen, Denmark, and the company expanded to the North American market in 1988.
So, our product is relatively new to North America, but historically it’s been around for quite some time now. We just opened up a new advanced factory in Ranson, West Virginia.
All of our factories are zero waste-to-landfill, and because stone wool insulation is hydrophobic, we use recycled rainwater to cut it. Even our factories that are wind- and water-powered are self-generating.
Not only is Rockwool insulation extremely fire-resistant, it also works to contain fire and prevent its spread. (Rockwool)
Dan: ROCKWOOL stone wool insulation is naturally fire-resistant because it’s made from rock. We don’t have to add any fire retardants or chemicals that increase flammability, so it’s never going to carry a flame and has zero smoke development.
Another advantage is mold resistance. ROCKWOOL stone wool insulation actually repels water. There will always be moisture in the air, especially when you’re talking about crawlspaces and attics.
Being able to repel that moisture away and forever being a mold and mildew-resistant product, it’s going to help with the durability of your wall assembly as well.
Attic Insulation
An attic is one of the most cost-effective areas to add insulation. (ROCKWOOL)
Dan: ROCKWOOL insulation batts come in 16-inch on center or 24-inch on center by 47 or 48 inches long, which is the perfect size for insulating attics. They fit perfectly between the studs, so you get that full cavity insulation.
Step one when installing attic insulation is to inspect the current insulation. Make sure there’s no moisture, mold mildew, rodent droppings or rodents living there. Rodents don’t primarily care for ROCKWOOL insulation.
After inspection, simply lay the batts down perpendicular to the joists, especially if the existing insulation is only to the joists.
If the existing insulation is below the joists, you’ll want to fill up to the joist line so you get more continuous insulation.
ROCKWOOL insulation typically has a 4.2 to 4.3 per inch R-value, so you actually don’t need quite as much to hit the higher R-value. However, we have products with a higher R-value primarily for attics.
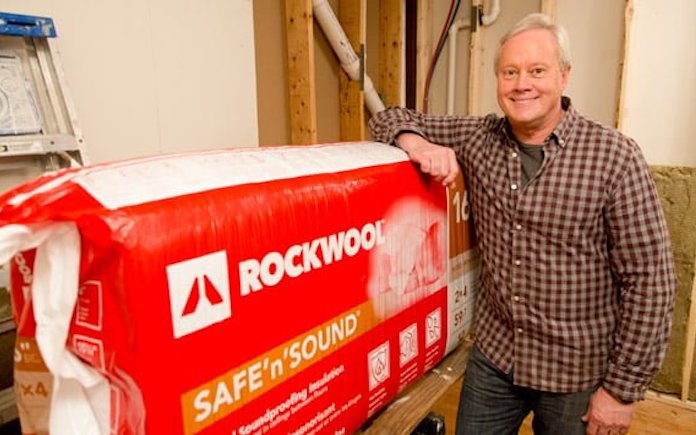
Rockwool Safe’n’Sound is designed specifically for sound dampening to help prevent noise from traveling. (3 Echoes Content Studio)
What About Sound Insulation?
Dan: The best thing for sound insulation is density and mass, both of which ROCKWOOL has.
The other part to sound insulation is friction fit, how tight it fits in that wall cavity. If you have one area that you can’t insulate properly, all the sound is going through that one section and you’re reducing that sound insulation.
When the house at the end of the cul-de-sac hasn’t changed in 28 years, it’s time for some front porch rehab.
This house belongs to Jeff and Eliese McAllister. The couple, known as Lolli and Pop to their grandchildren, want to update the front porch on “Camp Lollipop” so their grandchildren can enjoy their front yard as much as their children did while growing up.
The porch is blocked off by tall shrubs and is too narrow for the couple to comfortably sit and watch their grandchildren play.
And that’s where we can help!
The Projects
“Open concept” isn’t just for interiors! We’re opening up this front porch.
Opening Up the Front Porch
Removing the shrubs and handrails blocking Jeff and Eliese’s front-yard view is our first big job.
We have to pressure-wash the house to create a clean slate to start our work. Jeff and I remove shrubs, with the help of the couple’s grandsons, while Chelsea and Eliese tackle the handrails.
This is what happens when your wood isn’t treated before painting or staining it.
Because the wood handrails aren’t treated, they are rotting away. So, knocking them out with a sledgehammer is the best way to open up the porch — and, maybe, release some tension along the way.
After removing the handrails, we apply putty and sand the columns so it’s like they were never there, to begin with.
Repairing siding isn’t just a cosmetic fix; it can prevent bigger problems later on if the elements enter your home.
Repairing the Shutters and Dormers
This curb appeal makeover requires more than opening up the front porch. We’ve noticed some problems that needed immediate fixes!
First, we repair the ground floor’s damaged shutters. Then, we get up on the roof to repair siding on the dormers. Of the 12 shutters on the front of this house, just one set has a little wood rot. So, Jeff doesn’t want to replace them all.
Since none of these pieces were standard lumber sizes, we had to cut them down on the table saw. Chelsea used the old pieces as a pattern to cut new pieces from the fiber cement material.
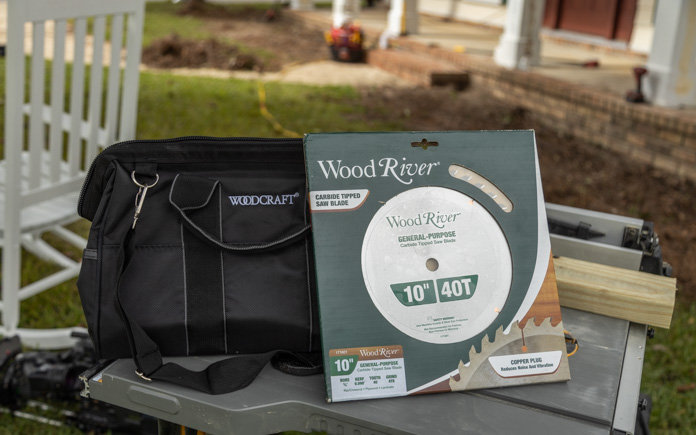
A Woodcraft WoodRiver General Purpose Carbide Tipped Saw Blade comes in handy when you need to make custom cuts.
This front porch is coming along, but it could use more character. We will paint the porch to add some.
Painting the Front Porch
After all the repairs were done, we put a fresh coat of paint on the siding, trim and front porch ceiling. The green shutters clashed with the red-tinted wood door, so we painted them gray to tone it down.
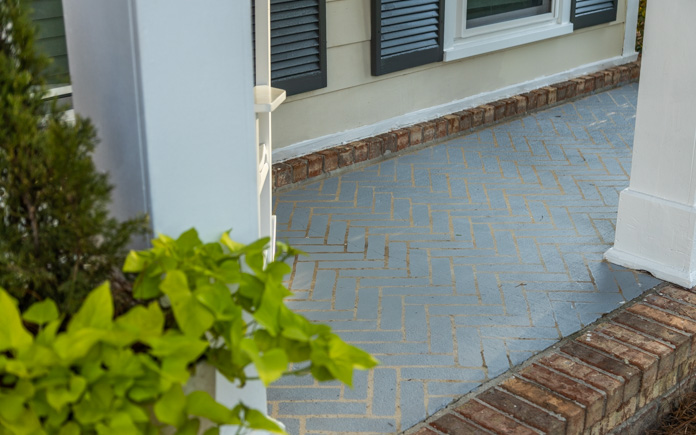
The painted pattern adds a pop of color to this front porch.
The concrete on the front porch has seen better days. Instead of gutting the concrete, we painted a pattern on it using a stencil! It’s a great way to give your concrete a fresh look without breaking the bank.
Spreading out the new flowerbeds adds to the open feeling.
Planting New Flowerbeds
Next, we added some fresh landscaping. Before, the plants were too concentrated at the front of the porch, so we spread them out to maintain the open space feel.
Finally, we put down a fresh layer of pine straw to finish off the flowerbed.
We also:
Added address numbers to the porch column
Removed the intercom/doorbell
Installed a new porch light
Installed soffit vents
Replaced the rocking chairs
“Today’s Homeowner” hosts Danny Lipford and Chelsea Lipford Wolf, pictured with Jeff and Eliese McAllister.
Post-Production Thoughts
This front porch rehab really brings things full circle: Jeff and Eliese’s kids grew up here, and now they’re seeing their grandkids grow here.
At one point, the couple thought about selling the house. But with this new front yard, they’re happy to be able to stay in the home they raised their kids, and now, their grandkids as well.
Aesthetically speaking, one of the most important decisions when choosing grout is whether it will blend with or stand out from the tile.
Light grout between light tiles can make your installation look like a single uniform piece — ideal for minimalist design. On the other hand, contrasting dark grout with light tiles makes a bold statement.
To pick grout color based on the impact you want your finished design to have, consider the following:
In This Article
Choose grout color based on the tiles’ style and design. (MultimediaDean/Getty Images)
Tile Design
Consider the tile’s characteristics and appearance. Then, answer these questions to ensure a successful installation:
Are the tiles patterned or do they have a solid color? With patterned tile, pick a grout color that best matches the tile edges so the pattern isn’t interrupted.
Are they natural stone or manufactured ceramic? For more contrast with natural stone tile, pick a darker color to highlight the dark veins.
If it is glass tile, is it transparent or opaque? White grout accentuates clear, iridescent and translucent glass tile.
Are there mosaic sheets or accents, and do they contain differently-colored tiles? Pick a neutral grout that works well with all the colors, or try a grout that’s light or dark enough for contrast.
Once you’ve answered these questions, it will be easier to determine which grout color will best suit the project.
When picking grout color for a backsplash, consider coordinating the color with the countertops. (TimAbramowitz, Getty Images Signature)
Room Colors
Look beyond the colors in the tile for grout color inspiration. Consider the walls, surfaces or fixtures, and use color theory to find a grout color based on those.
Maryville University describes color theory as the art of combining colors based on the color wheel to create harmonious color schemes.
Complementary colors are found opposite each other on the color wheel. (Adobe Stock)
The color wheel is an arrangement of all colors on the spectrum based on their relationships. To choose a grout color, use the wheel to create a color palette and find a complementary color.
Complementary colors are opposite each other on the color wheel. They enhance each other’s intensity when placed right next to each other, which is why they’re often used to create bold, high-contrast images that pop.
So, for instance, if your room is blue, choose a grout color with orange or yellow hues. Or if your room has shades of green, find a grout that has hints of mauve.
Dirt and spills are more noticeable on lighter-colored grout. (makasanaphoto, Canva)
Cleaning and Maintenance
Grout color can also have a major impact on tile installation and maintenance.
A lighter-colored grout can be easier to clean off the surface of tile during installation but is more difficult to maintain in high-traffic areas.
Dirt and spills are more noticeable, though a good sealer and cleaner can help to maintain the look of the original installation.
Darker grouts, meanwhile, may be more challenging to clean and are more noticeable on the surface of porous tile. Pre-sealing the tile can help eliminate this issue.
Once installed, darker grout does not show wear, dirt or damage as easily. In commercial kitchens, darker grout accents tiles and reduces the appearance of stains.
Fusion Pro Grout from Custom Building Products is stain resistant — no sealing is required. (3 Echoes Content Studio)
Custom Building Products Grout Selection
Once you choose a color, the next important decision is what type of grout to use.
Custom Building Products’ designer-inspired palette of grout colors provides 40 of the most popular shades.
Whether your installation requires a subtle color that matches the tile or a striking shade that accents your installation’s beauty, you can find the perfect grout with the performance characteristics that you need.
Grout Types
Fusion Pro Single Component Grout is a professional-grade sanded grout that features stain resistance with no sealing required. You don’t need to mix any other components to this grout, so it’s ready to use and easy to spread and clean. Fusion Pro can be installed in commercial and residential environments, interiors and exteriors, and on walls, floors and shower floors. Its patented formulation can be applied on all tiles and has built-in Microban antimicrobial product protection.
Prism Ultimate Performance Grout: Prism’s calcium Aluminate cement-based, latex polymer-modified formula offers consistent color with no shading regardless of tile type, temperature or humidity, and it will not effloresce. The rapid-setting formula results in high early strength and dense grout joints up to a half-inch. A unique blend of lightweight recycled glass and fine aggregate sand allows for a smooth consistency that is easy to spread and clean.
Polyblend Plus Sanded is a polymer-modified, cement-based sanded grout that produces hard, dense joints that resist shrinking, cracking, and wear. Formulated for durability, Polyblend Plus Sanded Grout accommodates 1/8- to 1/2-inch joints for interior or exterior installations, including floors, countertops, walls, ceilings, showers, fountains, and pools.
Polyblend Plus Non-Sanded is a polymer-modified, cement-based unsanded grout designed for highly glazed or polished tile, marble and natural stone that sanded grouts would scratch. This durable, non-shrinking grout accommodates joints up to 1/8-inch and can be used for interior or exterior installations, including floors, countertops, walls, ceilings, showers, fountains and pools.
SimpleGrout Pre-Mixed Grout is no-mix, no-mess alternative to traditional grout. This sanded, shrink- and crack-resistant formula also resists common household stains. SimpleGrout is easy to use, ideal for grout restoration and is available in eight colors.
No matter which grout you choose, always mix it according to the manufacturer’s instructions, if required. Improperly mixing the grout can lead to uneven color pigment distribution, which causes blotchy and inconsistently colored grout lines.
You don’t have to mix single-component grouts like Fusion Pro and premixed grouts like SimpleGrout; the color is already evenly distributed.
Find a caulk that matches the color of your grout for use on movement joints and changes of plane like Custom’s Commercial 100% Silicone Caulk. It’s easier to match grout colors when selecting both products from the same manufacturer, as the manufacturer will have designed the products to have the same hue.
Grout usually takes several days to cure and set, so if you’re concerned about color right after installation, give it time to get its final color.
Similarly, the color of the powder before installation and curing is different from the color of the finished plaster treated. Slight variations may occur based on mixing methods and drying conditions.
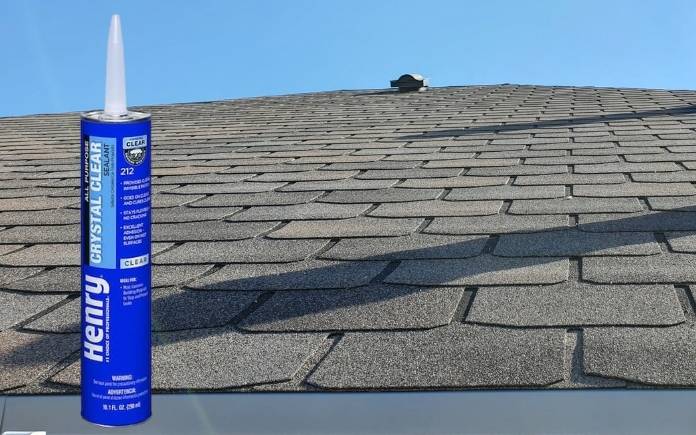
A roof patch is one of those things you often don’t know that you need to do until it’s raining. That’s why Henry designed its 212 Clear All-Purpose Patch to work in both wet and dry conditions.
This page contains affiliate links. If you purchase a product from these links, we will earn a small commission at no additional cost to you.
Henry 212 Clear All-Purpose Patch is a one-part, highly elastic, high-performance thermoplastic sealant that patches holes and cracks in wet or dry conditions.
This sealant even sticks to shingles when it’s applied underwater! Just watch Henry’s demonstration video to see how it stands up against its competitor.
This sealant can be applied in temperatures up to 110 degrees Fahrenheit. (Photo illustration: The Home Depot/Getty Images)
Stands Up to Temperature Changes
Apply this highly elastic roof leak repair sealant during a wide range of temperatures — from as low as 32 degrees to Fahrenheit all the way up to a scorching 110 degrees Fahrenheit!
And, once it’s fully cured, the roof patch can withstand temperatures as low as -40 degrees Fahrenheit and as high as 180 degrees Fahrenheit.
This easy-to-spread roof patch remains flexible to expand and contract with the roofing materials during temperature changes — so no cracking! That means you won’t have to apply more the next time the seasons change.
In Hour 1, learn which remodeling projects get the most bang for your buck, what could be causing a nail polish remover odor in a home, how to clean red cedar siding and more.
In years past, kitchen remodels have been at the top of the list of projects that will get the most back when you sell your home. However, Zonda’s 35th annual Cost vs. Value report shows that exterior replacement projects are now getting the highest return on investment.
The number one project on the list is garage door replacement. We think this is because front-facing garages are becoming more popular.
In the past, many homes were built with the garage tucked away on the side of the house. But now with building lots getting smaller and yards shrinking, there’s no room for the driveway to extend to make a turn into the garage. So now, homeowners want to make sure their garage door is attractive from the street view.
Number two on the list is manufactured stone veneer, which is stone made from cement. Stone veneer used to be tedious to install because it was sold in individual components. But now, you can purchase it in sections, so it’s easier (and faster) than ever to add some stone accent to your home’s exterior.
Number three on the list is a midrange kitchen remodel — a modest kitchen face-lift that offers a relatively high return when done prior to the sale of a house. You’d be surprised how far $1,000 or $2,000 can go in giving a kitchen a facelift. We did an entire kitchen makeover for under $1,000 on this Today’s Homeowner TV episode.
If you have a funky smell in your home, have an HVAC tech check your unit’s refrigerant levels. (valentynsemenov)
The scent of nail polish remover in her condo is giving Annie in Florida a headache.
She says, “The smell started a few days ago and it comes and goes. It seems to be concentrated in my condo, not out in the hallway or from my neighbors.”
The nail polish remover smell could be coming from your air conditioner.
Nail polish remover contains acetone, which has a similar smell to air conditioner refrigerant. So if your home smells like a nail salon, it could mean there’s a leak in your system.
Corroded parts or loose fittings in the unit could be causing a small leak. This will create that smell whether the unit is on or not, and it also explains why the smell is only concentrated in her condo and not the entire building.
Call an HVAC technician to come and inspect your system for leaks. And in the meantime, open a window to get some fresh air into your condo.
Safely Cleaning Wood Siding
If you don’t use the right cleaning method you can easily damage wood siding. (bruceman, Getty Images)
Juliet in Salem, Ore., has a ranch-style home that’s covered in red-cedar bevel siding.
She wants to know: “What can I use to clean the siding without buying or renting a power washer? I’ve heard that power washers can damage wood siding.”
Juliet is right. If the pressure is set to high, a power washer can damage red cedar beveled siding. Use the lowest possible setting to clean the siding.
If you want to err on the side of caution, use a brush and a cleaner instead. There are plenty of brushes available with long handles, so you can work fast and not worry about the danger that comes with a power washer.
For the cleaner, the USDA Forest Products Laboratory recommends cleaning cedar with a solution no stronger than three parts warm water mixed with one part bleach, with a small amount of powdereddetergent. Don’t use a detergent that contains ammonia because it will react with bleach to form toxic fumes.
If you need something stronger, you can substitute the detergent with some trisodium phosphate.
Scrub the solution onto the siding and then rinse it off with a garden hose. When rinsing, never shoot the water up, because it will get under the siding and cause water damage.
In Hour 2, hear our special technique to degrease kitchen cabinets, our thoughts on mixing and matching insulation, and more.
Cleaning Solution for Refinishing Cabinets
Degreasing kitchen cabinets is the key to a successful refinish. (Akintevs, Getty Images)
A hotline caller asks: “What kind of solution do you use to clean your cabinets so that you can refinish them?”
Before you do any type of painting or refinishing, you need to degrease them. No matter how clean you keep your kitchen, grease gets everywhere, especially around the range top area.
Here’s our degreasing cleaning solution:
Dampen a scouring sponge in a citrus-based degreasing solution. You can use a commercial degreaser like Simple Green All-Purpose Cleaner, or make a solution of your own. Add 1 cup of distilled white vinegar to a spray bottle, follow it with a drop or two of liquid soap and add 1 tablespoon of baking soda. Fill the container to the bottom of the neck with warm water, shake it and you’re ready to go.
Heat the damp sponge in your microwave for 30 to 40 seconds and spray your cabinets with the solution.
Use dishwashing gloves to remove the sponge and scrub the cabinets, then attend to any remaining residue with paper towels.
No matter what type of insulation you pick, the more you have, the better. (Branislav, Getty Images Signature/Macknm Mnpohb, thamerpic, Getty Images)
Kevin in Maine heard us mention the importance of insulating the attic floor, so he peeked into his attic and discovered there is only about eight inches of fiberglass insulation between the ceiling joists.
He wants to add at least another eight inches of insulation, but he wants to know: “Must I stay with fiberglass batts or can I use mineral wool or blown-in cellulose?”
Adding more insulation is some of the best money you can spend on your home in terms of the return on that home improvement dollar.
Yes, you can mix and match. I would recommend using mineral wool insulation. It’s very easy to install, mold and mildew resistant and great for soundproofing qualities as well.
You can put batts on top of your existing insulation and go perpendicular to your ceiling joists.
When putting in any insulation, don’t stuff it too tight over the soffit vents because you’ll block the flow of air.
The only time I don’t recommend adding a new type of insulation over another is if you’re going to compress any of the existing insulation. When insulation is blown in, you want it to be as fluffy as can be and remain that way. But if it’s down to where you’re seeing your ceiling joints, you can add the mineral wool perpendicular.
Cut it into place and do a little at a time or the whole attic in one go. I guarantee you, as soon as you put that insulation in there, you’ll start saving money 365 days a year.
Best New Products
Ryobi’s new USB Lithium Rotary Tool features a compact design that delivers more power for any application. Learn more >>
Simple Solutions
To keep combination wrenches easily accessible and quick to find, clip several together with a large carabiner. (syolacan, Getty Images Signature/RomeoLu, Getty Images)
Quick-Grab Wrench Holder — To keep combination wrenches easily accessible and quick to find, clip several together with a large carabiner clip. Then hang them from a pegboard or toss them into a toolbox.
In many cases, you can use a wrench without removing it from the carabiner clip.
This tip works with any tool with a hole in the handle, including adjustable wrenches.
Install screw hooks faster using a power drill. (studo58, Getty Images)
Easy-Drive Screw Hook Tip — Here’s a quick, easy way to drive in screw hooks:
First, drill a pilot hole and then twist in the screw hook by hand with just a few turns.
Then, chuck a screw eye into your drill, slip the eye over the hook and slowly squeeze the trigger.
As the screw eye spins, it’ll drive in the screw hook.
Products and Links Mentioned
This page contains affiliate links. If you purchase a product from these links, we will earn a small commission at no additional cost to you.
Further Reading
Radio Show & Podcast: Send us your question!
If you have a comment, general question about home improvement, or something we’ve featured on Today’s Homeowner, please fill in this form:
You know you’ve left your mark on the world when people quote you in the pages of Time magazine or you get interviewed by Oprah. But what does it mean if one of your top google results is “young house love toilet” (true story)? And up until now, searching that term on our blog didn’t really lead you anywhere helpful (Sherry talks a lot about our favorite toilet mostly on IG Stories). So if that’s the rabbit hole that led you to our blog and you typed in those infamous words, this post will now have you and all of your toilet-related queries covered.
Our favorite toilet is the Kohler Memoirs Elongated Toilet (sometimes also called the Memoirs Stately Elongated). It has been our go-to place to go for 7 years now, ever since installing it in our last home’s powder room. It’s comfortable, good looking, and – for lack of a better phrase – has always gotten the job done.
Why Is It Our Favorite Toilet?
The main selling feature to us was the slightly “fancier” design, specifically the classic crown molding-like detail around the top of the tank and similar flourish around the base. Out of all of the toilets out there, we thought it would bethe perfect complement to the traditional style of our previous Richmond, Virginia home. So we bought one for our downstairs bathroom and one for our ensuite bathroom upstairs.
But we’ve also bought one more recently for our more modern beachy-feeling home in Florida and it works just as nicely. More “modern-looking” toilets are likely to be simpler and therefore, to us, have a tendency to look more basic – like the kind you might find in a retail setting or a fast-casual restaurant. Just sort of… bulbous and round and kind of cartoony? Is that thinking too deeply about a toilet?
Probably.
I’d argue this toilet design is classic, so it can pretty much slip in anywhere. And wait until we get to the function part. That’s really where this baby shines.
The point is, if you’re the type who puts a lot of care or thought into the look of your other bathroom fixtures (faucets, showerheads, towel bars, etc), the Memoirs toilet looks like a more intentional choice and less like an afterthought. It also comes in several colors like black, gray, greige, and more – but we always prefer the classic white finish.
We also REALLY LIKE how it functions. As mentioned, we’ve bought it three times over the last 7 years, and have heavily used each one (these are our use-them-every-single-day toilets), and none of them have ever needed so much as one repair visit or one call to the plumber. Never. We have not plunged these toilets one time. Not once. Which is more than we can say for every other toilet we have owned. So yay for a toilet that does its job.
How Much Does It Cost?
Admittedly, it’s not the most affordable toilet out there. At the time of this writing, it’s sometimes listed around $399 (although it’s currently out of stock at that price) and often listed a little higher (like here on Home Depot where it’s actually in stock). So for that reason, we did skip it when doing more budget-friendly renovations, like in our duplex Airbnb. But when it came to the places we, um, use on a daily basis, we decided it was worth the extra few hundred bucks. Plus the elongated bowl and comfort height design makes it more comfortable to sit on than smaller cheaper models.
The main drawback is that the Kohler Memoirs Elongated 2-Piece toilet isn’t typically sold in stores, so you will need to order it online for delivery or in-store pickup. You can do that at places like Lowe’s and Home Depot, or with online retailers like Build.com.
TIP: Double-check if your listing includes a toilet seat because many don’t. We recommend this Kohler Highline toilet seat since it’s quiet-close and elongated (that’s a must, or your toilet will look like it has an underbite).
Want A More Basic Budget-Friendly Toilet?
Let’s talk about this for a sec. Because we certainly didn’t spring for our favorite toilet everywhere, as we already mentioned. Our favorite basic lower-budget-but-still-dependable toilet is this one by Delta, which we have used over 7 times in the duplex, pink house, and our previous house with zero issues ever – which is a pretty great track record). I mean, look at the reviews. For the price, there’s nothing better.
Ok, Back To Our Favorite Toilet – How About Some Before & Afters?
If you’re interested in seeing more of the bathroom makeovers where we’ve used the Kohler Memoirs toilet, you can check out this post about our current bathroom (and what it’s like having 4 people share 1 bathroom).
Or take a deep dive into the HUGE gut renovation of our previous main bathroom – we knocked down walls, tore out doorways, bashed out a tub, and more. That post even includes a budget breakdown for you (toilet included!)
As part of that renovation, we also made over our walk-in closet using affordable Ikea Pax systems. Our walk-in closet reveal post includes a walk-through video of how we customized and organized the closet to make the most of the space. Toilet not included in this space…
…although you can see it in the mirror above. All the more reason to spend more than a minute thinking about which one you buy 😉
This leads me to one last thing…
How To Install Or Fix A Toilet
Switching out your old toilet is also something you can totally do yourself. We’ve done it multiple times! Here are some posts that can help:
*This post contains affiliate links, so we may earn a small commission when you make a purchase through links on our site at no additional cost to you.