Picture seven o’clock on a weekday morning. The sun’s barely up over Biscayne Bay and it’s already halfway across the floor, sliding up the far wall. There’s hardly a window frame in sight. Just glass, top to bottom, and a lot of water. Brickell gets called the Manhattan of Miami because it’s grown upwards rather than outwards, and these days the newer Brickell luxury condos tend to be judged on how the rooms actually feel, rather than on a spec sheet. So what does living in one involve, design-wise? Light, mostly. Then scale, materials and a bit of tech. And there’s a fair amount UK homeowners can pinch for their own houses.
Table of Contents
Why the View Shapes Every Brickell Condo Interior
Here’s the thing about a bayfront tower: the view is going to win any argument you start with. So don’t start one. Lay the room out around the glass, not against it, and make sure that when you walk in from the front door, nothing gets between you and the water.
In practice that means low furniture in the middle of the room and seating that faces the light. The classic error in high-rise condo interior design? A sofa pointed at a telly on the wall, with the bay sitting behind everyone’s heads. Bookcases, display units, that enormous fiddle-leaf fig, they all go on the solid walls.
If you’ve never been, Brickell is Miami’s financial district. It’s compact and you can walk most of it, and the free Metromover loops round the neighbourhood and up into downtown. Plenty of Brickell condos are proper everyday homes, not winter bolt-holes, which means the rooms have to cope with school runs and laundry as well as sunsets.
Living With Full-Height Glass: Light, Glare and Heat
A wall of glass in the subtropical sun is gorgeous for roughly an hour. Then the glare kicks in, the room warms up, and over a couple of years your nice linen cushions go a slightly sad shade of beige. You can’t really fight the sun here. You can only filter it.
Start with a sheer. It takes the edge off the glare and you can still see the bay through it, which is the whole point. Behind that, hang something heavier, a blackout or dim-out, for sleeping and for those brutal mid-afternoons. Recess both tracks into the ceiling and, pulled back, they more or less vanish.
Motorised shades on a timer are worth more than they sound. The trick is getting them down on the sunny side before the room heats up, not once you’re already sweating. If you want the science behind it, the Building America guide to window attachments compares sheers, cellular shades and exterior shading in plain terms.
Oh, and keep art out of the direct beam, and turn your desk side-on to the window unless you enjoy squinting all day.
Ten feet is about three metres. Doesn’t sound much, but a sofa that looked roomy in the showroom can end up looking rather lonely under all that height.
The instinct is to go taller. Don’t. Go wider and deeper, and keep things low. Developers seem to have caught on to this early: at 619 Brickell, for instance, residences pair 10-foot ceilings with full-height glass, and in a room like that, deep, low seating and curtains hung from the ceiling are really the only sensible way to keep the bay in view. A rug big enough for every front leg pulls the group together.
Save the height for the solid walls: tall art, shelving right up to the ceiling, or a big mirror opposite the windows to throw the view back in.
At night, the glass goes black and the room can feel a bit like a goldfish bowl. A generous pendant or a long linear light pulls the ceiling down visually and makes it cosier. And please hang the curtains from the ceiling, not a few inches above the frame. It makes the walls look taller and calmer at the same time.
Choosing Materials for Subtropical High-Rise Living
Humidity, salty air and fierce sun. It’s a tough combination for anything soft or porous. Stone and large-format porcelain floors are the easy wins: cool underfoot, unbothered by damp, and with bigger tiles you get fewer grout lines, so a big room looks quieter.
For sofas and chairs, look at performance fabrics or natural fibres like linen in UV-stable colours. Silk and velvet in full sun? They won’t last. Wood is still fine, as long as it’s sealed or oiled and kept back from the hottest windows.
Colour-wise, you can’t go far wrong with sand, stone, soft white and a muted sage. They echo the bay and bounce light further into the room. Funnily enough, the same palette works beautifully in a sunny British garden room, twenty floors and an ocean away.
Smart-Home Technology That Disappears Into the Design
Good tech in a tall, glazed room is the stuff you forget is there. One integrated system for lighting, climate, shades and the front door means the room can shift mood through the day without a wall that looks like a cockpit. It’s restraint, really, rather than gadgetry, and the room is calmer for it.
So be strict with it. One small keypad by the door, a few scenes with names you’ll actually remember. Morning: shades up, soft light. Work: blinds angled against the glare. Evening: everything dimmed and warmed while the city lights came on below. If the shades follow the sun’s position automatically, the heat gets dealt with before anyone has to think about it.
What UK Homes Can Borrow From Brickell Condo Design
You don’t need a tower on the water for any of this to be useful. Work out which window is the best one in each room, whether it’s a rear extension, a loft conversion or steel-framed doors onto the garden, and plan around it. Curtains from the ceiling for extra height. Sheers for privacy that don’t kill the light. Nothing tall in front of the glass. Simple stuff, but it changes how a room feels more than a new sofa would.
North-facing rooms do especially well with pale, light-bouncing colours. Architects like Foster + Partners have treated daylight as a building material for decades, and honestly, that’s the main lesson from Miami luxury condos. Sort out the light first. The furniture can wait.
Frequently Asked Questions
How high are the ceilings in Brickell luxury condos?
Depends on the building, but plenty of the newer Brickell towers come in at around 10 feet, which is roughly three metres, usually with full-height glass. You get more light and a real sense of space. The catch is that ordinary-sized furniture can look a bit lost, so things need scaling up.
How do I reduce glare and heat from floor-to-ceiling windows in Miami?
Two layers, ideally motorised. A sheer handles glare and keeps the view. A heavier blackout covers sleep and the worst of the afternoon. Put the shades on a timer so they drop before the room heats up, keep screens side-on to the glass, and move anything delicate out of direct sun.
What size furniture works best in a room with 10-foot ceilings?
Wide and deep beats tall. A generous, low sofa and a big rug will anchor the room without blocking the windows. Get your height from tall art, shelving or mirrors on the solid walls, plus a decent-sized pendant or linear light overhead to fill the space above.
What interior materials hold up best in a humid, coastal high-rise?
Stone and large-format porcelain floors, mainly, since damp doesn’t bother them and they stay cool underfoot. Performance fabrics or linen in UV-stable colours for upholstery. Sealed or oiled timber rather than raw wood, which tends to move in the humidity. Keep the palette light, too.
Is Brickell a good place to live for design-minded buyers?
For a lot of people, yes, if you like walking everywhere and being in the middle of things. You’ve got the bay, free local transit and newer towers with tall ceilings and big glass. If you enjoy fiddling with light, proportion and materials, there’s plenty to play with.
The Bottom Line
Living well in Brickell’s high-rise homes mostly comes down to not fighting the light or the height. Keep sightlines clear, layer what goes over the glass, scale the furniture to the room, pick materials that can handle the climate and hide the tech. None of it’s specific to Miami, really. Find the best window in your room, keep whatever’s in front of it low, and let the daylight sort out the rest.
George Bernard Shaw used to write in a rotating garden hut. He literally spun his workspace to follow the sun across his lawn. The man won a Nobel Prize while working in a wooden box he could twirl whenever he wanted a new view.
That was ages ago, and honestly, we’ve only just started catching up. The tired old shed tucked behind the bins? These days, people are building garden spaces that look and feel like a real part of the home. The funny thing is, the main material hasn’t really changed. What’s different now is how we see it.
Let’s dig into seven design ideas worth stealing, and I’ll point out a few common mistakes along the way; stuff you definitely won’t see in the glossy photos.
Table of Contents
Why Timber Still Wins
Let’s be honest: plenty of materials can hold up a roof. But wood keeps coming out on top. The main reason? Texture. Every board has some life in it: the grain, those small knots, the shifts in color from one plank to the next. Composite cladding just can’t fake it.
Then you’ve got aging. Leave timber outdoors, and the weather fades it to this lovely silvery grey. Some people think it’s gorgeous. If you’d rather keep that warm, rich tone, you’ll need to break out the oil or stain once a year. It really depends on how hands-on you want to be.
And, of course, there’s the sustainability factor. Trees soak up carbon as they grow, and wood locks that away, so timber buildings normally have a much lower carbon footprint than steel or concrete ones.
The catch is buying the right stuff. Look for FSC certification; it’s a sign your timber comes from forests managed the right way, both for the environment and for people.
Maintenance deserves a reality check too. Timber lasts. But it needs air to move around it. Raise your building a bit on a solid base, and it’ll hang in there longer than one that just sits in wet grass. And always treat the ends of boards; water sneaks in fast where you least expect it.
Rustic Logs, Modern Feel
First up: ditch the hunting lodge image. Today’s log cabins cram classic interlocking timbers into buildings with huge windows and clean, simple rooflines. You get all the cozy warmth and texture from the logs, but with modern glass doors and sharp details.
The look changes a lot depending on the finish. Go dark, almost black, on the outside, and the building melts into the garden. Pair that with slim black window frames for extra punch. Inside, think Scandi: pale walls, one beautiful lamp, a soft wool throw.
Just a heads up: solid logs move around as they dry, so you have to allow for a little settling at doors and windows.
Bigger logs keep the heat in better than skinny boards, but if you want to use your cabin year-round, don’t skip proper insulation, especially under the floor and in the roof.
Flat Roofs and Simple Boxes
Next idea: a straightforward box with a flat or mono-pitch roof. It just works, especially in narrow gardens or where you want the building to sit quietly along a fence.
Plus, the look matches many new home extensions; simple and low-slung beats complicated peaks any day.
There’s a legal angle, too. In England, if you want to put a building within two meters of a boundary, most of the time you’re limited to 2.5 meters high. Mono-pitch designs help you hit that target. Check the planning regulations and your local rules; they vary.
Here’s what a lot of people miss: roofs need a bit of a slope. A truly flat roof collects puddles, so make sure there’s a slight fall and a sturdy membrane.
A Studio You’ll Actually Work In
For a lot of us, the garden studio or office is the dream. Here’s what makes them click: light, first and foremost. Put your desk looking out into the garden, but angle your screen so you’re not squinting through the roses at Excel.
Inside, aim for calm and tidy. Try plywood or timber walls, simple floors, and storage built in to swallow the clutter. Check out Palmako’s timber collection for examples that feel modern and finished.
Don’t ignore the boring stuff: power, insulation, and ventilation. Without those, you’re basically building a sauna for the summer.
And honestly, there’s a secret win: walking down the garden, even if it’s just a few steps, helps put real space between home and work. That separation is gold if you’re working from home all week.
Cladding With Personality
No one says timber cladding has to be boring. Go for a mix: paint some, leave some natural, run boards vertical on one wall, horizontal on the next.
Vertical lines make buildings look taller; horizontals stretch them out. Keep it simple, though; choose two main colors and maybe a contrasting trim. Add too many, and you’ll end up with a paint sample display.
The type of wood matters, too. Cedar and larch are reliable outdoors, with less maintenance needed. Spruce is cheaper, but it needs more attention over the years.
Roofs That Come Alive
Living roofs always turn heads. Sedum or wildflowers on top of your garden building soften the whole structure and throw in a bonus for pollinators. Plus, it looks great from upstairs because, let’s face it, that’s where you’ll spend most of the time looking at it.
Sedum is easier on the structure and copes with dry weather. Wildflowers need more soil, so they add more weight and need more water, especially starting out. Make sure your roof can handle the extra load before you plant anything up there.
Maintenance isn’t demanding, but it’s not zero. Pull a few weeds and water during dry spells, especially while everything’s getting established.
Paths, Planting, and Night Light
The last two ideas really belong together. A beautiful garden building isn’t much if it’s just stuck in the grass by itself. Use decking, stepping stones, and planting layers to invite people from the house to the door.
Walk to your kitchen window and decide exactly what you want framed; sometimes, that view matters as much as the building itself.
Come evening, let the place glow. Wall lights, uplighting in nearby trees, and warm light from inside make the building feel like a lantern tucked at the garden’s edge. Stick to warm white bulbs, about 2700K, and keep lights low. No garden needs to look like a parking lot.
Materials tie everything together. Weathered timber decking matches the building, and gravel or stone stepping stones make for a crisp, easy-to-drain path.
Plant in layers; grasses and low shrubs closest to the building, taller plants further back. That way, the building tucks into the garden, not just on it.
Treat It Like It Matters
Material, form, color, connection. That’s what really counts. Pick your timber with care, keep your shapes honest, stay disciplined with your color palette, and use paths, planting, and light to link the building to everything else.
Most people treat the garden building as an afterthought, like “Let’s do this when everything else is done.” Don’t. Give it the same attention as your kitchen; seriously, it’ll pay you back every day.
If you remember just one thing: the best garden buildings fit so naturally they feel like the garden’s been waiting for them the whole time.
Most roofing contractors don’t realize how exposed they are until a claim hits. Insurers for large-scale roofing projects carry a very different responsibility than standard insurers, and the gaps between general liability and builders risk policies on big job sites can be costly. Securing adequate coverage limits across multi-million dollar contracts, managing subcontractor insurance compliance across sprawling crews, and handling weather-related disputes all require real knowledge. After reviewing the top providers in this space, this guide breaks down five insurers worth considering for large-scale roofing work.
The shortlist methodology
Each company was assessed using publicly available information pulled from official websites, review platforms, directories, and case study records. Only providers with a proven track record in roofing or commercial contractor insurance made the cut. The goal was to surface options that actually perform in this space, not just ones that look good on paper.
Unlimited Contractors Insurance – Best for roofing contractors seeking specialized construction coverage across all 50 states
Chubb – Best for commercial property and casualty insurance for small to large businesses
The Hartford – Best for commercial roofing contractor insurance and small business property coverage
Progressive Commercial – Best for commercial auto and business liability insurance
Thimble (Arch) – Best for specialty property and casualty insurance for roofing contractors
Table of Contents
The Stakes Behind Choosing Insurers For Large-Scale Roofing Projects
Large-scale roofing projects carry risk at every stage, from contract signing to final inspection.
Securing adequate coverage limits relative to your total contract value isn’t optional. It’s the difference between a manageable claim and a project that wipes out your margins.
The coverage gaps between general liability and builders risk policies are where contractors get hurt most. Without an insurer who understands roofing-specific exposures, those gaps can go unnoticed until it’s too late.
Specialized insurers bring working knowledge of how roofing projects fail and where claims originate. That kind of industry fit is hard to match with a generic commercial policy.
The right insurer also affects how fast claims settle. A slow claims turnaround on a large commercial job means work stalls, crews go unpaid, and client relationships suffer.
Choose based on coverage limit adequacy, claims settlement speed, and the insurer’s loss ratio on commercial roofing accounts. Those three numbers tell the real story.
5 Insurers For Large-Scale Roofing Projects Compared
Note: All data in this table is sourced from review platforms and the official websites of the listed companies.
Unlimited Contractors Insurance is built for contractors, and roofing operations sit right at the center of what they know. They cover commercial general liability, workers’ compensation, commercial auto, umbrella and excess liability, builders risk, surety bonding, and tools and equipment. That’s a full stack of coverage for roofing teams of any size, from small crews to multi-site commercial contractors. They operate across all 50 states, which matters for contractors who work across state lines or bid on regional institutional projects. Their team includes CRIS-certified professionals and licensed P&C agents (not cheap credentials to hold) who actually understand roofing exposures.
Where Does Unlimited Contractors Insurance Win for Insurers For Large-Scale Roofing Projects?
Contractors bidding on large jobs often struggle to find an insurer who understands the full scope of roofing-specific risk, from completed operations exposure to subcontractor compliance. Unlimited Contractors Insurance addresses those precise pain points, which makes them a natural fit for established roofing companies managing multi-crew projects.
What the Reviews Show:
Clients consistently call out fast quote turnaround and personalized service as standout traits. Competitive pricing comes up often too, which suggests they’re not just knowledgeable but also practical about what roofing contractors can actually afford. That kind of responsiveness, combined with specialized construction knowledge, is genuinely rare.
2. Chubb – Best for Commercial Property and Casualty Insurance for Small to Large Businesses
How Can Chubb Help You?
Chubb has been in the insurance business since 1792, and that history shows in how they operate. They carry AA ratings from Standard & Poor’s and A++ from A.M. Best, which puts them at the top of the financial strength table. For roofing contractors working on high-value commercial contracts where coverage limit adequacy is non-negotiable, Chubb’s capacity and backing matter. They offer commercial property and casualty insurance across 54 countries and territories, supported by a network of 3,500 independent agents in the U.S. Their risk engineering capabilities add another layer of value for contractors who want more than just a policy.
Where Does Chubb Win for Insurers For Large-Scale Roofing Projects?
Large-scale roofing projects often require coverage limits that smaller insurers simply can’t support, and Chubb’s financial strength rating puts that concern to rest quickly. Their customized pricing approach and agent network mean roofing contractors can get coverage shaped around their specific project scope rather than a one-size-fits-all policy.
What the Reviews Show:
Chubb’s reputation is built more on institutional credibility than flashy reviews. Their financial ratings and two-century track record speak loudest here. Contractors and businesses who choose Chubb tend to stay, which suggests the long-term service experience holds up well.
3. The Hartford – Best for Commercial Roofing Contractor Insurance and Small Business Property Coverage
How Can The Hartford Help You?
The Hartford has been writing insurance since 1810, and they’ve spent those 215 years getting very good at serving small to mid-size businesses. They cover over 1.3 million small businesses today, so they understand the operational realities roofing contractors face. Their commercial portfolio covers property, casualty, workers’ compensation, and specialty lines, all relevant to roofing operations. What stands out about The Hartford is their consistent recognition for ethical business practices (named one of the World’s Most Ethical Companies by Ethisphere 15 times), which signals stable, trustworthy claims handling. For roofing contractors who need a reliable long-term insurer, that track record counts for something real.
Where Does The Hartford Win for Insurers For Large-Scale Roofing Projects?
Roofing contractors often need an insurer who can handle both the property and liability sides of a commercial project without stitching together multiple carriers, and The Hartford’s broad commercial portfolio makes that easier. Their deep experience with small business clients also means they understand budget constraints and can structure coverage without unnecessary padding.
What the Reviews Show:
The Hartford’s ethical rankings and Fortune 500 standing come up consistently in how the industry talks about them. Clients value their accessibility through agents and brokers, and the company’s size gives policyholders confidence that claims get paid without a fight (which isn’t always guaranteed in this space).
4. Progressive Commercial – Best for Commercial Auto and Business Liability Insurance
How Can Progressive Commercial Help You?
Progressive Commercial brings over 50 years of commercial insurance experience and holds the top spot as the number one truck insurer in the country. For roofing contractors running fleets of work vehicles across job sites, that matters more than it might seem. They offer more than 30 types of business liability and vehicle coverage, including commercial auto, workers’ compensation, business owners policies, general liability, and professional liability. Their AM Best A+ rating confirms they can back up what they write. Available across 49 states, they’re accessible for most roofing operations regardless of where projects are based. Their concierge claims service for small business customers (one of the first major insurers to offer it) simplifies what’s usually a frustrating process.
Where Does Progressive Commercial Win for Insurers For Large-Scale Roofing Projects?
Roofing contractors who run multiple trucks and crew vehicles across large project sites often find that vehicle coverage is the part of their insurance program that gets complicated fast. Progressive Commercial’s depth of experience in commercial auto makes them a strong fit for that specific piece of the puzzle.
What the Reviews Show:
Progressive Commercial’s reputation tends to center on their auto coverage strength and accessibility. The A+ AM Best rating comes up as a trust signal, and their concierge claims process gets mentioned positively by small business owners who’ve actually used it under pressure.
5. Thimble (Arch) – Best for Specialty Property and Casualty Insurance for Roofing Contractors
How Can Thimble (Arch) Help You?
Arch Insurance North America operates as a specialty insurer within Arch Capital Group, covering property, casualty, and specialty lines for corporations, professional firms, and financial institutions across the U.S. and Canada. They hold AA- from Standard & Poor’s and A1 from Moody’s, both strong signals of financial reliability for contractors concerned about insurer stability on long-term roofing projects. Their Arch APEX digital portal stands out as a practical tool that cuts through the friction of buying and managing layered coverage. For roofing contractors who deal with management liability, professional liability, and property exposures, Arch offers the product range to address what they need without jumping between carriers.
Where Does Thimble (Arch) Win for Insurers For Large-Scale Roofing Projects?
Specialty roofing projects that involve professional liability exposure or complex ownership structures need an insurer comfortable with layered risk, and Arch’s specialty background makes them well-suited for those situations. Their digital platform also reduces the administrative drag that typically slows down coverage setup on large projects with tight timelines.
What the Reviews Show:
Arch has earned multiple industry awards including a 5-Star Professional Liability recognition for 2024 and a PropertyCasualty360 Insurance Luminaries Award for Technology. Clients in specialty and commercial lines respond well to both their product range and the digital experience Arch APEX provides.
Evaluation Criteria and Research Approach
Building this list required a structured process, not just a quick scan of insurer websites. The research pulled from multiple source types to make sure each company on this list has real standing in the commercial roofing insurance space.
The First Data Gathering Phase
The starting point was building a broad longlist of insurers with documented activity in contractor and commercial construction insurance. Sources included industry directories, specialist insurance review platforms, agency listing databases, and published case studies referencing large-scale project coverage. Companies that appeared across multiple source types moved forward for closer review.
Initial Selection Criteria Applied
From the broader list, options without verified commercial roofing or contractor insurance experience were removed. Review patterns were analyzed to check for consistency, looking at whether the same strengths or weaknesses appeared repeatedly across different review sources rather than in isolated mentions. Any provider where the review profile seemed thin or inconsistent was set aside at this stage.
Authenticating the Selected Items
Each shortlisted company’s stated capabilities were cross-checked against what users and clients actually reported in reviews. Where a company claimed specialty in contractor coverage, that claim was checked against real-world feedback about how claims were handled, how policies were structured, and whether roofing-specific scenarios were referenced. Financial strength ratings from major rating agencies were pulled directly from official sources to confirm insurer stability.
The Authority Layer
Beyond financial ratings, companies were evaluated on external signals of authority in the insurance space. This included industry award recognition, mentions in trade publications, original research or data published by the insurer, and affiliations with contractor associations or professional bodies. A strong authority layer generally correlates with longer-term market presence and more reliable service delivery (which is what roofing contractors actually need when a claim lands).
Insurers For Large-Scale Roofing Projects Case Files
Finally, each company was checked for evidence specific to large-scale roofing and commercial construction coverage. This meant looking at dedicated service pages covering roofing or contractor lines, verified reviews from contractors or project owners, and any published case studies or project references tied to high-value construction work. Companies with clear, documented roofing insurance positioning earned higher weight in the final selection.
Finding the Right Insurers For Large-Scale Roofing Projects for Your Needs
Not every insurer on this list is the right fit for every roofing contractor, and that’s the point. Here’s what to weigh before making a decision.
Industry/Domain Experience: Look for insurers with documented experience covering contractor operations, not just general commercial lines. Roofing-specific knowledge in underwriting and claims handling makes a real difference when exposures are complex.
Features and Service: Check that the insurer can cover the full range of your project needs, including general liability, workers’ compensation, builders risk, and completed operations. Gaps in the product lineup create gaps in your protection.
Pricing Structure: Compare premium-to-coverage value carefully, especially on large contracts. An insurer offering lower premiums with tighter exclusions may cost far more when a claim actually occurs.
Results Measurement: Ask about claims settlement turnaround times and loss ratios for commercial roofing accounts. Those numbers tell you more about an insurer’s real performance than any marketing material.
Industry Knowledge and Compliance: Confirm the insurer understands OSHA standards, state contractor licensing laws, and subcontractor insurance mandates. Roofing projects carry state-specific requirements that a generalist insurer may not handle well.
Final Words
Choosing the right insurer for large-scale roofing work comes down to fit, not just price. Financial strength, roofing-specific coverage depth, and claims handling speed all shape the outcome when a project runs into trouble. The five insurers covered here each bring something distinct to the table. As roofing contracts grow in scale and scope, the demand for insurers who genuinely understand this space will only keep rising.
We independently select these products—if you buy from one of our links, we may earn a commission. All prices were accurate at the time of publishing.
Launching online and in stores today, the collaboration is the couple’s first with Anthropologie Home. Artful shoppers are sure to find something for their own homes — or the perfect gift for anyone on their list who enjoys music, hosting, or simply admiring a beautiful object.
What Is the Anthropologie Home x Suleika Jaouad and Jon Batiste Collection?
With almost 50 different products available, the collection is fairly large, focuses on a warm palette of jewel tones, and spans the categories of tabletop, decor, furniture, and entertaining. Inspired by Jaouad and Batiste’s Brooklyn home (where the campaign imagery you see here was shot) as well as their individual creative hobbies, cultural backgrounds, and love of hosting, the pieces feel super personal but are also universal in many ways, thanks to the inclusion of items like glassware, plates, and even holiday ornaments.“It’s rare to collaborate with artists who are so deeply connected to the creative process,” said John Murphy, executive creative director of Anthropologie Home, in a press release about the line. “Suleika and Jon brought such a distinct point of view to every detail, and we wanted the campaign to capture that same sense of warmth and curiosity.”
Some items, like the gorgeous Willoughby Chair, feature Jaouad’s original artwork, while others reflect her Tunisian heritage. Batiste’s composing chops are represented in the musical motifs you’ll find throughout the collection, and his own handwritten affirmations appear on the plates. A custom record player feels like the perfect conversation starter, and a few key textiles round out the cozy meets maximalist cool vibes of the full assortment. “We wanted to create objects that felt personal to us and told a story, but that could be integrated into someone else’s life and become part of their own rituals,” said the couple, also in a press release. “The designs were inspired by our shared visual vocabulary — the colors and patterns of Tunisia, the soul and saturated hues of New Orleans, and the deep blues and greens of the natural world.”
What to Shop from the Anthropologie Home x Suleika Jaouad and Jon Batiste Collection?
You’re going to want to check out this collection ASAP, as Anthro’s holiday offerings often sell out long before the holiday season is officially underway. Prices start at $16 for ornaments and top out at $1,698 for the upholstered chair featuring Jaouad’s art. These are the pieces I couldn’t take my eyes off of, but, again, the full collection is worth a look for sure.
Christmas may be the most wonderful time of the year, but it can also be incredibly chaotic. And as you add presents, decorations, and guests to the festive fun, clutter can multiply and take over your house. That’s why storage is key.
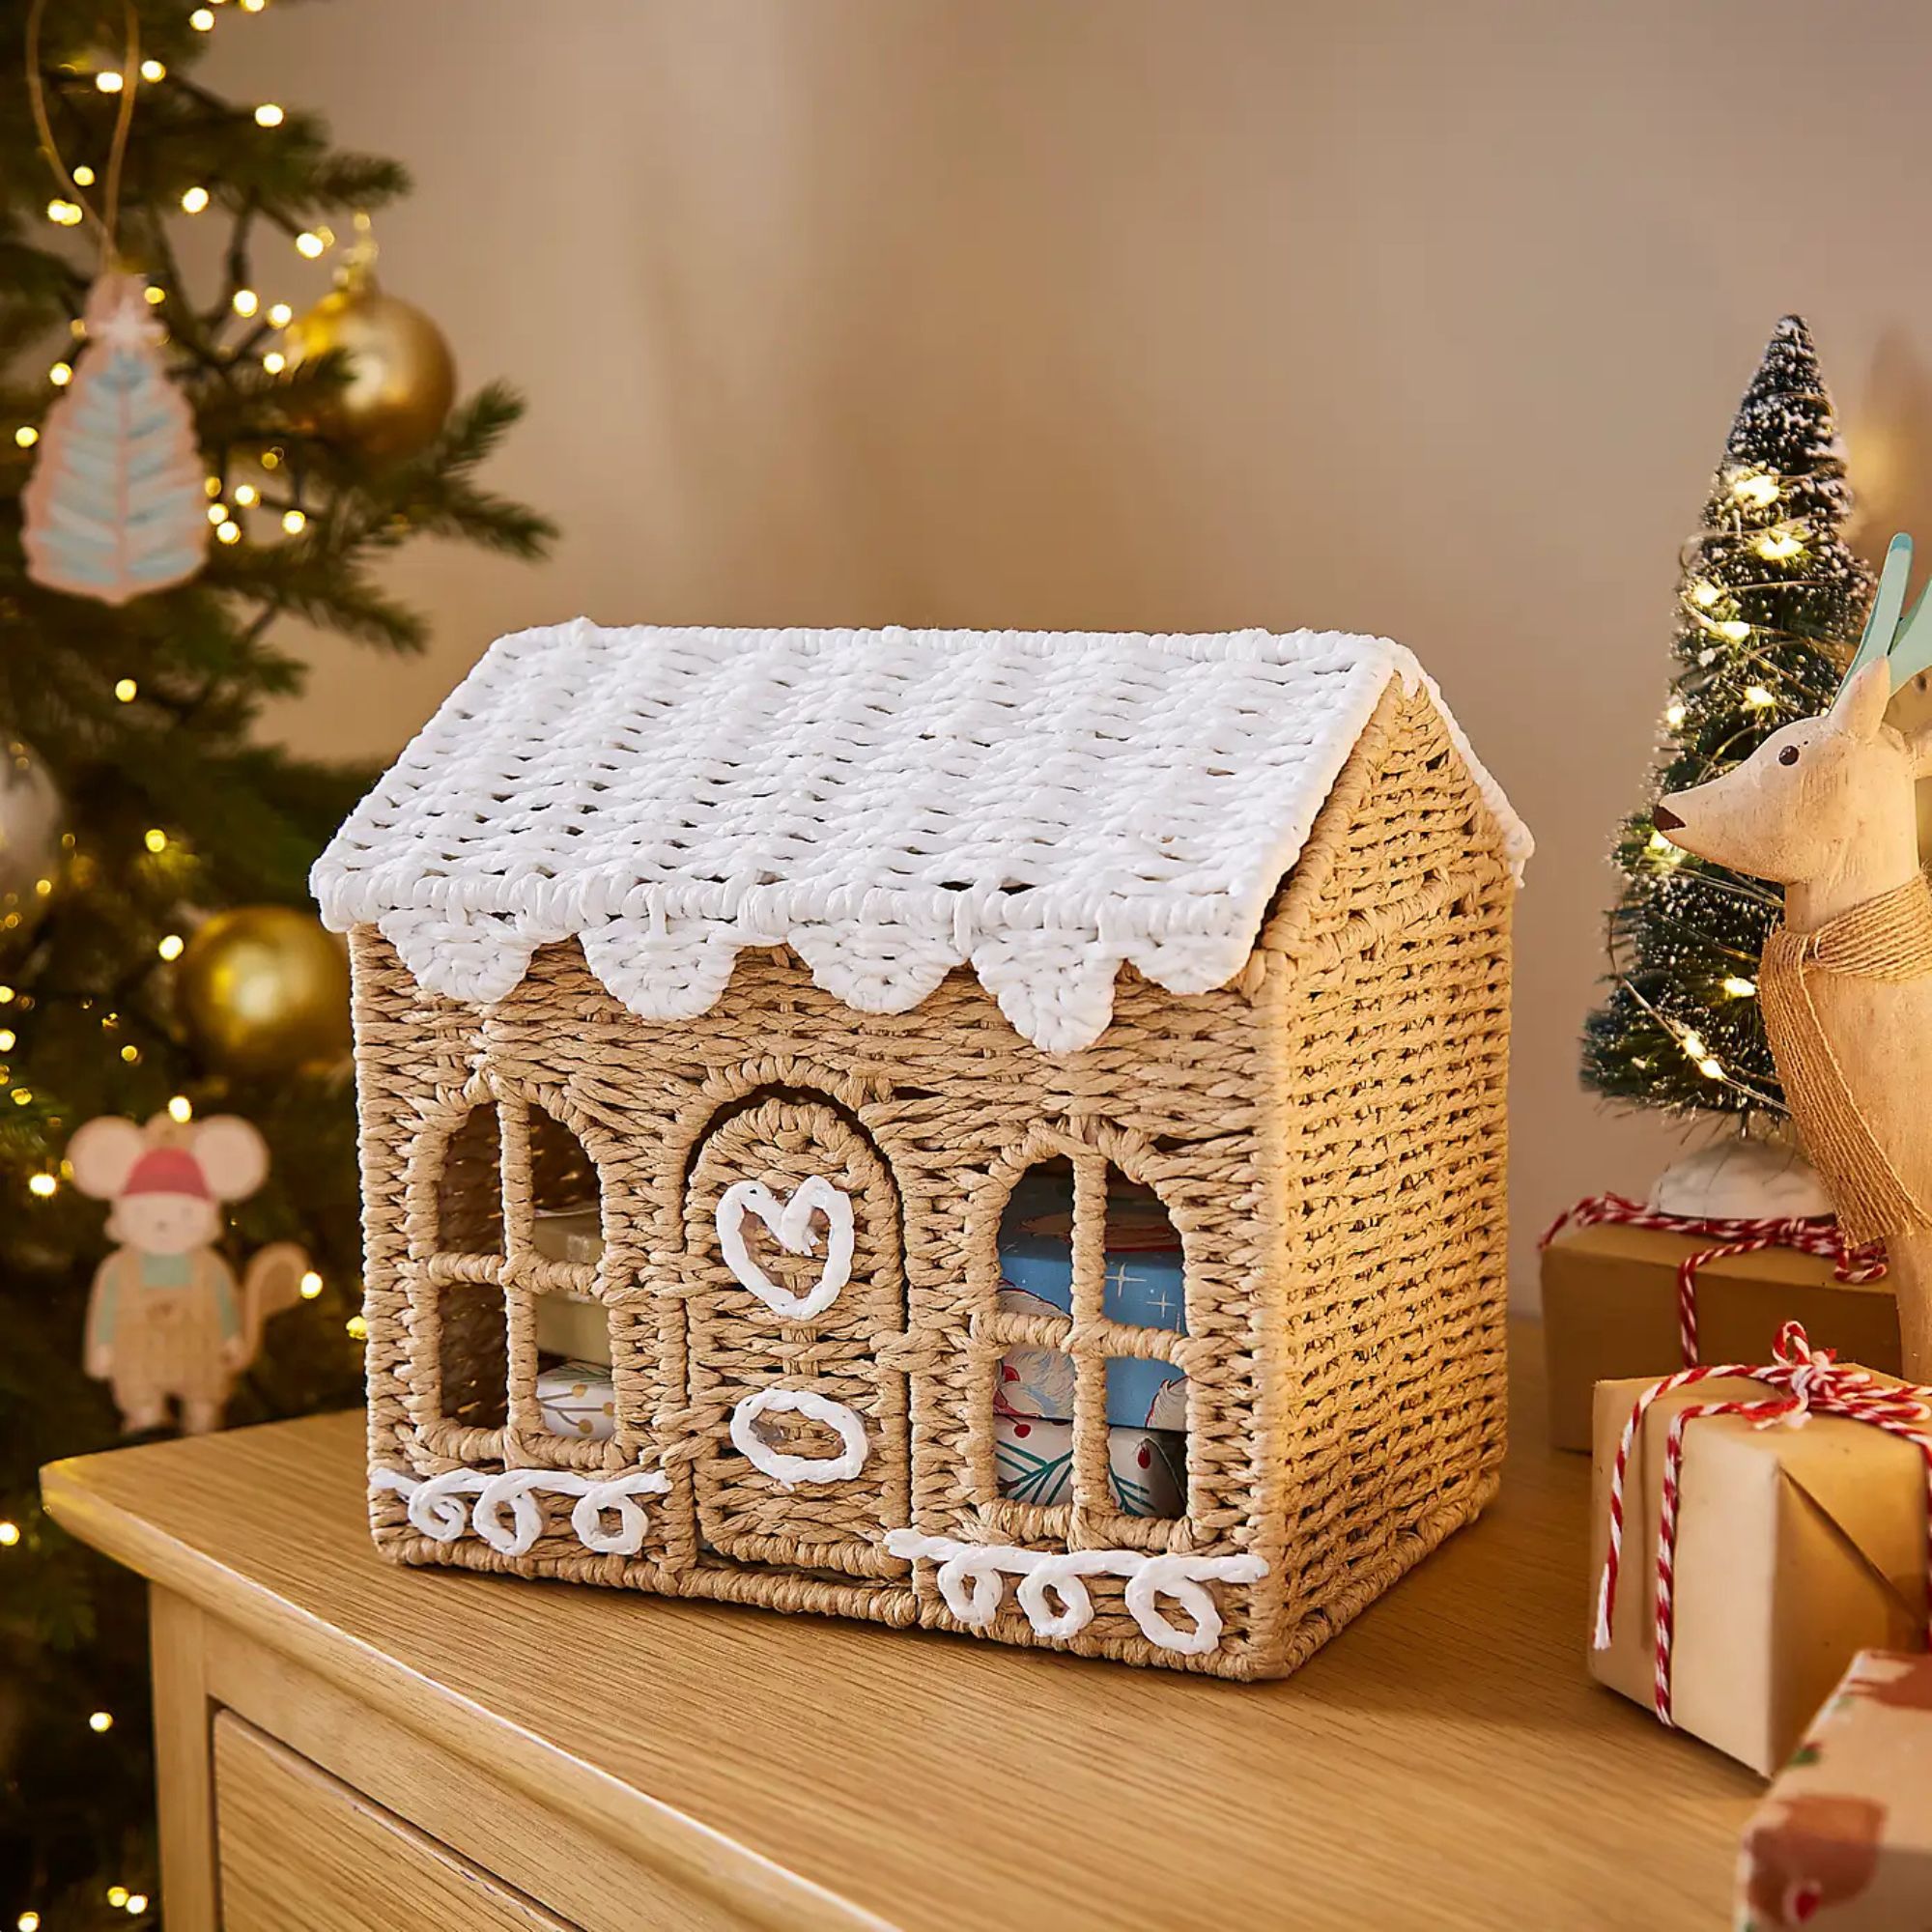
As Ideal Home’s resident organisation guru and storage obsessive, I’m a big fan of pretty-but-practical storage baskets that help you store (and sometimes hide) those items that you don’t want on show. But I’m also a HUGE fan of whimsical Christmas decor. So, when I spotted new Christmas-themed storage baskets making the rounds, I knew they were made for me.
From storage baskets shaped like Christmas puddings to adorable penguins and trees, these are the magical buys I’m snapping up right now to get ahead of Christmas clutter at home. After all, if my prediction is correct, these will sell like hotcakes… or should I say hot chestnuts?
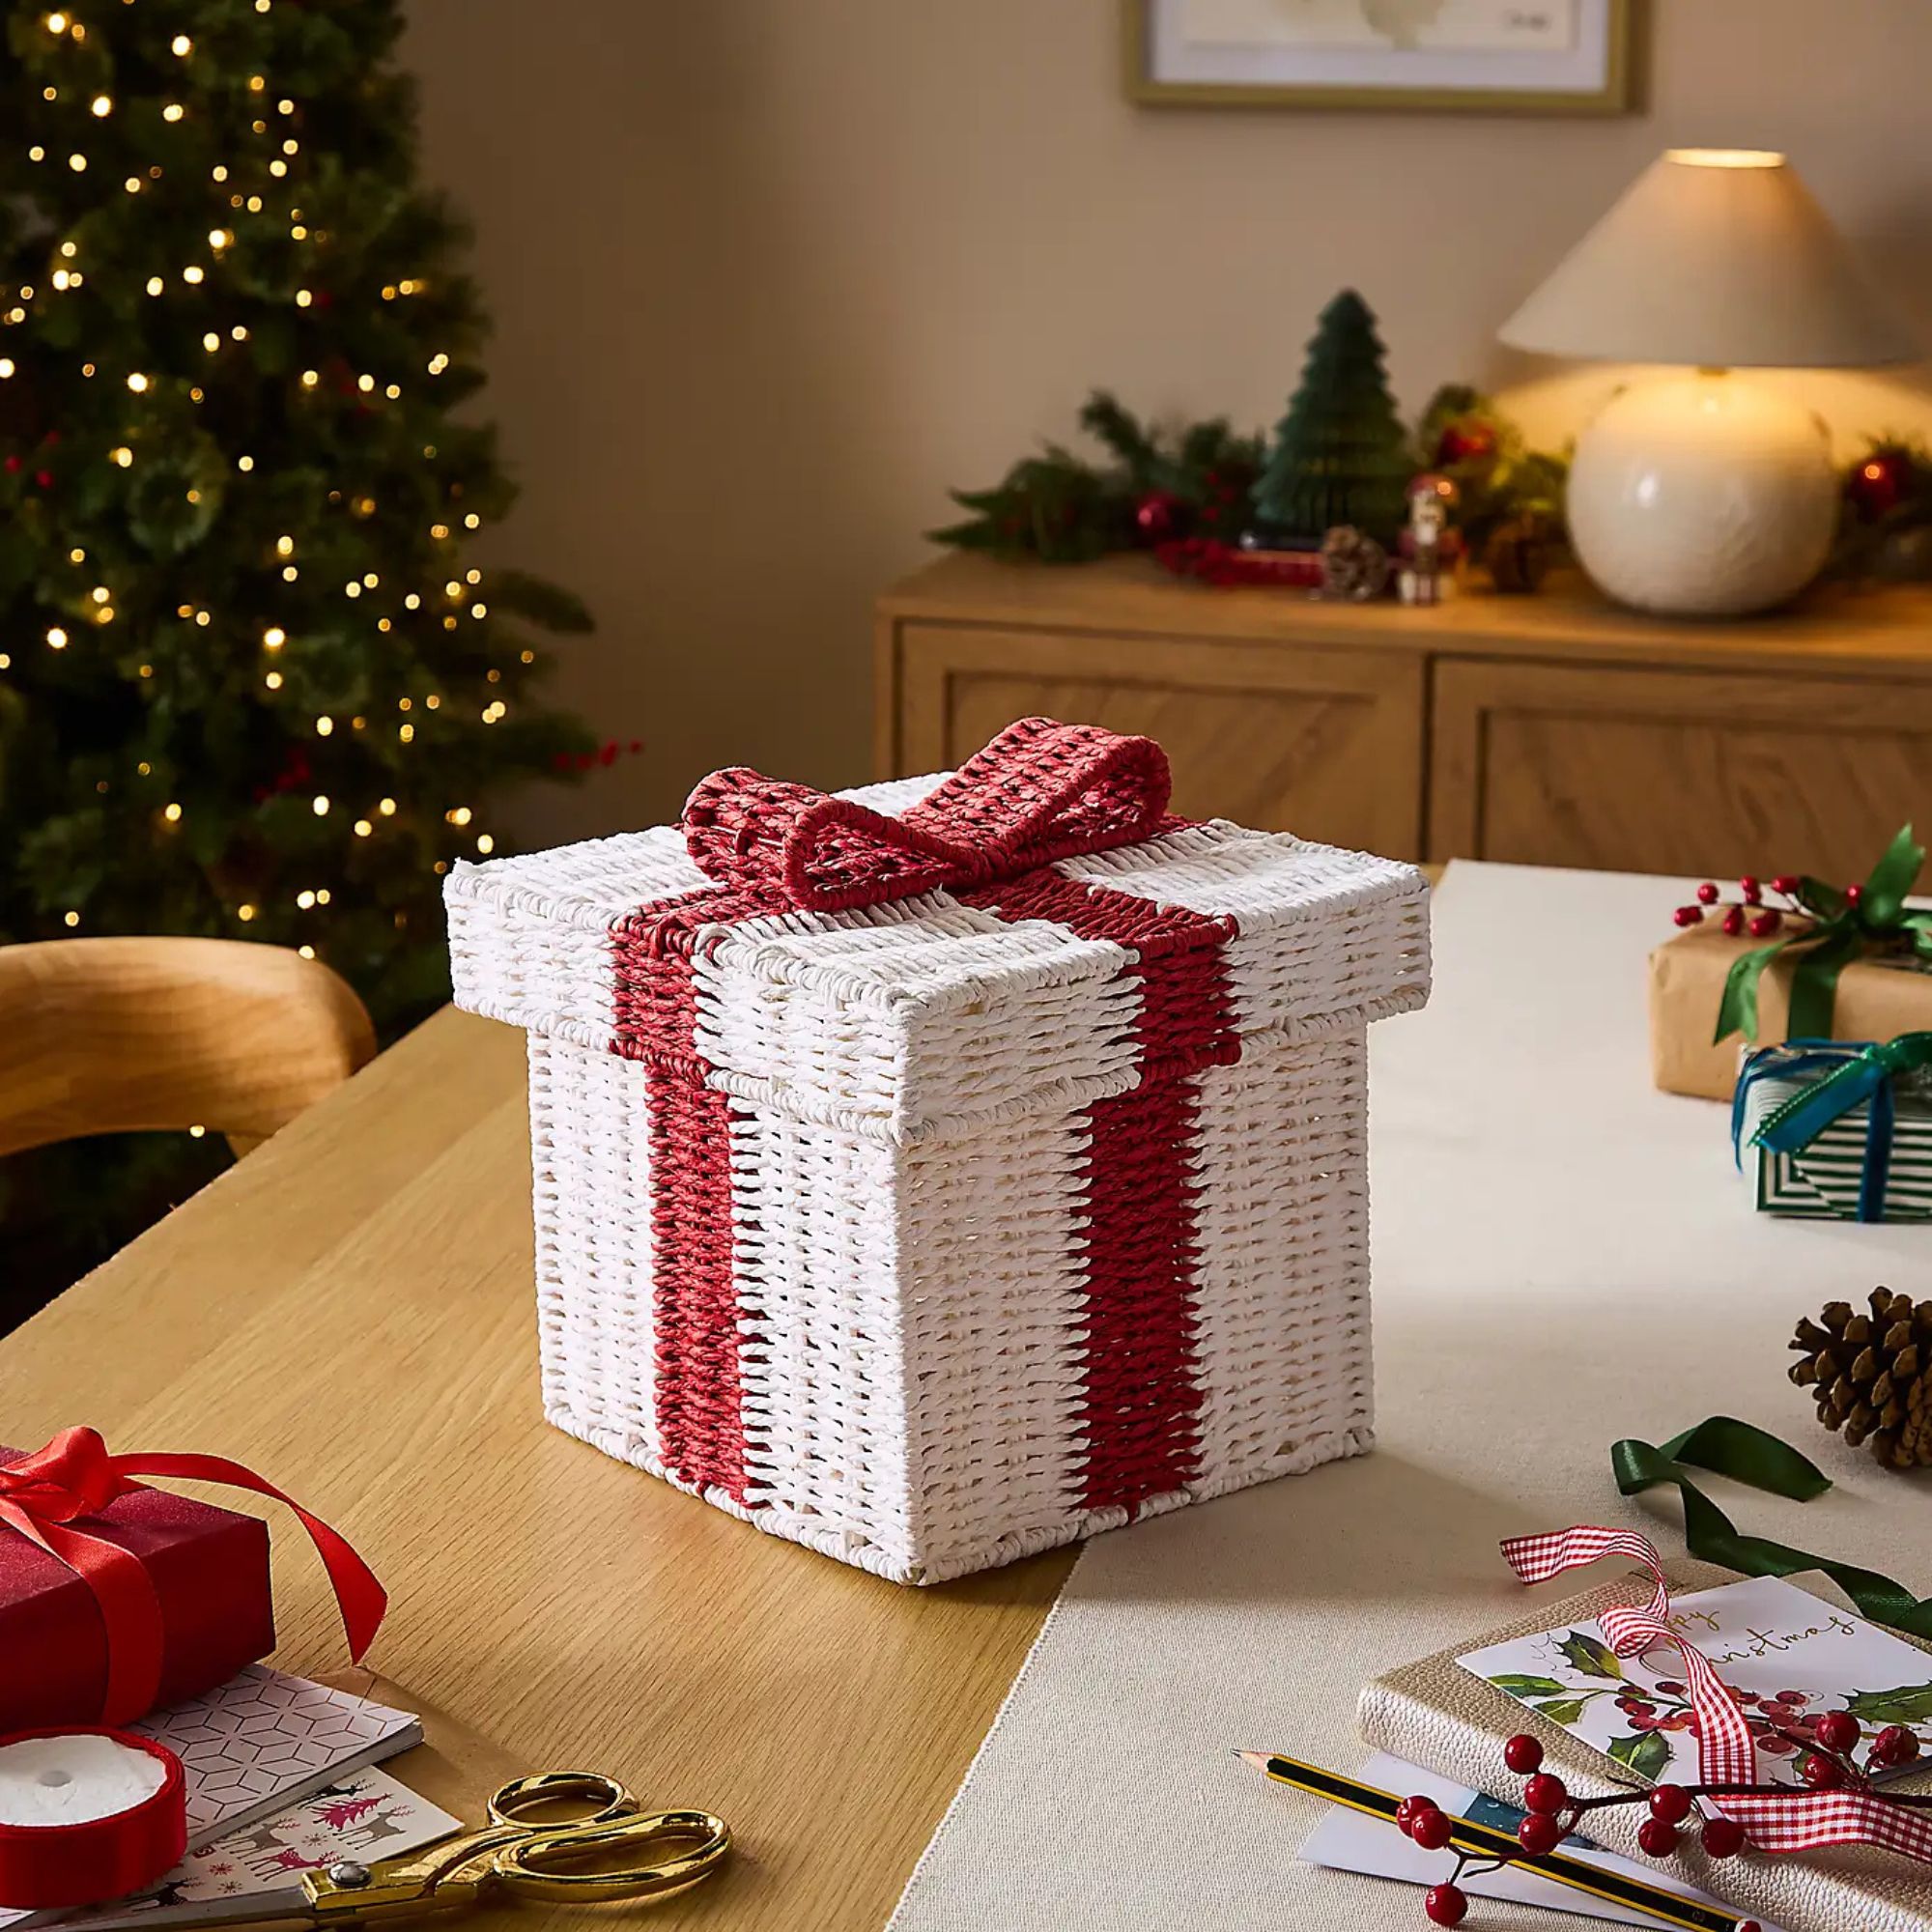
Perfect for decor and organisation, this present basket will be right at home in your living room – or even in your hallway to add some much-needed storage space during hosting season.","brand":"Dunelm","name":"Christmas Present Paper Rope Basket ","urlStyle":"","retailer":"","layout":"hero","linkText":"","noFollow":true,"noAffiliateTracking":false,"promoLabel":"","price":12,"salePrice":null,"currency":"GBP","linkLayout":"text","sponsored":false,"hawkProductNameMatchedCode":"","review":{"cons":[],"id":"","name":"","pros":[],"rating":0,"strapline":"","url":""},"id":"","lastCheckedPriceDate":"","link":{"url":"https:\/\/www.prf.hn\/click\/camref:1011l5dAX6\/pubref:hawk-custom-tracking\/destination:https%3A%2F%2Fwww.dunelm.com%2Fproduct%2Fchristmas-present-paper-rope-basket-with-lid-1000297049","merchantName":"Dunelm","merchantId":579677,"merchantNetwork":"PHG","merchantUrl":"dunelm.com"}}}}}” data-link=”https://www.prf.hn/click/camref:1011l5dAX6/pubref:hawk-custom-tracking/destination:https%3A%2F%2Fwww.dunelm.com%2Fproduct%2Fchristmas-present-paper-rope-basket-with-lid-1000297049″ data-link-merchant=”Dunelm” data-merchant-id=”579677″ data-merchant-name=”Dunelm” data-merchant-network=”PHG” data-merchant-url=”dunelm.com” data-model-brand=”Dunelm” data-model-name=”Dunelm Christmas Present Paper Rope Basket” data-name=”Product Block merchantlink widget” data-render-type=”fte” data-show-fallback=”button” data-widget-type=”merchantlink” class=”ecom-root”>
Perfect for decor and organisation, this present basket will be right at home in your living room – or even in your hallway to add some much-needed storage space during hosting season.
If you ask me, this Christmas pudding basket is perfect for keeping festive treats nearby when you have guests over. Fill it with chocolates, presents and other goodies to make Christmas so much sweeter. ","brand":"Argos Home","name":"Christmas Pudding Basket","urlStyle":"","retailer":"","layout":"hero","linkText":"","noFollow":true,"noAffiliateTracking":false,"promoLabel":"","price":15,"salePrice":null,"currency":"GBP","linkLayout":"text","sponsored":false,"hawkProductNameMatchedCode":"","review":{"cons":[],"id":"","name":"","pros":[],"rating":0,"strapline":"","url":""},"id":"","lastCheckedPriceDate":"","link":{"url":"https:\/\/www.anrdoezrs.net\/click-100624752-15618761?sid=hawk-custom-tracking&url=https:\/\/www.argos.co.uk\/product\/8279314","merchantName":"Argos","merchantId":535,"merchantNetwork":"CJ","merchantUrl":"argos.co.uk"}}}}}” data-link=”https://www.anrdoezrs.net/click-100624752-15618761?sid=hawk-custom-tracking&url=https://www.argos.co.uk/product/8279314″ data-link-merchant=”Argos” data-merchant-id=”535″ data-merchant-name=”Argos” data-merchant-network=”CJ” data-merchant-url=”argos.co.uk” data-model-brand=”Argos Home” data-model-name=”Argos Home Christmas Pudding Basket” data-name=”Product Block merchantlink widget” data-render-type=”fte” data-show-fallback=”button” data-widget-type=”merchantlink” class=”ecom-root”>
If you ask me, this Christmas pudding basket is perfect for keeping festive treats nearby when you have guests over. Fill it with chocolates, presents and other goodies to make Christmas so much sweeter.
Does storage get any cuter than this? Simply take off the top of the tree, and you can fill the inside with any items you don't want on show. Or fill it with new toys so they don't clutter up the floor. ","brand":"Dunelm","name":"Christmas Tree Cotton Rope Basket","urlStyle":"","retailer":"","layout":"hero","linkText":"","noFollow":true,"noAffiliateTracking":false,"promoLabel":"","price":12,"salePrice":null,"currency":"GBP","linkLayout":"text","sponsored":false,"hawkProductNameMatchedCode":"","review":{"cons":[],"id":"","name":"","pros":[],"rating":0,"strapline":"","url":""},"id":"","lastCheckedPriceDate":"","link":{"url":"https:\/\/www.prf.hn\/click\/camref:1011l5dAX6\/pubref:hawk-custom-tracking\/destination:https%3A%2F%2Fwww.dunelm.com%2Fproduct%2Fchristmas-tree-cotton-rope-basket-1000297048","merchantName":"Dunelm","merchantId":579677,"merchantNetwork":"PHG","merchantUrl":"dunelm.com"}}}}}” data-link=”https://www.prf.hn/click/camref:1011l5dAX6/pubref:hawk-custom-tracking/destination:https%3A%2F%2Fwww.dunelm.com%2Fproduct%2Fchristmas-tree-cotton-rope-basket-1000297048″ data-link-merchant=”Dunelm” data-merchant-id=”579677″ data-merchant-name=”Dunelm” data-merchant-network=”PHG” data-merchant-url=”dunelm.com” data-model-brand=”Dunelm” data-model-name=”Dunelm Christmas Tree Cotton Rope Basket” data-name=”Product Block merchantlink widget” data-render-type=”fte” data-show-fallback=”button” data-widget-type=”merchantlink” class=”ecom-root”>
Does storage get any cuter than this? Simply take off the top of the tree, and you can fill the inside with any items you don’t want on show. Or fill it with new toys so they don’t clutter up the floor.
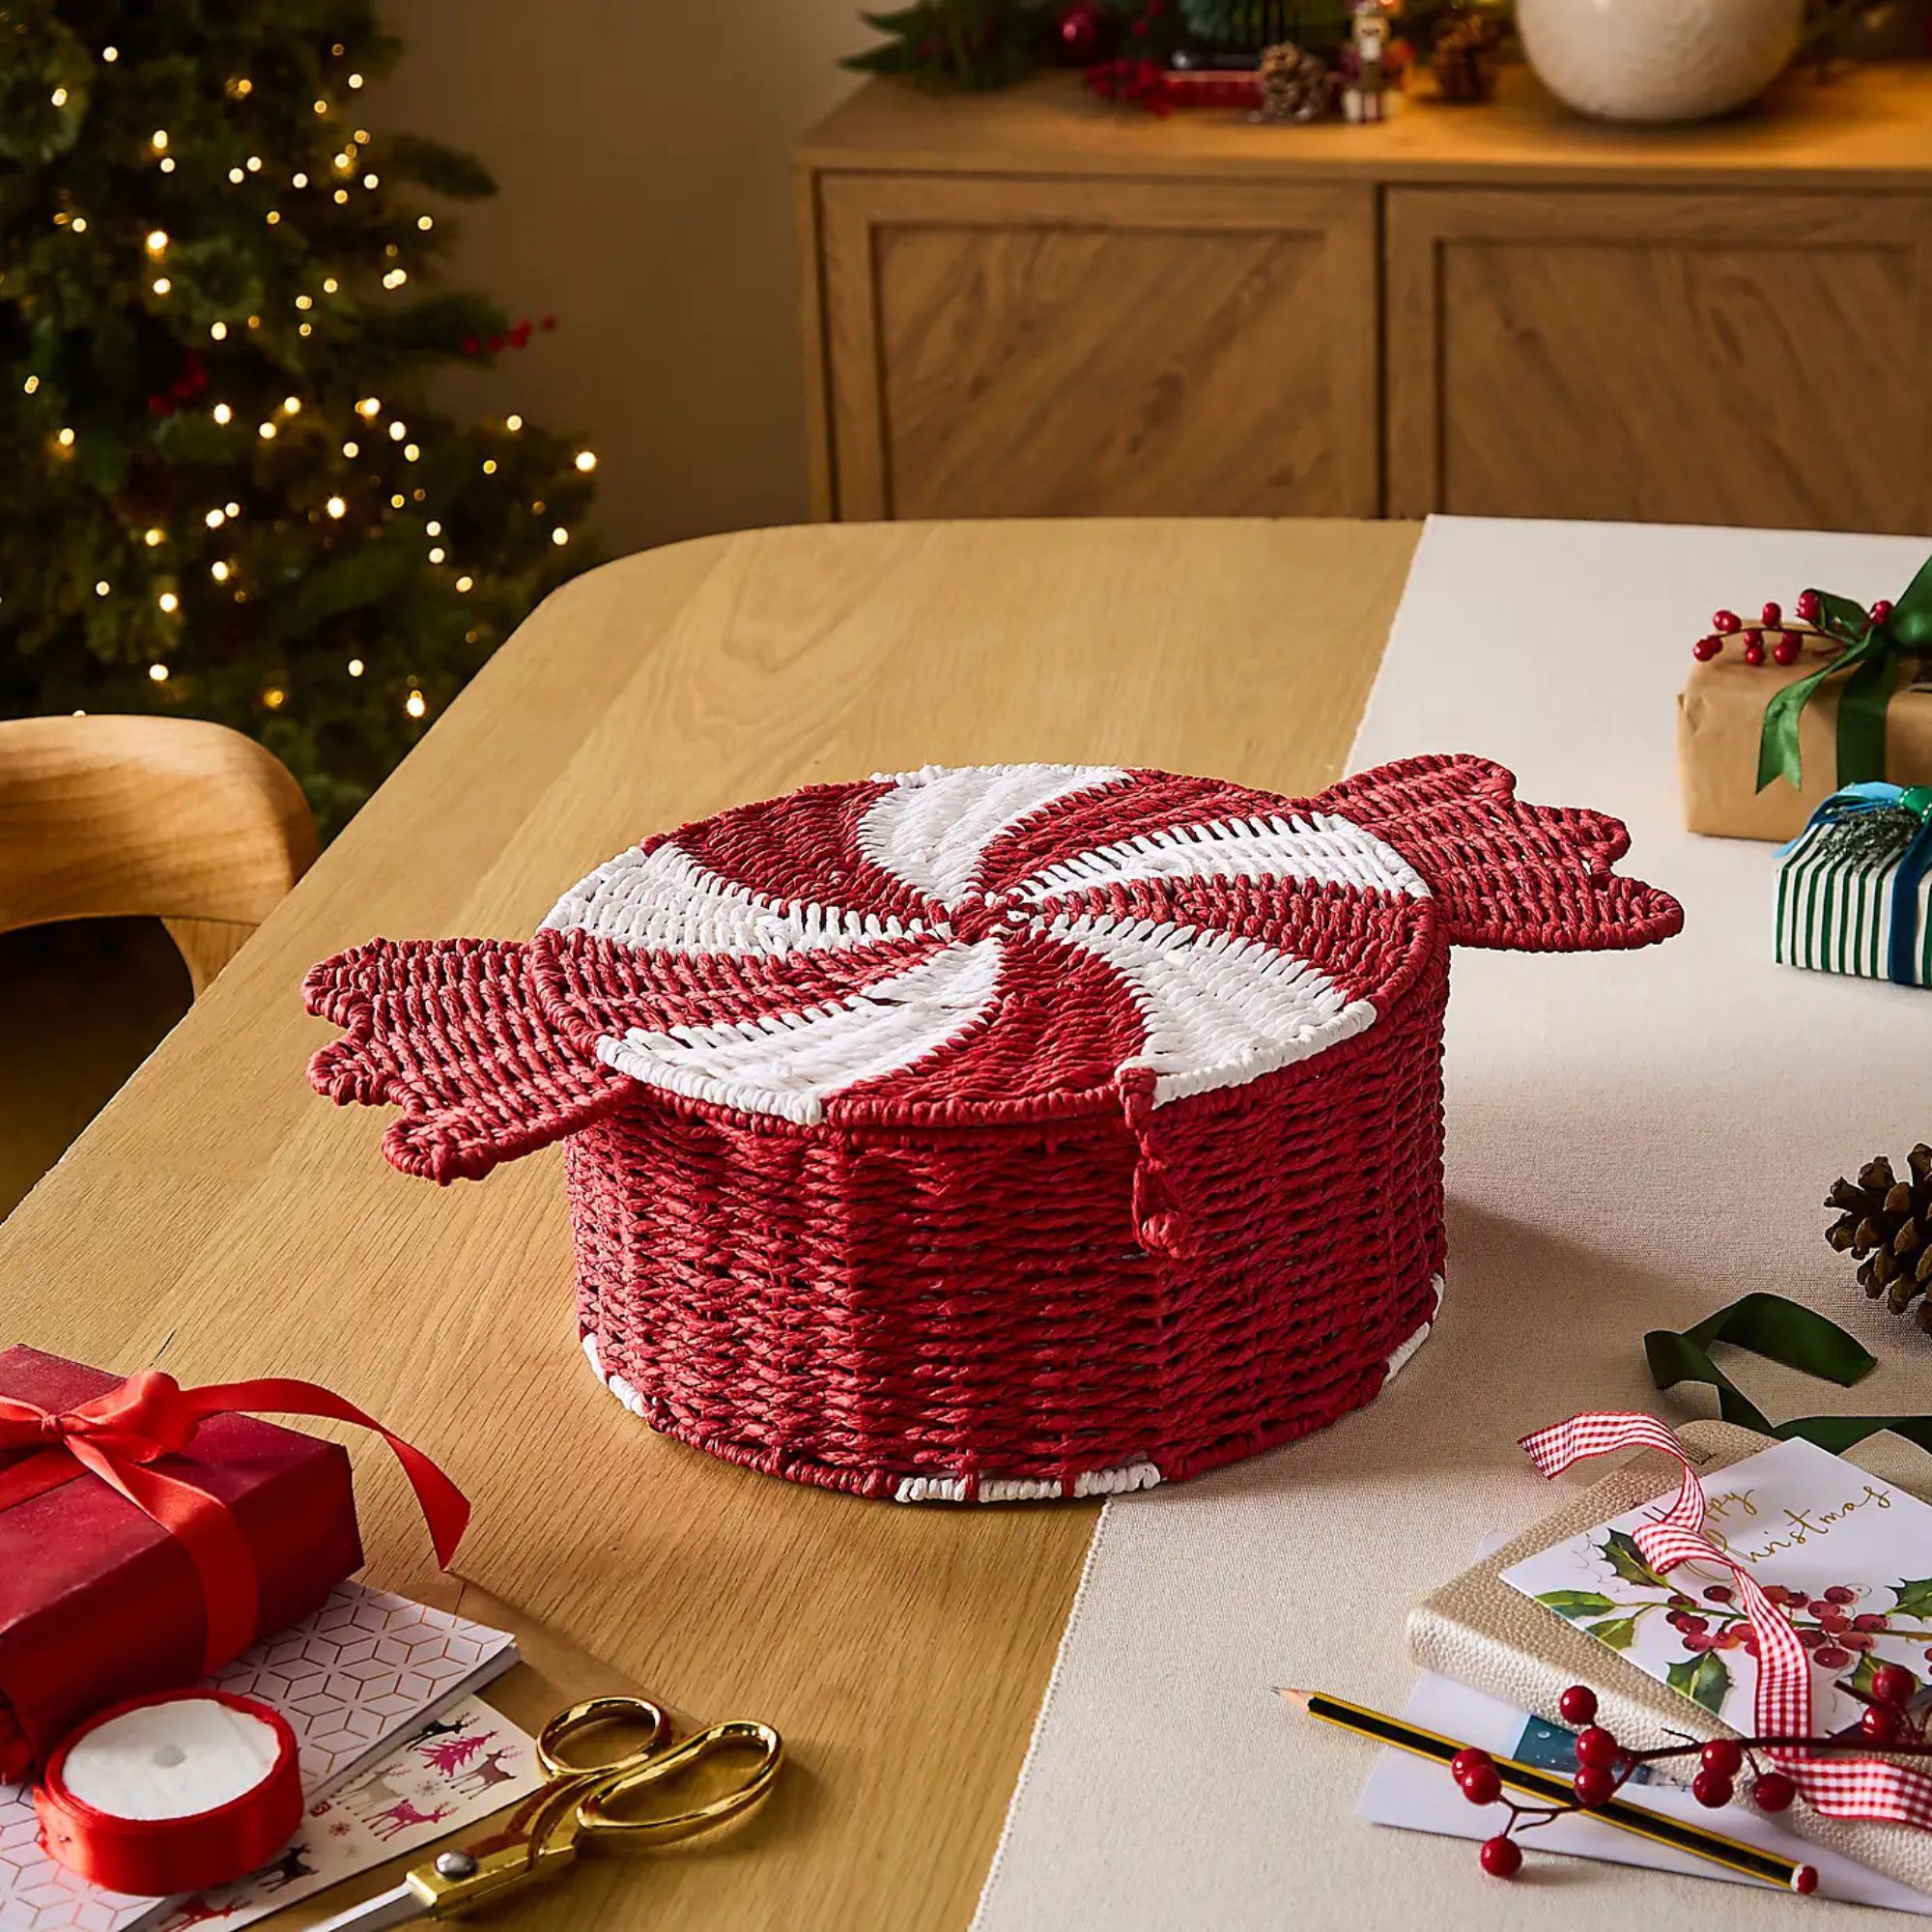
You could use this sweet hamper as part of a Christmas gift, or use it as handy storage around the home during the festive period. Personally, I'd pop this one under the tree and fill it with smaller presents. ","brand":"Dunelm ","name":"Christmas Sweet Paper Rope Hamper ","urlStyle":"","retailer":"","layout":"hero","linkText":"","noFollow":true,"noAffiliateTracking":false,"promoLabel":"","price":15,"salePrice":null,"currency":"GBP","linkLayout":"text","sponsored":false,"hawkProductNameMatchedCode":"","review":{"cons":[],"id":"","name":"","pros":[],"rating":0,"strapline":"","url":""},"id":"","lastCheckedPriceDate":"","link":{"url":"https:\/\/www.prf.hn\/click\/camref:1011l5dAX6\/pubref:hawk-custom-tracking\/destination:https%3A%2F%2Fwww.dunelm.com%2Fproduct%2Fchristmas-sweet-paper-rope-hamper-with-lid-1000297050","merchantName":"Dunelm","merchantId":579677,"merchantNetwork":"PHG","merchantUrl":"dunelm.com"}}}}}” data-link=”https://www.prf.hn/click/camref:1011l5dAX6/pubref:hawk-custom-tracking/destination:https%3A%2F%2Fwww.dunelm.com%2Fproduct%2Fchristmas-sweet-paper-rope-hamper-with-lid-1000297050″ data-link-merchant=”Dunelm” data-merchant-id=”579677″ data-merchant-name=”Dunelm” data-merchant-network=”PHG” data-merchant-url=”dunelm.com” data-model-brand=”Dunelm ” data-model-name=”Dunelm Christmas Sweet Paper Rope Hamper” data-name=”Product Block merchantlink widget” data-render-type=”fte” data-show-fallback=”button” data-widget-type=”merchantlink” class=”ecom-root”>
You could use this sweet hamper as part of a Christmas gift, or use it as handy storage around the home during the festive period. Personally, I’d pop this one under the tree and fill it with smaller presents.
The beauty of this festive storage basket is that it's not obviously Christmas-themed. This means that you can use it year-round, and it's perfect for adding some extra organisation to a child's (or adult's!) bedroom. ","brand":"Dunelm","name":"Penguin Paper Rope Hamper","urlStyle":"","retailer":"","layout":"hero","linkText":"","noFollow":true,"noAffiliateTracking":false,"promoLabel":"","price":15,"salePrice":null,"currency":"GBP","linkLayout":"text","sponsored":false,"hawkProductNameMatchedCode":"","review":{"cons":[],"id":"","name":"","pros":[],"rating":0,"strapline":"","url":""},"id":"","lastCheckedPriceDate":"","link":{"url":"https:\/\/www.prf.hn\/click\/camref:1011l5dAX6\/pubref:hawk-custom-tracking\/destination:https%3A%2F%2Fwww.dunelm.com%2Fproduct%2Fpenguin-paper-rope-hamper-with-lid-1000297052","merchantName":"Dunelm","merchantId":579677,"merchantNetwork":"PHG","merchantUrl":"dunelm.com"}}}}}” data-link=”https://www.prf.hn/click/camref:1011l5dAX6/pubref:hawk-custom-tracking/destination:https%3A%2F%2Fwww.dunelm.com%2Fproduct%2Fpenguin-paper-rope-hamper-with-lid-1000297052″ data-link-merchant=”Dunelm” data-merchant-id=”579677″ data-merchant-name=”Dunelm” data-merchant-network=”PHG” data-merchant-url=”dunelm.com” data-model-brand=”Dunelm” data-model-name=”Dunelm Penguin Paper Rope Hamper” data-name=”Product Block merchantlink widget” data-render-type=”fte” data-show-fallback=”button” data-widget-type=”merchantlink” class=”ecom-root”>
The beauty of this festive storage basket is that it’s not obviously Christmas-themed. This means that you can use it year-round, and it’s perfect for adding some extra organisation to a child’s (or adult’s!) bedroom.
While I’m obsessed with these adorable festive storage additions, I also appreciate that other Christmas storage needs to be practical. That’s why I’ve recently snapped up some practical storage for my Christmas tree, wreaths and baubles, too.
Sign up to our newsletter for style inspiration, real homes, project and garden advice and shopping know-how