
If you’re anything like me, your pets aren’t just animals, they’re full-fledged family members who deserve to be part of every holiday tradition. And what says “you’re part of the family” more than their very own Christmas stocking hanging alongside everyone else’s?
Making animal Christmas stockings is easier than you might think, and the best part is personalizing them to match your furry friend’s unique personality.
Whether you have a playful pup, a curious cat, or another beloved companion, I’m going to show you how to create adorable paw-shaped stockings that’ll make your pet feel extra special this holiday season.
Why Make DIY Animal Christmas Stockings?
Before we dive into the how-to, let’s talk about why handmade animal Christmas stockings are worth your time.
First, there’s the cost factor. Custom pet stockings can run $30-50 or more, while making your own costs just a fraction of that.
You’ll have complete control over the colors, fabrics, and details, so you can match your pet’s coloring or coordinate with your existing holiday decor.
These stockings also make incredibly thoughtful gifts for the pet lovers in your life. Imagine giving your friend a personalized stocking for their new puppy or their beloved senior cat.
It’s the kind of heartfelt present that shows you really get what matters to them.
Plus, let’s be honest, there’s something wonderfully satisfying about creating something with your own hands, especially when it becomes part of your family’s holiday traditions.
Years from now, you’ll smile remembering the afternoon you spent sewing that first stocking for your four-legged family member.
Materials You’ll Need
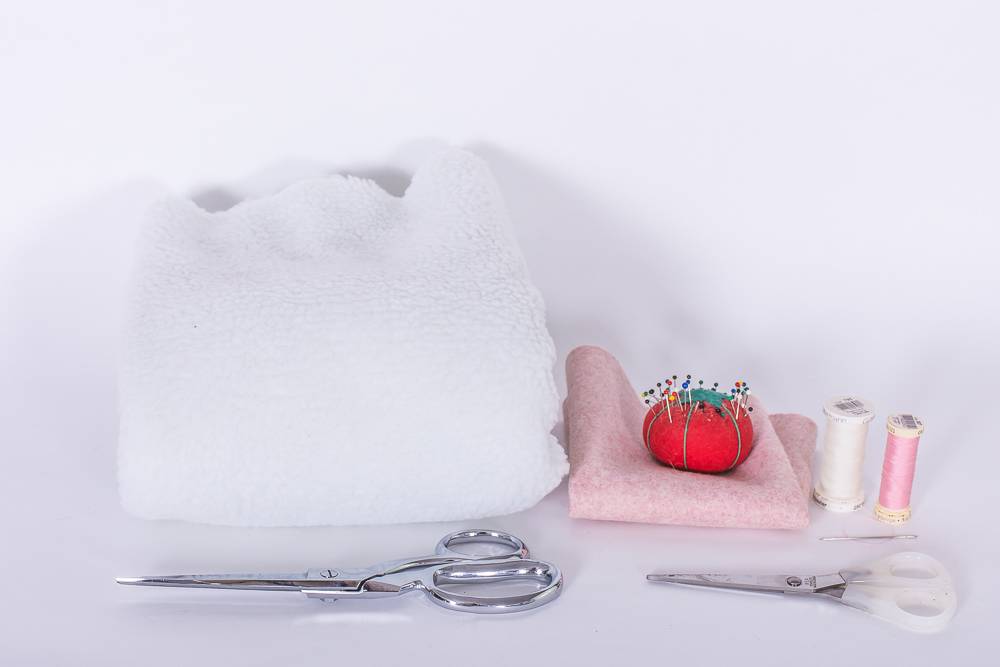
Gathering your supplies is the first step to success. Here’s everything you’ll need:
- Faux fur fabric (½ yard is plenty for one stocking)
- Felt in coordinating colors (for paw pads and cuff)
- Fabric scissors (sharp ones make all the difference!)
- Sewing machine or needle and thread
- Sewing pins
- Pen or fabric marker
- Paw template (download link)
- Optional: iron-on letters, embroidery supplies, or fabric paint for personalization
You can find faux fur fabric at most craft stores or online. I love choosing colors that match my pets—brown for my chocolate lab, gray for my tabby cat.
Felt comes in every color imaginable, so you can get creative with the paw pad colors. Some people like realistic black or pink paw pads, while others go bold with red or green for a festive touch.
If you’re working with a tight budget, check the remnant bins at fabric stores. You often need less than half a yard of faux fur, so remnants are perfect and usually discounted!
Step-by-Step Instructions
Now for the fun part—let’s make some stockings! I’ll walk you through each step, and trust me, this is more straightforward than it looks.
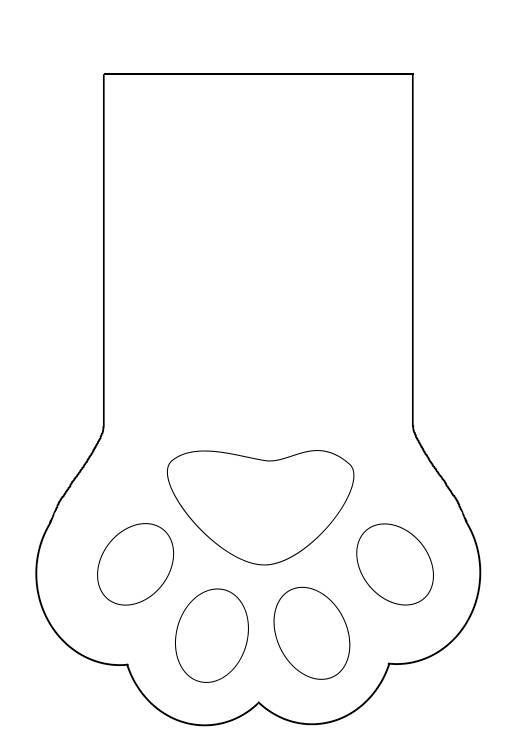
Download and Prepare Your Template
Start by downloading the paw template and printing it at full size. The template should create a stocking that’s approximately 12 inches tall. This is perfect for most dogs and cats.
If you have a smaller pet like a guinea pig or ferret, you can scale down the template when printing (try 75% for a 9-inch stocking). For larger dogs, scale it up to 125% for a 15-inch stocking.
Once printed, carefully cut out the template. You’ll notice it includes the main paw shape and separate paw pad pieces. Keep all the pieces together—I like to put them in a large envelope so nothing gets lost.

Cut Your Fabric Pieces
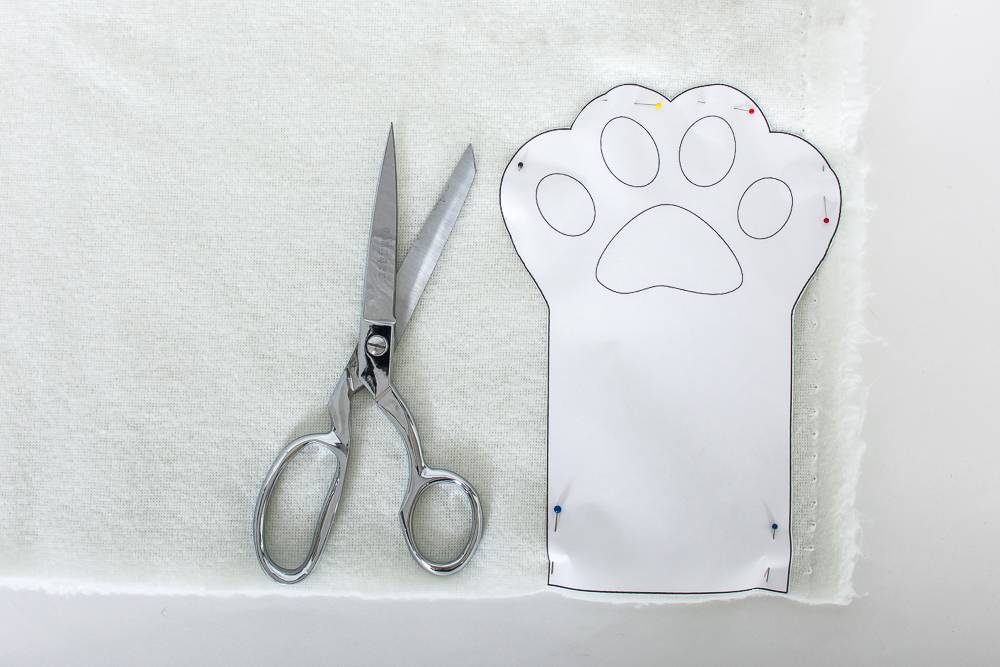
This is where your fabric scissors come in handy! Fold your faux fur fabric in half with the fuzzy side (the pile) facing inward. Place your paw template on top and pin it securely.
When cutting faux fur, here’s a pro tip: cut through just the backing fabric, not the fur itself. This prevents creating a choppy edge and minimizes shedding.
Pay attention to the direction of the fur pile—you want it running downward on your finished stocking for the most realistic look. Cut out two identical paw shapes.
Next, place your paw pad template pieces on your felt and trace them.
You’ll need one large center pad and four smaller toe pads. Cut these out carefully.
Felt is much easier to work with than faux fur!
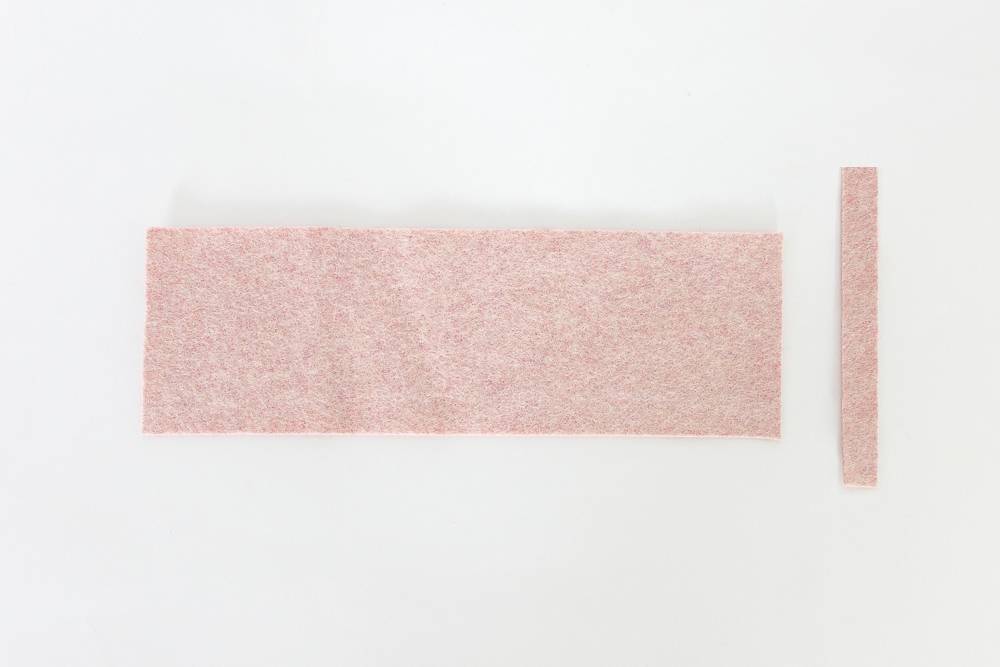
Finally, measure and cut two rectangles from your felt:
- One piece 9½ inches by 3 inches (this becomes your cuff)
- One piece 4½ inches by ½ inch (this becomes your hanging loop)
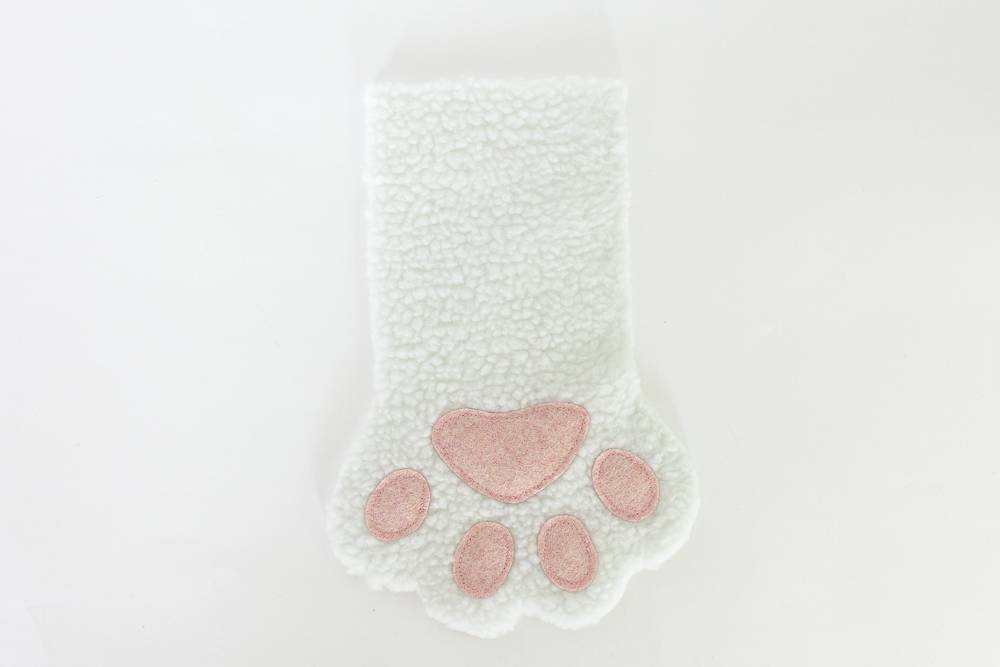
Create the Paw Pad Details
Now we’re adding those adorable paw pads that really make these stockings special! Lay out one of your faux fur paw pieces with the fuzzy side facing up (this will be the outside of your stocking).
Arrange your felt paw pads in position – one large pad at the bottom center and four smaller pads arranged above it like toes.
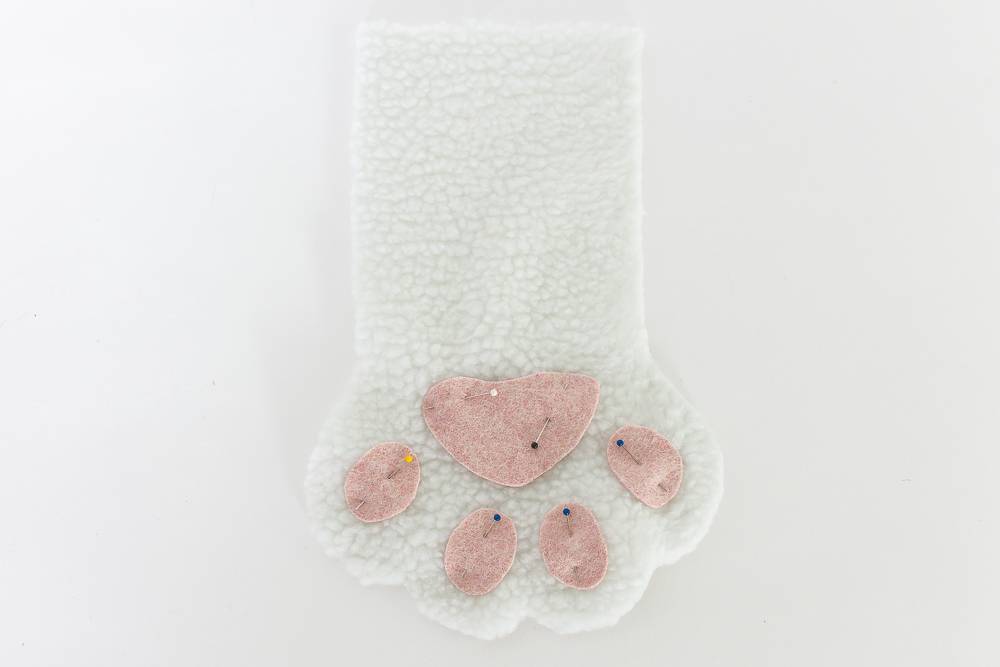
Take your time getting the placement just right before pinning everything in place. Once you’re happy with how it looks, sew each paw pad down using thread that matches your felt color.
You can do this by hand with a simple running stitch or whipstitch, or use your sewing machine with a straight stitch close to the edge of each pad.
I find that going slowly and pivoting carefully around the curves gives the neatest result. Don’t worry if your stitches aren’t perfect – remember, this is a handmade creation, and those little imperfections add character!
Assemble the Stocking
Here’s where your stocking really starts to take shape. Place your two faux fur paw pieces together with the right sides (fuzzy sides) facing each other.
The paw pads should be on the inside, hidden between the layers. Pin all around the edges, leaving the top straight edge open.
Using a ⅛-inch seam allowance, sew around the entire paw shape. Take your time around the toe curves and the space between the toes—these tight corners can be tricky.
If you’re sewing by hand, use a backstitch for strength. If you’re using a machine, go slowly and pivot with the needle down when turning corners.
Once you’ve sewn all the way around, carefully trim any excess fabric from the curves and corners, being careful not to cut into your stitches. This helps the stocking turn right-side-out more smoothly.
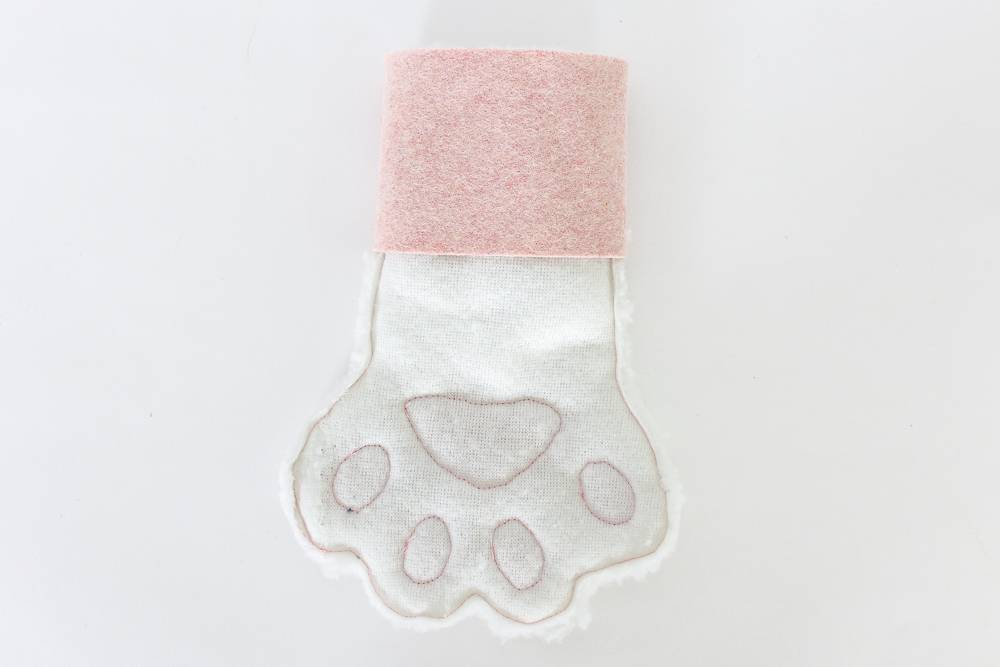
Add the Cuff
Take your 9½-inch by 3-inch felt rectangle and sew the short ends together with a ⅛-inch seam allowance. This creates a tube that will become your cuff. Now turn your stocking inside-out (if it isn’t already) so the paw pads are hidden inside.
Slip this felt tube over the top of your inside-out stocking, with the seam of the tube aligned with the back seam of your stocking. Pin the raw edge of the felt tube to the raw edge at the top of your stocking, making sure everything is even all the way around.
Sew around this top edge to attach the cuff to the stocking. This seam will be hidden when you fold the cuff down, so don’t worry too much about making it perfect.
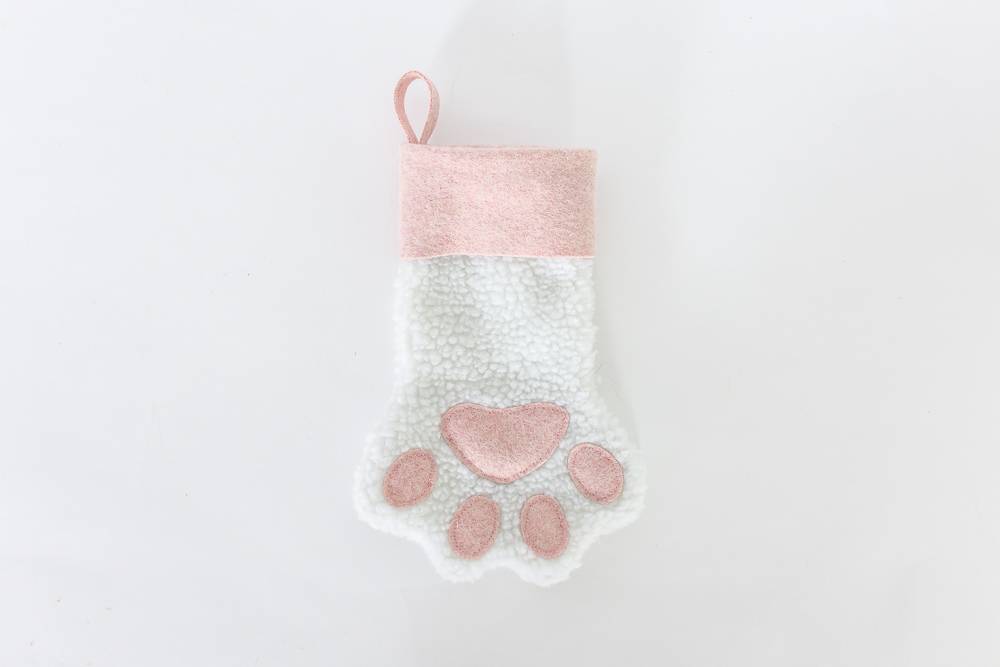
Create Hanging Loop and Final Touches
Almost done! Turn your stocking right-side-out through the top opening. Give it a good shake to fluff up the fur, and use your fingers or a blunt tool to gently push out the toe shapes so they’re nice and rounded.
Fold the felt cuff down to create that classic stocking look. Now take your 4½-inch by ½-inch felt strip and fold it in half to create a loop. Position this at the top back corner of your stocking (on the cuff) and hand-sew it securely in place.
Make sure to stitch through both layers of the cuff for a strong attachment. You don’t want this falling off when it’s stuffed full of treats!
If you’re adding personalization like your pet’s name, now’s the time to do it. Iron-on letters work great on the felt cuff, or you can embroider names for a truly custom touch.
Personalization Ideas
This is where you can really let your creativity shine! Here are some ideas I love:
Match Your Pet’s Coloring: Use brown faux fur for chocolate labs, gray for tabbies, white for Westies, or spotted fabrics for Dalmatians. Getting that color match makes the stocking feel extra special.
Add Their Name: Iron-on letters are the quickest option and come in tons of fonts and colors. If you’re handy with embroidery, stitching their name adds an elegant touch. Fabric paint works too, but test it on a scrap first to make sure you like how it looks.
Size It Right: The standard 12-inch stocking works for most pets, but don’t be afraid to adjust. I made a tiny 6-inch version for my friend’s hamster, and it was absolutely precious hanging on her mantel!
Festive Embellishments: Consider adding small bells, ribbon bows, or holiday-themed appliques. Just make sure anything you add is securely attached if your pet might try to “help” remove it later.
Coordinate With Your Decor: If your holiday color scheme is gold and white, use cream faux fur with gold felt accents. Love traditional red and green? Go for it! These stockings should fit seamlessly into your existing holiday setup.
Tips for Success
Working with faux fur can be a little tricky if you’ve never done it before, so here are my hard-won tips:
Minimize the Mess: Faux fur sheds during cutting. Work over a trash bag or old sheet you can shake outside afterward. A lint roller is your friend for cleanup!
Cutting Technique: Always cut from the backing side, not the fur side, using just the tips of your scissors. This prevents cutting the actual fur fibers and reduces shedding.
Sewing Through Thick Layers: When sewing the cuff to the stocking, you’re going through several layers of fabric. If you’re using a machine, go slowly and use a heavy-duty needle. Hand-sewing? Use a thimble to save your fingers!
Test First: If you’re trying a new technique like fabric paint or embroidery, practice on felt scraps first. It’s much better to make mistakes on scraps than on your finished stocking.
Keep Pieces Organized: As you cut out your paw pads, keep them arranged in position so you remember which piece goes where. I learned this the hard way when I mixed up all my toe pads!
Common Mistakes to Avoid: Don’t skip the step of pinning everything before sewing—it really does make a difference in your final result. Also, resist the temptation to use a seam allowance larger than ⅛ inch, as this will make your stocking noticeably smaller than intended.
What to Fill Your Animal Christmas Stockings With
Now that you’ve created these adorable stockings, what should go inside them? Here are some ideas that’ll make your pet’s tail wag (or purr with contentment):
For Dogs
- Favorite treats or training rewards
- New tennis balls or squeaky toys
- Dental chews
- A new collar or bandana
- Puzzle toys filled with peanut butter
For Cats
- Catnip toys
- Feather wands or crinkle balls
- Freeze-dried treats
- A new collar with a bell
- Small plush mice
For Other Pets
- Species-appropriate treats
- New hideaways or tunnels
- Chew toys
- Grooming supplies
- Food puzzles
Remember to consider your pet’s size when filling their stocking. You don’t want it so stuffed that it falls off the mantel!
I like to include a mix of treats they can enjoy right away and toys that’ll keep them entertained throughout the holiday season.
Variations and Adaptations
While the paw-shaped design is classic, there’s room for creativity:
Different Paw Prints: Cat paws are smaller and more delicate than dog paws. You can modify the template to create species-specific shapes. Rabbit paws are longer and narrower—perfect for your bunny friend!
Traditional Shape With Animal Details: Not comfortable with the paw shape? Make a traditional stocking pattern and add paw pad appliques to the front, or use animal-print fabric.
No-Sew Options: If sewing isn’t your thing, you can create stockings using fabric glue instead of stitching. It won’t be quite as durable, but it absolutely works for decorative purposes.
Bone-Shaped for Dogs: Instead of a paw, why not make a bone-shaped stocking? Use the same construction technique with a bone-shaped template instead.
Mini Stockings: Create tiny versions (4-6 inches) for small pets like birds, hamsters, or fish. They’re quick to make and absolutely adorable!
Frequently Asked Questions
What fabrics work best for animal Christmas stockings?
Faux fur is my top choice because it’s soft, festive, and comes in colors to match almost any pet. However, fleece, flannel, or even quilting cotton work beautifully, too.
For outdoor dogs who might actually interact with their stocking, machine-washable fabrics like fleece are practical.
Can I make this without a sewing machine?
Absolutely! Hand-sewing takes longer, but it’s completely doable. Use a backstitch for strength along the seams, and a whipstitch or running stitch for attaching the paw pads.
Plan for about 2-3 hours of sewing time, rather than 30-45 minutes by machine.
How do I adjust the size for different pets?
The easiest way is to scale the template when printing. Print at 75% for a 9-inch stocking (perfect for cats and small dogs), 100% for a 12-inch stocking (most dogs), or 125% for a 15-inch stocking (large dogs). Remember to adjust your felt cuff measurements proportionally, too.
What’s the best way to add my pet’s name?
Iron-on letters are quickest and look clean and professional. You can find them at any craft store in multiple fonts and colors.
For a more personal touch, hand-embroidery using backstitch or chain stitch creates beautiful results. Fabric paint or markers work too. Just be sure to let them dry completely and heat-set them if required.
How do I wash handmade pet stockings?
Spot-clean when possible using a damp cloth and mild soap. If you need to fully wash it, turn it inside-out, place it in a mesh laundry bag, and use cold water on a gentle cycle.
Air dry completely. Never put faux fur in the dryer, as heat can damage its fibers. If you made yours from fleece or cotton instead, machine washing and drying is usually fine.
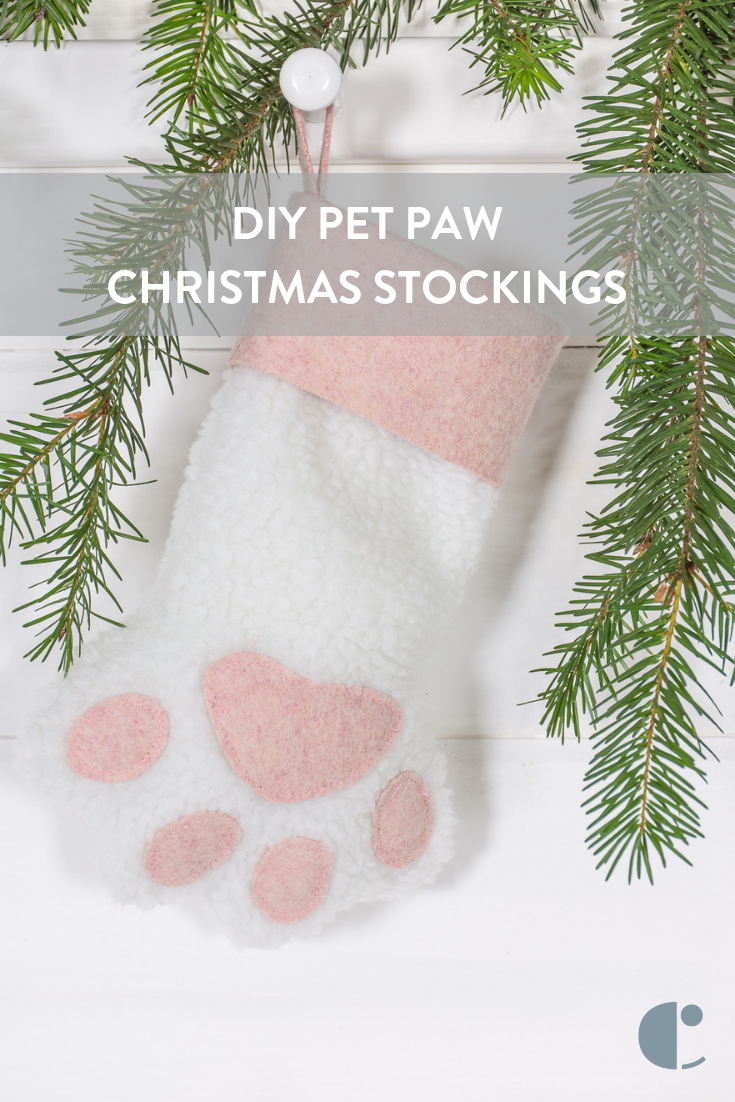
DIY Pet Christmas Stockings

Learn to sew adorable paw-shaped Christmas stockings for your furry family members! This beginner-friendly tutorial shows you how to create personalized animal christmas stockings using faux fur and felt. Perfect for dogs, cats, and other pets, these handmade stockings add a special touch to your holiday traditions. Customize with your pet’s name and favorite colors for a one-of-a-kind decoration they’ll love seeing filled with treats each year.
Materials
- Faux fur fabric
- Felt
- Fabric scissors
- Sewing machine (optional)
- Needle
- Thread
- Regular scissors
- Sewing pins
- Pen
- Paw template (download)
Instructions
Notes
Helpful Tips:
- Fabric tip: Cut faux fur with the pile running downward for the most realistic paw appearance
- Sizing: Template creates a 12″ stocking; scale up or down on your printer to adjust size for different pets
- Beginner-friendly: Can be sewn by hand if you don’t have a sewing machine—just allow extra time
- Personalization: Add your pet’s name using iron-on letters, embroidery, or fabric paint before assembling
- Seam allowance: Keep consistent ⅛” seam allowance throughout for best results
- Drying time: Allow at least 48 hours for complete drying if using any fabric glues or paints
Quick Notes:
- Scale the template up or down to fit different pet sizes (final stocking is approximately 12″)
- Cut faux fur with pile running downward for best appearance
- Add personalization (names, embellishments) before final assembly
- Can be hand-sewn if no sewing machine is available