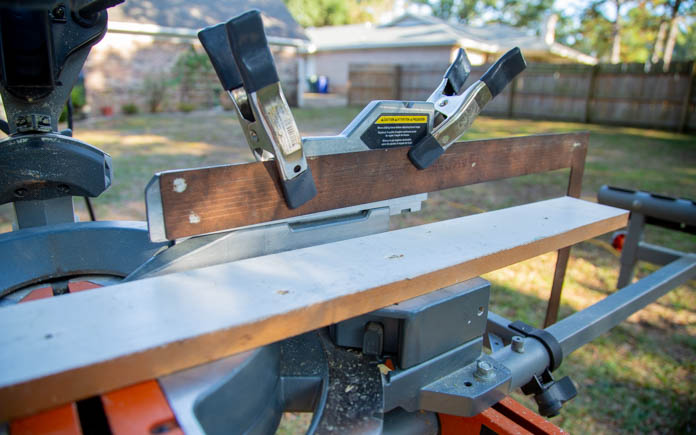
A stop block makes cutting multiple pieces of wood on a miter saw faster and easy.
A stop block is a simple reusable jig used in woodworking to mark an edge so multiple pieces of wood can be cut quickly and uniformly.
It can get tiresome to stop and measure each piece before you cut it, so built-in stop blocks keep you working at a steady and fast pace.
The hold-down clamps that come with most power miter saws are useful for securing a stop block when making repetitive cuts. But they’re only useful for cutting short pieces because it limits the length of board you can cut.
For bigger projects like decks and railing, long cuts of wood typically won’t fit within a standard stop block. Cutting these pieces shouldn’t take up the majority of your time. This time is better spent on getting these pieces together and your project complete.
However, you can make an extended stop block using a framing square. This technique works well for making repetitive cuts between about 16 inches and 23 inches long.
Here’s how you do it:

First, use two spring clamps or short bar clamps to secure the framing square to the saw’s fence. Extend it out to the length you need the board to be.
Check to confirm the distance from the blade to the vertical tongue of the framing square equals the desired length of the pieces you’re cutting.

Then, carefully slide the board up against the edge of the square’s tongue and make the cut.
Repeat to make repetitive cuts to produce pieces of all the same exact length.
Watch the video above for the demonstration!

