
How to Build Planter Posts for String Lights
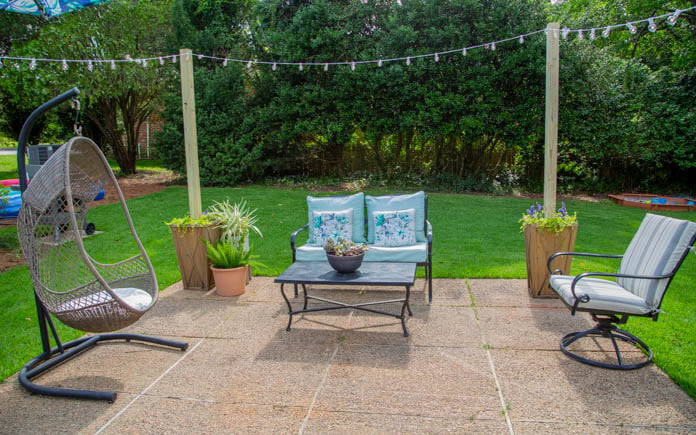
Our family loves to relax on the patio, and now it has some serious ambiance thanks to my latest DIY project: planter posts for string lights!
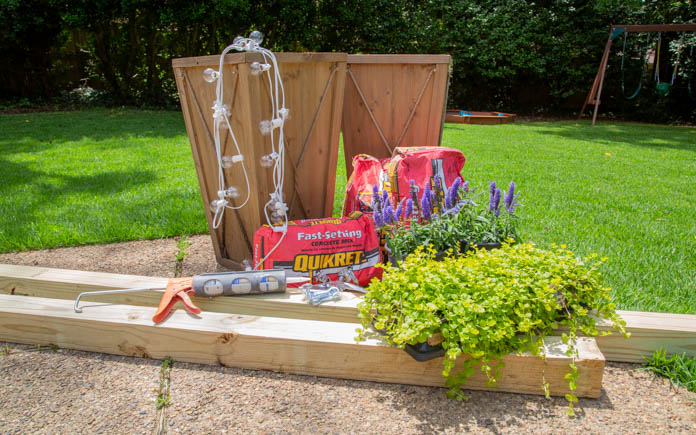
They’re super-easy to make. You just need Quikrete Fast-Setting Concrete Mix, in the red bag, a couple of planters and string lights, and small tools.
Ready to create something special? Let’s go!
What You’ll Need:
- Bags of Quikrete Fast-Setting Concrete Mix (per post)
- 2-4 Planters (enough to support the café lights)
- 4-by-4 Posts (enough to support the lights)
- Steel Screw Hooks
- Café lights
- Drill
- How to Build Planter Posts for String Lights
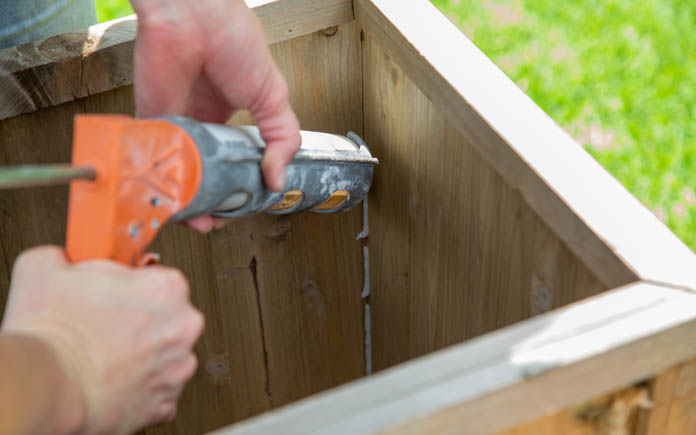
Seal the insides. You won’t want potting soil or concrete mix to spill from your planters (I used wood), so apply Advanced Polymer Non-Sag Sealant or Advanced Polymer Construction Adhesiveto close any gaps or cracks inside them.
Find a location. Place the planter where it will be used. Make sure it’s where you’ll spend a lot of time and could use a little light. (I just want to stress: This is a permanent placement. You won’t want to move the planter after it has concrete in it!)
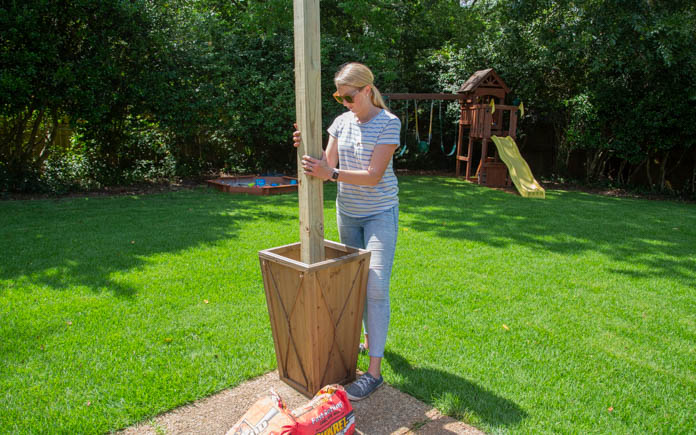
Place the post. Add a 4-by-4 post at the center of the planter. (I kept mine the full length of 8 feet.) You can eyeball it or check that each side-to-side measurement is the same.
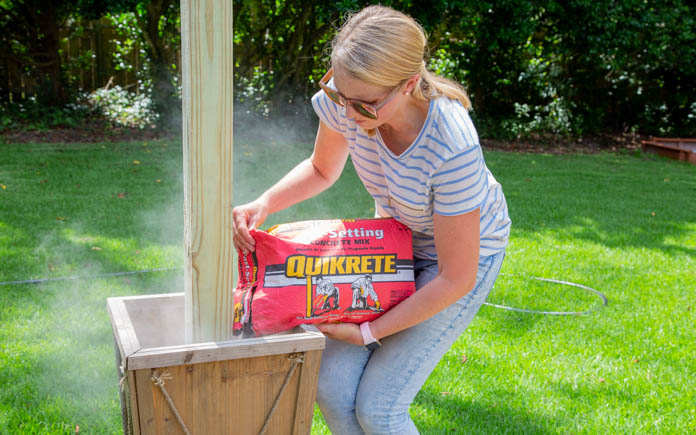
Pour the concrete. Slowly pour two bags of Quikrete Fast-Setting Concrete Mix around your post so that it’s evenly distributed.
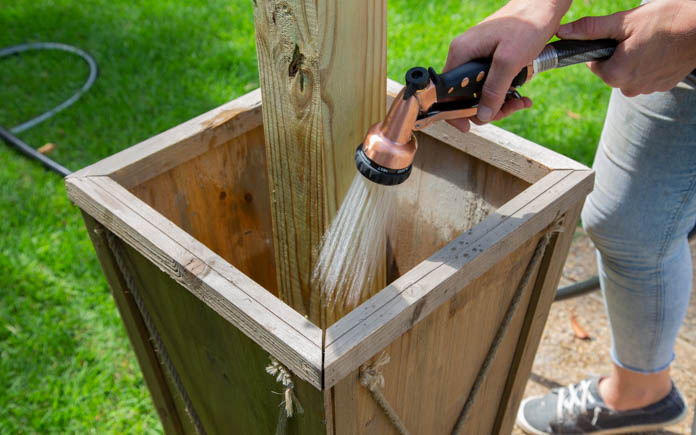
Slowly add water. You’ll need approximately one gallon of water per 50-pound bag of concrete. The great thing about Fast-Setting Concrete is you don’t need to mix it around. Just pour in the concrete and add the water — easy peasy!
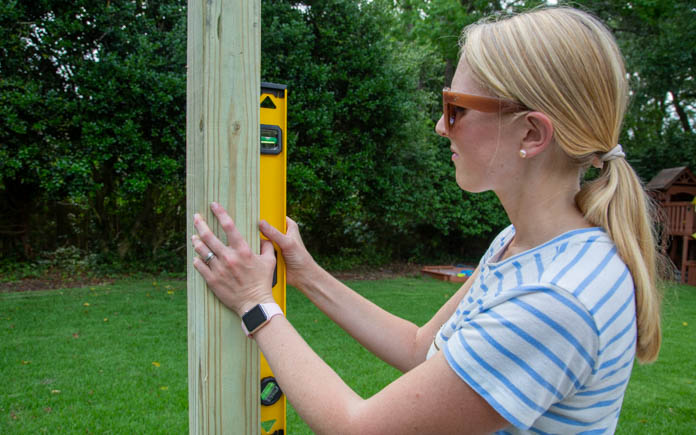
Level it. While the concrete is setting but still loose, use a level to check that each planter post for string lights is perfectly plumb. It shouldn’t be leaning in either direction.
Repeat steps 1-6. If you need a second planter to support your string lights, repeat these steps while the first one dries. By the time the second one is drying, the first one will be ready for the next step: hooks!
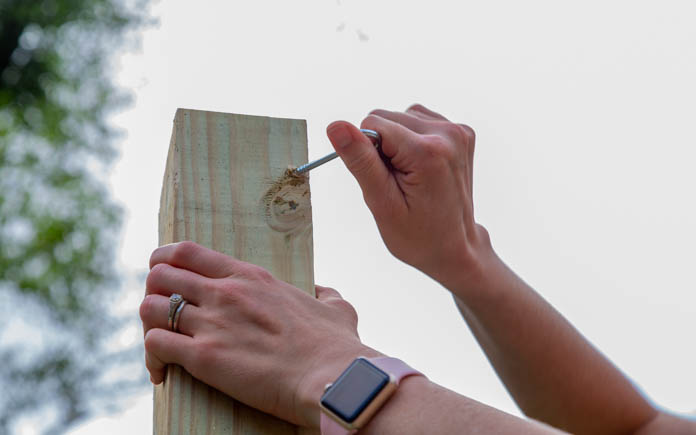
Add hooks. So far, we’ve got planters with posts secured in concrete. Now we need to create the support system for our string lights. Use a tiny drill bit to start a pilot hole on the corner of your post. Then attach a steel screw hook.
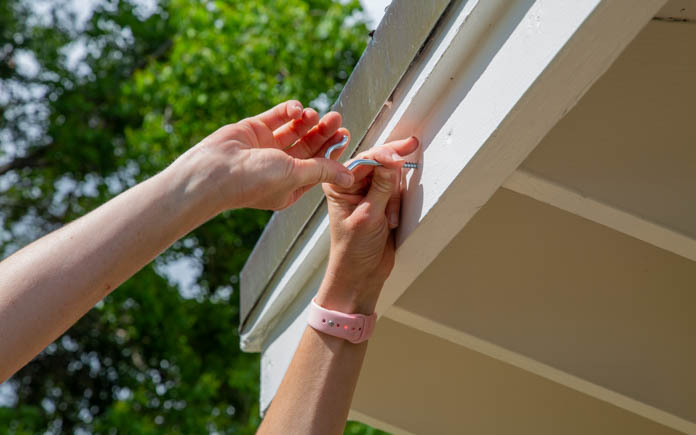
You can create four planter posts (arranged in a square or rectangle) to support the string lights, or drill two pilot holes into your home’s facia to connect the lights from the planters.
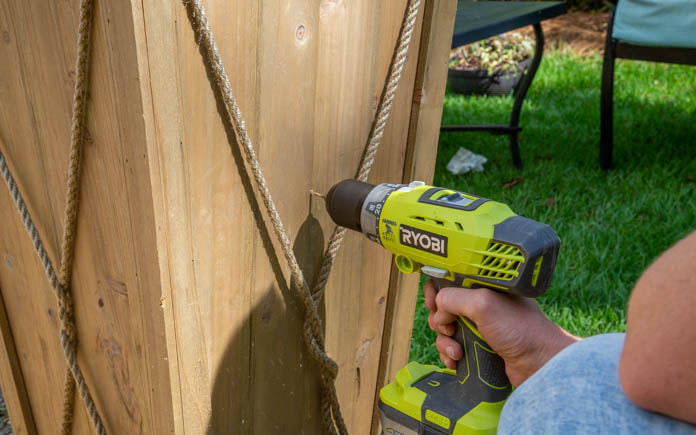
Create drainage. While you have your drill bit in your drill, add a small drainage hole on the backside of your planter, above the concrete.
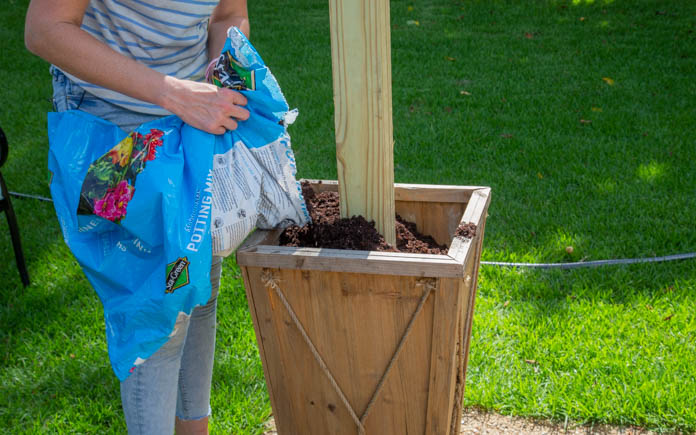
Insert plants. Add potting soil and plant some pretty plants. You can keep it simple with one plant per planter or, for eye-catching results, go ‘extra’ and create a ‘thriller, filler, spiller’ arrangement. (Google it!)
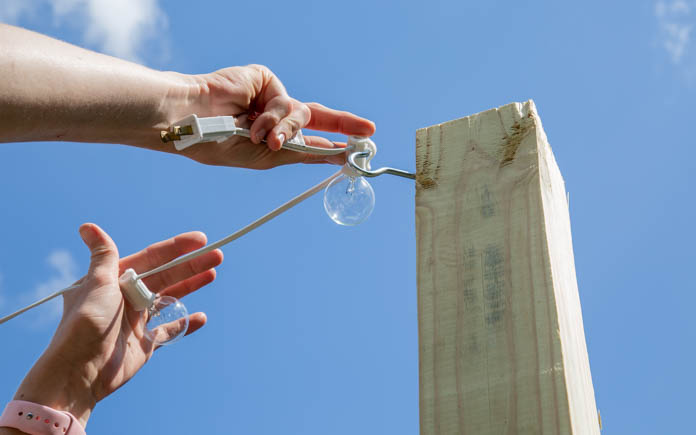
Add lights. Finally, drape your string lights over the hooks and plug them in.
That’s all it takes to make planter posts for string lights! Now, family gatherings on the patio have just a bit more atmosphere so you can make more memories together.