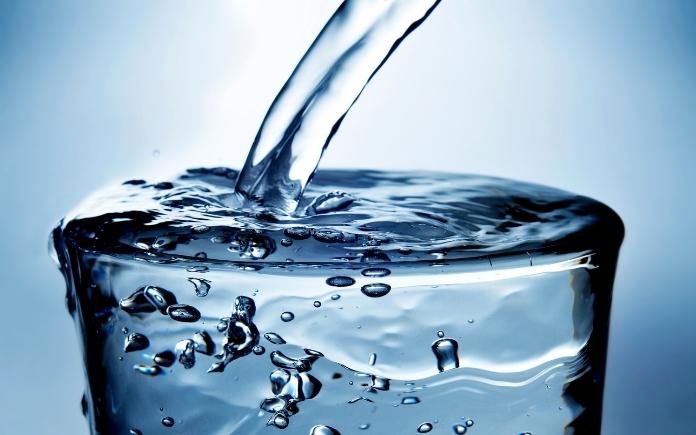
PFAS, or forever chemicals, are being detected in drinking water all over the U.S. (nito100, Getty Images)
Residents across the U.S. are on high alert after the Environment Protection Agency announced new limits for the acceptable amount of PFAS in drinking water.
PFAS, or per- and polyfluoroalkyl substances, are “forever chemicals” that don’t break down over time.
The new advisories cut the safe level of PFAS in drinking water down to just four “parts per trillion” — compared to its previous 70 parts per trillion.
Subsequently, local officials across the U.S. are addressing the presence of these forever chemicals in their water supply.
So, how did these harmful chemicals get into drinking water, and what can you do to limit your exposure?
PFAS is a term for man-made chemicals that have been used in industry and consumer products worldwide since the 1950s.
These forever chemicals are in non-stick cookware, water-repellent clothing, stain-resistant fabrics and carpets, some cosmetics, some firefighting foams, and products that resist grease, water, and oil.
While producing and using products with PFAS, the chemicals can migrate into the soil, water and air.
Unfortunately, since they don’t break down naturally, they tend to stay in our environment.
In areas with high PFAS exposure in the environment, trace amounts of these substances are in food products, the environment, and even people and animals.
The Environmental Working Group, a nonprofit organization that researches toxic chemicals and drinking water pollutants, says 200 million Americans could be drinking PFAS-tainted water and 99 percent of Americans may have some amount of PFAS built up in their bodies.
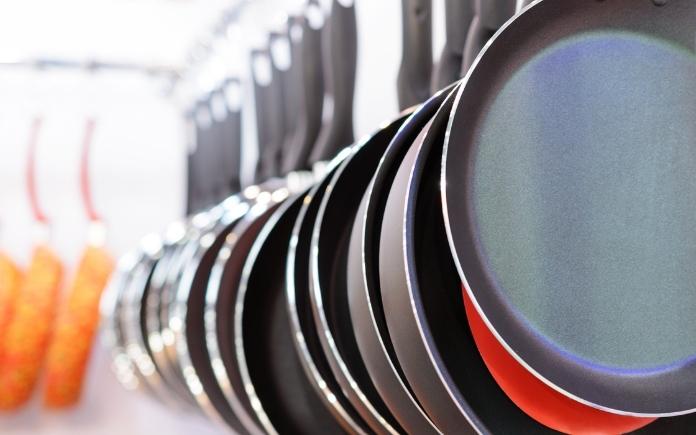
Cooking in non-stick pans may expose you to PFAS. (Nordroden, Getty Images)
Risks of PFAS Exposure
Trace amounts of PFAS have been linked to numerous health issues.
Philippe Grandjean, a Harvard researcher focusing on the long-term impacts of developmental exposure, says PFAS exposure is associated with kidney and testicular cancer, weakened immunity, endocrine disruption, fertility problems, and decreased birth weight.
People can be exposed to PFAS by:
Working in occupations such as firefighting or chemicals manufacturing and processing.
Drinking water contaminated with PFAS.
Eating certain foods that may contain PFAS, including fish.
Swallowing contaminated soil or dust.
Breathing air containing PFAS.
Using products made with PFAS or packaged in materials containing PFAS, including coating on paper and cardboard wrappers used in fast food and bakery goods furniture and carpets, stain-proof and water-repellent clothes, and personal care and cosmetic products.
The EPA announced a comprehensive strategy in 2021 to limit PFAS exposure. (Skyhobo, Getty Images Signature)
How Are We Combating PFAS in Drinking Water?
New studies, new food packaging, lobbying, and bills aim to limit PFAS exposure.
In October 2021, the Environmental Protection Agency launched the PFAS Roadmap. This comprehensive strategy outlines actions over the next three years, including steps to control PFAS at its sources, hold polluters accountable and address the impacts on communities.
Popcorn bags may contain PFAS. Cook it on the stovetop instead. (Jamesmcq, Getty Images Signature)
How to Limit Your Exposure to PFAS
According to Clean Water Action, you can do a few things in everyday life to limit your exposure to PFAS.
They include:
Not using non-stick cookware
Cooking at lower temperatures if you have to use non-stick pans
Popping your own popcorn rather than microwaving bagged popcorn
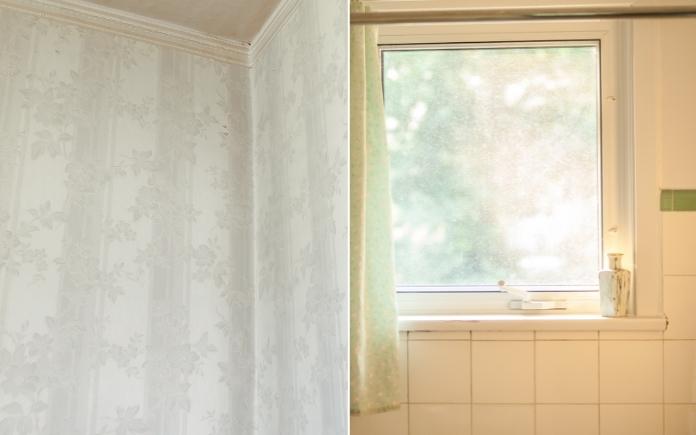
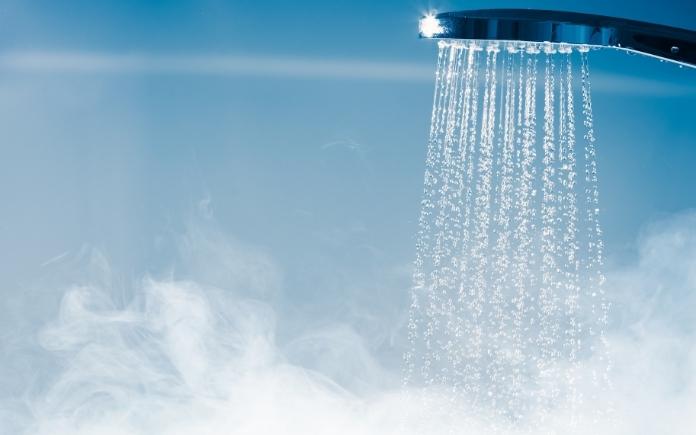
This week, learn how to clean old wallpaper and protect a wood-framed shower window from water damage. (Sandy Knollenburg/simplyzel, Getty Images)
Hour 1
In Hour 1, hear our suggestions for matching wood posts to vinyl, cleaning old wallpaper, and more.
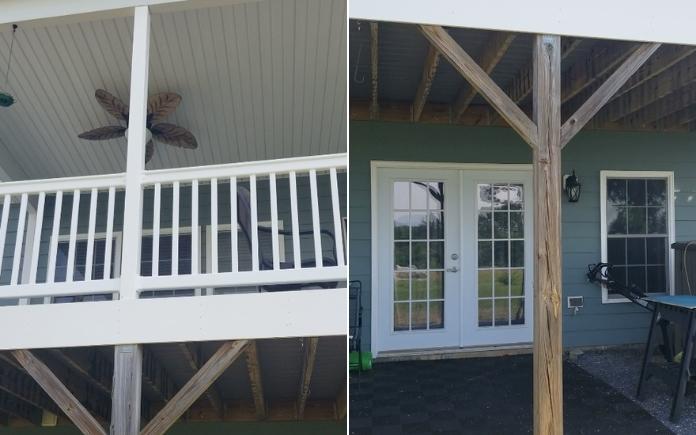
Matching Wood Posts to Vinyl
Matching these wooden support posts to the vinyl posts is as easy as applying a coat of paint. (Photos by Doug May)
Doug May has a great view of the Blue Ridge Mountains on his covered back porch. But, the view of his porch isn’t as pleasing.
“The upper part has vinyl sleeves over the top of the posts. Everything’s covered and it’s nice and smooth and white. But down below, it’s just pressure-treated wood, with all the cracks and gaps,” Doug says.
He wants the wooden support posts on the ground to match the white vinyl posts on the porch above. What’s stopping him from covering the wood posts with vinyl is the diagonal wood braces. He’s worried about the hassle of connecting the many vinyl pieces on the diagonals and sealing them.
“What I want is the smooth look and feel of the vinyl on the posts below. Is there a way to do that?” Doug asks.
Vinyl sleeves are expensive! If you want the posts to match, try this budget-friendly option:
First, clean the wood posts and apply a coat of primer.
Then, use auto body filler (like Bondo) to skim out the cracks. Once that dries, lightly sand the posts.
Then, caulk the areas where the diagonal braces meet the vertical posts.
Finally, apply two coats of acrylic latex paint.
Once you do this, no one will know one set of posts is vinyl and the other set isn’t! The acrylic paint will give it a glossy look and seal the joints.
If you decide you want to cover the posts with vinyl, remove one post at a time, including the diagonal supports, and attach the vinyl sleeves to each piece.
Miter cut the ends of the sleeves to fit the diagonal brace posts, and thoroughly caulk each seam so water doesn’t get in.
Don’t caulk the bottom of the diagonal brace pieces where the wood meets the post. If water were to get inside the vinyl, you want it to be able to drain out and dry.
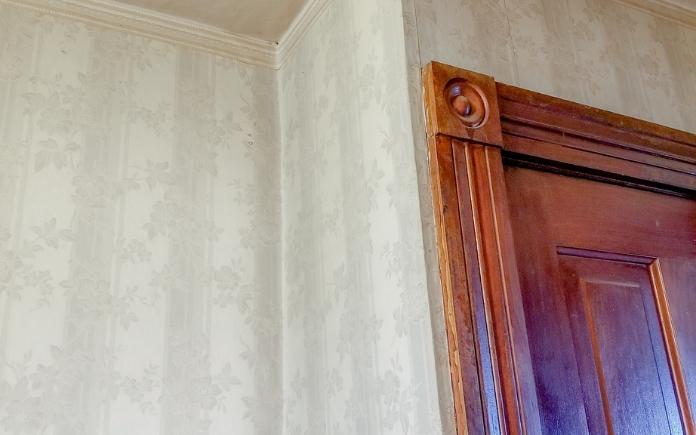
Original wallpaper keeps an old home’s character true to its age. (Photo by Sandy Knollenburg)
How to Clean Old Wallpaper
Sandi Knollenburg bought a 100-year-old farmhouse in Bloomington, Ill., five years ago, and she’s been renovating it little by little.
Right now, she’s working on the stairwell area. The walls that extend from the first floor to the second are covered in wallpaper from the 1960s. She loves the pattern, and the wallpaper is still in pretty good shape! All it needs is a good cleaning.
She asks, “What’s the best way to clean and preserve the wallpaper?”
Most modern wallpapers have an acrylic or latex coating that makes them washable and, in some cases, scrubbable. Older wallpaper is just plain paper, so you don’t want to get it wet. If you do, it will peel off the wall.
Try these options to remove the dirt and dust:
Wipe the wallpaper with a large, dry sponge.
Use a vacuum cleaner.
Attach a microfiber cloth to a Swiffer-type mop for hard-to-reach spots.
To remove skids and scuffs, use a gum eraser. You can buy these at an art supply store. Another option is a dry Magic Eraser. If that doesn’t work, lightly dampen it.
Hour 2
In Hour 2, learn how to prevent wood rot in a shower window, remove sediment from water, and more.
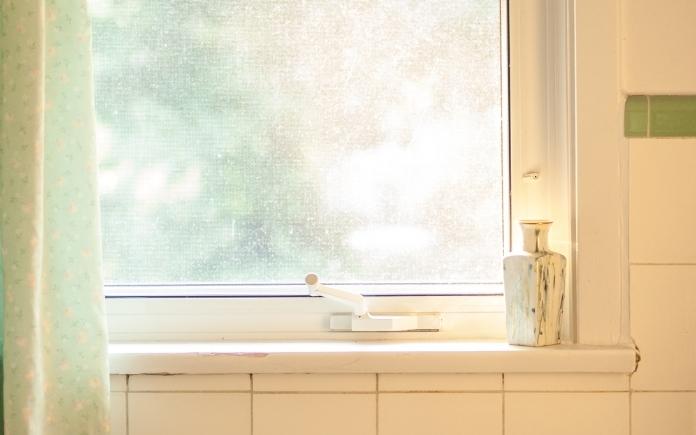
Worried about water damaging a wood-framed shower window? Protect it with tile. (simplyzel, Getty Images)
Protecting a Wood Window Frame in a Shower
A caller needs advice on tiling around a window in his shower. The wood frame sticks out slightly, so he can’t tile over it.
“What do you do to treat that to make it so that the water is not damaging that wood and causing wood rot, and more importantly that water is not getting behind that and causing damage to the shower?” he asks.
A lot of older houses have this problem. Typically, at one point in time, the bathroom had just a tub with a window above it. Then somewhere along the way, a shower was installed.
I’ve seen a lot of homeowners put a shower curtain over the window but rarely does that last long.
To protect the wood frame from water damage, encapsulate the window frame with the tile.
Before you lay the tile, be sure to caulk and paint the frame. Bring the tile up to the wood and then overlap extra tile over the window frame. This will protect the frame from the water and give it a nice, pronounced look.
If water can still hit it directly, install a waterproof window.
To completely eliminate any chance of rood rot, remove the window and replace it with a vinyl one.
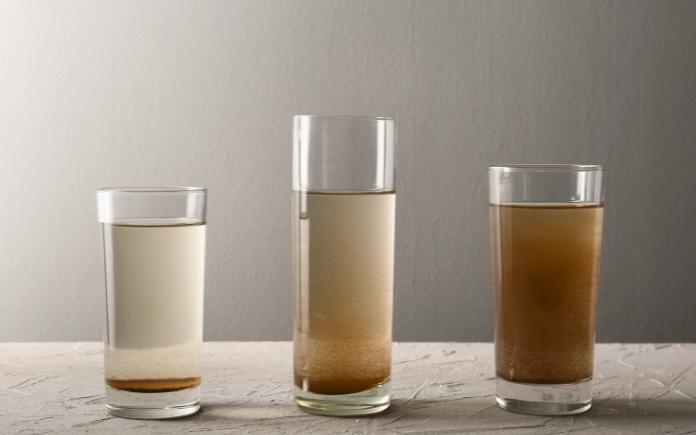
Sick of sediment in your water? It’s time for a new water filter. (pixelshot)
Sediment in Water
Pablo Sandoval in Willow Creek, Calif., is sick of sediment in his water. His home draws water from a deep well and all wastewater flows into a septic tank.
“For most of the year, the water supply is good, but every summer we have a problem with sediment that clogs aerators at sinks and showerheads. Plus, the washing machine takes forever to fill with water. What can we do to alleviate these issues?” he asks.
Sediment problems are more frequent in the summer because water levels are usually lower. There’s less water but the same amount of sediment in the system, so it finds its way to the pump and into your house.
You’ll need to have a well water contractor take a look at your pump. You might need a new screening.
Also, here are two options to consider:
Have a water well contractor install a sand separator on your pump. This device uses centrifugal force to push dirt, sand and debris outward to the separator wall and downward in a spiral motion. The cleaned water then rises and returns back to your plumbing system.
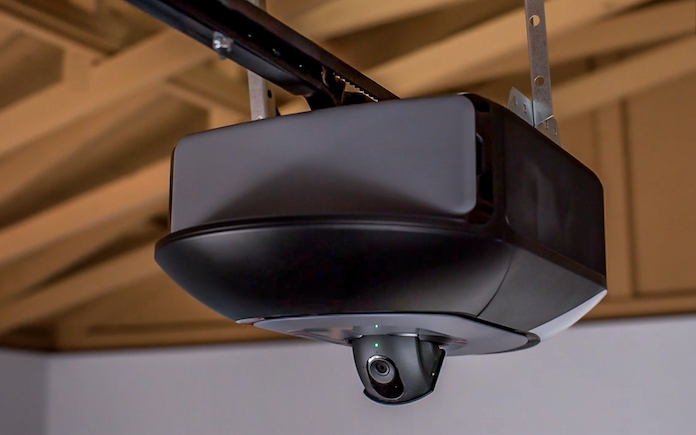
If your home’s primary entrance is in the garage, then you’ll want Chamberlain’s new garage door opener with an integrated camera. Learn More >>
Simple Solutions
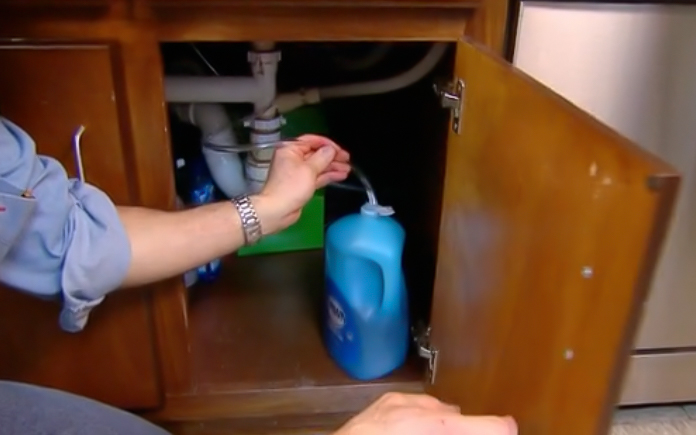
This Simple Solution keeps you from constantly refilling your kitchen soap dispenser. (3 Echoes Content Studio)
Improved Soap Dispenser — Kitchen-sink soap dispensers hold such a small amount of liquid soap that it requires you to constantly refill the reservoir bottle. Here’s a better option:
Lift off the hand pump from the dispenser, pull off the plastic fill tube, and replace it with a long flexible quarter-inch-diameter tubing.
Feed the opposite end of the tubing down through the hole in the sink deck and place it in a large jug of liquid soap.
Now you’ll never have to refill the dispenser; simply replace the soap jug once it’s empty.
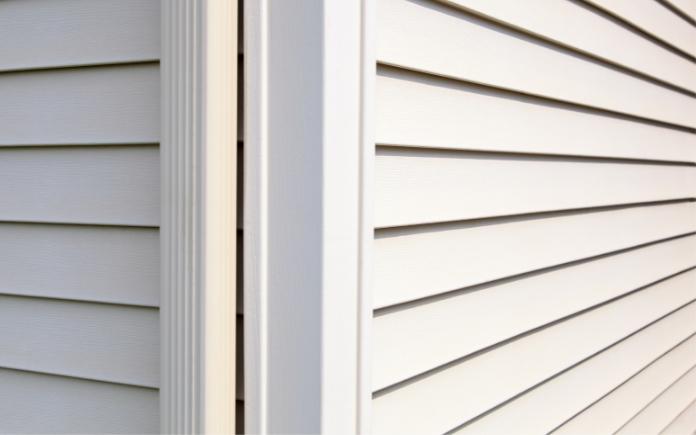
If you’re installing gutters on vinyl siding, run the drill in reverse for smooth holes. (Garrett Aitken, Getty Images)
Smooth Cut in Vinyl Siding — When using a hole saw to drill through vinyl siding, run the drill in reverse. That way, the hole saw will create a nice clean hole with no rough edges.
Once you cut through the siding, switch the drill to forward and bore through the wall sheathing.
Other Products & Links Mentioned
Further Reading
Radio Show & Podcast: Send us your question!
If you have a comment, general question about home improvement, or something we’ve featured on Today’s Homeowner, please fill in this form:
That said, there have been plenty of tasks that have come as a surprise since becoming a homeowner — things I used to leave to a landlord or, more often, leave totally unattended because I didn’t realize they even needed to be done.
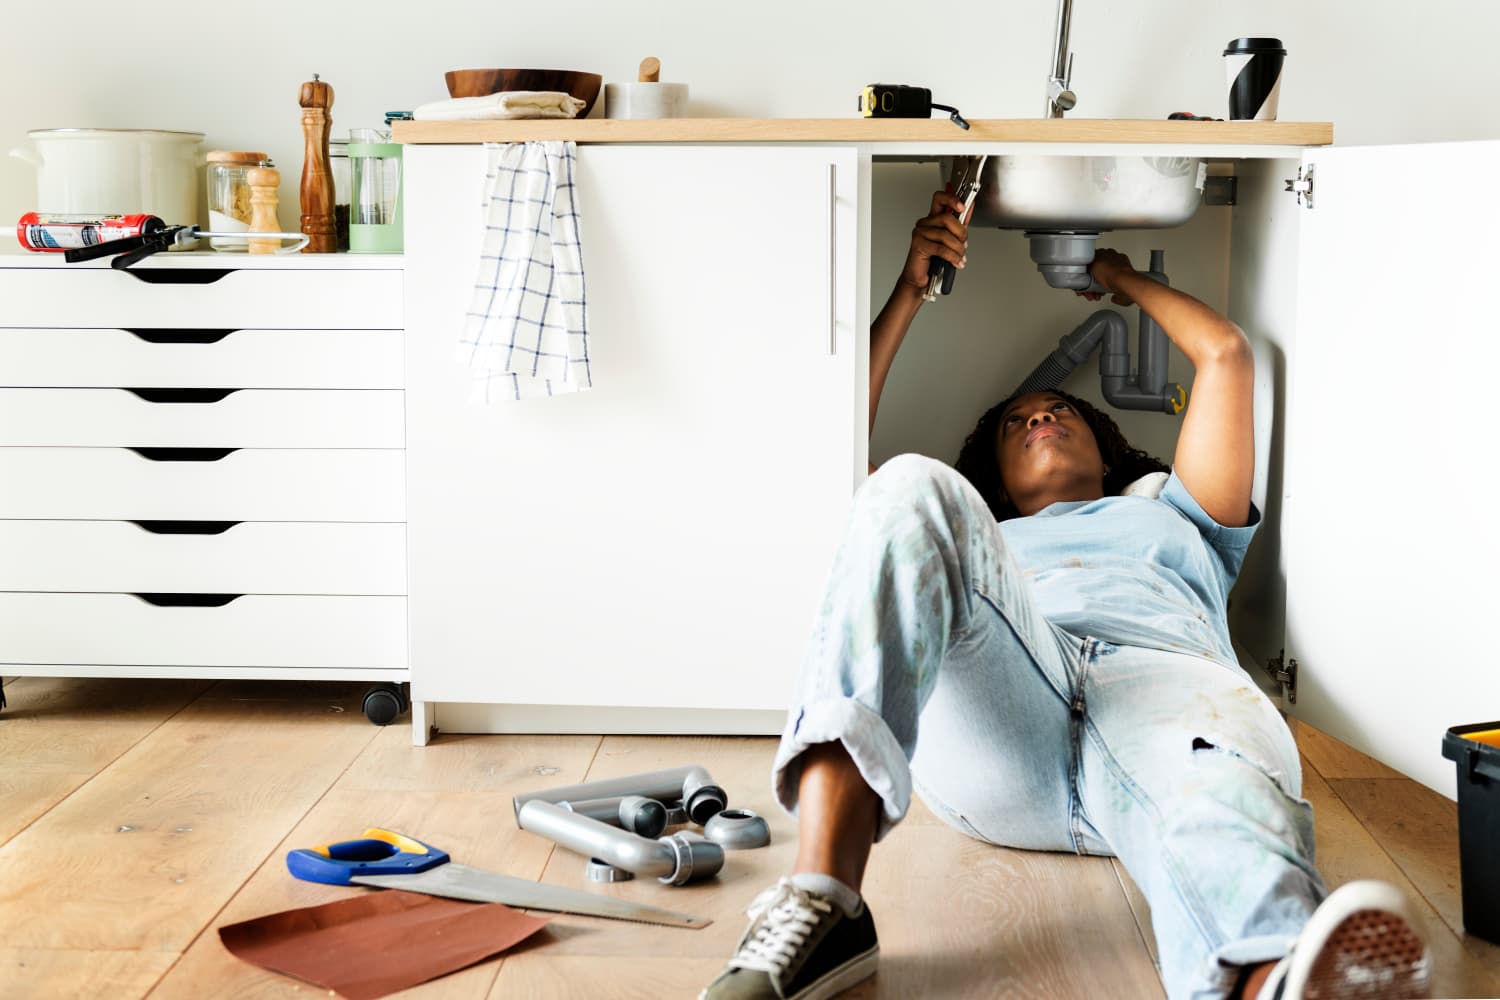
But when I was working on redoing our bathroom last fall, I hit a snag that came with a pricey lesson. I had hoped to replace our standard-issue low-neck faucet with something more modern and stylish, which the internet assured me I could totally do. I assembled my tools, I pulled up my YouTube videos, and I slid myself underneath the vanity to get to work.
Unfortunately, I didn’t get far. I knew that step one to any project involving plumbing was to turn off the water locally. That meant reaching under the sink to turn two shutoff valves — one for hot, one for cold — so that they were completely blocked and no water would make its way from the main water line to the sink. I turned on the water at the sink so I had real-time feedback on my progress. I turned the handle that controlled the left valve, which turned off without issue. Then, I turned the handle for the right valve until I couldn’t any more. I looked up to the sink, and the water was still running. Huh.
Over two hours, I fussed and futzed over the two handles, using my hands, my hands plus grippy rubber bands, my hands plus pliers, and my hands plus WD-40 to try to get the valve to close. And while I was able to turn the actual handle, the valve housed inside of it would. not. close. Nothing worked. Finally, I gave up and called a plumber.
Backup was thankfully fast to arrive, and even faster to fix the issue. It turns out the shutoff valves in my 65-year-old house had become sticky over time, a common issue among older homes. My bill came to around $200 to have the plumber replace the old valves with new ones that would effectively open and close when you turned them, allowing me to (hours later) finish my full remodel.
While he was working, my plumber told me a secret: This pricey visit could have been avoided by giving the shutoff valves under the vanity a little workout by fully closing and opening them a couple times about once a month — a chore that takes literal seconds. Giving those valves a bit of a stretch helps prevent mineral buildup that can lead to them sticking in the future.
Functional shutoff valves aren’t just important for doing DIY home upgrades like I was. In the event of an emergency — an overflowing toilet, a clogged sink — the shutoff valves help you to cut off the water supply to the affected fixture. If you’ve ever tried to staunch an overflowing toilet, you know how important that can be.
Since my plumber’s visit, I’ve been periodically giving all the valves in my house a little twist. It’s not always once a month; usually it’s just when I remember to do it, but that’s better than nothing. When you think of it, try to give yours a stretch, too. It could save you from paying hundreds of dollars for a plumber visit — or even thousands for repairing avoidable water damage.
Megan is a writer and editor who specializes in home upgrades, DIY projects, hacks, and design. Before Apartment Therapy, she was an editor at HGTV Magazine and This Old House Magazine. Megan has a degree in Magazine Journalism from Northwestern University’s Medill School of Journalism. She is a self-taught weighted blanket connoisseur.
Need ideas to turn your boring bathroom into a spa? These simple changes can transform any bathroom from a routine stop to a serene sanctuary!
If you can, allow just natural light in your bathroom. (Poravute, Getty Images)
1. Get the Right Lighting
Our first spa bathroom idea is one of the easiest, adds ambiance and can make a drastic difference: Change up the lighting!
If possible, only let natural light in, but if your bathroom lacks enough windows to do that, replace bulbs with a softer white tone for a more relaxing feel.
For a more far-out spa experience, try blue lighting. A preliminary study from PLOS ONE journal found that blue lighting accelerates post-stress relaxation faster than traditional white lighting.
For a more subdued look, light a few candles. Pick unscented candles purely for the lighting or find a fragrant one that relaxes you.
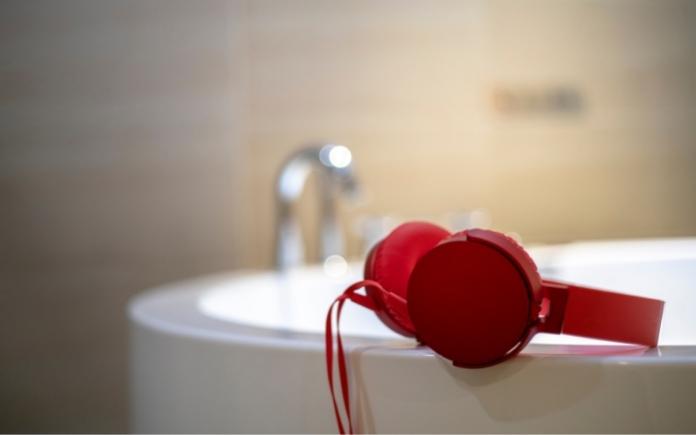
Find your inner peace with the right playlist. (yipengge, Getty Images Signature)
2. Add Some Soothing Tunes
Listening to music can lower your heart rate, improve your sense of well-being and even reduce burnout, according to PsychCentral. That’s why setting the tone is No. 2 on our spa bathroom ideas list.
Most professional spas lean toward music inspired by nature to put their clients at ease. Others play classical tunes heavy on string instruments.
However, this is your bathroom, so choose whatever music helps you unwind! Play your tunes on a Bluetooth speaker or put on some headphones for a secret retreat.
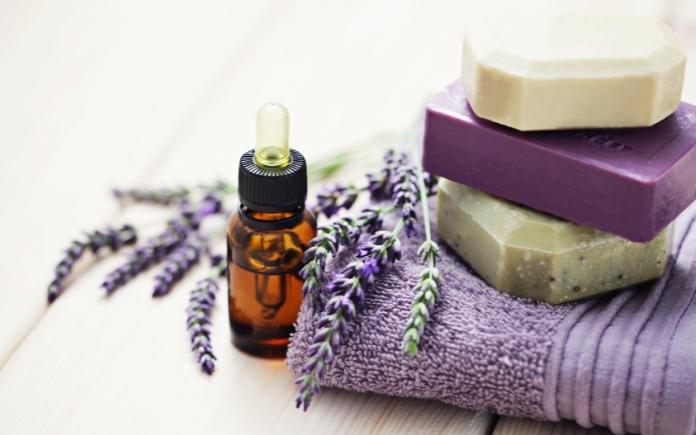
Inhale pleasant aromas and exhale any stress. (matka_Wariatka, Getty Images)
3. Infuse the Air With Essential Oils
Aromatherapy has been used for centuries to improve physical and mental well-being. The practice dates back to ancient Egyptians burning incense made from aromatic woods, herbs and spices.
Many people view having a spa day as a healing experience, so essential oils — naturally — make it on our list of spa bathroom ideas.
There are dozens of essential oils but these are the ones you’ll want for a destressing spa day, according to Healthline:
Get an oil diffuser and take in a deep breath. You’ll instantly feel like you’re at a professional spa.
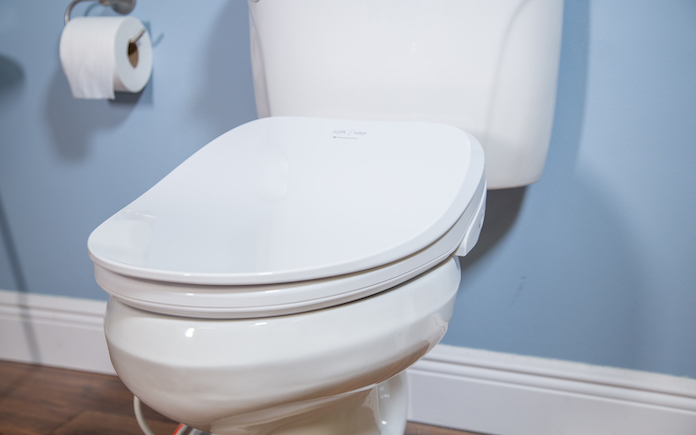
Fluidmaster’s Soft Spa Electronic Bidet Toilet Seat can be retrofitted to any toilet seat, so you don’t have to buy a new toilet. (3 Echoes Content Studio)
4. Get Bathroom Bliss With a Bidet
Want to up your self-care routine and pamper yourself every day? No spa bathroom ideas list would be complete without this one: install a bidet!
Soft Spa features an integrated water heater, adjustable water pressure and wand positioning, as well as a heated seat and warm air-dryer.
You can even personalize your pampering with different pressure settings. Gentle mode, with low water pressure, is available for users with sensitive skin.
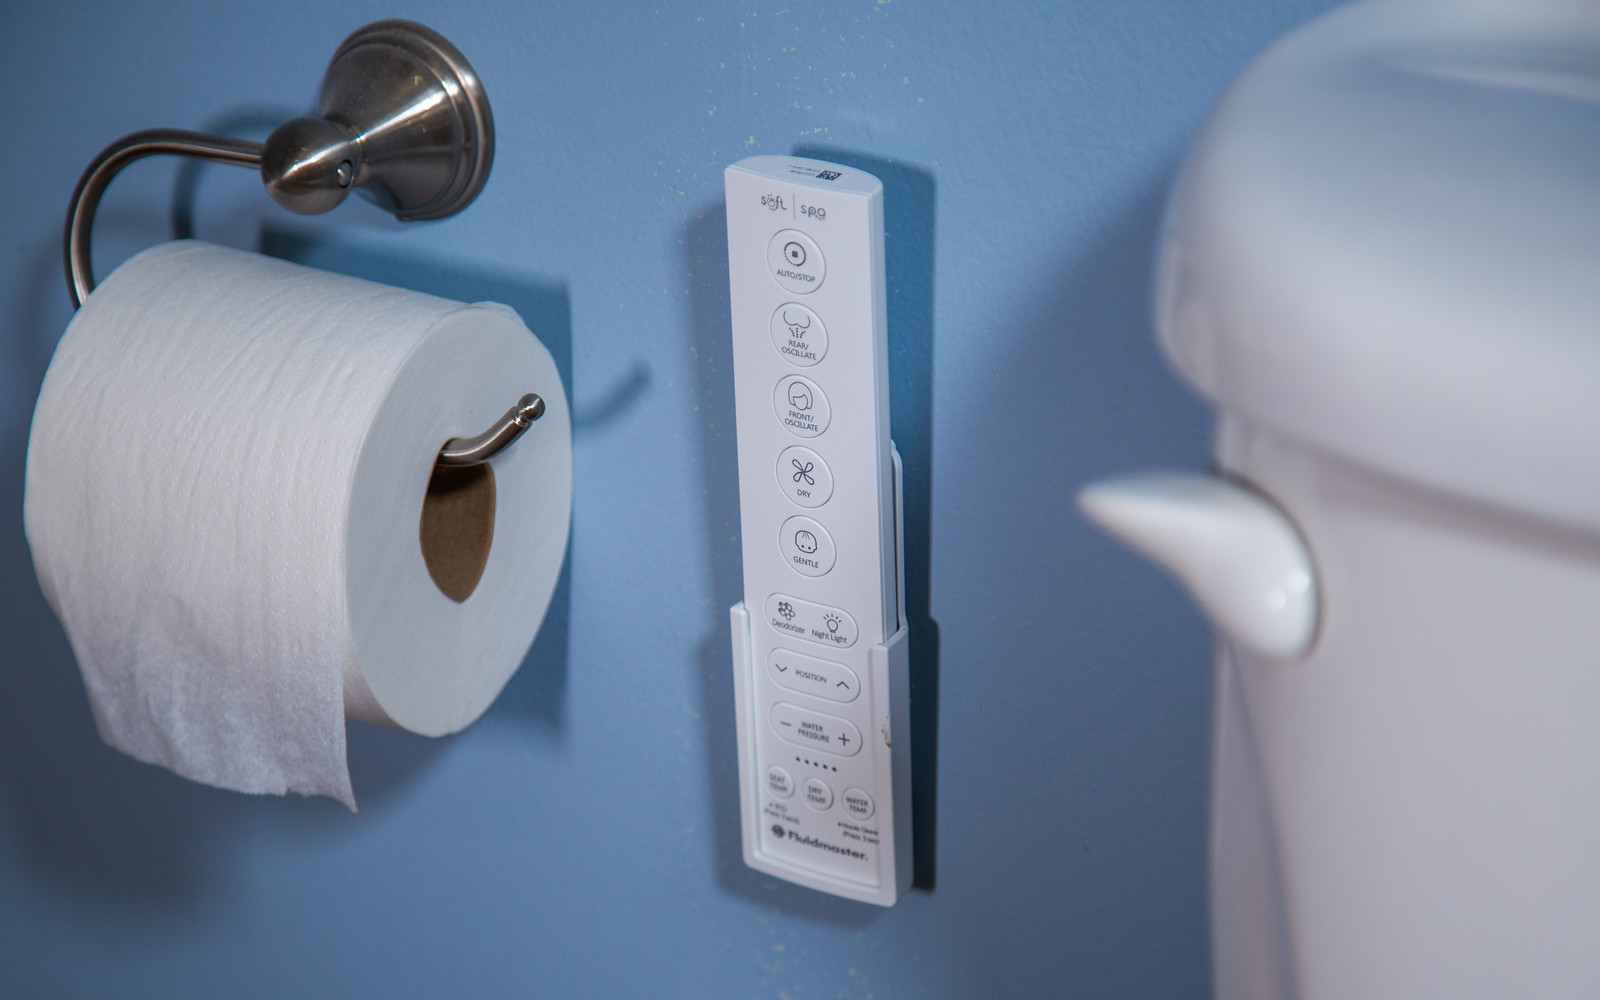
Old-fashioned bidets require users to straddle them or reach behind for adjustments. Fluidmaster’s Soft Spa has a remote control for added comfort and convenience. (3 Echoes Content Studio)
Best of all, this bidet makes self-care smart. Its included remote is a game-changer for people who use freestanding bidets with water controls on the back.
Old fixtures — which some people still use — require users to straddle and face the controls, or reach behind to make adjustments. In fact, bidet is French for “pony,” referring to this common position.
Conversely, Soft Spa’s remote control allows you to face ahead, providing greater comfort and freedom, so you can lounge in luxury.
A new showerhead can make all the difference each morning. (nikkytok, Getty Images)
Want to create the ultimate steam room experience? Upgrade your shower!
No, you don’t have to replace the surround or do anything too pricey. Just replace your showerhead for an at-home luxury spa experience every day.
Find a high-pressure showerhead to help ease tense muscles, or try this two-in-one shower head that will make you feel like you’re rinsing in a rainforest.
Continue that rainforest shower feeling when you step out of the shower by laying down a bamboo floor mat. These mats look luxurious and feel great underfoot.
Lastly, swap out your regular bathroom towels and dry off with a softer, higher-quality towel. Towels with a high thread count are plush, durable and absorbent.
Want to share your ideas for turning a bathroom into a spa? Comment below and be sure to share this article with friends!
It can be tempting to throw scraps down the drain if you have a garbage disposal and/or a new-build house with modern pipes. But even though they look harmless, disposals can actually wreak longterm havoc on your pipes if you’re not careful. If you want to save yourself from a hefty plumbing bill later down the road, here are some of the things you should avoid throwing down your drain, no matter what.
Most people have been guilty of this from one time or other. You have leftover coffee grounds from your French press or aero press, and down the sink it goes. After all, they’re small granular pieces. How much damage can they do to pipes? Apparently, a lot. Grounds are highly fibrous and tend to clump together in water while going down drains. This makes them hard to dissolve, and over time they can create obstructions or clogs that will require a professional to fix. Instead, toss them into the trash or, better yet, into a compost bin. (This one’s super cute!) They can also be used to fertilize your garden.
Have you ever wondered why some folks pour bacon grease or ground meat fat from a frying pan into an aluminum can? It’s because pouring it down the drain can clog it. While the oil might slide down the drain easily once it’s hot, it eventually cools, coating the inside of the pipes with its thick fat. Not only can this cause clogs, but the fat can also go rancid, emitting a stinky smell from the drain and causing a sewage backup in your sink. Instead, let the pan cool slightly and pour leftover oil into a can. Once the fat hardens, toss it into the trash. If you don’t have an aluminum can handy, here’s an easy TikTok hack: Line the drain with aluminum foil, creating a “cup” in the drain. Pour the grease directly in, and once cooled, roll the foil into a ball and put it in the trash.
Don’t let any remnants of your rice dinner make it down the drain, even if you have a garbage disposal. Because rice is water-absorbent (it can swell up to four times its uncooked size when cooked) it could clump together and stick to the confined space. The same happens when rice is put through garbage disposal blades, turning it into a thick, starchy paste and promising pipe trouble down the line. It’s best to throw it in the trash or compost bin — if you’re a pro composter. (Experts say uncooked rice can potentially attract pests, while cooked rice can also lead to harmful bacteria.) However, avoid the compost bin if the rice is saturated in sauce or animal fats.
Eggshells are brittle and flimsy, so one would assume they would be safe for a garbage disposal or sink drain. But thanks to the membrane, they cling when they’re wet and pieces can wrap around the shredder ring. Those same piece can also get stuck in the pipes, hardening over time, or the sharp edges can catch things going down the drain after it, creating a blocking hazard. While they might not create a dam to clog your pipe, they can exacerbate a problem when other troublesome things get thrown down the drain, like rice and oil.
Potato peels, carrot shavings, corn, and leftover asparagus bits are all very fibrous, meaning they won’t dissolve while going down your drain or garbage disposal and can eventually clog it. They tend to get “stuck,” so throwing them into a compost bin or trash can is best.
Are you done with a small DIY project or have leftover paint from changing the walls? It might be tempting to pour the extra paint down the drain, but it will coat your pipes and harden, laying the groundwork for future clogs. The same goes with rinse water and washing your paintbrushes in the sink. Instead, clean the paintbrushes in a special solvent and wipe them down with paper towels. As for leftover latex paint, let it dry up. You can either let it air dry and harden or use things like kitty litter and sawdust to speed up the process. Afterward, throw it in the garbage. Remember, oil paint is considered a hazardous material, and you need to dispose of it at a local drop-off center.
When removing water-based paint solvent from rinse water or cleaning solvent, before disposing of it, run the water or solvent through a few coffee filters to capture the paint. Once it’s dry, throw it in the trash if it’s acrylic or at a drop-off center if it’s oil. You can then pour the water down the sink. As for the solvent, you can either reuse it later or dispose of it at a hazardous waste facility. (But don’t throw it in the trash since some of the solvents are combustible and can be a fire hazard.)
Marlen is a writer first, vintage hoarder second, and donut fiend third. If you have a passion for finding the best taco joints in Chicago or want to talk about Doris Day movies, then she thinks an afternoon coffee date is in order.