When you have a master bathroom that’s anything but, and you’re working with a limited budget, it’s time for a small bathroom remodel.
This mid-century house belongs to Logan and Hannah, who share it with their daughters Brooklyn and Dakota and, soon, another baby girl.
The growing family has a master bathroom that needs to grow too, but since it can’t, we’re making the most of what they have.
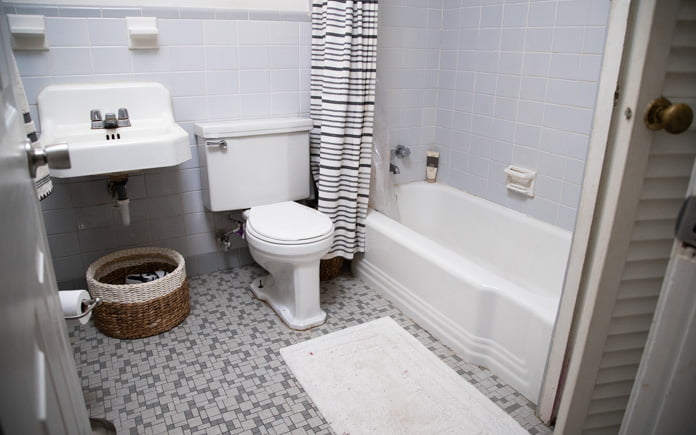
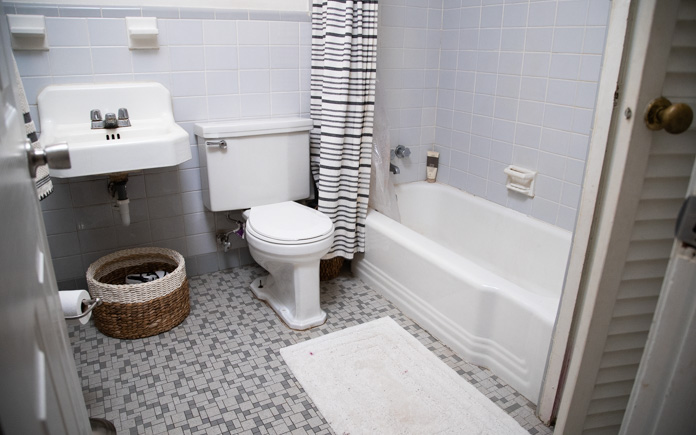
This bathroom looks dated and institutional. It’s not the inviting spa that it should be — but it has plenty of potential.
The Problems
Logan and Hannah’s master bathroom is not much of a master. It’s small and has a dated light fixture and medicine cabinet, tired tile, a toilet too large for the space, and an overall lack of storage.
Then there’s an oddly placed outlet that prevents Logan from entering the bathroom without getting tangled up while Hannah blow-dries her hair.
Finally, their exhaust fan sounds like a freight train when it’s turned on.
And we’re going to fix all these problems with a small bathroom remodel on this episode of Today’s Homeowner.
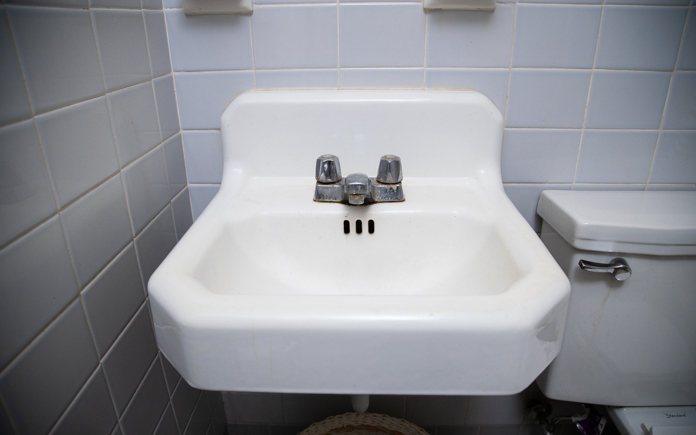
A sink without a vanity isn’t very functional. Every bathroom needs storage underneath.
Adding a Vanity
The sink is, well, just a sink. There’s no vanity, and that means there are no drawers, no doors, and no storage. That means Hannah has to store things in a basket under the sink — not ideal. So, the first thing we’ll do during this small bathroom remodel is replace this sink with a proper vanity.
Usually, when you have water lines coming out of a bathroom, there’s a shutoff valve. While there’s one of those near the toilet that we removed, there’s not one for the sink. That means we have to turn the water off at the street and then add shutoff valves. This is a job for the plumber, Artie.
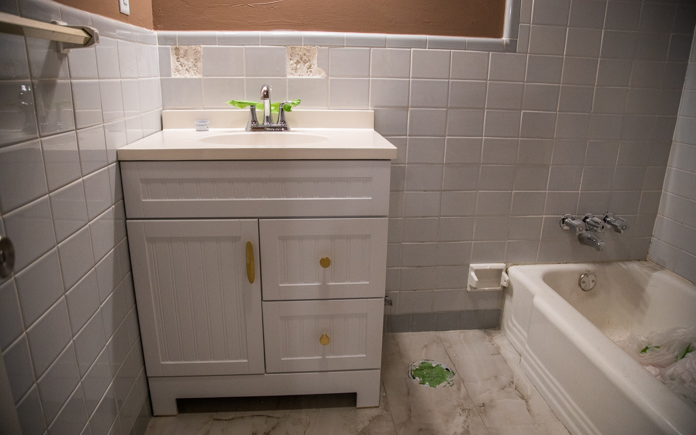
This bathroom is really coming along! It’s starting to take on the grand appearance the homeowners wanted.
He will do more than add shutoff valves; he’ll also install an offset toilet flange. This will allow us to position the toilet closer to the vanity.
But before he arrives, I’ll remove the dated ceramic cup holder and toothbrush caddy.
Adding an arch gives your fireplace character and enhances its visual interest.
Are you looking to finish a fireplace arch with glass, pottery shards or other materials, and need some tips to do the job right?
Or are you building a small patio and don’t know the best materials to use? How about making a birdhouse? It’s a popular project, but do you know the next steps to take?
Listen to the Today’s Homeowner Radio Show where we cover these topics and many more such as:
The best way to clean an old concrete birdbath
Which adhesive to use when installing tile on the sides of kitchen countertops
What to do when dealing with an unresponsive contractor
How to fix visible cut-ins from a botched paint job
A toilet that constantly runs or fills slowly is annoying, not to mention wasteful. If you’re dealing with this issue, the Korky 2X Long Life Toilet Fill Valve could be the solution for you.
This fill valve fits 99% of toilets. Also, it’s easy to install. Simply remove your old valve, insert the new one, adjust for a tight fit and you’re done.
This page contains affiliate links. If you purchase a product from these links, we will earn a small commission at no additional cost to you.
The rubber formulation resists chlorine, hard water, bacteria and rust, making it last — you guessed it — twice as long than other valves.
It’s ideal for toilets built since 1994 with a 1.6-gallon flush and it’s fully adjustable to prevent wasting water in any toilet.
The Korky Toilet Fill Valve will help your toilet bowl fill faster while keeping quiet.
A toilet that constantly runs or fills slowly is annoying, not to mention wasteful. If you’re dealing with this issue, the Korky 2X Long Life Toilet Fill Valve could be the solution for you.
This fill valve fits 99% of toilets. Also, it’s easy to install. Simply remove your old valve, insert the new one, adjust for a tight fit and you’re done.
This page contains affiliate links. If you purchase a product from these links, we will earn a small commission at no additional cost to you.
The rubber formulation resists chlorine, hard water, bacteria and rust, making it last — you guessed it — twice as long than other valves.
It’s ideal for toilets built since 1994 with a 1.6-gallon flush and it’s fully adjustable to prevent wasting water in any toilet.
Patio seating comes in many materials and price ranges — which can be good and bad.
For instance, ready-to-assemble outdoor furniture may be functional, but it also looks off-the-rack. And like everybody else’s outdoor furniture.
Whether you entertain a lot or just want a backyard paradise to personally enjoy, creating a set of paver chairs is a surefire way to do that.
Pavestone RumbleStone blocks, made of durable concrete, are engineered to mimic the appearance of weathered cut stone. They have a natural look and feel and give any outdoor living space texture and depth.
Best of all, they resist decaying and fading and don’t attract pests.
Patio seating made from these rustic building blocks is sure to be a crowd-pleaser and a conversation piece.
Follow this guide as inspiration to create your own paver chairs.
What You’ll Need
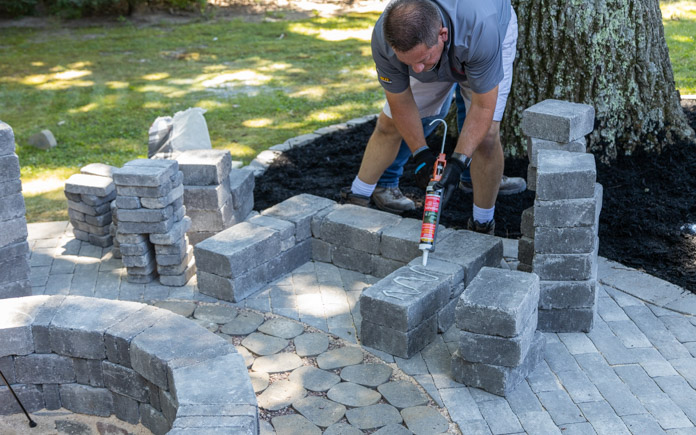
Start your paver chair with a U formation of building blocks.
How to Build Paver Chairs
1. Create a ‘U.’ Lay small, medium and large RumbleStone blocks in a U shape. Choose the size that works for you and cut any of the blocks as needed with a circular saw. (Just wear protective eyewear before you do.) This chair’s U shape is 24 1/2 inches deep and 35 inches wide.
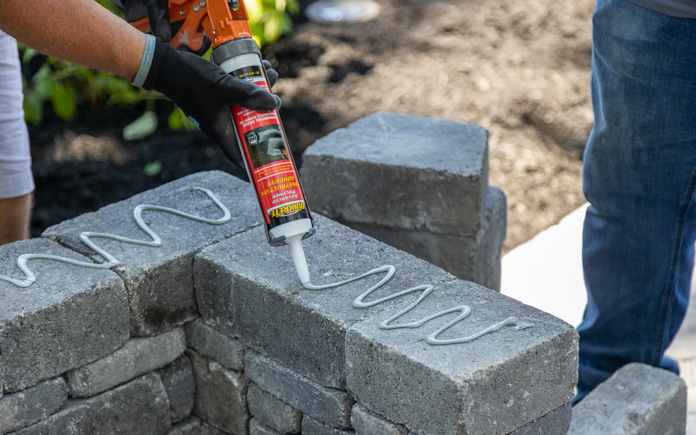
Apply Quikrete Advanced Polymer Construction Adhesive to secure each bottom row of pavers to the one above it.
2. Bond the blocks together. Apply construction adhesive on top of each row of stones before you add the next row of stones.
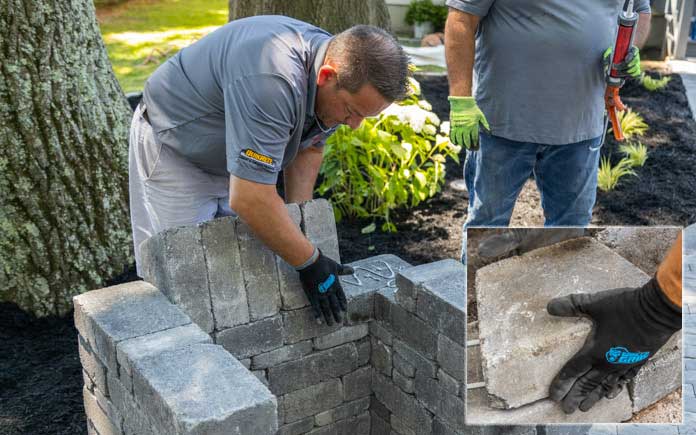
3. Mix it up. Vary the pattern of stones for each new row. This way, no continuous seams will be seen from the bottom to the top of the chair. Also, this makes the chair stronger and more visually appealing.
Cut RumbleStone blocks into trapezoids to fill in the back of the chair.
4.Fill it in. Use trapezoid blocks to fill in the back of the chair once it reaches 24 inches high. Apply construction adhesive to the bottoms and the sides of these blocks to form the back of your chair.
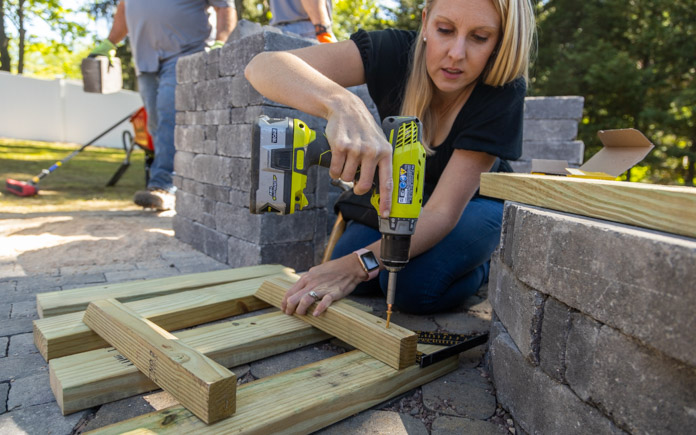
Secure two 2-by-2 cleats to four 2-by-4 planks with a power drill and deck screws.
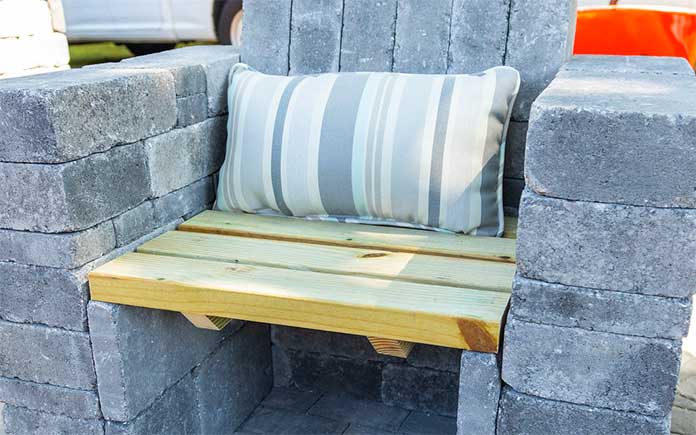
5.Add the seat. Patio seating is nothing without the seat! So, inside the legs of the chair, glue four 45-millimeter-large blocks vertically to support the seat of the chair. Then, to create the seat, secure four 2-by-4 wood planks to a couple of 2-by-2 cleats with a power drill and deck screws.
Buy a lumbar pillow or a full back cushion for each chair to soften its appearance and add comfort.
Make them Comfortable
These chairs add instant elegance to your outdoor living space, especially if you have a paver patio. Now there’s just one thing left to do: add cushions!
You can add a back cushion and leave the wooden seat as is, or you can add a matching seat cushion to soften the chair’s appearance and enhance your comfort.
Need shade? Add a matching patio umbrella or shade sail overhead to tie the look together, so your hardscape elements (the paver patio and paver chairs) match, and your cloth elements (the cushions and shade) complement each other, too!
The result is sure to rival your neighbors’ patio seating, and will make your outdoor living space the best-looking one on the block.