So, it’s always helpful to have a little refresher on the ins and *specifically* outs of your general household waste bin. The best kitchen bin shouldn’t be a catch-all for things you don’t know what to do with. These are five items you should never put in a household bin.
Latest Videos From
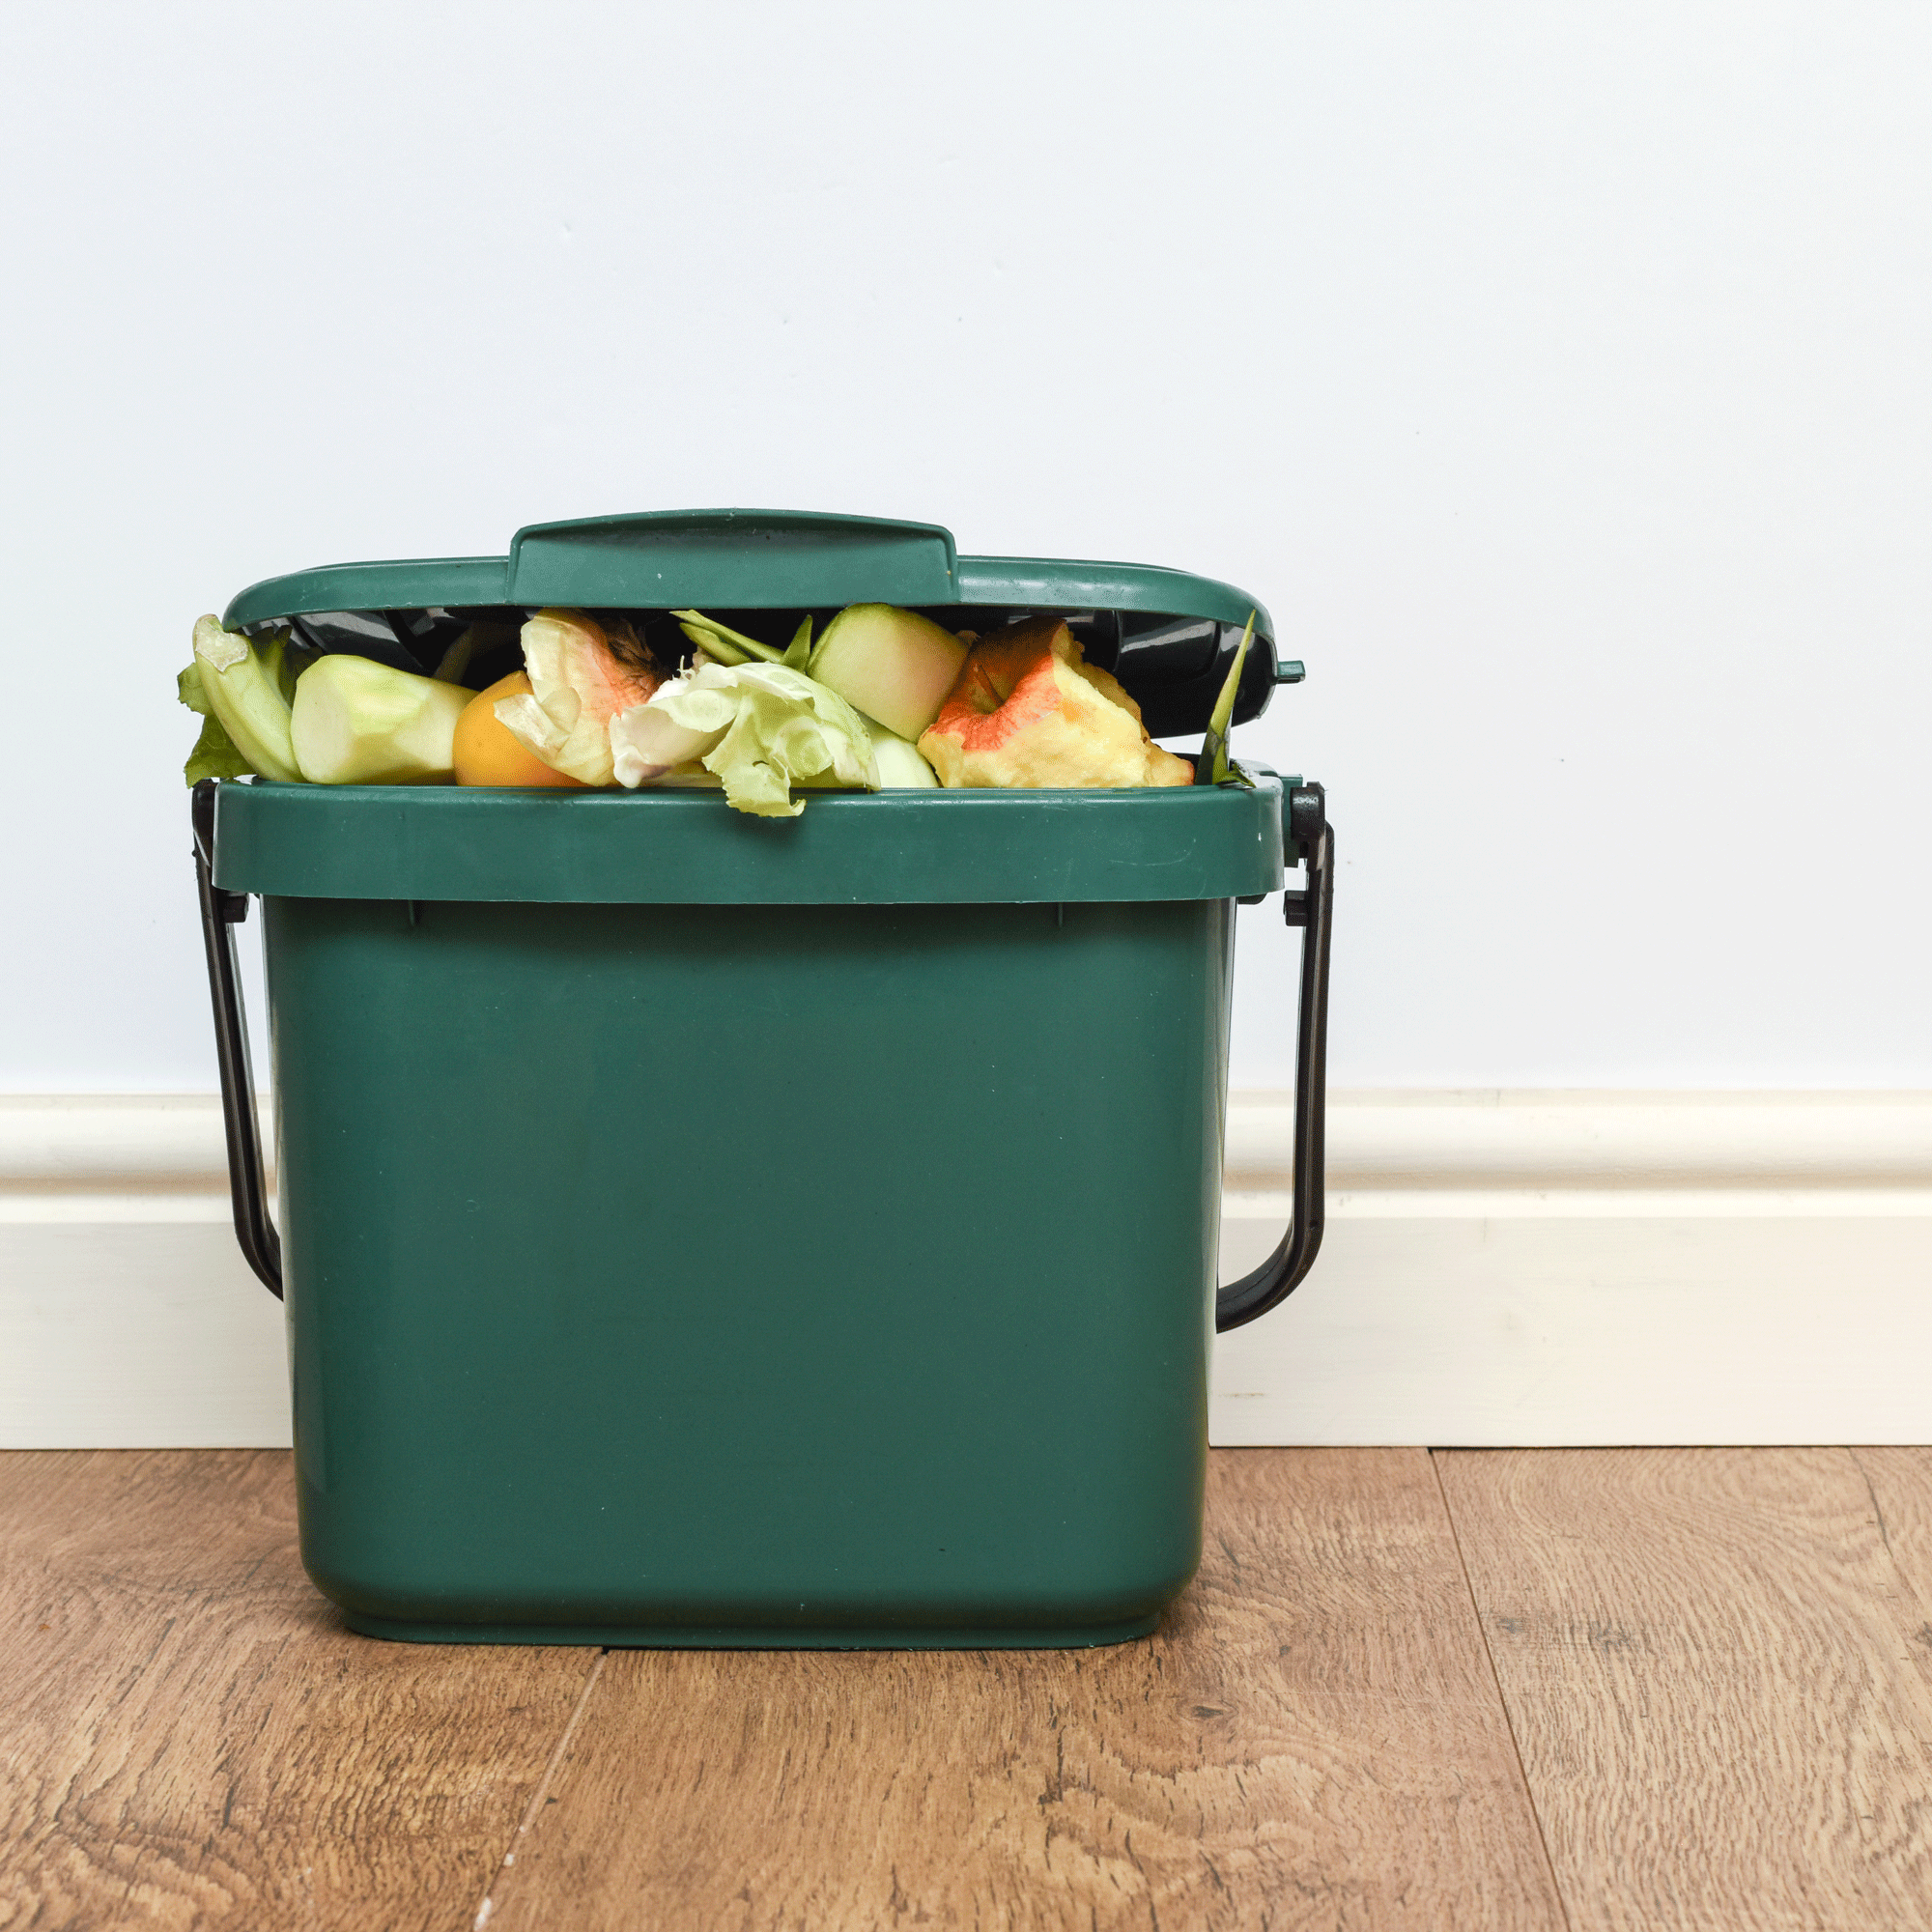
1. Food waste
Under the new rules, households in England will be issued a food waste bin, meaning putting your veg peelings in the kitchen bin is a big no-no. This can actually result in less stinky kitchen bins, especially if you opt for an odour-absorbing food bin such as the Joseph Joseph Food Waste Caddy (£29.99, Amazon).
(Image credit: Getty Images)
‘In areas of the UK where food waste is now collected separately, food should be kept out of the general household waste bin where possible and only put into the food waste bin. The separate food waste collections allow for it to be processed more efficiently,’ adds Ryan Kaila, waste and recycling expert at Kingfisher Direct.
2. Vapes, batteries and small electricals
You must avoid putting these items in your kitchen bin at all costs. This is because they pose a fire risk, which puts you and the waste collectors at risk. Small electricals refer to a number of appliances, including small toys, cables and even hairdryers.
(Image credit: Future PLC/Dominic Blackmore)
‘We’re seeing a worrying increase in fires caused by items that simply shouldn’t be placed in household recycling or general waste. The biggest culprits are vapes, loose batteries and small electricals – what we often call ‘hidden hazards’ or ‘bombs in bins,’ says Luke Walter, regional manager at the Aldridge depot for waste management company Biffa.
Sign up to our newsletter for style inspiration, real homes, project and garden advice and shopping know-how
‘These items contain lithium-ion batteries. If they are crushed or damaged during collection or processing, they can spark and ignite extremely quickly. In a split second, that can turn into a serious fire in a collection vehicle or at a recycling facility, putting our crews at risk and causing significant disruption to local services.
‘Instead, they should be taken to designated recycling points at supermarkets or household waste recycling centres, where they can be handled safely and recycled properly.
We know most residents want to do the right thing, but there’s still confusion about what belongs in the recycling bin. Anything with a plug, battery or cable should be kept out.’
3. Medical waste
‘Any medical waste, including sharp tools, syringes and even medications. Sharp items can injure sorting staff at waste facilities, and medications can pose a risk to the environment. Dispose of sharp medical waste through a specialist collection system, or take sharp medical waste and waste medications to a pharmacy for safe disposal,’ says Ryan.
(Image credit: Future Plc)
Your doctor or chemist should be able to provide you with a sharps bin if you need one. Or you can pick up a sharps bin for £6.51 at Amazon. You may be able to dispose of medical waste via your doctors or chemist, or you need to arrange a Clinical Waste Collection from your local council.
4. Gas canisters and aerosols
It is perhaps common sense that anything flammable should never go in your bin. This is not only to keep you safe, but to keep waste collection workers safe, too. You should instead take these items to a local recycling centre.
(Image credit: Getty Images)
‘Items like gas canisters, aerosols, and anything flammable are a major fire risk and should never go in standard household recycling,’ says Luke.
‘These fires are preventable. By taking a moment to dispose of these items correctly, people can help protect frontline workers, prevent damage to vital infrastructure, and ensure more materials are recycled safely and effectively.’
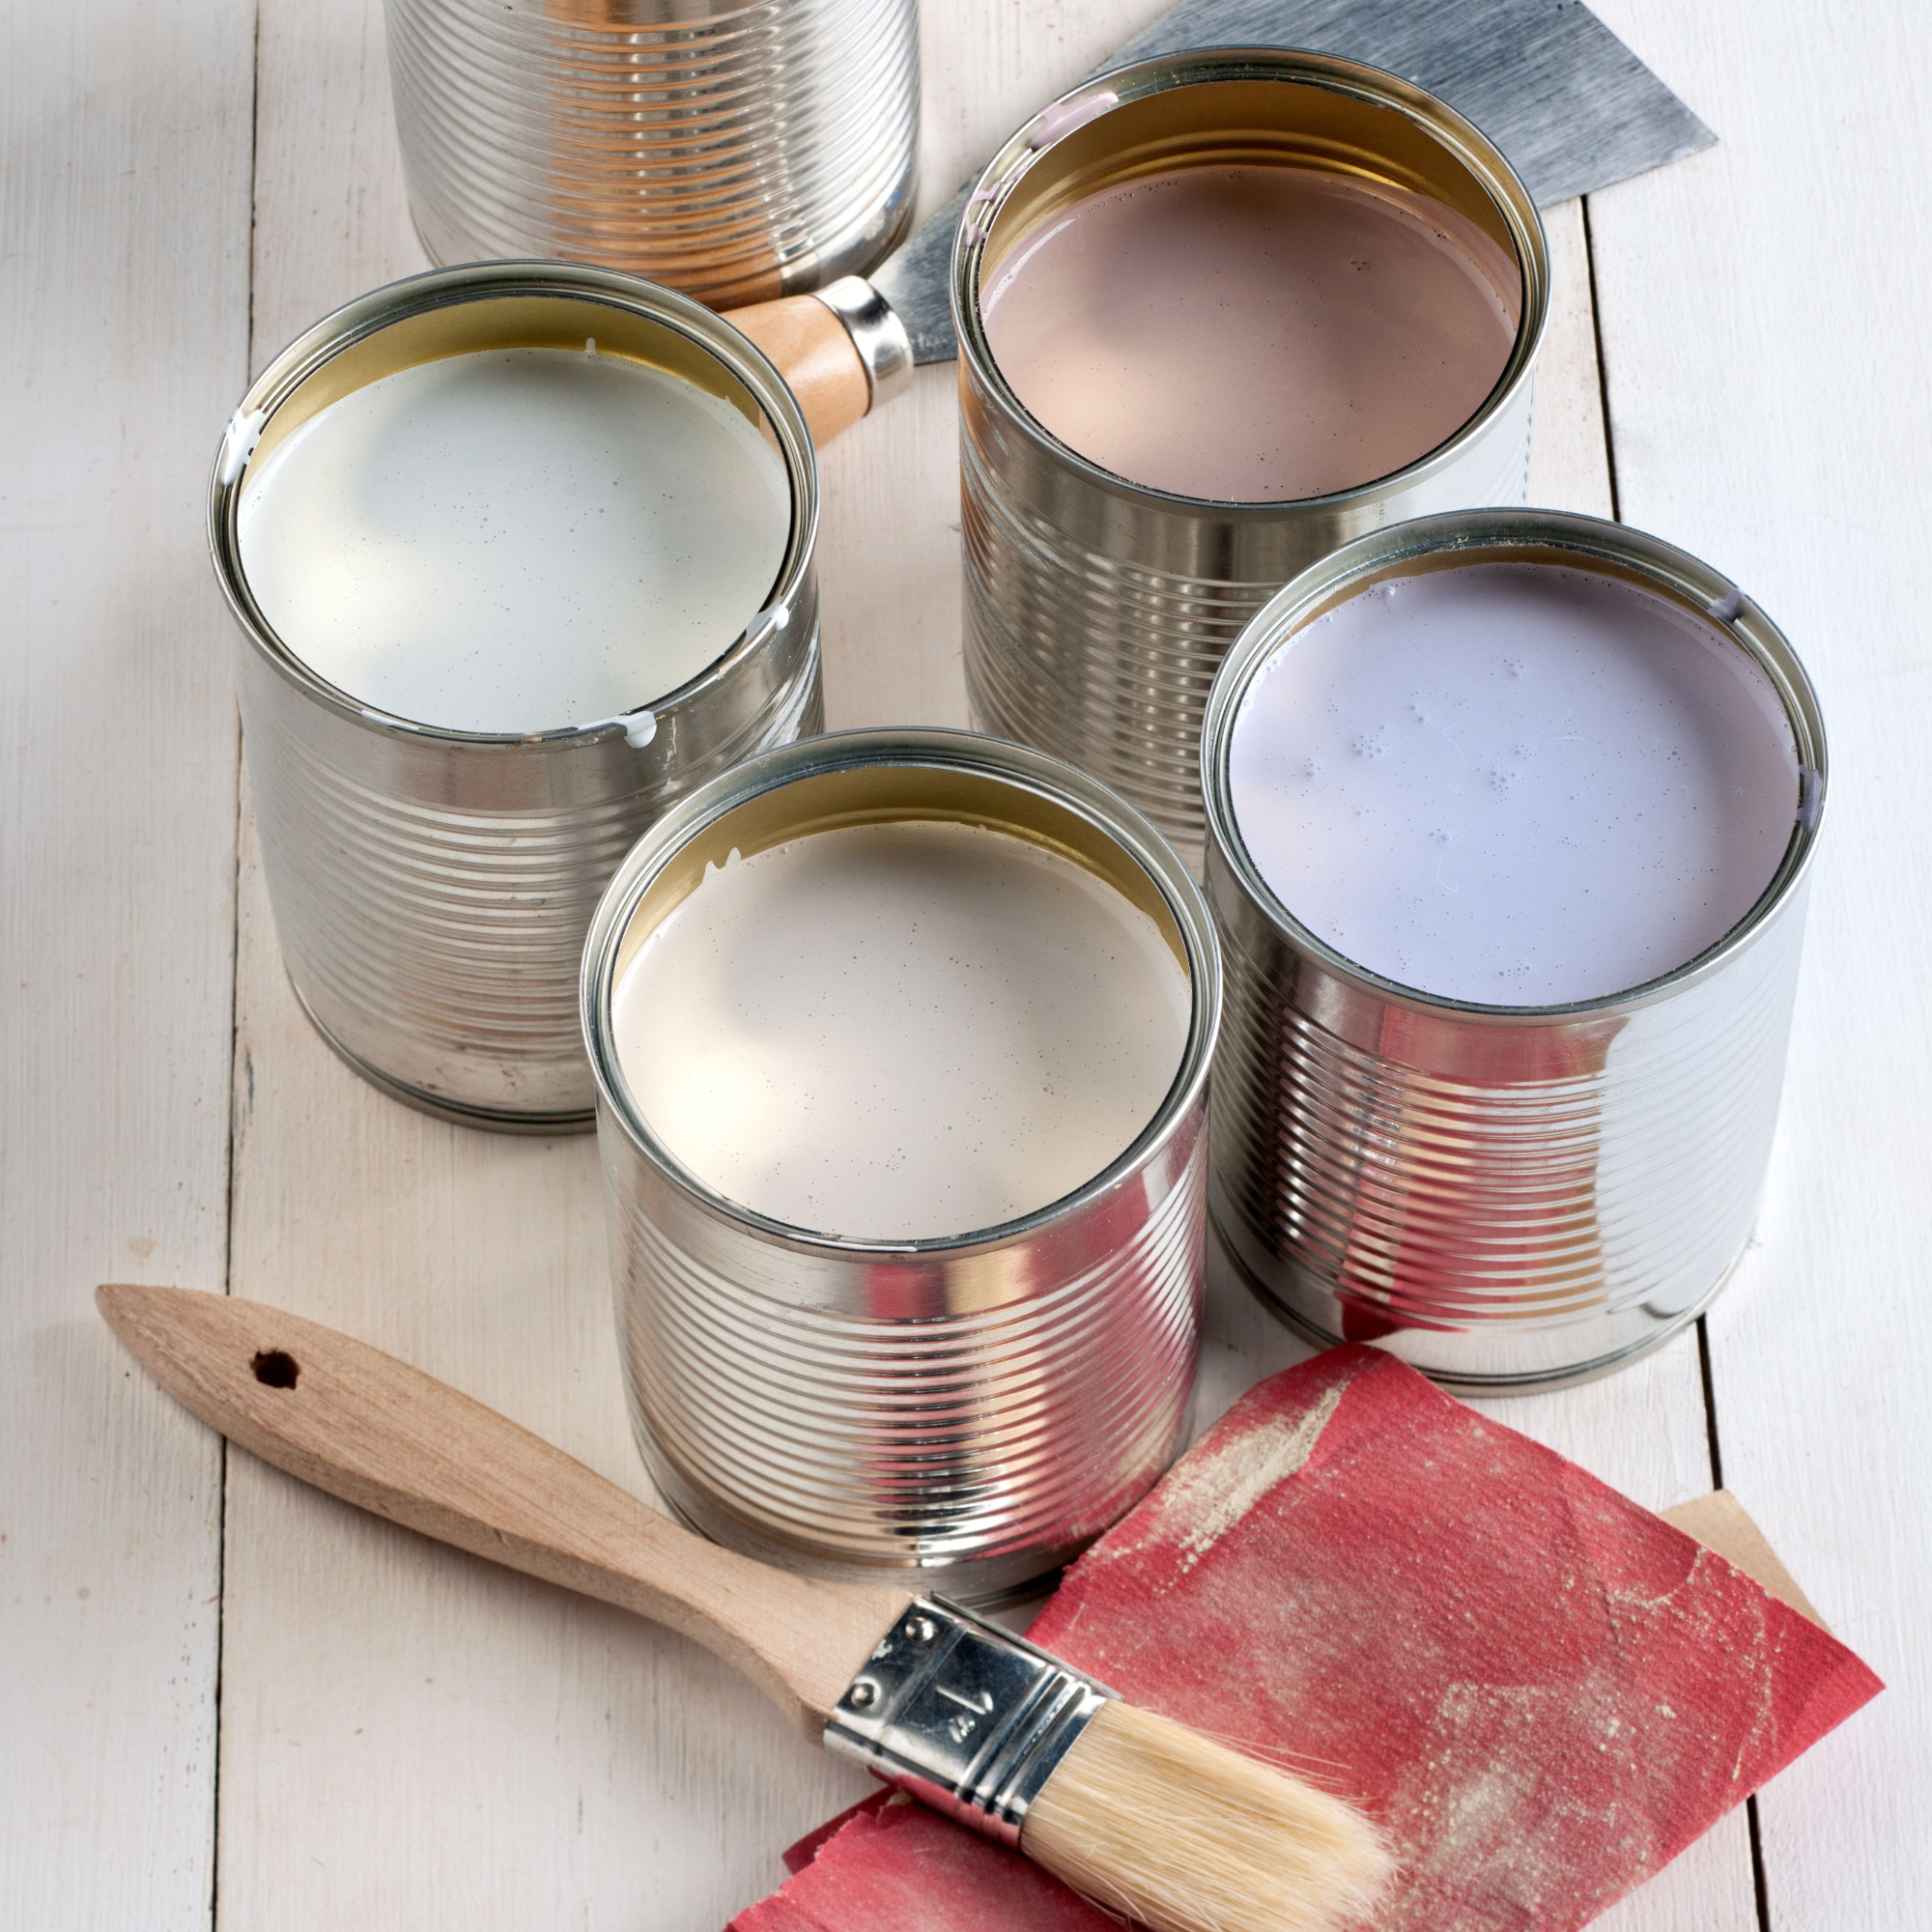
5. Paint
Lastly, if you’re looking to get rid of paint, your kitchen bin is not the answer.
(Image credit: Getty Images)
‘Any kind of paint shouldn’t be poured into bins or placed into household waste while it’s still wet, as it can leak, spill and contaminate other waste, which makes it harder for this waste to be disposed of safely and effectively,’ says Ryan.
‘Paint can also contain chemicals that shouldn’t be sent to landfill or standard waste processing facilities, as doing so could damage the local environment. Check your local council’s waste guidelines for paint disposal instructions.’
Sort your waste easily
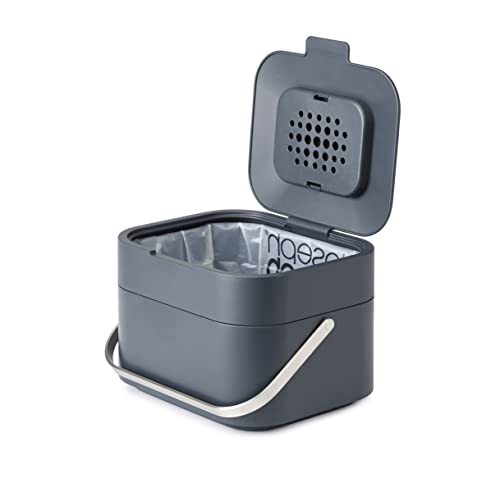
Joseph Joseph
Joseph Joseph Food Waste Caddy
Invest in a well-made food waste bin and sit it near the kitchen sink.
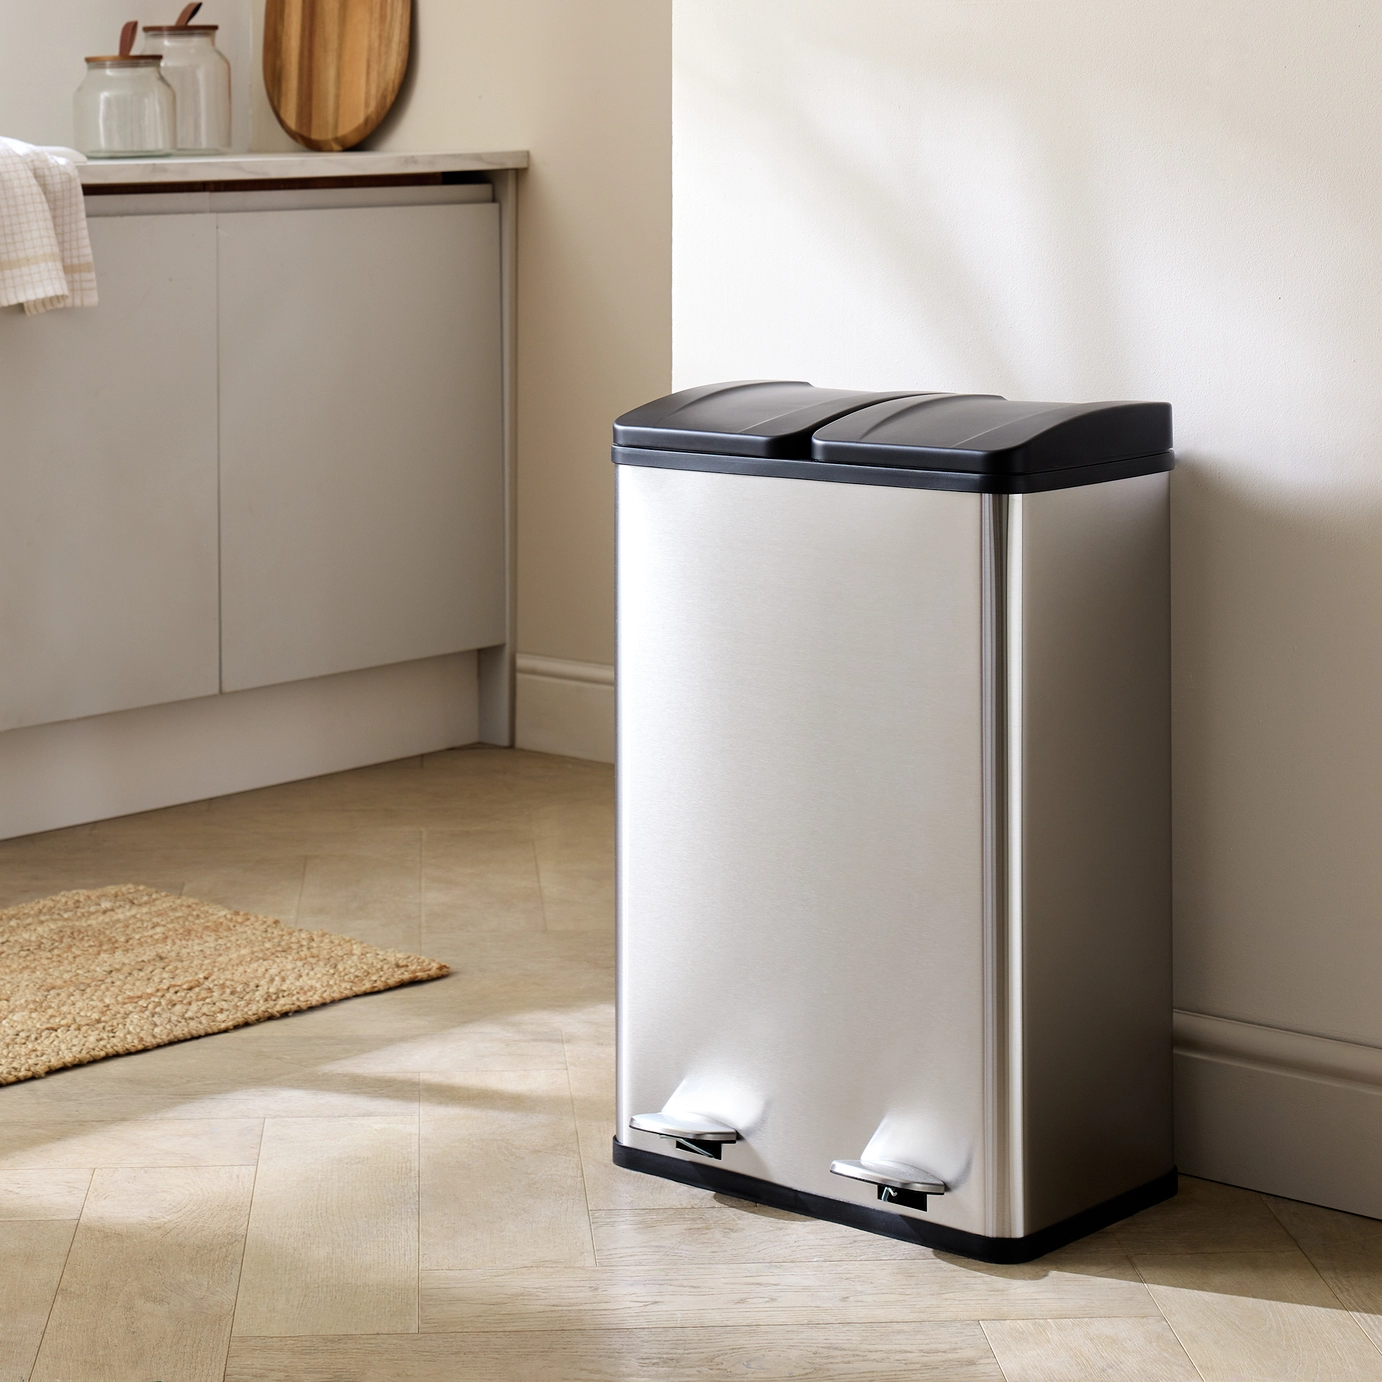
Habitat
Habitat 55 Litre Twin Compartment Pedal Bin – Steel
A twin compartment bin will make recycling feel more streamlined and second nature in a busy household.
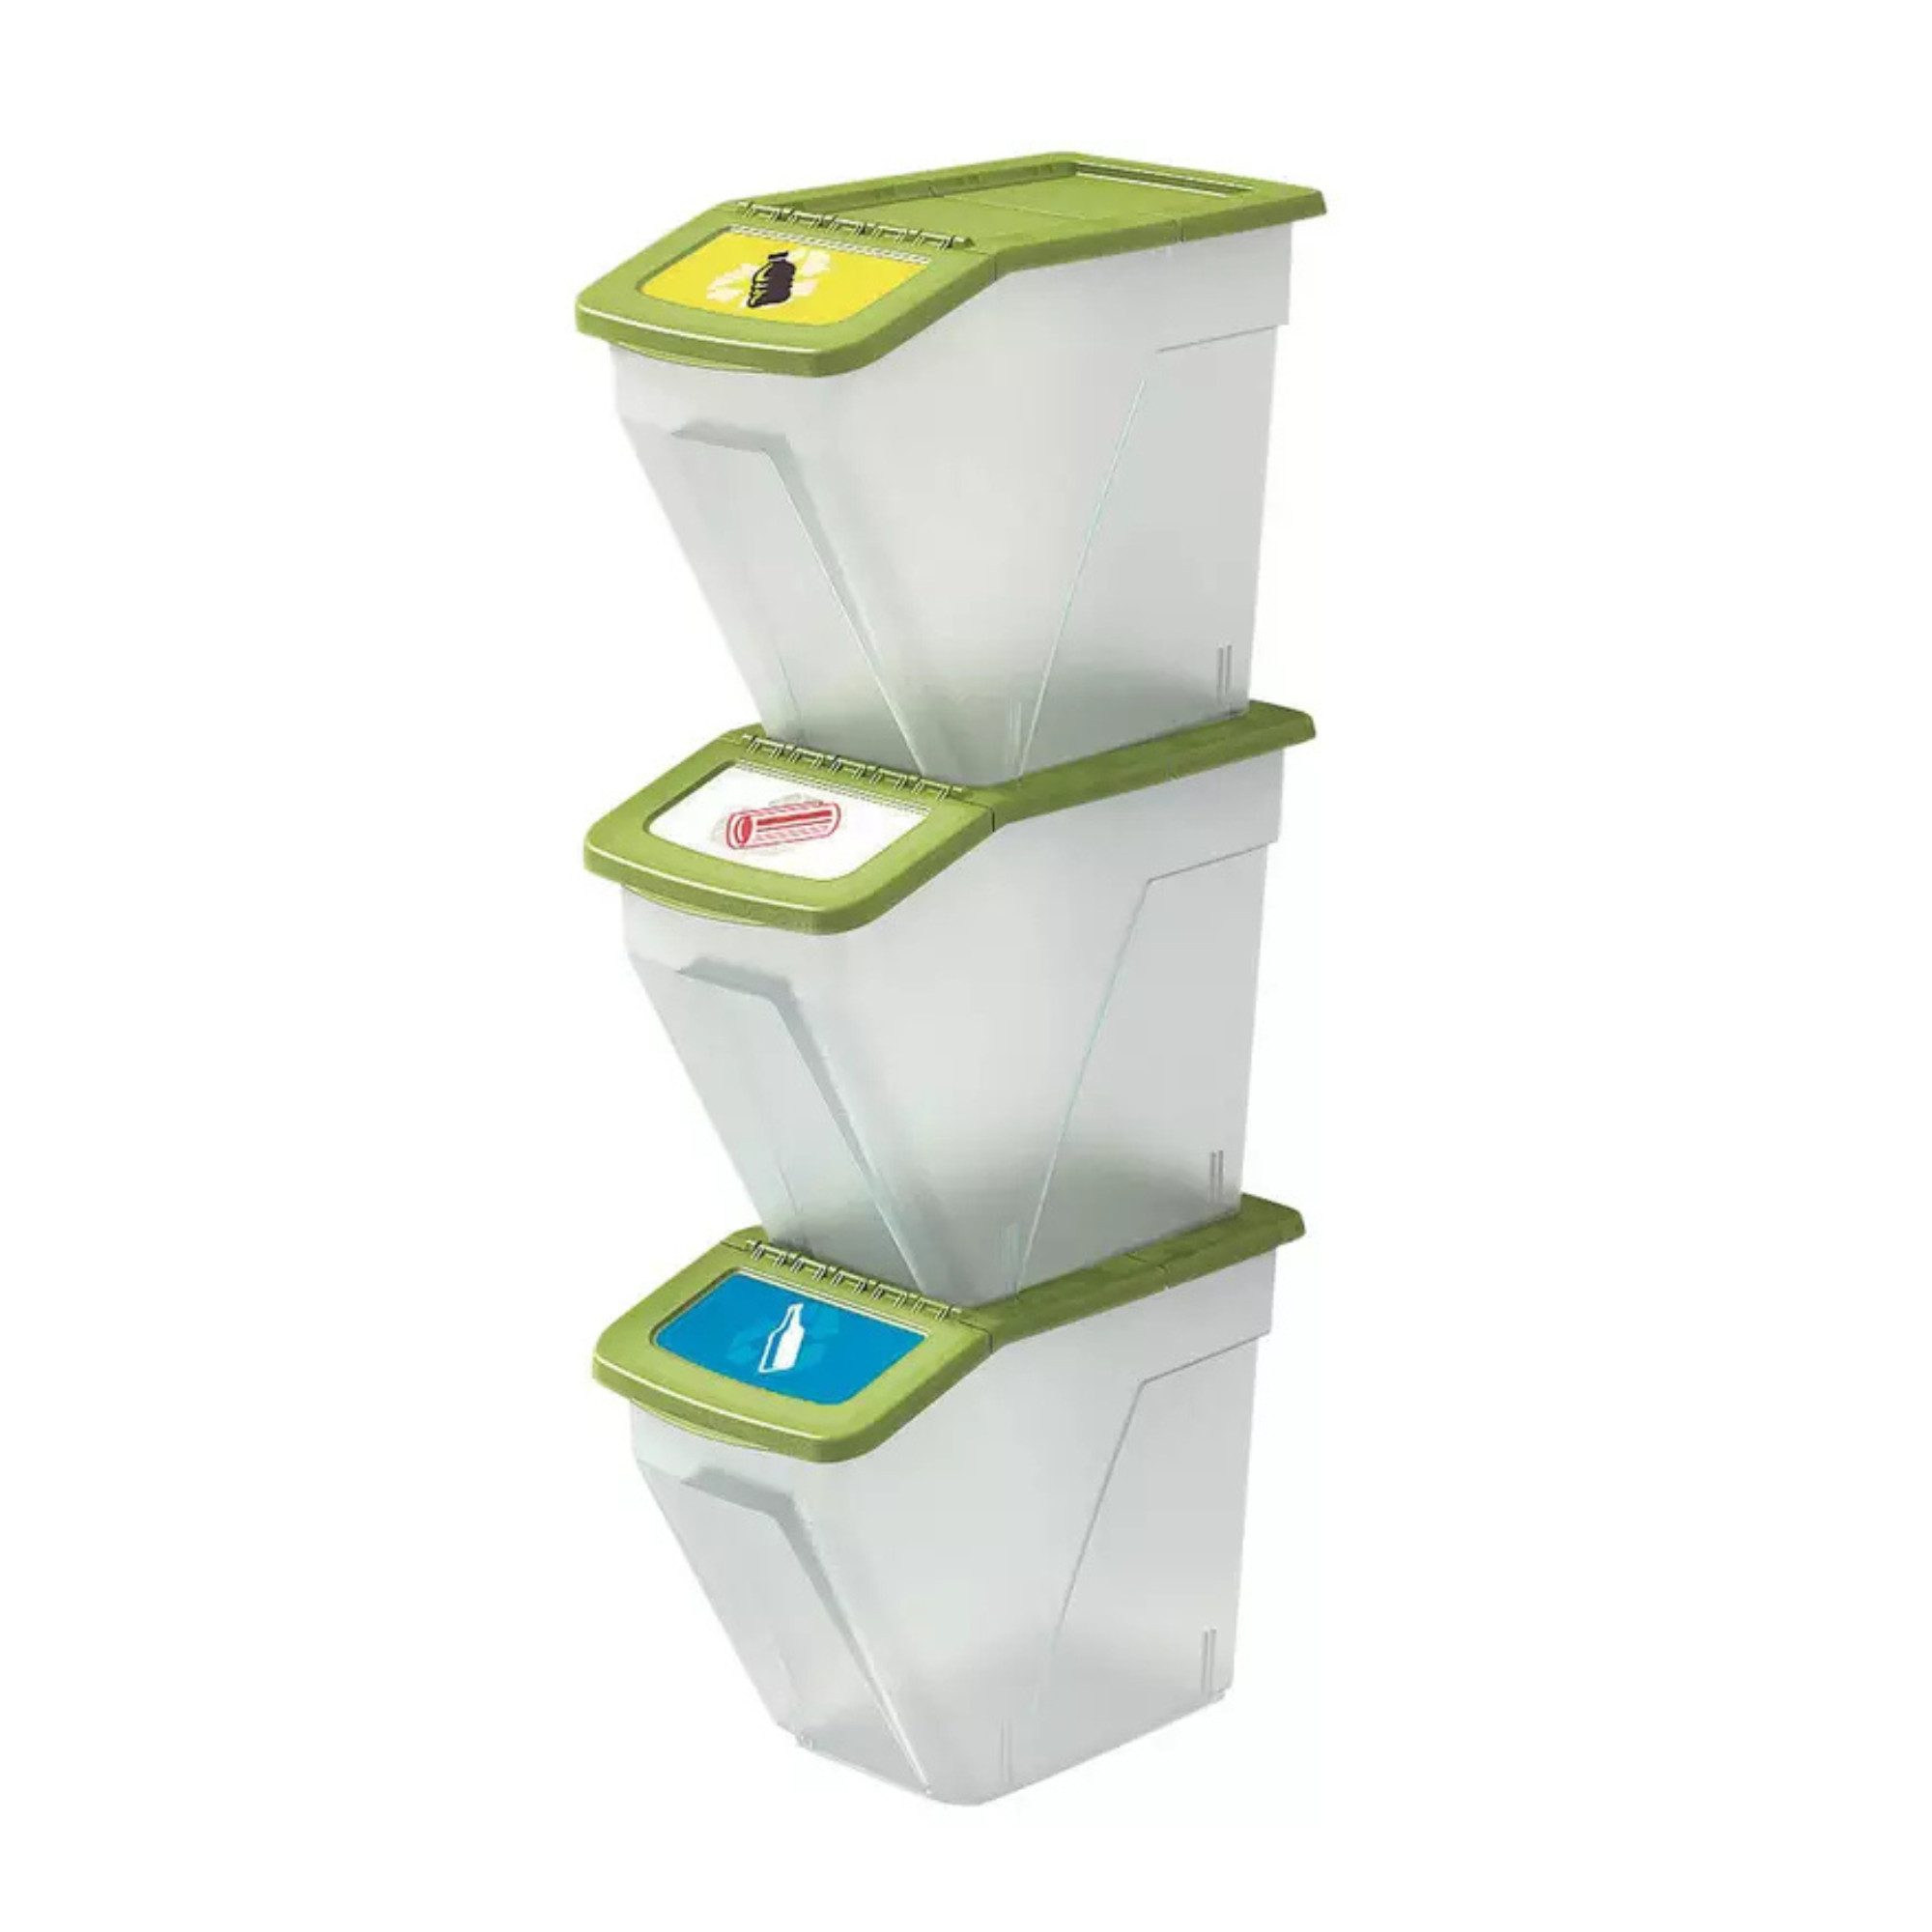
Curver
Curver 34 Litre Recycling Bins – Set of 3
If you need more recycling space, these stackable bins are a great alternative. You could even use them in a garage to organise things to go to the local tip.
If you’re in doubt about what items you can put in your bin, you should always check your local council’s website for more information.
If you enjoyed reading this, sign up for the Ideal Home newsletter for all the latest home decor trends and inspiration delivered straight to your inbox
We independently select these products—if you buy from one of our links, we may earn a commission. All prices were accurate at the time of publishing.
I’ve been on both sides of the ironing vs. steaming debate, and I believe that both methods have their flaws. In my experience, irons give clothes a crisp finish in less time, but the tangle-prone cables make them more of a pain to use. Steamers are gentler on delicate fabrics, but take more time to smooth out wrinkles. I actually gave up on both for a while because I was convinced neither one was a fit for my routine. That is, until I tried the Panasonic Cordless Lightweight Steam/Dry Iron.
The Steam/Dry Iron turned out to be the all-in-one solution I’d been missing — and it’s surprisingly well-suited to small-space living. And after using it for the past month and change, I can confidently say it’s made me a regular ironer/steamer again. Here’s why.
What Is the Panasonic Cordless Lightweight Steam/Dry Iron?
Weighing only 26.5 ounces, it’s the lightest steam iron Panasonic has ever made. It’s also cordless, comes with a handy carrying case, and heats up in 50 seconds on the accompanying power base (that plugs into a standard electrical outlet). The power base features a built-in cord compartment to make setup and storage easy. So already it solves some of my biggest gripes with traditional irons. It offers smooth, 360-degree movement without tethering you to a restrictive cord, and the iron’s portability also makes it uniquely suited to use beyond the house. Take it with you to quilting and craft classes, check it in your luggage while traveling — it goes where most irons and steamers can’t.
In terms of ironing and steaming ability, the Panasonic Steam/Dry Iron gives you the best of both. Its nonstick, U-shaped soleplate gives you the smooth glide of an iron, complete with a precision tip to tackle corners, collars, and seams, while its vertical steam and powershot functions offer the wrinkle-releasing powers of a steamer — all without staining or damaging fabrics.
Why I Love the Panasonic Cordless Lightweight Steam/Dry Iron
As someone who owns a traditional corded iron and a steamer, I can honestly say that Panasonic’s steam iron replaces both. For starters, it’s way easier to use: I plug in the power base, choose my heat setting, and the iron is ready to go in seconds. I use it on one of these tabletop ironing boards (small apartment problems), and because the iron itself isn’t restricted by a cord, I can glide it freely up and down pieces of clothing without fussing. One thing I noticed, though, is that the iron has a slightly rounded bottom that keeps it from standing upright on its own, so I need to set it on its power base between pieces. It took some getting used to, but it’s worth doing for the iron’s long-lasting heat.
Most important, though, is how effectively the Panasonic steam iron smooths out creases and wrinkles — even on my mostly air-dried clothing. Its U-shaped plate lives up to its nonstick claims, gliding over fabrics without snagging or leaving scuffs or water stains. And while I’m admittedly not as careful as I should be with my clothes, the iron’s three heat settings make it hard to mess up. The iron’s power shot function is a huge help for stubborn creases on more rigid fabrics, and when it comes to pieces too delicate to press, the iron’s vertical steam bursts do the trick.
While my old iron and steamer used to sit in a tangled heap on my closet shelf, the steam iron’s compact carrying case tucks away neatly for a clean, clutter-free look. I don’t have to worry about any residual water spilling out either, because the iron sits securely on its base. So if you’re looking for a wrinkle-smoothing solution that’s effective and space-efficient, I’d say the Panasonic Cordless Lightweight Steam/Dry Iron is worth looking into!
We independently select these products—if you buy from one of our links, we may earn a commission. All prices were accurate at the time of publishing.
Like many people, I use a daily shower cleaner after every shower to keep my glass doors free of soap scum and hard water buildup. I also take the extra step of using a squeegee to prevent excess stains. While I thought this homemade daily cleaner of dish soap, vinegar, and water was working fine, I was starting to notice cloudiness on my doors and figured it might be time for a deeper cleaning.
I wanted to find out the best shower glass cleaner, so I decided to try out six cleaning methods to see which one got them the most sparkly clean. I discovered that not only was my homemade cleaner not working as well as I thought, but the winning method was also a product I was solely using to clean my floors.
I tested three methods on the doors in my main bathroom shower (two on different parts of one door and one on the other), and three methods on each door of my guest bathroom shower. Before testing, I did not use my homemade cleaner or squeegee on either shower for one week so I could more accurately see the results of each method.
The ratings: I used a rating scale of 1 to 5, with one being the least effective and 5 the most effective. I determined each rating based on overall effectiveness, convenience, and time spent implementing the method.
Method 1: Dish Soap, Vinegar, and Water
Method: I mixed 1/4 cup of dish soap, one cup of distilled water, 1/2 cup of distilled white vinegar, and a few drops of lavender essential oil into a spray bottle. I generously sprayed this solution onto one door and let it sit for half an hour. Afterward, I used a scrubbing brush and rinsed everything off with the showerhead.
How it went: This is the cleaning solution I use as a daily cleaner so my hopes weren’t too high. After rinsing the door, it looked clean, but I was suspicious. I exhaled hot breath onto the door (to mimic the steam of a normal shower) and could see a layer of hard water stains.
Method: I used a Bounce Dryer Sheet to gently rub the hard water stains on the door and around the hardware to try to get rid of any grime and buildup.
How it went: I admit that I was impressed that a dryer sheet was able to mostly get rid of these stains. However, the sheet would either slip out of my hand or it would grip onto the glass and my hand would slip over it, making this method quite inconvenient and not worth the time to clean up several stains.
Method: I used a brand-new Magic Eraser, soaked it with water, and wrung out the excess. I cleaned the door using circular motions and added a bit more water whenever I felt it was dried out.
How it went: Although this did require a bit more elbow grease in comparison to other methods, it did an excellent job at removing hard water stains. While I wouldn’t recommend this as the main form of cleaning glass shower doors, it’s an efficient method for quick cleanups in between deeper cleanings.
Method 4: Bar Keepers Friend
Method: I poured about a tablespoon of Bar Keepers Friend Soft Cleanser onto a slightly damp sponge, scrubbed the door in a circular motion, and let it sit for a couple of minutes. I then rinsed it off with the showerhead and removed the excess with a damp microfiber cloth.
How it went: Despite removing most of the hard water stains and other residue, this method was the most inconvenient. Not only was the scent overwhelming (especially if you’re using this after a steamy shower in a windowless bathroom), but the abrasive and grainy texture of the product was also a nightmare to feel and clean from the bathtub.
Method 5: Pine-Sol and Soft Cloth
Method: Because I only wanted to test this method before making a big batch, I did not follow Pine-Sol’s dilution directions. Instead, I poured about 2 tablespoons onto a clean, damp microfiber cloth. I then wiped the door in a circular motion.
How it went: Although it’s a multi-surface cleaner,I have always associated Pine-Sol with floor cleaning (perhaps because of its woodsy pine scent), so I wasn’t sure what to expect. This method was overall the most effective and convenient; it effortlessly wiped away hard water stains and soap scum, and left behind a fresh scent. Because this method was such a success, I will be diluting it in a spray bottle and spraying it directly onto the doors instead of pouring the concentrate directly onto the cloth.
Method 6: Lime-a-way Spray
Method: Using gloves as instructed by the label, I sprayed Lime-a-way onto a section of the door, let it sit for a minute, wiped it with a damp microfiber cloth, rinsed it with water, and used a squeegee to remove excess droplets.
How it went: When I first sprayed this product onto my door, I was overcome with its strong chemical scent — in fact, I immediately started coughing! I covered my face with my T-shirt as I wiped it away with a microfiber cloth. As effective as this spray was, I couldn’t comfortably clean the rest of my shower doors in my small, windowless guest bathroom.
I learned how to clean glass shower doors by testing out six different methods and discovering that one method reigned supreme. While the winning method was clear (literally!), every method could be useful in some way depending on your preference and lifestyle factors. For example, if you have a guest bathroom that doesn’t get used often, wiping off a couple of droplets with a dryer sheet could be a quick fix.
Additionally, a daily cleaner (whether it’s homemade or not) and a squeegee can still be beneficial for the overall maintenance of glass shower doors. If you’re looking for a thorough, deep clean, however, you can’t go wrong with Pine-Sol and a soft cloth.
Moving is expensive, and losing your security deposit makes it worse. Whether it’s one or two months’ rent, that’s hundreds or thousands of dollars you can’t afford to lose. The good news? Most security deposits ARE returned when tenants follow the right steps.
This guide covers everything from protecting your deposit on day one through getting that check in the mail. We’ll show you how to document properly, clean effectively, and dispute unfair charges if needed.
.tasty-pins-banner-container{display:block;margin-bottom:20px;position:relative;width:-moz-fit-content;width:fit-content}.tasty-pins-banner-container a{cursor:pointer;display:flex;font-size:14px;font-weight:700;letter-spacing:1px;line-height:1.8em;text-transform:uppercase}.tasty-pins-banner-container a:hover{opacity:1}.tasty-pins-banner-container .tasty-pins-banner{align-items:center;bottom:0;cursor:pointer;display:flex;justify-content:center;left:0;padding-bottom:1em;padding-top:1em;position:absolute;right:0}.tasty-pins-banner-container .tasty-pins-banner svg{margin-right:4px;width:32px}.tasty-pins-banner-container .tasty-pins-banner span{margin-top:4px}.tasty-pins-banner-container a.tasty-pins-banner{text-decoration:none}.tasty-pins-banner-container a.tasty-pins-banner:hover{opacity:.8}.tasty-pins-banner-container a.tasty-pins-banner-image-link{flex-direction:column}.tasty-pins-banner-container a img{margin-bottom:0}.entry-content .wp-block-image .tasty-pins-banner-container img{margin-bottom:0;padding-bottom:0}#et-boc .et-l div .et_pb_image_wrap .tasty-pins-banner-container .tasty-pins-banner{padding-bottom:1em!important;padding-top:1em;text-decoration:none}#et-boc .et-l div .et_pb_image_wrap .tasty-pins-banner-container a.tasty-pins-banner{cursor:pointer;display:flex;font-size:14px;font-weight:700;line-height:1.8em;text-transform:uppercase}#et-boc .et-l div .et_pb_image_wrap .tasty-pins-banner-container a.tasty-pins-banner span{letter-spacing:2px;margin-top:4px}.et-db #et-boc .et-l .et_pb_module .tasty-pins-banner-container a:not(.wc-forward){padding-bottom:0}
Understanding Your Security Deposit Rights
What Is a Security Deposit?
A security deposit is money renters pay upfront—typically one to two months’ rent—that serves as financial protection for the landlord. However, this is YOUR money held in trust, not a fee.
Deposits can legally cover damage beyond normal wear and tear, unpaid rent or utilities, lease violations, and excessive cleaning costs. They CANNOT be used for normal wear and tear (faded paint, worn carpet from regular use), repairs from landlord neglect, or upgrades the landlord chooses to make.
Return timeline: Most states require 14-30 days (California: 21 days, New York: 14 days)
Interest requirements: Some states mandate interest on deposits held long-term
Itemized deductions: Nearly all states require detailed lists with receipts
Search “[Your State] security deposit laws” to understand your specific rights.
Normal Wear and Tear vs. Damage
“Normal wear and tear” is deterioration from ordinary use over time. “Damage” results from negligence or abuse.
Normal wear and tear (NOT deductible): Faded paint, minor scuff marks, worn carpet in high-traffic areas, loose door handles, small nail holes, dirty windows.
Damage (deductible): Large holes in walls, broken windows or fixtures, pet stains and scratches, cigarette smoke damage, permanent carpet stains, broken appliances from misuse.
The rule: If you caused it through carelessness, it’s damage. If it happened naturally from living there, it’s wear and tear.
Protect Your Deposit from Day One
Document Everything at Move-In
Within 48 hours of moving in, take comprehensive photos and videos of every room from multiple angles.
Get close-ups of any existing damage, stains, or issues. Document all walls, floors, appliances, bathroom fixtures, windows, doors, light fixtures, and inside closets and cabinets.
Complete the move-in checklist in extreme detail. Don’t write “good condition” if there are any issues. Be specific: “small dent in bedroom door,” “light scuff marks on living room wall.” Have your landlord sign and date it, or email it to them for a paper trail.
Review Your Lease Carefully
Note specific requirements about move-out cleaning, notice requirements (typically 30-60 days), repair responsibilities, and any pet policies. Understanding these upfront prevents costly mistakes later.
Build a Good Landlord Relationship
Communicate promptly and professionally in writing (email is perfect). Pay rent on time, follow property rules, and document all interactions. A landlord who views you as a good tenant is more likely to be reasonable about minor issues at move-out.
During Your Tenancy
Clean regularly to prevent dirt and stains from becoming permanent. Address issues promptly—a small leak can become major water damage.
Report problems in writing to create documentation.
Get written approval before making any changes, save receipts for repairs you make, and take photos documenting any incidents or repairs.
Provide your landlord notice when preparing to move out within the timeframe outlined by your lease.
The Move-Out Cleaning Checklist
The property should be as clean as when you moved in. This is where most deposits are lost or secured. Here’s your deep cleaning guide:
Kitchen
Appliances: Remove and wash all refrigerator shelves and drawers. Wipe down interior surfaces and door seals.
Clean the top, sides, and underneath if possible. Use oven cleaner on the interior and scrub away all baked-on grease.
Clean stovetop burners and drip pans thoroughly. Run the dishwasher empty with cleaner and wipe down the door and edges.
Surfaces: Scrub the sink until it shines. Wipe down all countertops, backsplash, and cabinet exteriors. Clean inside all cabinets and drawers, removing any crumbs or spills.
Floors and Details: Sweep and mop thoroughly, paying attention to corners. Wipe down baseboards and clean any light fixtures.
Bathrooms
Fixtures: Scrub the toilet bowl, seat, tank, and base. Remove all soap scum and mildew from the shower and tub. Scrub tiles and grout. Clean shower door tracks thoroughly. Polish all chrome fixtures.
Vanity and Surfaces: Scrub the sink and faucet. Wipe down countertops and clean inside all cabinets. Polish mirrors and medicine cabinets.
Finishing Touches: Clean the exhaust fan cover. Sweep and mop floors, including baseboards.
Living Areas and Bedrooms
Floors: Vacuum carpets thoroughly, including edges and corners. Consider renting a carpet cleaner for deep cleaning, especially if there are stains. Sweep and mop all hard floors.
Walls and Windows: Spot clean any marks or smudges with a damp cloth. Fill small nail holes with spackle if needed. Clean all windows inside and out, along with sills and tracks.
Details: Dust ceiling fans and light fixtures. Replace burnt-out bulbs. Vacuum inside all closets. Wipe down all baseboards. Remove and wash air vent covers.
Often-Missed Areas
Don’t forget: inside closets, top of ceiling fans, behind appliances, window tracks, door frames, inside the dishwasher and microwave, dryer lint trap and vent, and any balcony or patio areas.
Should You Hire Professional Cleaners?
If your lease requires it, you must. Otherwise, consider professionals if you’re short on time, the property is large, or you want documentation. Professional cleaning typically costs $200-$500, but can prevent larger deposit deductions.
Final Walk-Through Strategy
Request a pre-move-out walkthrough inspection with your landlord if possible. This allows you to address any concerns they raise while you still have access to the property, and shows good faith.
After cleaning, take comprehensive photos and videos of every room, matching the angles from your move-in photos when possible.
Be sure to remove all personal items so you can show all rooms empty, clean appliances (open doors to show interiors), spotless bathrooms, and clean floors, walls, and windows.
Return all keys, remotes, parking passes, and any other items. Get a written receipt that you returned everything on a specific date, or send a confirmation email and keep a copy.
After You Move Out
Follow Up on Your Deposit
Provide your forwarding address in writing and know your state’s timeline for deposit returns (typically 14-30 days). Mark this date on your calendar. If you haven’t heard from your landlord a few days before the deadline, send a polite email reminder referencing your state’s law and the due date.
Review the Itemized Statement
When you receive your deposit statement, compare it to your move-in and move-out photos. Check that:
Charges aren’t for normal wear and tear or pre-existing damage
Amounts are reasonable and supported by receipts
The statement includes an itemized list of the damage, costs, and receipts (required in most states)
The math is correct
Disputing Unfair Deductions
If charges are improper, send a formal dispute letter via certified mail including:
Your name, property address, and move-out date
Specific reasons each charge is improper
References to state law and your documentation
The amount you believe you’re owed
A deadline for response (10-14 days)
If the landlord doesn’t respond, consider filing a complaint with your state’s tenant protection agency or pursuing small claims court.
Small claims court is practical when the disputed amount is significant, you have thorough documentation, and the landlord has violated state law. Many states award double or triple damages for willful withholding, and courts tend to favor well-documented tenants.
Common Reasons Tenants Lose Deposits (And How to Avoid Them)
Inadequate cleaning (most common): Follow the detailed cleaning checklist, don’t rush the process, and consider professional cleaners. Take before-and-after photos of the house or apartment.
Damage beyond normal wear and tear: Treat the property carefully, repair minor damage yourself (nail holes, scuffs), and report issues immediately.
Unpaid rent or utilities: Pay all rent through your last day, verify final utility bills are paid, and never use your deposit as “last month’s rent” unless explicitly allowed.
Not giving proper notice: Review notice requirements early (typically 30-60 days), provide notice in writing via email and certified mail, and keep proof of delivery.
Breaking the lease early: Review early termination clauses, attempt to negotiate, find a replacement tenant if allowed, and document reasons for breaking the lease.
Missing items or keys: Make a list of everything that came with the rental, ensure it’s all present at move-out, and get receipts for returned items.
Pet damage: Professionally clean carpets, repair scratches, and eliminate odors completely.
Smoking damage: If you smoked inside, be prepared for significant cleaning costs, including wall washing and carpet cleaning or replacement.
Special Situations
Pet Deposits: Have carpets professionally cleaned and save the receipt. Repair scratches, eliminate all odors, and take extensive photos showing no pet damage.
Roommate Situations: When moving out together, agree in advance on how to split deductions. When one roommate moves early, document the property condition, get written agreements on responsibility, and involve the landlord to clarify liability.
Breaking a Lease: Review early termination clauses, check if your state allows termination for specific reasons (military deployment, unsafe conditions), try finding a replacement tenant, and consider negotiating to forfeit part of your deposit. Document everything if breaking due to landlord violations.
HOW TO GET YOUR DEPOSIT BACK: STEP-BY-STEP CHECKLIST
Never miss a step with this comprehensive guide! Follow these proven steps from move-in to move-out to maximize your chances of getting your full deposit back. Includes cleaning tasks, documentation tips, and post-move-out procedures.
Instructions
AT MOVE-IN (Day 1-2)
Document Everything
☐ Take photos and videos of every room from multiple angles
☐ Get close-ups of any existing damage, stains, or issues
☐ Report all maintenance issues in writing (email)
☐ Get written approval before making any changes
☐ Pay rent on time every month
☐ Keep all correspondence with landlord
30-60 DAYS BEFORE MOVE-OUT
☐ Provide written notice via email and certified mail
☐ Request a pre-move-out inspection with landlord
☐ Create a cleaning plan and schedule
☐ Address any issues landlord identifies
MOVE-OUT CLEANING (1-2 Weeks Before)
Kitchen
☐ Clean refrigerator inside, outside, underneath, and behind
☐ Deep clean oven and stovetop
☐ Clean inside and outside of all cabinets and drawers
☐ Scrub sink and wipe down countertops
☐ Clean dishwasher and all appliances
☐ Sweep and mop floor thoroughly
Bathroom
☐ Scrub toilet bowl, seat, tank, and base
☐ Remove all soap scum from shower/tub
☐ Scrub tiles and grout
☐ Clean sink, faucet, and inside vanity cabinets
☐ Wipe down mirror
☐ Sweep and mop floor
Living Areas & Bedrooms
☐ Vacuum all carpets thoroughly (consider professional cleaning)
☐ Sweep and mop all hard floors
☐ Spot clean any wall marks
☐ Clean all windows (inside and out)
☐ Dust ceiling fans and replace burnt-out bulbs
☐ Clean inside all closets
☐ Wipe down all baseboards
Don’t Forget
☐ Clean air vents
☐ Wipe down door frames and light switches
☐ Clean behind appliances
☐ Remove all personal belongings
FINAL STEPS (Last Day)
Document Final Condition
☐ Take comprehensive photos of every room (empty and clean)
☐ Use same angles as move-in photos when possible
☐ Photograph clean appliances, bathrooms, floors, and windows
Return Everything
☐ Return all keys, remotes, access cards, and parking permits
☐ Get written receipt for what was returned and when
Provide Forwarding Information
☐ Give landlord your new address in writing
☐ Confirm landlord has correct forwarding address
AFTER MOVE-OUT
Follow Up on Deposit
☐ Mark deposit return deadline on your calendar (usually 14-30 days)
☐ Follow up if you haven’t heard from landlord by deadline
Review Deposit Statement
☐ Compare charges to your move-in/move-out photos
☐ Check if charges are for normal wear and tear (improper)
☐ Verify charges are reasonable and supported by receipts
Dispute Unfair Charges
☐ Send formal dispute letter via certified mail if charges are unfair
☐ Include your documentation and references to state laws
☐ Consider small claims court if direct resolution fails
SPECIAL CONSIDERATIONS
If You Have Pets: Have carpets professionally cleaned, repair scratches, eliminate odors
If You Have Roommates: Agree in advance how to split deductions, document property condition
If You’re Breaking Your Lease: Review early termination clause, attempt to find replacement tenant, document reasons
Remember: Your security deposit is YOUR money. With proper documentation and following these steps, you have an excellent chance of getting it all back!
Conclusion
Getting your security deposit back requires attention to detail and proper documentation. The key steps are:
Document everything from move-in to move-out. Photos are your best protection against unfair charges.
Know your rights and understand your state’s security deposit laws. Don’t accept deductions that violate them.
Clean thoroughly using the detailed checklist above. This is where most deposits are lost or secured.
Follow procedures, including proper notice, meeting deadlines, and fulfilling all lease requirements.
Your security deposit is YOUR money. Landlords must prove specific damages or violations to withhold it. With thorough documentation and following these steps, you’re in the strongest position to get every penny back.
There are moments in life when you suddenly feel like a real adult. Like when you buy your first car, or take that car for its first oil change. When you open a savings account, or purchase your first washer and dryer. Or like when you finally learn how to fold a fitted sheet properly.
.tasty-pins-banner-container{display:block;margin-bottom:20px;position:relative;width:-moz-fit-content;width:fit-content}.tasty-pins-banner-container a{cursor:pointer;display:flex;font-size:14px;font-weight:700;letter-spacing:1px;line-height:1.8em;text-transform:uppercase}.tasty-pins-banner-container a:hover{opacity:1}.tasty-pins-banner-container .tasty-pins-banner{align-items:center;bottom:0;cursor:pointer;display:flex;justify-content:center;left:0;padding-bottom:1em;padding-top:1em;position:absolute;right:0}.tasty-pins-banner-container .tasty-pins-banner svg{margin-right:4px;width:32px}.tasty-pins-banner-container .tasty-pins-banner span{margin-top:4px}.tasty-pins-banner-container a.tasty-pins-banner{text-decoration:none}.tasty-pins-banner-container a.tasty-pins-banner:hover{opacity:.8}.tasty-pins-banner-container a.tasty-pins-banner-image-link{flex-direction:column}.tasty-pins-banner-container a img{margin-bottom:0}.entry-content .wp-block-image .tasty-pins-banner-container img{margin-bottom:0;padding-bottom:0}#et-boc .et-l div .et_pb_image_wrap .tasty-pins-banner-container .tasty-pins-banner{padding-bottom:1em!important;padding-top:1em;text-decoration:none}#et-boc .et-l div .et_pb_image_wrap .tasty-pins-banner-container a.tasty-pins-banner{cursor:pointer;display:flex;font-size:14px;font-weight:700;line-height:1.8em;text-transform:uppercase}#et-boc .et-l div .et_pb_image_wrap .tasty-pins-banner-container a.tasty-pins-banner span{letter-spacing:2px;margin-top:4px}.et-db #et-boc .et-l .et_pb_module .tasty-pins-banner-container a:not(.wc-forward){padding-bottom:0}Share this life hack on Pinterest!
Once you learn the easiest way to fold a fitted sheet, your linen closets will never be the same.
The best part? This technique becomes second nature after just a few tries and only has a few easy steps. Let me walk you through exactly how to fold fitted sheets so they look as neat as your flat sheets.
Why Folding Fitted Sheets Feels Impossible
If you’ve ever wrestled with a fitted sheet and given up in frustration, you’re not alone. There’s a very real reason why folding fitted sheets feels so much harder than folding regular sheets, those elastic corners.
The stretchy edges and rounded corners that make fitted sheets hug your mattress perfectly are the same features that make traditional folding techniques completely useless.
You can’t simply fold a fitted sheet in half like you would a flat sheet because those elastic edges create bulk and rounded shapes that refuse to cooperate.
Most people resort to balling up their fitted sheets and shoving them in the linen closet and leaving the closet an absolute mess.
It’s not laziness. It’s just that no one ever showed us an actual method that works. The elastic creates resistance, the corners bunch up and creases awkwardly, and before you know it, you’ve got what looks like a fabric burrito instead of a neatly folded sheet.
But here’s the good news: there’s a specific corner-tucking technique that makes folding fitted sheets genuinely easy.
Once you understand how to nest the corners properly, the process takes less than two minutes. The trick is working with the elastic corners instead of fighting against them.
What You Need to Fold a Fitted Sheet
One of the best things about this method is how simple it is. You don’t need any special tools or equipment, just:
A clean, dry fitted sheet
Your hands
A flat surface (optional but helpful for the final folds)
That’s it!
No clips, no fancy folding boards, nothing to buy. You can fold a fitted sheet standing up, sitting on your bed, at a table, or wherever feels most comfortable. The whole process takes just two to three minutes once you know the technique.
I recommend starting on a bed or large table for your first few attempts. Having that flat surface nearby makes it easier to lay the sheet down for the final folds. But honestly, once you’ve practiced a few times, you can do this anywhere.
The Easiest Method: How to Fold Fitted Sheets Step-by-Step
Ready to master this life-changing skill? I’m breaking down the easiest way to fold a fitted sheet into clear, manageable steps. Follow along with the video below, or use these written instructions—whichever works best for you!
Getting Your Starting Position
Start by holding your fitted sheet lengthwise—meaning the longer sides are stretched between your hands. Face toward a bed or table where you’ll eventually lay the sheet flat.
Place your hands inside the two top corners of the sheet with the elasticized edges facing you. The seams should be facing outward. This starting position is crucial because it sets you up for the corner-tucking magic that follows.
The First Corner Tuck
Now comes the key move that makes everything else work. While holding both top corners, bring your right hand over to meet your left hand. Tuck the right corner over and into the left corner. The elastic edges should now sit together neatly.
You’ll now have two corners resting on your left hand. Don’t worry if it feels a bit awkward at first—this is the trickiest part, and it gets easier with practice. Make sure those corners are properly nested together before moving on.
Finding the Bottom Corners
With the top two corners secured on your left hand, use your right hand to reach down and locate the two bottom corners of the sheet. Keep the top corners steady in your left hand as you work.
The fitted sheet will be hanging down, and you’re looking for where the elastic edges meet at the bottom two corners. These are easier to find if you gently shake the sheet to let them fall naturally.
Bringing All Corners Together
This is where it all comes together—literally! Bring the bottom right corner up to meet the top corners in your left hand. Tuck it into the other corners so all three are nested together.
Repeat this with the bottom left corner. Now, all four corners are tucked into one hand, and you should be holding what looks like a roughly rectangular piece of fabric with elastic edges, all nestled on one side.
Smoothing and Shaping
Give the sheet a gentle shake to release any bunched-up fabric. Smooth the material with your free hand, encouraging it to form a rectangular shape. The elastic edges should all be together on one side, and the rest of the sheet should hang fairly straight.
This shake-and-smooth step is more important than it seems. Taking a moment here to work out the wrinkles and get a nice shape makes the final folding much easier.
The Final Folds
Lay your sheet on your flat surface with the elastic edges facing the same direction. Smooth it out into the neatest rectangle you can manage. The elastic corners will create a bit of bulk on one end—that’s totally normal and fine.
Fold the sheet in thirds lengthwise to create a long, narrow rectangle. Then fold it in thirds or in half widthwise, depending on your storage space. You can adjust these final folds based on the size of your linen closet shelves.
The result? A neat, flat rectangle that looks like you actually know what you’re doing with laundry! Sure, it might not be quite as crisp as a flat sheet, but it’s a million times better than the crumpled ball you started with.
Pro Tips for Perfect Fitted Sheet Folding
Once you’ve got the basic technique down, these tips will help you fold fitted sheets even more efficiently and neatly.
Start with the long side. Holding the sheet lengthwise creates better balance and makes it easier to control as you’re tucking corners. If you start with the short side, the sheet feels heavier and more awkward to manipulate.
Use a flat surface for the final folds. While you can do the corner-tucking while standing, having a bed or table to lay the sheet on for those final folds creates much crisper, cleaner results. The difference is noticeable in how your sheets look in the closet.
Practice makes perfect. Your first attempt might feel clumsy, and that’s completely normal. By the third or fourth time, though, your hands will remember the movements and it’ll start feeling natural. I promise it clicks faster than you’d expect!
Smooth as you go. Don’t wait until the end to deal with wrinkles and bunched fabric. A quick smoothing motion after each corner tuck keeps everything neat and makes the final result much better.
The corners are everything. Getting all four corners properly nested together is what creates that neat rectangular shape. If your sheet doesn’t look right at the end, it’s usually because one corner didn’t get fully tucked in with the others. Don’t rush this part!
Match your sheet size to your folding style. King and queen fitted sheets are easier to fold on a bed, while twin sheets work fine folded at a table or even standing up. Adjust your approach based on what you’re working with.
What to Do If It’s Not Perfect
Let’s be real—your first folded fitted sheet probably won’t look Instagram-worthy, and that’s okay! Even an imperfect fold is dramatically better than the ball-of-fabric situation you had before.
The corners might stick out slightly, creating little lumps on one end of your folded sheet. This is normal because that’s where all the elastic is gathered. As long as your sheet is generally rectangular and reasonably flat, you’re doing great.
If your sheet is wrinkled, give it a quick smooth with your hands before the final folds. Or better yet, fold your sheets right out of the dryer when they’re still slightly warm—the heat helps them smooth out naturally.
If your first attempt looks terrible, just unfold it and try again! The beauty of this skill is that there’s no penalty for practice. Each time you do it, you’ll understand the technique a little better.
How to Store Your Beautifully Folded Fitted Sheets
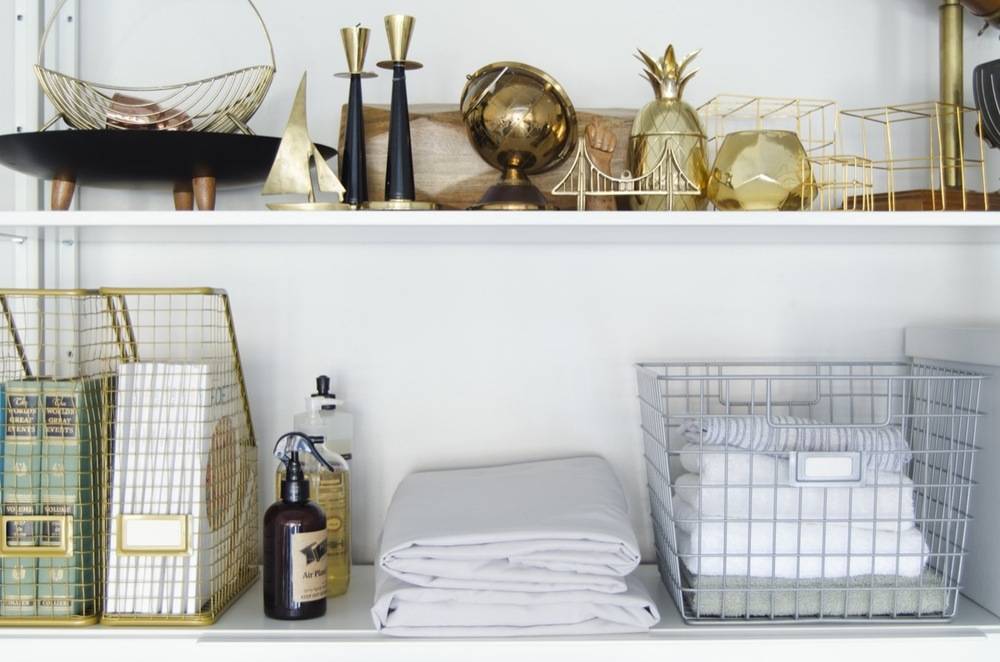
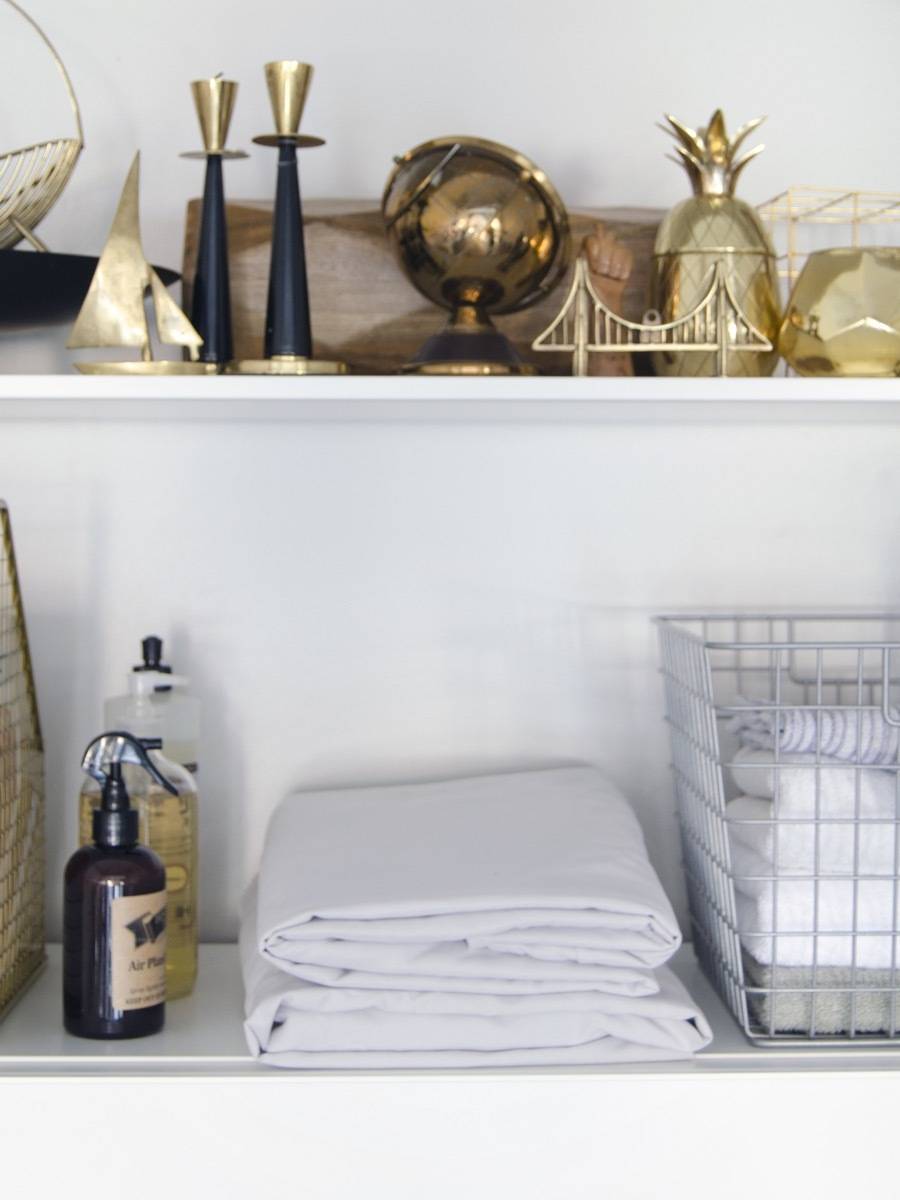
Now that you can fold fitted sheets like a pro, let’s talk about how to store them so your linen closet stays organized and your sheets stay neat.
The game-changing trick? Store complete sheet sets together. Fold your fitted sheet, flat sheet, and pillowcases to similar sizes, then tuck everything inside one of the pillowcases. This creates a neat “bundle” that keeps sets together and makes it easy to grab what you need without disturbing other sheets.
Stack sheets by bed size on your linen closet shelves. Keep all your twin sheets together, all your queen sheets together, and so on. If you have multiple sets for each bed, rotate them to distribute wear evenly.
Consider using shelf dividers if you have lots of sheet sets. This prevents stacks from toppling and makes it easy to pull out a set without disturbing others. You can find simple wire dividers at any home store, or even use tension rods installed vertically.
Label your shelves if you have sheets for multiple beds in your home. A simple label like “Master Bed – Queen” or “Guest Room – Full” saves time when you’re making beds and ensures sheets end up back in the right spot.
Vertical storage can work well too, especially if you have deep shelves. Stand your folded sheet bundles on end like books. This makes it easy to see all your options at once and grab what you need without unstacking.
With properly folded fitted sheets, you’ll be amazed at how much more space you have in your linen closet. No more shoving crumpled sheets into overstuffed shelves!
Common Mistakes to Avoid When Folding Fitted Sheets
Even with the best instructions, there are a few common pitfalls that can trip you up. Here’s what to watch out for and how to fix these issues.
Trying to fold it like a flat sheet is the number one mistake. The elastic corners make this impossible, so you have to use the corner-tucking method. If you catch yourself attempting traditional folds, stop and start over with the proper technique.
Not getting all four corners together properly will leave you with a lumpy, misshapen result. Take your time with each corner tuck, making sure they’re fully nested before moving to the next one. This is the foundation of the whole method.
Rushing through the corner-tucking steps leads to corners that aren’t secure and sheets that unfold themselves. Slow down, especially while you’re learning. Speed comes naturally once you’ve mastered the technique.
Folding on a lumpy surface makes it hard to get clean, crisp final folds. Your bed can work, but make sure there aren’t any blankets or pillows creating bumps underneath. A clear table or dresser top is ideal.
Folding sheets when they’re slightly damp creates wrinkles and can even lead to mildew if they’re stored before fully drying. Always make sure your fitted sheets are completely dry before folding and storing them.
You’ve Got This!
Learning how to fold fitted sheets properly is one of those life skills that seems impossible until someone shows you the trick. Then suddenly, it’s so simple you wonder why it ever seemed hard! The corner-tucking method works because it embraces what makes fitted sheets unique—those elastic corners—rather than fighting against them.
After your first few attempts, this technique will become second nature. You won’t have to think through each step; your hands will just know what to do. And the payoff is worth it: an organized linen closet with neat stacks of sheets, more storage space, and the satisfying feeling of having conquered the fitted sheet challenge.
Remember, perfection isn’t the goal—progress is. Even if your folded fitted sheet isn’t magazine-worthy, it’s infinitely better than a crumpled ball shoved in the back of the closet. Give yourself grace during the learning process, and celebrate the fact that you now have this skill in your life-management toolkit.
Have you tried the corner-tucking method? What tips would you add for fellow fitted-sheet folders? Share your experiences in the comments below—we’d love to hear your success stories or any questions you have!