A spool of nylon string can be used for many things — general crafting, fishing and hunting, and laying mason lines.
When used for masonry, it’s one of the simplest quickest and most accurate ways to create a perfectly straight line.
That’s why a spool of nylon string is often sold as mason’s line — because brick masons use it to get nice straight brick walls.
The string is easy to unwind off the spool, but it’s not as easy to get back on after you’ve used it.
Winding it by hand back onto the spool can lead to tangles and uneven distribution. And eventually, you’ve got an unusable mess that you have to cut up.
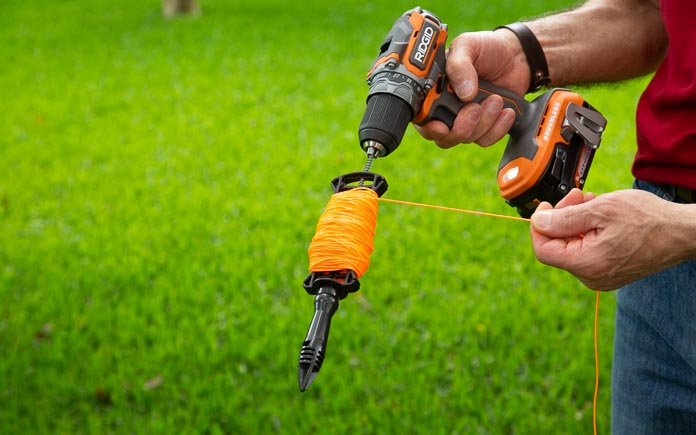
Using a power drill to wrap nylon string around a spool will speed up the process and lessen the likelihood of tangles. (3 Echoes Content Studio)
Here’s a much better, and faster, solution:
Take a screw and drive it through the end of the plastic housing that the spool is on. Then, chuck it into a drill.
Turn on the drill to the lowest setting, and just like that, you can now use the power of the drill to put the line back on the spool.
It only takes a few seconds to wind the nylon string back onto the spool!
As you’re winding up the nylon string, slowly move it back and forth along the spool.
This way, you don’t overload one side or the other, and the string winds up neatly every time.
Did you know you can recycle coffee grounds for plants to use in your garden?
Horticulturists praise coffee grounds for acidifying soil and enhancing plant growth.
Coffee grounds are slightly acidic (5.5 to 6.8 pH), so certain acid-loving plants like azaleas, rhododendrons and gardenias love them.
Azaleas prefer soil with a pH of 5 to 6.5. (c11yg, Getty Images)
They contain about 2 percent nitrogen, 0.06 percent phosphorus, and 0.6 percent potassium by volume, according to the University of Wyoming Extension. They also contain many micronutrients including calcium, magnesium, boron, copper, iron, and zinc.
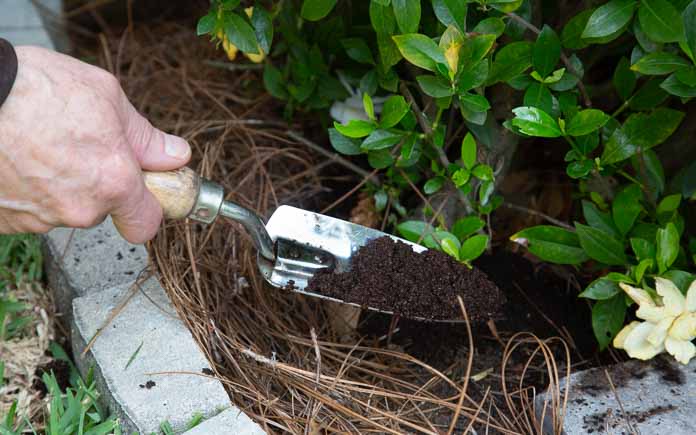
Use a garden shovel to spread a thin layer of coffee grounds around the base of acid-loving plants. (3 Echoes Content Studio)
Here’s how to use them in your garden:
After you’ve had your morning cup of joe, save the used coffee grounds in a plastic container. You should have enough grounds after about a week or so to use in your garden.
To use them as a soil amendment for your plants, rake back the mulch to expose the soil. Then, use a small garden trowel to spread the coffee grounds around the base of the plant. Only spread the grounds about a quarter of an inch thick.
And then, of course, rake the mulch back just to protect the soil and keep the weeds down.
Add a thin layer of grounds to the plants about once a month, and you’ll see a much healthier plant with many more blooms.
By the way, if you don’t have coffee, you can also use tea leaves just be sure to take it out of the tea bag first.
Did you know you can recycle coffee grounds for plants to use in your garden?
Horticulturists praise coffee grounds for acidifying soil and enhancing plant growth.
Coffee grounds are slightly acidic (5.5 to 6.8 pH), so certain acid-loving plants like azaleas, rhododendrons and gardenias love them.
Azaleas prefer soil with a pH of 5 to 6.5. (c11yg, Getty Images)
They contain about 2 percent nitrogen, 0.06 percent phosphorus, and 0.6 percent potassium by volume, according to the University of Wyoming Extension. They also contain many micronutrients including calcium, magnesium, boron, copper, iron, and zinc.
Use a garden shovel to spread a thin layer of coffee grounds around the base of acid-loving plants. (3 Echoes Content Studio)
Here’s how to use them in your garden:
After you’ve had your morning cup of joe, save the used coffee grounds in a plastic container. You should have enough grounds after about a week or so to use in your garden.
To use them as a soil amendment for your plants, rake back the mulch to expose the soil. Then, use a small garden trowel to spread the coffee grounds around the base of the plant. Only spread the grounds about a quarter of an inch thick.
And then, of course, rake the mulch back just to protect the soil and keep the weeds down.
Add a thin layer of grounds to the plants about once a month, and you’ll see a much healthier plant with many more blooms.
By the way, if you don’t have coffee, you can also use tea leaves just be sure to take it out of the tea bag first.
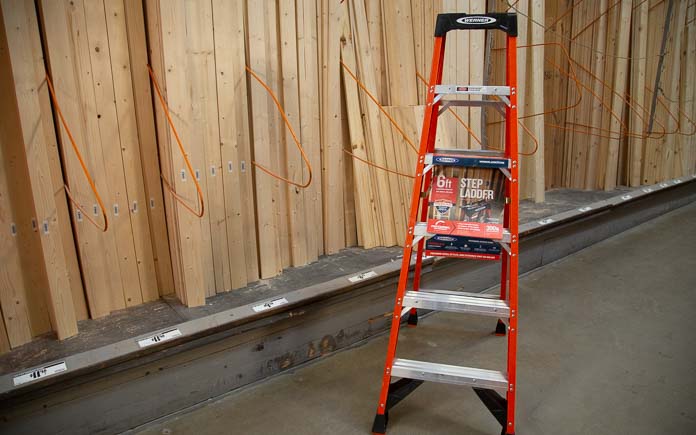
Most homeowners only own one ladder, and it’s usually a six-foot step ladder. So if this is the only ladder you have, make sure it’s one that keeps your parts and tools organized and within reach, like the Werner 6 ft. Fiberglass Step Ladder.
This page contains affiliate links. If you purchase a product from these links, we will earn a small commission at no additional cost to you.
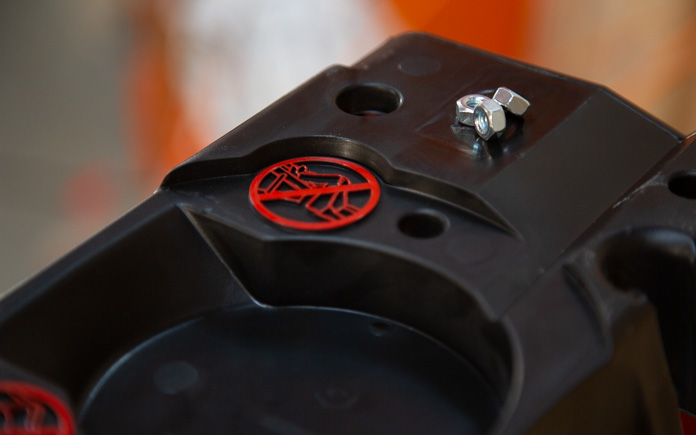
Multi-Functional HolsterTop Keeps tools and supplies secure and within reach while working. (3 Echoes Content Studio)
Designed With Productivity in Mind
The Werner 6-ft. ladder has a trademarked multi-functional Holster-Top to keep your tools secure. It features a magnetic strip hardware bin, drill slot and pipe channel, so tools and supplies stay secure and in reach while you’re working.
This ladder is compatible with lock-in accessories. It works with Werner Lock-In accessories (sold separately) to provide customized tool storage right at your fingertips.
The Werner 6-ft. ladder is rated to hold up to 300 pounds, so you can have peace of mind knowing it can hold you and all the materials you’re working with.
For added safety, the steps are double-riveted and slip-resistant. And because it’s made from aluminum and has non-conductive fiberglass rails, it’s ideal for working near electricity.
With this ladder, you can reach up to 10 feet and feel safe while doing so. All steps and top rear horizontal are knee-braced for extra support. And, this ladder has oversized footpads, so you can firmly plant your feet on each step.
Other Features
The Werner 6-ft. ladder is ANSI and OSHA-compliant for safety, plus it’s weather-resistant, so you can use it outdoors.
It has internal pinch-proof spreaders, so it’s easy to open and close, and the legs have 360 Edge bracing for enhanced strength and increased protection against damage.
Watch the video to learn all about this Best New Product!
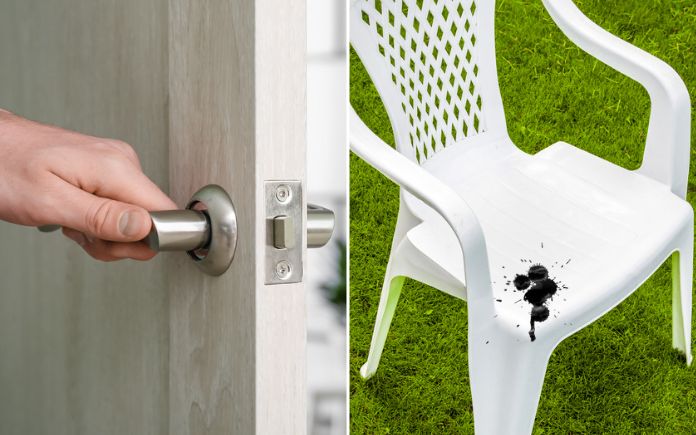
This week, learn how to fix a door that won’t stay open and remove paint from plastic furniture. (pixelshot/Photo illustration by SVproduction, Getty Images/NA, Photo Images)
Hour 1
In Hour 1, hear the answer to these questions: ‘Can I tile over tile?’ ‘Can you install vinyl plank flooring over asphalt?’ and more.
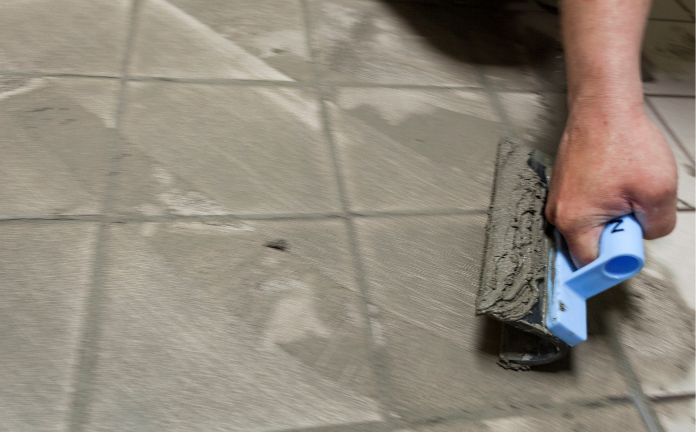
Tiling over Tile
In order to tile over existing flooring, you need to level the surface with a floor patch compound. (DimitarOmi, Getty Images)
Jim in Florida has a shower pan that is structurally sound, but the tile could be more appealing.
“Can I retile over the existing tile by sanding, cleaning, and putting down a self-adhesive waterproof membrane without applying thin set? Where can I find a waterproof membrane that has adhesive on both sides?” he asks.
Most professionals steer you away from laying tile over tile. In most cases, there’s a problem with the tile and you don’t want to tile over it. In this case, the tile is sound, so it can be tiled over it.
If you want to tile over tile, the existing tile needs to be clean, level, and free of cracks and crumbling grout.
I’ve seen this done many times, but you always have to use thin-set. Use whatever is recommended by the tile manufacturer.
One method is to sand the tiles with 100-grit sandpaper, then lay down a floor patch compound to create a new surface. Put down about an eighth of an inch, or enough to fill the grout lines.
Then, apply two coats of a waterproof coating called Redgard.
Next, Then, it’s ready to be tiled. We suggest using tile that’s slightly larger than the original tile so you can bridge as many of the old grout joints as you can.
In some ways, this is about the best shower pan you’re gonna get because you’ve got not only the original waterproofing and tile, you have another layer and a layer of tile.
Just make sure you use the right grout, a sealed grout that’s integrated into the grout, or seal the grout after you apply it.
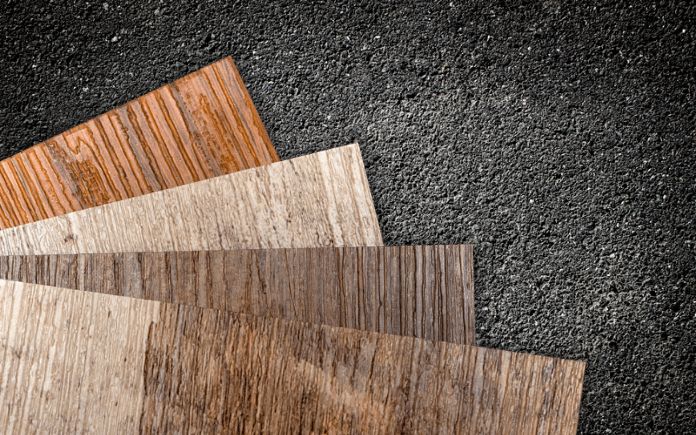
Vinyl plank flooring over asphalt? It’s possible — but we don’t recommend it. (Photo illustration: alvintus/SERSOL, Getty Images)
Peter Kolisnyk British Columbia has a covered carport with an asphalt floor and a deck above it.
“My wife wants to cover it with something (nice). We want to enclose the carport and use it as a patio. Would I be able to glue a vinyl plank floor to the asphalt?” he asks.
One thing about asphalt that I’ve found over the years is it’s so different in different areas of the country. Some types are a lot more porous and coarse than others. It’s also affected thermally a lot more than concrete — when it’s warm, it gets soft and when it’s cold, it tightens up.
For these reasons, I would say it’s not suitable for vinyl plank flooring. Check to see what the manufacturer recommends. This is probably going to be different from one manufacturer to another.
Another thing with asphalt as opposed to concrete is it’s not perfectly flat. Sometimes it has a bit of undulation in it and moisture can get through it more easily. One of the most important parts of vinyl plank flooring installation is the moisture barrier.
Without the proper moisture barrier, the flooring can become discolored or warped and come apart. The barrier could be polyethylene film or asphalt-coated paper. If there is a moisture barrier on the underside of the planks, you might still have to put something else down.
We don’t recommend gluing down vinyl plank flooring. Instead, do a floating system, where the planks snap together and they’re not actually fastened down in any manner.
Another option is to lay pavers over the asphalt. There are some available that are only two inches thick, so they won’t take up a lot of room. Stain or seal them for a more finished look.
Hour 2
In Hour 2, hear how to fix chipped paint on cabinets, remove paint from outdoor plastic furniture, keep a door from swinging open, and more.
Fixing Chipped Paint on Cabinets
If cabinets aren’t prepped properly before painting, the paint can easily chip off. (dlinca, Getty Images Signature)
Here’s a familiar problem: a homeowner paints their pine cabinets, and now the paint is chipping off.
“What can I do to fix that, and if I decide, can I take all of the paint off?” she asks.
It’s a good bit of work to paint cabinets, and when the paint doesn’t perform the way you want it to, it can be a bit discouraging.
Apparently, the paint is just not adhering to the surface below it. This just goes back to the importance of proper prep work — making the surface conducive to paint sticking to it.
You don’t have to strip away all the paint down.
In a situation like this, sand off the peeling paint with 120-grit sandpaper. Feather out the old paint so the surface is even. Then apply a bonding primer.
Paint the area wider than just the repair area so it blends in with the rest of the cabinet.
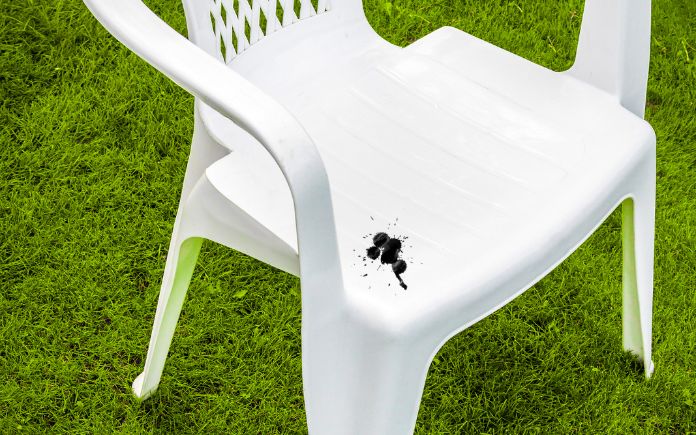
Removing Paint From Plastic Furniture
Because plastic is smooth and non-porous, it’s rare for paint to form a permanent bond with it. (Photo illustration: SVproduction, Getty Images/NA, Photo Images)
Paint splattered onto a caller’s outdoor plastic furniture.
He asks, “What can I use to remove the paint without damaging the furniture? I’m not sure if it is water or oil-based paint.”
Take a white cotton cloth and soak it in vegetable cloth or rubbing alcohol (not both — one or the other)
Buff or scrub the splatter. Try one spot for a few minutes. The vegetable oil or rubbing alcohol will release the paint a bit.
Then take a plastic putty knife to scrape off the paint.
There’s also paint specially formulated for plastic furniture. If you get the paint splatter off and it’s still not quite what you want, you can change the color completely or match the color.
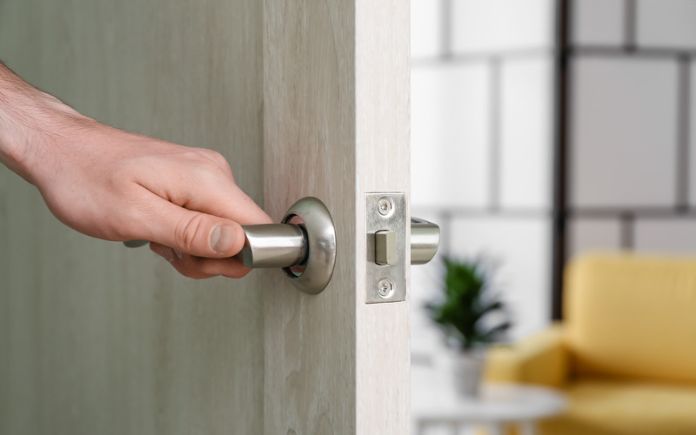
Fixing a Door That Won’t Stay Open
A door that won’t stay open can be very annoying. Fortunately, there’s an easy fix (pixelshot)
Some inconveniences are daily aggravations that can affect your quality of life.
“I have a bathroom door that I cannot leave halfway open, it always seems to swing all the way open by itself,” a homeowner says. “What can I do to correct this problem?”
A door that just doesn’t stay where you want is one of the most frustrating things that can happen around your home.
Here’s how to fix it:
Take a hammer and a nail punch (or a fairly good-sized nail) and tap the hinge to remove the hinge pin.
Hammer the hinge pin on a wood block to bend the hinge pin slightly.
Tap the hinge pin back into the hinge.
Repeat this with the other hinge pin if this doesn’t keep the door in place.
This creates just the right amount of friction to allow you to put the door right where you want it (and it will stay!).
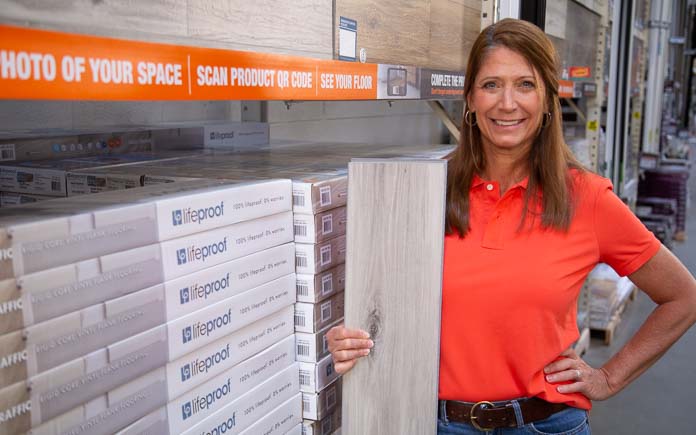
Lifeproof’s new Luxury High Traffic Vinyl Plank flooring is tough enough to take on life’s everyday messes. Learn more >>
Simple Solutions
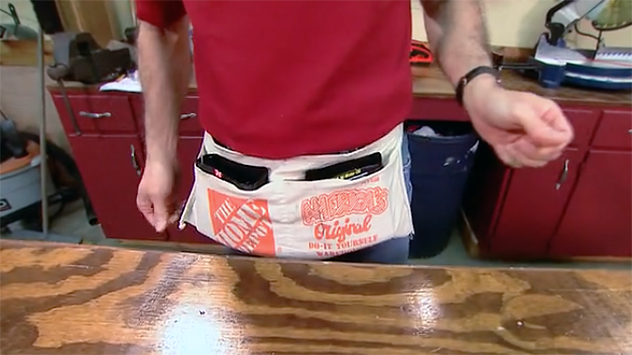
Use plastic liners in your apron to switch between nails and screws easily. (3 Echoes Content Studio)
Nail Apron Liners — Make interchangeable liners for your nail apron or tool pouch out of one-quart plastic motor oil bottles. Cut off the spout, wipe the bottle clean, fill it with nails or screws, and slip it into the apron pouch. Fill up several bottles with various types and sizes of fasteners, so you can quickly and easily switch them in and out without having to dump out the apron.
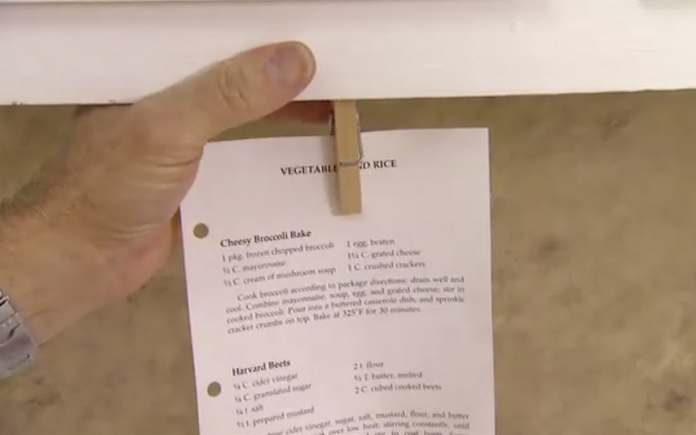
This simple, flip-down kitchen cabinet recipe holder made from a wooden clothespin keeps recipes off the counter and at eye level. (3 Echoes Content Studio)
Recipe Reminder — Here’s how to keep recipes in sight, but off the countertop:
Cut 1/2″ off one leg of a wooden clothespin.
Drill a 3/16” hole through the long leg of the clothespin.
Insert a short screw in the hole in the clothespin.
Screw the clothespin to the inside of the frame on a hanging cabinet in your kitchen, so it can swing up out of site when not in use.
This is also a good way to leave messages for family members before you leave the house.
In this episode of “Ask Danny,” we’re talking with Josh Hembree, owner of Hembree Heating and Air Conditioning. (3 Echoes Content Studio/Josh Hembree)
In this episode of “Ask Danny,” I’m talking with third-generation heating specialist Josh Hembree, general manager of Hembree Heating & Air Conditioning in Mobile, Ala. He’s answering some of the most-asked questions we get about heating your home.
Josh Hembree of Hembree Heating and Air Conditioning. (Photo courtesy Josh Hembree)
About Josh
Born and raised in Mobile, Josh moved away for a bit to earn a law degree, but his entrepreneurial spirit and drive to continue family legacies brought him back to run the family business.
Josh loves helping people, from serving in his church to offering his community the best care the heating and air industry has to offer.
He’s been married to Kala for six years, and they have a 4-year-old daughter and a 1-year-old son.
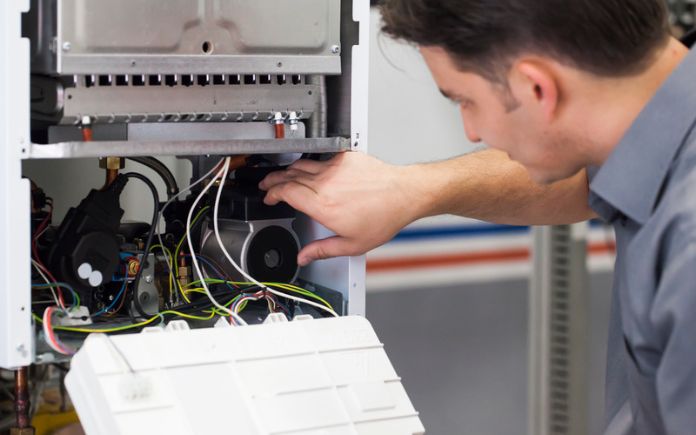
Before winter comes into full force, have an HVAC professional service your heating system. (aytacbicer, Getty Images Signature)
Preseason Maintenance
Q. With the weather getting colder, what should homeowners do right now to help keep their homes warm this winter?
Josh: We always recommend preseason maintenance – pre-season preventative maintenance, if you will. Your home heating system needs some love, and often times if you proactively do that, you can avoid problems before they become a problem.
It’s even more important going into the winter season to have your heating system inspected compared to your air conditioning system because safety inspections on heating systems can save your life. For instance, making sure the vents are working properly to prevent carbon monoxide poisoning.
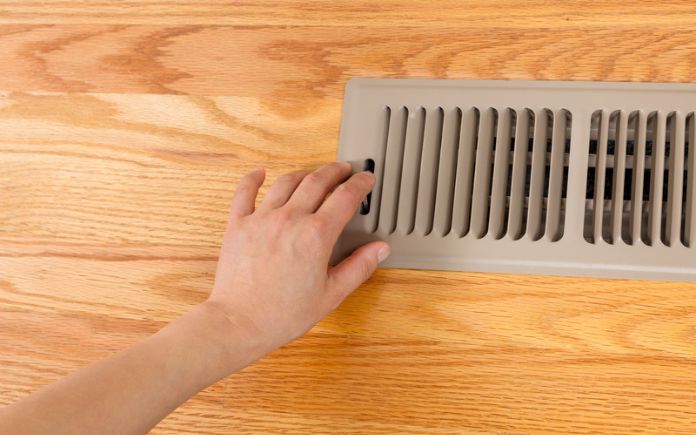
Don’t be alarmed if there’s a burning smell when you turn on your heater for the first time this season. (tab1962)
What’s That Burnt Dust Smell?
Q. Homeowners are always asking me, what is that smell when you turn on the heater for the first time? So ill ask you, what is that smell?
Josh: When the first cold snap happens, our phones start ringing off the hook with that questions. It’s a very common odor when you first turn your heater on. The good news is there’s a simple explanation for it.
When your system’s been cooling all summer long — the heating system has not been run in months — little pieces of dust can accumulate on the inside parts of the system.
So when you turn your heating on for the first time in a long time, there are certain parts of the system that are designed to get hot. Those heating parts actually heat up the dust and cause that burning smell.
Oftentimes, it’s nothing to worry about, and the smell will go away after a short while.
A heat pump reverses the flow of refrigerant to pump warm air back inside your home. (jpproductions, Getty Images)
Heat Pumps
Q. I think most homeowners don’t really understand how a heat pump works during the winter. Tell us.
Josh: What we’re talking about here is a heat pump versus a gas furnace heating system. Those are the two primary types of heating systems you can have.
In regards to a heat pump specifically, in the summertime, when you’re system’s running in cooling mode, have you ever walked out to your outdoor unit and felt the air blowing out of the top it? It’s hot air.
A heat pump simply works by being able to reverse the flow of refrigerant in your system. When in cooling mode, the cold gasses are pumped into your home, and in heating mode, the process is reversed and hot gasses are pumped into your home.
So it’s actually reversing the flow of refrigerant to heat or cool your home.
And, on the bitter cold days of the year, when you’re heat pump is struggling to keep up, there are electric heat strips in the system that kick on to heat your home fast.
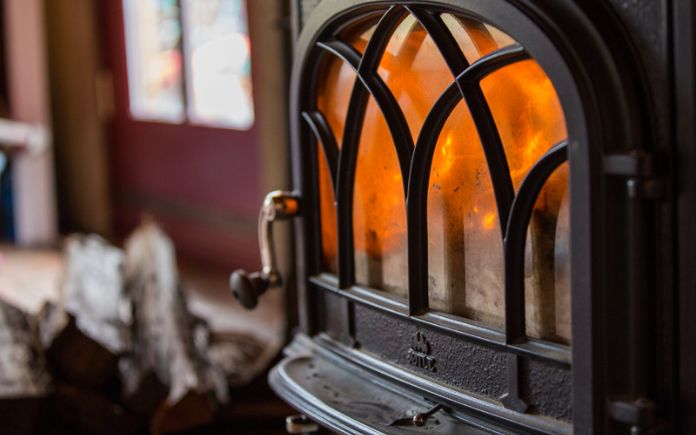
In theory, you can recirculate warm air from a cast iron stove throughout your home, but you shouldn’t rely on this method. (fodera72, Getty Images)
Third-Party Heating
Q. Is it feasible to only run your system on fan mode to circulate heat from another heat source? (like a fireplace, space heater, or cast iron stove)
Josh: This is a unique conversation that I honestly don’t have often. But, it could work. So long as that third-party heat source is close to the return of your central system. That way your central system will have the best chance of sucking up the heat and redistributing it throughout the home.
However, in our experience, in most cars that third-party heat source is not going to produce enough heat to keep the entire home comfortable. Airflow in the wintertime can be uncomfortable unless it’s properly heated.
It could work in theory, but it’s just not likely to be able to work well.
Also, make sure the third-party heat source is not putting off carbon monoxide. If it is, that could get into a safety issue with your central system pumping that throughout the whole home.
In unique situations, it might help some, but don’t rely on it.
Listen to the entire podcast for more home heating tips.