9 Kitchen Updates That Help Us Make The Most Of Our Small Kitchen

9 Kitchen Updates That Help Us Make The Most Of Our Small Kitchen

“We just couldn’t figure out why you weren’t tearing out the kitchen.”

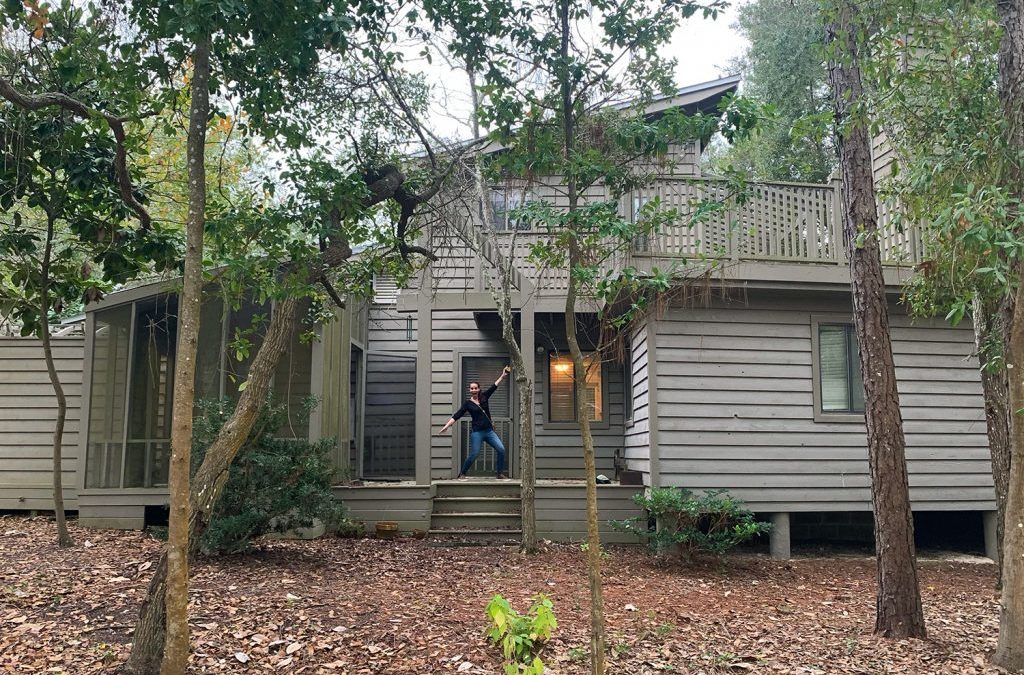
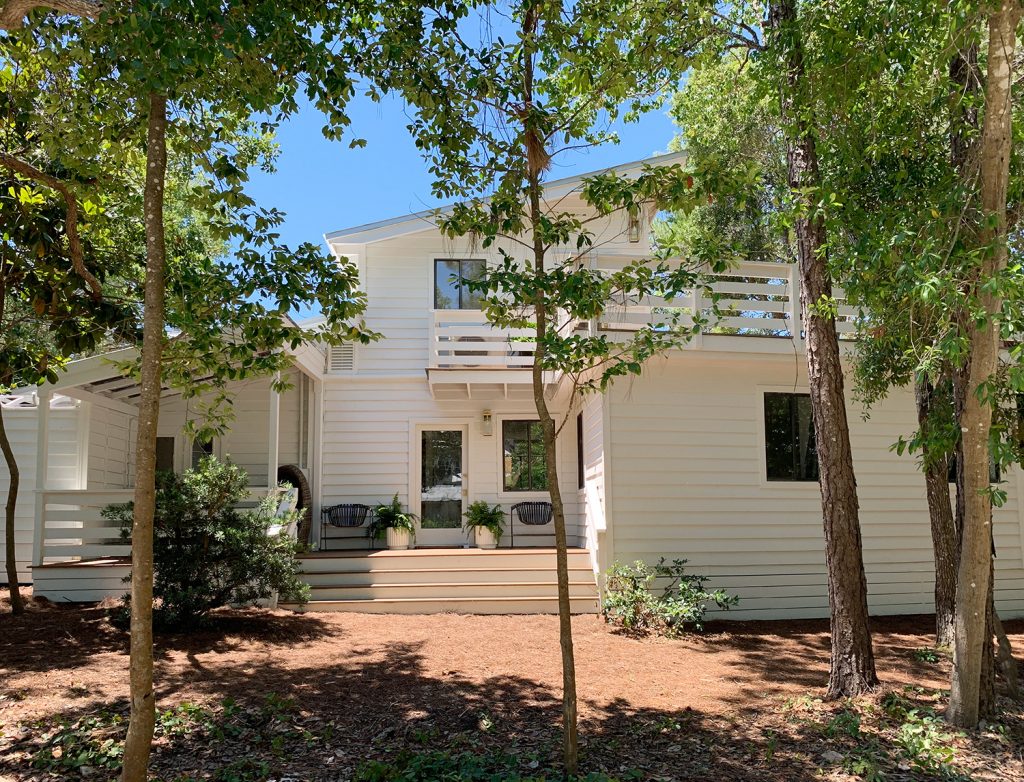
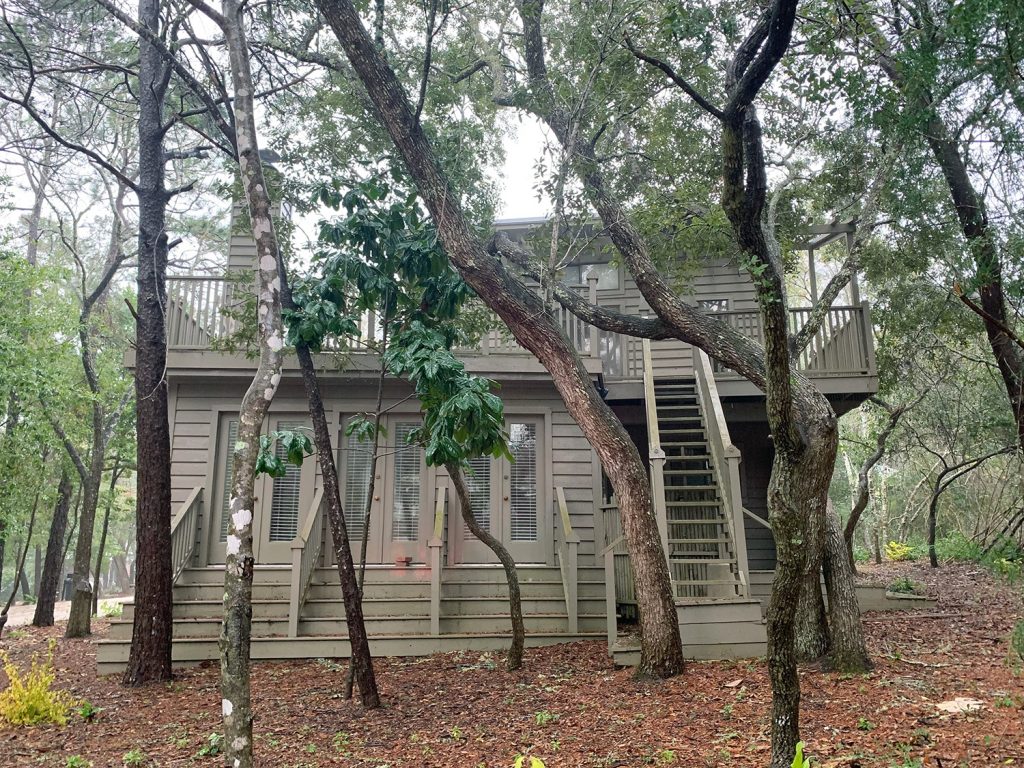
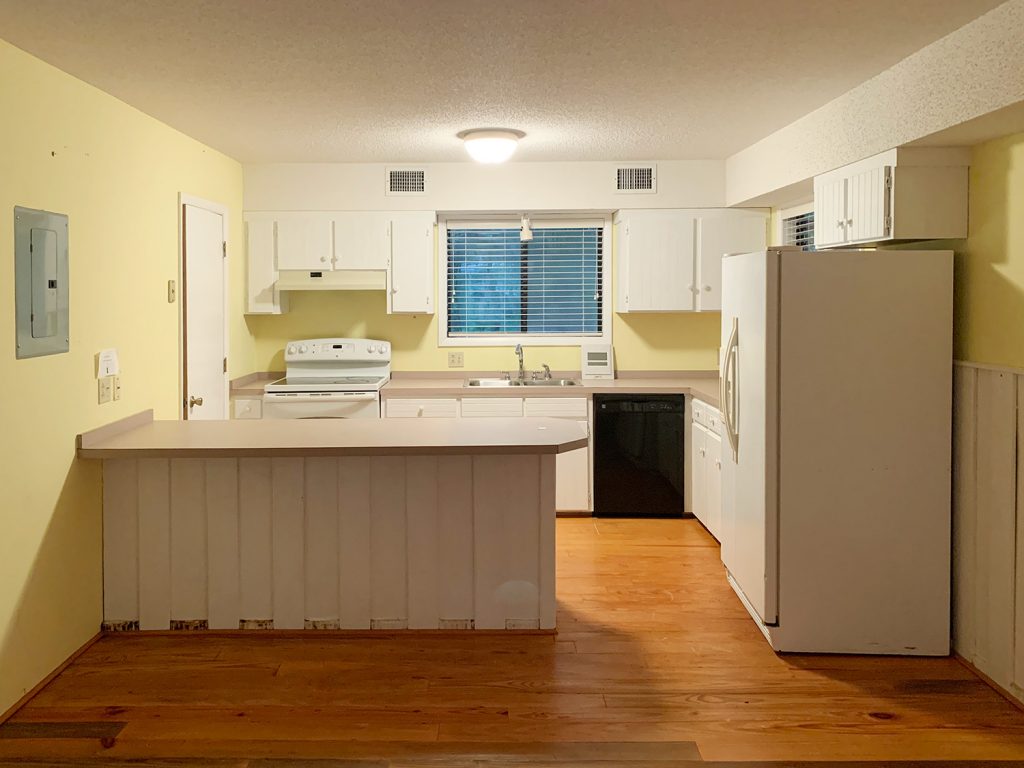
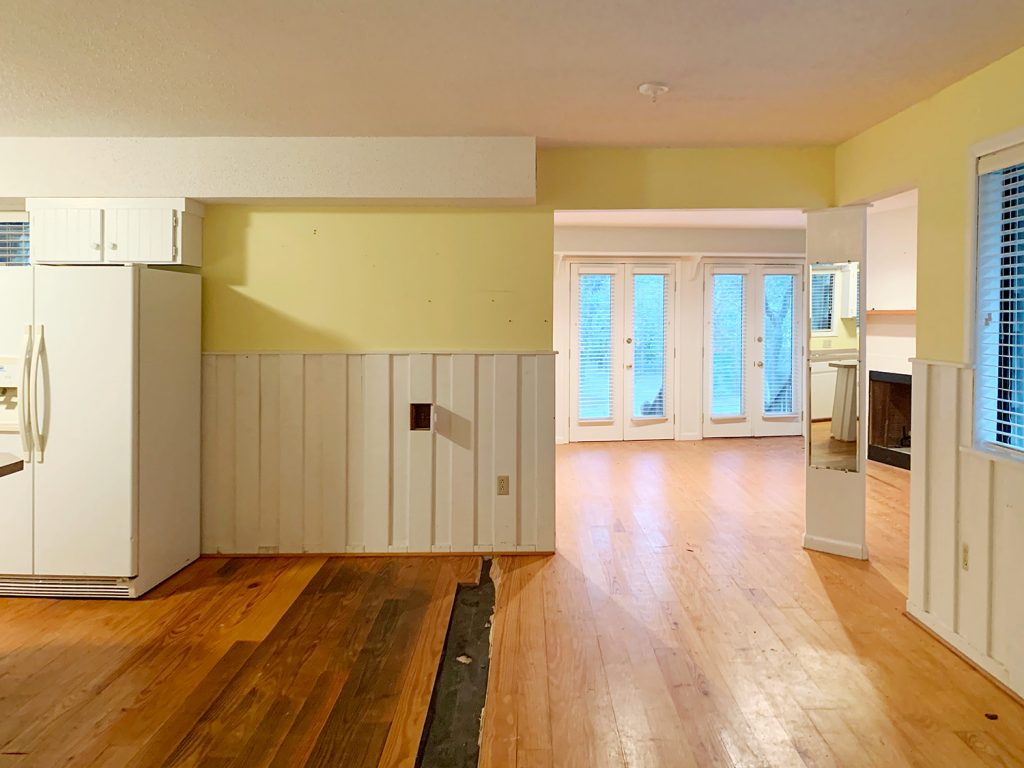
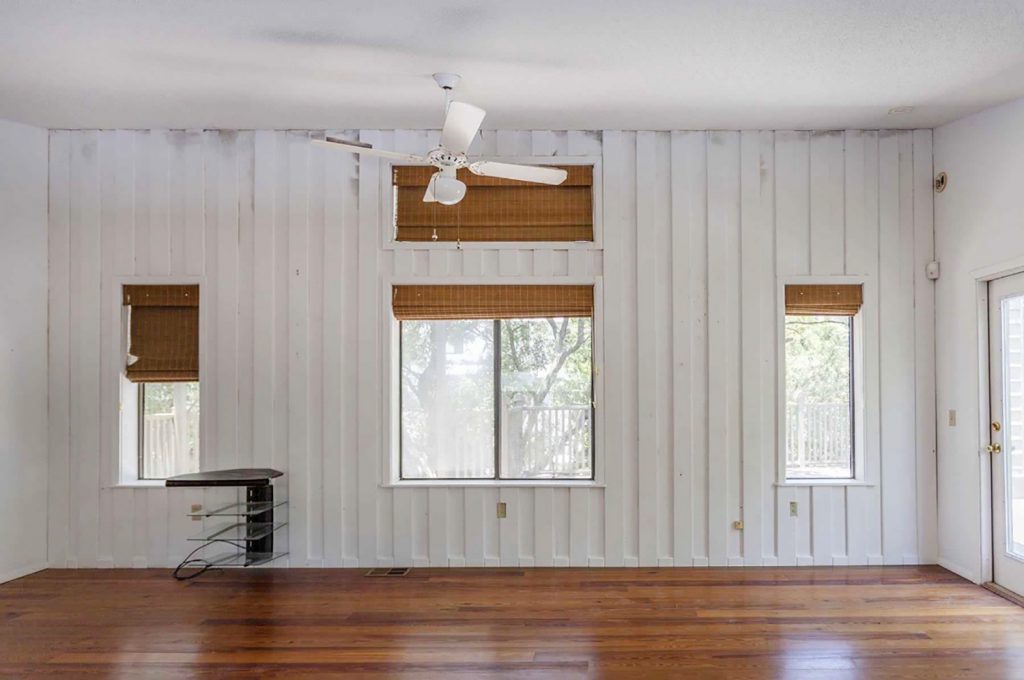
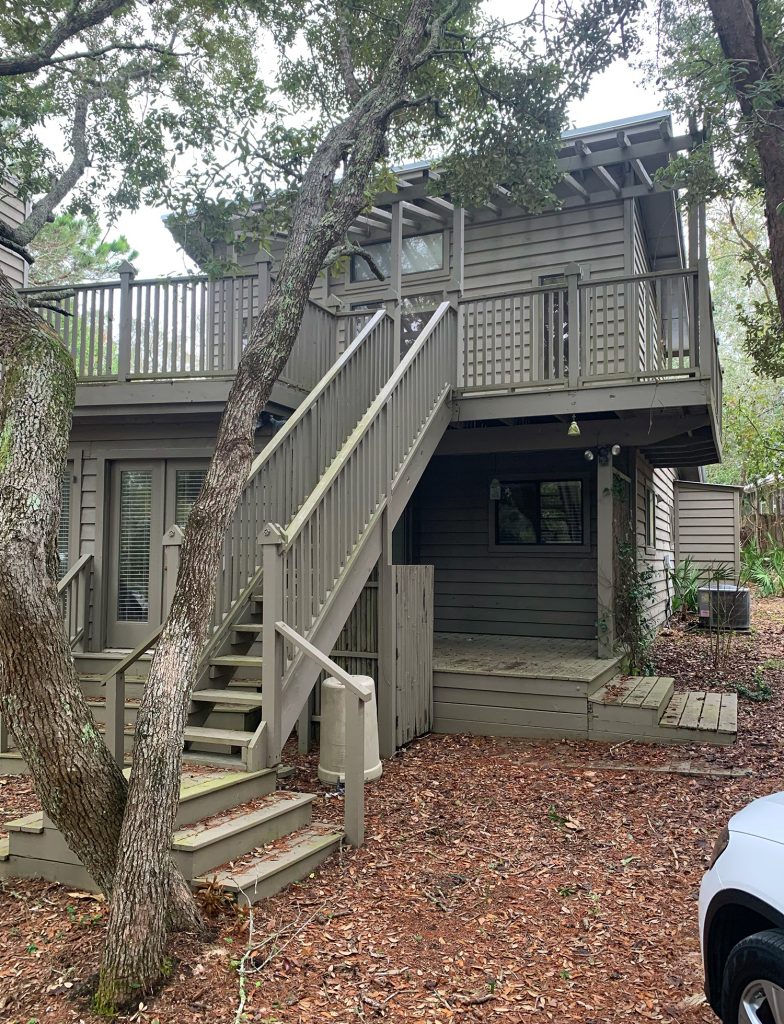
That’s what one of our contractor’s guys said to us right as we moved in last year. I understood his confusion. We were redoing floors, moving doors, vaulting ceilings, etc – but we left the small old kitchen relatively untouched – complete with mauve laminate countertops. You can see what I mean in this post.

But to know us is to know that we strongly prefer to live with an expensive-to-renovate room like a kitchen first, just so we don’t rush into spending major money on big permanent changes that we might later regret or wish that we thought through a little longer. So we spent the last 16 months debating various big ideas for this room, all while peppering in some simple smaller updates to get a feel for how they help improve the space and what we might want for our more long-term plan.


Closer View Of Beachy Kitchen From Sitting Area With Dining Table And Built In Pantry


table | chairs | sconces | pendant | floating shelves | wall shelf | hardware | cabinet color: SW Artsy Pink

Over the past 16 months, we debated adding more cabinetry in various spots, later realized that we had a chance to add a nice big pantry with a built-in fridge on the entire stair wall (more on that in a second), and also debated closing off a window – or at least half of it – to accommodate a bathroom off of our bedroom… that we later realized would be much smarter in a completely different place (more on that here).

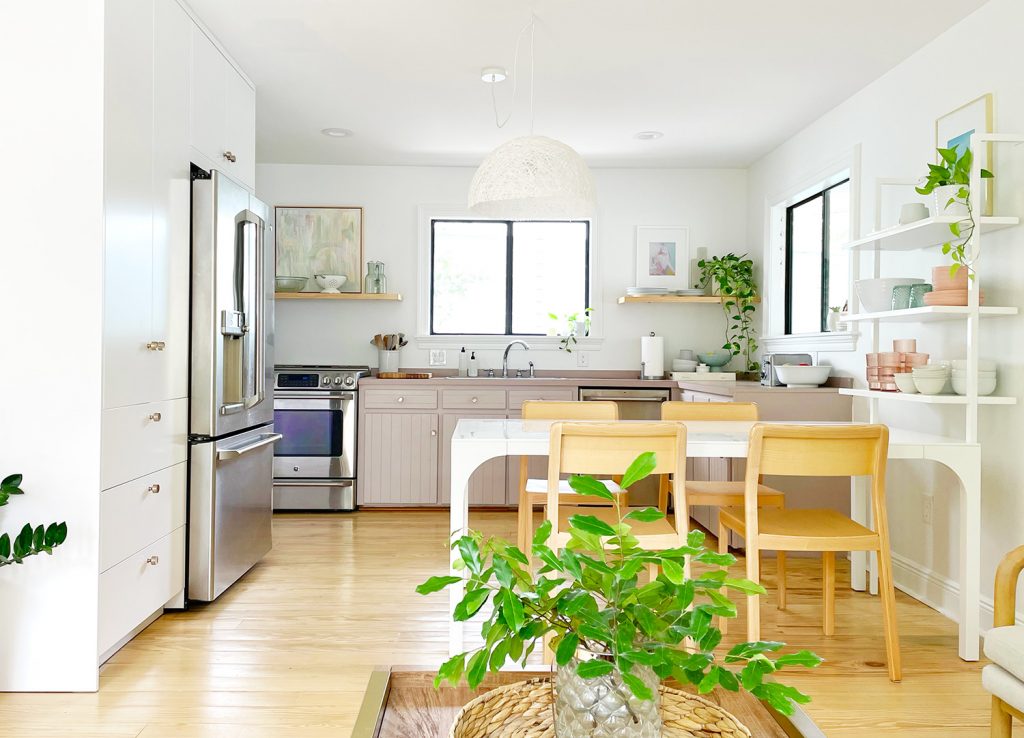
Not only did we land on a better spot for our ensuite bathroom, we now have a much better idea for that side kitchen window and the porch that it overlooks – so we’re sharing that later on in this post too. In short: sixteen months of slowly adding in a bunch of inexpensive updates (painting the cabinets, adding new hardware, hanging some shelves and art, rearranging the table and sitting area until they felt right, etc) gave us plenty of time to visualize various things and make the kitchen more efficient and functional for us – all while allowing us to save up for a few of the more major long-term updates.

We’ll get into our big plans in this post (because the good news is that we think we’re on the brink of confidently making some bigger, more permanent renovations to the space!) – but I also want to take you through some of the recent updates that have helped us make the most of our modestly sized kitchen… many of which we haven’t even shown you yet here on the blog. But first…
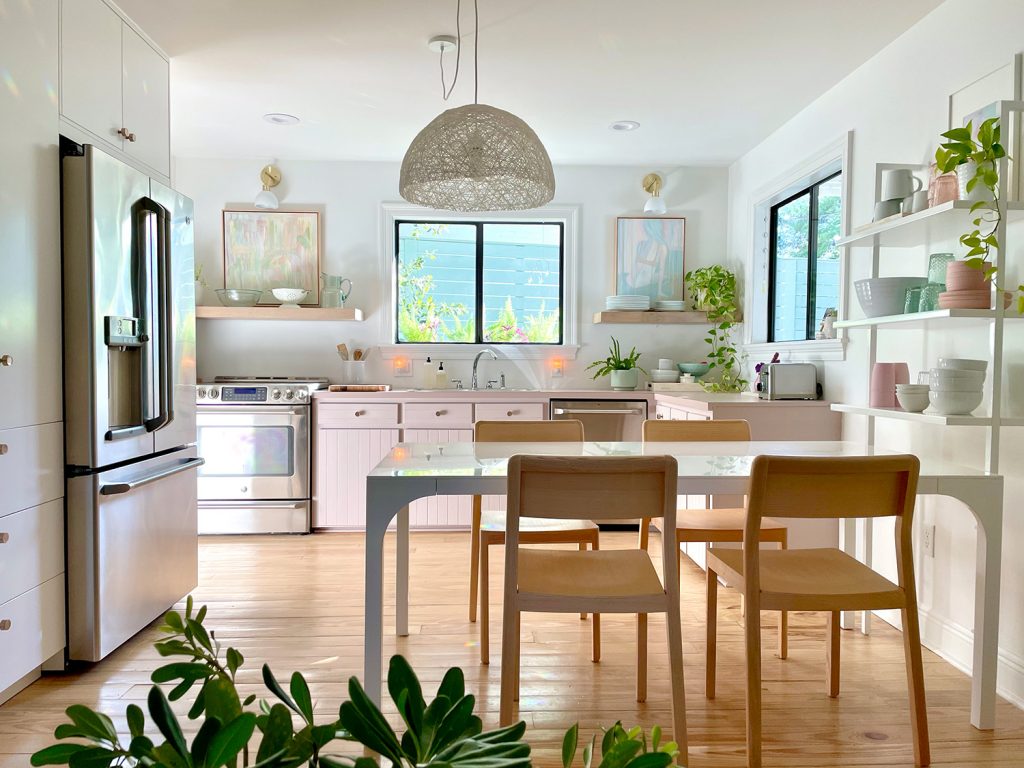
A Quick Video Tour

Let’s kick things off with a video of the entire space. A little walk-about feels so much more like you’re in the space than 1,000 photos, so click play (no need to have sound on, there’s no narration) to get a much better idea of how the whole room looks & feels:

Note: You can also watch this video on YouTube.

Ok, and now let’s get into the nine updates that we’ve slowly worked in over the past few months.

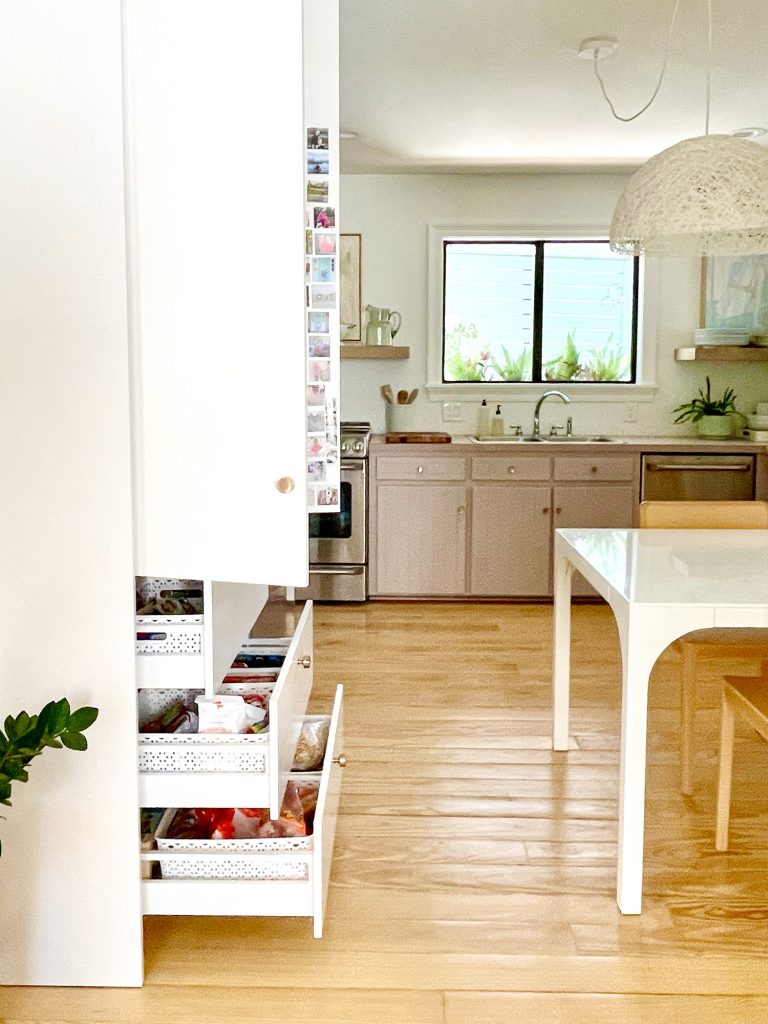
Adding A Built-In Pantry

The biggest improvement we’ve made lately is adding a built-in floor-to-ceiling pantry cabinet that created SO MUCH STORAGE that we didn’t have before. Previously we only had 7 kitchen cabinets (here’s how we organized them) which is why we relied so heavily on some freestanding Ikea Fjalkinge shelves to hold all of our food, serving ware, and even tools.


It worked well enough in the short term, but we wanted something deeper and much more functional for the long haul. So over the summer, we ordered two big Ikea cabinets – one tall pantry cabinet and one over-the-fridge cabinet – and some side panel pieces to make it happen. Working with Ikea cabinets is old hat for us by now, but you can read our tips and tricks for installing them if you’re new to it.


Ikea Kitchen Pantry In Progress With Frame Built And Doors Still Off


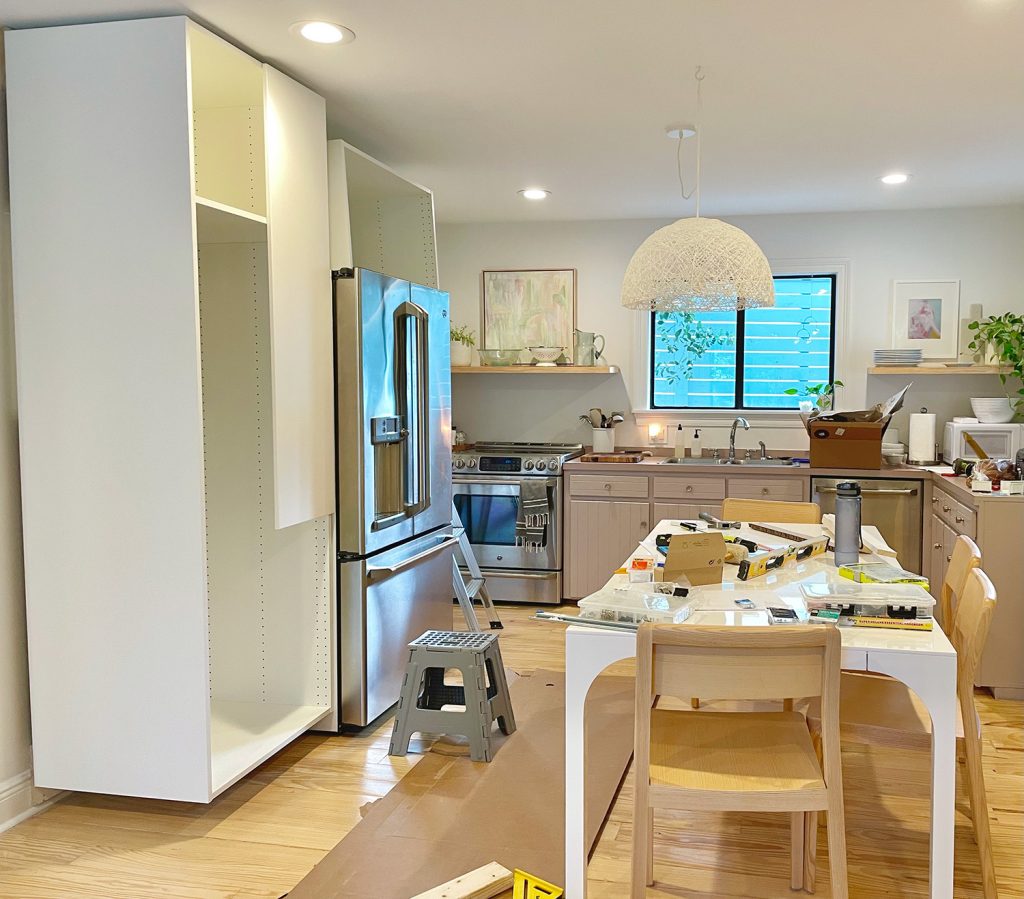
Once you build them all in, they look really crisp and polished – and they come with all sorts of inserts and options (for example, the pantry cabinet could have cabinets or drawers on the bottom, etc. We decided to keep this area of cabinetry simple (flat fronted and white) rather than painting them mauve to match the other cabinets since they go all the way to the ceiling and we thought that side of the room might feel heavy and out of balance with the rest of the room. But we did install these matching knobs to tie them to the existing kitchen (here’s how to quickly install new hardware).

Not only was it a big aesthetic improvement (especially having the fridge built in!) it was a HUGE functional improvement that earned us tons of extra storage. Almost more than we knew what to do with! We even ran an extension cord to put our microwave in there and get it off our counter (remember to leave your pantry door open for ventilation when it’s running if you store yours in a closed cabinet or “appliance garage”).


Ikea Kitchen Built-In Pantry With Doors Open to Show Shelf Organization With Baskets


storage bins | microwave | hardware

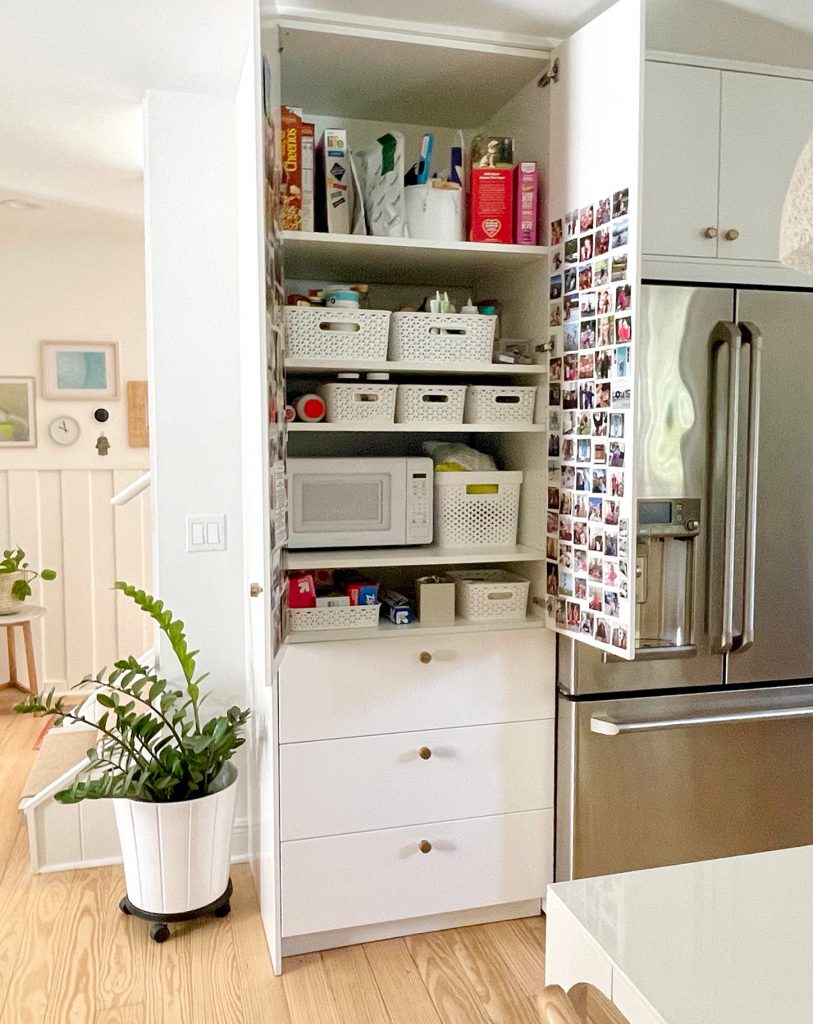
There’s not much magic to the organization in here. Sherry just used some storage baskets that we already had to wrangle categories of things like: baking stuff, chips, snack bags, vitamins, etc. We use the top for less accessed stuff, like our s’mores supply caddy, and “backstock” food, like extra cereal. We also filled the inside of the doors with favorite family photos (many of which we had taped up in our old mudroom cabinets at our last house). I promise they’re less blurry in real life 😉


Close Up Shot Of Pantry Shelves With Baskets And Microwave


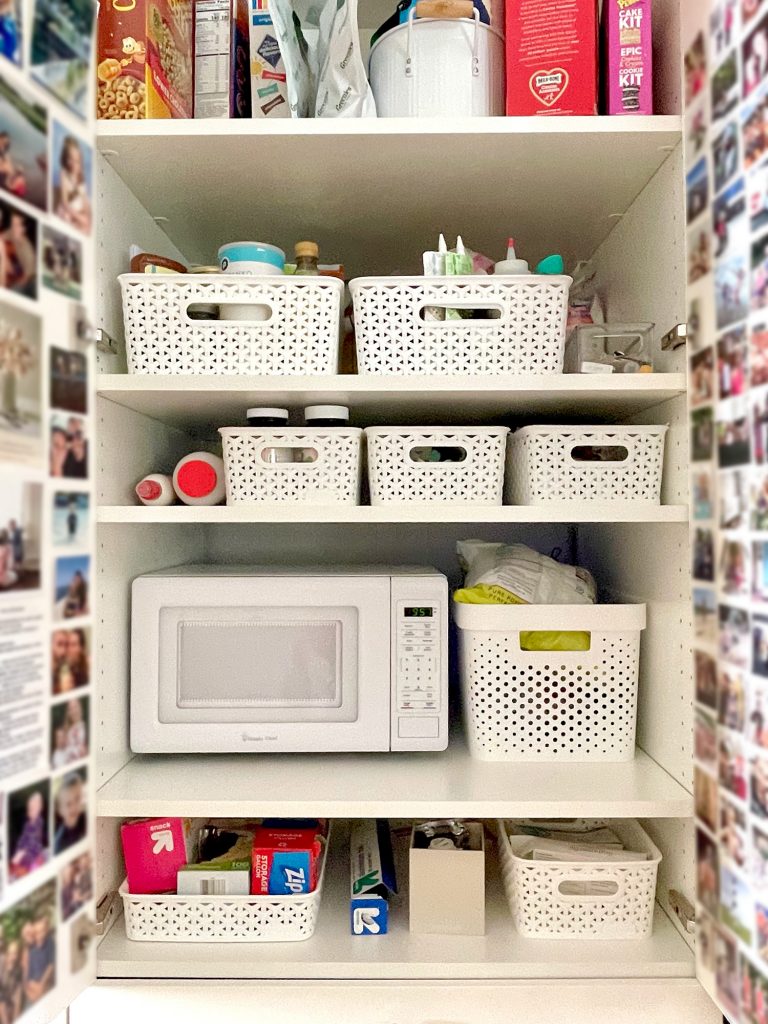
We chose the Ikea pantry cabinet that had drawers on the bottom because we love having drawers on a lower cabinet. It functions similarly to the freestanding Fjalkinge units where we used to store our food, but these drawers are deeper and taller. I can’t underscore how much more storage we have now that we’ve added this (don’t forget the big cabinet over the fridge that we gained too!).


Ikea Built-In Pantry With Lower Drawers Open to Show Walking Space


Adding this pantry cabinet also allowed us to add one other bit of convenience and function too…

Wall-Mounting A Spice Rack

Previously all of our spices were in one of the Fjalkinge shelving units, several steps from the stove and cooking area where we needed them most. Ideally, they would’ve been in the skinny drawer right next to the stove, but alas, it was too narrow to fit more than 3 or 4 spice jars at once.

So we ordered this wall-mounted spice rack and secured it to the side of the pantry (it’s magnetic so it can stick right to the side of a fridge, but it also comes with screws to hang it if you have a side panel like ours). We also ordered a set of matching spice jars (that come with pages of simple-looking labels) and now everything is right within reach of the stove and requires zero fishing around in a drawer.

You can see it also holds a roll of paper towels, so that was another thing we were able to get off the countertop. Between that and the microwave being gone, we felt like we gained lots of space up there!

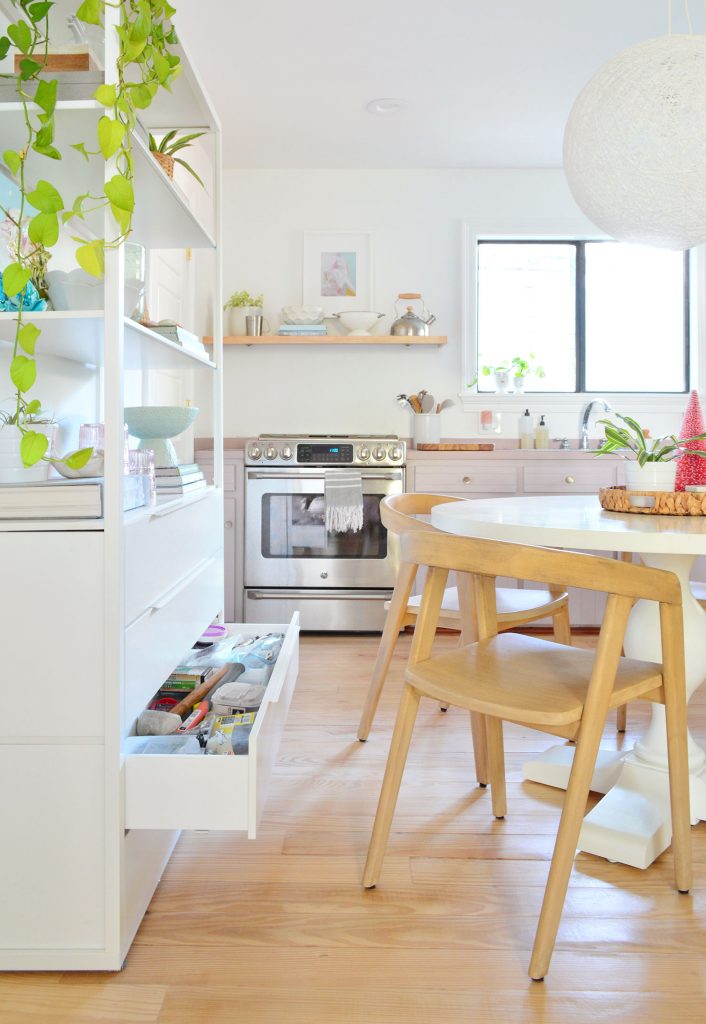
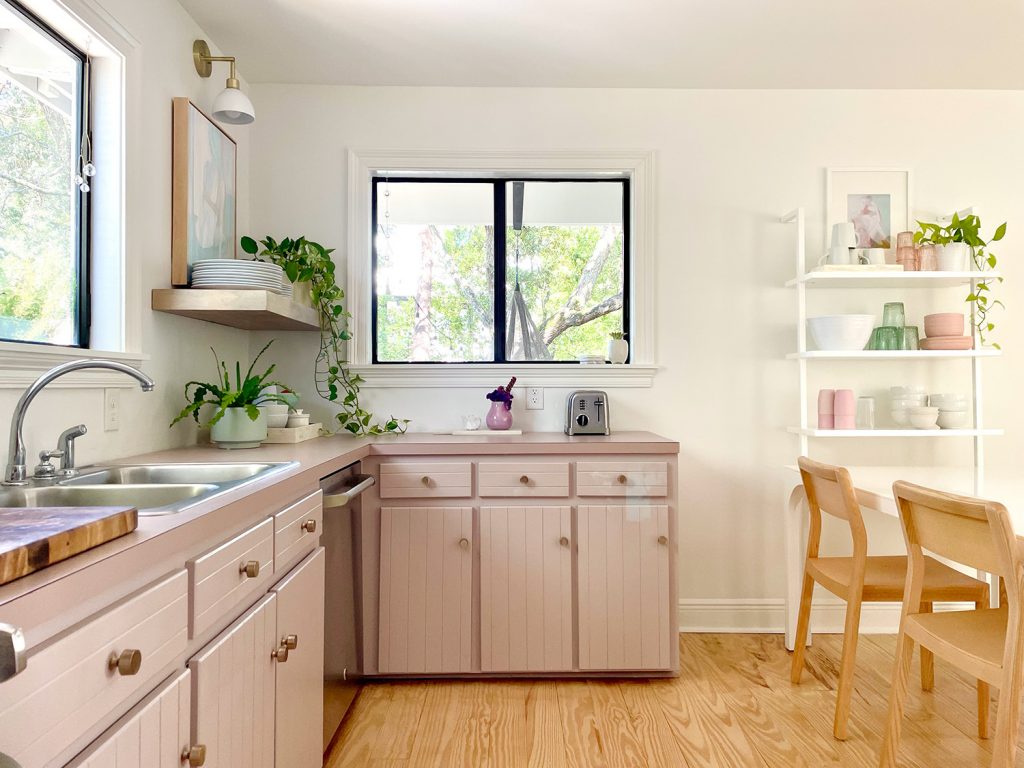
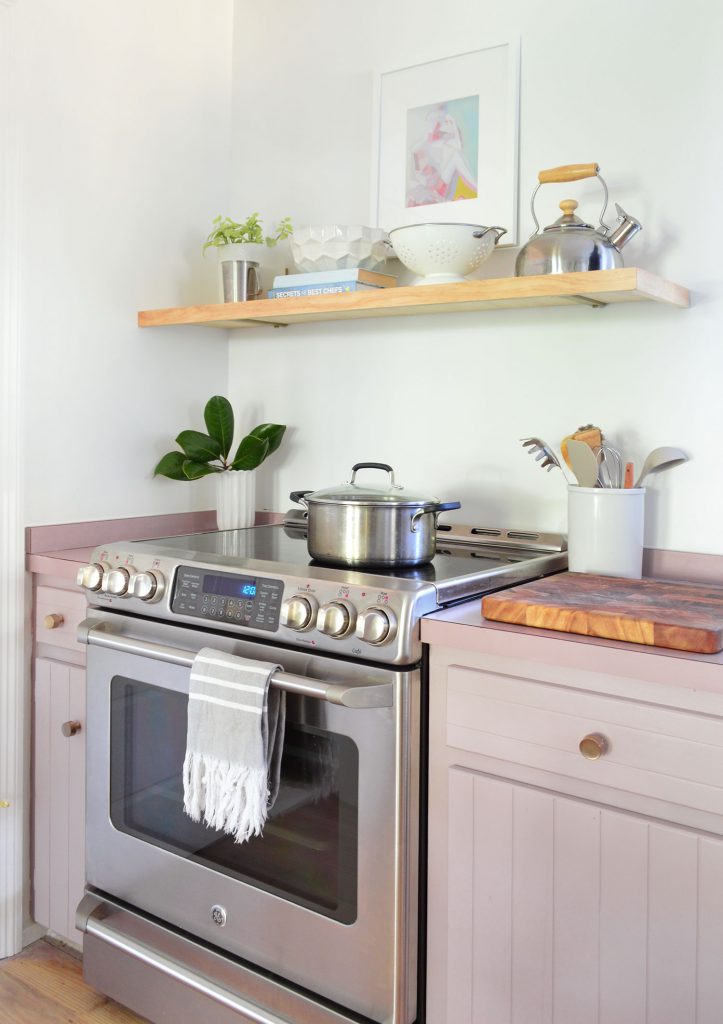
Beefing Up The Floating Shelves

The next couple of improvements are more visual than functional, but were still really helpful in making the room feel like it’s inching closer to the final result that we’re going for. The original “floating” wood shelves were a quick and dirty DIY that we did shortly after we moved in with wood leftover from our laundry closet shelving. We had always planned to replace them with someone more permanent, it just took us over a year to do so!


The new shelves are from Pottery Barn and they’re nice & chunky, and truly floating (unlike the old ones that were held up by some brackets that we strategically obscured by the items on the shelves). We lucked out that these shelves came premade in both 48″ and 36″ lengths, since the window isn’t centered on that wall.


Straight View Of Beach Kitchen With Pink Mauve Cabinets And Floating Shelves


table | chairs | sconces | pendant | floating shelves | hardware | water filter

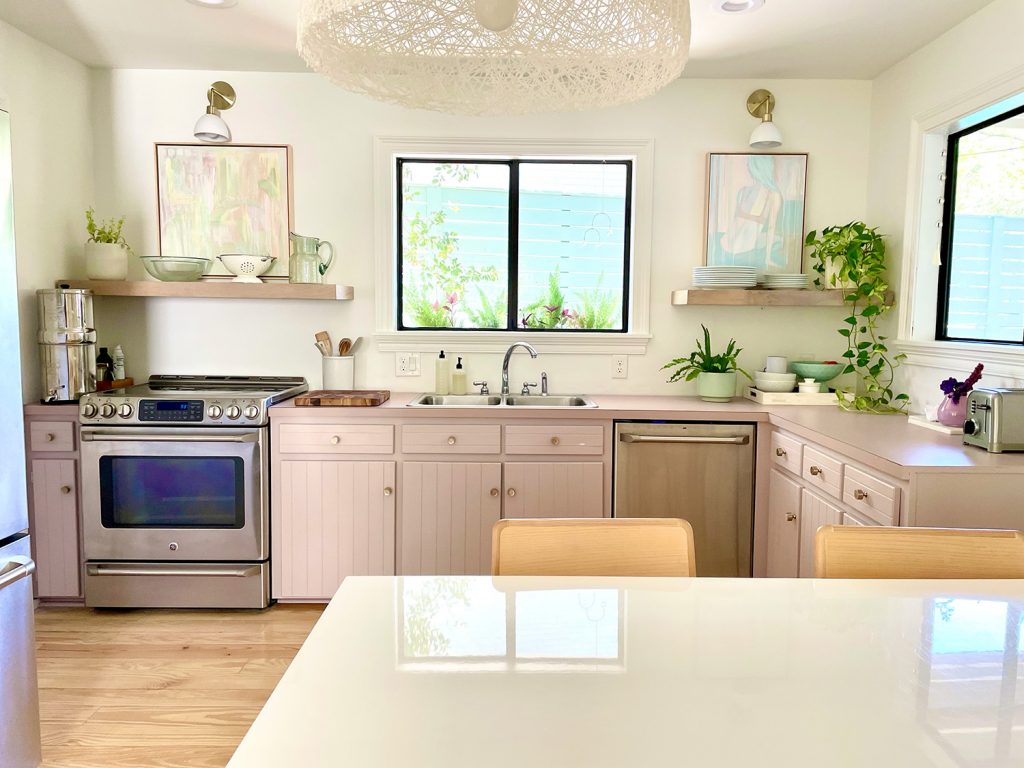
They’re deep and sturdy enough to hold our biggest plates, so they pretty much checked every box we had for them. They were also super easy to install. Five stars. Highly recommend. Not sure why we waited so long to make the change.


Mauve Painted Kitchen Cabinets With View Through Window And Open Shelves


sconces | floating shelves |hardware | table | chairs | wall shelf | cabinet color: SW Artsy Pink

And right above the shelves, you can see our other “visual” improvement

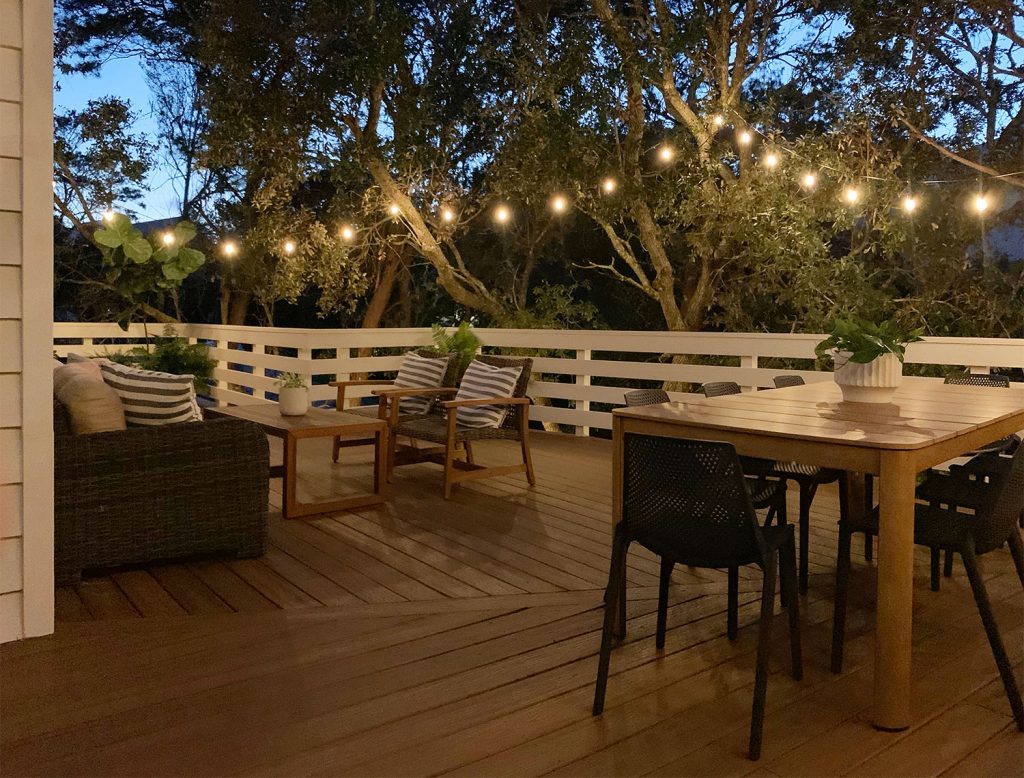
Hanging Wall-Mounted Sconces

We’ve always wanted some sconces above the floating shelves but we weren’t looking forward to the trouble of an electrician tearing up the walls – especially if we’re not doing a full-fledged reno yet (we have 8 ceiling lights in this room, so we’re not exactly hurting for illumination). So we decided to hang some decorative sconces (yes, they’re purely decorative at this point – because they’re literally sans wiring) just to make sure we liked the look & placement before getting them hardwired (which we’ll likely do when we add the backsplash).


Beachy Kitchen With Mauve Pink Cabinets And Wood Floating Shelves With Mid Century Modern Lights


We used the mid-century sconces we designed in the brass + white combo to tie in all of the brass and white elements throughout our house. We just screwed the included mounting brace right into the drywall, since there’s no fixture box there currently. The wires are still nicely capped and tied up inside, so we can get them wired eventually, but for now they’re helping us figure out where/if we want something permanent there in the long run.

Also, if we ever want to actually “turn them on,” we bought these rechargeable battery-powered light bulbs that turn on as soon as you screw them in – no wiring needed at all. They’re designed as a back-up light source in case of a power outage, but they work well in this application too!

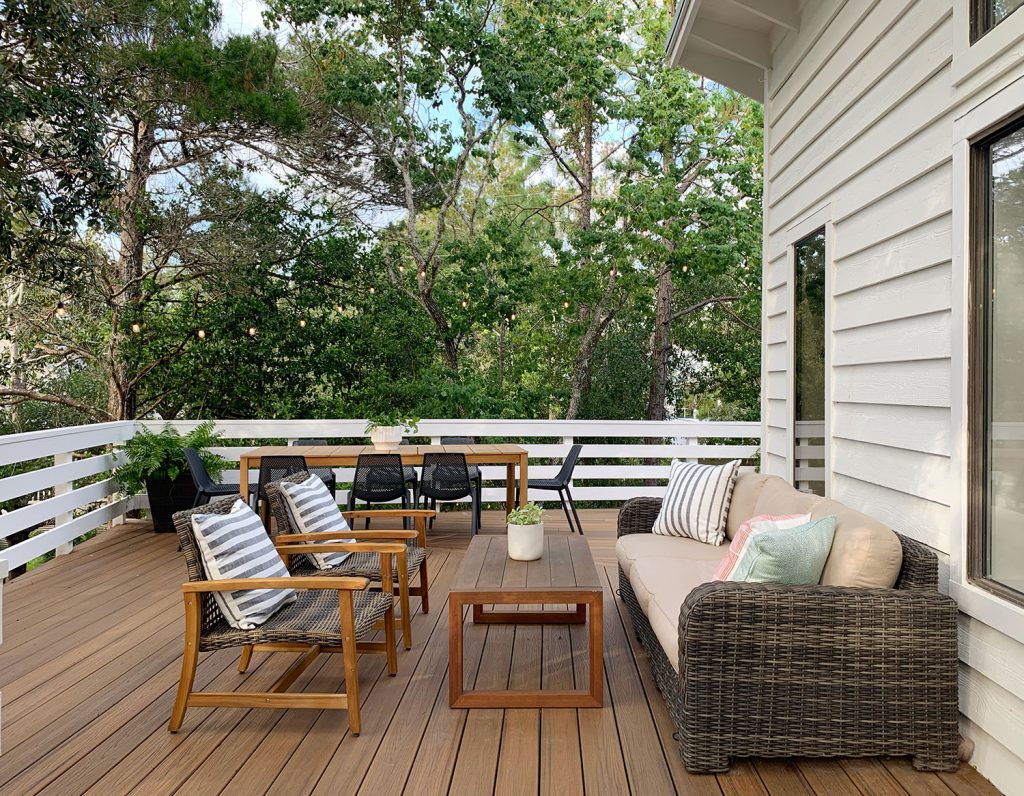
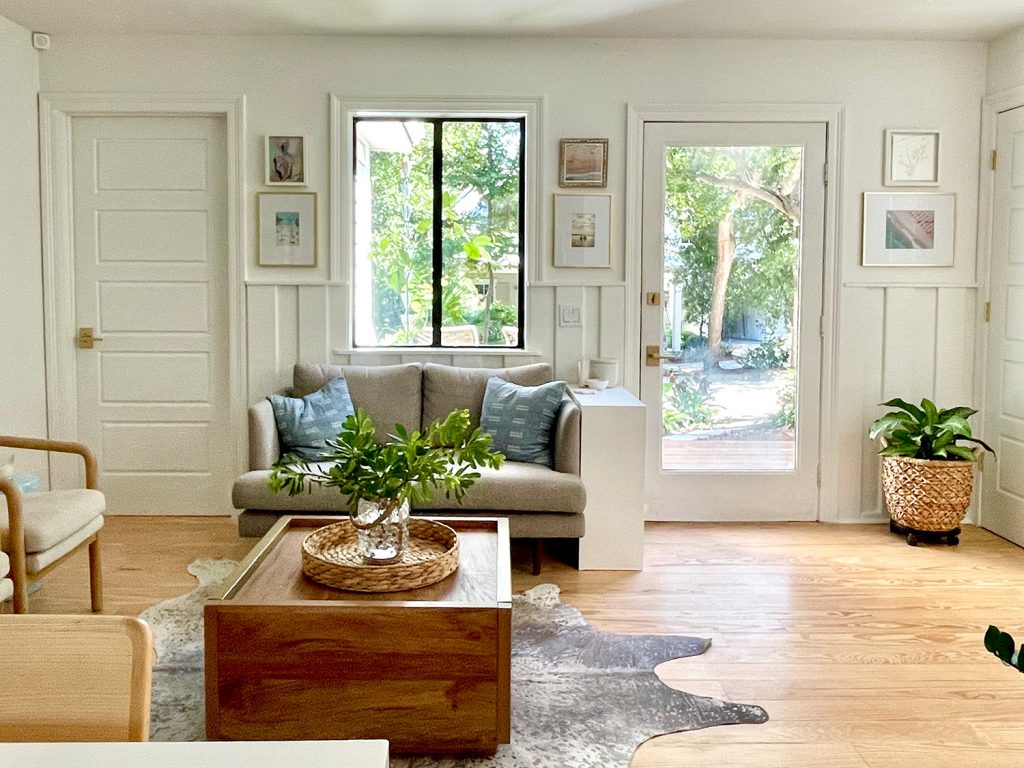
Hiding Ugly Stuff Outside With A Window Box

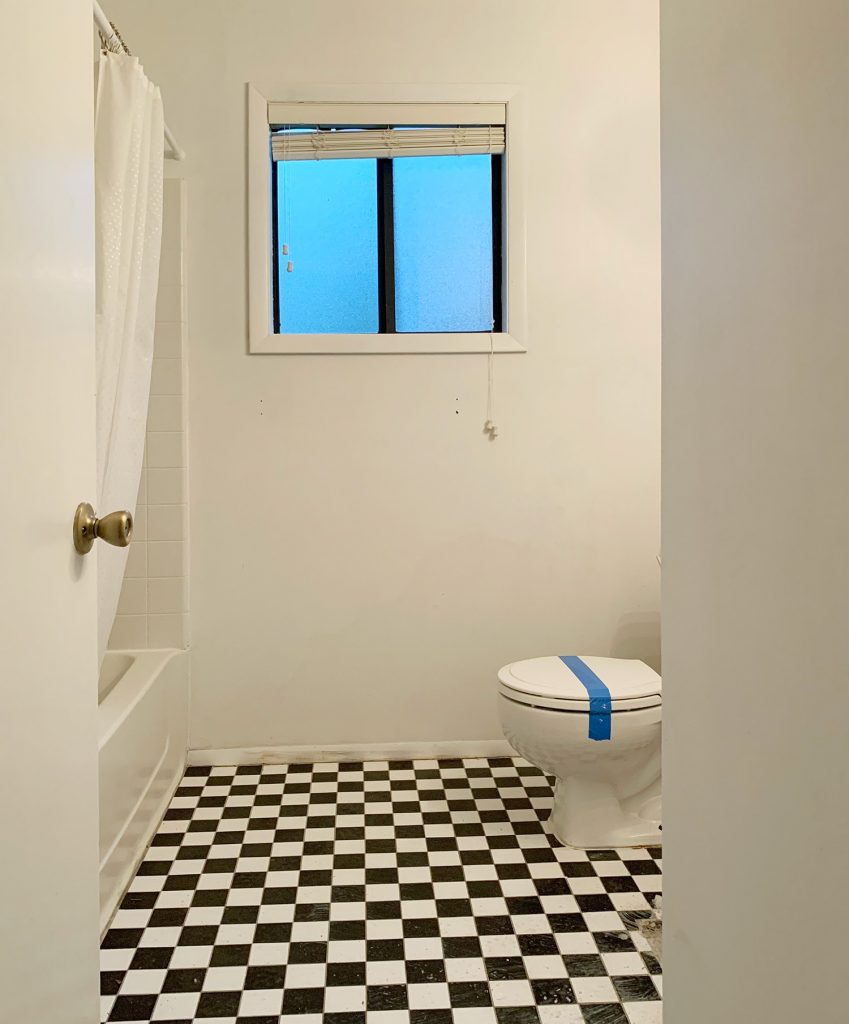
We’re spoiled with lots of pretty views in our house, but this view out the window above the sink probably ranks at the bottom of the list. Apart from our bathroom window (which is frosted), this one is thankfully the only one that looks directly into the fence…


Closer View Of Beachy Kitchen From Sitting Area With Dining Table And Built In Pantry


table | chairs | sconces | pendant | floating shelves | wall shelf | hardware | cabinet color: SW Artsy Pink

… and we made the view even worse when our pool was being installed because the only place the pool equipment could be placed was right outside this window. Our generator, A/C unit, and gas meter are already out there, so it was a natural place for all the ugly things to congregate. It just didn’t make the view while doing dishes any better. So, like we’ve done before here and here, we improved the view with plants.


View Through Kitchen Window With Window Box And Tropical Plants


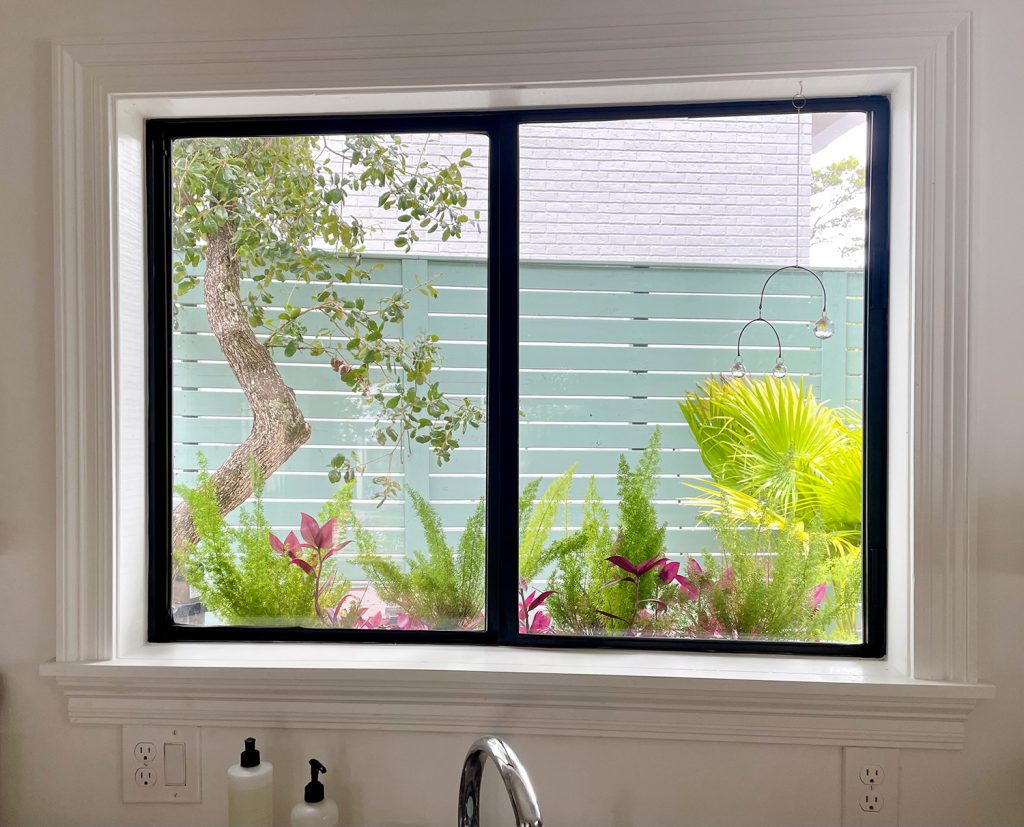
We just hung a window box outside and filled it with foxtail ferns and inchplants (they’re the purple ones), which fully block the bottom few inches of the window, which is where we could see all that ugly equipment back there on the ground. When in doubt… put a plant on it. Or twenty.

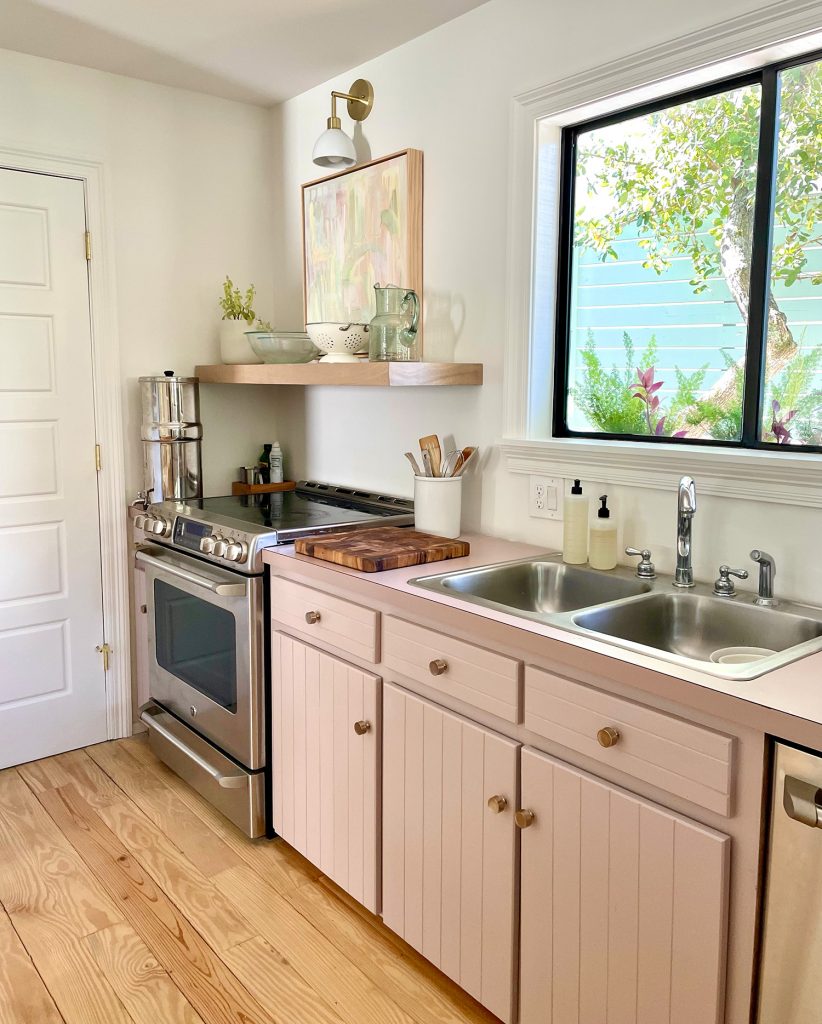
Removing The Backsplash

Before you think “why would you ever remove a backsplash” or “wait, what backsplash?” let me clarify – I’m talking about the 4′ piece of matching laminate that extended up from the back of the countertops. You can see it in the photo below, along with the old shelves.


You probably don’t even notice it much in these photos, but having it out makes the kitchen feel a little more streamlined and modern (and it’s not like we didn’t have stove splatters constantly hitting above that tiny “backsplash” anyway – we just wipe down the wall and they come right off. As for how we got the backsplash out, Sherry just smiled at me when I walked out the door to run errands and then pried it off and patched/smoothed/painted the drywall behind it while I was gone. She loves a big reveal like that. Our eventual plans are to tile this entire back wall to the ceiling, so now we’re one step closer. Also I love a project that magically happens when I’m gone.


Beachy Kitchen With Mauve Pink Cabinets And Wood Floating Shelves With Mid Century Modern Lights


Removing it did leave a small gap at the back of the countertops, but we think we’ll just grab a small piece of trim and paint it to match the counters and shove it back there. It’s not big enough to lose food or spoons in it or anything (and it will eventually be filled by a real tile backsplash at which point we’ll also get new counters) but just so we don’t have a weird little crumb valley, the wood trim piece will be a nice (literal) stopgap.

Making Plans For A Door

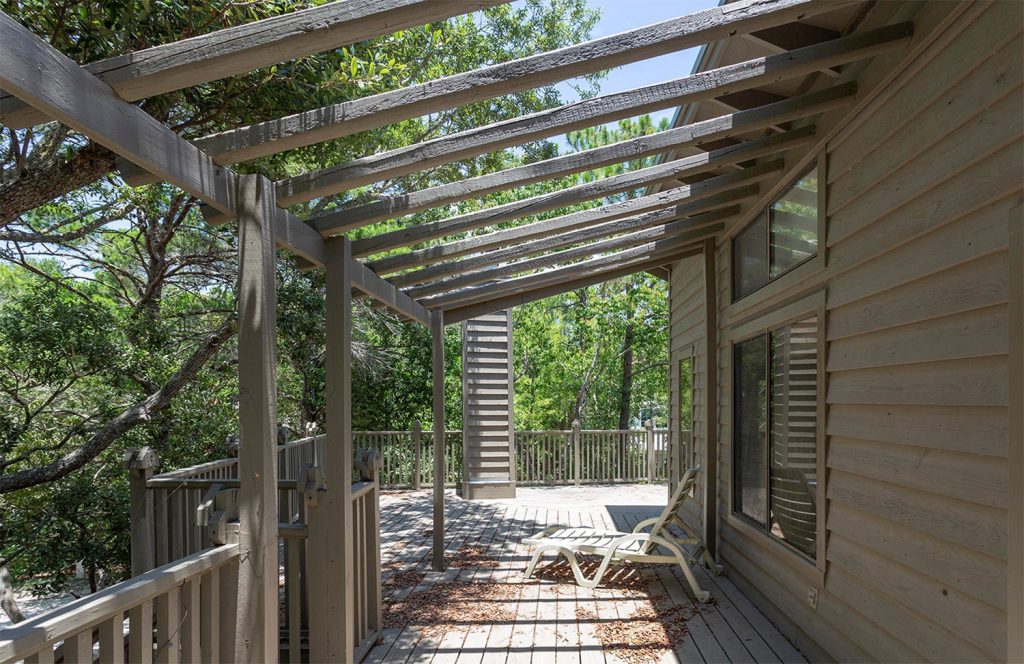
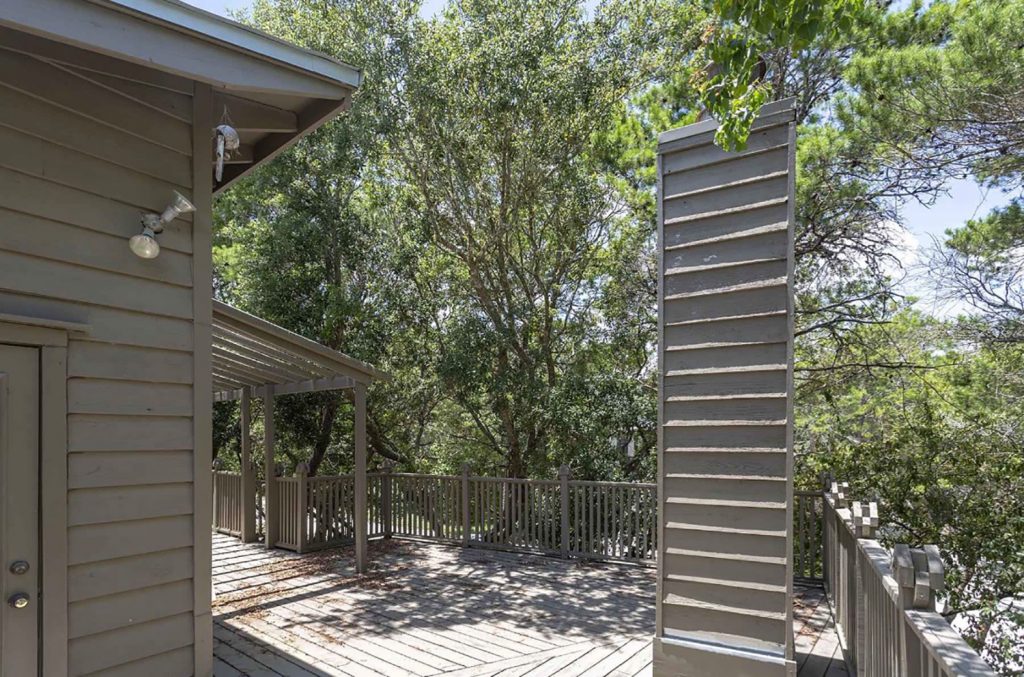
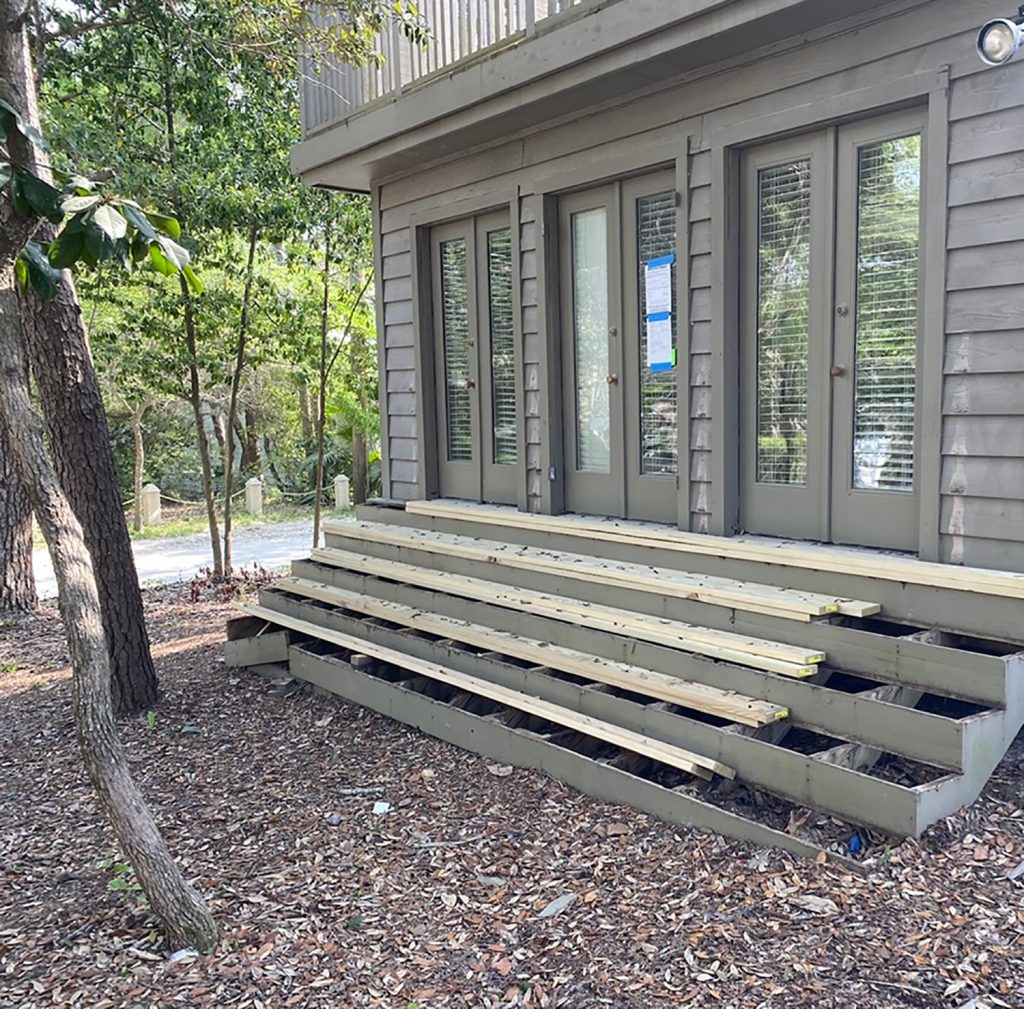
As I said, all of these upgrades and tweaks are inching us closer to making some bigger, more permanent changes to this space. One of which is replacing this side window with a door. I know, you didn’t see that coming. We didn’t either until we lived here for a while!


Mauve Painted Kitchen Cabinets With View Through Window And Open Shelves


table | chairs | sconces | floating shelves | wall shelf | hardware | cabinet color: SW Artsy Pink

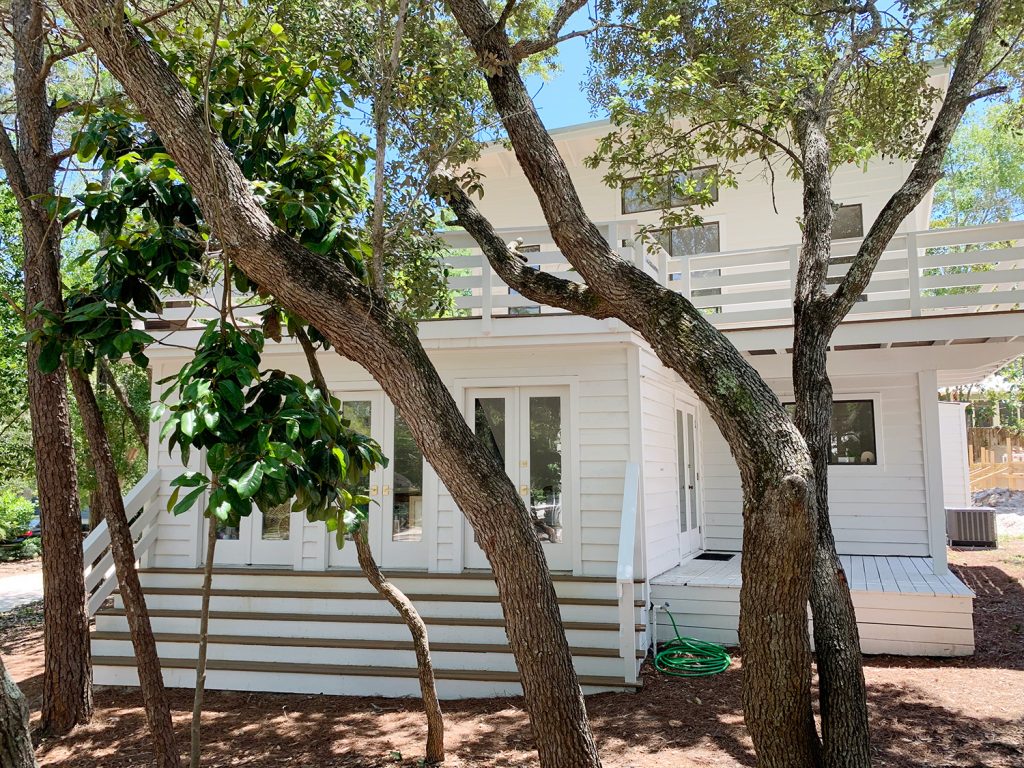
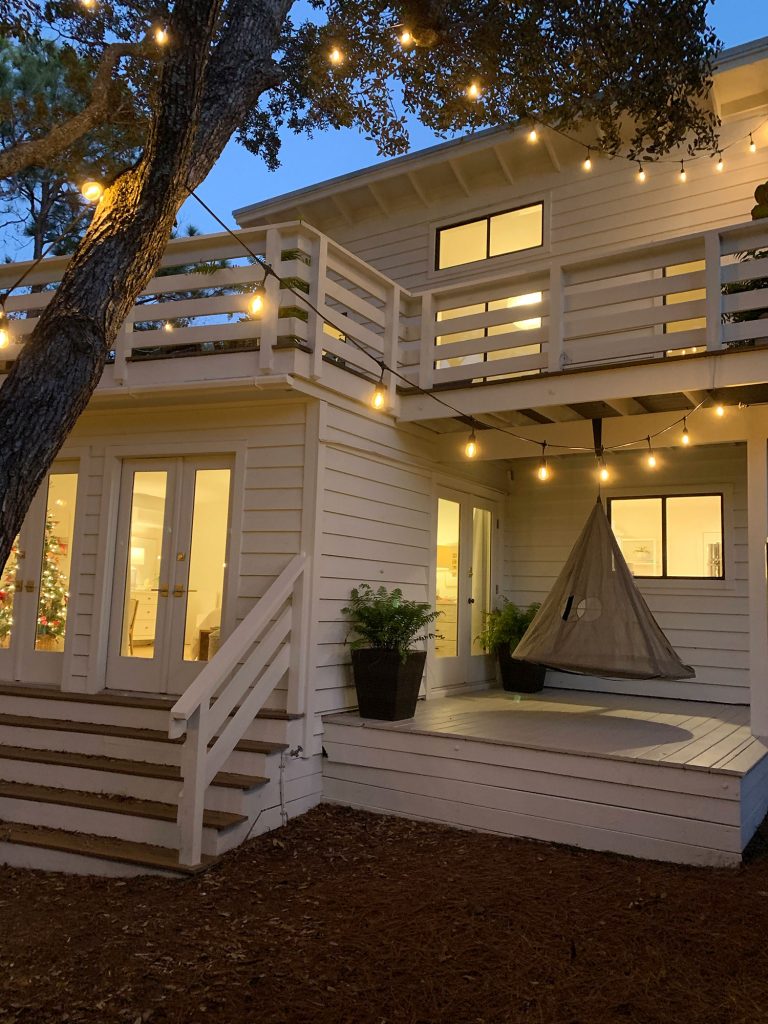
This is one of those changes we never would’ve considered off the bat (especially because we originally planned to add a bathroom that attached to our bedroom in that spot – more on why that plan changed here). Right outside that window is a covered side porch that we realized over time would be SO NICE to have access to from the kitchen.

  • It would give us a direct entrance to the kitchen for unloading groceries (our preferred parking space is right out there so it would be much more efficient than our longer current route).
  • With better access to that porch, we’d finally have a convenient spot for a grill that we could use right off of the kitchen (we didn’t want a grill on our front porch, but love the idea of one on a hidden side porch).
  • It would let even more light into the kitchen.
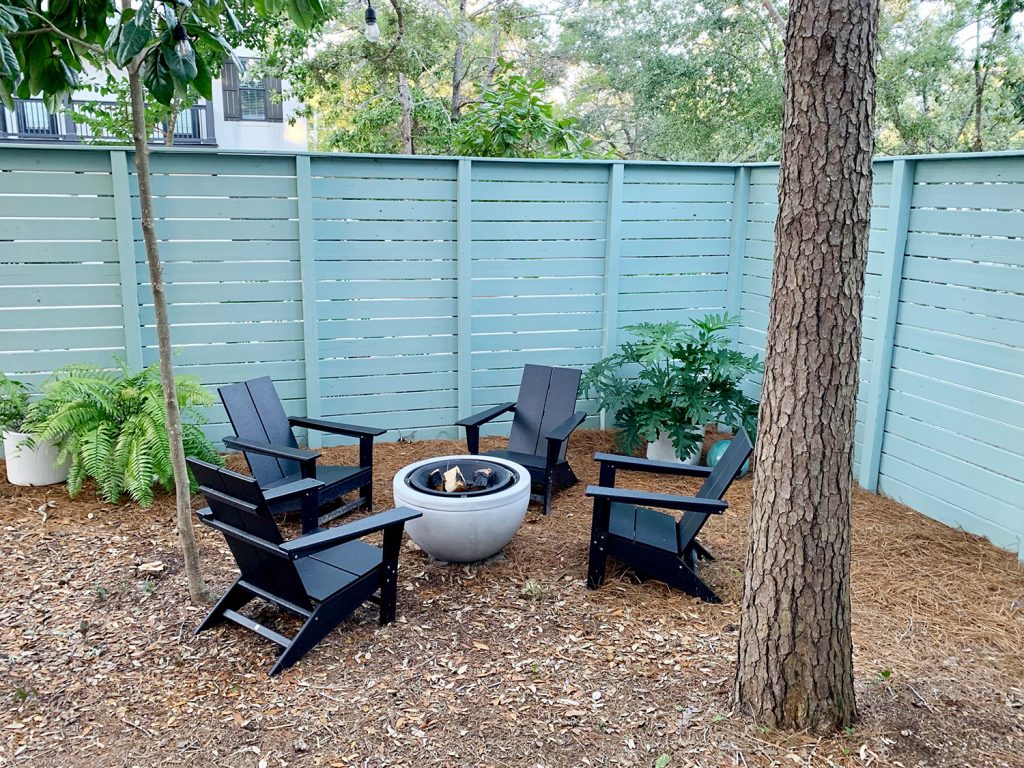
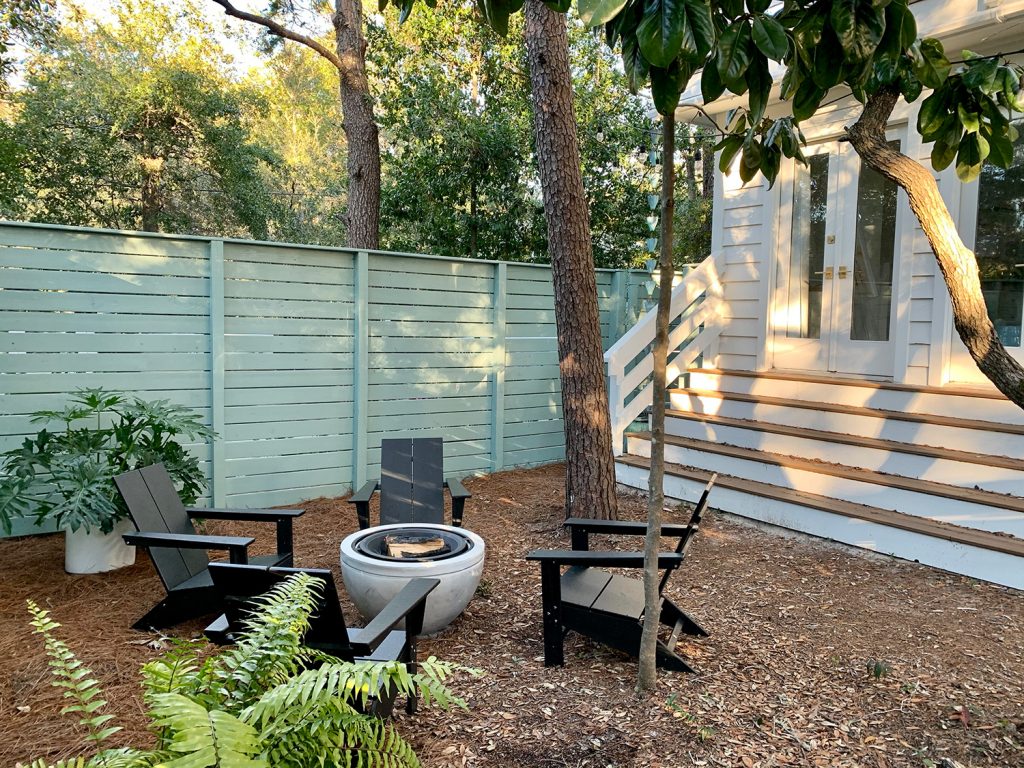
  • It leads to a fenced in area where Burger can be let out (right now he uses the front door, which isn’t a fenced area – but this side porch is within the fence that encirles our fire pit area as well)
  • Speaking of which, we’d have a door that leads to our fire pit instead of always using the doors in our bedroom – which feels nice for when we entertain and don’t want everyone to have to traipse through our room (another way to get to it is to walk out our front door, walk left for a while outside, and go through the fence to enter it, but this will be much more direct).

Sherry has whipped up a little Photoshop action to show you what we mean. Flawless, no?


Photoshop Rendering Of Doorway In Place Of Mauve Cabinets And One Window


The only downside to the plan is that we lose about 18″ of cabinet space (after we factor in the space that we gain in the corner, which is currently blocked by the cabs that run along the wall where the door will go). See that space to the right of the dishwasher? That’ll become a freed up nice wide lower cabinet with a drawer above it (26″ wide)- so we gain that. But we lose the little peninsula of cabinets that’s currently blocking it, which is 44″ wide (hence my calculation that we lose 18″ overall).


Straight View Of Beach Kitchen With Pink Mauve Cabinets And Floating Shelves


table | chairs | sconces | pendant | floating shelves | wall shelf | hardware | cabinet color: SW Artsy Pink

We weighed the pros and cons and have decided it’s still worth going for it – especially because we gained so much storage when we added our pantry cabinet. And to test it out, we’ve just stopped using that whole run of cabinetry for the last several weeks to make sure can do without them (just emptied them out and said: “we’ll see how this goes”). So far, it feels totally fine to lose them forever in order to gain all the bulleted pros that we listed above. Again, that’s why we love to live with things before making any huge decisions. Note: it certainly can be argued that more cabinetry is better for resale than adding a door, but we’re making this change because it works better for our family (in other words: resale shmesale).

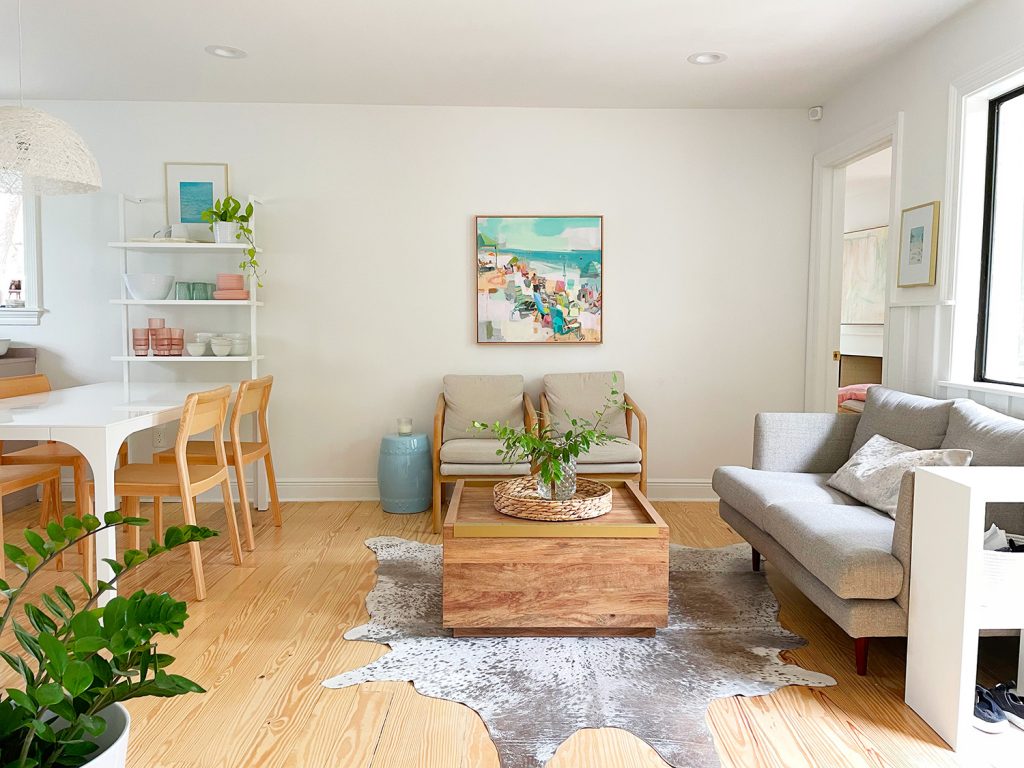
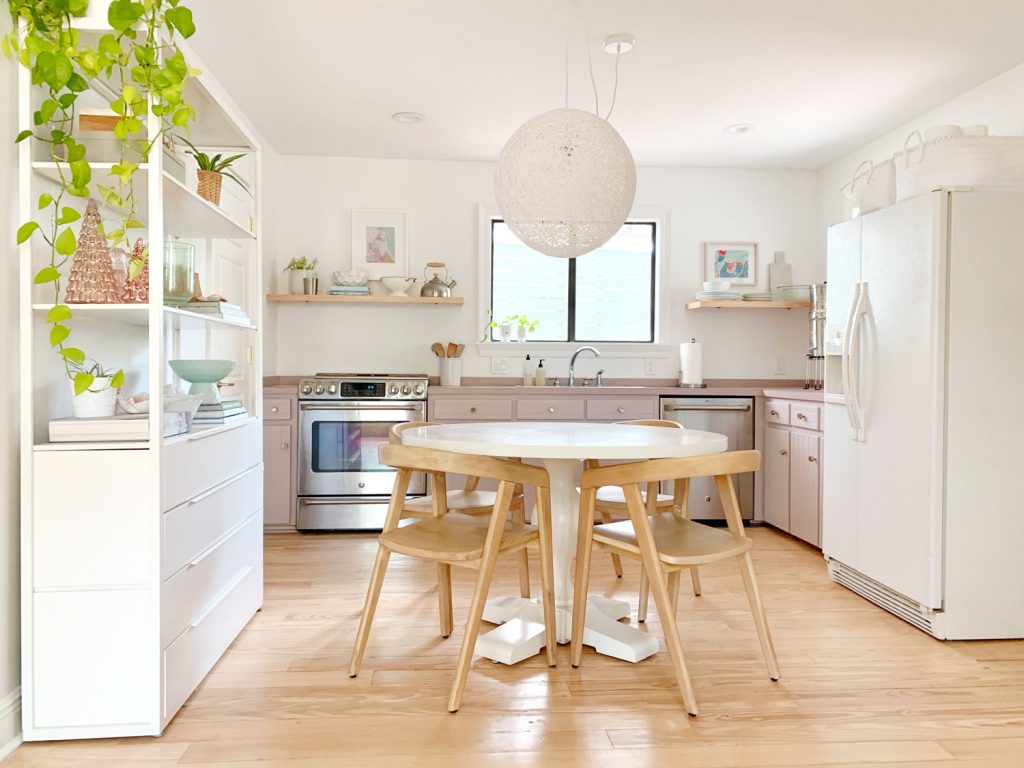
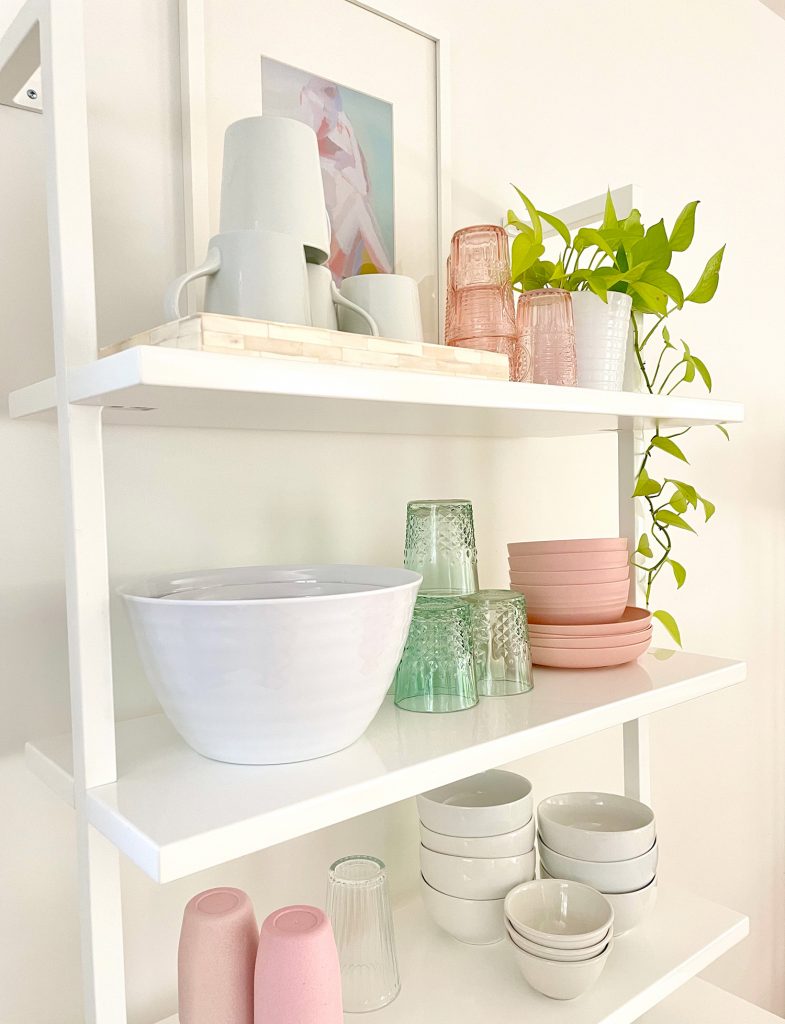
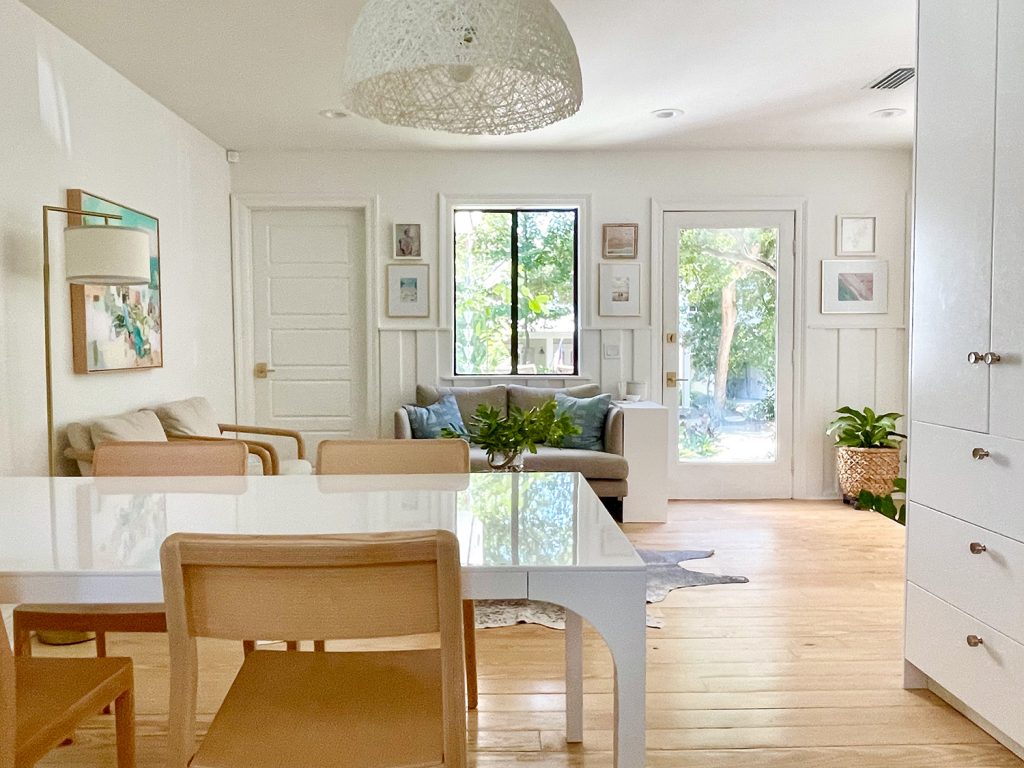
Keeping More Shelf Storage

After moving the Fjalkinge shelves, we realized we still loved having our bowls and cups and glasses on the wall by the dining table. Enter this CB2 ladder shelf, stage right (we just took off the bottom two shelves and it nests right in with our similarly glossy white table like they were always meant to be together).


Vertical View Of Walking Space To Beachy Kitchen With Wood Furniture And Mauve Cabinets


coffee table | rug | table | chairs | sconces | pendant | floating shelves | wall shelf | hardware | cabinet color: SW Artsy Pink

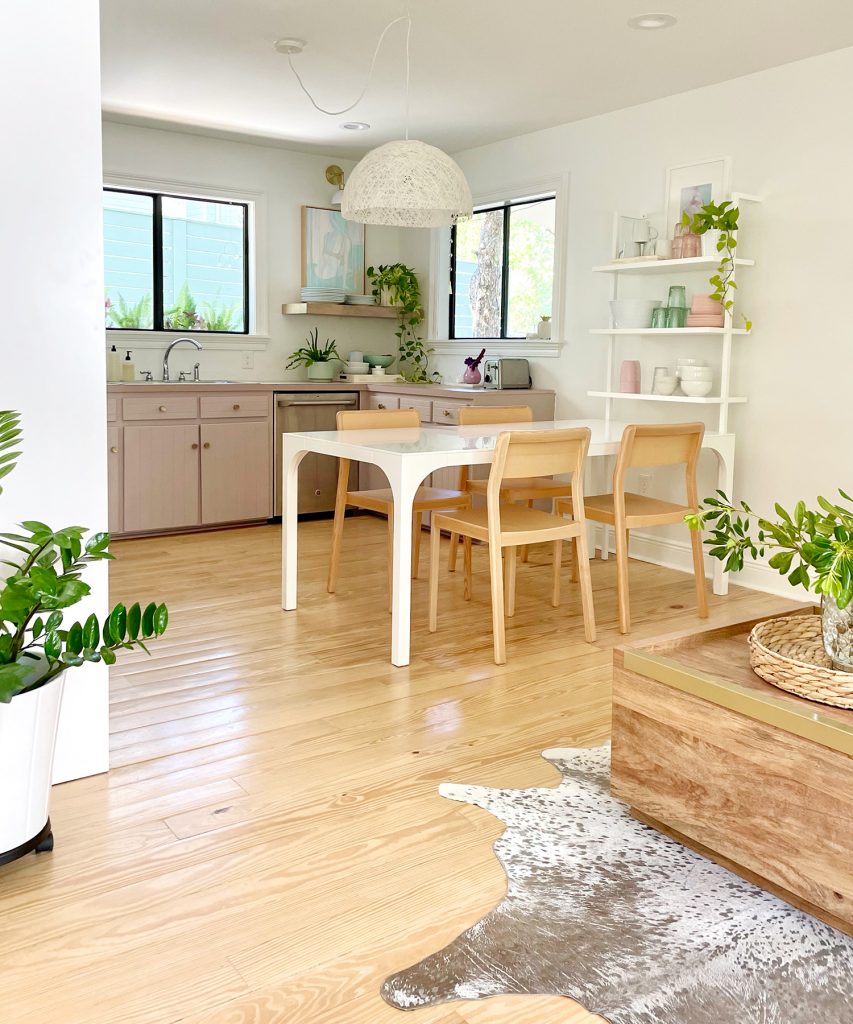
This shelf had been upstairs, but it was displaced by the two Fjalkinge bookcases that we moved up there (which look like they were always meant to live up there). Here’s where Sherry would clap her hands and say “Shop. Your. House. And. Try. New. Arrangements. What’s the worst that could happen?!”


chandelier | bookshelves | desk | desk chair | sofa | similar rug

The height of the shelf is nice since it balances the height of the windows (and the future door!) and since we have some art hanging in the sitting area and above the kitchen shelves, it’s nice to have a display spot/functional storage here as opposed to just another framed piece of art.


White CB2 Breakfast Table Against White Wall Shelf With Bowls And Cups


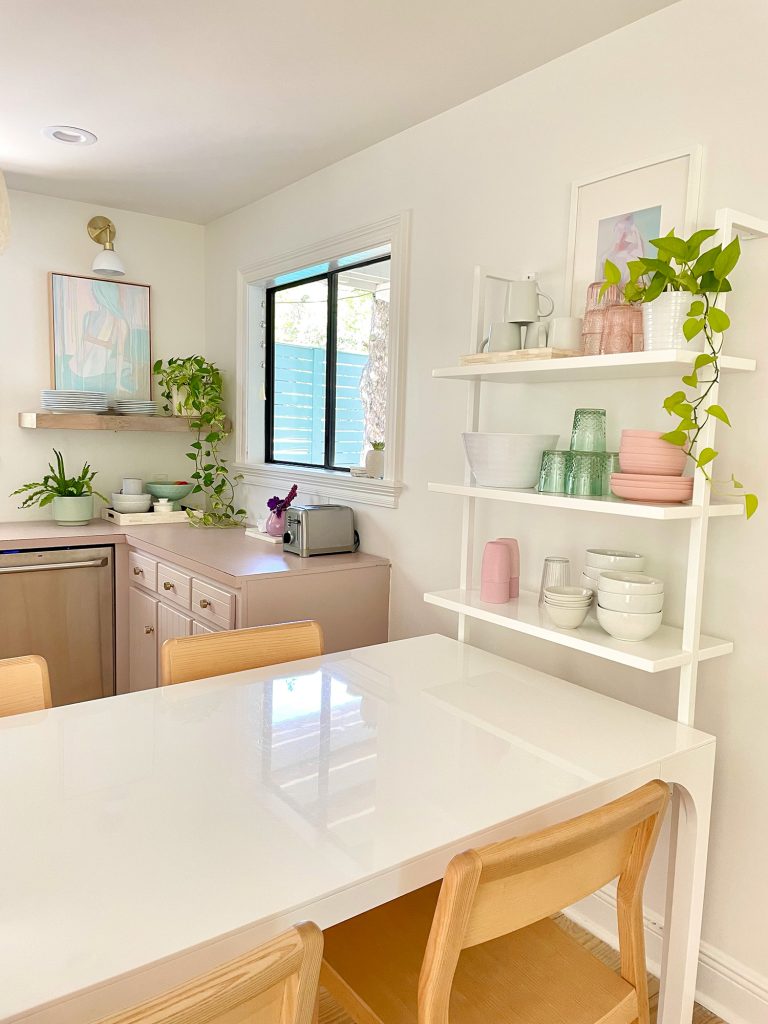
Sherry’s quick shelf-styling tip is to add a little plant or some art if things look too sterile – and a tray can help contain like items and make them feel less jumbled (all of our white mugs get stacked in ours).


Detail View Of CB2 Floating Ladder Bookcase With Kitchenware On It


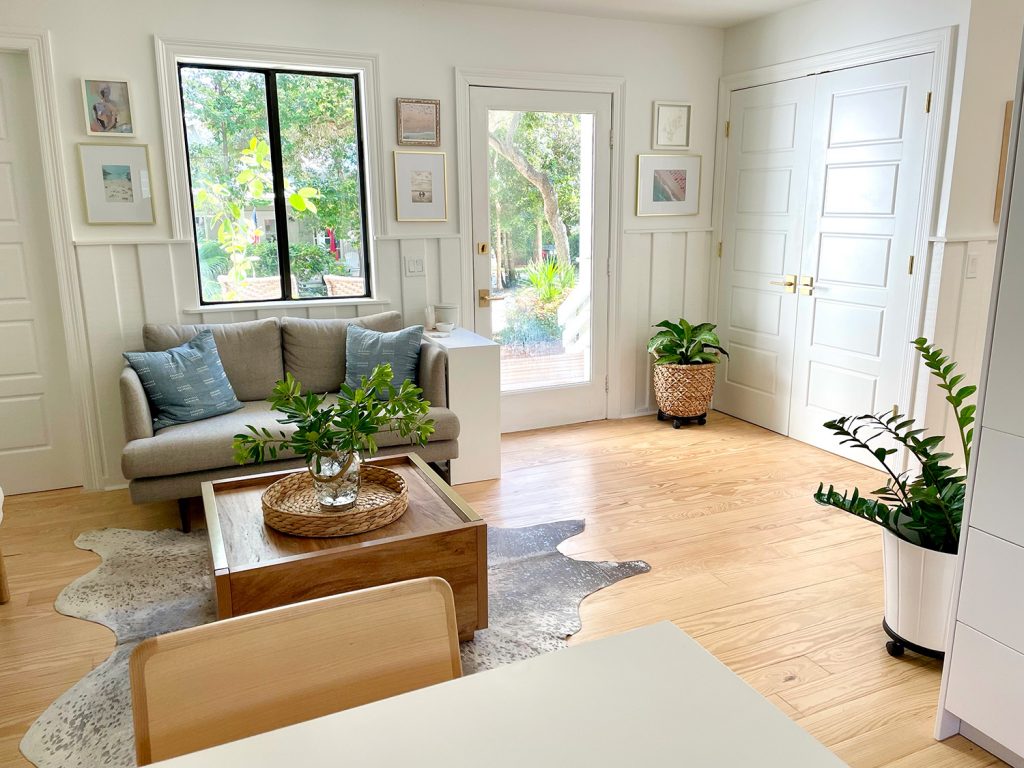
While we’re here, let’s keep spinning around the room and talk about our sitting area that’s adjacent to the kitchen.

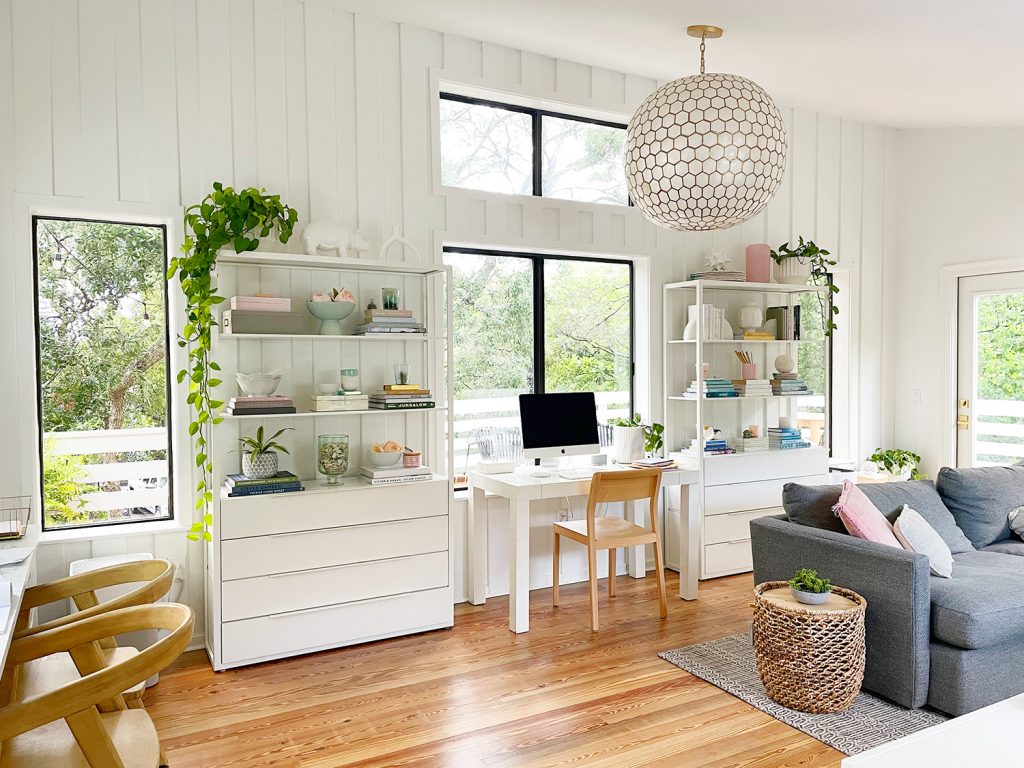
Fine-Tuning The Sitting Area

This is has been one of the toughest spaces to figure out for us in the house since it needed to do a lot in a little area. Back in January, we showed you how we maximized it with a comfortable loveseat, some cozy chairs, and a hardworking storage coffee table.


Beach Kitchen Seating Area With Loveseat Chairs And Painting


table | chairs | wall shelf | floor lamp | chairs | coffee table | loveseat | pillow

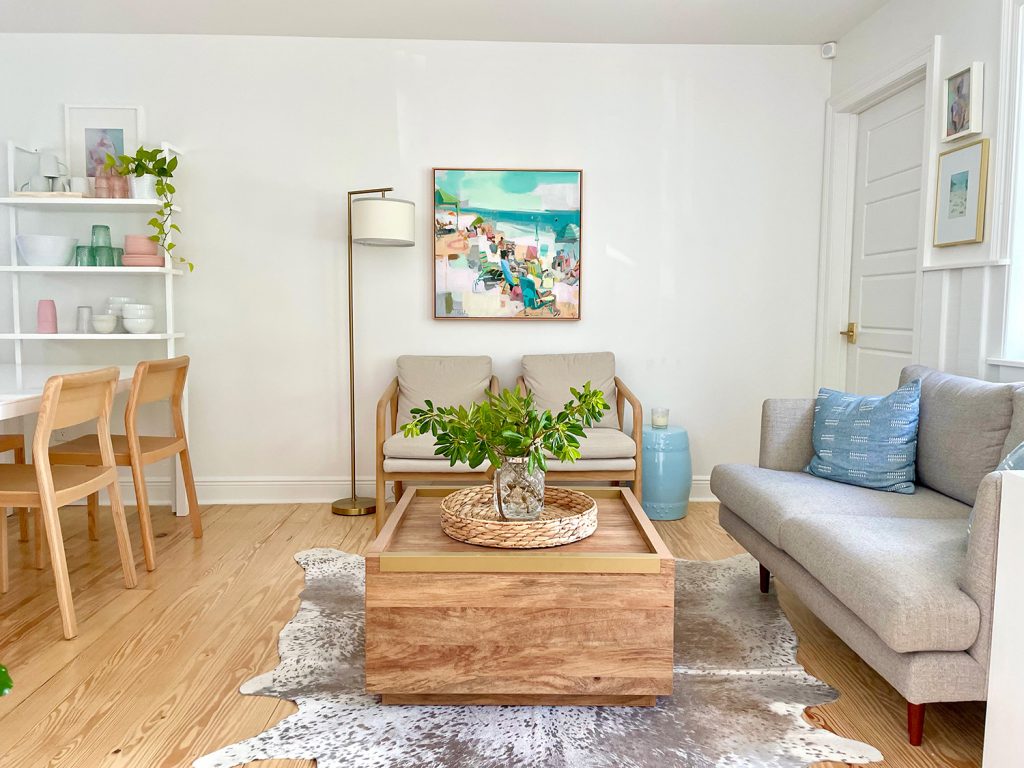
All of those elements are still the same, but they’ve gotten a bit more breathing room now that the big Fjalkinge shelves are upstairs. We had some neighbors over recently and this is where the four of us hung out all night while the kids played upstairs. I know it can look a little tight in pictures, but in person it’s perfectly cozy (I think the video does a better job of showing you how this room feels in real life – so try to watch that if you haven’t yet).


View Of Kitchen Sitting Area With Door And Window Out To Front Yard


chairs | coffee table | loveseat | pillows | rug

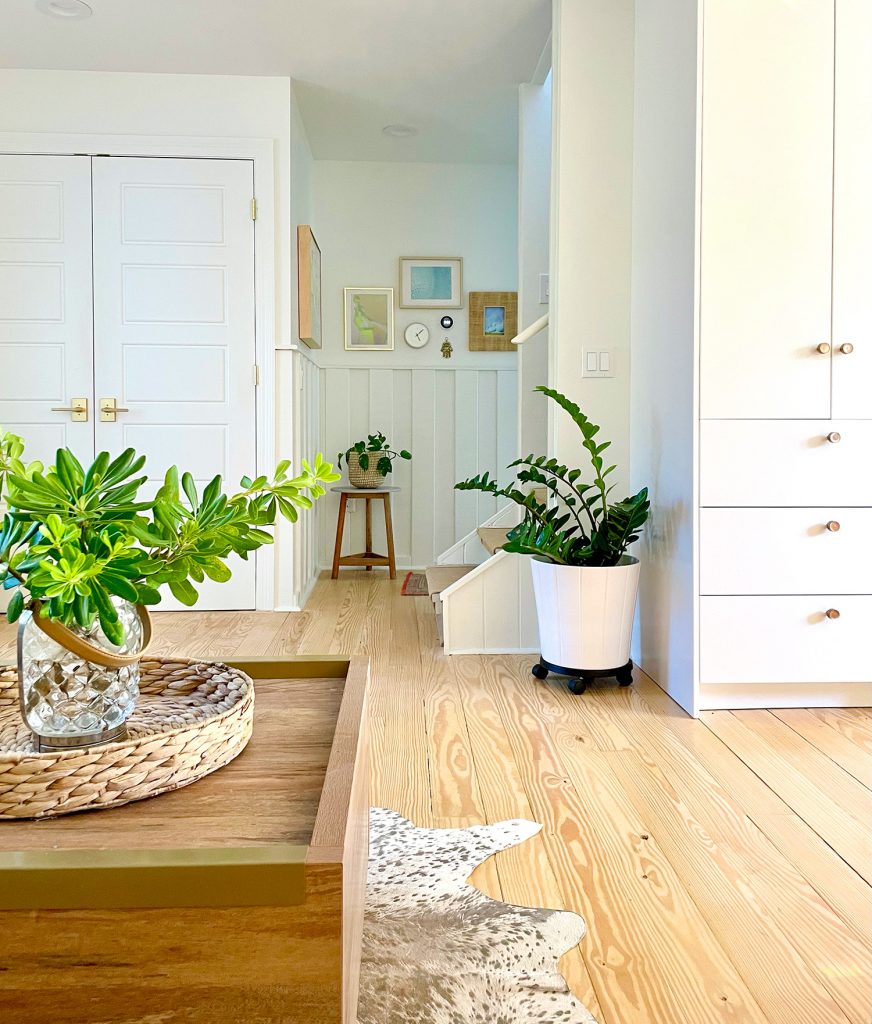
The main thing we’ve changed is that I built a custom-sized four-cube cubby right next to the door that perfectly fits against the side of the loveseat’s armrest and gives us a spot to store our everyday shoes and a lot of the other stuff we grab on the way out the door (like facemasks, sunscreen, an umbrella, etc).

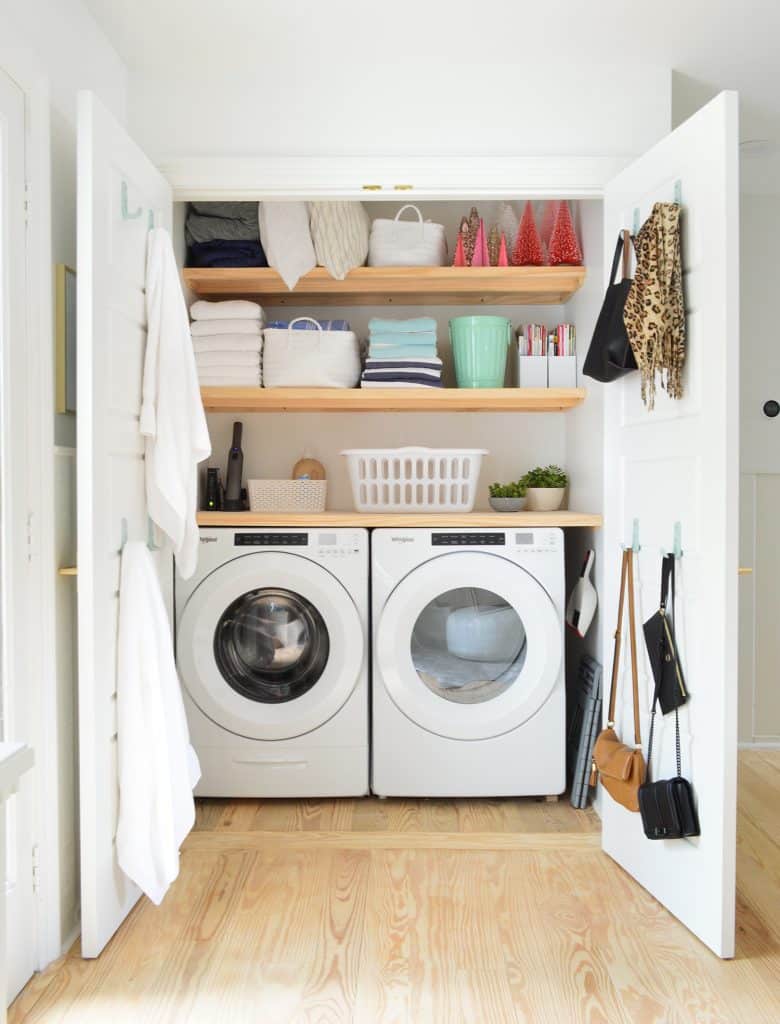
So it works remarkably well as a “foyer” of sorts, since we’ve got shoes in the cubby and jackets & backpacks hung on the back of the laundry closet’s double-doors (you can see the inside of our laundry closet here – although that was before the kids were back in school, so now just picture jackets & backpacks on the interior door hooks).


Entry Zone Of Kitchen With Sitting Area And Breakfast Table


chairs | coffee table | loveseat | pillows | rug

It feels like it took us a while to figure out the flow in this room (I think there were something like 10+ furniture arrangements in this front sitting area before we figured things out), but we’re really pleasantly surprised by how well it works. I even let Sherry have a “told you so” moment recently because I had my doubts during some of our earlier layout attempts, but we hang out here every morning with the kids before school and use it anytime friends drop in or even for reading on lazy weekends. It felt like we’d never have a comfortable seating area in this spot, and now it gets more use than the couch upstairs! #nevergiveup


View Towards Stairs And Back Hallway Of House With Lots Of Plants And Frames


coffee table | rug | small table in hallway | cabinet hardware

So that’s the current state of our kitchen. Functionally it works really well for us and the layout is finally starting to “click” for us too. That’s why we feel like we’re finally getting closer to making some more dramatic changes, like adding that new door and upgrading that back wall of cabinets, getting new counters, and adding that backsplash to the ceiling. I can’t even tell you how much we’re looking forward to a sink that’s more than 5″ deep. That’s going to be the icing on the cake.


View Towards Sitting Area With White Modern Dining Table And Wood Chairs


chairs | coffee table | loveseat | pillows | rug

We’ve even ordered some sample backsplash tiles and worked out the new cabinets we want to order. Not sure about counters yet, but one thing we’re certain of is a super deep stainless single bowl sink (after MANY kitchen renos, it’ll just always be our favorite). I think the entire “real reno” stage of this kitchen will be around 5K total (including the new door to the side porch, new cabinets, new counters, a new sink and faucet, and a full wall of backsplash tile) so that’s one other perk to the slow evolution towards a finished product… and a smaller kitchen without tons of new cabinets to have to purchase!

*This post contains affiliate links, so we may earn a small commission when you make a purchase through links on our site at no additional cost to you.

Before & After Photos: 14 Months In!

Before & After Photos: 14 Months In!

Note: This post was born from an updated Before & After page that we heard people were having trouble finding (since it wasn’t at the top of our blog feed). So here it is, forever immortalized as a chronological post. And now, since we’ll continue to update our Before & After page over time, we have this post frozen in time, which is nice to look back on. Wish we had done it around 6 months in and at the year mark too.

We downsized to this 1,400 square foot house in Northwest Florida on May of 2020 after a fast, furious, and long-distance three-month renovation. You can read more about how we found ourselves craving a pared-down lifestyle for our family here and here (that last one is a really good synopsis of what led us to this exact spot). But onward to the before & after pictures!

NOTE: We created this Shop Our House page to help you hunt down any furniture/accessories that you see in our house, along with our paint colors.

The Exterior

We kept all of the same cedar siding, black metal windows, exterior doors, and metal roofing…


… but updated the decking, railings, front steps, and gave everything a fresh coat of white paint! You can see this post for more photos & details on the exterior renovation.


Then we started layering in all the tropical landscaping and it evolved to this. We need to take more photos and do an updated blog post soon.


Here’s the side of the house as it looked when we bought it back in Feb of 2020:


And here it is all painted, with new horizontal railings on that second-floor deck. Removing the steeply pitched steps to the upper deck instantly made us feel safer (someone outside being able to access our second-floor windows & doors just felt off). And even small changes like removing the guard rails that cut through those wide steps that you see (while maintaining the railings on the outside ends) made a big difference too!


There’s more that we did to this area (fences, ferns, and a firepit – oh my!) but let’s pop inside for a second and head back outside again later on in the tour.

The Kitchen

The kitchen involved some large renovations and some small projects to get it to its current state. This is what we were starting with:


We repaired the floors, removed the soffit, added additional lighting, and replaced the drywall (goodbye popcorn ceiling!). You can read more about those projects in this post and this post.

We gradually updated the room in a few affordable ways, like hanging new lighting & DIY shelves and painting the cabinets (you can also see a full tour of how our kitchen is organized). Then we scored an awesome deal on secondhand appliances & tweaked the room’s layout and later added an Ikea pantry that we built in around the fridge, which we moved to the opposite wall (blog post about that coming soon!).


By shifting the fridge to the other side of the room, you can actually see that side window now! It used to be almost entirely blocked from this vantage point by the fridge (scroll back up a few photos to see what I mean). Plus we gained an entire pantry full of storage around our newly relocated fridge. Win-win!

In order to enjoy a comfy little sitting area on this side of the room, we closed off that wide doorway that you see below. You can still enter that room via the door next to the loveseat in the next photo (it’s our bedroom – so that extra-wide doorway wasn’t necessary). You can read more about the sitting area here & we’re planning an updated post all about the kitchen now that we added the pantry, so stay tuned.


This room is deceptively large, so along with having room for an eat-in kitchen table, we love that we gained this casual bonus hangout spot (since our big family room with the TV is upstairs, we tend to gather in here when someone’s cooking or when friends drop in for a coffee or a drink). It’s also great to have when someone wants to hang out or read without hearing the TV upstairs). Having two common areas in the house that aren’t open to each other (meaning that the sound doesn’t travel between them very much and one kid can do homework while the other watches cartoons or does a big part project) is key to feeling like we’re living large in a smaller footprint. If we had one larger adjoined space as our only shared area in the house, we’d feel a lot more cramped & on top of each other, I think!


The Stairs

The stairs that lead to our upstairs family room and second-floor deck had cool vertical planking and got lots of natural light thanks to a window above them in the family room. But the wood treads had some finish issues after we had them redone, and it didn’t match our wood floors downstairs (more on that here).


We ended up adding a really nice textured runner (and painting the treads to solve the finish issue), which gives our dog Burger some much-needed traction. It’s an indoor/outdoor rug, so it’s super durable (more on that here). Don’t mind this older shot of the kitchen before we added the pantry – we’ll take an updated photo eventually…

Finish Sisal Stair Runner On Staircase With Kitchen In Background

The Family Room

The only room upstairs is this large multi-purpose room that we use as a TV/movie room, home office, and kids’ crafting area (thanks to the pandemic it was a virtual-learning spot too). It’s by far the largest room in our house (two 8 x 10 rugs can fit in here without touching!) so it’s awesome to all get to enjoy it – and for it to perform so many functions for our family. Here’s how it looked when we bought the house. Note that scummy mildew along the top of the ceiling…


And here it is more recently after some simple floor refinishing and a fresh coat of paint (those big windows and cool paneling were already there!). You can see more of this room in this post – and see a few updates we later added in this post. We’ve also made some other changes up there, so we’ll have to take more photos and a video for an updated post.


Here’s the other half of the room as it looked when we bought the house. It was pouring rain when we took this picture, hence it being so dark (and those foggy windows):


Here it is more recently from the same angle. This is such a good demonstration of how adding furniture can help so much with capturing a room’s scale! Doesn’t the room look half as wide in the before shot above? And it appears to only have a sliver of space between the windows on the right-hand wall when there’s really over 70″ for a wide bookshelf with four spacious drawers. It’s wild!


The Upper Deck

Right outside the living room is a large upstairs deck that we all use as an extension of our living area. It was hugely improved by replacing the rotting deck, railings, and rickety pergola.


This is what the deck looks like now, thanks to the magic of new decking, railings, nixing that chimney that popped up in the middle of where our big 8-person table now lives, and a whole lot of white paint. We’ve also added some more seating, a dining area, and some string lights to make this one of our favorite hangout spots! You can read all about the details of this space right here.


Deck Seating Area With Outdoor Couch Table And Two Woven Lounge Chairs


Another fun before & after shot of this upstairs deck is this one. I can’t tell you how much better it is without that huge chimney jutting through the deck (when we bought the house it was majorly leaking down into the bedroom below).


And here’s the after shot from that vantage point now. This is one of our favorite spaces in the whole house – for sharing pizza with friends or having a family game night up in the trees. It’s really cozy and makes our house feel so much bigger thanks to this huge outdoor room.


Nighttime View Of Large Deck With String Lights


Our Bedroom

Here is our bedroom as it looked when we bought the house. This house only had one bedroom with an actual door that you could close when we bought it (it was originally listed as a one bedroom, one bathroom!), so we converted this beautiful light-filled space into our bedroom by closing a large extra doorway that led to the kitchen.


We refinished the floors, gave it some fresh paint, and then it just took some comfortable things like curtains, furniture, and a cozy rug to make this feel like a welcoming retreat.


Here’s a before and after view of the bed wall, since it’s hard to see in the photo above…

This image has an empty alt attribute; its file name is before-bedroom-shot-of-bed-wall-1024x608.jpg

We added a lot more storage to the room and rearranged things and closed off 2 of the 8 exterior doors (yes we really had that many doors in here, which is why the two on the bed wall in the before picture above are now gone – but the room is still flooded with light). We also added a closet (storage, glorious storage!) which you can read about here. That update really was a game-changer!


We have eventual plans to create an attached bathroom in an existing underutilized corner of the room (you can read more about that plan here). Sharing a bathroom hasn’t been nearly as bad as we expected – so we’re not in any rush.

Here’s another before shot of our bedroom back when we bought the house:


Here’s the same angle now. It really is a life hack to have a puzzle table by the fireplace if there’s randomly room in your bedroom. It keeps the kitchen table clear for food – and provides a fun spot to sit and decompress whenever the mood strikes (John can be found here a lot more than I ever expected. He has become a true puzzle lover).


Speaking of the fireplace, we updated ours and shared those details in this post and this post. It’s such a cozy feature to have in a bedroom.

*And now for a long-winded bedroom-related side note, because the most common question we get about our house is if we ever considered making the large upstairs family room into our bedroom. The short answer is that we did, but ended up nixing it for a number of reasons:

  • 1) we all prefer to sleep on the same floor
  • 2) that room upstairs is nearly twice as big (it’s the single biggest room in our house!), and we’d much rather share it than take it all for ourselves
  • 3) entertaining a bunch of people on the huge upstairs deck would mean everyone would have to walk through our bedroom to access it
  • 4) there’s no plumbing upstairs, so adding an ensuite bathroom would be much pricier than the one we have planned for downstairs
  • 5) we already mentioned this, but it bears repeating for anyone who is looking to downsize & worries they’ll feel too cramped. We’ve learned that it’s SO HELPFUL in a smaller home if there are two common areas that aren’t right next to each other (someone can watch a movie upstairs or do a zoom call for work while someone else is downstairs at the kitchen table working undisturbed or reading in the sitting area). We’ve also found that when our friends & their kids drop in, the kids all run upstairs to play & we sit downstairs in the sitting area and chat & have drinks or a snack.

You can find more layout tips for a small house (& other general downsizing info) right here in this post. Ok, but on with the tour!

The Bathroom

Our house only has one bathroom – and it didn’t even function when we bought it! The sink and vanity had been torn out, there were leaks festering in the walls behind the drywall and the tile, and the toilet couldn’t even be flushed due to the absence of a sewer line. Here’s what it looked like back then:


Before we moved in, we had basically everything replaced (except for the window!) to make this space functional. I gotta say, as much as we like the fun floor tile, and the cheerful accessories, a toilet that flushes really is the best part of any bathroom. You can see more of the room in this post.


The Laundry Closet

We converted a (weirdly double-sided) closet right off the front door into a laundry closet, which actually reminds us a lot of the laundry nook that we had in our very first house.


In addition to the new appliances, we built some nice deep shelves and added lots of hooks to make it extra hardworking.


Our Daughter’s Bedroom

Some of our favorite transformations in this house are our kids’ bedrooms, since we were able to vault the ceilings in both rooms – making these spaces feel so much bigger and brighter than they used to feel.


Yup, this is the same room, from the same angle. Crazy the difference that ceiling change made, right? It wasn’t structural (the roof already had that slope, so we essentially removed a drop drywall ceiling, added insulation, and just followed the slope of the roof with the planked ceiling). You can click here to see more photos (and get a DIY channel headboard tutorial). We have since changed up the side tables and added a desk so we’ll have to share updated photos soon.


You can also see this room in particular had a very colorful past…


… which we embraced by hand-painting a large mural on the newly vaulted wall across from our daughter’s bed.


Our Son’s Room

We were also able to vault the ceilings in our son’s room to follow the slope of the roof, as well as adding more planking and beams to the ceiling, which adds character and some nice dimension. Here’s the before:


And here’s what it looks like these days:


This super cozy room is one of our kids’ favorite spots to hang out together (ever since the beach house bunk room they’ve loved quiet time together in a small space). We built in the bed by creating a simple DIY wraparound headboard, which they hang out on kind of like a daybed.

Here’s another before shot that was taken with the camera swung more towards the right wall of the room:


And here’s the same angle of the room as it looks now:


Boys Twin Bed With Fabric Headboard Bookcase And Rainbow Gradient Wall Treatment


Every inch matters in smaller spaces like this, so the built-in bookshelf we made is really functional too. That foot or so of floor space along that wall works so much harder for us now! You can also see that we added some horizontal planking along that side wall and painted it a bunch of fun colors. You can see how we did that entire project right here. We have also since added custom shelves to the closet and built in a desk – so again, we have to shoot new photos and share an updated post soon (new drinking game ever time I say that in this post…).

The Outdoor Shower

We weren’t quite sure what to make of this space when we bought the house because it felt pretty grody with so much grime going on…


… but after some pressure washing, resealing the cedar with teak oil, and adding lights, plants, and new shower fixtures, it has actually turned into one of our favorite spaces. The whole family prefers this shower to our indoor one! You can see more of it in this post and we just kept adding more plants from there (so you’ll see that it’s a lot more lush in this updated photo below):


Wood Outdoor Shower With Cascading Planters And Bench


While we’re talking about the outdoor shower, the area that leads to it is kind of like a covered side porch, and this is what it started out looking like.

This image has an empty alt attribute; its file name is Florida-Before-Outdoor-Dining-Porch-871x1024.jpg

It has come a LONG WAY, thanks to removing the mildewed screening around it, replacing the rotten floor, rebuilding the railing with a modern horizontal design (like the one we added up on the second floor deck) and a whole lot of paint. And for anyone wondering what our secret is to avoiding mosquitoes without screens – it’s that ceiling fan we added! They hate flying into moving air, so when we’re out there we flip it on and they don’t bother us. You can read more about our side porch update and how we built the hanging daybed.


Finished White Hanging Daybed Under Covered Front Porch


We also have a covered porch on the other side of the house, which looked like this when we bought the house:


Now looks like this, thanks to lots of paint and a hanging swing that both kids love to lounge on (ok, us too). You can read more about this space here.


We also added a fence to create more of a private courtyard and made a cozy little firepit zone from a formerly unused area that felt exposed to the street. This is the before:


And here’s what it looks like now that there’s a fence to define that area and make a nice little private courtyard:


Here’s another angle from before we painted the house, redid the railings, and added the fence to create this new outdoor space of ours.


It used to just be an area where we never spent any time, and now it gets so much use. We can access this through a gate in the fence near our front porch, or from the wall of glass doors in our bedroom, so it’s really nice to hang out at night and make s’mores with the kids – or sit outside with a cold beverage after they’re tucked into bed.


And in one of our longest-running updates to date (it took about a year from when we applied for the permit to completion!), we also added a pool to this formerly weed-riddled part of our yard. Here’s the best before picture I can find, which was taken right after we added that fence on the right, but before we painted anything:


And here’s what it looks like now that we painted all the fences to match and added a pool with a retaining wall and three fountains that sound better than any white noise machine we’ve ever had (it’s so soothing!). We also added a pool deck with some spots to lounge and planted lots of leafy landscaping that’ll fill in a bunch over the next few years. Oh and adding some more big plants to that large bed behind the retaining wall is next on the list:


So that’s our progress so far on this house, about a year and a few months into living here. We can’t wait to take some updated photos and share the other ways that this house evolves for our family over time. In the meantime, you can check out these related pages for even more info, details, project tutorials, etc:

P.S. And to see the entire makeover of our house in chronological order, this category has you covered!